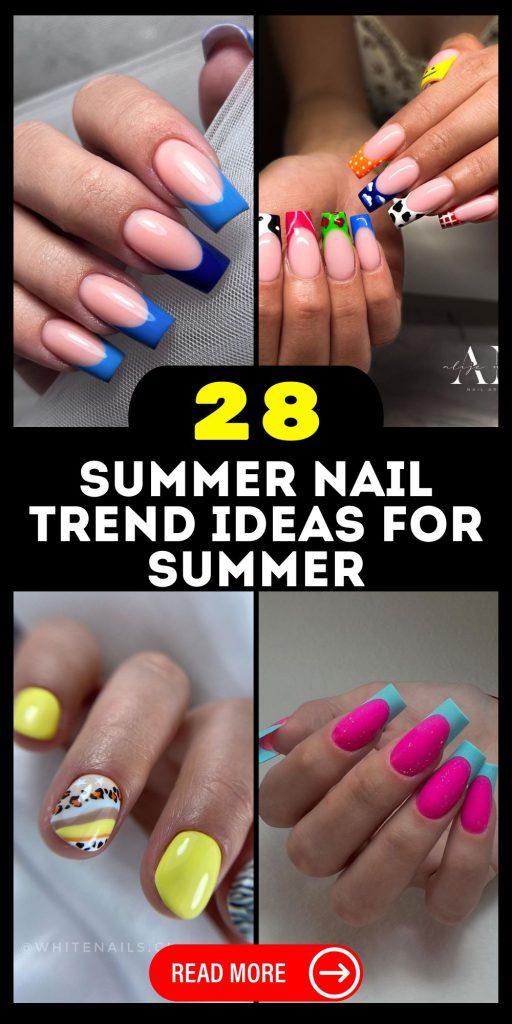
Summer is here, and it’s time to refresh your nail game with the latest trends. Whether you’re lounging on the beach, exploring new cities, or just enjoying the warm weather, having the perfect manicure is a must. What are the top summer nail trends this year? How can you achieve these looks at home? Let’s dive into the best and most trendy nail designs of the season, perfect for any mood and occasion.
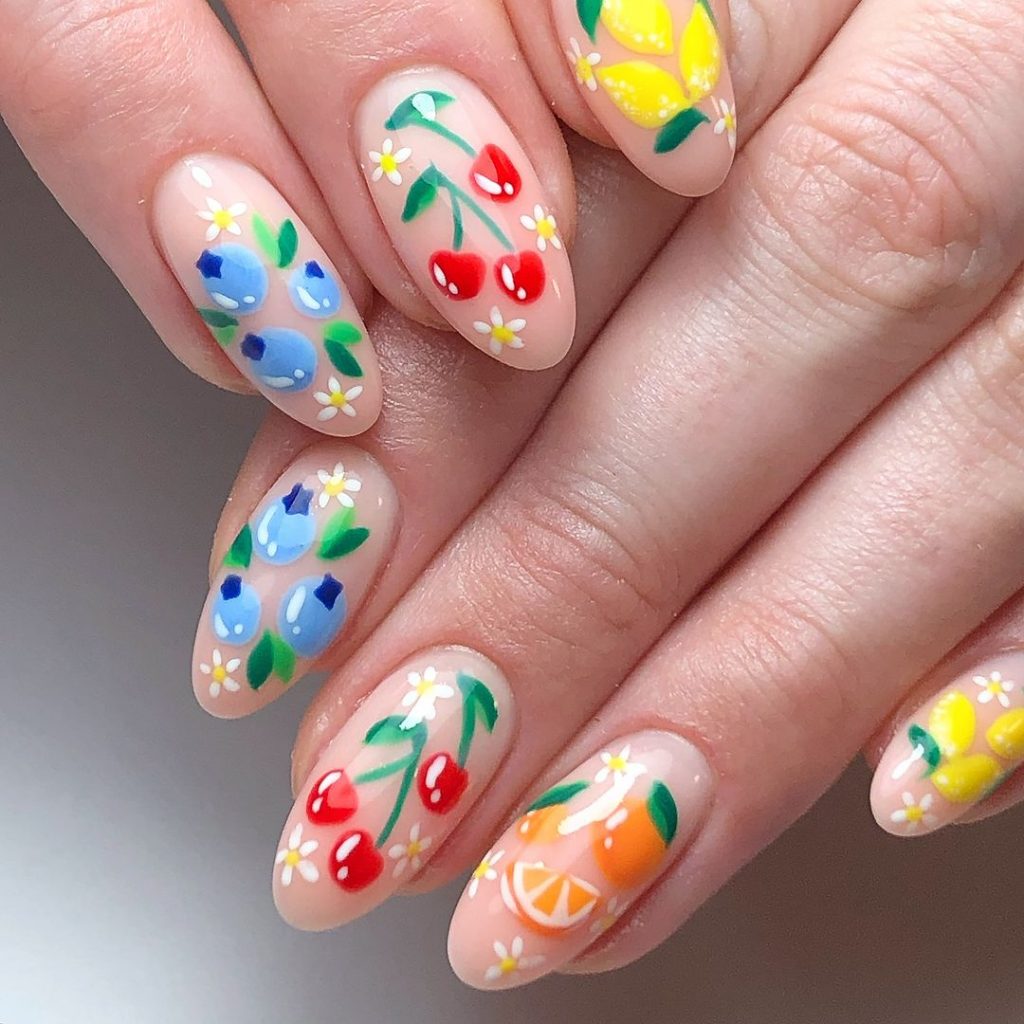
Fruit Nail Art
Summer nail trends have taken a fruity turn this year with vibrant and playful designs. This manicure features adorable fruit motifs like cherries, blueberries, lemons, and oranges on a nude base. The tiny white flowers add a delicate touch, making the overall look fresh and summery.
Consumables:
-
- Nude base polish (e.g., OPI Nail Lacquer in “Samoan Sand”)
- Colored polishes for fruits (e.g., Essie in “Blanc” for details, “Bikini So Teeny” for blueberries, “Forever Yummy” for cherries)
- Nail art brushes and dotting tools
- Top coat for sealing the design
DIY Instructions:
-
- Apply the nude base polish and let it dry completely.
- Use nail art brushes to paint the fruit designs on each nail.
- Add tiny white flowers using a dotting tool.
- Seal your design with a top coat to ensure longevity.
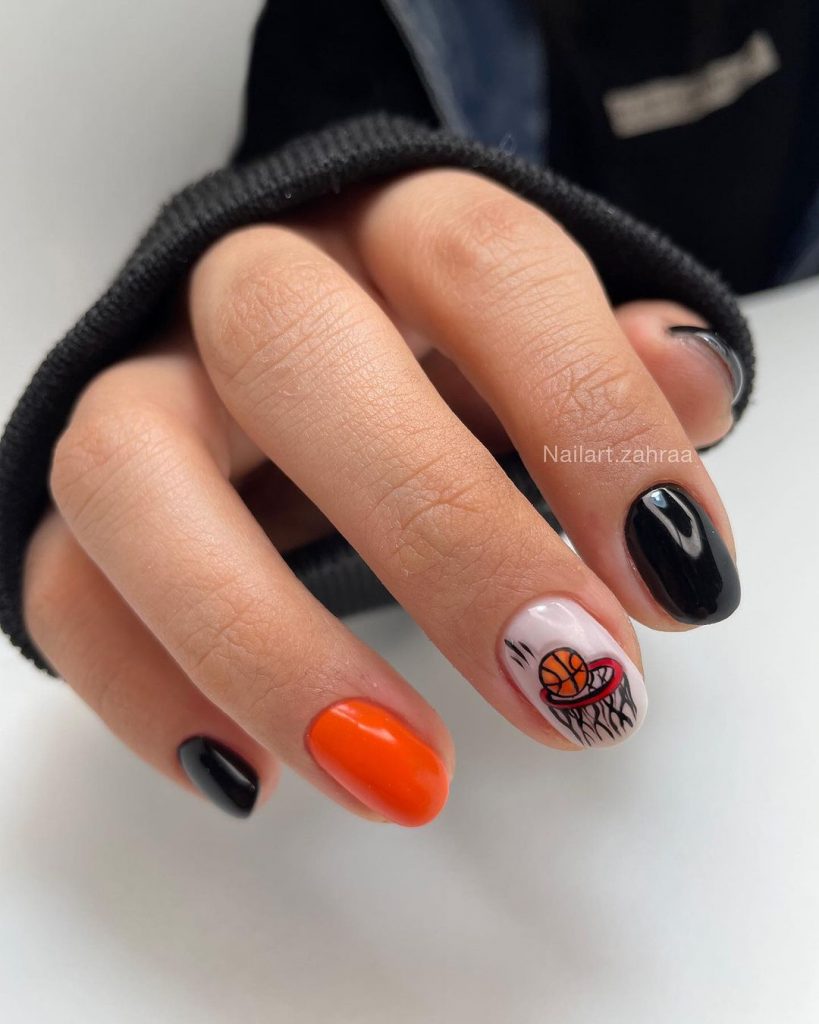
Basketball Theme
Nail designs with sports themes are perfect for showing off your interests. This basketball-inspired manicure combines bold black and orange nails with a fun basketball hoop design on the accent nail. It’s trendy and eye-catching, making it perfect for sporty events or casual outings.
Consumables:
-
- Black polish (e.g., Sally Hansen Miracle Gel in “Blacky O”)
- Orange polish (e.g., OPI Nail Lacquer in “A Good Man-darin Is Hard to Find”)
- White and red polish for the basketball and hoop details
- Fine nail art brushes
- Top coat
DIY Instructions:
-
- Paint your nails with black and orange polishes, alternating colors.
- Use white polish to draw the basketball and red polish for the hoop on the accent nail.
- Add black lines for the basketball details.
- Finish with a top coat to protect your design.
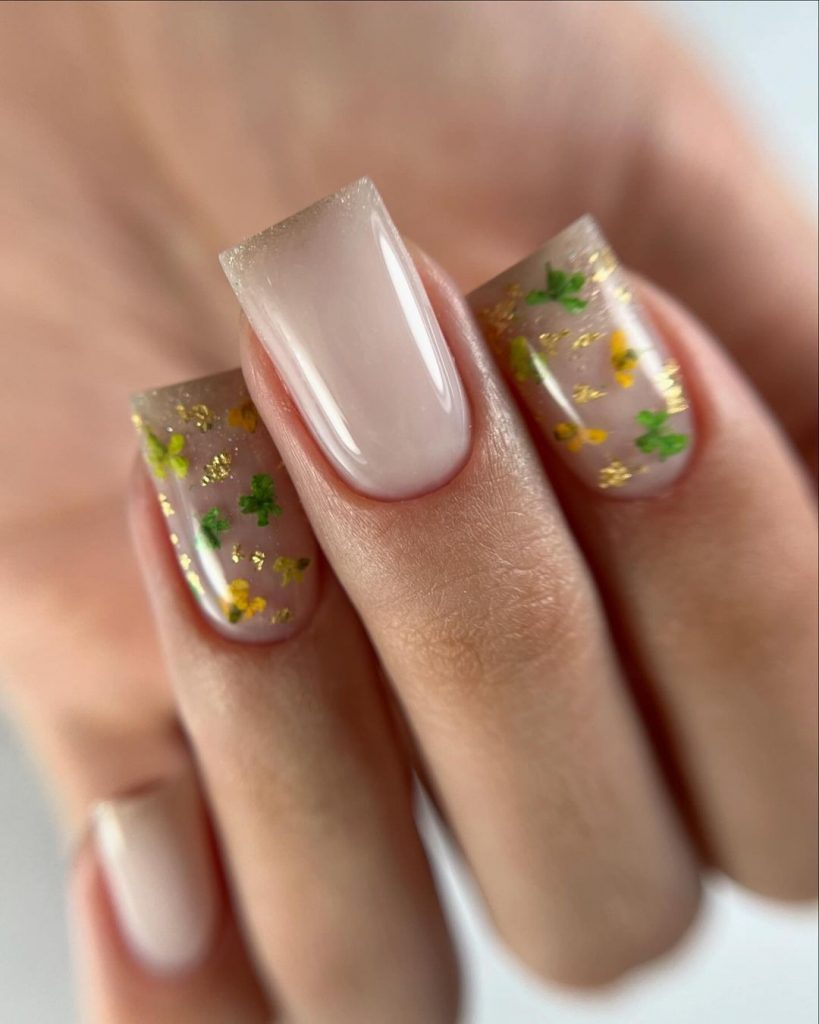
Clover and Glitter
For a more sophisticated summer look, try a subtle yet stunning design with clovers and gold glitter. This manicure features a clear base with delicate clover accents and a touch of gold foil, creating a perfect balance between simplicity and elegance.
Consumables:
-
- Clear base polish (e.g., Essie Gel Couture in “Fairy Tailor”)
- Green polish for clovers (e.g., Zoya Nail Polish in “Josie”)
- Gold foil flakes
- Fine nail art brushes and tweezers
- Top coat
DIY Instructions:
-
- Apply the clear base polish and let it dry.
- Paint small clovers using green polish and a fine brush.
- Carefully place gold foil flakes on the nail using tweezers.
- Seal with a top coat for a glossy finish.
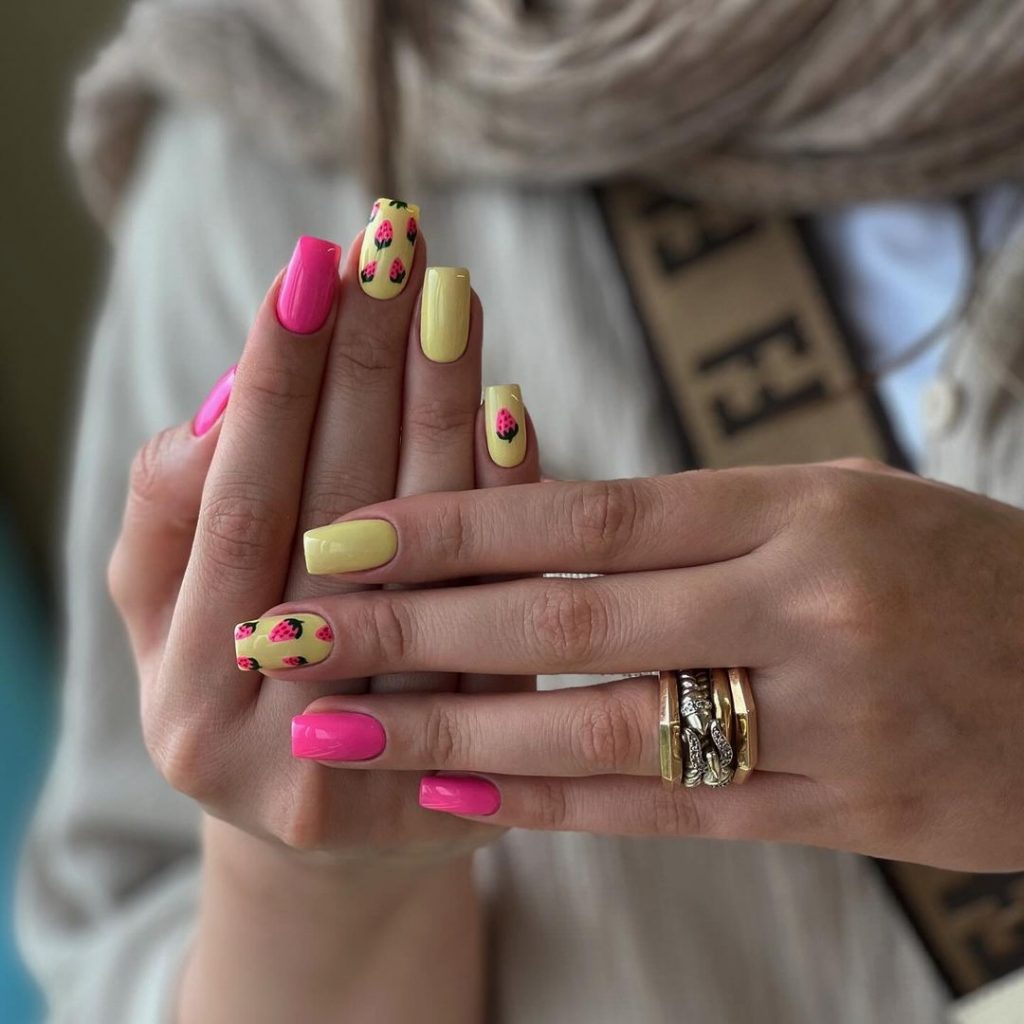
Strawberry Fields
Brighten up your summer with a playful strawberry-themed manicure. This design features vibrant pink and yellow nails with cute strawberry patterns, perfect for beach vacations and sunny days out.
Consumables:
-
- Pink polish (e.g., Essie Nail Polish in “Mod Square”)
- Yellow polish (e.g., China Glaze Nail Lacquer in “Happy Go Lucky”)
- Green polish for strawberry leaves (e.g., Essie in “Mojito Madness”)
- Nail art brushes and dotting tools
- Top coat
DIY Instructions:
-
- Paint your nails with pink and yellow polishes, alternating colors.
- Use green polish to create strawberry leaves and red polish for the strawberry details.
- Add seeds using a dotting tool with white polish.
- Finish with a top coat to seal the design.
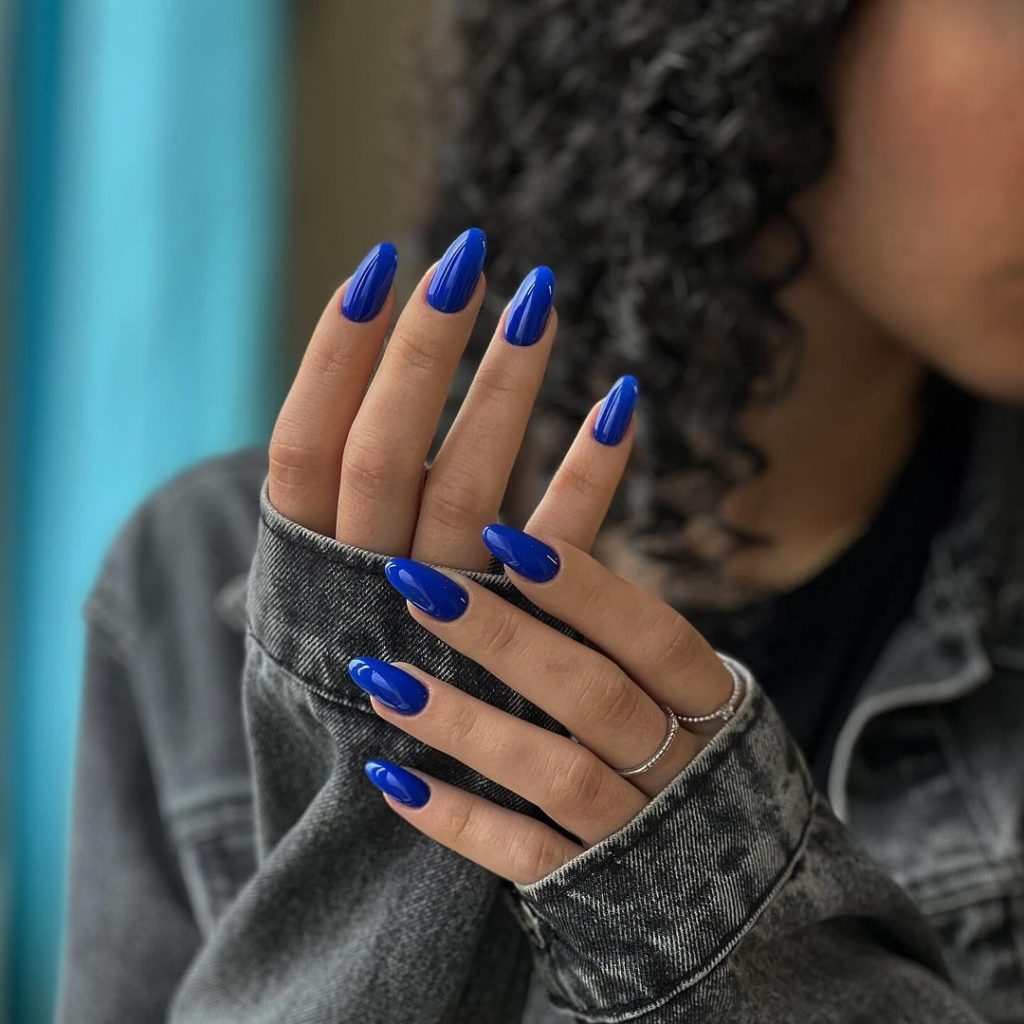
Royal Blue Elegance
For a bold and sophisticated look, royal blue nails are a must-try this summer. This simple yet striking design features a solid royal blue color, perfect for making a statement. It’s versatile enough to complement any summer outfit, from casual jeans to elegant dresses.
Consumables:
-
- Royal blue polish (e.g., OPI Nail Lacquer in “My Car Has Navy-gation”)
- Base coat
- Top coat
DIY Instructions:
-
- Apply a base coat to protect your natural nails.
- Paint your nails with the royal blue polish, applying 2-3 coats for full opacity.
- Finish with a top coat for added shine and durability.
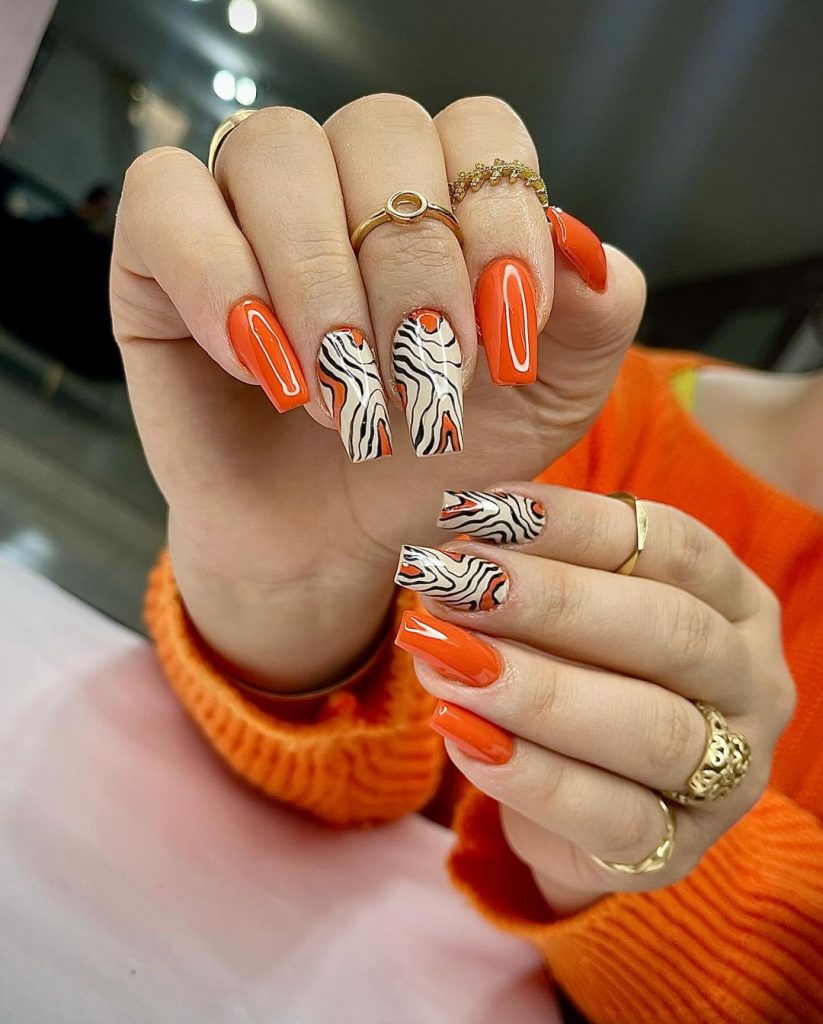
Zebra Stripes and Orange Accents
One of the hottest summer nail trends this year is the bold combination of zebra stripes and vibrant orange accents. This design features a striking contrast between the black and white zebra stripes on a couple of nails and a bright orange color on the others. The pattern creates an eye-catching look perfect for summer.
Consumables:
-
- Bright orange polish (e.g., Essie Nail Polish in “Tangerine Tease”)
- Black and white polishes for zebra stripes (e.g., OPI Nail Lacquer in “Alpine Snow” and “Black Onyx”)
- Fine nail art brushes
- Top coat
DIY Instructions:
-
- Start with a clear base coat to protect your nails.
- Paint your selected nails with the bright orange polish.
- Use black and white polishes with fine nail art brushes to create the zebra stripes on the accent nails.
- Seal with a top coat for added shine and durability.
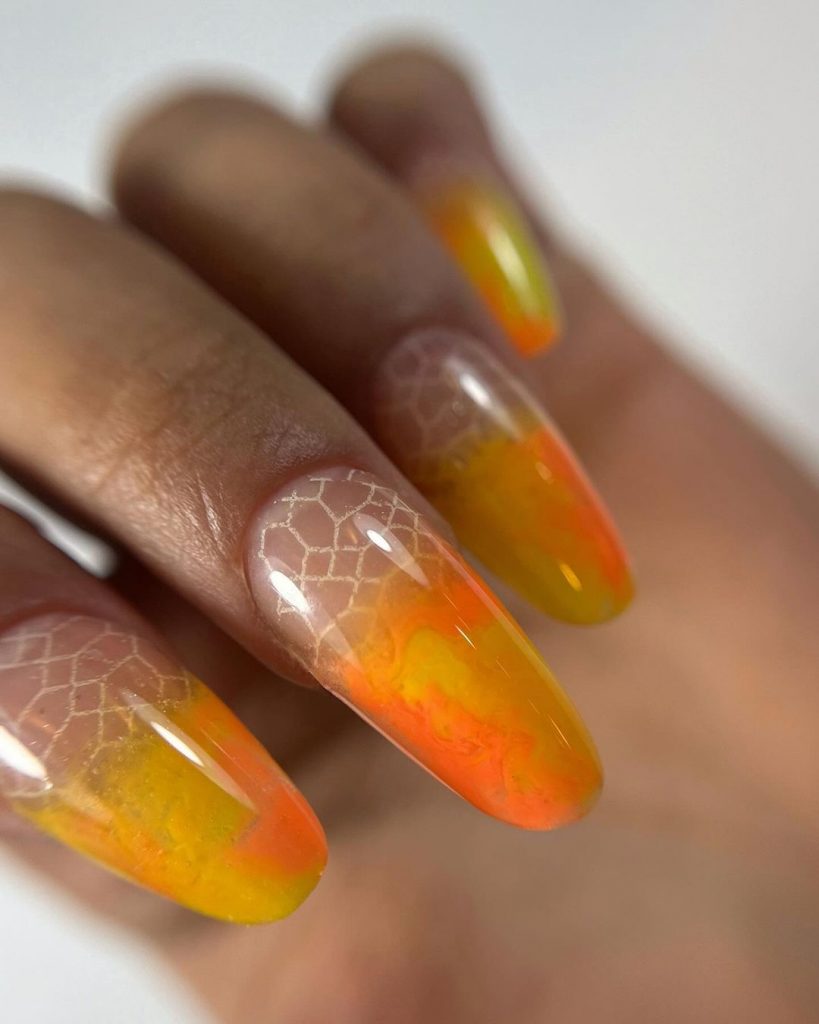
Neon Ombre with Geometric Lines
Neon ombre nails are perfect for making a statement this summer. This design features a gradient effect from bright yellow to orange, complemented by intricate white geometric lines. The blend of colors creates a vibrant and eye-catching look.
Consumables:
-
- Neon yellow and orange polishes (e.g., China Glaze in “Yellow Polka Dot Bikini” and “Sun Worshiper”)
- White polish for geometric lines (e.g., Essie in “Blanc”)
- Makeup sponge for the ombre effect
- Fine nail art brushes
- Top coat
DIY Instructions:
-
- Apply a base coat to your nails.
- Use a makeup sponge to dab the yellow and orange polishes, creating a gradient effect.
- Once dry, use a fine nail art brush to paint the geometric lines with white polish.
- Finish with a top coat to protect the design.
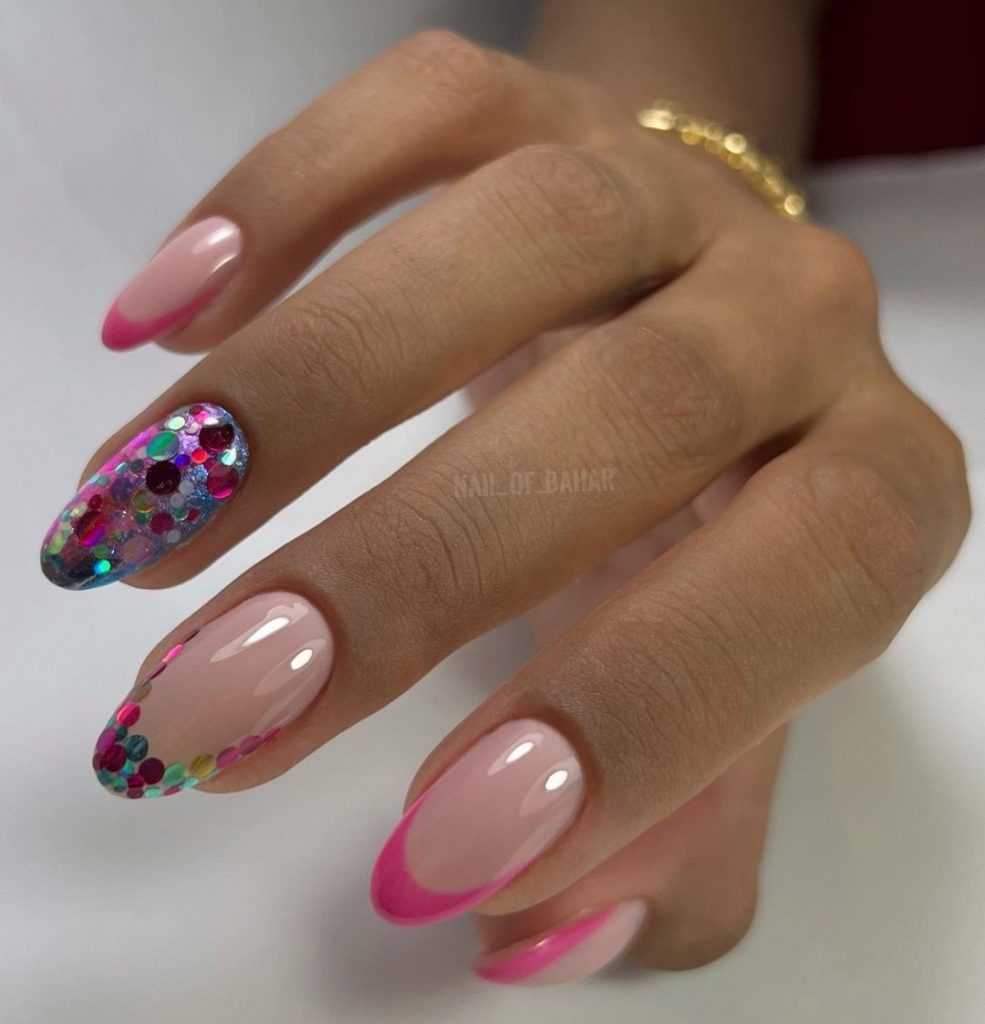
Confetti Glitter and Pink Tips
For a fun and festive look, try this confetti glitter and pink tips design. The nails feature a clear base with vibrant pink tips and a playful confetti glitter accent nail. It’s perfect for adding a touch of celebration to your summer style.
Consumables:
-
- Clear base polish (e.g., Essie Gel Couture in “Fairy Tailor”)
- Pink polish for tips (e.g., OPI Nail Lacquer in “Hotter than You Pink”)
- Multicolored confetti glitter polish (e.g., China Glaze in “Glitter Me This”)
- Fine nail art brushes
- Top coat
DIY Instructions:
-
- Apply a clear base coat to your nails.
- Use a fine nail art brush to paint the pink tips.
- Apply the confetti glitter polish to the accent nail.
- Finish with a top coat to seal the design.
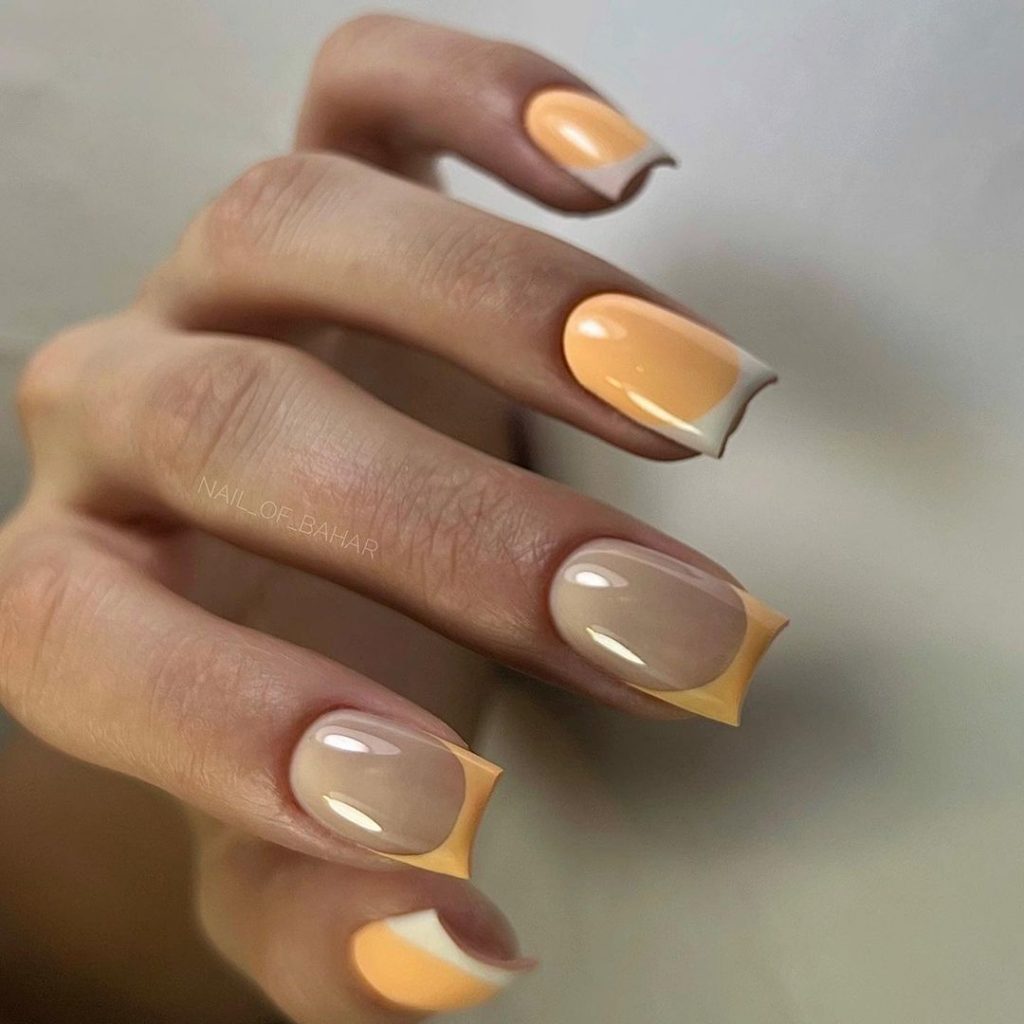
Peach and Nude French Tips
French tips are a timeless classic, and this summer, they’re getting a peachy twist. This design features elegant nude nails with soft peach tips, creating a sophisticated and trendy look. It’s perfect for both casual and formal summer occasions.
Consumables:
-
- Nude base polish (e.g., Essie Nail Polish in “Ballet Slippers”)
- Peach polish for tips (e.g., OPI Nail Lacquer in “Crawfishin’ for a Compliment”)
- Fine nail art brushes
- Top coat
DIY Instructions:
-
- Apply a nude base coat to your nails.
- Use a fine nail art brush to paint the peach tips.
- Seal with a top coat to ensure the design lasts.
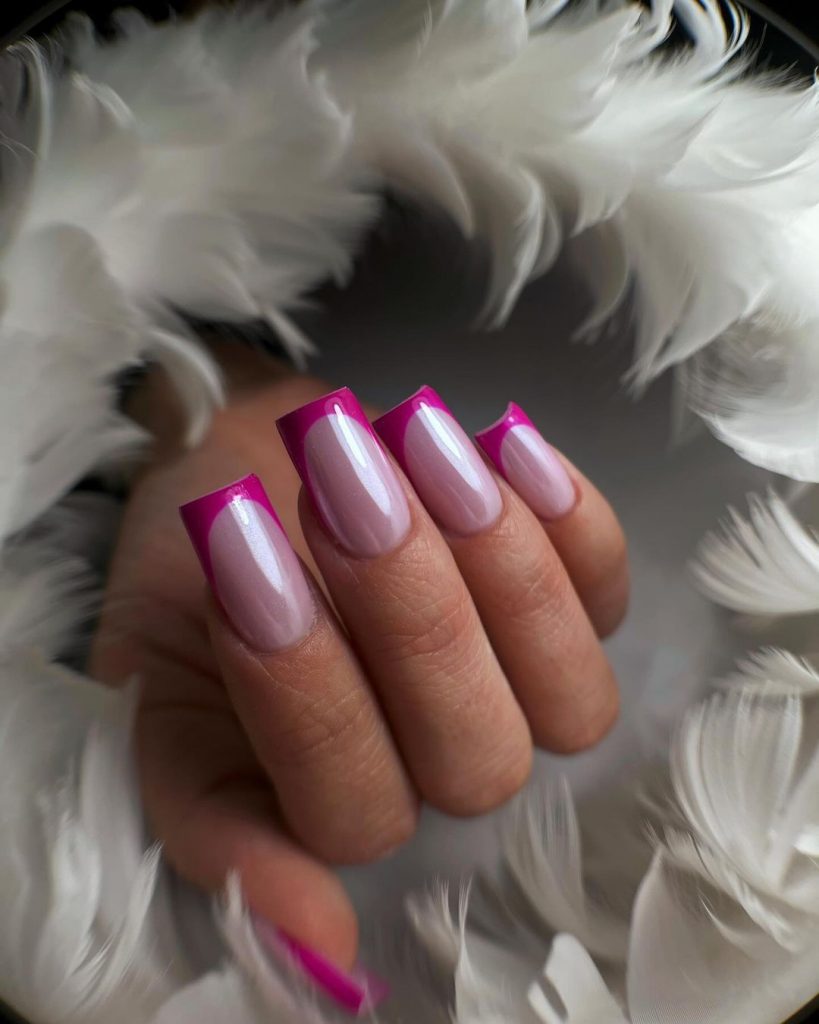
Bright Pink French Tips
Add a pop of color to your summer look with these bright pink French tips. This design features a nude base with vibrant pink tips, creating a fresh and lively manicure that’s perfect for summer.
Consumables:
-
- Nude base polish (e.g., Essie Nail Polish in “Mademoiselle”)
- Bright pink polish for tips (e.g., OPI Nail Lacquer in “Pink Flamenco”)
- Fine nail art brushes
- Top coat
DIY Instructions:
-
- Apply a nude base coat to your nails.
- Use a fine nail art brush to paint the bright pink tips.
- Finish with a top coat to protect the design.
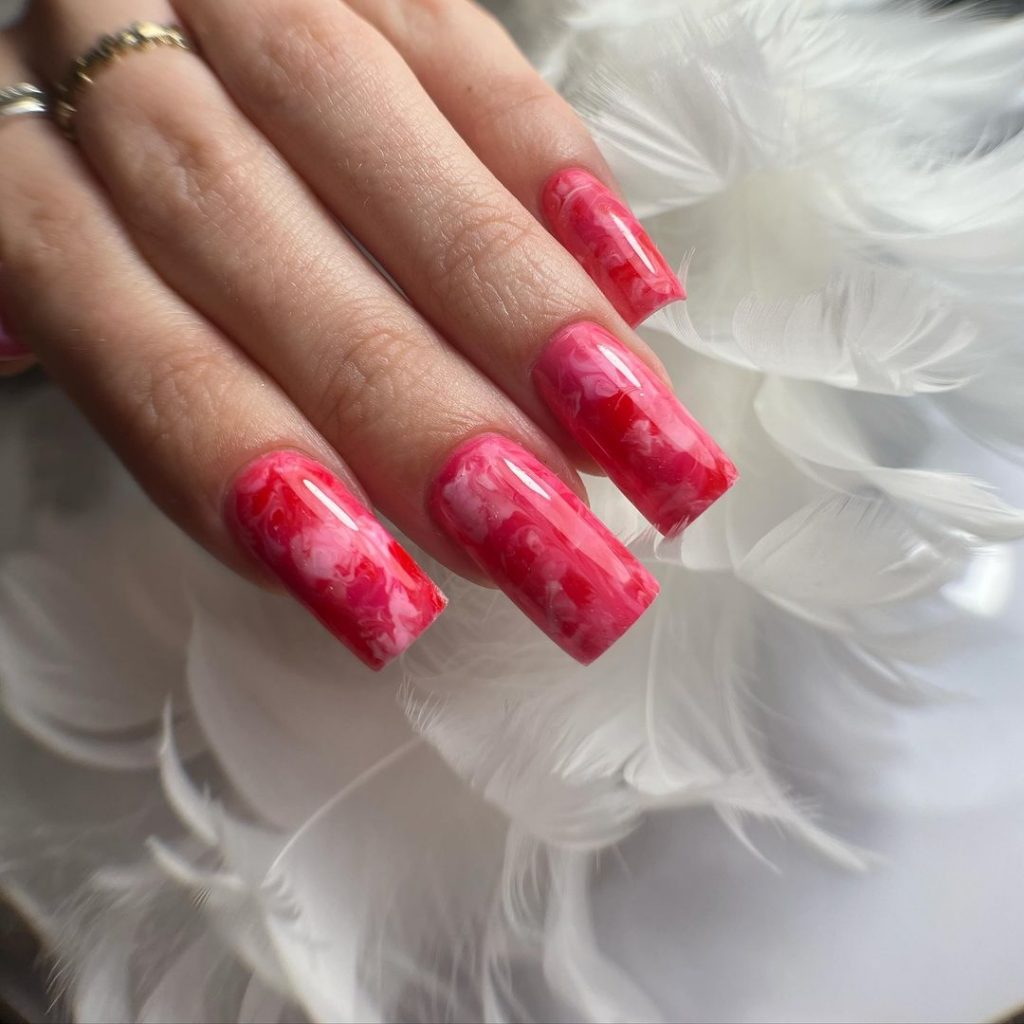
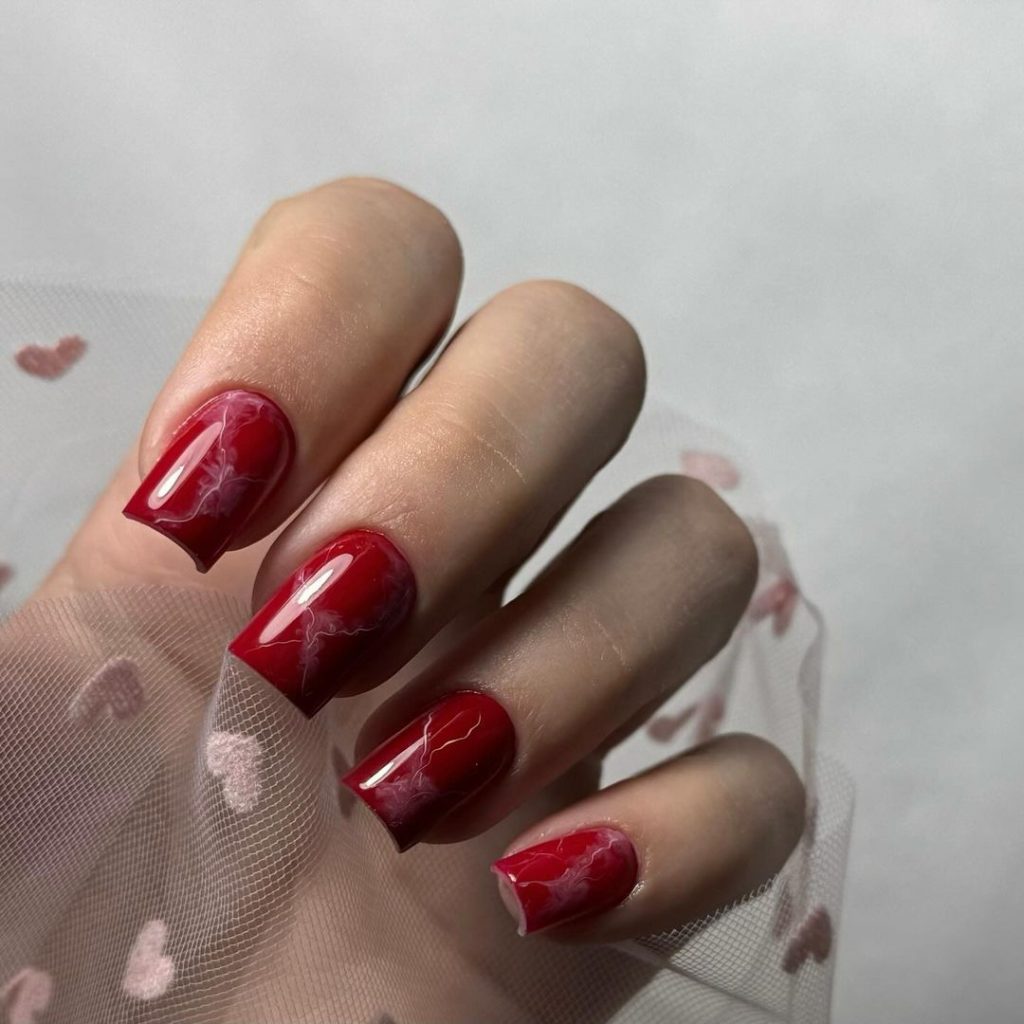
Marble Red Design
Marble designs are making a comeback this summer, and this red marble look is both bold and elegant. This manicure features a mix of red and white swirls, creating a marble effect that stands out. The design is perfect for adding a touch of sophistication to your summer style.
Consumables:
-
- Red polish (e.g., OPI Nail Lacquer in “Big Apple Red”)
- White polish (e.g., Essie in “Blanc”)
- Nail art brushes and a dotting tool
- Top coat
DIY Instructions:
-
- Apply a clear base coat to your nails.
- Use a nail art brush to apply the red polish in swirls, then add white polish to create a marble effect.
- Blend the colors gently with a dotting tool.
- Finish with a top coat to seal the design.
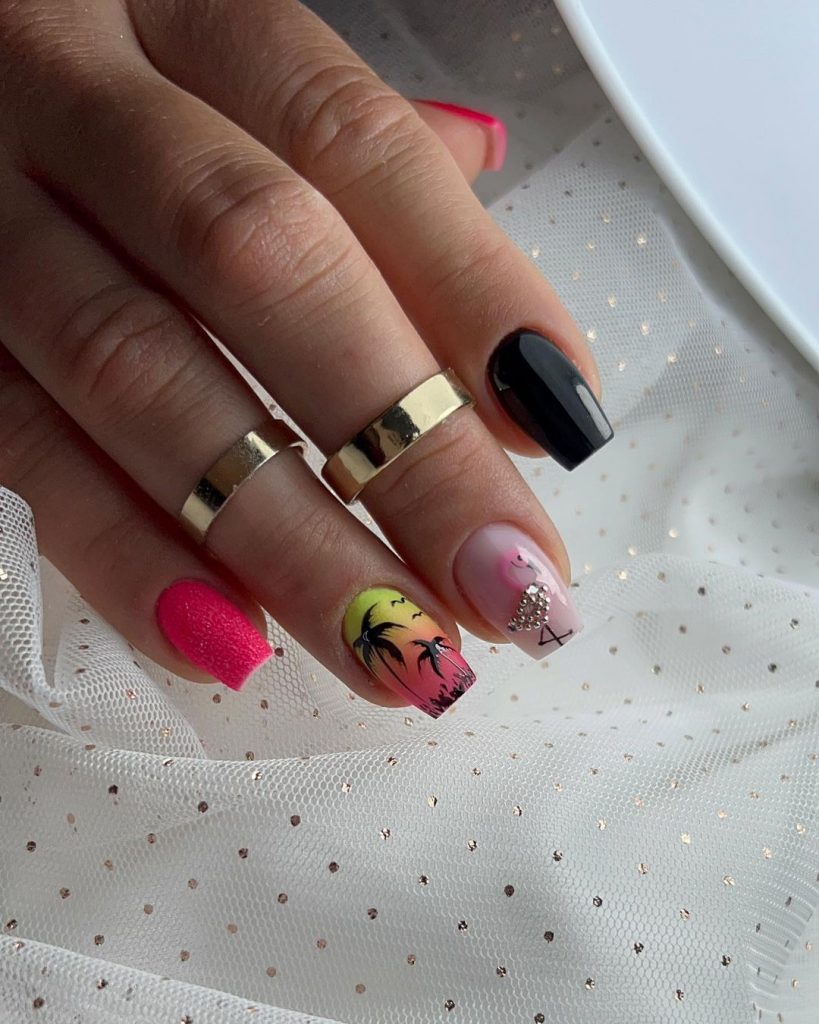
Tropical Vibes
This tropical-inspired manicure is perfect for beach vacations. Featuring bright colors like pink, black, and yellow, along with palm tree silhouettes and a flamingo design, this look captures the essence of a summer getaway.
Consumables:
-
- Bright pink polish (e.g., Essie Nail Polish in “Fiesta”)
- Black polish (e.g., Sally Hansen Miracle Gel in “Blacky O”)
- Yellow polish (e.g., China Glaze Nail Lacquer in “Happy Go Lucky”)
- Rhinestones for extra sparkle
- Fine nail art brushes
- Top coat
DIY Instructions:
-
- Apply a base coat to your nails.
- Paint each nail with the different base colors as shown.
- Use fine nail art brushes to draw palm trees and flamingo designs.
- Apply rhinestones for added sparkle.
- Seal with a top coat to protect the design.
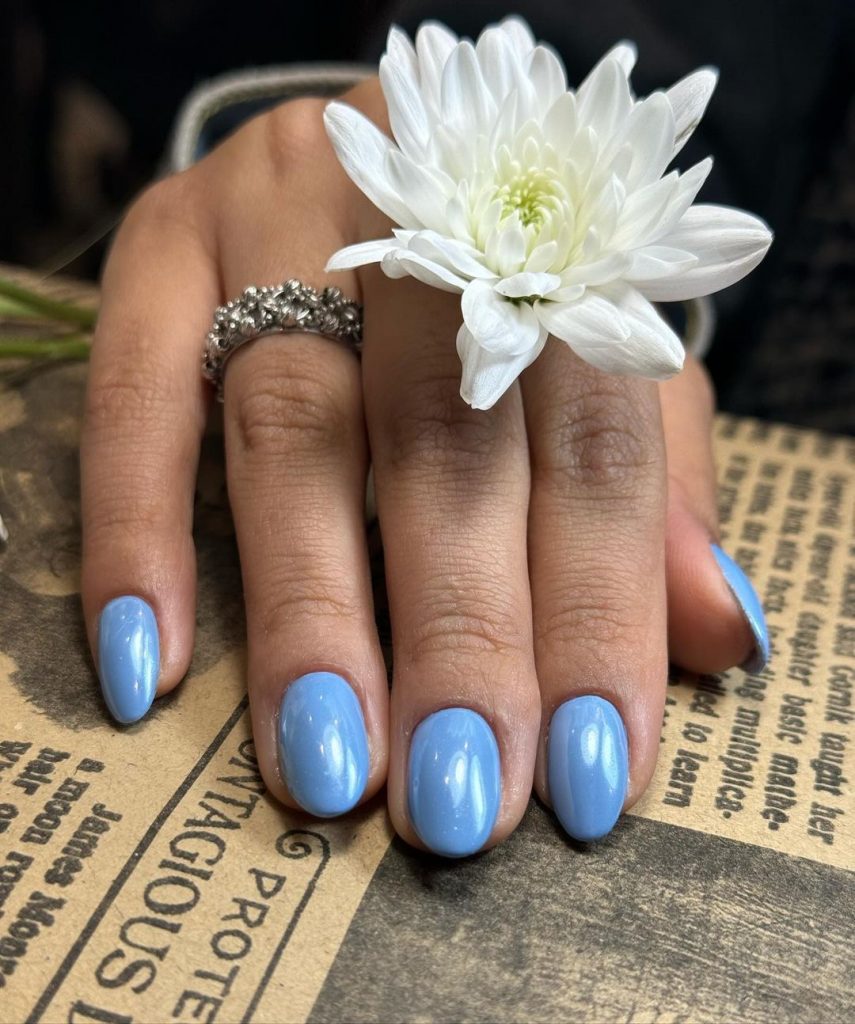
Soft Blue Elegance
Soft blue nails are a timeless choice, especially for summer. This manicure features a solid light blue color that’s both serene and stylish. It’s perfect for any occasion, from casual outings to formal events.
Consumables:
-
- Light blue polish (e.g., OPI Nail Lacquer in “It’s a Boy!”)
- Base coat
- Top coat
DIY Instructions:
-
- Apply a base coat to your nails.
- Paint your nails with the light blue polish, applying 2-3 coats for full opacity.
- Finish with a top coat for added shine and durability.
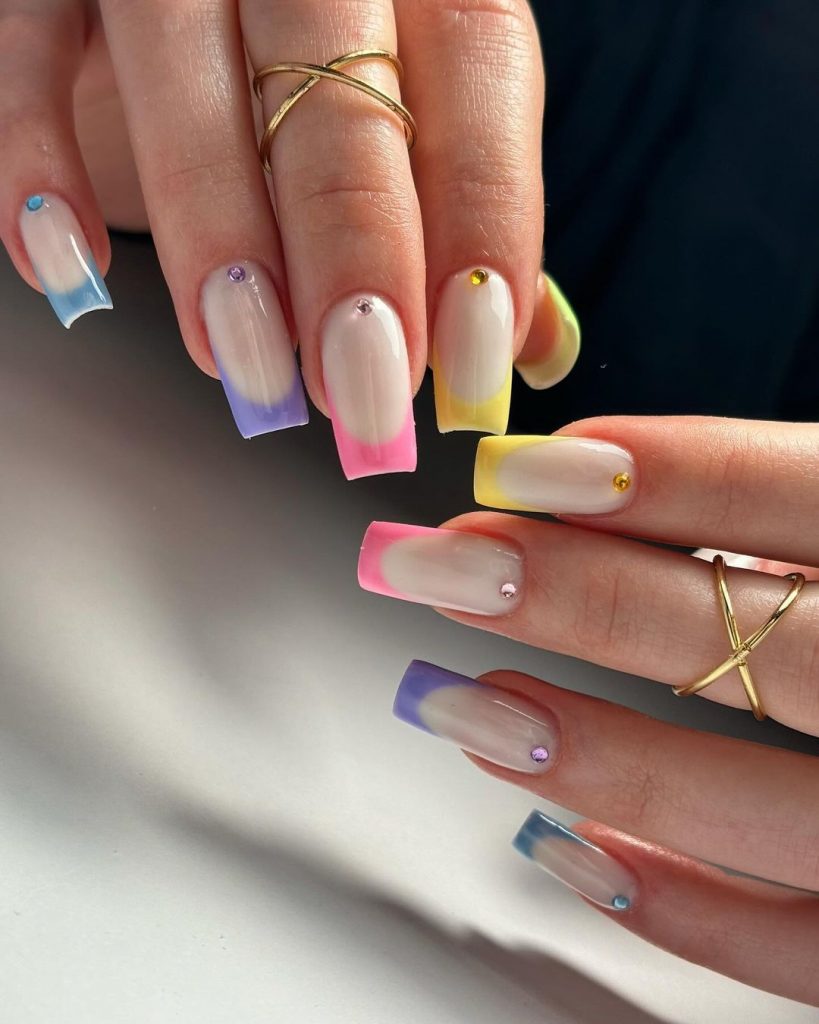
Pastel French Tips
For a playful yet elegant look, try these pastel French tips. The nails feature a clear base with pastel tips in shades of pink, yellow, purple, and blue. Small rhinestones add a touch of glamour to this design.
Consumables:
-
- Clear base polish (e.g., Essie Gel Couture in “Fairy Tailor”)
- Pastel polishes for tips (e.g., OPI Nail Lacquer in “Mod About You”, “Lemonade Stand By Your Man”, “You’re Such a Budapest”, and “No Room for the Blues”)
- Rhinestones
- Fine nail art brushes
- Top coat
DIY Instructions:
-
- Apply a clear base coat to your nails.
- Use fine nail art brushes to paint the pastel tips.
- Apply rhinestones at the base of each tip.
- Seal with a top coat to ensure the design lasts.
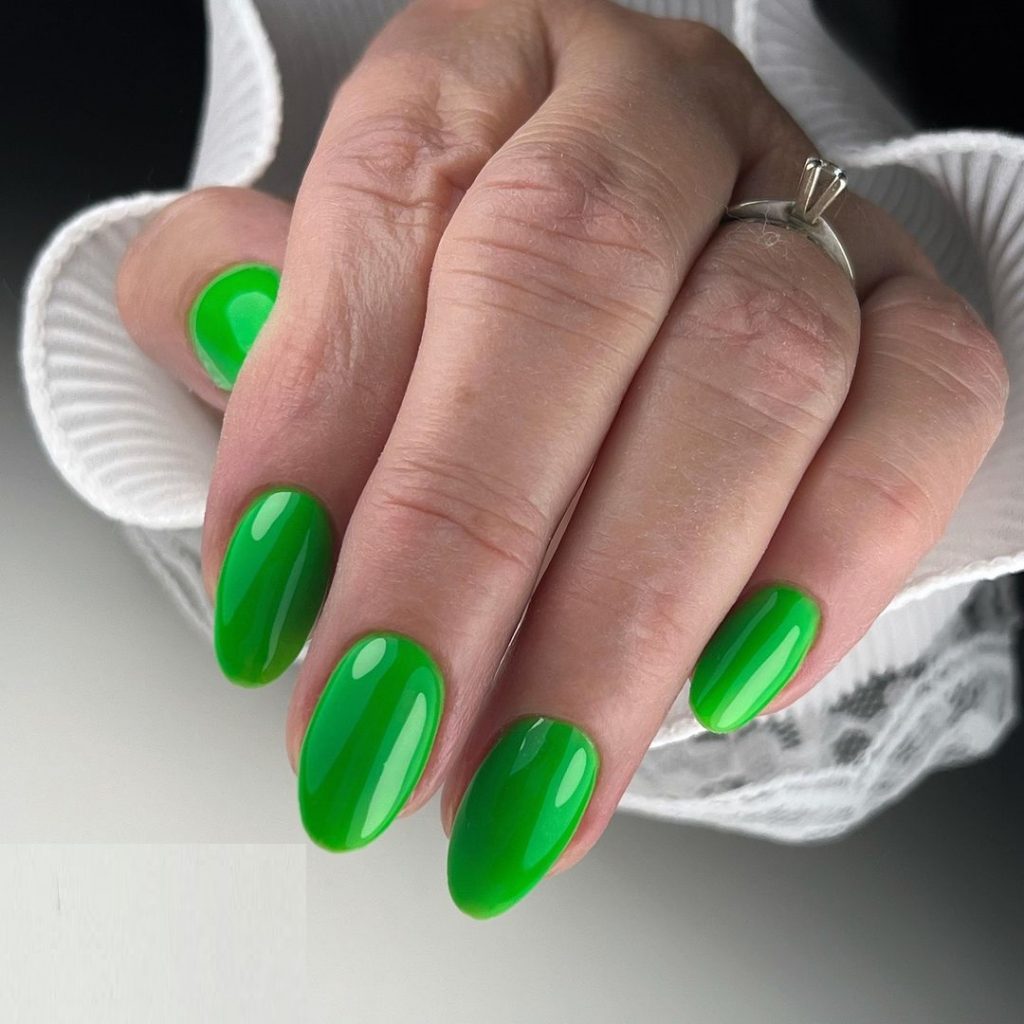
Bright Green Nails
Make a bold statement this summer with bright green nails. This solid color design is vibrant and eye-catching, perfect for those who love to stand out. It’s an excellent choice for adding a pop of color to any summer outfit.
Consumables:
-
- Bright green polish (e.g., Essie Nail Polish in “Shake Your Money Maker”)
- Base coat
- Top coat
DIY Instructions:
-
- Apply a base coat to your nails.
- Paint your nails with the bright green polish, applying 2-3 coats for full opacity.
- Finish with a top coat to protect the design.
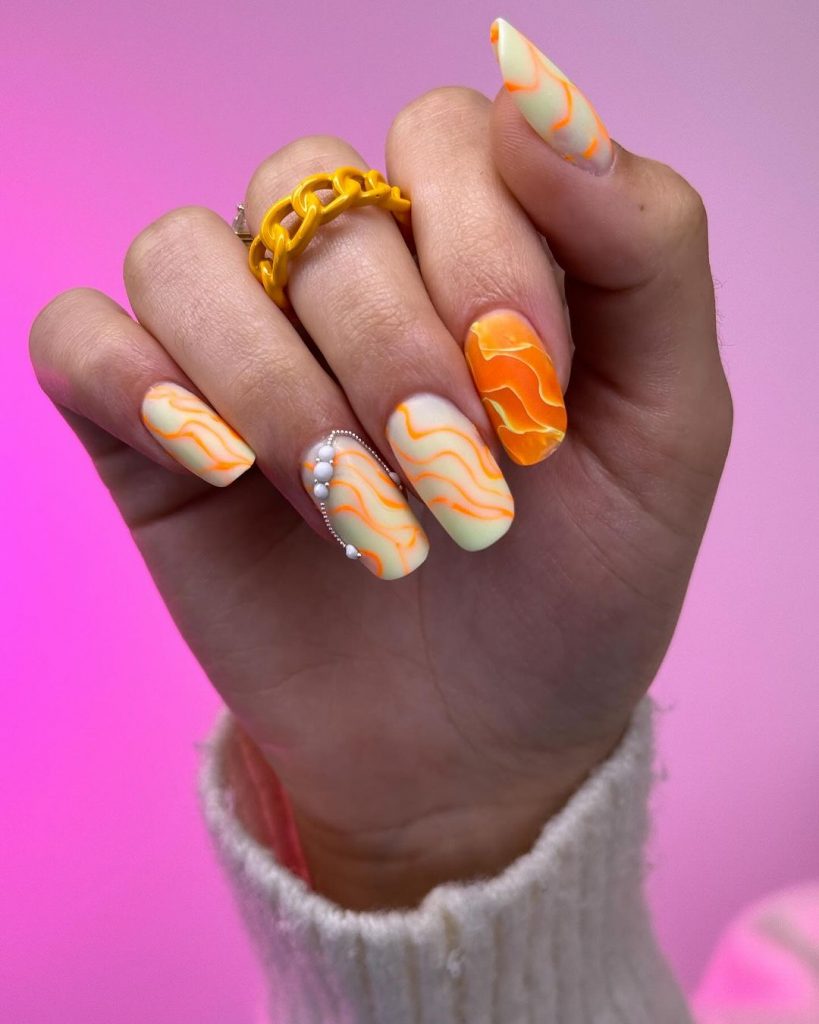
Orange Waves
Orange wave designs are perfect for a vibrant summer look. This manicure features a mix of soft yellow and bright orange with wavy patterns. The accent nail, adorned with a pearl chain, adds a unique touch to the overall design.
Consumables:
-
- Soft yellow polish (e.g., OPI Nail Lacquer in “How Does Your Zen Garden Grow?”)
- Bright orange polish (e.g., Essie Nail Polish in “Tart Deco”)
- Pearl chain embellishments
- Fine nail art brushes
- Top coat
DIY Instructions:
-
- Apply a base coat to your nails.
- Paint your nails with soft yellow polish.
- Use a fine nail art brush to create wavy patterns with the bright orange polish.
- Attach the pearl chain to the accent nail using nail glue.
- Seal with a top coat to protect the design.
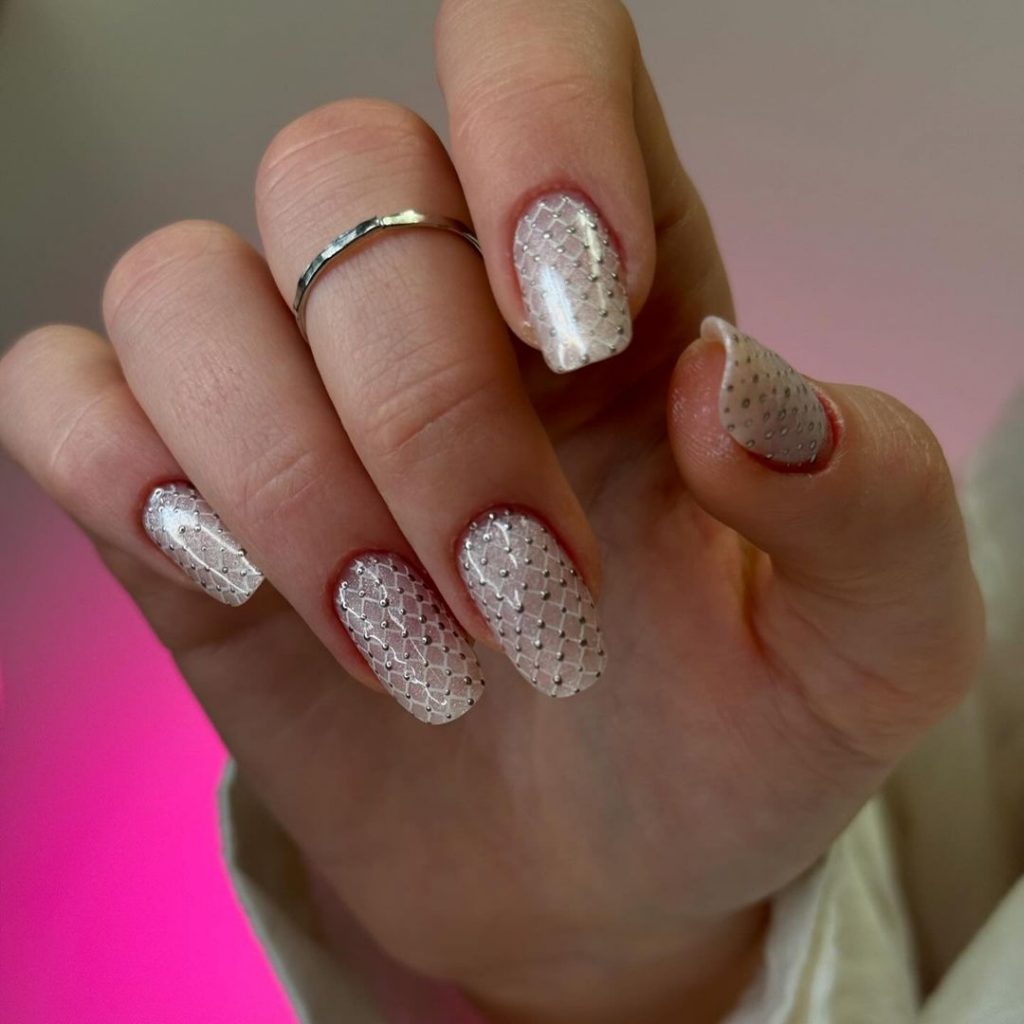
White Netting
This white netting design is perfect for those who prefer a subtle yet intricate look. The design features a clear base with white netting patterns, creating a delicate and elegant effect.
Consumables:
-
- Clear base polish (e.g., Essie Gel Couture in “Fairy Tailor”)
- White polish for netting (e.g., Essie in “Blanc”)
- Fine nail art brushes
- Top coat
DIY Instructions:
-
- Apply a clear base coat to your nails.
- Use a fine nail art brush to paint the white netting patterns.
- Finish with a top coat to ensure longevity.
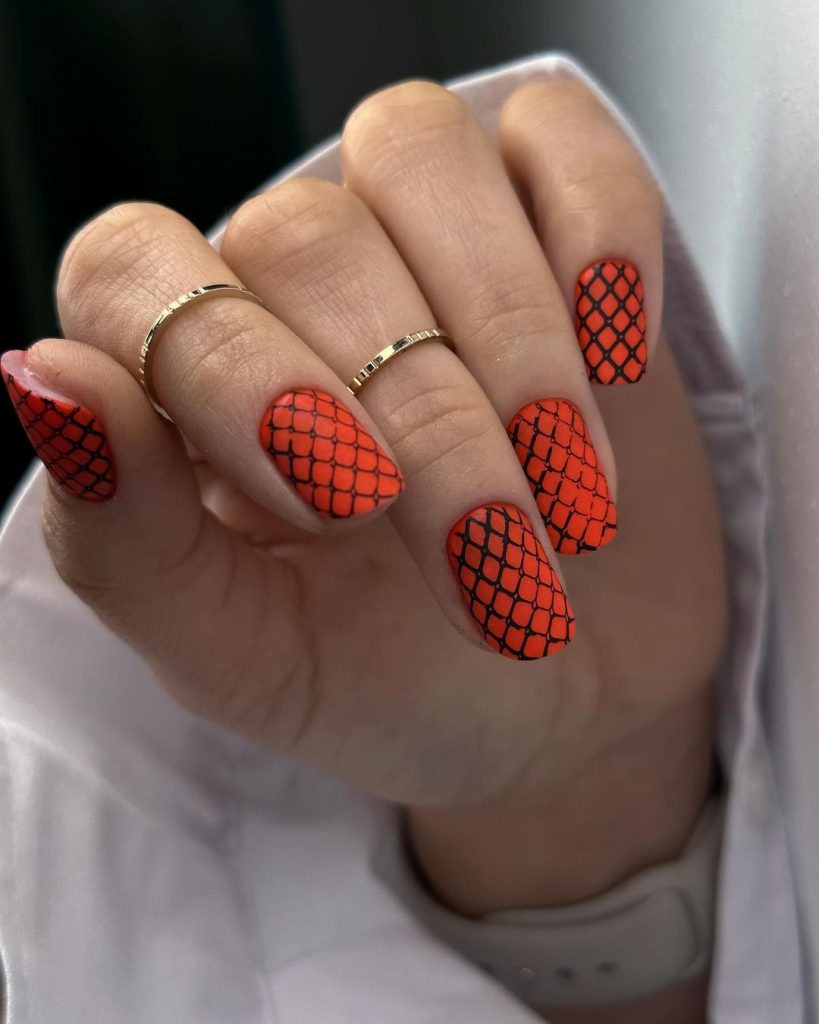
Black Fishnet
For a bold and edgy look, try this black fishnet design. The nails feature a bright orange base with black fishnet patterns, creating a striking contrast that’s perfect for summer nights.
Consumables:
-
- Bright orange polish (e.g., Essie Nail Polish in “Clambake”)
- Black polish for netting (e.g., Sally Hansen Miracle Gel in “Blacky O”)
- Fine nail art brushes
- Top coat
DIY Instructions:
-
- Apply a base coat to your nails.
- Paint your nails with the bright orange polish.
- Use a fine nail art brush to create the black fishnet patterns.
- Seal with a top coat for added shine and protection.
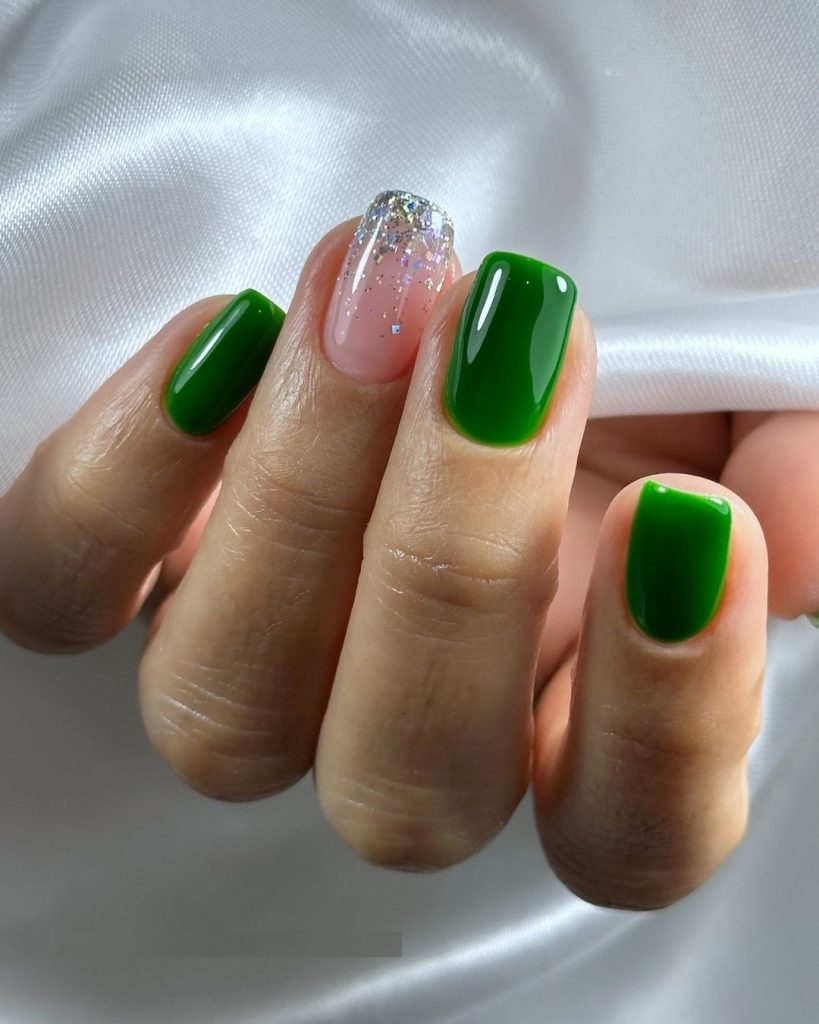
Green with Glitter Accent
This manicure combines solid green nails with a glitter accent nail, creating a fun and festive look. The green is bright and vibrant, while the glitter adds a touch of sparkle.
Consumables:
-
- Bright green polish (e.g., Essie Nail Polish in “Shake Your Money Maker”)
- Silver glitter polish (e.g., China Glaze in “Fairy Dust”)
- Top coat
DIY Instructions:
-
- Apply a base coat to your nails.
- Paint most of your nails with the bright green polish.
- Apply the silver glitter polish to the accent nail.
- Finish with a top coat to seal the design.
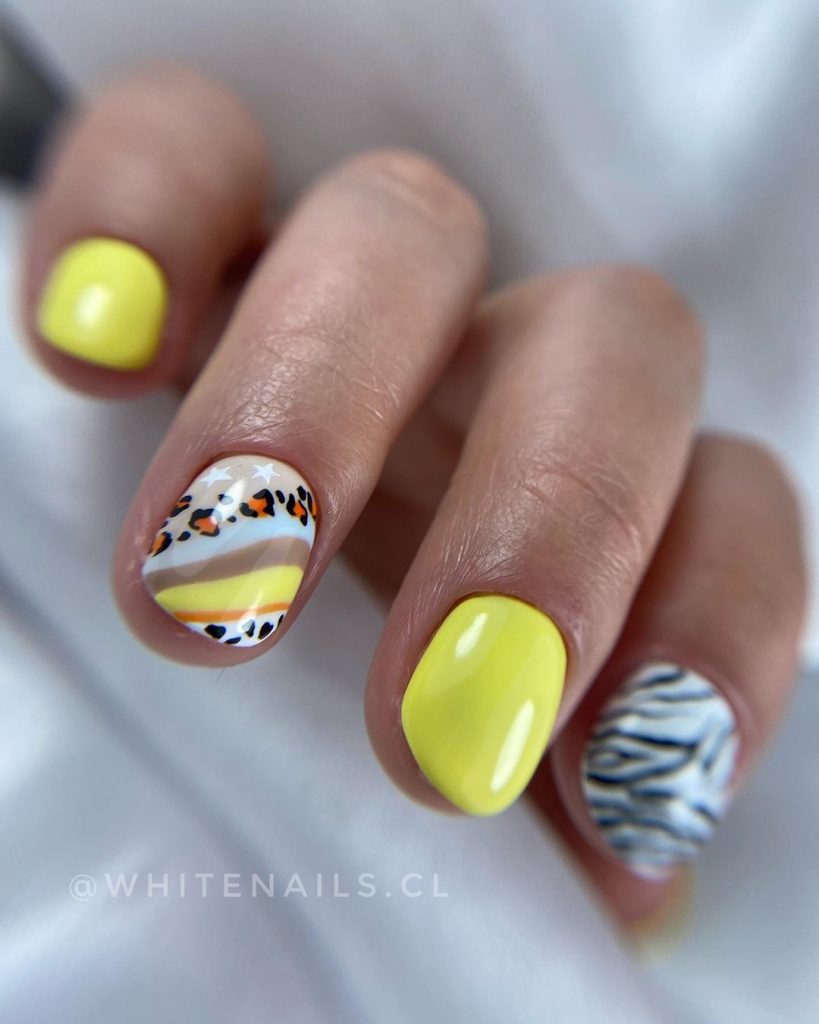
Yellow and Animal Print
For a playful and trendy look, try this yellow and animal print design. This manicure features bright yellow nails combined with animal print patterns on a couple of nails, creating a stylish and fun summer look.
Consumables:
-
- Bright yellow polish (e.g., OPI Nail Lacquer in “Sun, Sea, and Sand in My Pants”)
- White polish for base (e.g., Essie in “Blanc”)
- Black and brown polishes for animal print (e.g., OPI Nail Lacquer in “Black Onyx” and “Chocolate Moose”)
- Fine nail art brushes
- Top coat
DIY Instructions:
-
- Apply a base coat to your nails.
- Paint most of your nails with the bright yellow polish.
- Use white polish as a base for the animal print nails.
- Create the animal print patterns using black and brown polishes with fine nail art brushes.
- Seal with a top coat to protect the design.
Floral French Tips
Floral French tips bring a refreshing twist to the classic French manicure. This design features nude nails with vibrant floral patterns on the tips, incorporating shades of pink, green, and a hint of blue for a colorful and elegant look.
Consumables:
-
- Nude base polish (e.g., OPI Nail Lacquer in “Dulce de Leche”)
- Colored polishes for flowers (e.g., Essie in “Blossom Dandy” for green, “Peach Daiquiri” for pink)
- Fine nail art brushes
- Top coat
DIY Instructions:
-
- Apply a nude base coat to your nails.
- Use fine nail art brushes to create floral patterns on the tips with green, pink, and blue polishes.
- Finish with a top coat to seal the design and add shine.
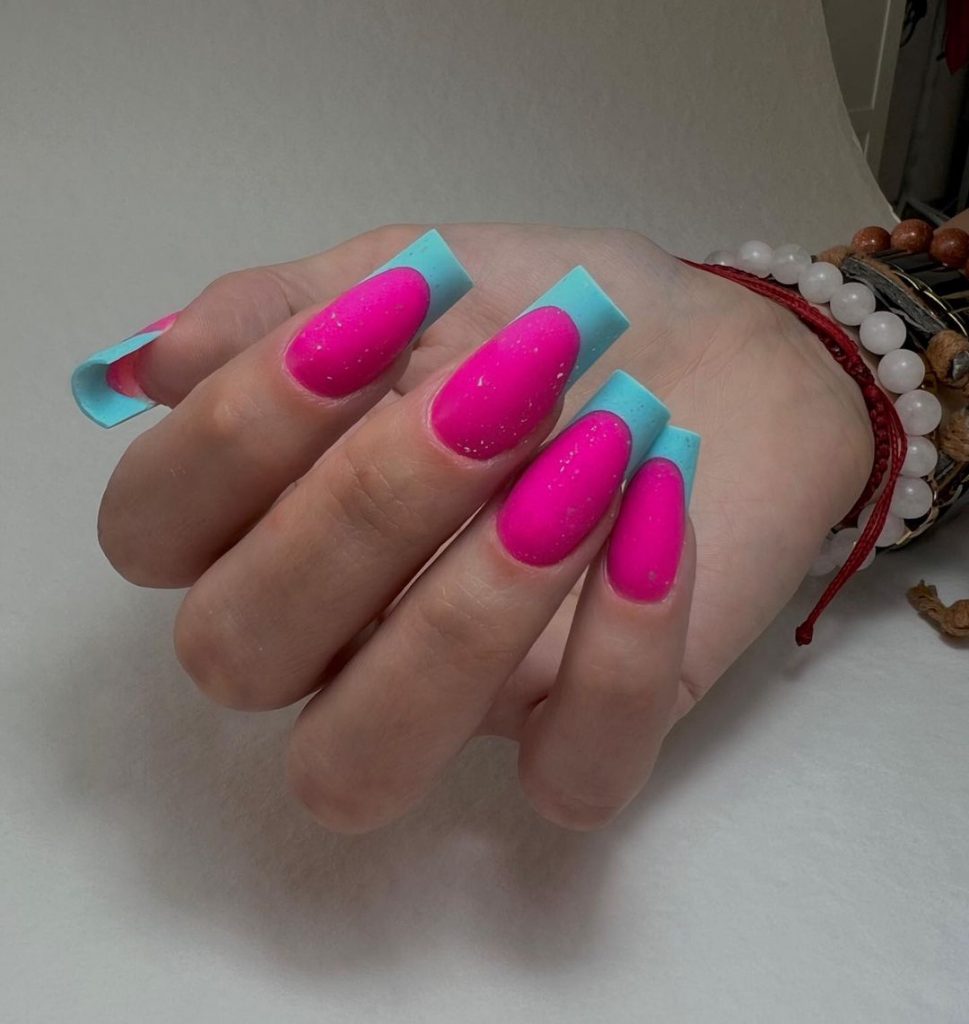
Pink and Blue French Tips
This playful manicure combines bright pink and blue colors with a unique French tip design. The contrast between the vibrant pink base and the cool blue tips makes this design stand out, perfect for those who love bold colors.
Consumables:
-
- Bright pink polish (e.g., Essie Nail Polish in “Mod Square”)
- Blue polish for tips (e.g., OPI Nail Lacquer in “My Car Has Navy-gation”)
- Fine nail art brushes
- Top coat
DIY Instructions:
-
- Apply a base coat to your nails.
- Paint your nails with the bright pink polish.
- Use fine nail art brushes to paint the blue tips.
- Seal with a top coat for durability.
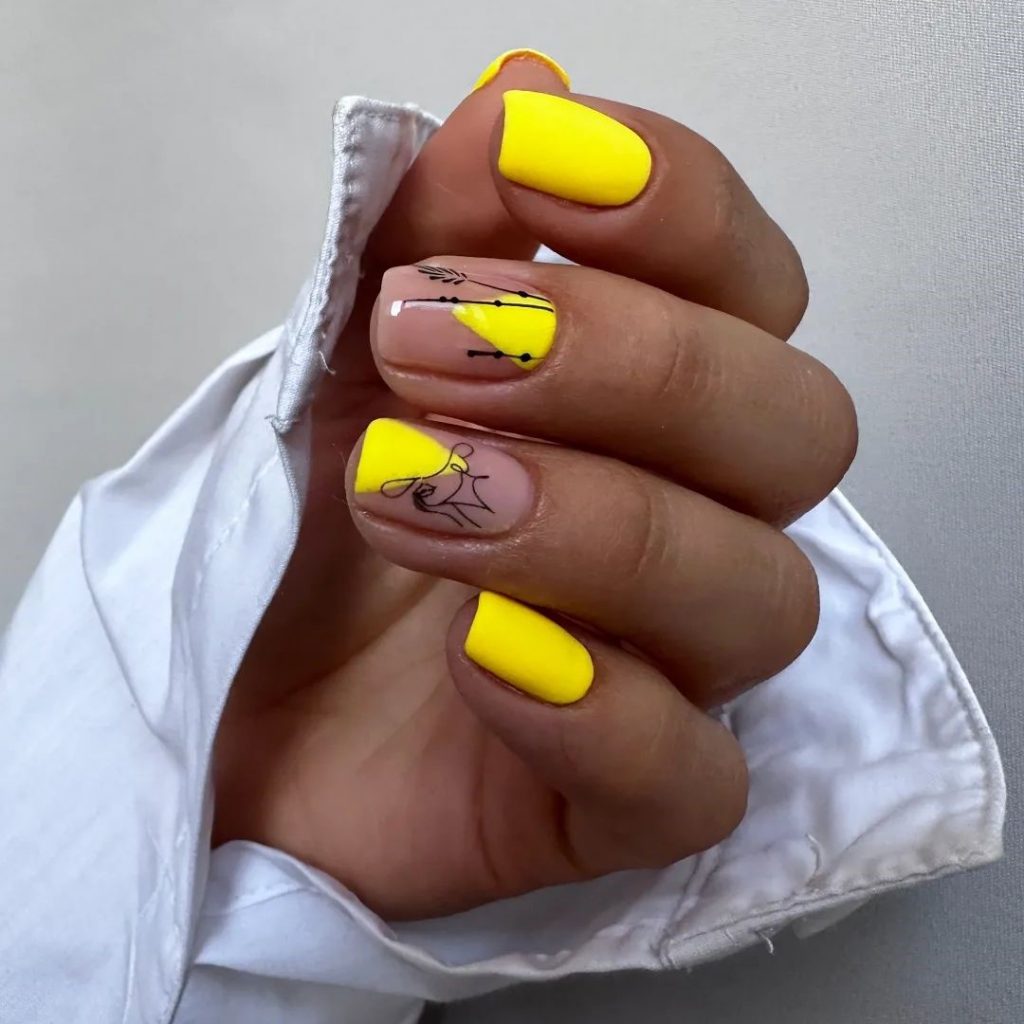
Yellow Abstract
Yellow abstract designs are trendy this summer. This manicure features bright yellow nails with accent nails displaying abstract line art on a nude base. The combination of bold yellow and delicate line work creates a modern and chic look.
Consumables:
-
- Bright yellow polish (e.g., China Glaze Nail Lacquer in “Happy Go Lucky”)
- Nude base polish (e.g., Essie Nail Polish in “Ballet Slippers”)
- Black polish for line art (e.g., OPI Nail Lacquer in “Black Onyx”)
- Fine nail art brushes
- Top coat
DIY Instructions:
-
- Apply a nude base coat to your accent nails and bright yellow polish to the rest.
- Use fine nail art brushes to create abstract line art on the accent nails.
- Seal with a top coat to protect the design.
Red Marble Elegance
This red marble design is perfect for a sophisticated summer look. The nails feature a rich red base with delicate white marble patterns, creating a luxurious and elegant effect.
Consumables:
-
- Red polish (e.g., OPI Nail Lacquer in “Big Apple Red”)
- White polish for marble effect (e.g., Essie in “Blanc”)
- Fine nail art brushes
- Top coat
DIY Instructions:
-
- Apply a base coat to your nails.
- Paint your nails with the red polish.
- Use fine nail art brushes to create the white marble patterns.
- Finish with a top coat to seal the design.
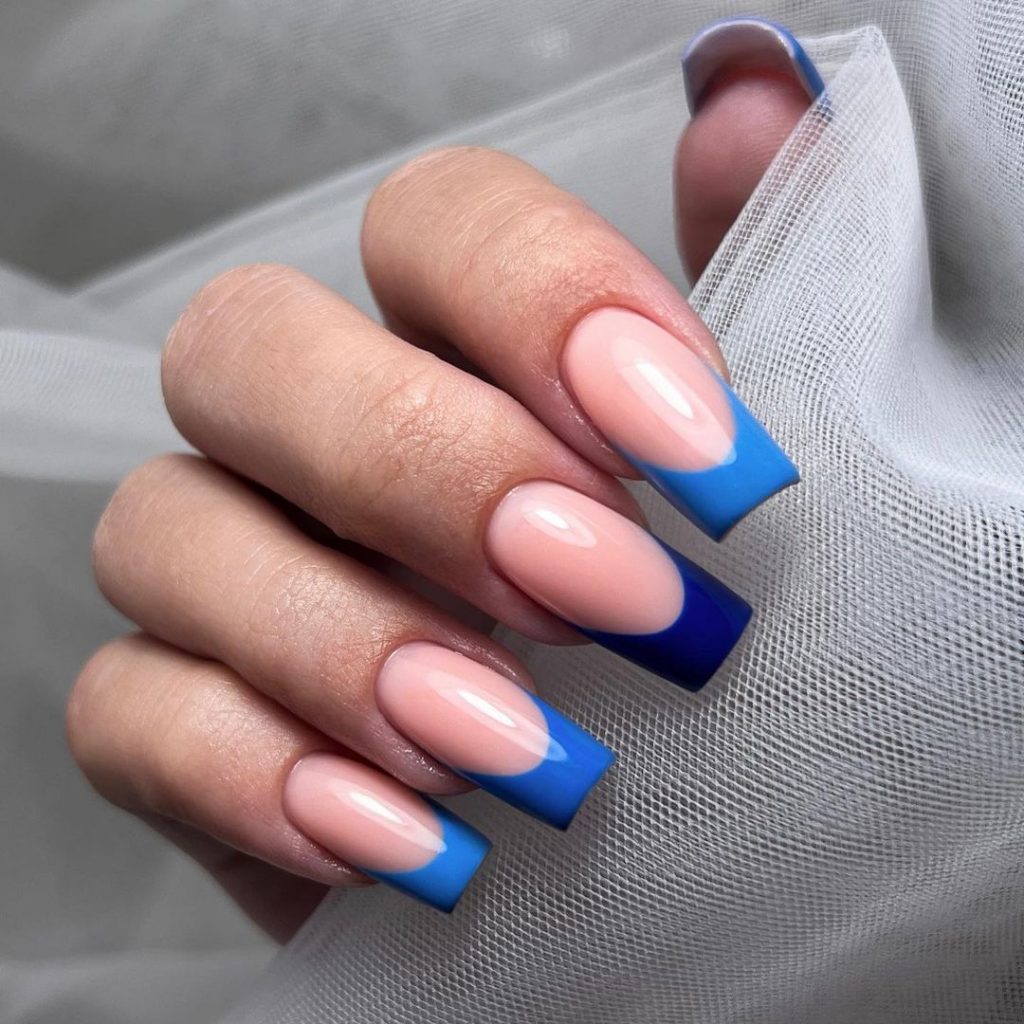
Blue French Tips
For a cool and contemporary look, try these blue French tips. This design features a nude base with varying shades of blue on the tips, creating a gradient effect that’s perfect for summer.
Consumables:
-
- Nude base polish (e.g., Essie Nail Polish in “Mademoiselle”)
- Light and dark blue polishes for tips (e.g., OPI Nail Lacquer in “No Room for the Blues” and “Russian Navy”)
- Fine nail art brushes
- Top coat
DIY Instructions:
-
- Apply a nude base coat to your nails.
- Use fine nail art brushes to paint the blue tips, creating a gradient effect.
- Seal with a top coat to ensure the design lasts.
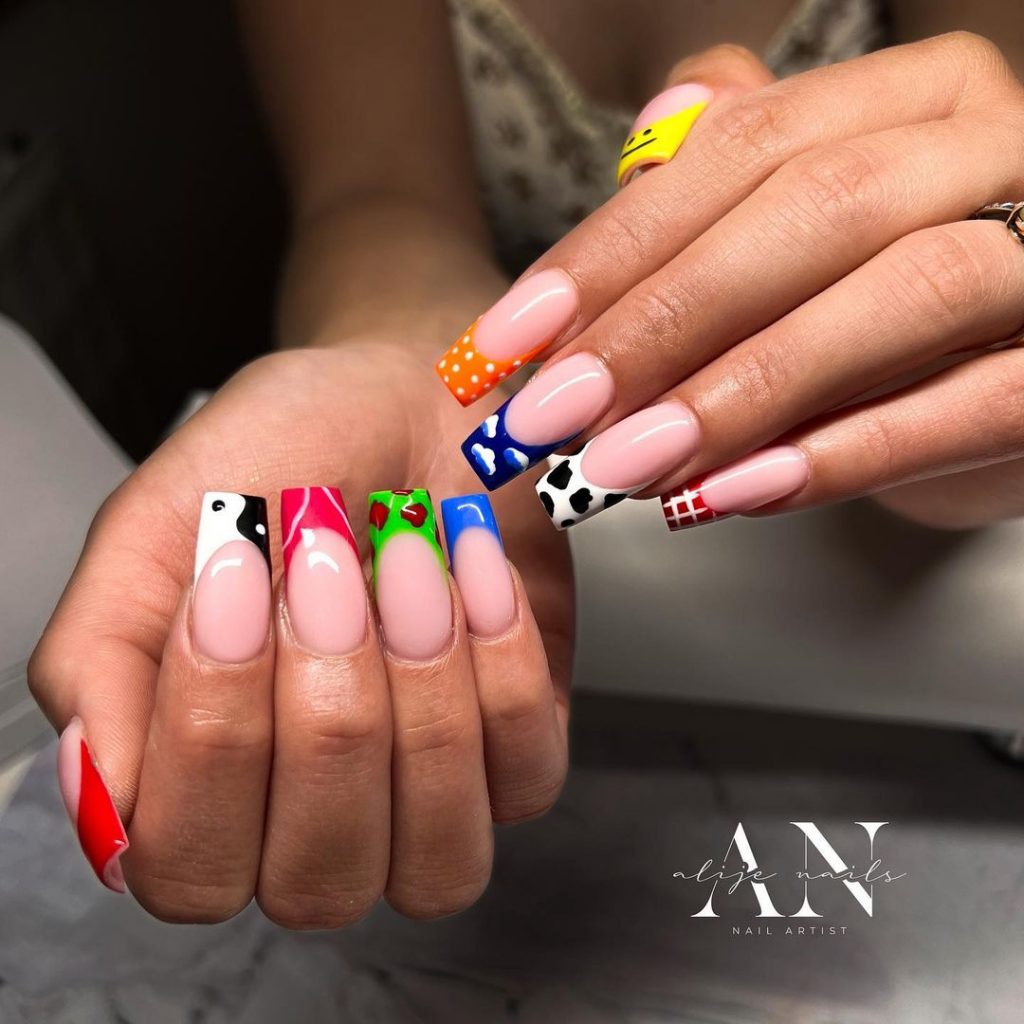
Colorful Abstract French Tips
This playful manicure features a unique take on the classic French tip design. Each nail showcases a different color and pattern, including polka dots, clouds, hearts, and cow prints. The variety of designs creates a fun and vibrant look perfect for summer.
Consumables:
-
- Nude base polish (e.g., OPI Nail Lacquer in “Bubble Bath”)
- Colored polishes for tips (e.g., Essie in “Blanc” for clouds, “Butler Please” for blue, “She’s Pampered” for red)
- Nail art brushes and dotting tools
- Top coat
DIY Instructions:
-
- Apply a nude base coat to your nails.
- Use different colored polishes to paint the tips, each with a unique design.
- Use nail art brushes and dotting tools to create patterns like polka dots, hearts, and cow prints.
- Seal with a top coat for added shine and protection.
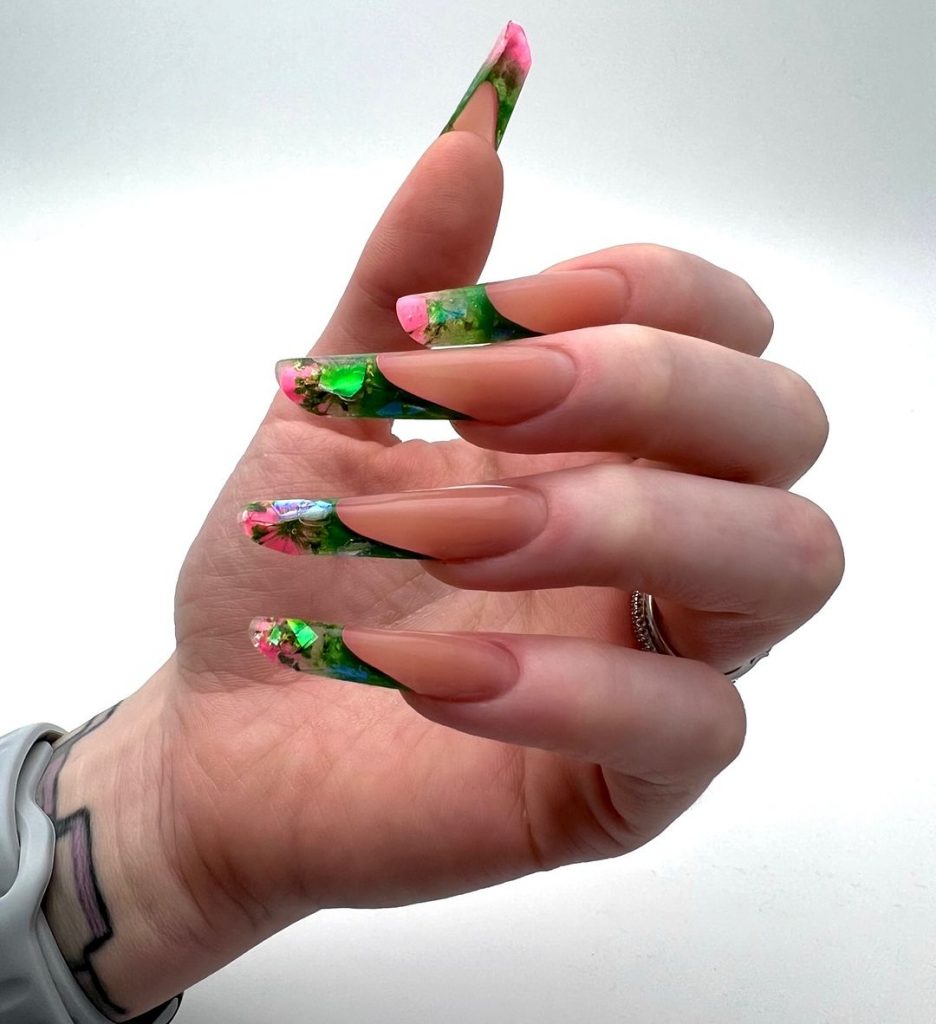
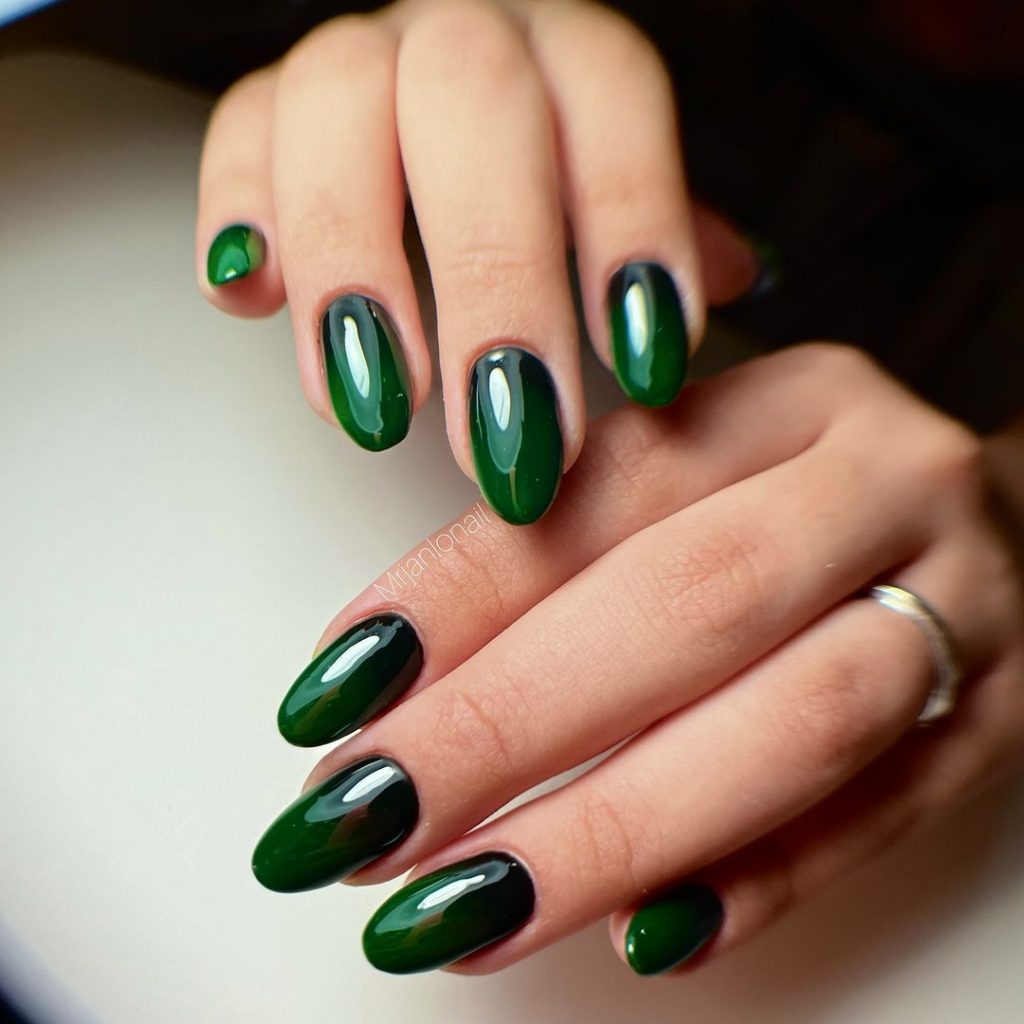
Dark Green Ombre
For a chic and sophisticated look, try this dark green ombre design. The nails feature a gradient effect from a deep forest green to a lighter shade, creating a rich and elegant appearance.
Consumables:
-
- Dark green polish (e.g., Essie Nail Polish in “Off Tropic”)
- Light green polish for gradient (e.g., OPI Nail Lacquer in “My Dogsled is a Hybrid”)
- Makeup sponge for ombre effect
- Top coat
DIY Instructions:
-
- Apply a base coat to your nails.
- Use a makeup sponge to dab the dark green polish at the tips, blending into the light green towards the base.
- Repeat until the desired gradient effect is achieved.
- Finish with a top coat to seal the design.
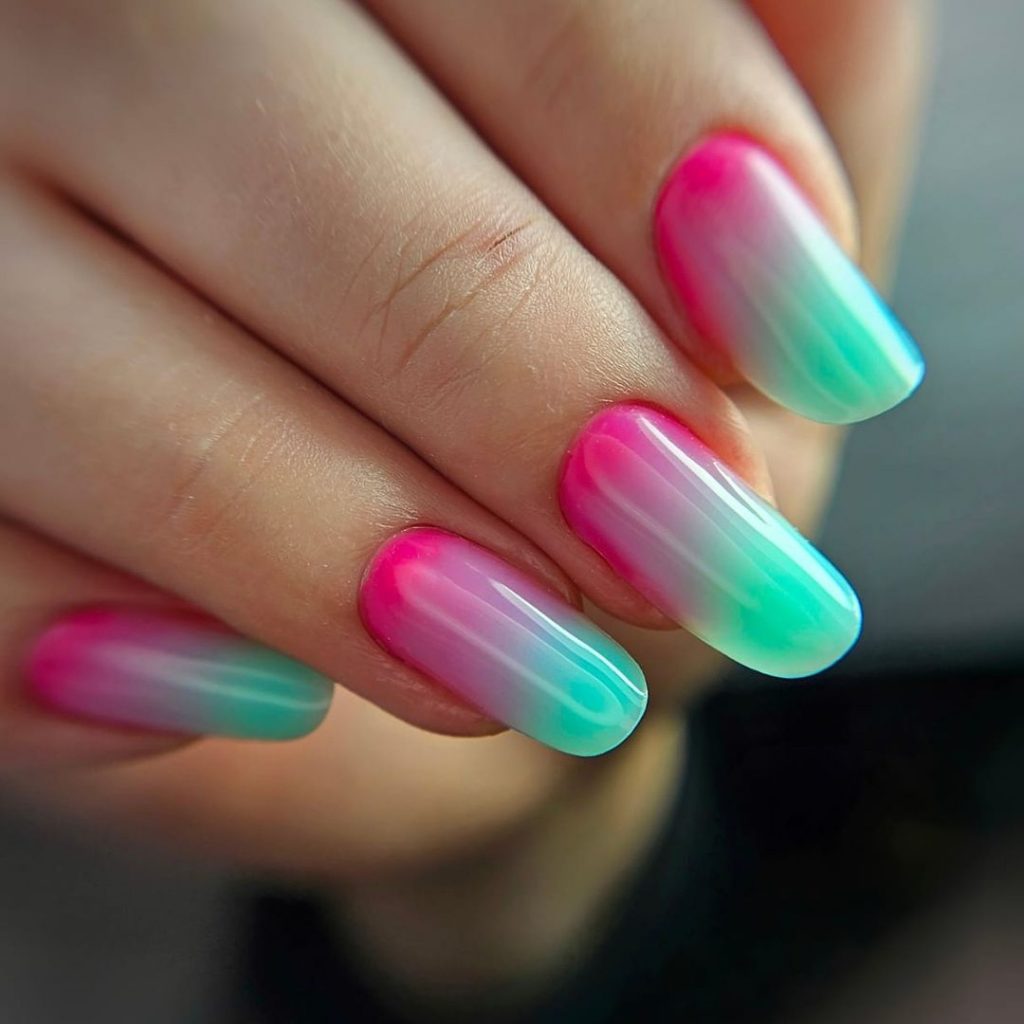
Pink and Blue Ombre
This vibrant ombre design features a beautiful blend of pink and blue. The gradient effect creates a smooth transition between the colors, resulting in a dreamy and eye-catching manicure.
Consumables:
-
- Pink polish (e.g., China Glaze Nail Lacquer in “Shocking Pink”)
- Blue polish (e.g., Essie Nail Polish in “Mint Candy Apple”)
- Makeup sponge for ombre effect
- Top coat
DIY Instructions:
-
- Apply a base coat to your nails.
- Use a makeup sponge to dab the pink polish at the base, blending into the blue towards the tips.
- Repeat until the desired gradient effect is achieved.
- Seal with a top coat to protect the design.
Save Pin