

The smallest mark on a manicure can change its whole balance. A line that follows the edge can sharpen a soft shape, a raised accent can make a plain base feel tactile, and a little open space can keep a strong color from taking over. What matters is not how many details are present, but whether each one has a job the eye can recognize.
Start by choosing the detail you would miss if it disappeared, then build the rest of the manicure around that choice. Keep the surrounding surface calm enough to support it, and be honest about the length or upkeep it demands; practical editing usually makes a design feel more considered, not less special. The site’s fall nail art reference can help you judge that balance without copying someone else’s proportions.
Blue and Cream Almonds With Flowing Linework
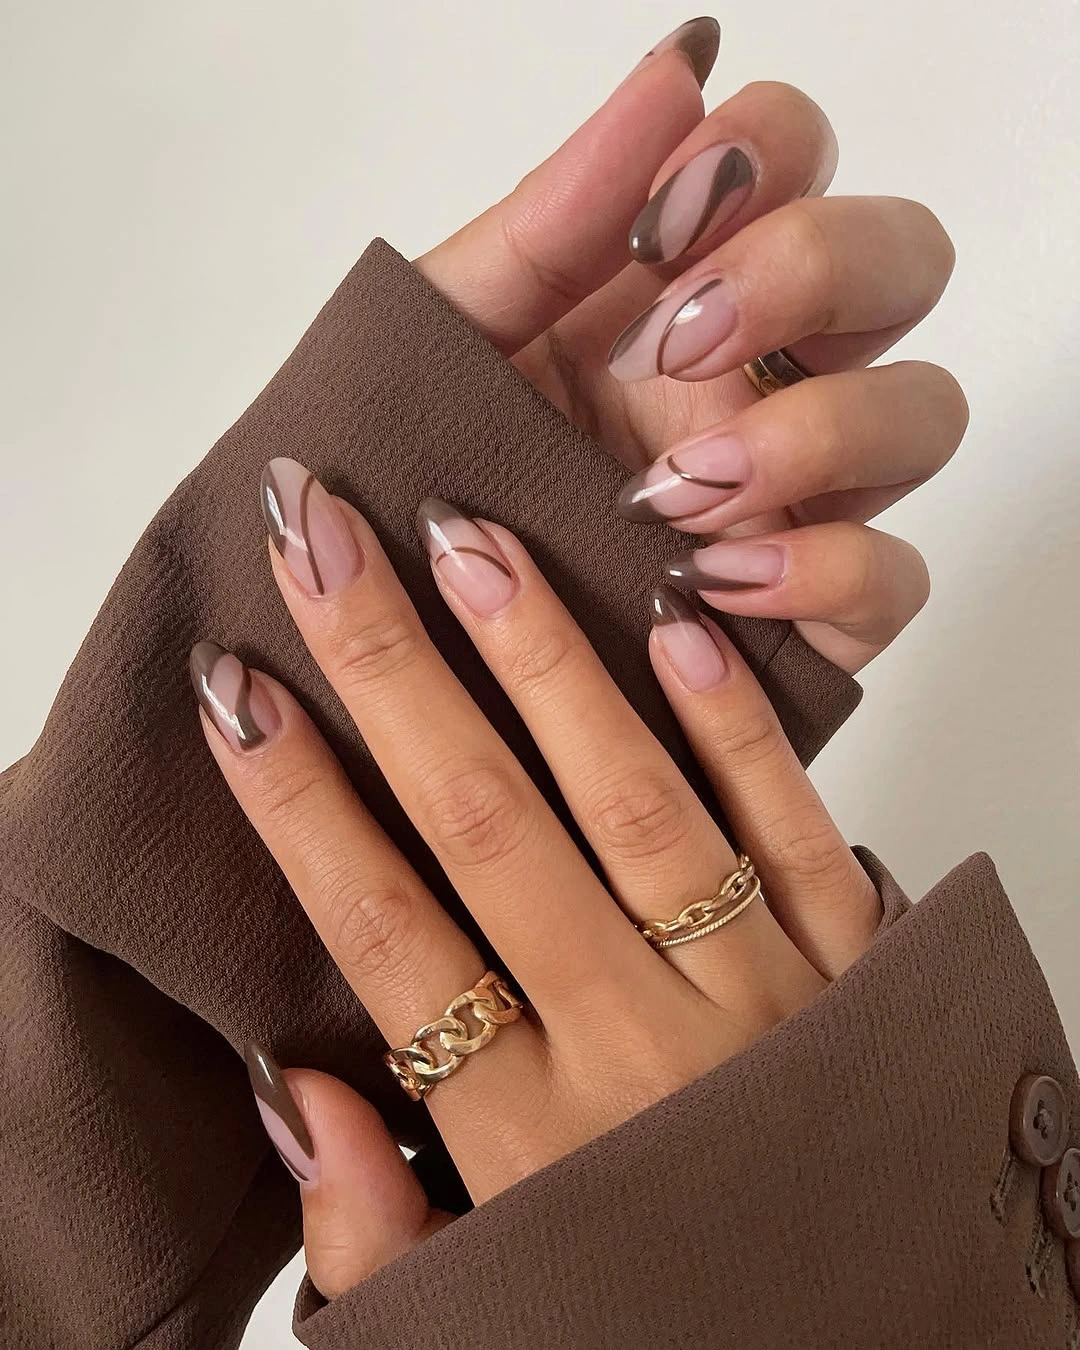
Medium almond nails combine pale blue or cream surfaces with navy curved linework and one deep blue accent, creating an abstract wave-like arrangement. The repeated curves guide the eye across the hand while the dark accent gives the pale palette a clear anchor, so the smallest detail – the line direction – carries more weight than the number of colors.
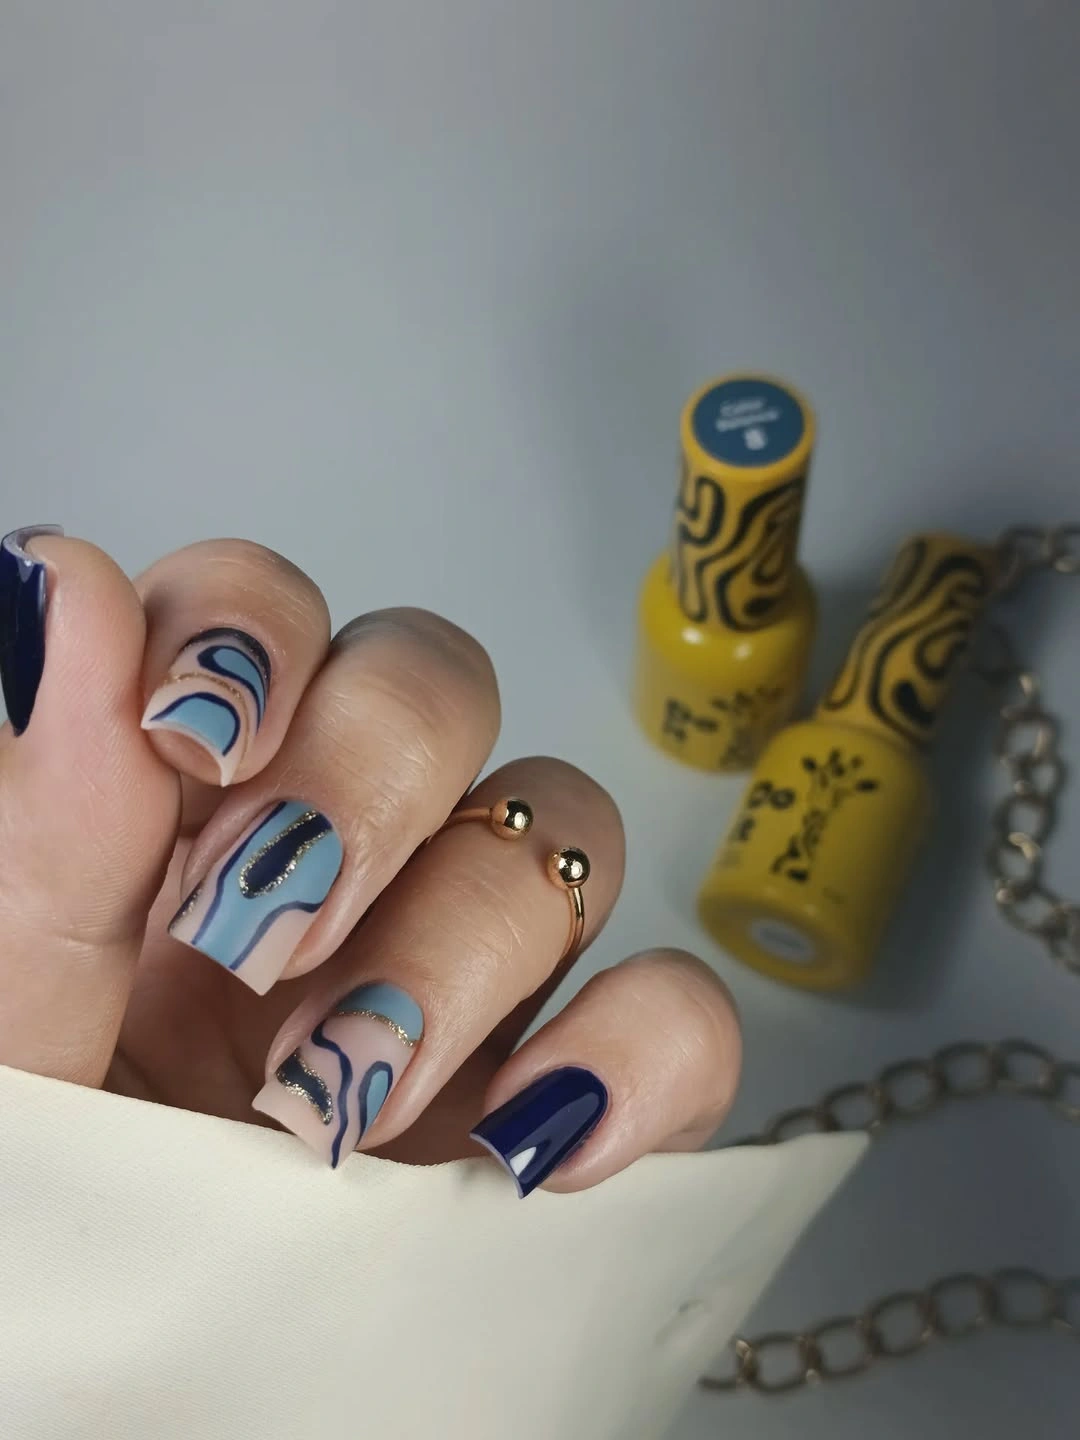
Keep the navy curves on two accent nails and use a plain pale blue or cream on the rest. That edit preserves the movement but gives the hand more open surface, and it lets a medium almond shape look deliberate without needing to repeat the same wave on every finger. The dark accent therefore works as a guide for the eye, not as another pattern competing with the pale field.
Thin curved details can look crowded near the sidewalls or become uneven as the nail grows. Leave enough space around each line to protect its shape, and remember that the deep blue accent already supplies contrast; adding another dark motif would weaken the quiet rhythm. Keeping the base quiet also makes the linework easier to judge and easier to reduce if the nails are filed shorter.
Long Almonds With Raised Pearl-Like Clusters
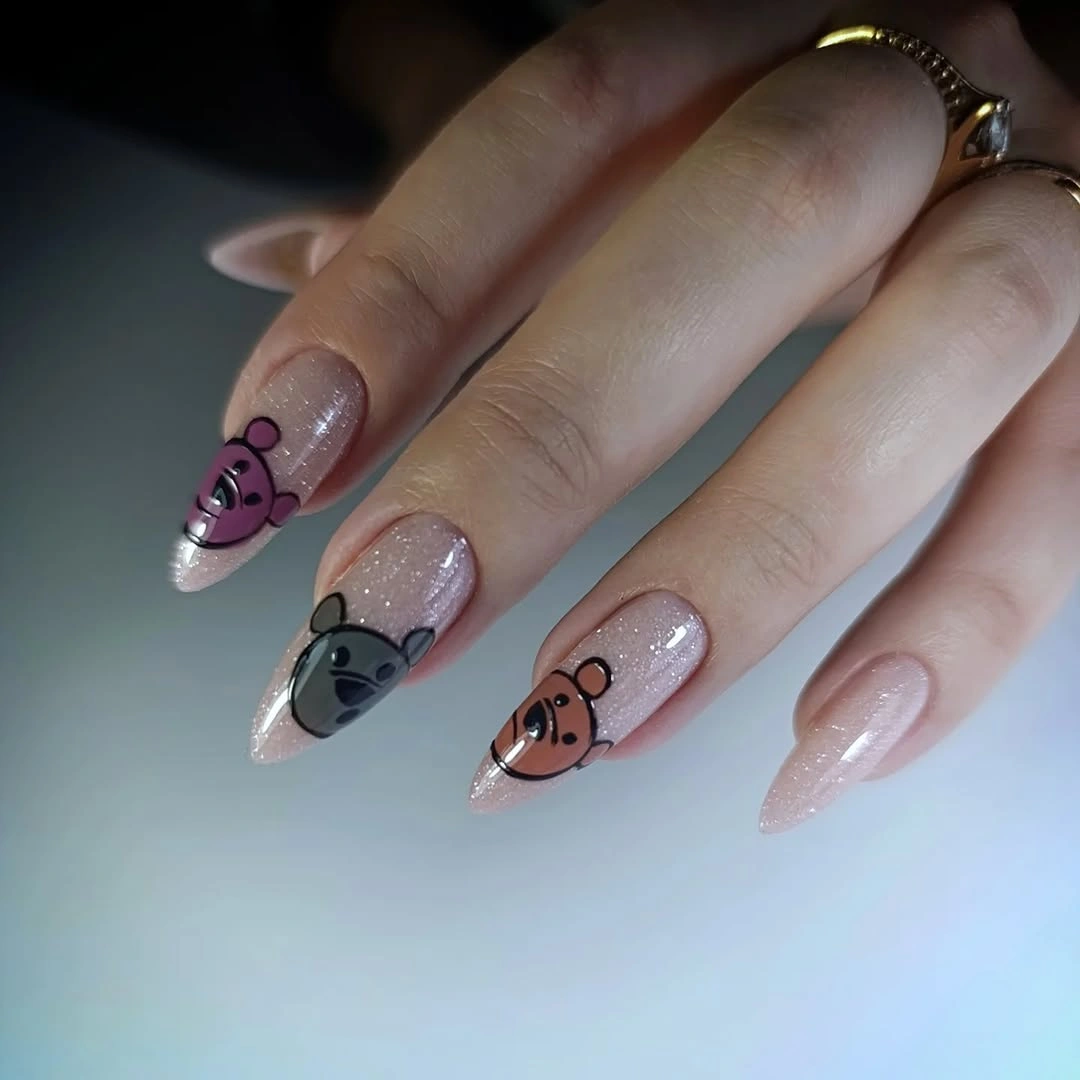
Long almond nails use a pale translucent or nude base with multiple pearl-like beads and rounded raised-looking accents arranged across several nails. The three-dimensional details become the focal point, while the soft base keeps the ornate surface from feeling visually heavy; the manicure is defined by touchable-looking placement rather than by a complicated color palette.
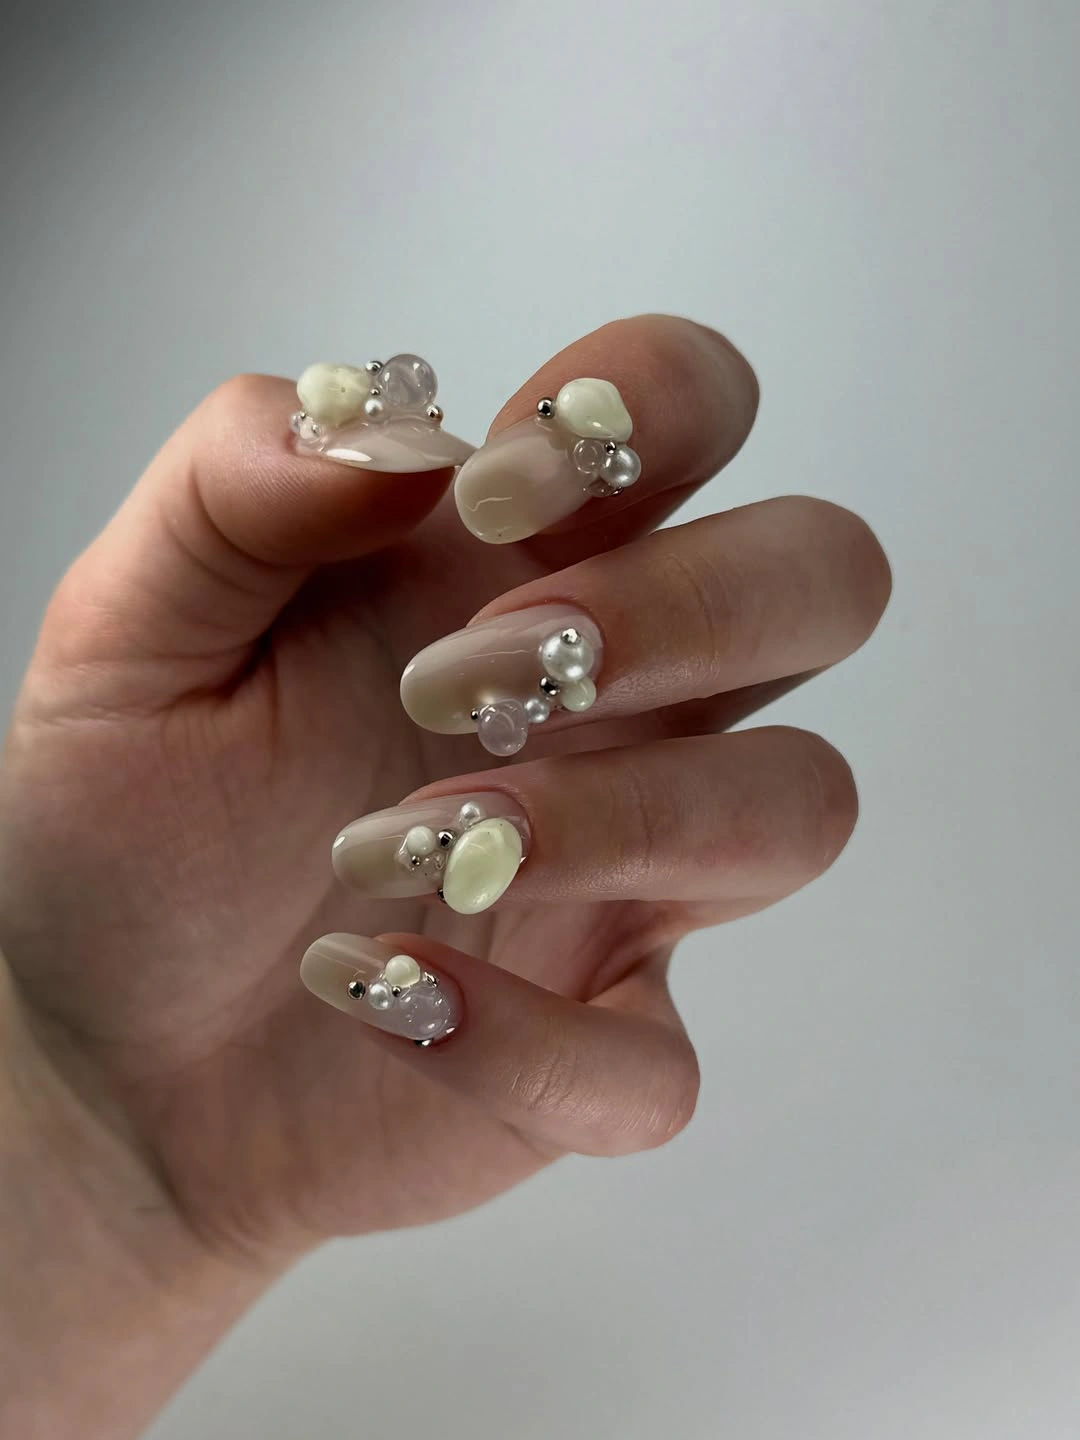
Place one small bead cluster on a medium almond accent nail and keep the rest softly nude. This preserves the contrast between flat base and raised detail, while reducing the number of surfaces that need to coordinate and making the idea easier to pair with a simple outfit or jewelry. The soft foundation lets the raised details stay visible without asking the color to carry a second dramatic contrast.
Raised accents can catch on fabric and require more upkeep than a flat painted design. The limitation is part of the design language, so if practical wear matters, remove some of the beads rather than replacing them with unrelated glitter that would change the balance. A single cluster can still change the character of the manicure because the surrounding nude space gives it visual authority.
Pale Almonds With Clustered White Pearl Accents
Medium almond nails carry a milky pale base with small white rounded accents placed near the tips and center of several nails. Repeating the rounded details echoes the almond shape and gives the pale set dimension without adding dark contrast, showing how a minor raised element can become the organizing rhythm for the entire hand.
Use one pearl-like cluster on each hand and leave the other nails plain ivory or blush. That distribution keeps the accent visible while creating enough negative space for the almond outline to remain part of the look, rather than hiding it beneath equal decoration. The rounded accents are most convincing when they remain smaller than the open surface around them. The shape comparison is close to the softer proportions used in fall almond nails, where the outline does part of the styling work.
Raised details can snag, and their placement may look unbalanced if the accents are too large for the nail surface. Smaller rounded pieces will preserve the tactile idea with a lower practical cost, especially on a medium length that already has a clear silhouette. The pale base will still carry the mood even after the most delicate raised mark is removed.
Milky Coffin Nails With Thin Gold Curves
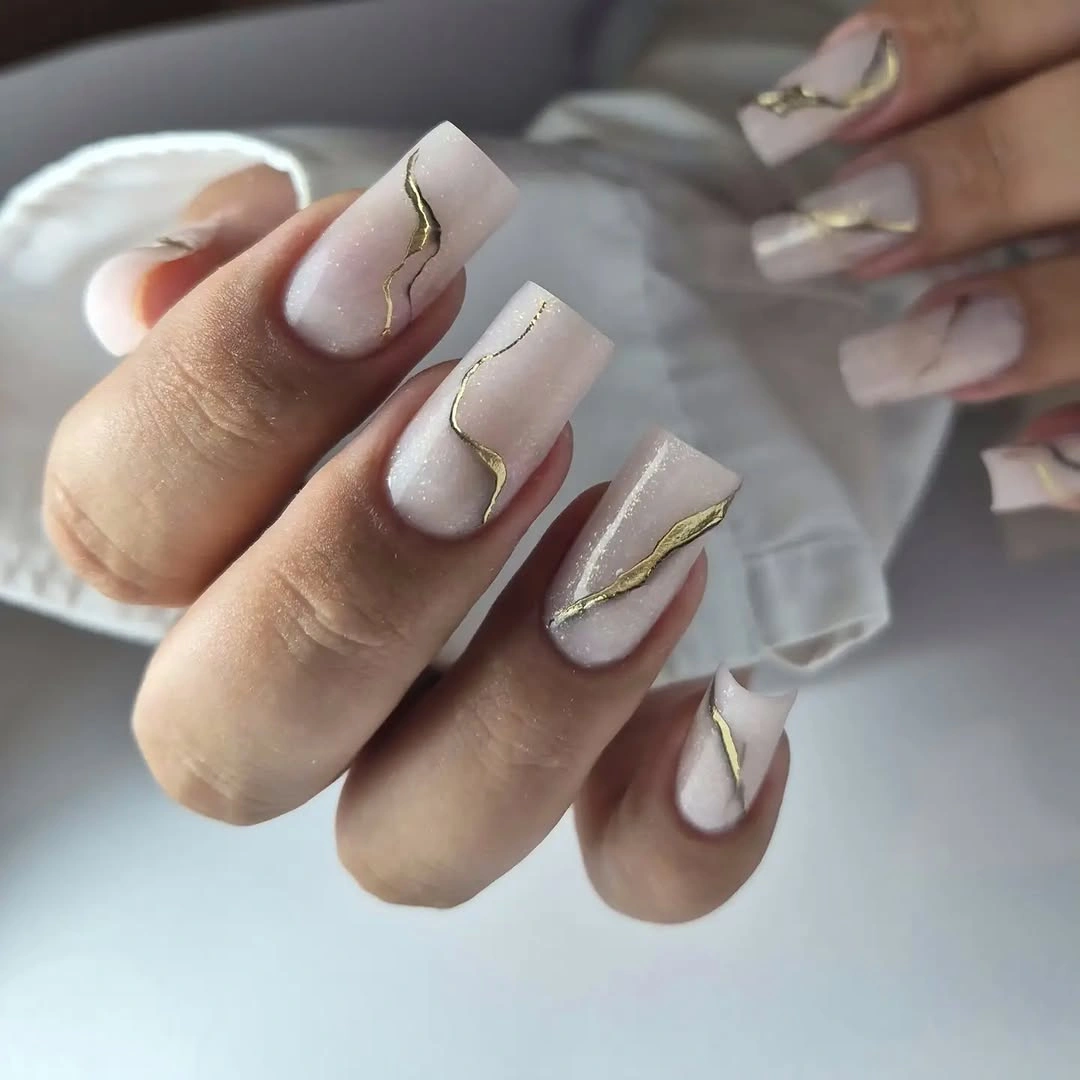
Long coffin nails use a pale milky base with fine metallic-looking gold curves, outlined corners, and small areas of negative space. The linear detail follows the straight shape and adds polish without covering the clean field, so the edge itself becomes the visual guide and the gold works as a precise accent rather than a full metallic surface.
Keep one gold curve on short square nails for a wearable version with the same architectural feel. A shorter shape will reduce the amount of linework needed, and leaving the base pale will keep the contrast between open space and thin gold visible even when the nail is small. The white space around the curves gives the hand a calmer pace and keeps the line from becoming a border everywhere.
Thin lines need even placement, and the long straight edge makes chips and corner wear visible. If the line begins to look uneven, remove one curve rather than adding another; the manicure is strongest when the clean pale surface remains the larger visual field. A shorter version can hold the same architectural contrast as long as the gold remains thin and the base stays open.
Pale Squares Framed by Layered Gold Lines
Medium-long square nails combine a blush or milky base with white edge blocks and narrow gold-looking lines that frame the tips and sides. The repeated framing mirrors the square silhouette and keeps the metallic detail precise rather than scattered, making the border itself the small decision that controls the whole manicure.
Use one gold line over a pale French tip on short square nails instead of outlining every finger. That reduction keeps the frame readable and makes the shape easier to maintain, while the white and blush values still give the hand a soft contrast rather than a heavy metallic effect. The border works as a framing device, so it needs enough surrounding pale surface to remain a supporting detail.
Multiple thin borders can look busy on a shorter nail and will show growth at the cuticle. A single clear edge is more forgiving than several competing lines, and the lighter base gives you room to adjust the border without changing the entire color story. A little visual breathing room prevents the gold from turning the square edge into a dense outline.
Short Magenta Squares With One Shimmer Accent
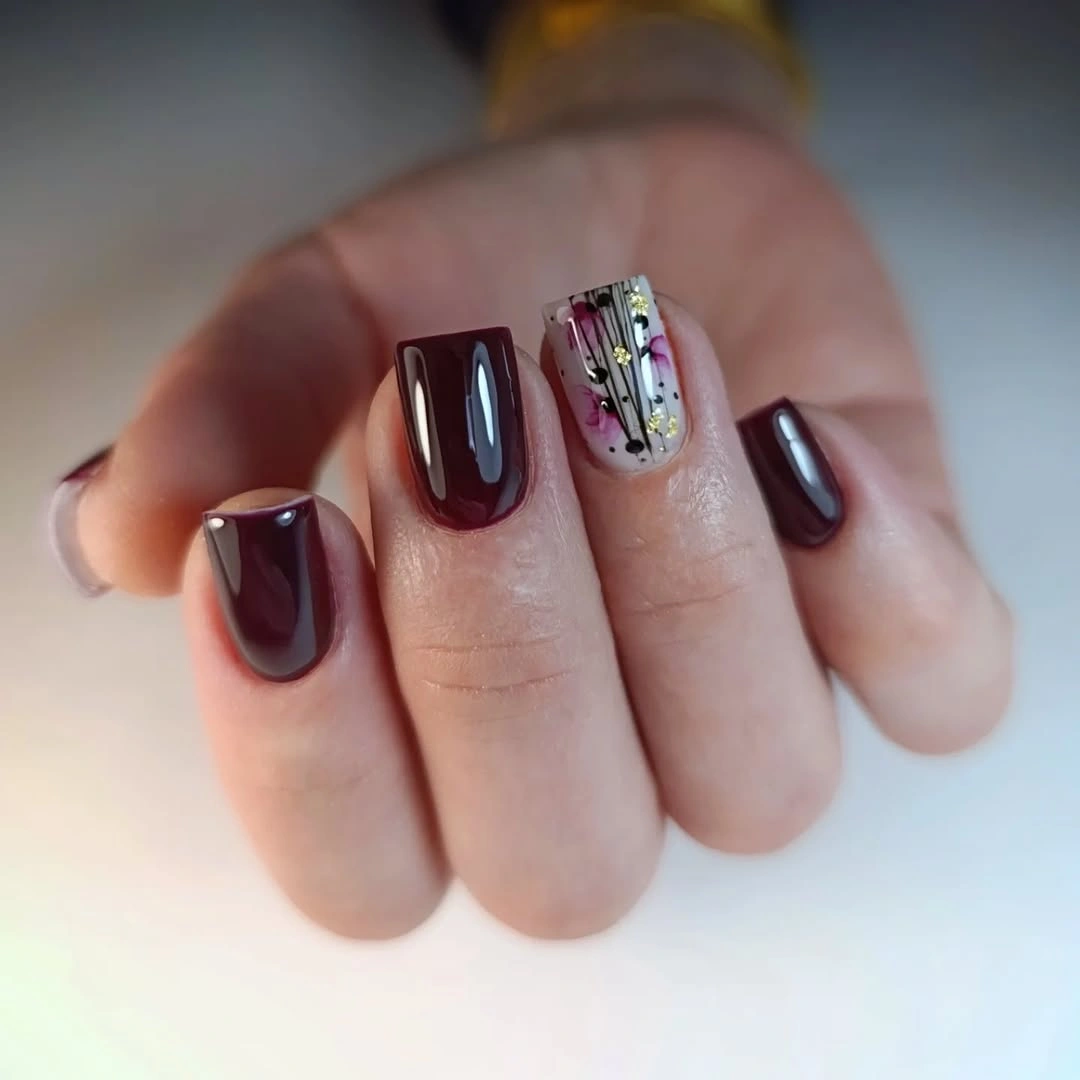
Short square nails alternate glossy magenta or berry surfaces with a pale shimmer accent, keeping the remaining fingers mostly solid. The related berry tones create a simple rhythm, while the light accent gives the set a single point of relief; the detail works because it is allowed to interrupt the repetition without replacing it.
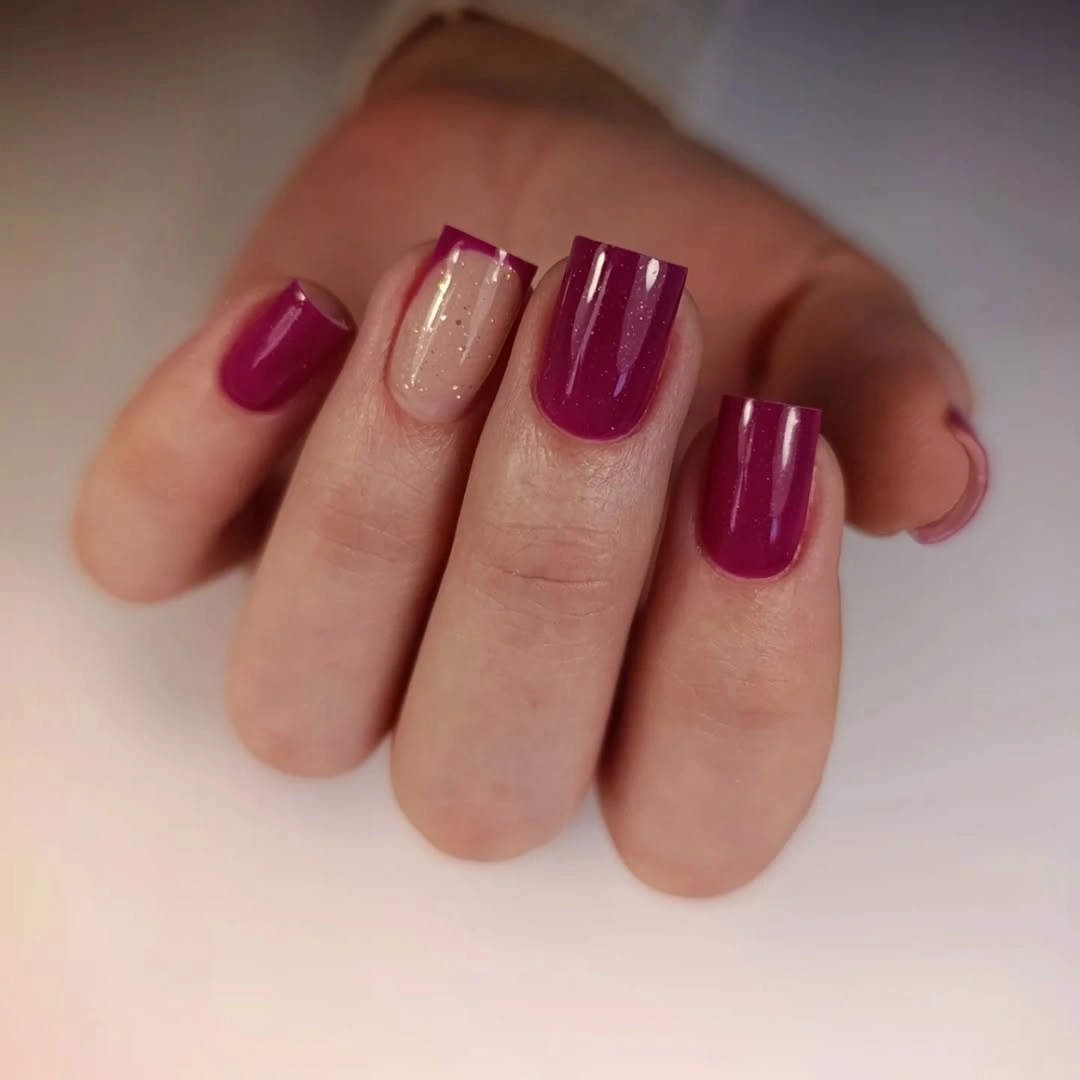
Keep the shimmer on one nail and use a slightly softer berry tone on the rest for a compact look. If the magenta feels too saturated, changing only the accent nail to a muted nude will lower the intensity while preserving the contrast between solid color and reflective texture. The light accent changes the hand without demanding a new motif, which is why the berry base still feels unified.
Bold berry solids make corner chips visible and can overwhelm the nail if the length is filed too short. Keep the shape softly squared and avoid adding more art to the shimmer nail; one change in finish is enough to give the hand dimension. The shimmer is strongest when it marks one place of relief rather than spreading evenly across every finger.
Burgundy Squares With Dark Reflective Panels
Medium square nails use a deep burgundy base with black or charcoal reflective sections that catch red and silver highlights through the center. The panels add depth to the dark color while the square shape keeps the composition crisp, so the important detail is not the amount of shine but where the reflective area stops inside the burgundy frame.
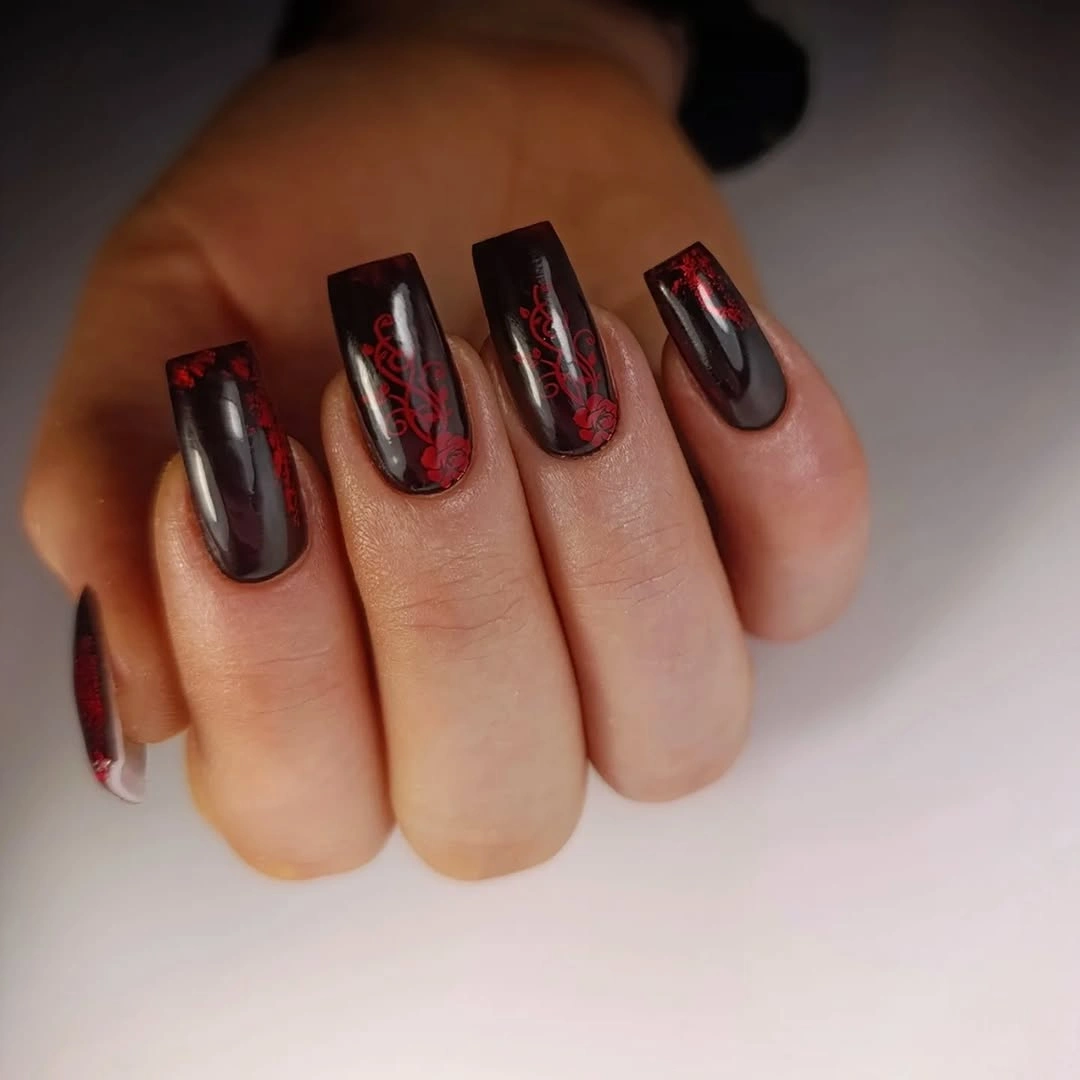
Use the reflective section on two accent nails and leave the others burgundy for more negative space. That change preserves the contrast between wine color and darker center while making the visual hierarchy easier to read, particularly on a shorter square outline. The dark panel adds depth without changing the wine color underneath, so placement carries the visual argument.
High-contrast shine makes uneven surfaces and tip damage easier to spot. A smaller panel can soften the maintenance demand, and a plain burgundy nail beside it gives the eye a stable reference instead of making every finger equally reflective. A quiet burgundy nail beside the panel makes the reflective surface feel intentional instead of simply brighter.
Glossy Wine Squares as a Quiet Color Pause
Medium square nails are coated in a deep wine or burgundy color with a smooth high-shine surface and no visible motif. The straightforward color lets the shape and reflective surface carry the look, making it easier to read than a layered design and proving that a simple surface can still feel tied to the season.
Use the same wine shade on a short rounded square if you want a calmer proportion. The softer corner will change the silhouette without disturbing the color, while a slightly lighter berry tone can reduce the value contrast if near-black wine feels too intense. The solid wine color gives the eye a pause, allowing the shape to remain visible after the reflective panels. A low-shine alternative can be judged beside fall matte nails if the color feels stronger than the finish.
Solid dark color shows chips and regrowth quickly, especially along a square edge. That visibility can be useful because it tells you exactly when the manicure needs attention; there is no dense artwork to mask an uneven boundary or a worn tip. A rounded edge can also make the deep color feel softer, even when the surface remains fully glossy.
Nude Squares With Gold Foil and Wine Sides
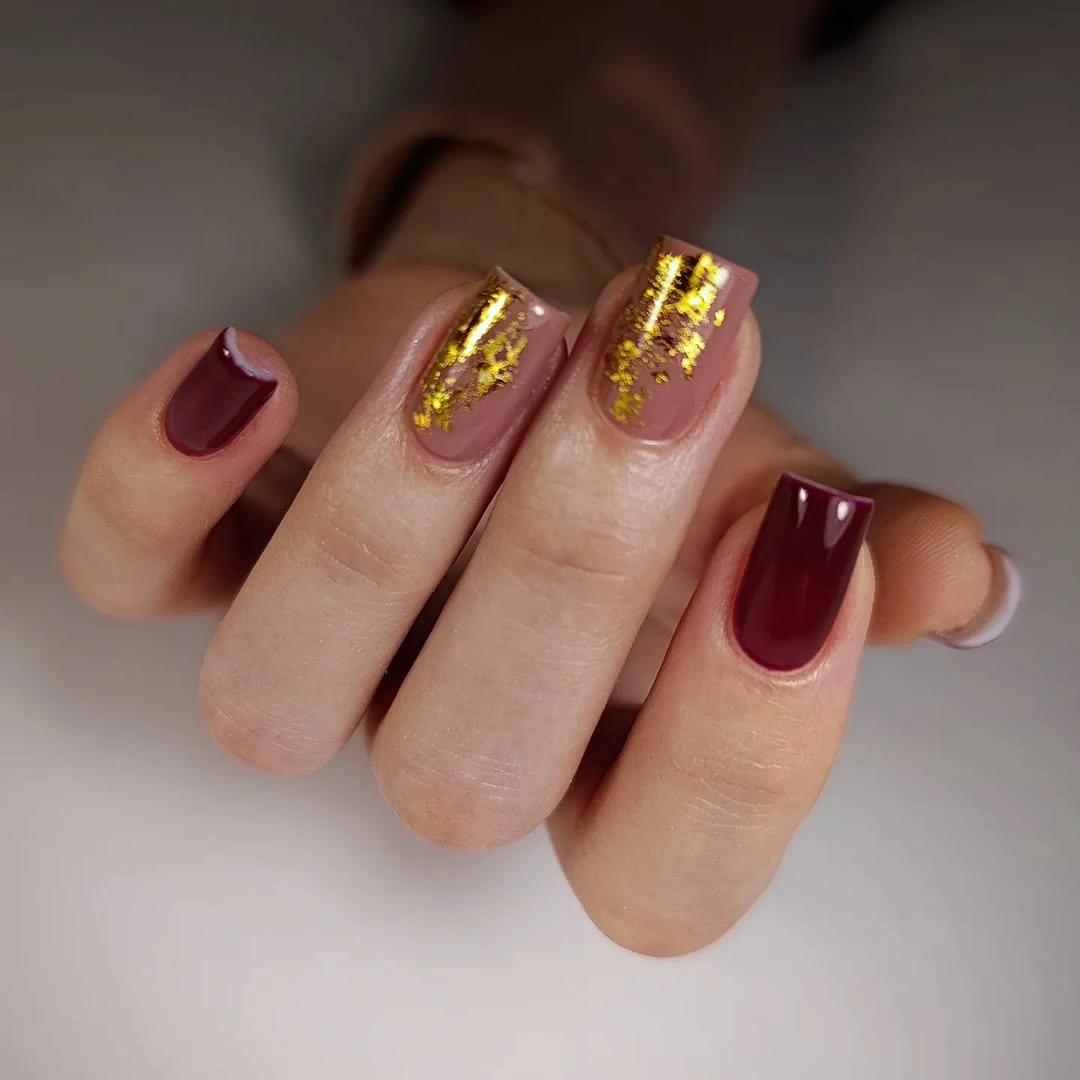
Medium square nails combine a nude base, small irregular gold-looking foil accents, and several wine-colored nails that frame the lighter details. The gold marks work as small flashes against the quiet nude field, while wine repeats the autumn depth across the hand; the design depends on selective placement rather than equal decoration.
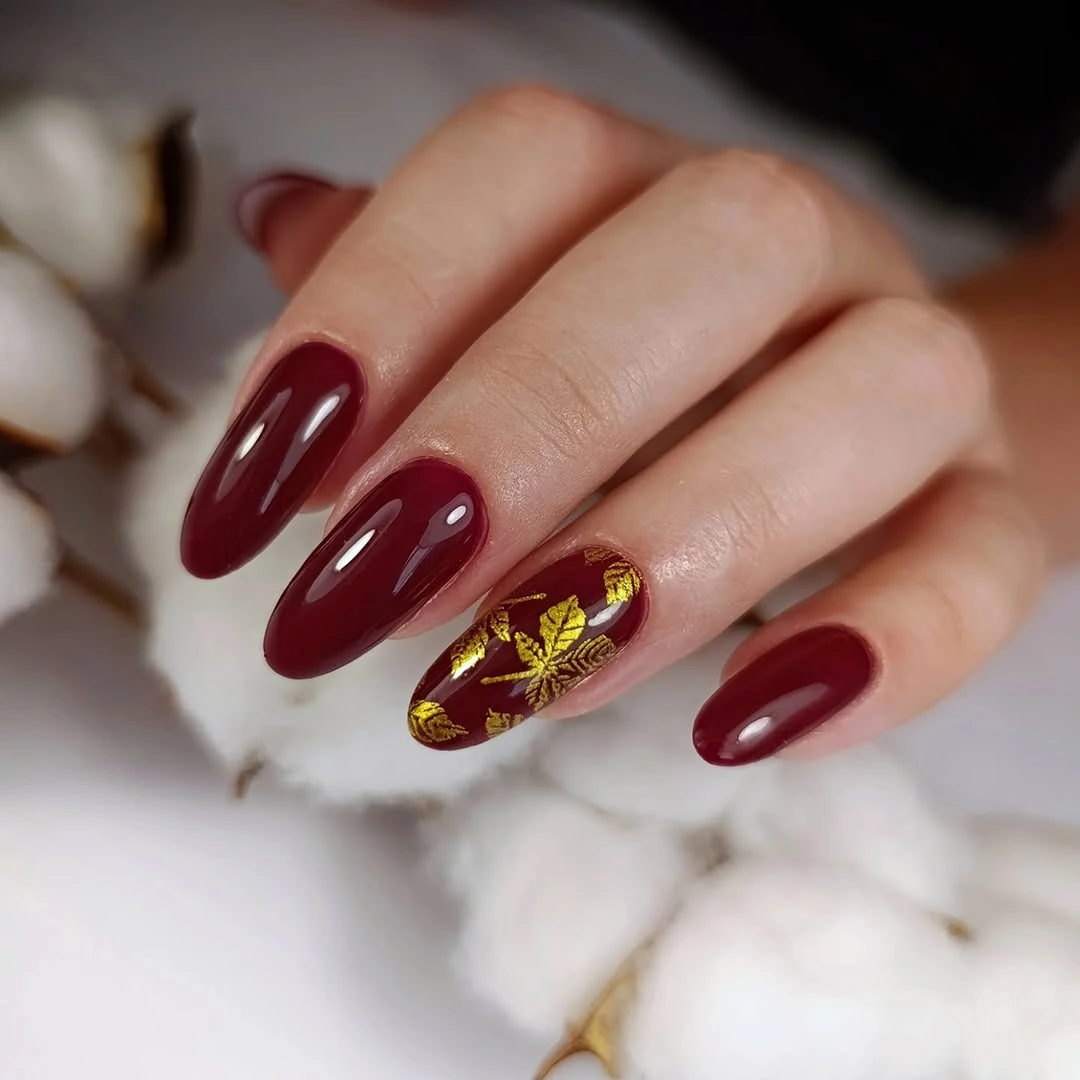
Limit the foil to two accent nails and use plain nude or wine on the rest. The reduced number of bright marks keeps the value contrast clear and gives the foil a reason to exist, while the darker nails hold the hand together without adding another motif. The foil is more persuasive when the nude field remains larger than the bright pieces and the wine stays supportive.
Irregular foil-like details can lift at the edges or make minor surface wear more visible. A smaller piece placed away from the tip will usually remain readable longer, and keeping the surrounding nails simple makes an imperfect accent less disruptive. That selective placement lets the lighter detail carry attention without turning the manicure into a repeated metallic print.
Warm Wine Nails With Focused Gold Foil
Medium square nails alternate warm burgundy or brown-red surfaces with two pale gold-looking foil accents, leaving the remaining nails comparatively simple. Concentrating the bright detail keeps the mixed palette intentional and gives the eye a clear focal area; the foil has more impact because it is not repeated across every finger.
Use one gold accent beside plain brown-red nails for a lower-density autumn manicure. This keeps the warmth of the palette and the contrast between dark base and light detail, while reducing the number of edges that need to stay neat as the nails grow. The white tip is doing structural work, keeping the jeweled mark from becoming the only thing the eye can see.
Metallic-looking flakes can catch at the edge, and the contrast will expose uneven placement. Leave a quiet nail next to the foil so small wear is less obvious, and avoid adding extra linework that would compete with the concentrated gold. A medium length can therefore preserve the elegant contrast while making the corners easier to handle.
Long Pale Squares With French and Jeweled Lines
Long square nails use a pale blush base, white French-like tips, and selected nails with dark or metallic linework and small reflective embellishments. The clean tip keeps the ornate accents from spreading across every nail, so the hand still has open space; the detail works because the French foundation remains visible underneath it.
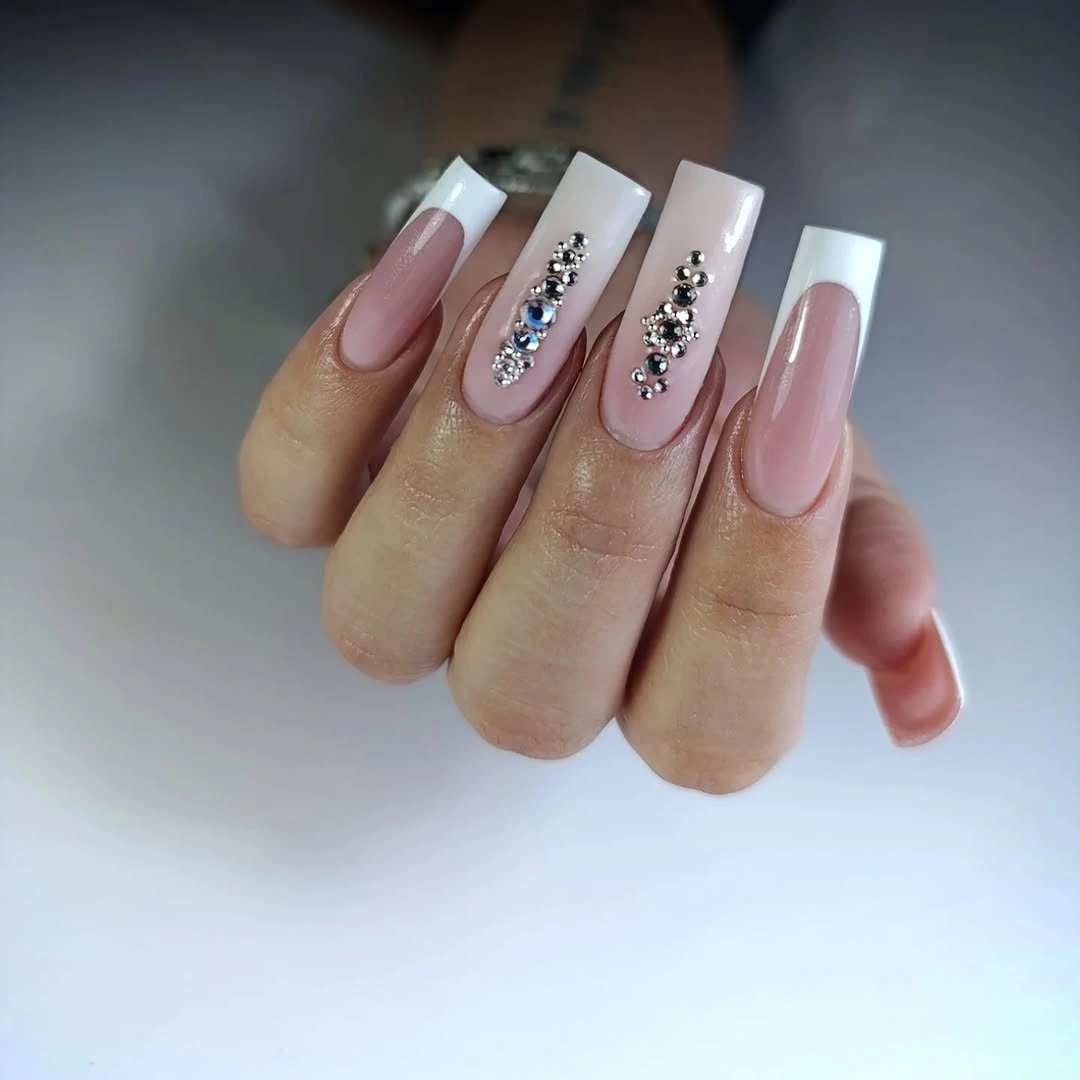
Keep the jeweled line on one accent nail and use plain pale French tips on the rest. That edit protects the soft base and lets the accent carry its own weight, while the long square shape still provides enough room for the line to look intentional. The orange detail remains surrounded by white, so the warmer color adds direction without filling the whole hand. The selective-accent approach is also useful when comparing fall nails with an accent nail.
Long square length plus small embellishments increases snag risk and makes edge wear more visible. If you prefer a medium length, move the detail toward the center and leave the corners clear; the design will feel lighter without losing its selective contrast. Reducing one accent also gives the oval outline a clearer role, which keeps the result softer than a full patterned set.
White Ovals With Orange and Black Marble
Short-to-medium oval nails are mostly glossy white, with two accent nails carrying warm orange, black, and pale swirled sections. The white base creates strong negative space around the warm accents, so the mixed colors feel deliberate rather than dominant; the detail is the contrast between an open field and an irregular, concentrated panel.
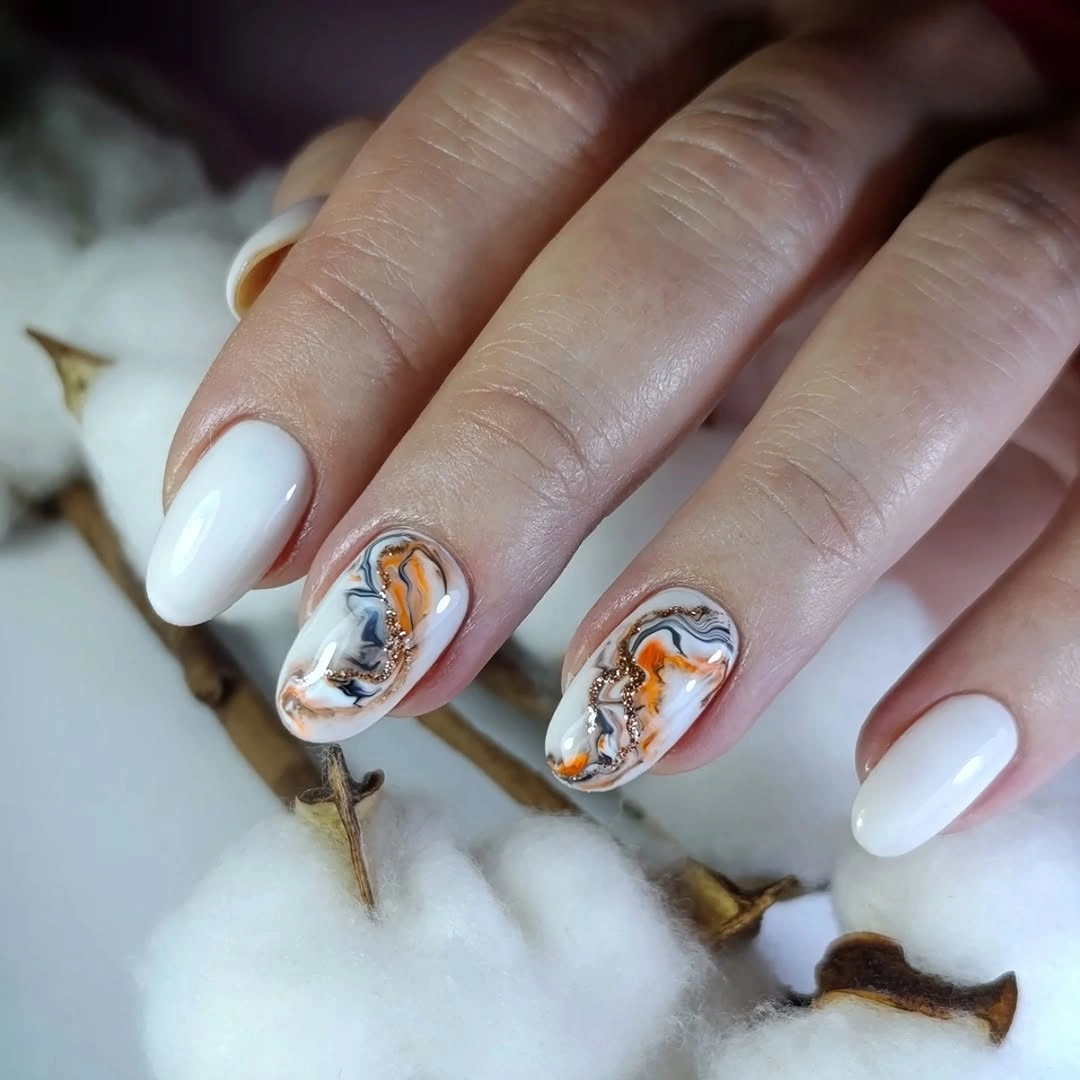
Use one marbled accent and keep the other nails plain white or soft orange. This lowers the visual density while preserving the color relationship, and it gives the oval shape enough room to read as soft rather than buried beneath a busy pattern. The small illustrations feel seasonal because the orange returns in different places while the white remains the common ground.
Marbled accents can look visually dense near the cuticle and may show growth more clearly than a solid color. Keep the swirl away from the edge when possible, because a little untouched white will make the design easier to maintain and easier to understand. Removing one tiny mark will usually improve clarity more than replacing it with another color.
White Nails With Tiny Orange Illustrations
Medium almond or oval nails use a glossy white base, with selected nails showing small orange and dark illustrated details that resemble compact autumn motifs. The white field keeps the small artwork legible and lets orange act as a repeated seasonal thread, so the design gains coherence from the color returning in several small places.
Put the orange detail on two nails and use a plain white or warm nude finish elsewhere. The smaller number of illustrated accents gives each mark more breathing room and makes the manicure easier to translate to a shorter shape without losing its seasonal cue. The blue carries the saturation, while the monochrome panel supplies contrast without introducing a third bright hue.
Small illustrations need enough surface space to remain readable and can blur as the nail grows. If the details start to merge, preserve the orange color and remove one mark; the repeated hue will still connect the set even after the artwork is simplified. A plain blue finger beside the pattern creates a visual pause that helps the accent stay recognizable.
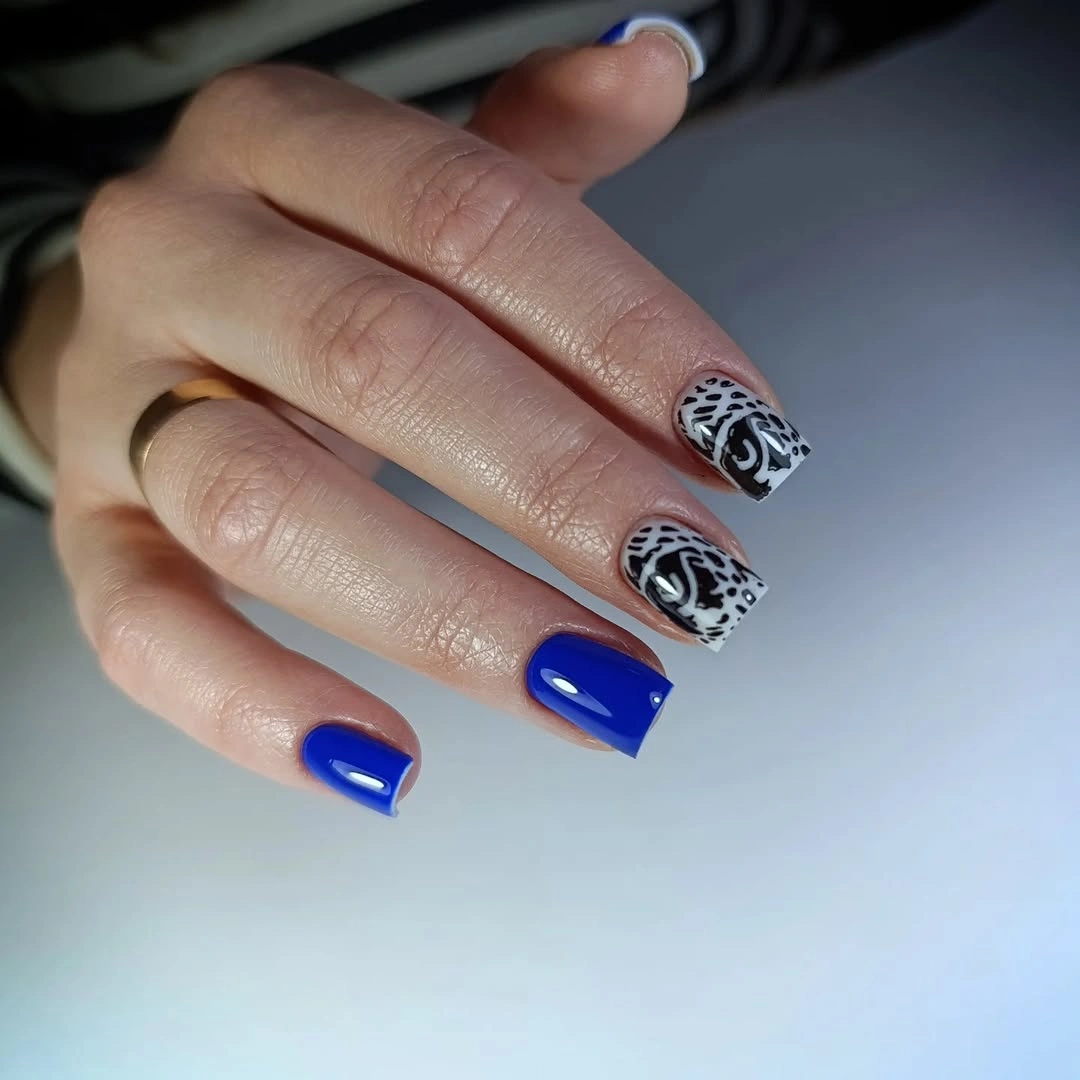
Blue Squares With Black and White Patterned Tips
Medium square nails alternate a vivid blue solid color with black-and-white patterned panels and narrow linework on selected tips. The plain blue nails give the monochrome accents space, while the square edge repeats the graphic feeling of the pattern; the contrast works because the strongest detail is isolated instead of spread evenly.
Use one patterned accent nail and keep the rest blue for a clearer everyday version. That choice leaves saturation concentrated in the blue while the black-and-white detail acts as a single visual interruption, making the hand easier to pair with other color. The glossy surface keeps the vivid blue current, while the square edge gives it enough graphic structure to stand alone.
Fine black-and-white lines may look crowded on shorter nails and will show wear at the edge. Wider pattern sections are easier to keep distinct, and leaving a plain blue finger beside the accent gives the design a built-in comparison point. A single pale accent is a larger change in value, so it should remain isolated if the cobalt is meant to lead.
Cobalt Blue Squares With a Clean Glossy Surface
Medium square nails are a saturated cobalt blue with a smooth glossy finish and no visible motif, creating a confident single-color statement. The strong color and straight edge supply enough visual structure without extra decoration; a small change in shine or shape would alter the mood more than adding a busy pattern.
Keep the cobalt on short square nails or soften it with a single pale accent if the full set feels intense. The shorter edge will reduce the visual weight, while one pale finger would introduce value contrast without taking the blue out of the leading role. The black border makes the olive center look placed inside the nail, giving a small reflective area disproportionate impact.
Bright blue solids make corner chips and uneven shaping immediately visible. That boundary can be useful if you want a clear, easily judged manicure, but choose a softened square when you need the color to feel less strict at the tip. The two-accent edit also leaves more room for the square shape to register at a glance.
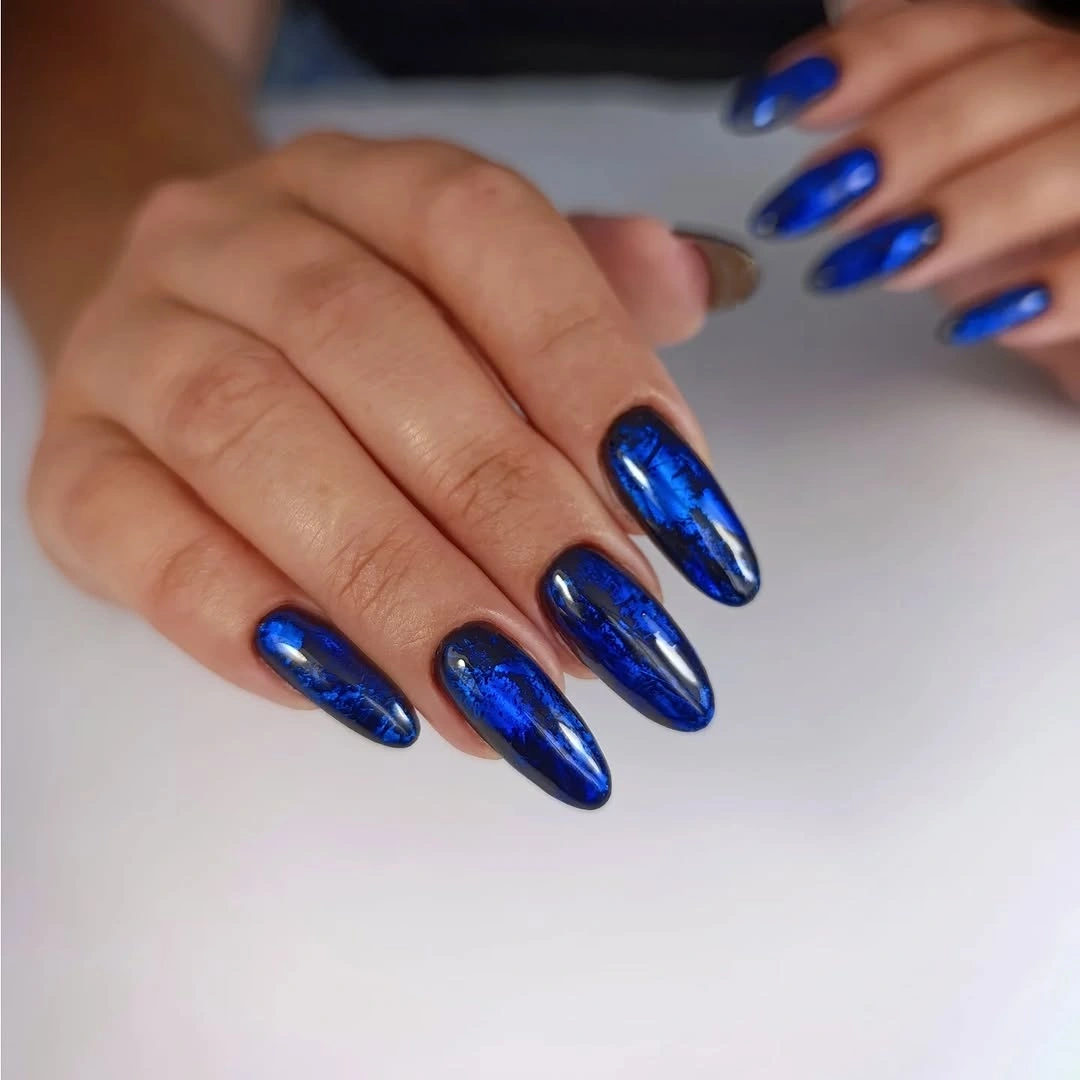
Black Squares With Olive Reflective Centers
Medium square nails combine glossy black edges with olive or muted gold reflective sections, creating a dark frame around the lighter center. The black border protects the square silhouette while the olive center adds an autumnal counterpoint, and the small placement decision does more than a full olive set would.
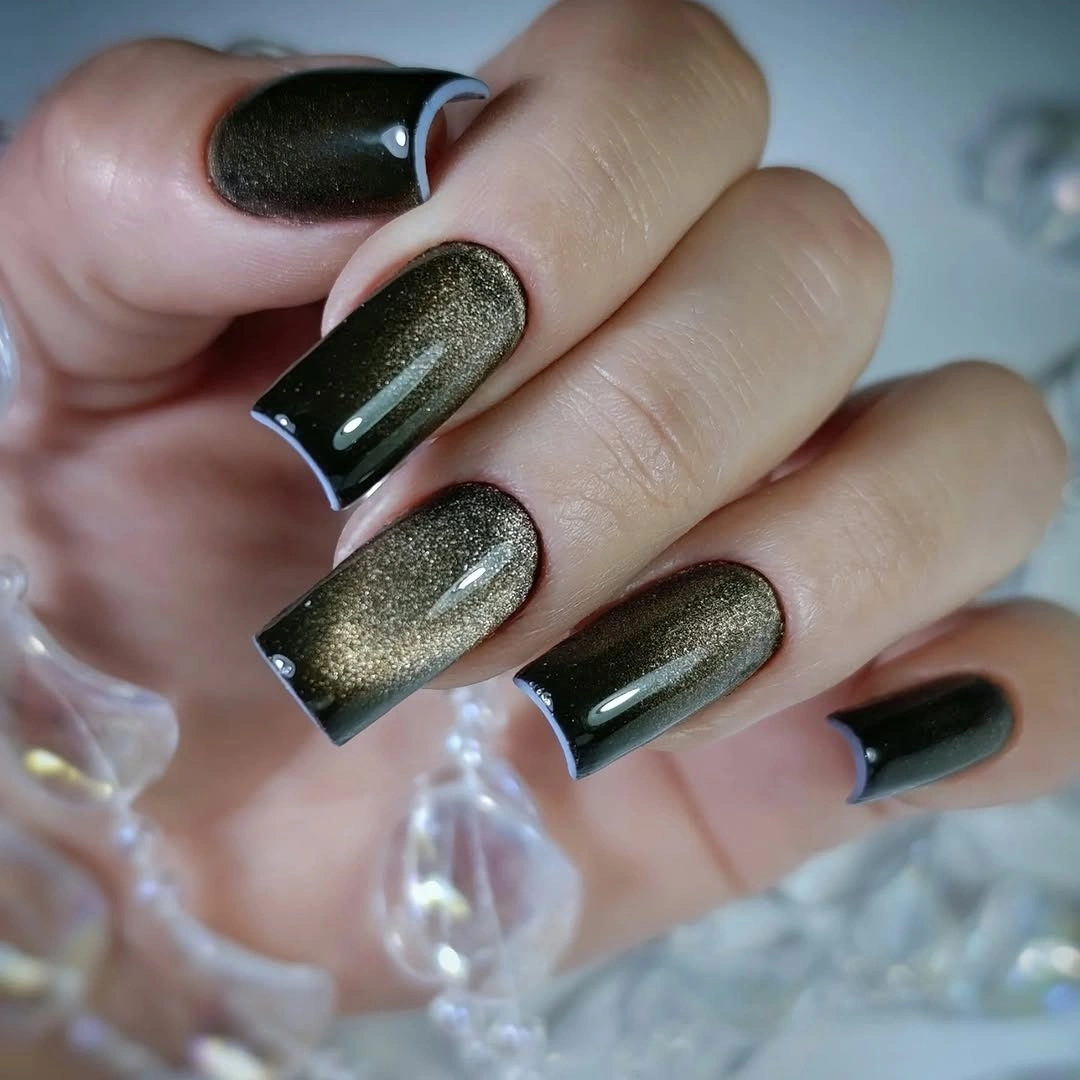
Place the olive detail on two nails and leave the rest black for a more restrained translation. This preserves the depth and warm-cool contrast while making the reflective center easier to notice, especially when the square length is shortened. The compact palette is what prevents the mixed set from feeling random, even though no two fingers share every detail.
Reflective centers can reveal uneven placement and the square corners remain exposed to tip wear. Keep the olive section away from the very edge if you want more visual forgiveness, and let the black border stay broad enough to hold the shape. Keeping the base neutral helps the olive and gold marks remain accents rather than competing color blocks.
Berry Olive Gold and Nude Short Accents
Short square nails combine deep berry, olive-grey shimmer, pale nude-pink, and small gold decorative marks across different fingers. The set gains variety through finish and placement, while the muted palette keeps the different accents from competing; the most important detail is the scale, because each element stays compact.
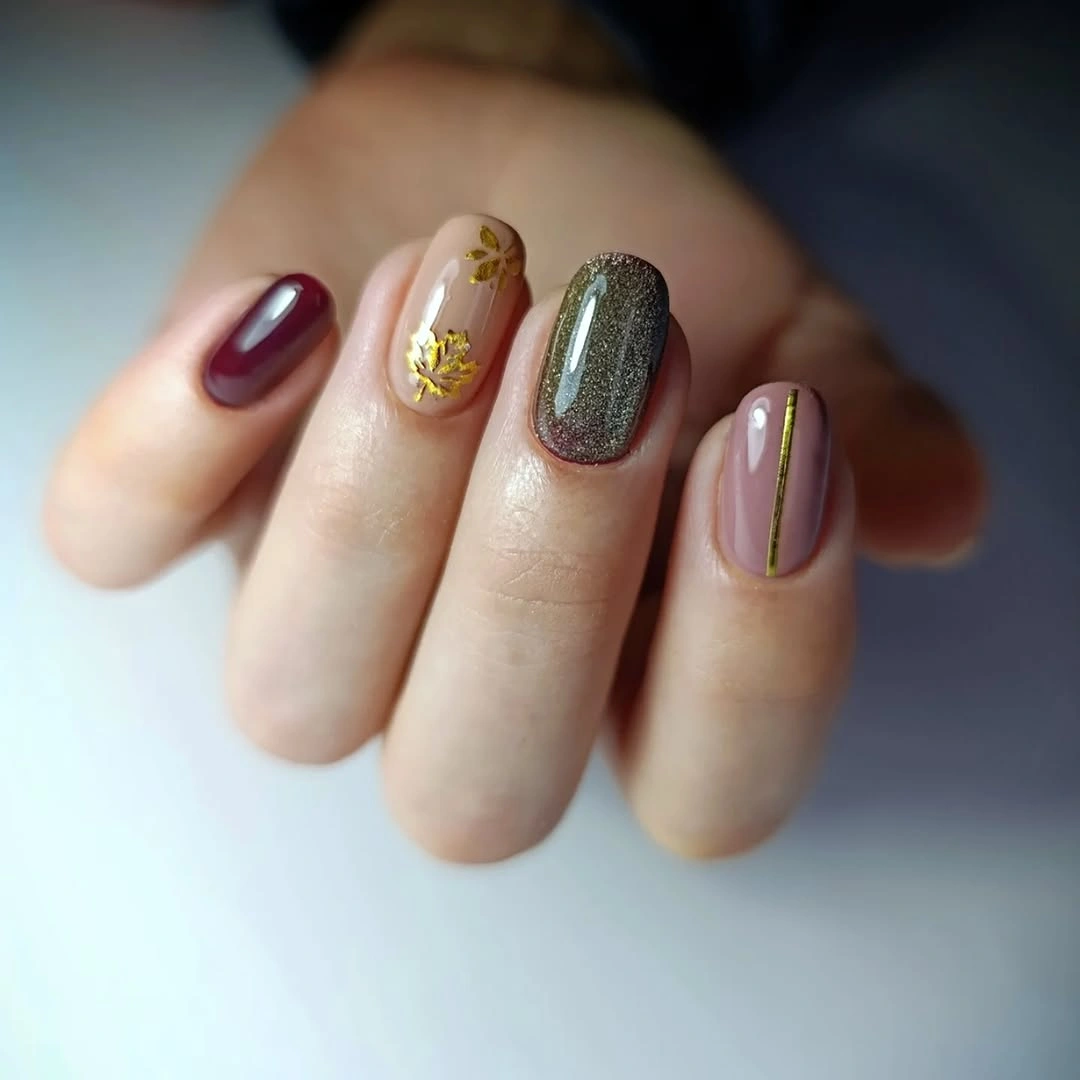
Choose one berry, one olive shimmer, and one gold detail beside plain nude nails. That edit keeps the mixed color relationship but creates a clearer hierarchy, and it allows the short shape to remain visible rather than disappearing under several equally strong accents. The gold marks act as small punctuation, while the muted berry and olive tones keep the hand from becoming too bright.
Mixed finishes require more visual restraint and can make a damaged accent stand out. If you want a longer-lasting translation, keep the berry and nude as the base and let the olive shimmer replace the smallest gold mark instead of carrying every detail forward. A shorter shape will keep the same palette relationship, but the spacing around each accent will become more important.
Burgundy Olive Shimmer and Fine Gold Lines
Short square nails use a deep burgundy solid, an olive shimmering nail with a small gold mark, and a pale mauve nail crossed by a thin gold line. The related dark palette creates a controlled mix, and the gold accents act as small connectors rather than full motifs; placement keeps the different finishes in conversation.
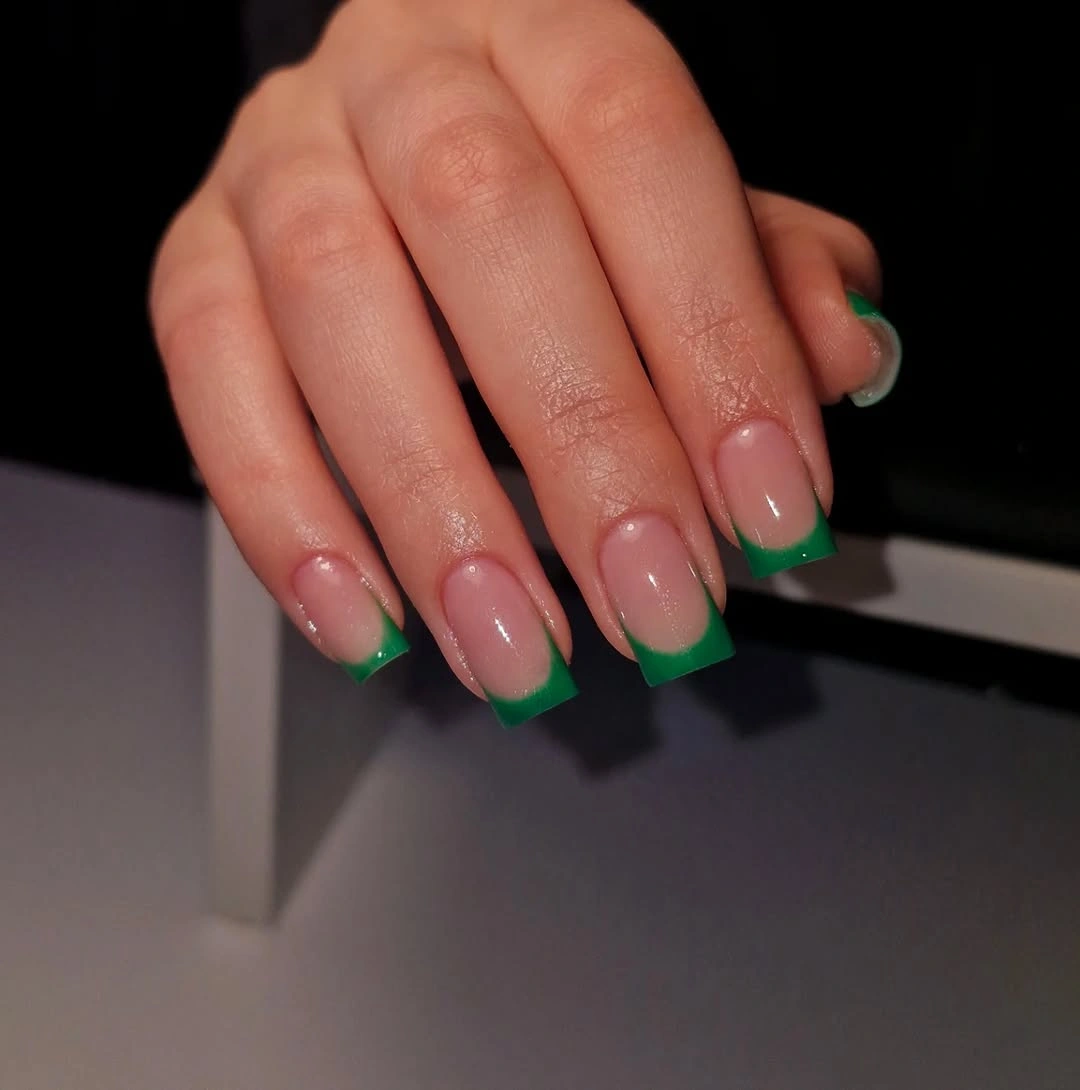
Keep only the burgundy and olive shimmer for a two-finish version with less detail. You can add the gold line later if the base feels too quiet, but starting with fewer variables makes it easier to tell whether the contrast or the decoration is doing the work. The fine line works because the mauve nail remains quiet enough for the gold to act as a connector.
Fine gold linework needs a steady boundary and may become less crisp near the cuticle over time. A shorter line placed in the center will usually stay readable longer than a border that follows every edge, and the burgundy base will continue to ground the design. Removing the smallest detail lets the burgundy and olive finishes carry the contrast with less visual maintenance.
Pale Pink Nails With Vivid Green French Tips
Short oval or squoval nails use a pale pink base and bright green tips that create a clean color-blocked edge. The soft base keeps the vivid green readable without covering the whole nail, while the curved tip follows the compact shape; the small edge detail changes the mood more than a full green coat would.
Use a thinner green line on short oval nails or choose one green accent if the full edge feels strong. The pale base will remain the larger value field, and the green will still provide a clear seasonal counterpoint without taking over the hand. The green edge has a clear role because it sits against a pale field instead of competing with another full-color base.
Bright tips reveal uneven curves and move visually as the nail grows out. The look rewards a clean boundary, so choose a line width that can survive a little regrowth rather than making the original curve so delicate that it loses its shape immediately. The shorter accent option protects the same pale-to-bright relationship while making the tip easier to keep even.
Nude Squares With Bright Green Curved Tips
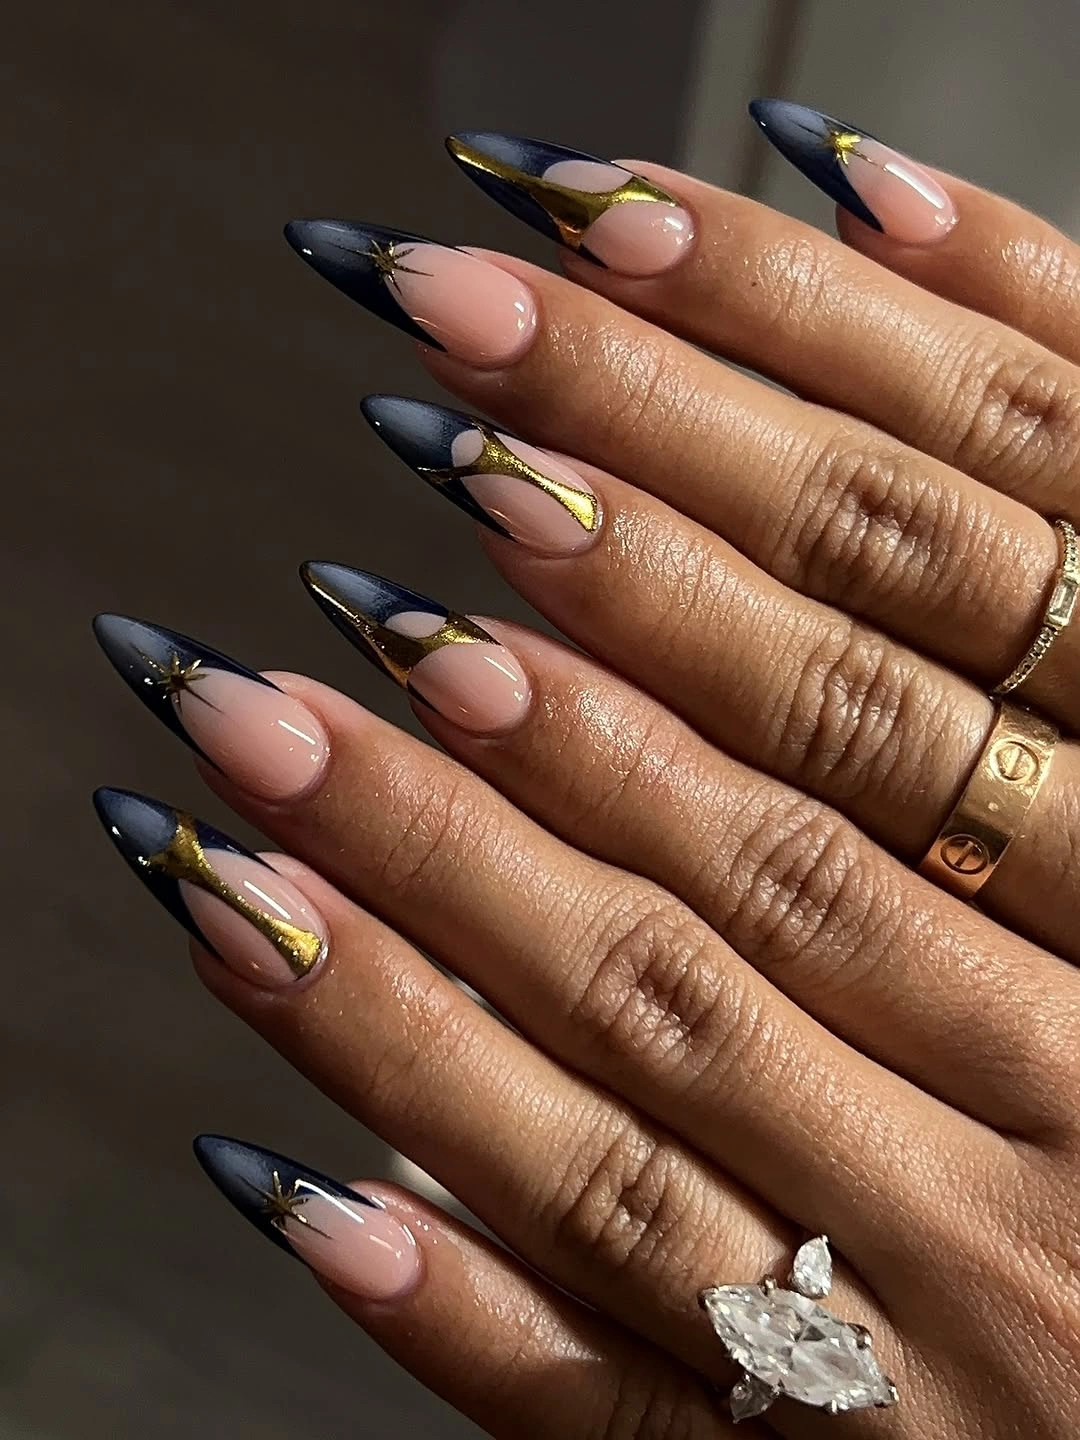
Medium square nails use a sheer nude or pink base with vivid green tips that follow the straight edge and curve slightly at the corners. The neutral center makes the green boundary the focus and keeps the bold color easy to compare with the previous pale-pink version; the detail is the shift from curved softness to a straighter frame.
Keep the green on two accent nails and use a plain nude base on the rest for a quieter set. That preserves the value contrast and gives the bright edge more authority, while a shorter square will reduce the amount of tip work without changing the central color relationship. The brown base gives the white marks a warm frame, so the small dots and stripes do not float apart.
Tip symmetry matters, and growth changes the proportion between the nude base and green edge. A consistent border will keep the design readable, while a slightly wider curve may be easier to maintain than an ultra-thin line on a straight square silhouette. Leaving brown around each motif is what keeps the playful details from merging into one busy surface.
Caramel Brown Nails With Dots and Stripes
Short almond or oval nails combine warm brown solids with white polka dots, pale dotted accents, and a few thin horizontal or curved stripes. The repeated brown base grounds the different marks, while dots and stripes give the compact set a playful rhythm; the manicure works because the motifs stay small and the palette stays warm.
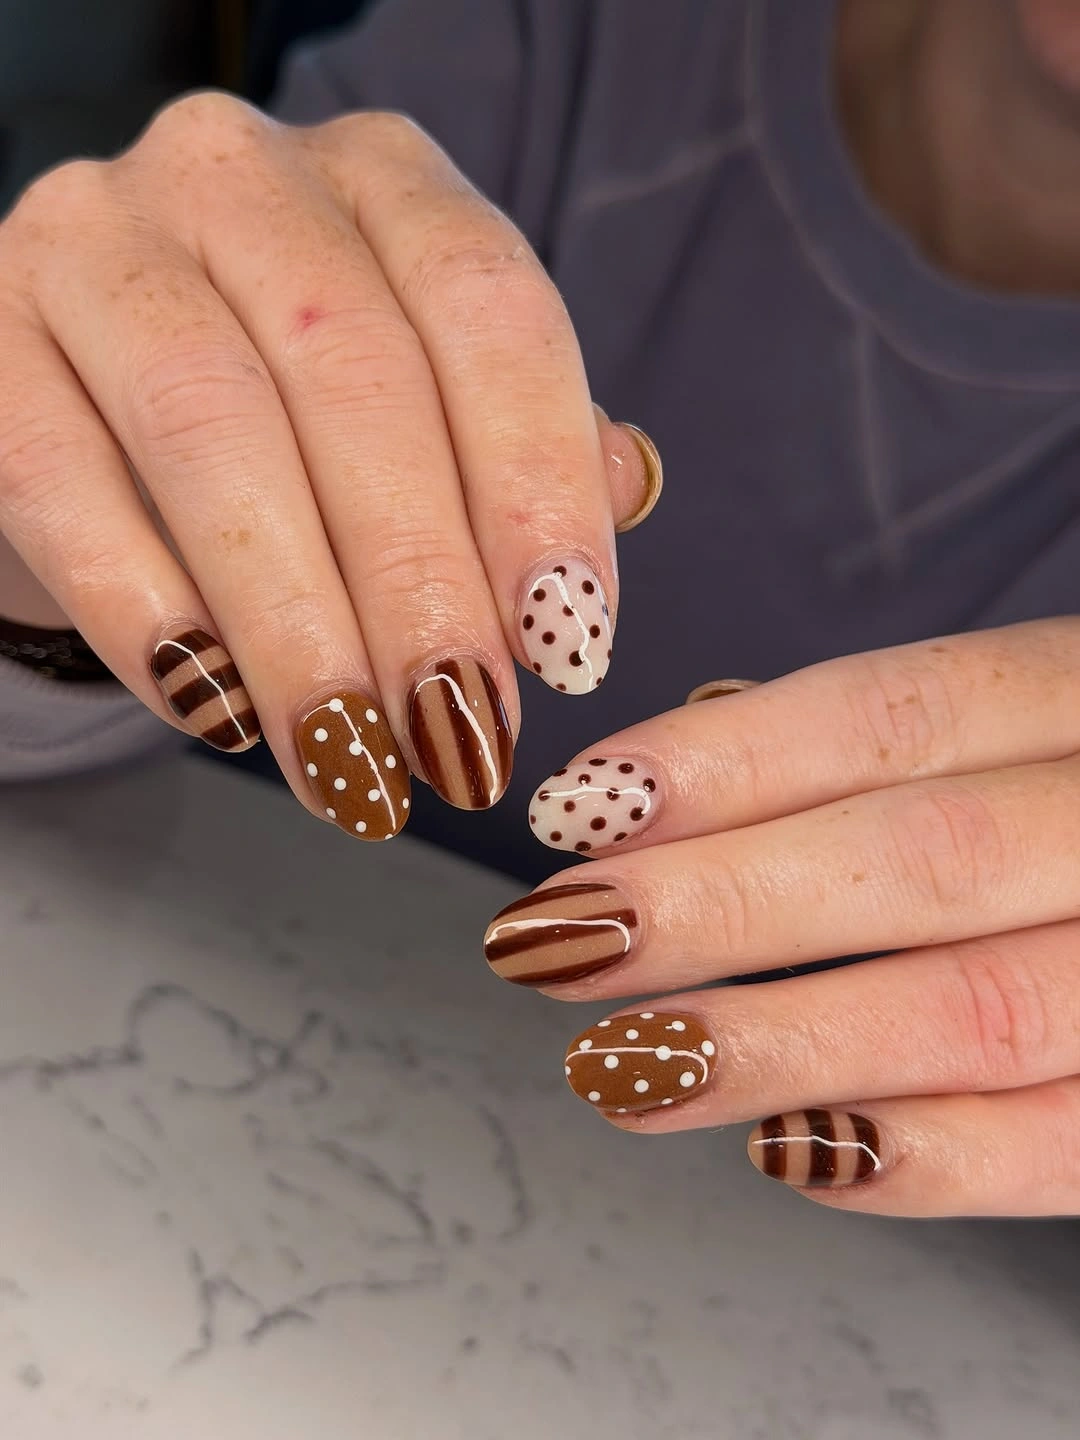
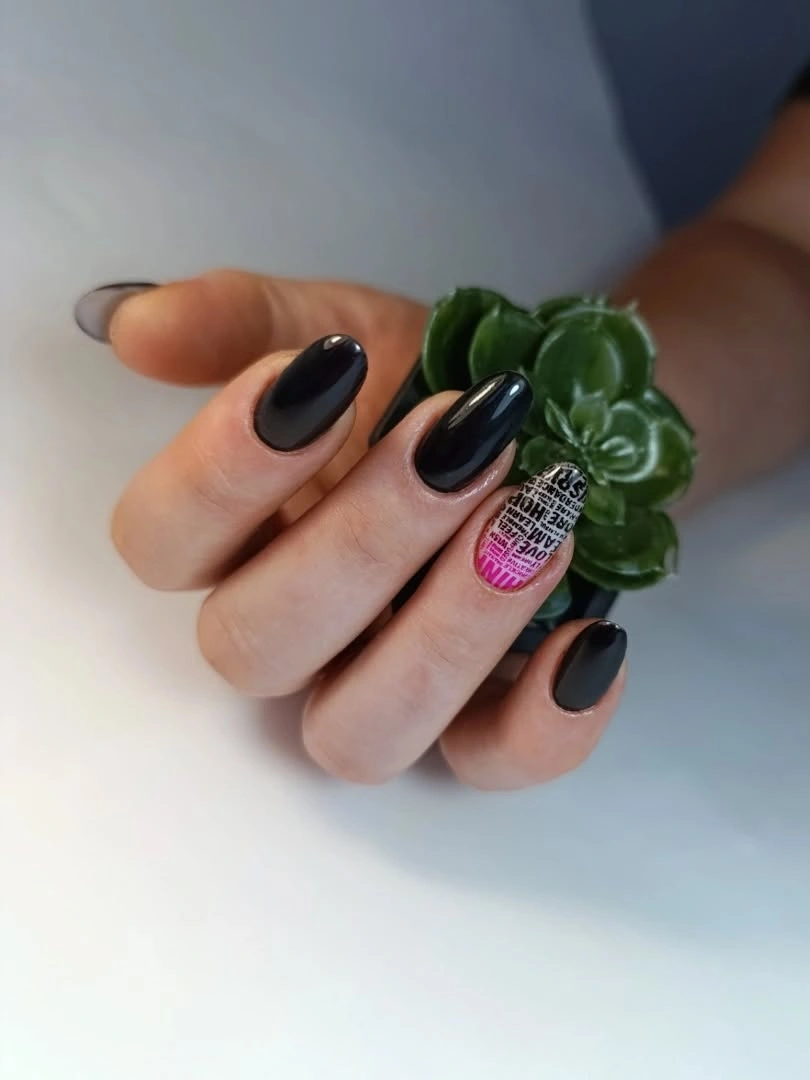
Use dots on two nails and one striped accent beside plain caramel brown nails. That version keeps the seasonal warmth and creates a more obvious focal point, while the almond or oval shape gives the marks a softer frame than a hard square would. The magenta panel is strongest when it remains a concentrated event surrounded by light, quiet nails.
Small dots and stripes can become crowded on a shorter surface and show growth near the cuticle. Leave a little brown around each mark, because the base color is not empty space to fill; it is what keeps the playful details connected. A medium almond still gives the spots enough room while lowering the length commitment that makes the original feel theatrical.
Long Pale Pink Nails With Magenta Spot Panels
Long almond nails alternate soft pink or white surfaces with vivid magenta spotted panels and narrow pink edges on selected fingers. The pale nails provide negative space, while the repeated magenta spots create a clear focal rhythm across the hand; the design feels lively because the strongest pattern is surrounded by quieter value.
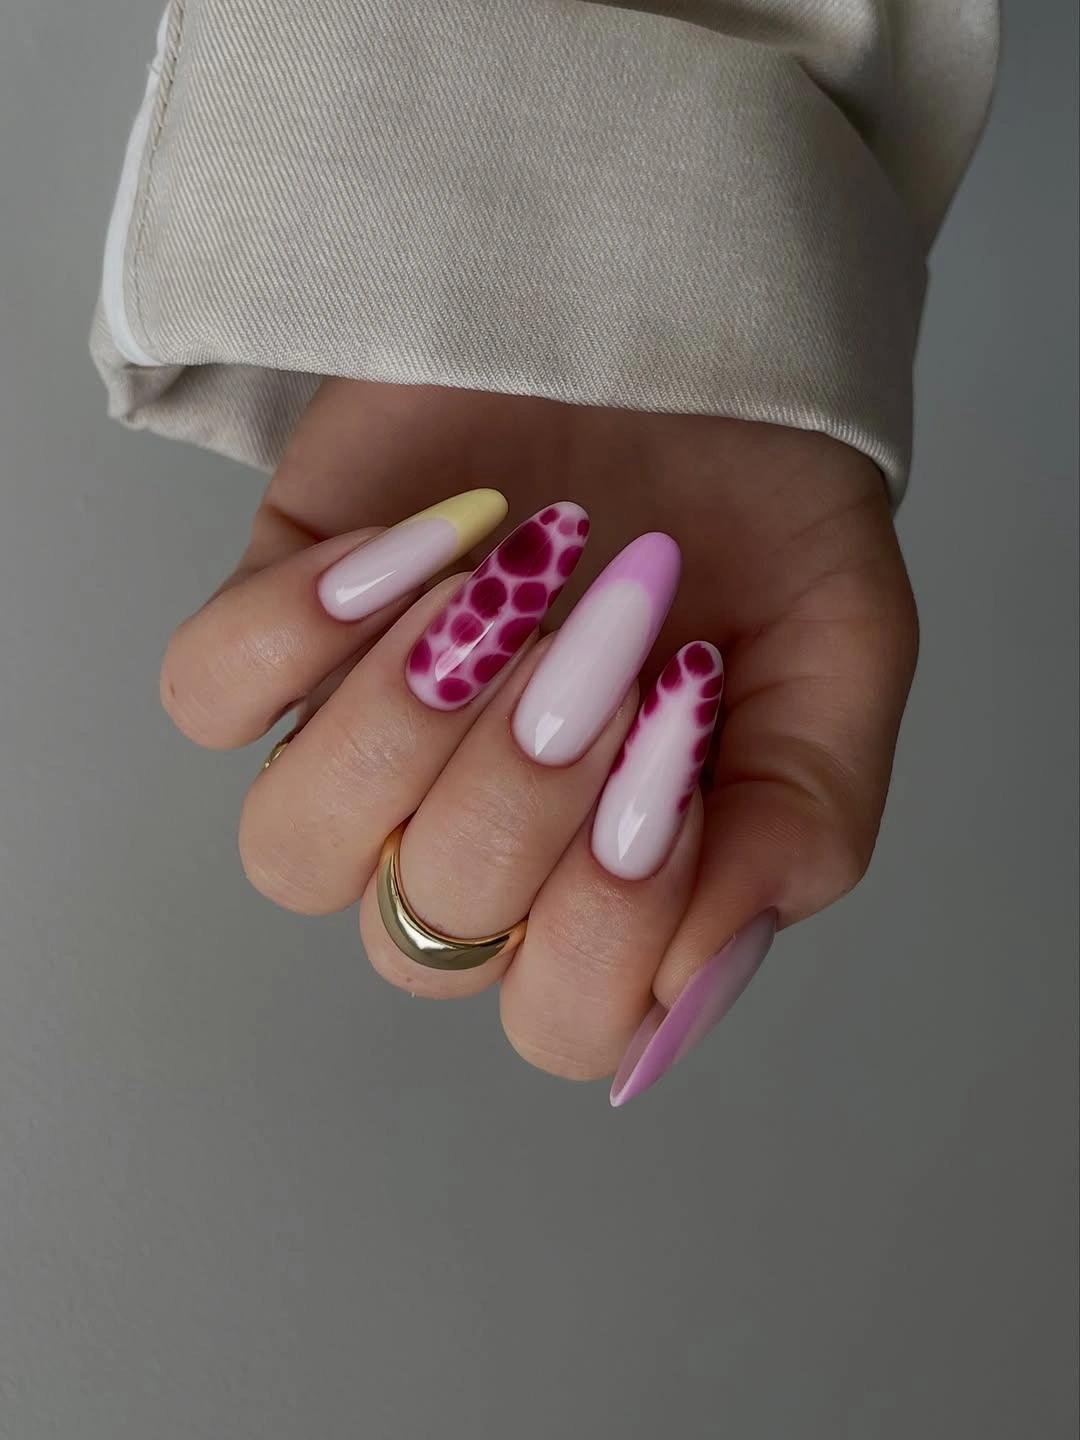
Keep one spotted accent on a medium almond set and leave the other nails plain blush or white. That reduction keeps the magenta marks memorable and makes the manicure easier to translate to a shorter length without losing the contrast between soft base and bright print. The pale accent keeps the brown from reading as one solid block, and the small graphic remains visible without dominating. A medium outline can also be compared with medium fall nail ideas when the detail matters more than extreme length.
Long almond length and dense spots increase upkeep, and small marks may blur as the nail grows. If the pattern is the detail you want to preserve, sacrifice some length first; if the silhouette matters more, reduce the spots to a single clean panel. The simplified mark will also be easier to maintain because the glossy base remains the larger, more forgiving surface.