

Polka dots are one of those nail details that can look sweet, graphic, retro, or unexpectedly grown-up depending on where the dots sit and how much open base is left around them. The strongest versions do not treat every nail as a tiny canvas to fill. They use scale, color contrast, and a little breathing room to make a simple circular mark feel considered.
Before choosing a dot pattern, decide whether the shape or the color should lead. Short nails often benefit from finer dots and a pale ground, while longer almond tips can carry a darker border or a more deliberate mix of accent nails. A limited palette keeps the design readable, and it also makes the look easier to adjust when a bold version feels like too much.
Milky Pink With Tiny Berry Dots
The short rounded nails keep a milky pink base almost completely open, then place small berry-red dots with enough space between them to stay crisp. The gentle contrast makes the dots noticeable without turning the whole manicure into a dense pattern. On a compact shape, that restraint is exactly what keeps the design light instead of crowded.
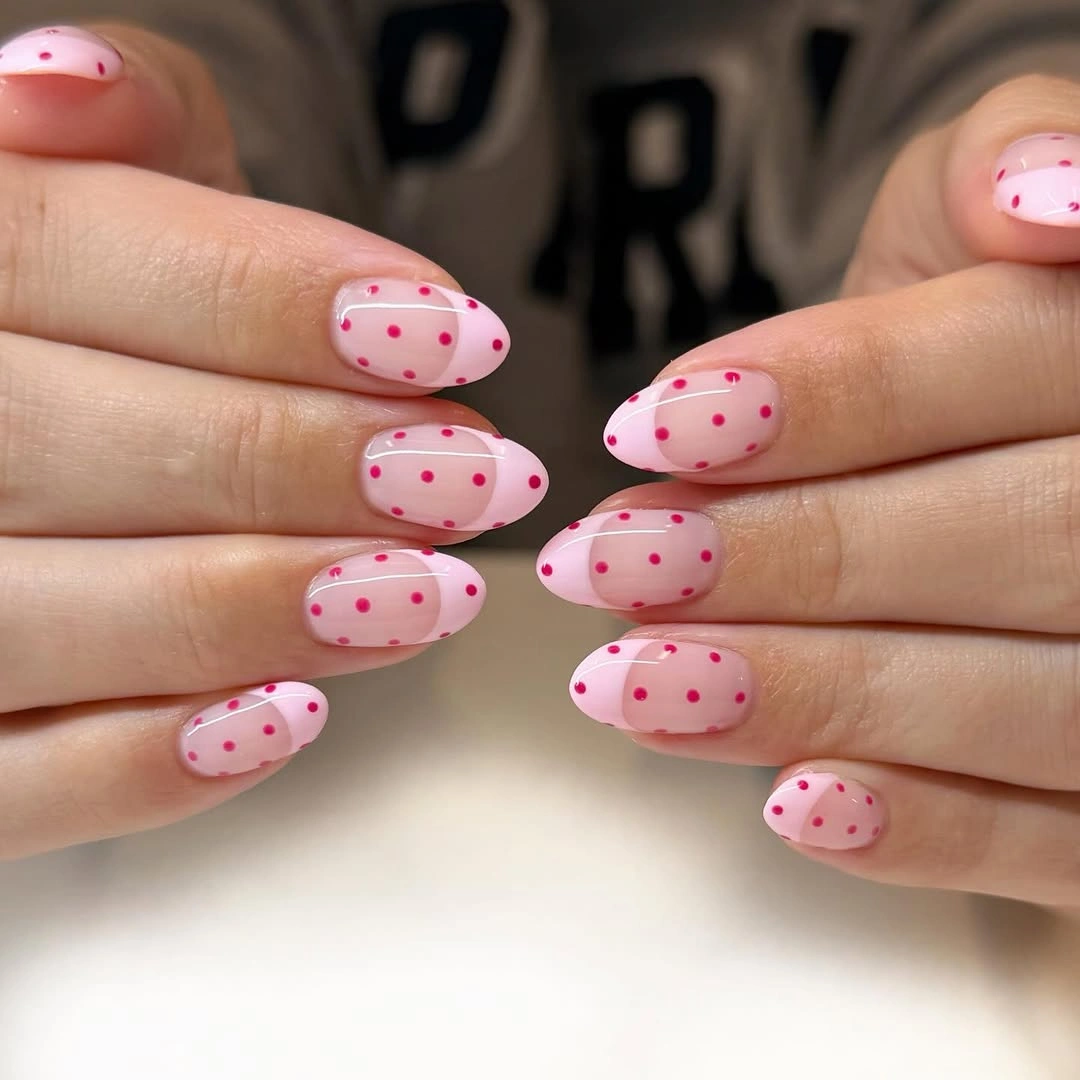
Fine dots suit this length because they echo the nail’s rounded edge rather than fighting it. If you want a more neutral version, switch the berry shade to warm brown or soft white while preserving the same spacing. The visible base is important here, so resist adding a French tip or a second motif that would erase the manicure’s clean pause.
Small dots can show uneven placement more quickly than larger ones, especially on the thumbs where there is more surface area. Keeping the pattern loosely scattered rather than perfectly gridded makes minor differences feel intentional. This is an easy reference for anyone who wants pink polka dot nails with a playful detail that still feels appropriate for everyday hands.
Burgundy and Cream Accent Contrast
Deep burgundy nails sit beside cream accent nails covered in fine dots, with thin white line work adding another delicate layer to the darker color. The long almond shape gives the warm palette room to feel rich rather than heavy. Switching the base and dot colors from nail to nail creates movement across both hands without needing a completely different motif.
The cream accents matter because they interrupt the burgundy before it becomes one uninterrupted block of dark color. For a quieter version, use only one cream nail per hand and let the burgundy remain the dominant field. If you like the depth of this palette, the warm contrast also pairs naturally with other maroon nail ideas that rely on small light details.
Long almond nails make each line and dot very visible, so a dense pattern needs careful spacing near the pointed free edge. Avoid adding jewelry-like charms or glitter on top, since the color reversal and fine lines already create enough visual interest. The design feels most balanced when the cream nails stay clean around the cuticle and the darkest tone remains concentrated on selected fingers.
Spotted Browns With One White Accent
Brown mottled nails, glossy black solids, and a white nail marked with black spots build an animal-inspired mix without relying on one repeated pattern. The medium almond shape keeps the contrasting colors elegant, while the white accent creates a clear pocket of negative space. Each nail has a different role, but the black dots provide a visual thread that holds the group together.
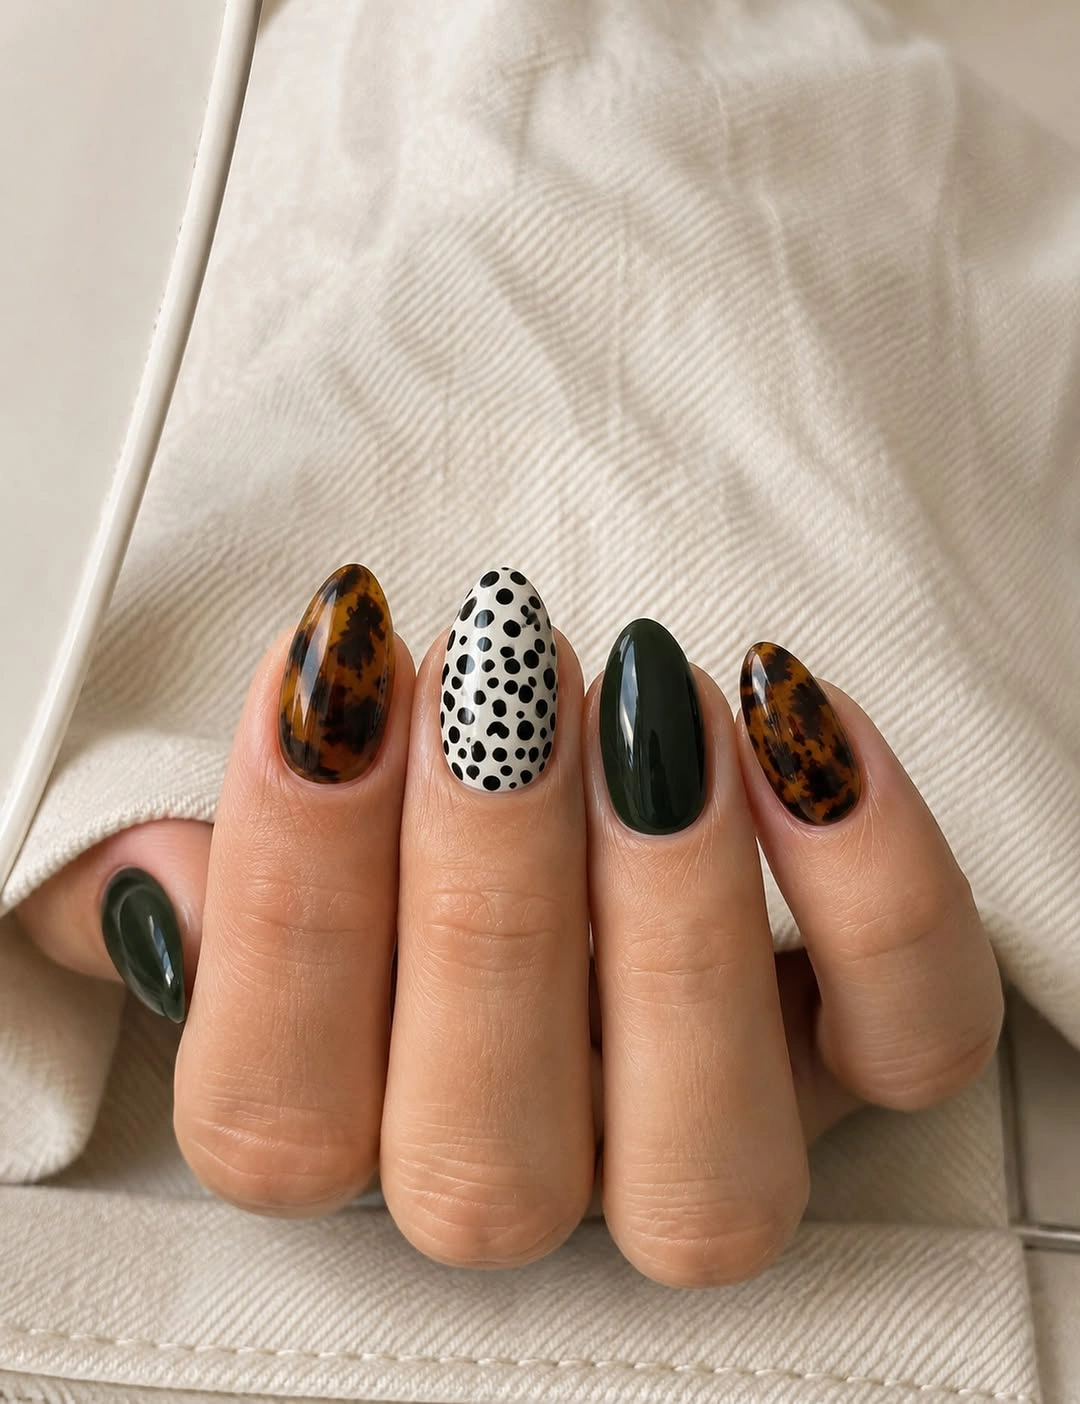
The white dotted nail is the smart editor in this design because it gives the darker brown and black surfaces somewhere to breathe. If a full mixed set feels too busy, choose just the white accent and pair it with solid espresso nails. The look reads best when the spotted areas stay within a warm brown-and-black family rather than adding a bright unrelated color.
Varied designs are flexible, but they can become harder to maintain visually if each nail has a different density of detail. Keep one color, such as black, repeating on every hand so the manicure still looks connected as it grows out. The rounded almond silhouette supports the soft organic spots; a sharp square shape would make the same motif feel more graphic and less fluid.
Hot Pink With a Single Dotted Pause
Long square nails in hot pink make an immediate statement, then one pale pink accent covered in darker dots softens the repetition. The contrast is simple but effective because the accent does not try to match the intensity of the solid nails. Instead, it provides a lighter place for the eye to rest before returning to the saturated pink.
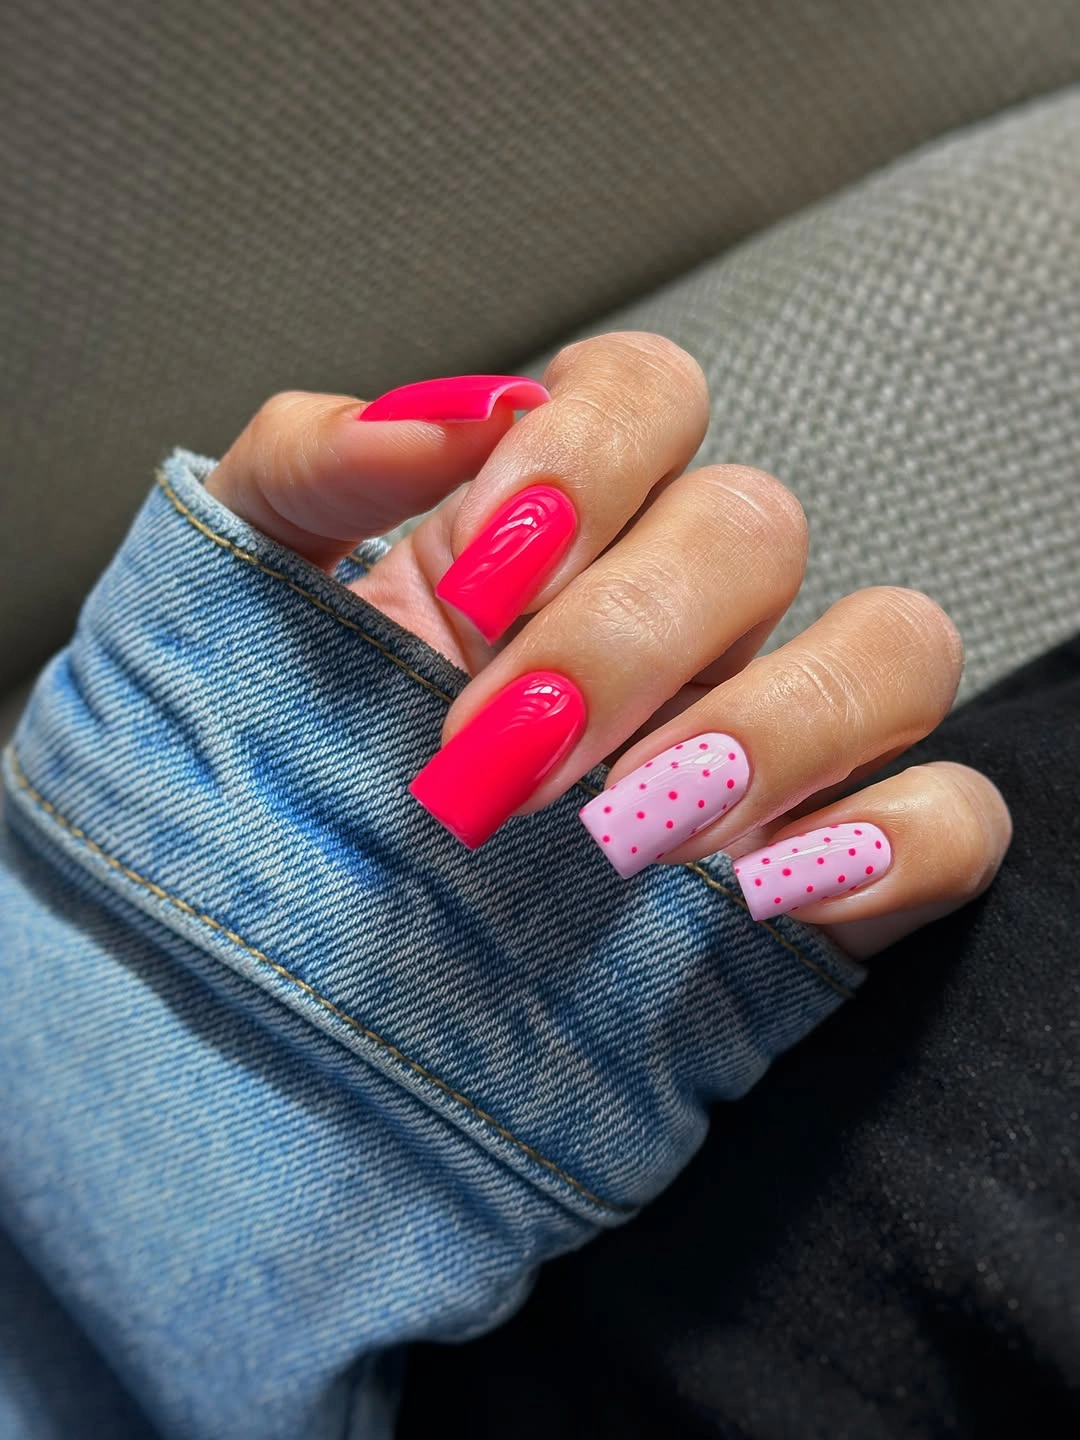
On a bright set like this, one accent nail is usually enough. Adding dotted details to every finger would compete with the strong square shape and make the color feel less focused. For a more wearable take, choose a medium pink base and keep the accent nail pale, using berry dots that echo the original contrast without the same neon intensity.
Long square corners can make a bold color look even more assertive, so consider a slightly softened square if you want the same effect with less edge. The dotted accent may also show wear differently from the solid nails because its pale base is more visible near the free edge. Keep the dots concentrated away from the tip if you want the design to remain neat for longer.
Reversed Burgundy and Pink Dot Pairing
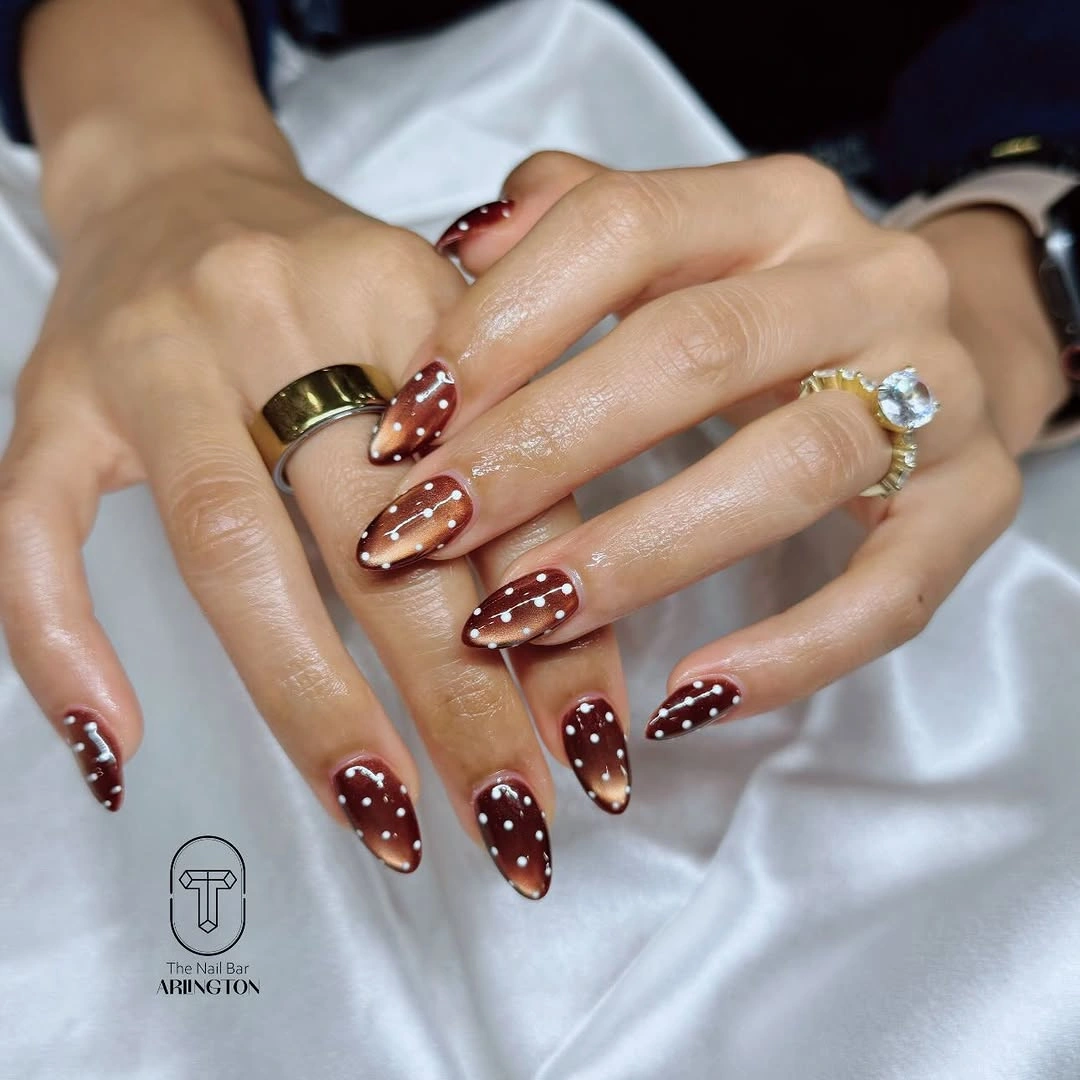
These long almond nails alternate between burgundy bases dotted in white and pale pink bases dotted in burgundy, turning the same two colors into a reversible pattern. The repeated contrast feels intentional because each direction of the design appears more than once. Rather than making every nail identical, the manicure lets the palette create rhythm through alternation.
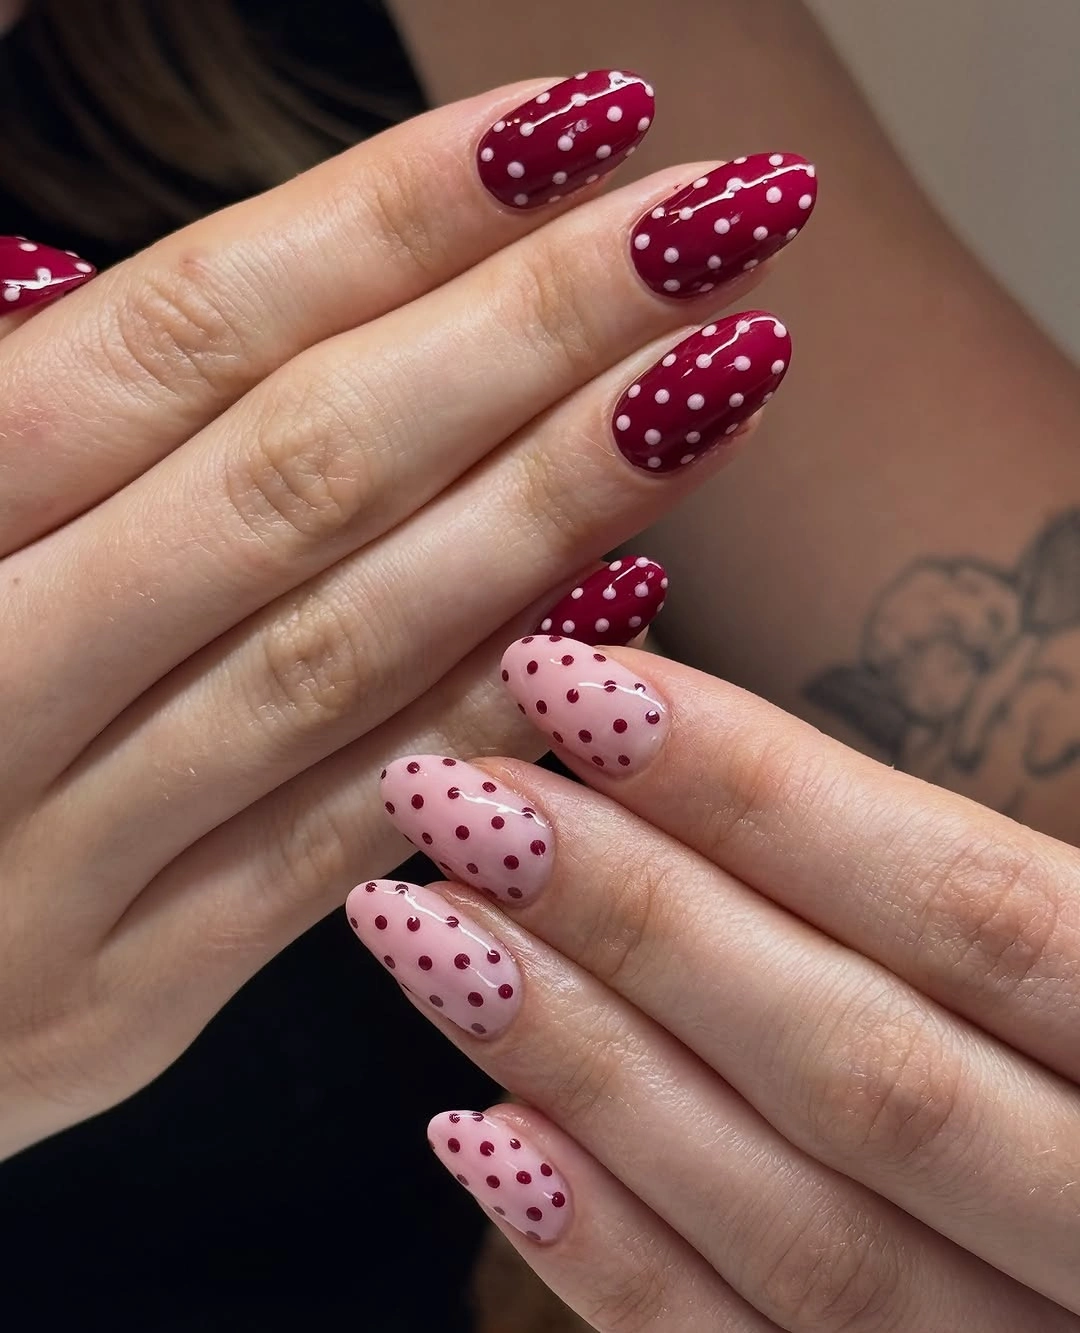
Reversing dot colors is an easy way to make a two-tone polka dot manicure feel more detailed without adding a third shade. A shorter version could use only two accent nails in the pale base, leaving the rest burgundy for a calmer result. Keep the dots consistently small enough that the almond tips still read as a clean silhouette from a distance.
The tradeoff is visual density. Because both dark and light nails are patterned, this design benefits from a simple outfit palette or minimal rings so the hands do not compete with other details. If you want less maintenance pressure, keep the pale pink closer to the cuticle area and let burgundy sit at the tips, where darker color is more forgiving when the edge becomes visible.
Warm Multi-Color Dots on Almond Nails
Cream, burgundy, and blush pink bases appear together here, each carrying dark dots in a related warm family. The long almond shape gives the mix enough length to stay legible, even when several colors share the same hand. Rather than looking random, the pattern feels gathered by the recurring dark circular marks and the consistent glossy finish.
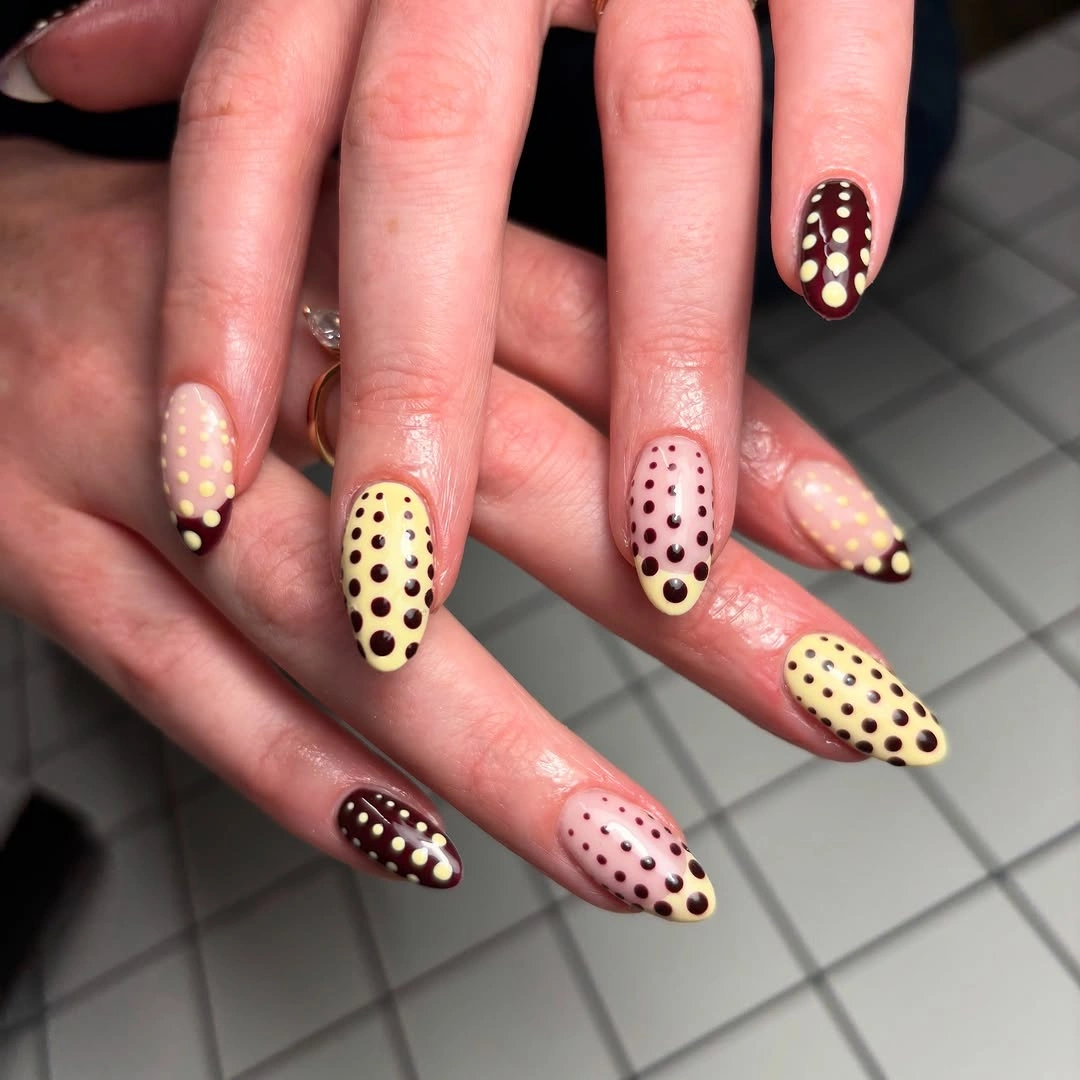
A multi-color set needs one repeated feature, and the dark dots do that work more quietly than a repeated glitter accent would. For an easier version, use cream and burgundy only, then leave blush pink for one nail on each hand. The soft warm bases make the design friendly for different outfits, but they should stay muted enough that the dots remain the main event.
More colors mean more opportunities for the design to feel uneven if the placement changes too much from finger to finger. Keep the dots loose but similar in scale, especially across the thumbs and ring fingers where the eye tends to pause. The longest nails can carry this variety, while a shorter shape might look better with fewer base colors and one clear accent nail.
Bright Pink Dots Across Every Nail
Vivid pink almond nails use deeper berry dots across every finger, creating a direct, cheerful take on the polka dot nails trend 2027 without relying on a contrasting neutral. The dots are visible because the base and accent differ in depth, not because they shift into a separate color family. That close tonal relationship gives the manicure energy while keeping it cohesive.
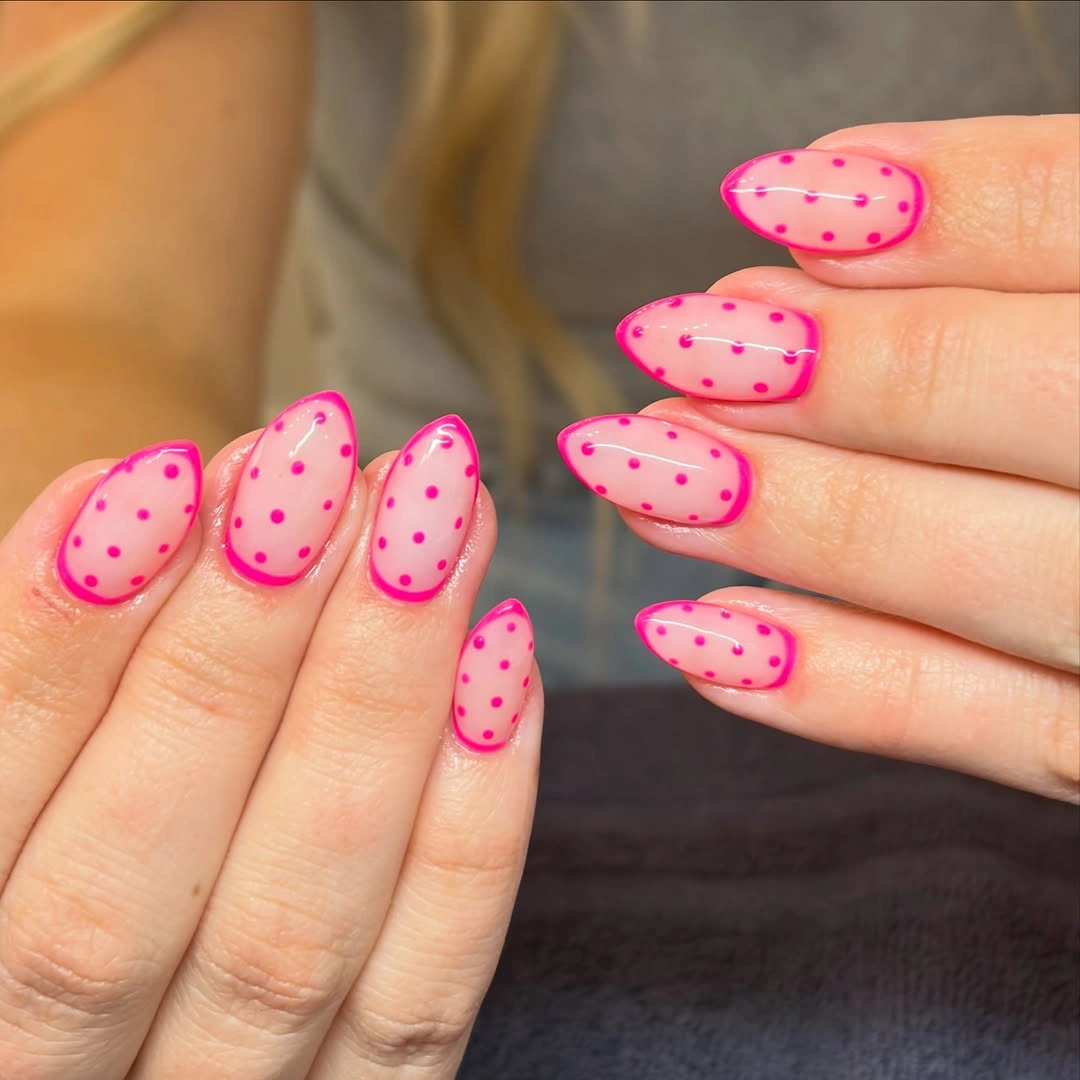
Using one color family is useful when you want dots to feel playful but not overly retro. A darker pink creates enough contrast to stay clear, while a lighter pink would produce a softer, more delicate surface. If every nail is patterned, choose a consistent dot size and leave a small margin around the cuticle so the design does not feel pressed into the base.
This approach is less adaptable to very formal outfits than a nude or burgundy version, but it has a strong casual appeal. The practical benefit is that there are no accent nails to balance or duplicate, so the overall idea is easy to understand. Keep rings minimal and allow the pink to be the color statement, especially when the shape is already a visible medium almond length.
Short Burgundy and Ivory Reversal
Short rounded nails make the burgundy-and-ivory reversal feel tidier and more everyday than the long almond version. Dark red nails carry tiny pale dots, while the ivory nails receive matching burgundy marks, so the two colors still speak to each other. The compact length keeps the pattern from becoming overly decorative and lets the small circles remain the clear focus.
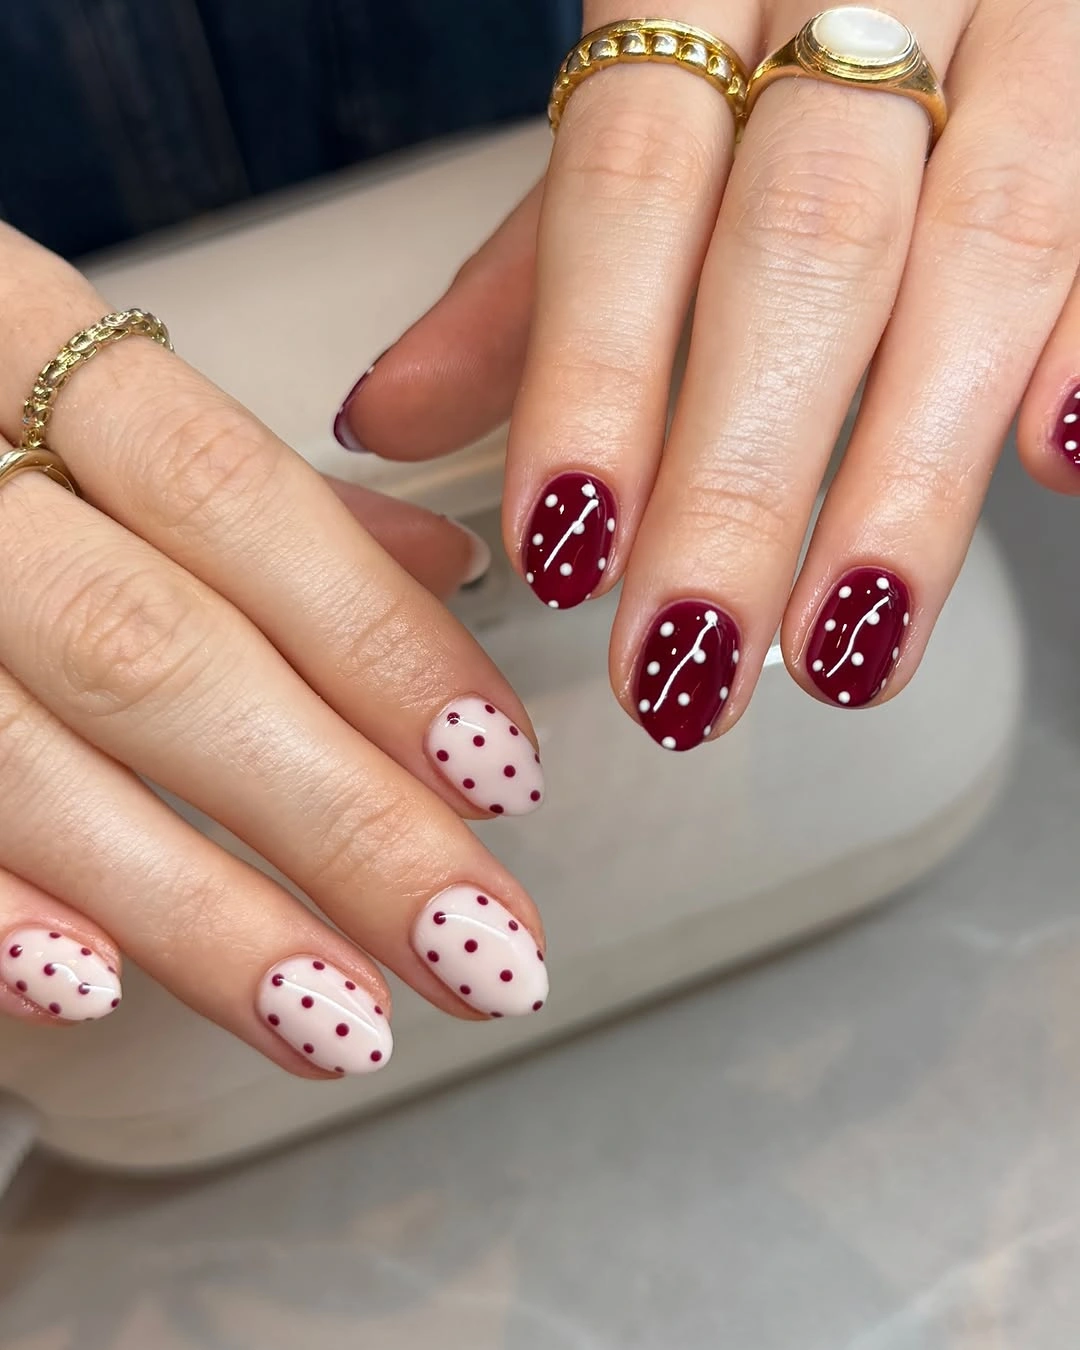
A short shape is forgiving for a paired color design because each nail offers less surface area to fill. If you want even more restraint, make only the ring fingers ivory and keep the remaining nails burgundy with a few isolated dots. The red and cream palette has enough contrast for cold months, yet it avoids the heaviness of an all-dark manicure.
Dot placement near the free edge matters more on shorter nails because there is less open space to balance an uneven cluster. Leave a visible rim of base color around the sides and tip, and the pattern will look more intentional as the nails grow. This version is a good reminder that short nails can carry a clear motif when the scale is adjusted rather than simply copied from a longer set.
Navy Dotted French Edges on Pink
A pale pink almond base stays open through the center, while navy French edges decorated with tiny white dots create a crisp border at the tips. The cool navy contrast is sharper than burgundy but still feels grounded because the dark color is limited to the outer edge. The dots turn an ordinary French shape into something more playful without covering the whole nail.
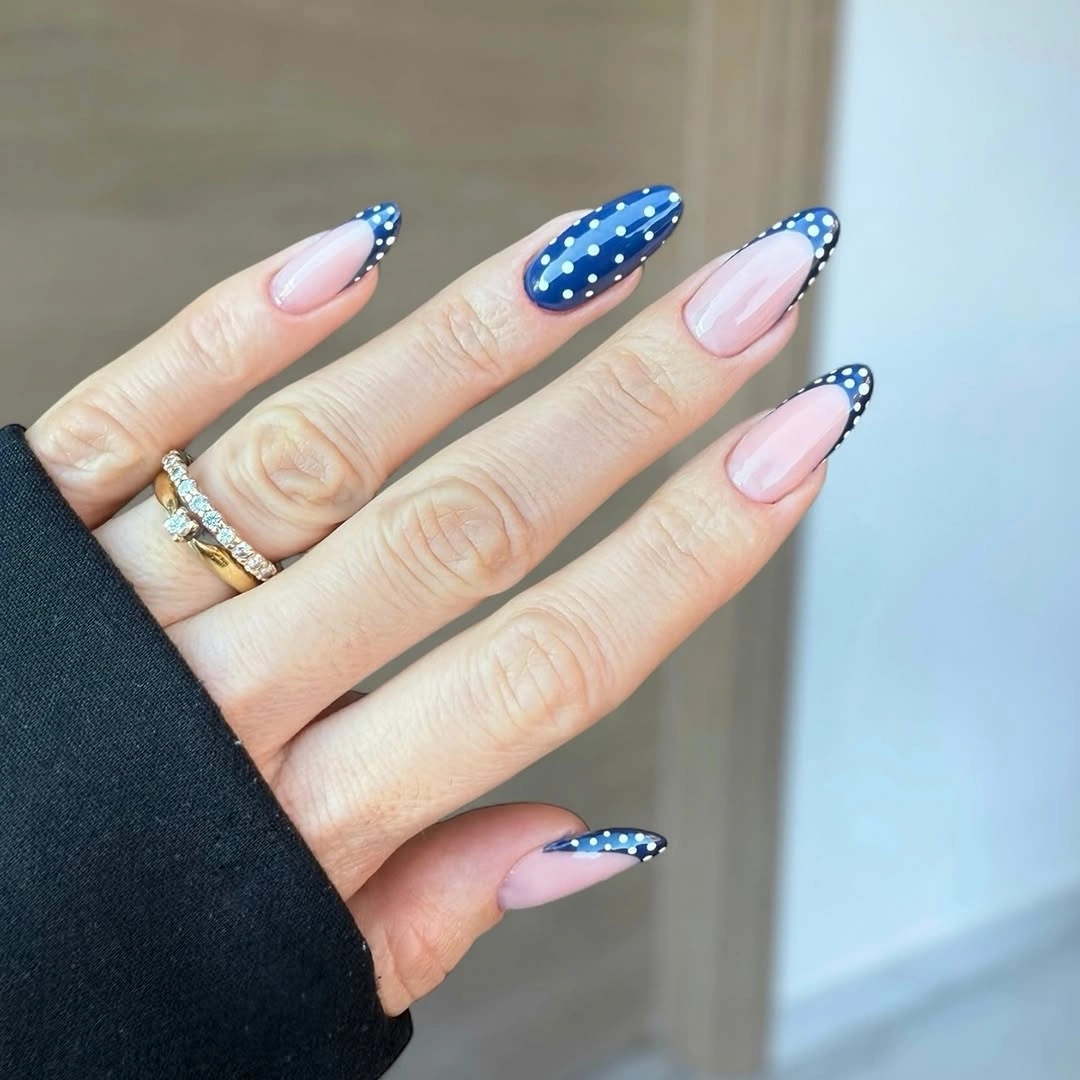
Tip placement is a practical advantage here because it leaves the cuticle area simple and makes the design look lighter as the nail grows. For a shorter nail, use a thinner navy band and fewer dots so the edge does not take over. The combination works best when the pink base remains sheer-looking and clean, allowing the blue to read as a deliberate frame rather than a block.
Dark French edges can chip more visibly at the very tip than a full dark nail, so a slightly curved line that sits just inside the edge may be easier to keep looking neat. Avoid adding navy dots to the base as well, because the open center is what gives this design its graphic clarity. One cool color and one small white detail are enough for the shape to carry the rest.
Nude Base With Burgundy Dotted Tips
Warm nude almond nails use deep burgundy French tips with tiny white dots, creating a rich boundary while leaving most of the nail neutral. The contrast feels seasonal without requiring a full dark base, and the longer shape gives the curved tip enough room to stay smooth. Burgundy is concentrated where it has the most visual impact instead of covering every surface.
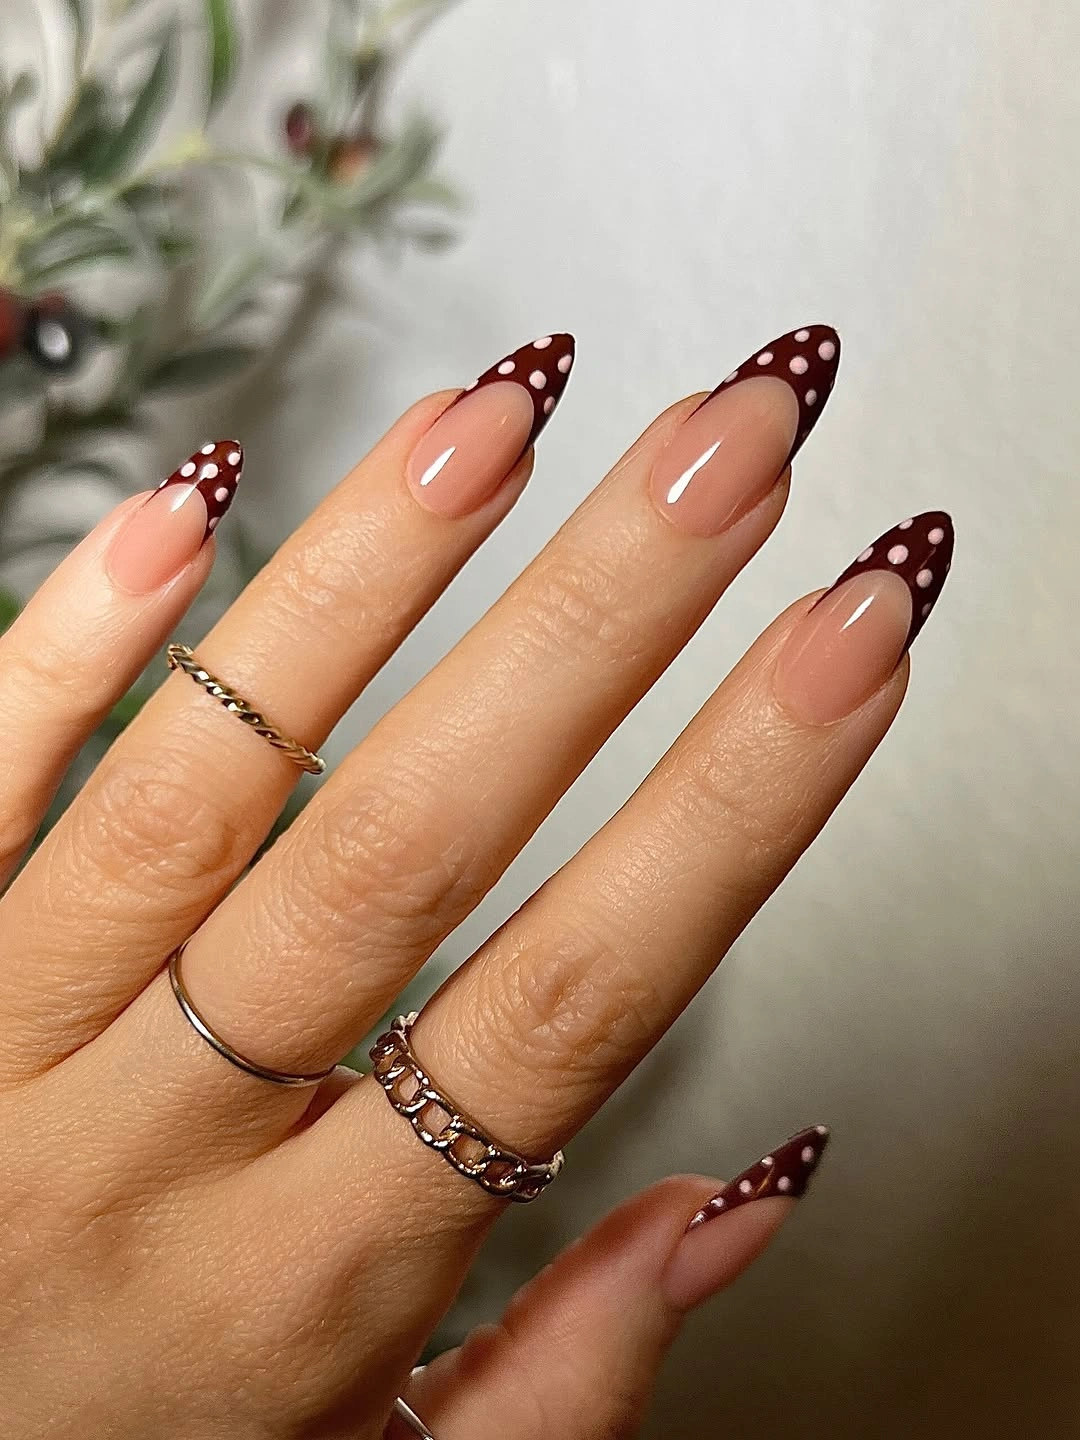
The nude center keeps the manicure adaptable, especially if you like dark color but do not want a completely saturated set. A narrower tip would feel more delicate, while a broader burgundy edge would move the look closer to a dramatic color-block design. The white dots should remain small and spaced, otherwise they can make the tip appear visually heavier than the almond shape supports.
For maintenance, darker tips are often a smarter choice than pale ones because small signs of wear are less obvious at the edge. The tradeoff is that any uneven curve is easy to notice against the nude base, so the line should follow the nail’s natural arch. Pair this with understated rings or warm neutral clothing and the burgundy detail will feel precise rather than overly formal.
Black Dotted Tips With Soft Pink Centers
Soft pink nails receive black curved French tips filled with fine white dots, making the contrast feel graphic while the center remains delicate. The long almond shape helps the dark edge follow a graceful line instead of looking severe. This design is bolder than a classic pale manicure, but the large amount of pink negative space keeps it balanced.
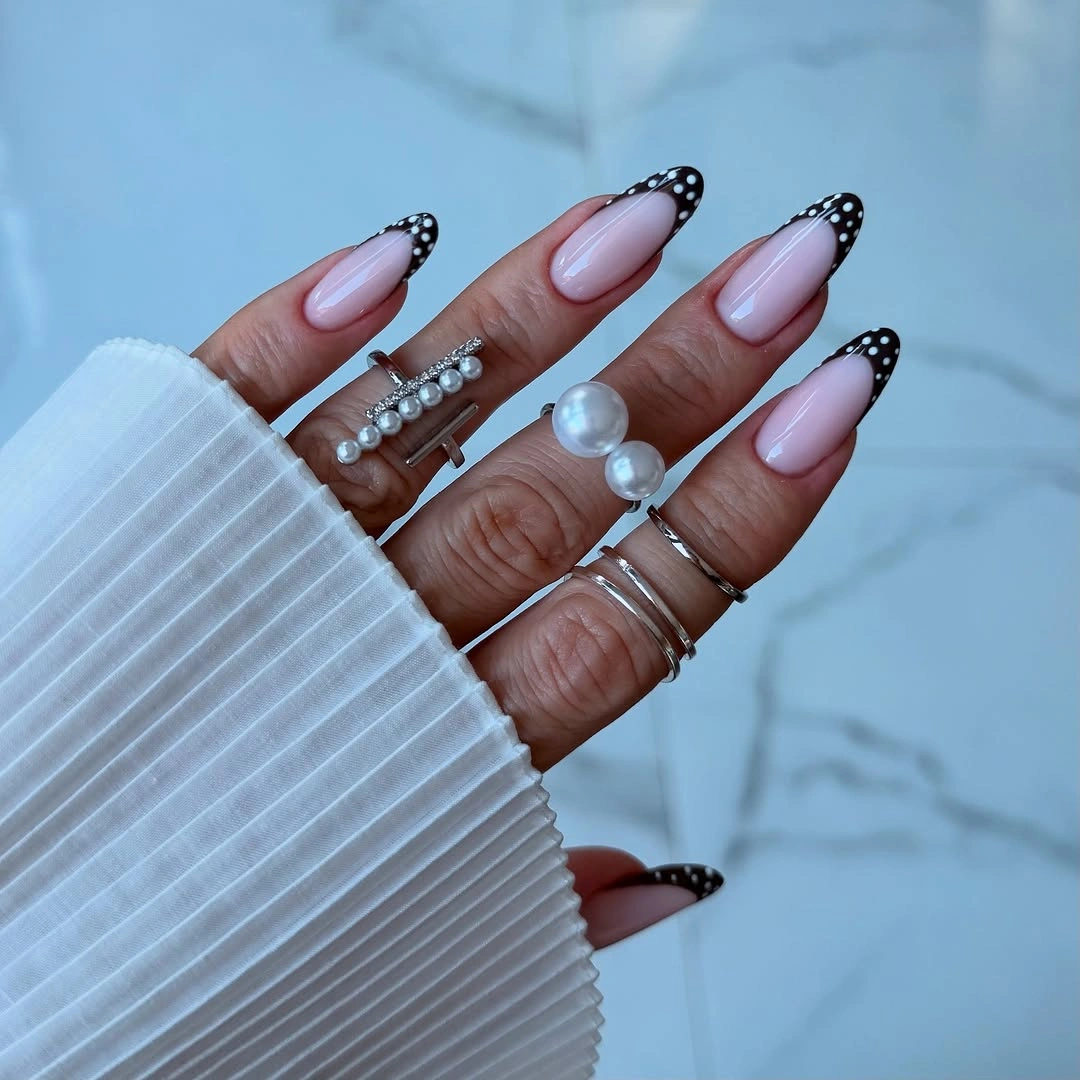
Black at the edge works because it is contained. If the tips extended much farther toward the cuticle, the manicure would lose the airy quality that makes the dots visible. A shorter interpretation could use black only on two accent tips and leave the rest pink with a single white dot, preserving the same idea with a softer level of contrast.
Because black draws the eye immediately, the dots need to stay small and fairly even in size. A few oversized circles could make the tip feel more like a costume motif than a refined pattern. The long shape offers enough room for the detail, but it also means the dark free edge will be the first part to show wear, so avoid using it as a design that depends on an ultra-crisp extreme tip.
Sheer Dark Tips and Fine Line Detail
A neutral nude base keeps the fingers looking elongated, while dark dotted tip sections and a small line accent introduce a much more intricate finish at the free edge. The black appears slightly translucent in places, which softens the contrast against the skin-toned base. One tiny bow-like or crossed-line detail makes the set feel personal without forcing every nail into the same density.
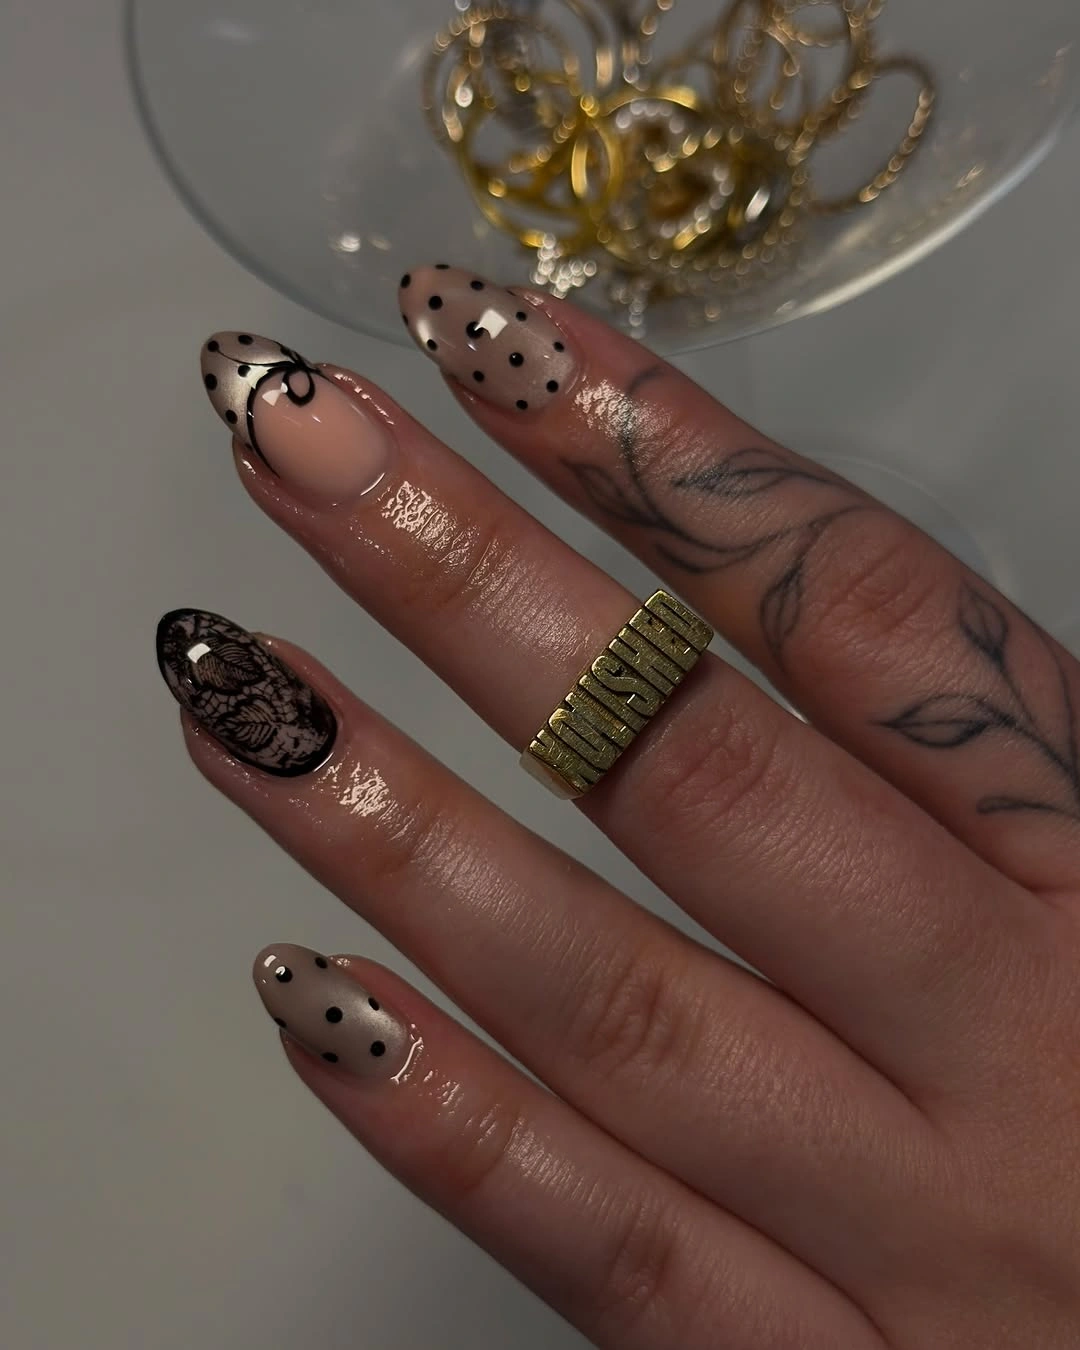
Mixing a dotted tip with one delicate line detail works when the overall palette stays strict. Adding another color would dilute the quiet black-and-nude conversation and make the smaller accent harder to notice. If the line detail feels too precious for everyday wear, keep the dotted tips and switch the accent nail to a simple nude base with one small black dot cluster.
Fine dark lines can lose clarity faster than broad dots, particularly near an active thumb or index finger. Place them on a less high-contact nail if you want the manicure to remain readable with normal use. The design’s charm comes from contrast in density: some nails carry a dark edge, while others leave enough nude space to make that edge feel intentional.
Curved Red Dots Over Blush Pink
Blush pink almond nails use curved berry-red tips rather than straight bands, with small white dots bringing a cheerful texture to the color. The curved placement follows the natural almond outline and makes the edge look softer than a squared French tip. One lighter dotted variation breaks up the repetition while keeping the red-and-pink palette coherent.
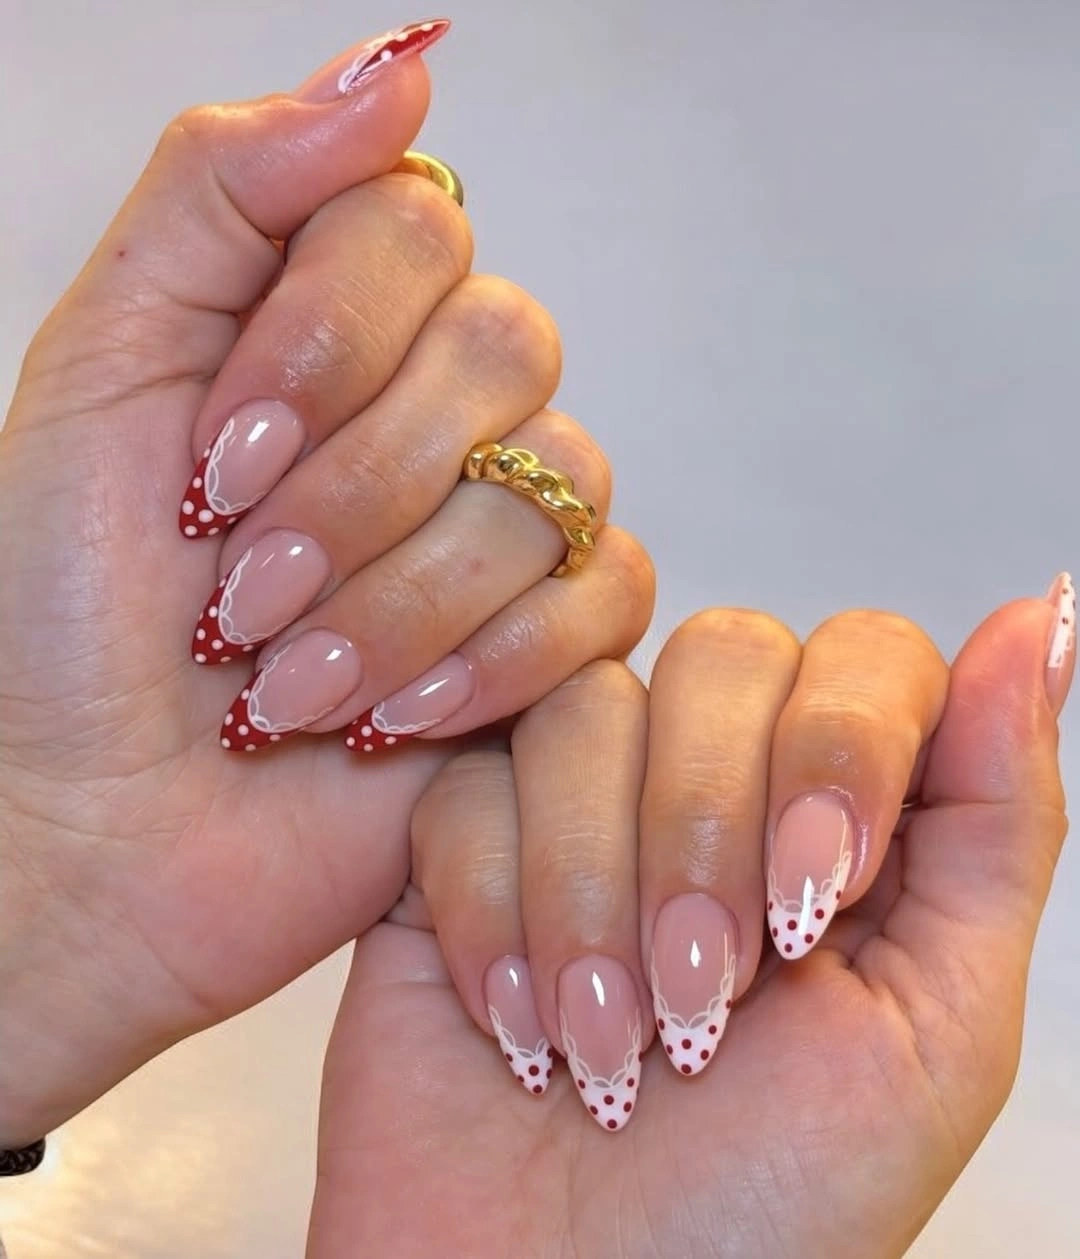
Curved tips are useful when you want a visible color edge that still feels gentle on a rounded shape. A deeper red would make the design moodier, while a coral shade would shift it toward a brighter warm-weather version. Keep the dots near the tip rather than scattering them over the base, because the open blush center is what gives the manicure its graceful spacing.
This design has a pleasant balance between decorative and restrained, but the curve needs to be consistent across fingers or the pattern can look accidental. The middle and ring nails are good places for the strongest dotted detail, leaving the pinky or thumb slightly simpler. That variation keeps the hand from looking too symmetrical while preserving the shared red edge that unites the set.
Cow-Print Tips on a Nude Base
Natural nude centers meet white French tips scattered with black cow-print spots, giving the manicure a high-contrast motif while keeping it mostly confined to the edge. The medium almond shape makes the white tips look clean and elongated rather than cartoonish. Because the base remains skin-toned, the black-and-white pattern has room to feel graphic without covering the whole hand.
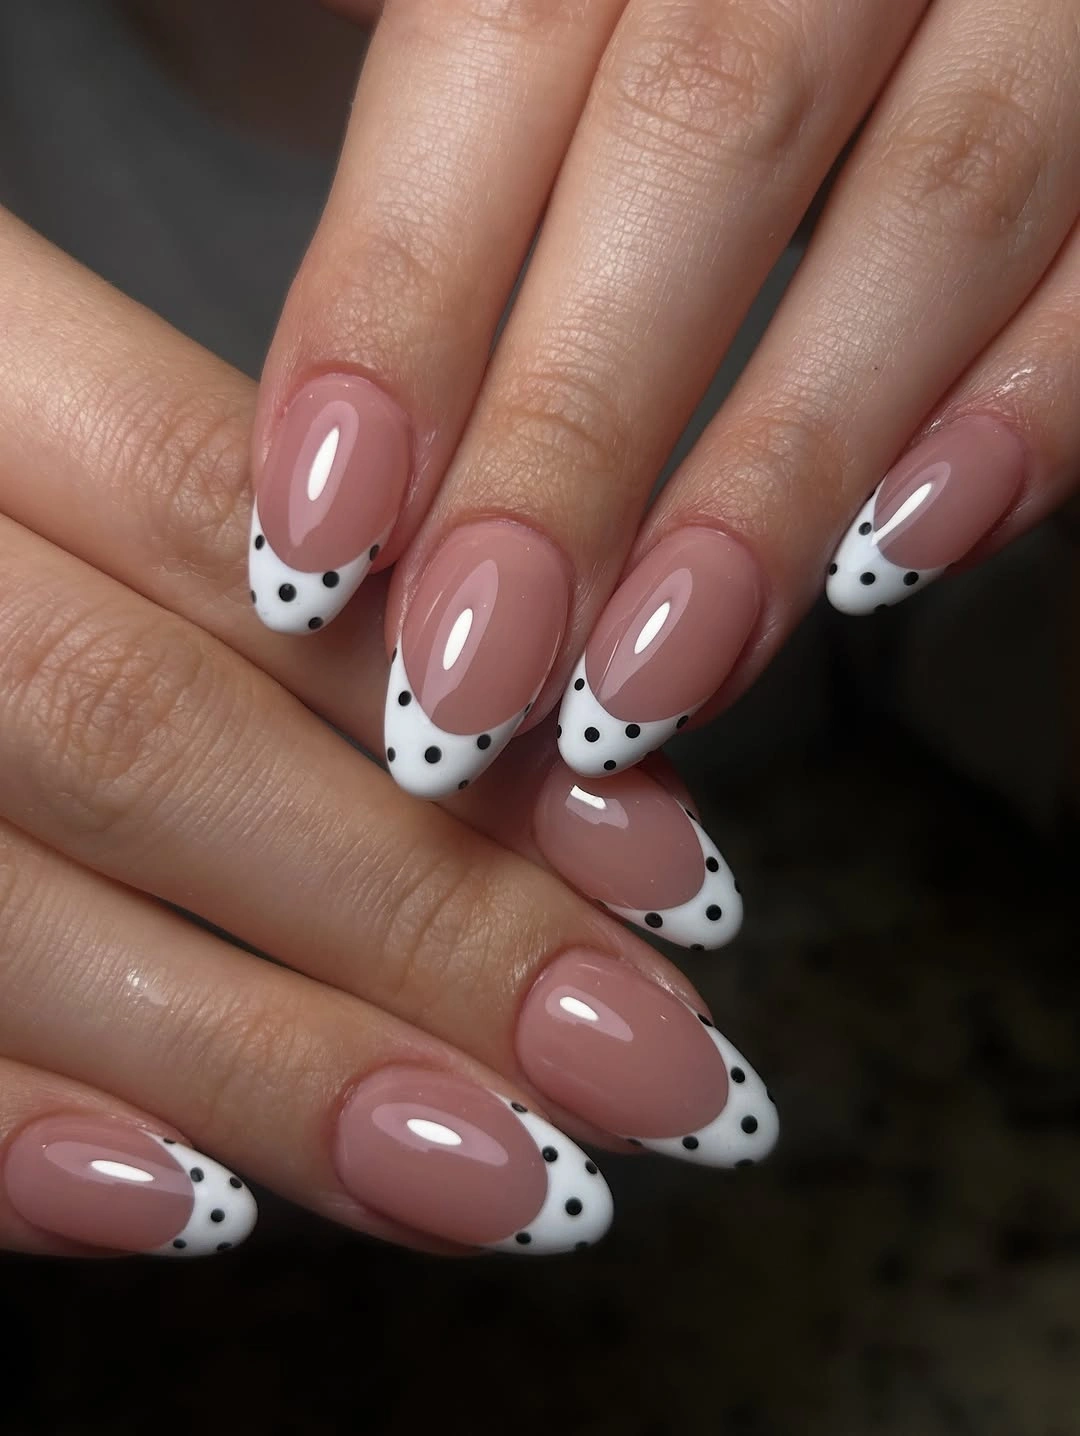
The best part of using a cow-print motif at the tips is that it keeps the strongest contrast away from the cuticle. If you want a quieter version, place the spots only on two white accent tips and use plain nude French nails beside them. The pattern should stay irregular but not too dense, so every spot has a little white space around it.
White tips can show edge wear more quickly than darker colors, particularly on longer nails, so a slightly thicker white band may be more practical than a hairline French edge. The black spots should not touch every border, because leaving a clean rim makes the design appear neater. This is a bold motif, but its placement makes it easier to wear than a full cow-print surface.
Long Pink Nails With Black Dot Frames
Long pale pink nails carry black dotted tips that frame the free edge, while a small cool-toned variation keeps the set from repeating exactly. The high contrast makes the dots easy to see, but the pink base stays dominant through the center of every nail. On this length, the tip pattern reads almost like a border drawn around a soft neutral canvas.
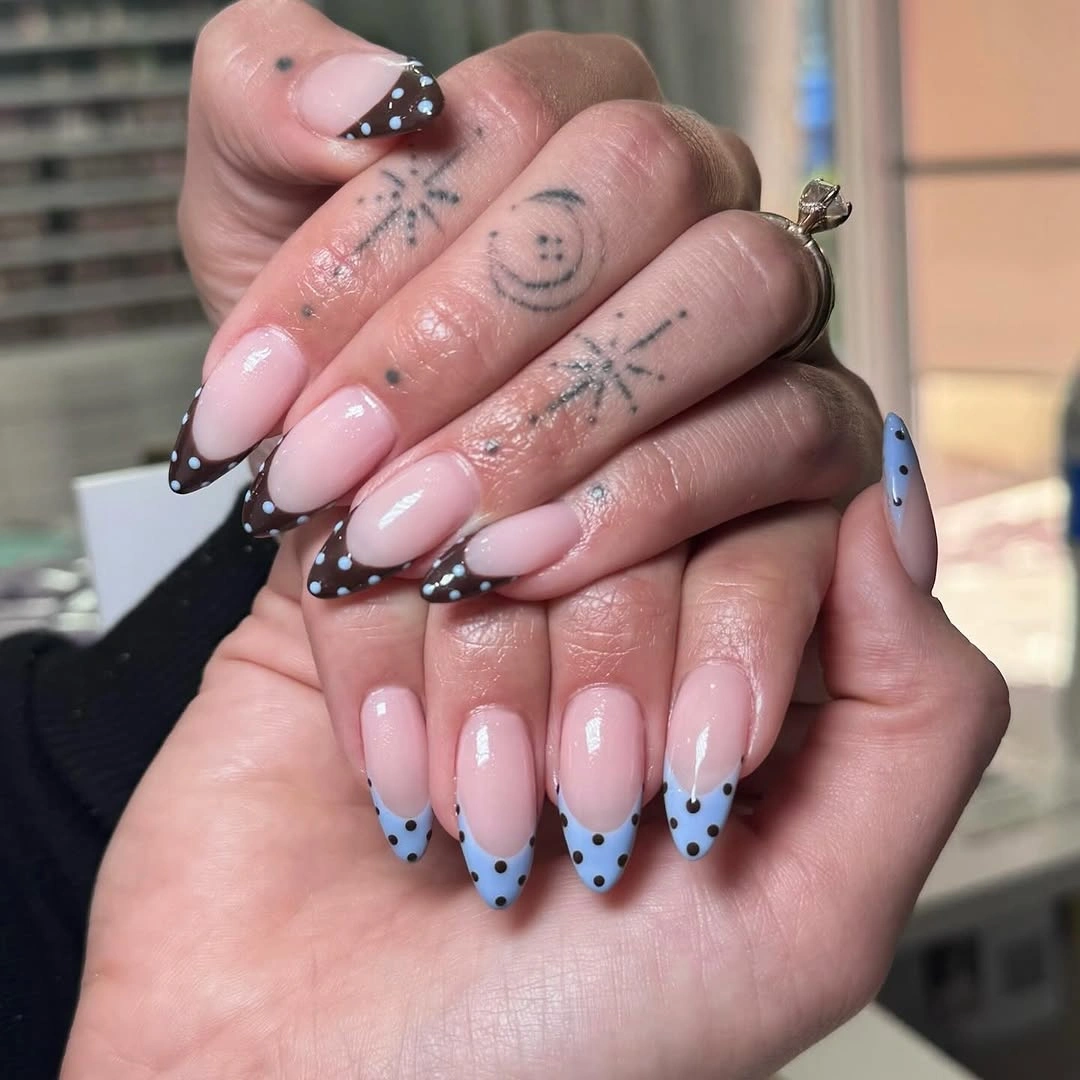
A long shape can support a broader patterned tip, but it still benefits from leaving at least half the nail pale and unmarked. If you reduce the length, narrow the black edge and use fewer dots so the design does not feel compressed. The tiny cool accent is more interesting than a completely identical set, yet it works only because it remains a small variation within the same strong outline.
With dark tip designs, the most visible maintenance point is the free edge, so keep the black band smooth and avoid an overly jagged outline. A rounded almond shape softens the contrast more than a coffin or sharp square would. The manicure feels deliberate when the black frame stays confident and the pink center remains clean, not when every surface receives more decoration.
Royal Blue Dots at the French Edge
Medium oval nails use a neutral base and royal blue rounded French edges, then scatter tiny white dots across the blue area for a cool, crisp finish. The blue is saturated enough to stand out, yet it does not cover the center of the nail. That placement creates a more wearable way to include a strong color than turning every nail completely blue.
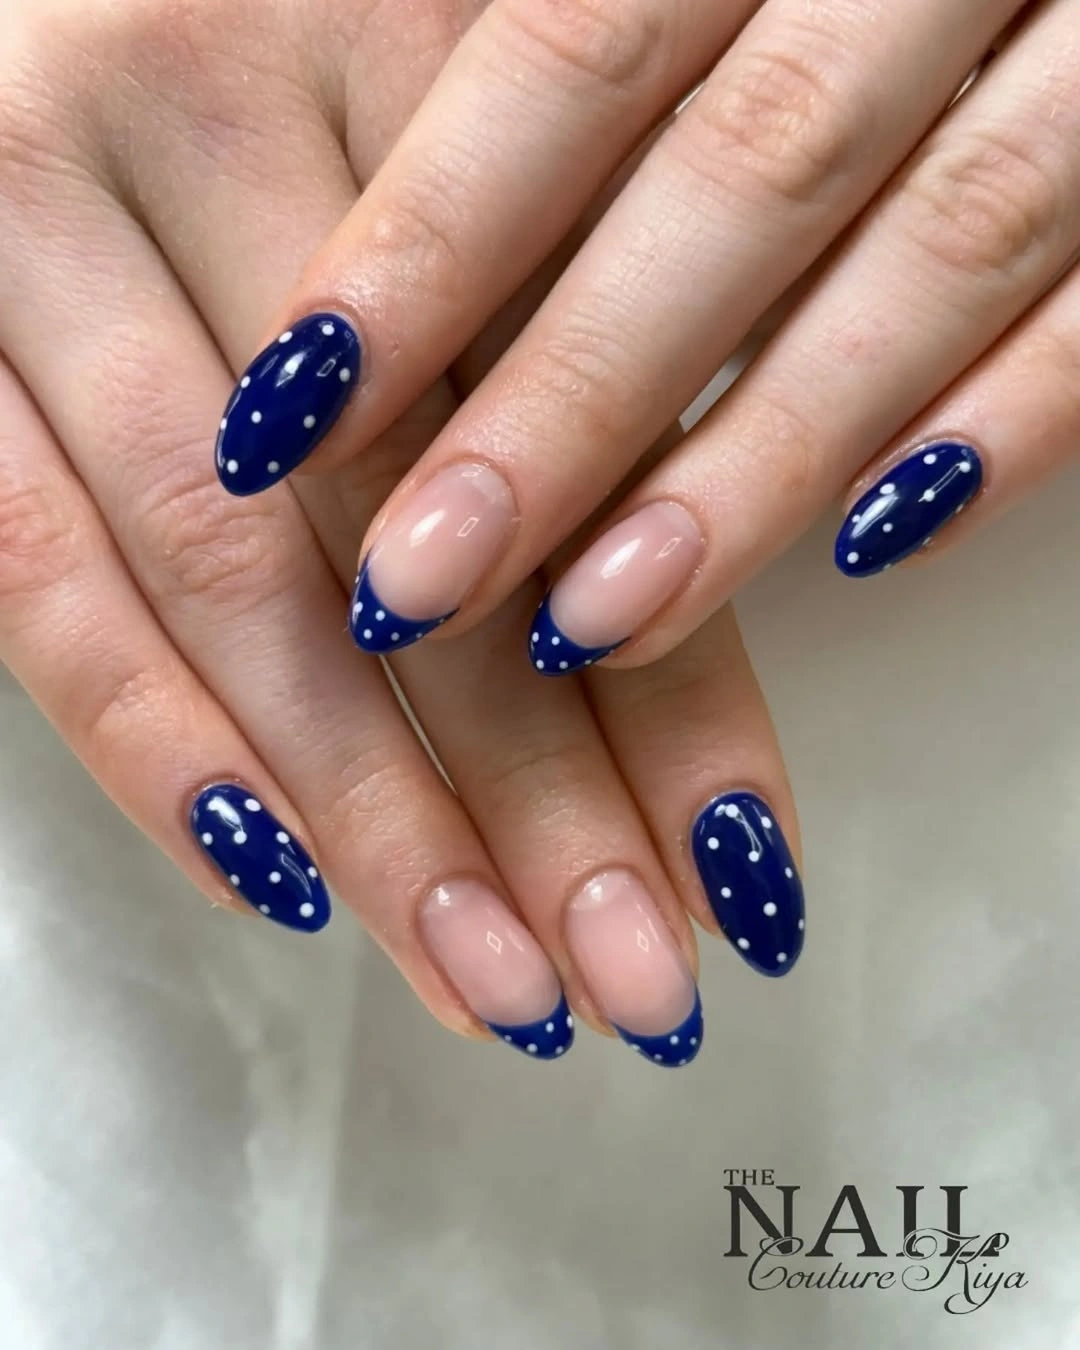
Royal blue works well with a natural base because the contrast is clean and the white dots remain visible without needing an additional color. For a quieter variation, use navy instead, or apply the blue only to alternating fingers. The rounded French line should follow the oval shape closely; a straighter band would make the same design feel more rigid and less connected to the nail’s silhouette.
Blue tips are eye-catching, so keep the rest of the hand styling simple if you want the manicure to remain the focus. The edge can show wear at the very front, but a slightly deeper curve that sits just below the free edge gives the color enough visibility without depending on a perfect outer rim. This is a good option for anyone who likes cool color but still wants lots of neutral space.
Mixed Black Tip Placements on Nude
Nude nails carry several versions of black dotted detailing: a more complete dark tip, a thin outlined edge, and one pale dotted nail that breaks up the repetition. The varied placement creates rhythm across the hand without abandoning the same black-and-nude color story. Long nails make these small differences readable, especially when the base remains consistently soft and glossy.
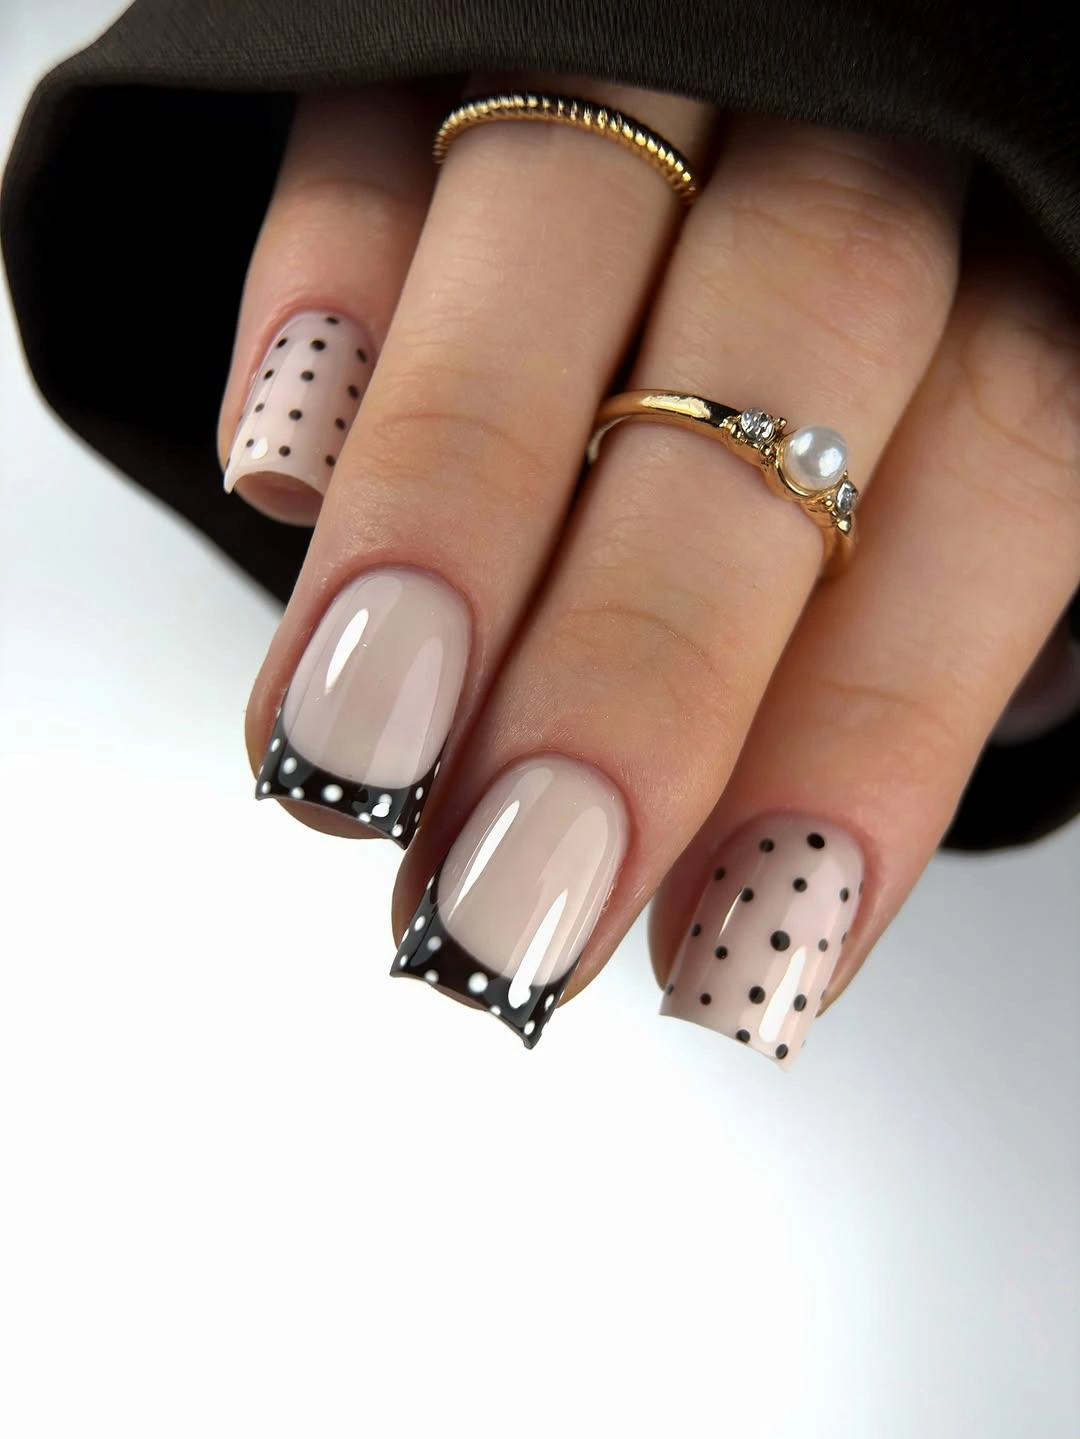
Different tip placements can look thoughtful rather than mismatched when each one uses the same dot scale and dark shade. If you prefer a calmer manicure, choose two patterns only and repeat them across the hands instead of giving every finger a distinct role. The pale accent nail is useful because it gives the black edges a visual pause and keeps the set from becoming too heavy.
Variety adds interest, but it also means small placement errors are easier to compare. Keep the most detailed variation on one or two nails and let the others be simpler outlines or clean tips. The nude base gives this design room to grow out gracefully, while the dark edges keep the overall look defined enough to feel more intentional than a standard French manicure.
Freeform Magenta Dot Clusters
Medium almond nails in soft pink use deeper magenta dot clusters and curved darker areas rather than a fixed French boundary. The marks gather toward selected edges, which creates movement without making the whole nail uniformly patterned. This feels more spontaneous than a grid of dots, yet the matching pink family keeps it from looking random.
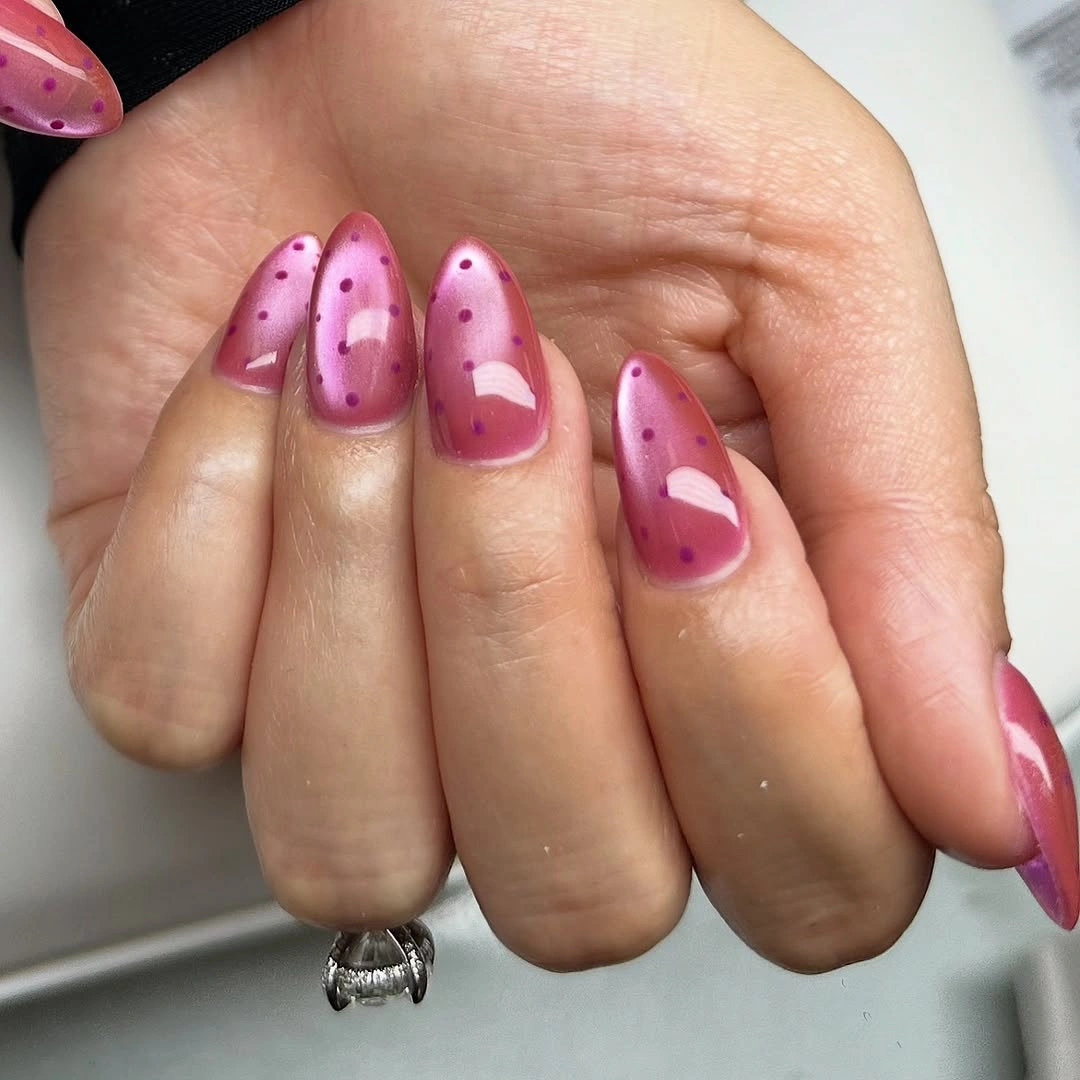
Clustered dots are a nice alternative when you want the idea of polka dots without the formality of even spacing. Keep the deepest color gathered around two or three nails and leave at least one finger relatively open for contrast. A pale base is especially helpful here because it allows the irregular placement to feel airy rather than crowded.
The tradeoff is that freeform designs can appear uneven if every nail uses a different density or direction. Choose one recurring gesture, such as dots curving around the sidewall, and repeat it subtly across the set. This pink version remains wearable because the color contrast stays close; changing the clusters to black would make the same layout feel much more graphic and demanding.
Mauve Nails With Cool Dotted Accents
A muted mauve base is paired with pale blue tips on some nails and darker black-and-white dotted tips on another, creating a cool-toned mix that feels less sweet than pink alone. The long almond shape lets the different tip ideas coexist without becoming visually cramped. Soft mauve keeps the design grounded while the cool details introduce a more directional contrast.
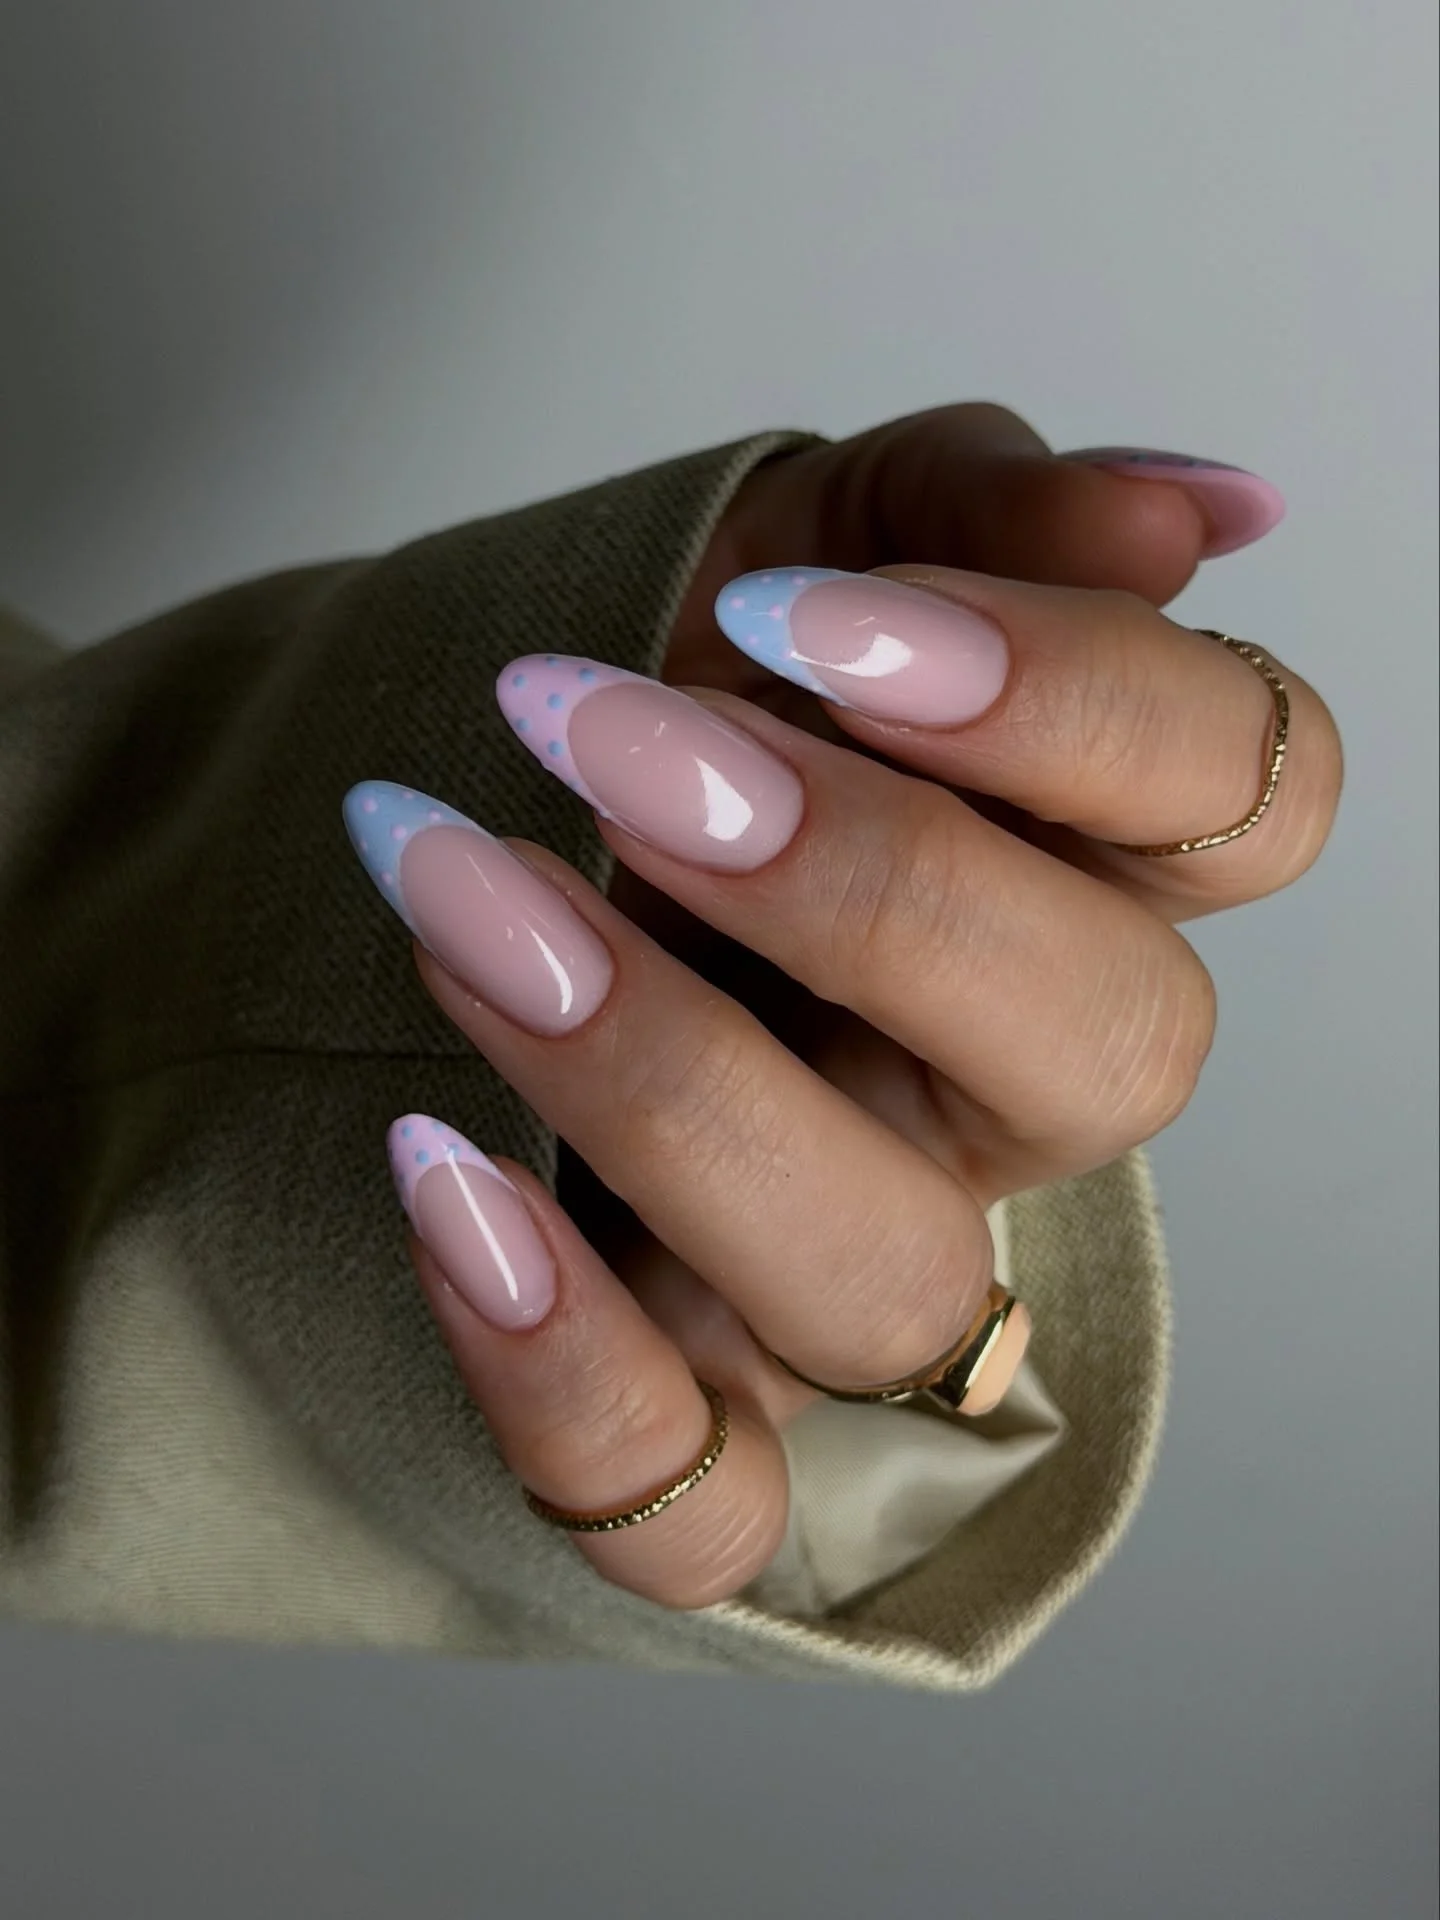
The pale blue is an effective bridge between the mauve base and the black dotted detail because it keeps the palette cool rather than abruptly monochrome. For a simpler take, use blue on all tips and reserve the black dots for two accent nails. Keep the base color muted; a brighter pink would compete with the blue and make the black-and-white dots seem like a separate design entirely.
Mixed cool tips need a little planning so the hand does not look divided into unrelated color groups. Repeat the black outline or a small white dot on more than one finger, even if the blue appears only once or twice. The longer almond silhouette helps the colors stretch gracefully, but shorter nails would benefit from selecting just one cool accent instead of three different tip treatments.
White Dotted Tips With Black Detail
Pale pink almond nails use white French tips scattered with black dots, while one nail introduces a curved black accent that gives the set a sharper punctuation mark. White makes the tips feel brighter and more open than a fully black edge, even though the same graphic dot motif remains present. The result is a balanced black-and-white contrast over a soft pink ground.
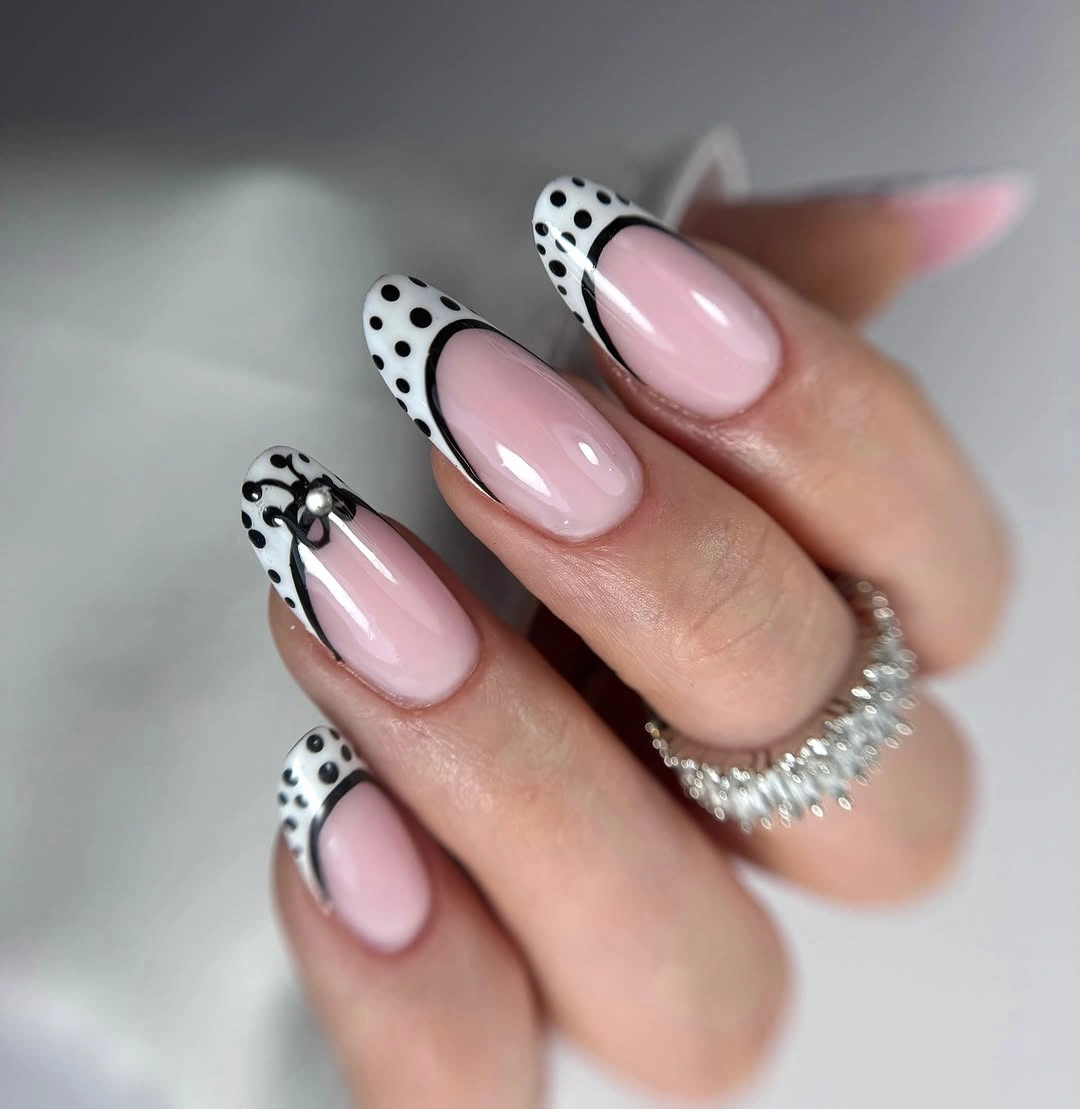
White tips are useful when you want a dotted manicure to feel lighter than a dark French design. The black spots should remain relatively small so the white still reads as the main edge color from a distance. If you prefer less contrast, choose chocolate brown dots instead of black and keep the same soft pink base for a warmer, gentler version.
Because the white edge is visually clean, it will show any discoloration or wear more readily than burgundy or navy. A slightly fuller tip gives the dots enough surface area and can make maintenance less stressful than a very narrow line. Let the curved black accent stay on one finger, where it breaks repetition without turning the manicure into a collection of competing outlines.
Chocolate Micro-Dots on Short Nails
Short rounded nails in glossy dark chocolate brown are scattered with tiny pale dots that resemble a restrained night-sky pattern. The dot scale is much smaller than the earlier pink or French versions, which suits the compact nail shape and keeps the dark base from feeling heavy. The design is simple, but its contrast is clear enough to register without extra accent nails.
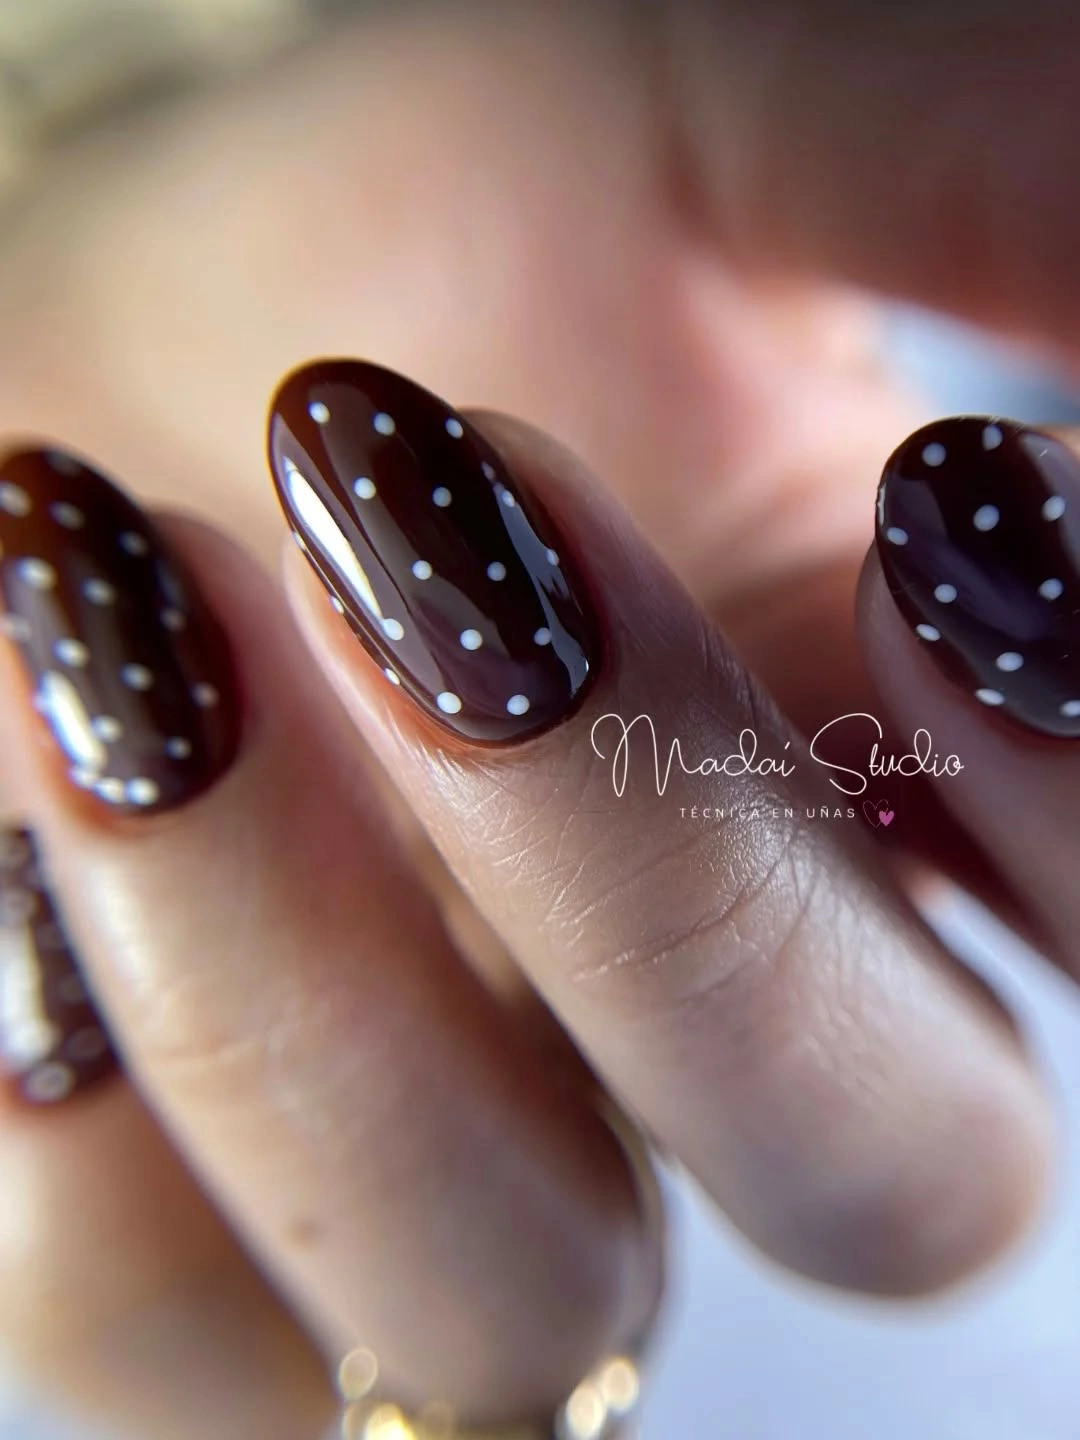
Micro-dots are a practical choice for short nails because they add texture without taking over the limited surface area. If the brown feels too deep, a coffee or warm plum base would keep the same cozy mood while softening the result. Leave the dots scattered rather than perfectly aligned, since a loose placement makes the manicure feel more organic and less like printed fabric.
Dark bases are usually forgiving around the free edge, but the light dots will stand out if they are too large or unevenly distributed. Keep their size consistent and avoid crowding the cuticle line, where the pattern can make grow-out more noticeable. This is one of the easiest designs in the group to adapt for low-key days because the color does most of the work and the dots remain a quiet finish.
Nude Confetti Dots With Tiny Color Pops
A short nude base is sprinkled with very small pink, yellow, blue, and green dots, plus a few gold-like accents, creating a confetti effect that stays light because most of each nail remains bare-looking. The short oval shape keeps the color pops compact and friendly rather than overly busy. This is the most playful palette in the set, yet the natural base gives it room to breathe.
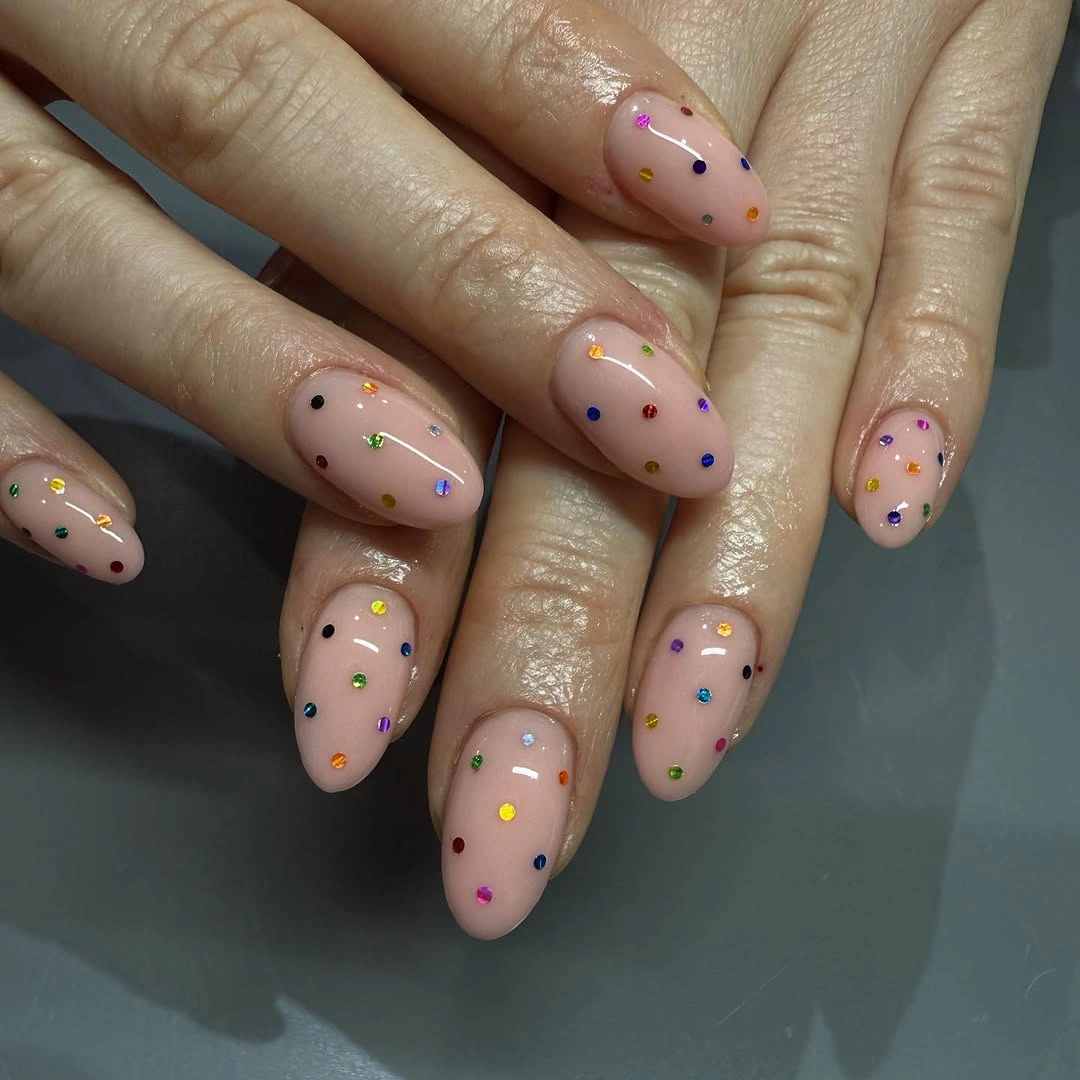
Multiple colors work here because every mark is tiny and no single shade claims the whole nail. For a more restrained version, choose three colors instead of four and leave the gold-like detail out, especially if you wear a lot of rings. A nude base makes this idea easier to pair with different clothes, while a bright base would quickly turn the same dots into a much louder statement.
The main upkeep consideration is density: adding more dots later can make the design look uneven rather than charming. Keep a visible clear margin near the cuticle and sides, then distribute color with a light hand across the center. If you enjoy the playful placement but want a moodier interpretation, the same tiny dots can sit over a cocoa base, connecting this approach to softer polka dot fall nails without copying the palette.