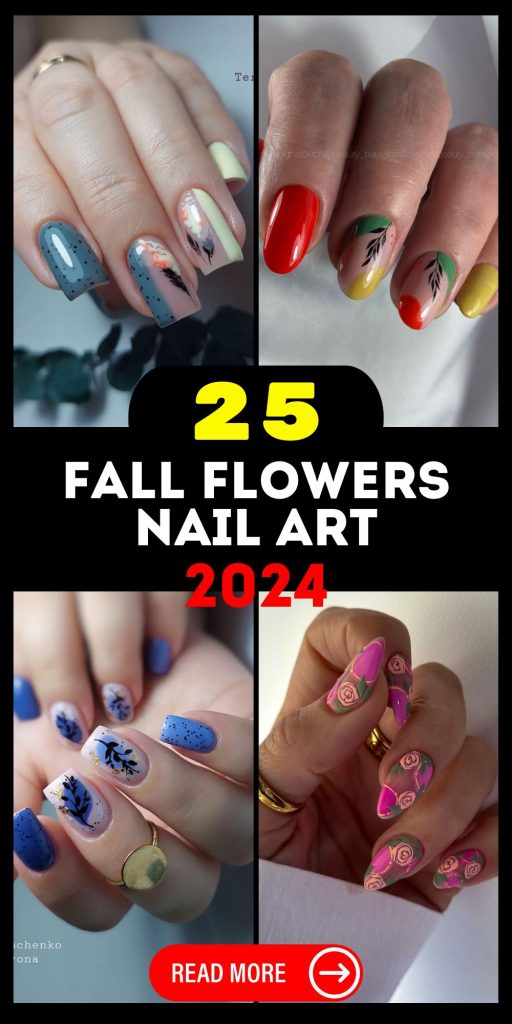
As fall arrives, it’s not just your wardrobe that needs an update but your manicure too. Fall flowers nail art is the perfect way to add a seasonal touch to your look. Have you ever wondered how to adorn your nails with beautiful flowers without spending too much time and money? Are you curious about the designs that will be trending this autumn? In our article, we’ve gathered 25 ideas for fall flowers nail art that suit all nail shapes and lengths—from almond to square and short. Whether you prefer simple designs or intricate 3D art, you’ll find plenty of inspiration here. Let’s dive into the world of fall nail art and get your nails ready for the season!
Warm Autumn Florals
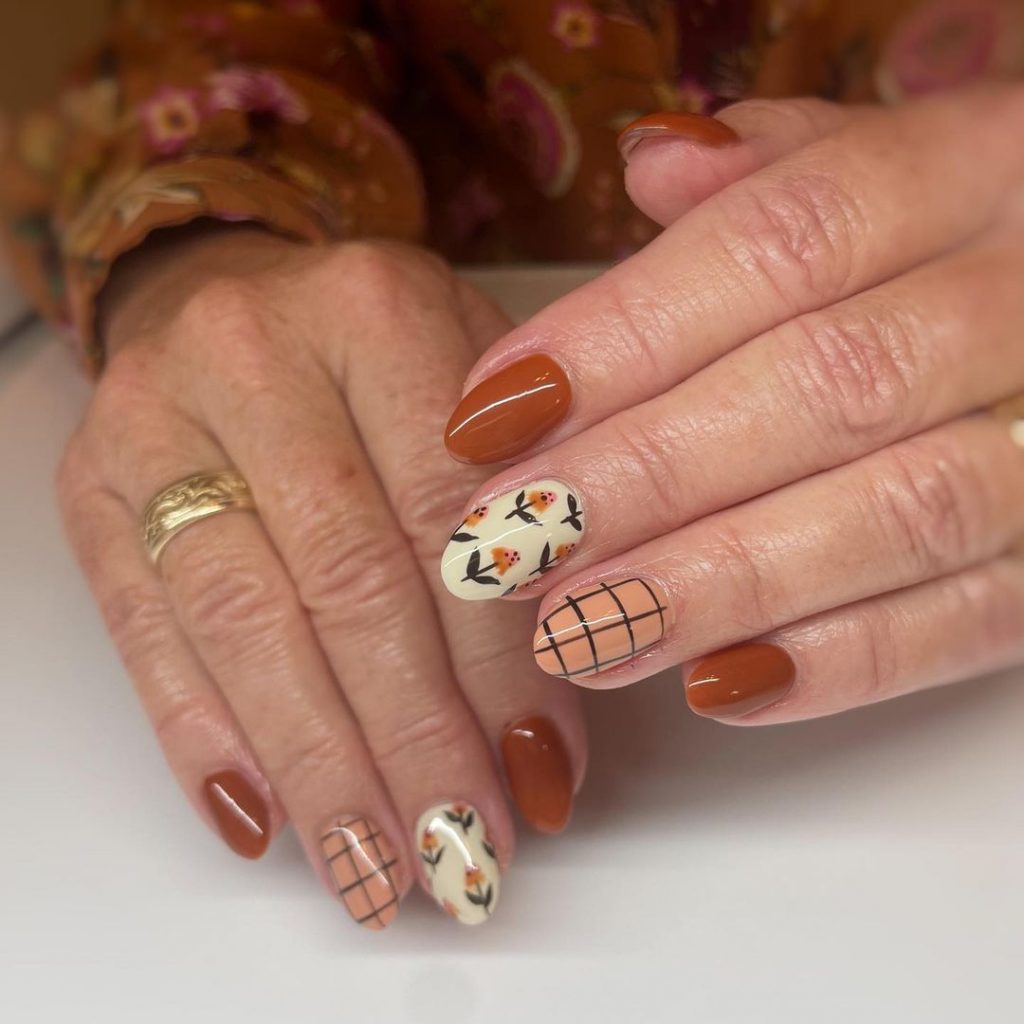
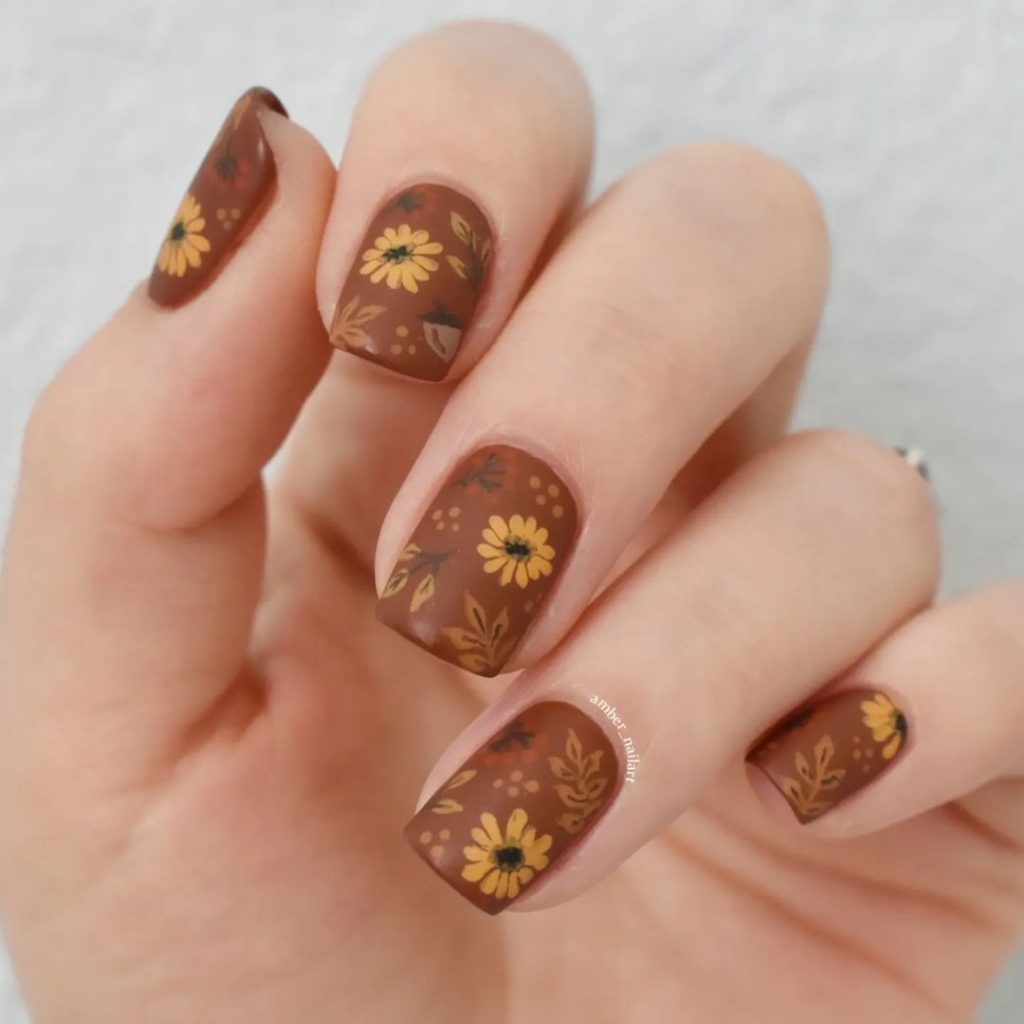
As the leaves change, so do our nail trends, and this warm autumn floral design captures the essence of the season perfectly. The rich brown and burnt orange tones create a cozy and stylish look, while the intricate floral accents add a touch of elegance. The grid pattern adds a modern twist, making this design perfect for those who love a mix of classic and contemporary styles.
Consumables:
- Base Coat: OPI Natural Nail Base Coat
- Nail Polishes: Essie in ‘Playing Koi’ (orange), OPI in ‘Chocolate Moose’ (brown), Zoya in ‘Chantal’ (nude)
- Nail Art Brushes: Detail brush for floral design
- Top Coat: Seche Vite Dry Fast Top Coat
- Grid Nail Stencil: Twinkled T
DIY Instructions:
- Apply a base coat to protect your natural nails.
- Paint your nails with two coats of the orange and brown polishes, alternating nails.
- Use the detail brush to paint the floral designs on the accent nails with the nude polish.
- Apply the grid stencil to another accent nail and fill in with the nude polish.
- Finish with a top coat to seal and protect your design.
Earthy Botanical Mix
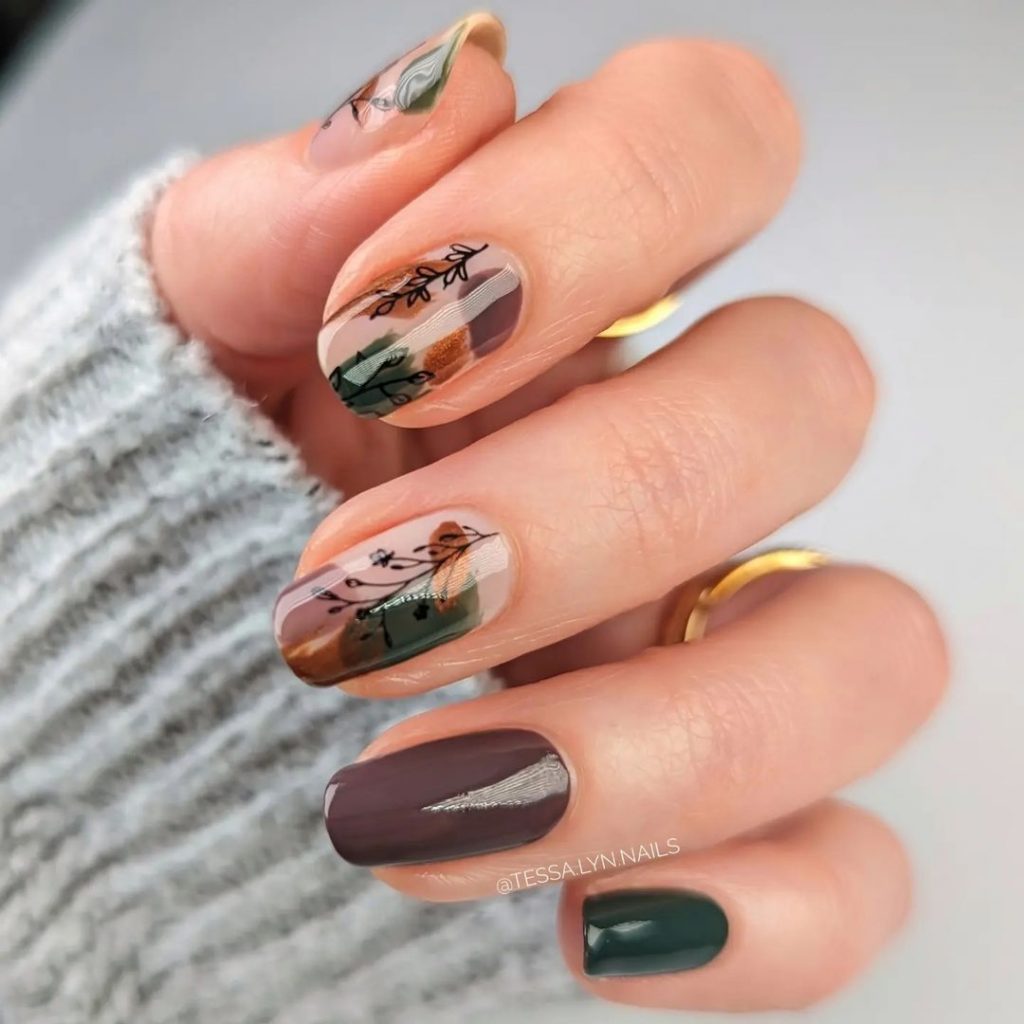
This earthy botanical mix combines various shades of green and brown, with a touch of purple, to create a harmonious and natural look. The layered floral patterns and soft color transitions make it a perfect choice for a sophisticated and understated fall nail art.
Consumables:
- Base Coat: Zoya Naked Manicure Base
- Nail Polishes: Essie in ‘Mossed Over’ (green), OPI in ‘You Don’t Know Jacques’ (brown), China Glaze in ‘Purple Panic’ (purple)
- Nail Art Brushes: Fine liner brush for detailed work
- Top Coat: Sally Hansen Miracle Gel Top Coat
- Stamping Kit: Born Pretty Floral Stamping Plates
DIY Instructions:
- Start with a base coat to ensure a smooth application.
- Apply two coats of green, brown, and purple polishes on different nails.
- Use a fine liner brush to create detailed floral patterns, alternating colors for a layered effect.
- Use the stamping kit for additional floral details on some nails.
- Seal with a top coat to give it a glossy finish.
Delicate Blossoms on Rose Gold
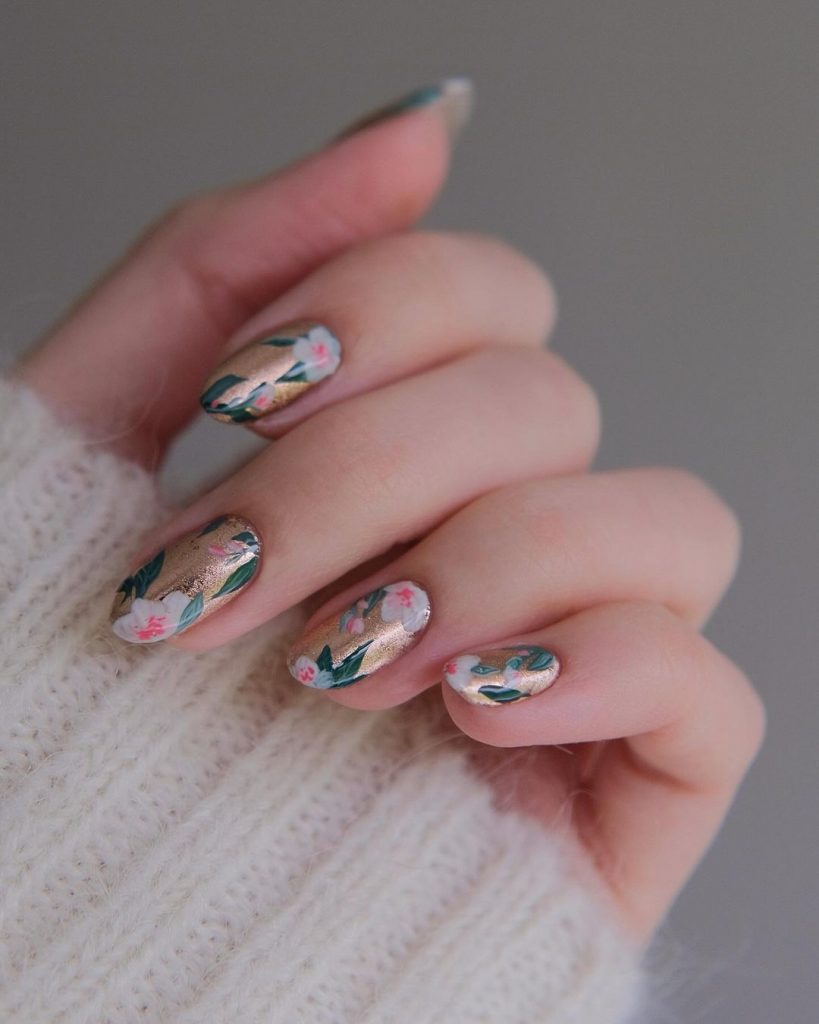
This design showcases delicate blossoms over a rose gold base, creating an elegant and feminine look. The soft pastel colors and intricate floral details make this nail art perfect for a subtle yet chic fall style.
Consumables:
- Base Coat: Deborah Lippmann Gel Lab Base Coat
- Nail Polishes: Sally Hansen in ‘Gilded Rose’ (rose gold), OPI in ‘Mod About You’ (pastel pink), Essie in ‘Blanc’ (white)
- Nail Art Brushes: Ultra-thin detail brush
- Top Coat: Essie Gel Couture Top Coat
- Nail Decals: Floral water decals for added detail
DIY Instructions:
- Apply a base coat to your nails to prep them.
- Paint your nails with two coats of the rose gold polish.
- Use an ultra-thin detail brush to paint small blossoms with pastel pink and white polishes.
- For added detail, apply floral water decals on some nails.
- Finish with a top coat to protect your design and add shine.
White Wildflower Meadow
The white wildflower meadow design is fresh and clean, featuring delicate floral patterns on a pure white base. This look is ideal for those who prefer a minimalist yet sophisticated nail art style.
Consumables:
- Base Coat: Butter London Nail Foundation
- Nail Polishes: Essie in ‘Blanc’ (white)
- Nail Art Brushes: Fine detail brush for precise work
- Top Coat: CND Vinylux Weekly Top Coat
- Nail Stickers: White floral nail stickers for intricate details
DIY Instructions:
- Apply a base coat to create a smooth surface.
- Paint your nails with two coats of the white polish.
- Use a fine detail brush to paint delicate floral patterns with the same white polish for a subtle effect.
- Add white floral nail stickers to enhance the design.
- Seal the design with a top coat for a polished look.
Red Daisies on Nude
This design features vibrant red daisies on a nude base, creating a striking contrast that is both bold and beautiful. The addition of red tips gives it a modern and edgy twist, perfect for the fall season.
Consumables:
- Base Coat: OPI Natural Nail Base Coat
- Nail Polishes: OPI in ‘Dulce de Leche’ (nude), Essie in ‘Russian Roulette’ (red)
- Nail Art Brushes: Detail brush for painting daisies
- Top Coat: Seche Vite Dry Fast Top Coat
- Nail Art Tools: Dotting tool for creating daisy centers
DIY Instructions:
- Start with a base coat to protect your nails.
- Apply two coats of the nude polish for a smooth base.
- Use a detail brush to paint red daisies on the accent nails.
- Create the daisy centers using a dotting tool with the same red polish.
- Add red tips to the remaining nails for a cohesive look.
- Finish with a top coat to seal and protect your nail art.
Elegant Daisy French Tips
This nail design combines classic French tips with delicate daisy accents, creating an elegant and timeless look. The almond shape enhances the sophistication of the design, while the small white daisies add a touch of whimsy and femininity.
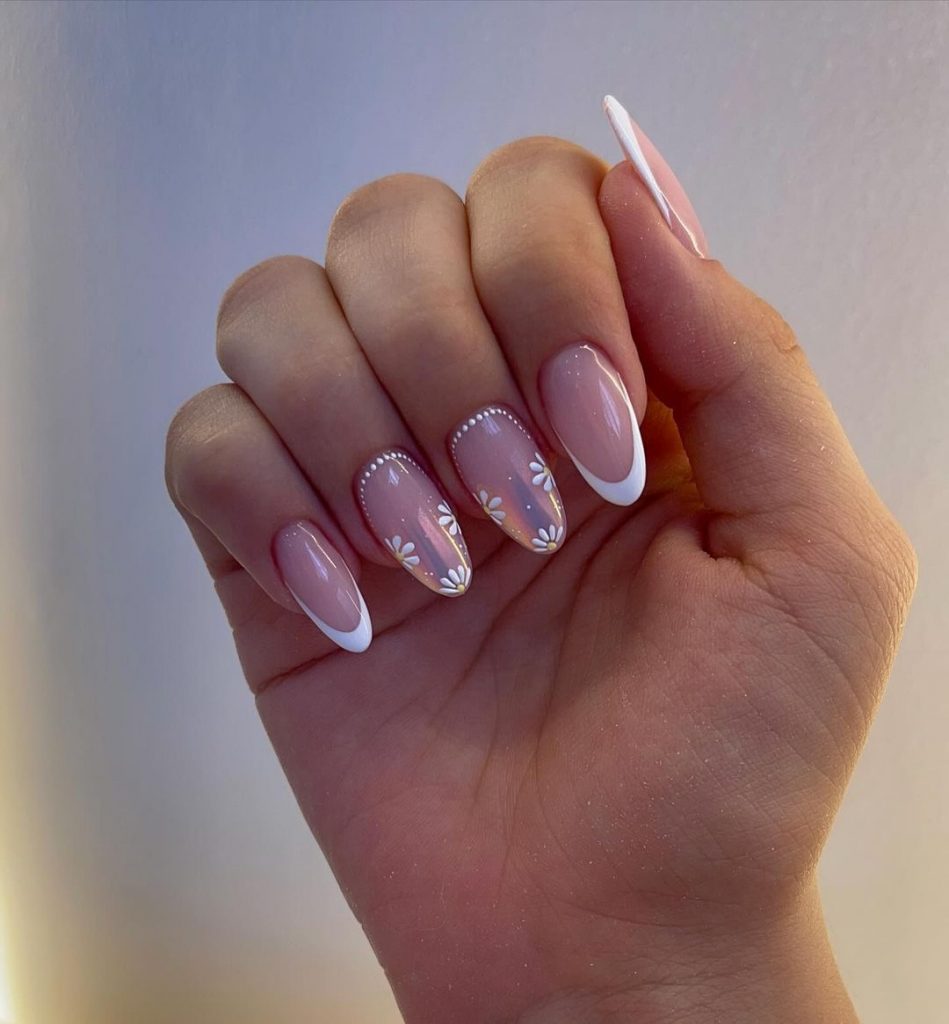
Consumables:
- Base Coat: OPI Nail Envy Original
- Nail Polishes: Essie in ‘Ballet Slippers’ (nude pink), OPI in ‘Alpine Snow’ (white)
- Nail Art Brushes: Fine detail brush for the daisy design
- Top Coat: Seche Vite Dry Fast Top Coat
- Dotting Tool: For creating the daisy centers
DIY Instructions:
- Apply a base coat to protect and strengthen your nails.
- Paint your nails with two coats of the nude pink polish.
- Use the detail brush to create the French tips with the white polish.
- Use the dotting tool and white polish to create small daisy petals on the accent nails.
- Finish with a top coat to seal and protect your design.
Bright Floral Mix
This vibrant design features a mix of colorful flowers on a light base, perfect for those who love a playful and cheerful manicure. The combination of pink, yellow, and blue flowers creates a lively and eye-catching look.
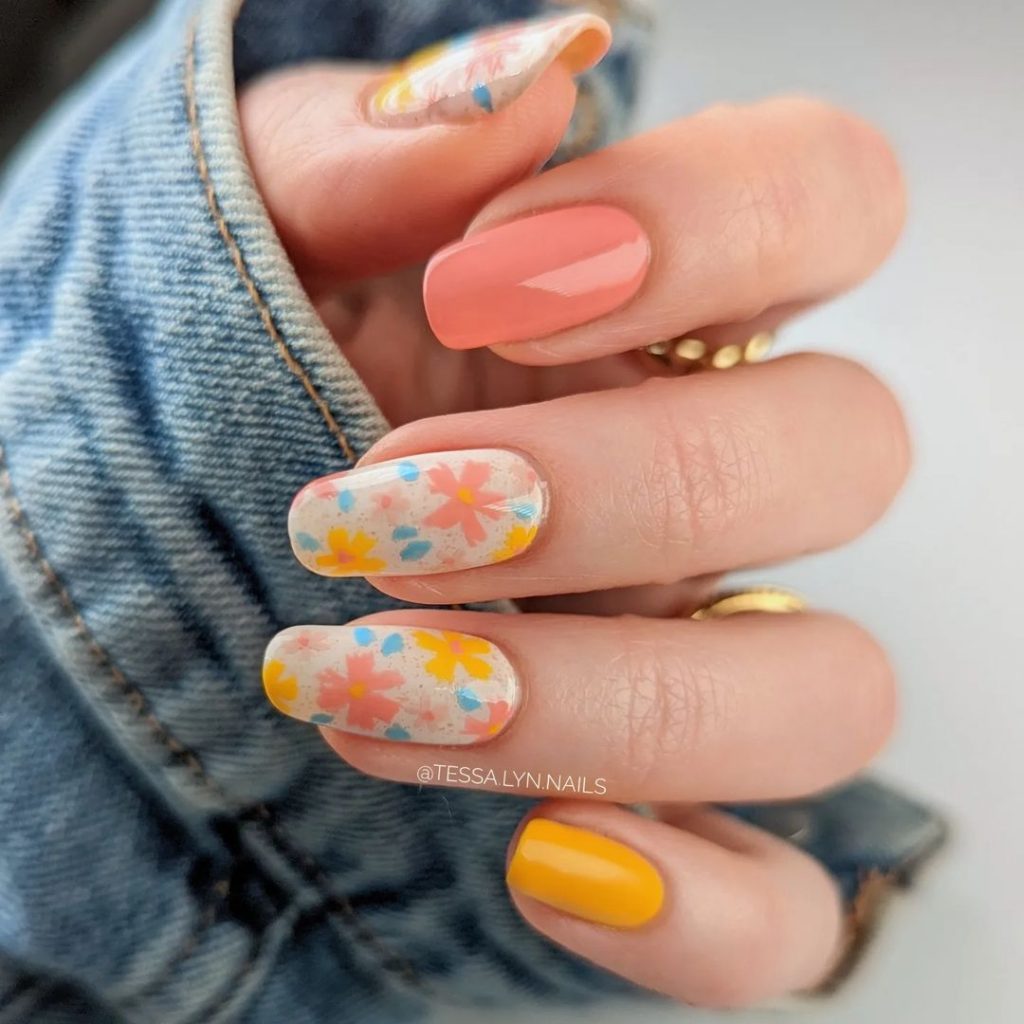
Consumables:
- Base Coat: Essie Strong Start Base Coat
- Nail Polishes: Essie in ‘Mademoiselle’ (light pink), Sally Hansen in ‘Sun Kissed’ (orange), OPI in ‘Need Sunglasses?’ (yellow), Essie in ‘Butler Please’ (blue)
- Nail Art Brushes: Fine detail brush for floral designs
- Top Coat: Sally Hansen Miracle Gel Top Coat
- Stamping Kit: Floral stamping plates for intricate patterns
DIY Instructions:
- Apply a base coat to ensure a smooth and even nail surface.
- Paint your nails with two coats of the light pink polish.
- Use the detail brush to paint the colorful flowers, alternating colors for each flower.
- Use the stamping kit for additional floral details if desired.
- Seal with a top coat to protect your manicure and add a glossy finish.
Earthy Brown Floral
This design features a rich brown base with delicate yellow and orange floral accents, capturing the essence of fall. The matte finish adds a modern twist, making this design perfect for those who love a sophisticated yet earthy look.
Consumables:
- Base Coat: Orly Bonder Rubberized Base Coat
- Nail Polishes: OPI in ‘Chocolate Moose’ (brown), Essie in ‘Meet Me At Sunset’ (orange), Zoya in ‘Bee’ (yellow)
- Nail Art Brushes: Ultra-fine detail brush for precise floral work
- Top Coat: Essie Matte About You Matte Finisher
- Nail Stickers: Optional for adding extra floral details
DIY Instructions:
- Apply a base coat to prepare your nails.
- Paint your nails with two coats of the brown polish.
- Use the ultra-fine detail brush to paint the yellow and orange flowers on the accent nails.
- Add nail stickers for additional detail if desired.
- Finish with a matte top coat to complete the look.
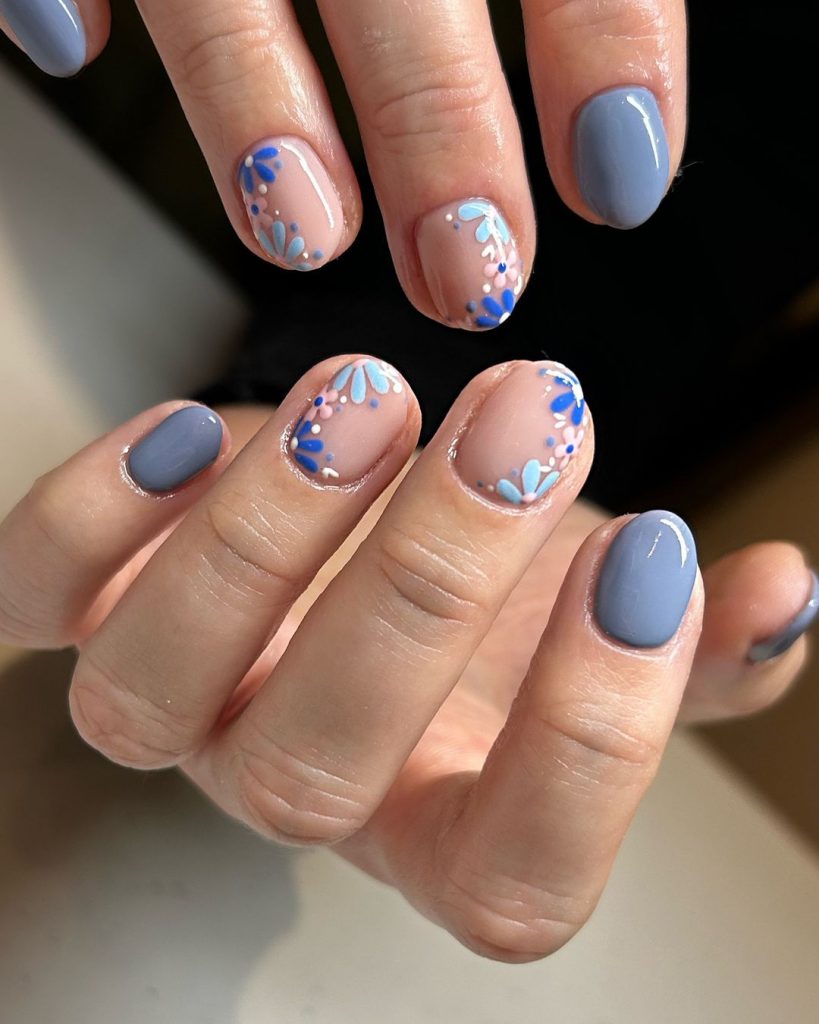
Blue and Nude Blossoms
This design features soft blue and nude tones with delicate floral accents. The flowers are painted in varying shades of blue, creating a harmonious and calming look. The short nail length adds to the overall elegance and simplicity of this design.
Consumables:
- Base Coat: Butter London Nail Foundation
- Nail Polishes: Essie in ‘Ballet Slippers’ (nude), OPI in ‘It’s a Boy!’ (light blue), Essie in ‘Butler Please’ (blue)
- Nail Art Brushes: Detail brush for floral designs
- Top Coat: Seche Vite Dry Fast Top Coat
- Dotting Tool: For creating flower centers
DIY Instructions:
- Apply a base coat to ensure a smooth surface.
- Paint your nails with two coats of the nude polish.
- Use the detail brush to paint the flowers in varying shades of blue on the accent nails.
- Create the flower centers with a dotting tool and blue polish.
- Finish with a top coat to seal and protect your design.
Pastel Garden
This nail design features a pastel pink base with detailed floral artwork, creating a beautiful garden effect on your nails. The mix of flowers and leaves in soft colors makes this design perfect for a gentle and romantic fall look.
Consumables:
- Base Coat: OPI Natural Nail Base Coat
- Nail Polishes: Essie in ‘Fiji’ (pastel pink), OPI in ‘Do You Lilac It?’ (lilac), Zoya in ‘Neely’ (mint green)
- Nail Art Brushes: Fine detail brush for intricate designs
- Top Coat: Sally Hansen Insta-Dri Top Coat
- Nail Decals: Floral decals for added detail
DIY Instructions:
- Apply a base coat to protect your nails.
- Paint your nails with two coats of the pastel pink polish.
- Use the detail brush to paint flowers and leaves in lilac and mint green on the accent nails.
- Apply floral decals for additional detail if desired.
- Finish with a top coat to seal and protect your design.
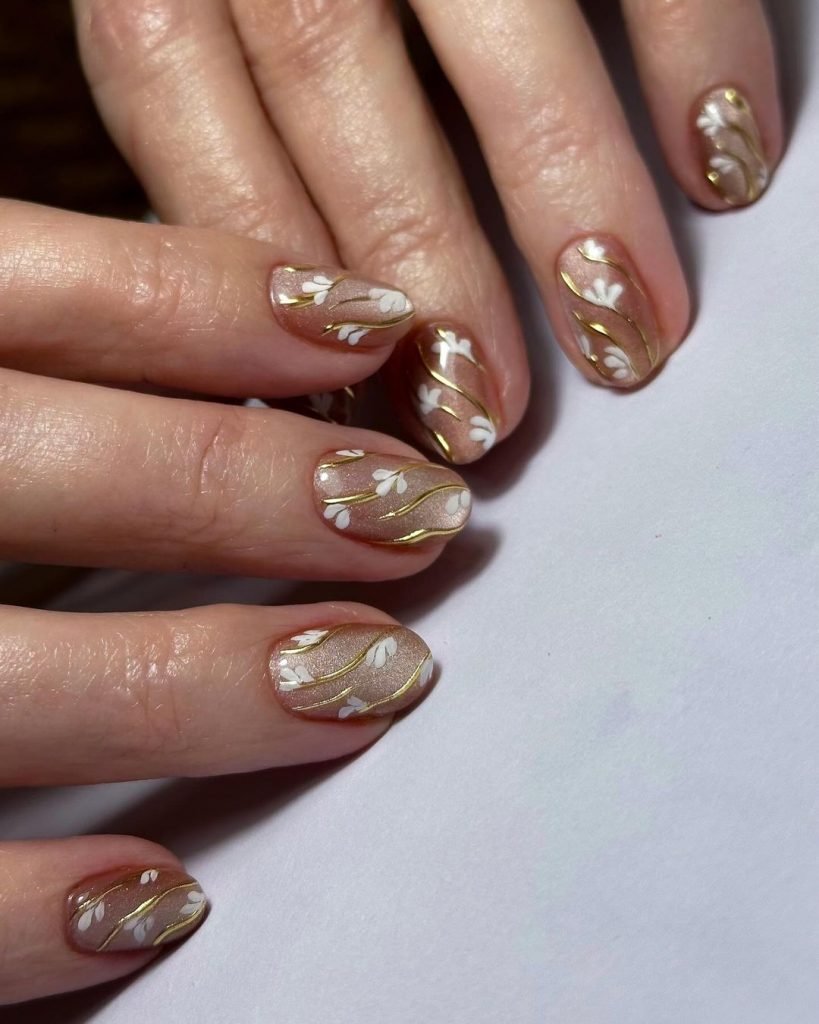
Golden White Florals
This sophisticated design features a soft nude base adorned with delicate white florals and elegant golden accents. The flowing golden lines add a touch of luxury, making this manicure perfect for special occasions or an elegant everyday look.
Consumables:
- Base Coat: Zoya Anchor Base Coat
- Nail Polishes: Essie in ‘Bare With Me’ (nude), OPI in ‘Alpine Snow’ (white), China Glaze in ‘Goldie But Goodie’ (gold)
- Nail Art Brushes: Fine liner brush for golden accents and white flowers
- Top Coat: Seche Vite Dry Fast Top Coat
DIY Instructions:
- Apply a base coat to protect your nails.
- Paint your nails with two coats of the nude polish.
- Use a fine liner brush to create flowing golden lines on each nail.
- Paint small white flowers along the golden lines using a detail brush.
- Seal the design with a top coat to ensure longevity and shine.
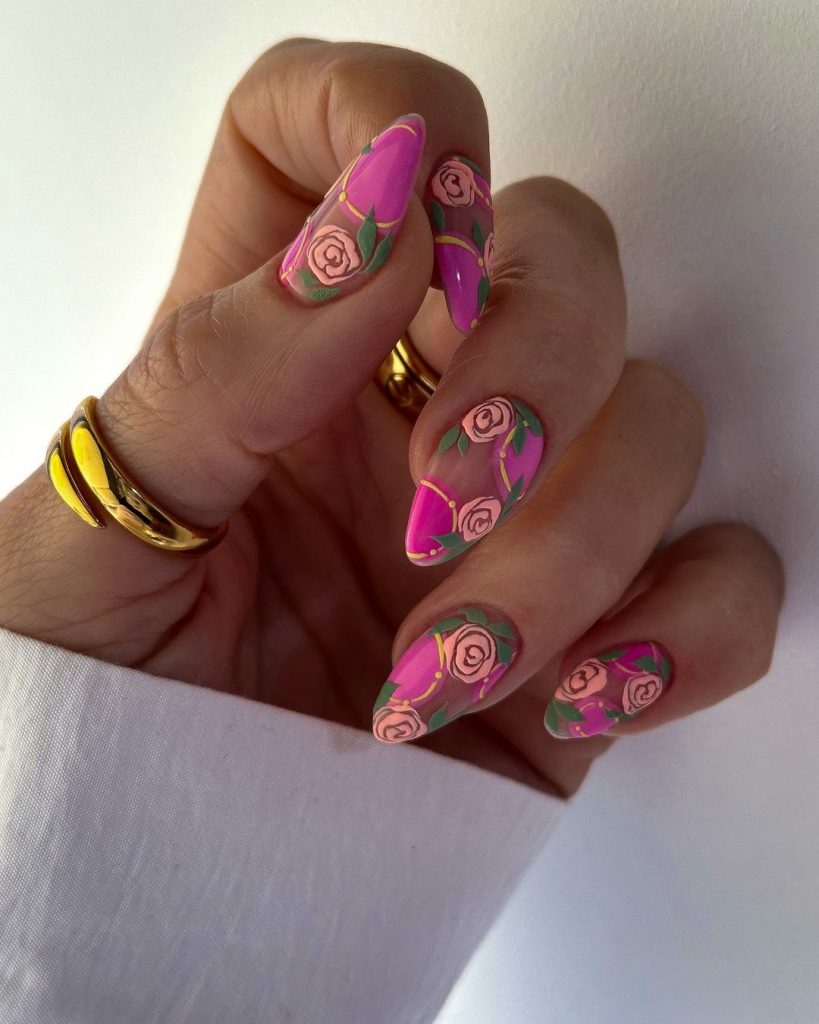
Bold Pink Roses
This vibrant design features bold pink and peach roses on a nude base, making a statement with its striking color contrast. The almond shape and intricate rose details add a touch of sophistication and modern flair.
Consumables:
- Base Coat: OPI Natural Nail Base Coat
- Nail Polishes: Essie in ‘Ballet Slippers’ (nude), OPI in ‘Hotter than You Pink’ (pink), Essie in ‘Peach Daiquiri’ (peach)
- Nail Art Brushes: Fine detail brush for painting roses
- Top Coat: Sally Hansen Miracle Gel Top Coat
DIY Instructions:
- Start with a base coat to prepare your nails.
- Paint your nails with two coats of the nude polish.
- Use a detail brush to paint the roses in pink and peach on the accent nails.
- Add green leaves around the roses for a more realistic effect.
- Finish with a top coat to seal and protect your design.
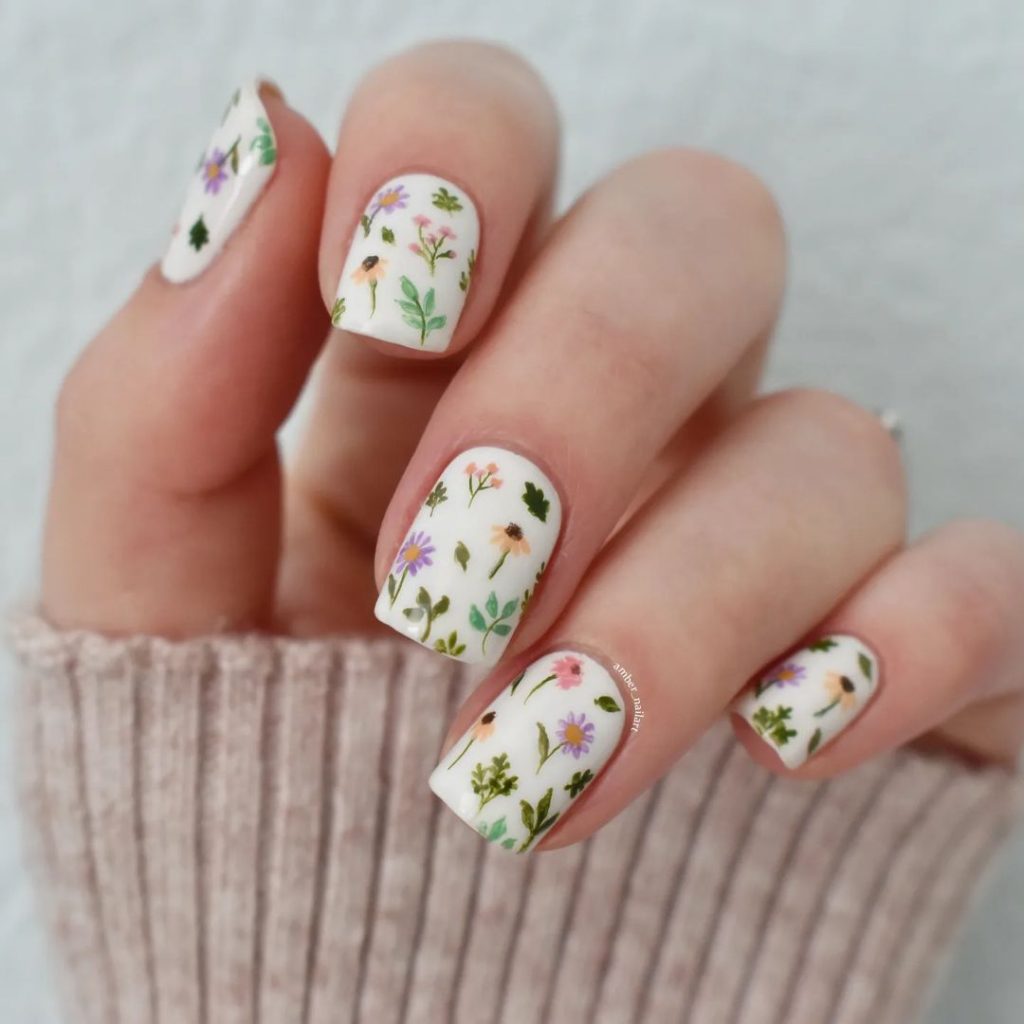
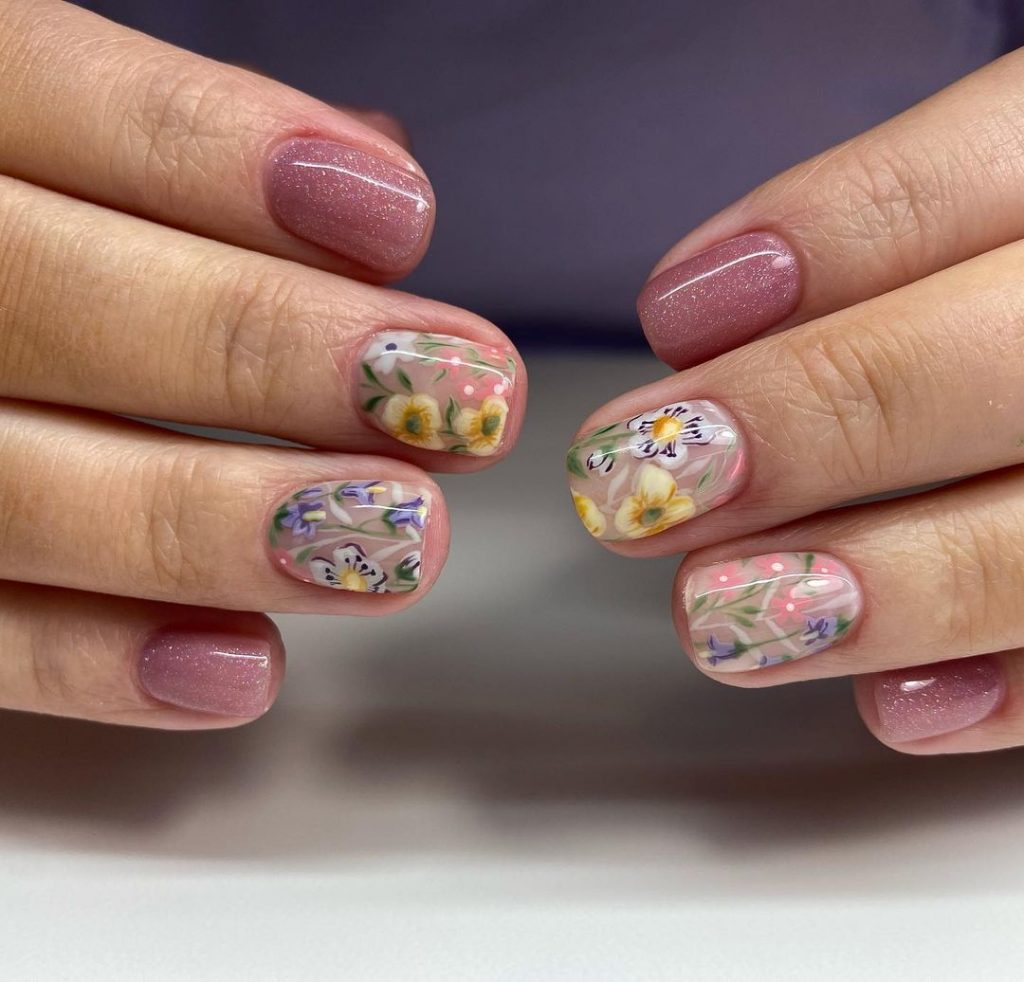
Wildflower Garden
This design showcases a beautiful array of wildflowers on a clear base, creating a whimsical and delicate look. The variety of colors and floral patterns gives the impression of a blooming garden, perfect for a subtle yet eye-catching manicure.

Consumables:
- Base Coat: Orly Bonder Rubberized Base Coat
- Nail Polishes: Essie in ‘Mademoiselle’ (sheer pink), Various colors for the flowers (yellow, purple, white, green)
- Nail Art Brushes: Ultra-thin detail brush for painting flowers
- Top Coat: CND Vinylux Weekly Top Coat
DIY Instructions:
- Apply a base coat to create a smooth surface.
- Paint your nails with one coat of the sheer pink polish.
- Use an ultra-thin detail brush to paint various wildflowers on each nail.
- Add green stems and leaves to complete the garden look.
- Seal with a top coat to protect your manicure and add a glossy finish.
Green Elegance
This elegant design features deep green nails with delicate white and green floral accents, creating a sophisticated and modern look. The combination of solid green and intricate floral designs adds depth and interest to this manicure.

Consumables:
- Base Coat: Deborah Lippmann Gel Lab Base Coat
- Nail Polishes: Essie in ‘Off Tropic’ (green), OPI in ‘Alpine Snow’ (white), Essie in ‘Mint Candy Apple’ (light green)
- Nail Art Brushes: Fine detail brush for floral designs
- Top Coat: Essie Gel Couture Top Coat
DIY Instructions:
- Apply a base coat to protect your nails.
- Paint your nails with two coats of the green polish.
- Use a detail brush to paint white and light green flowers on the accent nails.
- Add small dots and lines to enhance the floral design.
- Finish with a top coat to seal and protect your design.
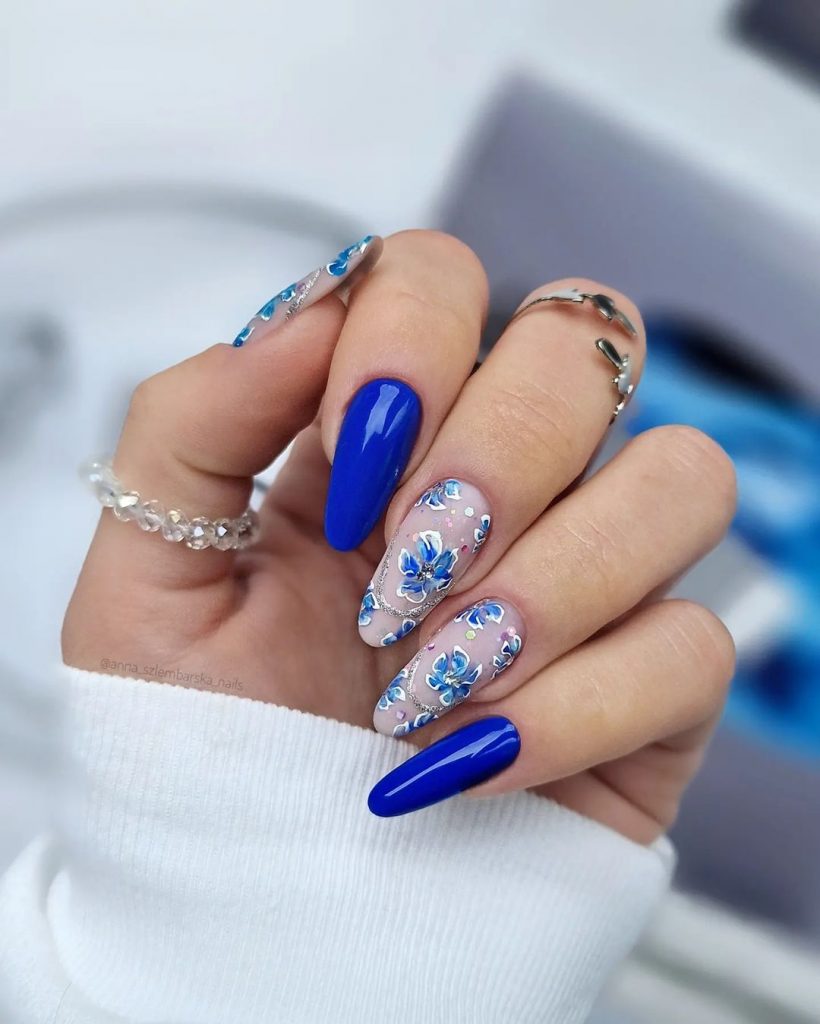
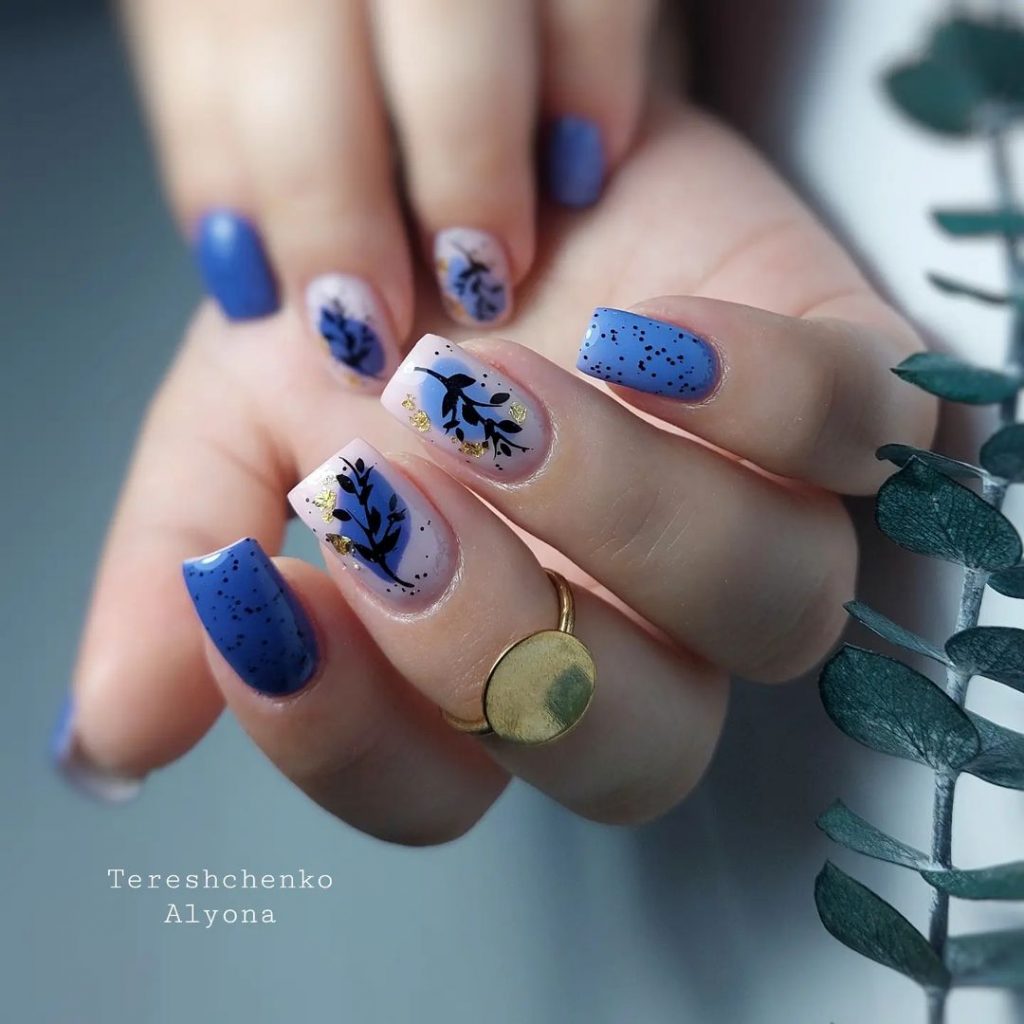
Royal Blue Florals
This striking design features royal blue nails with intricate blue floral accents on a clear base. The bold blue color and detailed floral artwork create a regal and eye-catching manicure perfect for any occasion.
Consumables:
- Base Coat: OPI Nail Envy Original
- Nail Polishes: Essie in ‘Aruba Blue’ (royal blue), China Glaze in ‘White on White’ (white), Various shades of blue for the flowers
- Nail Art Brushes: Fine detail brush for painting flowers
- Top Coat: Seche Vite Dry Fast Top Coat
DIY Instructions:
- Apply a base coat to prepare your nails.
- Paint your nails with two coats of the royal blue polish.
- Use a detail brush to paint blue flowers on the accent nails.
- Add white accents to the flowers for more dimension.
- Seal with a top coat to protect your design and add shine.
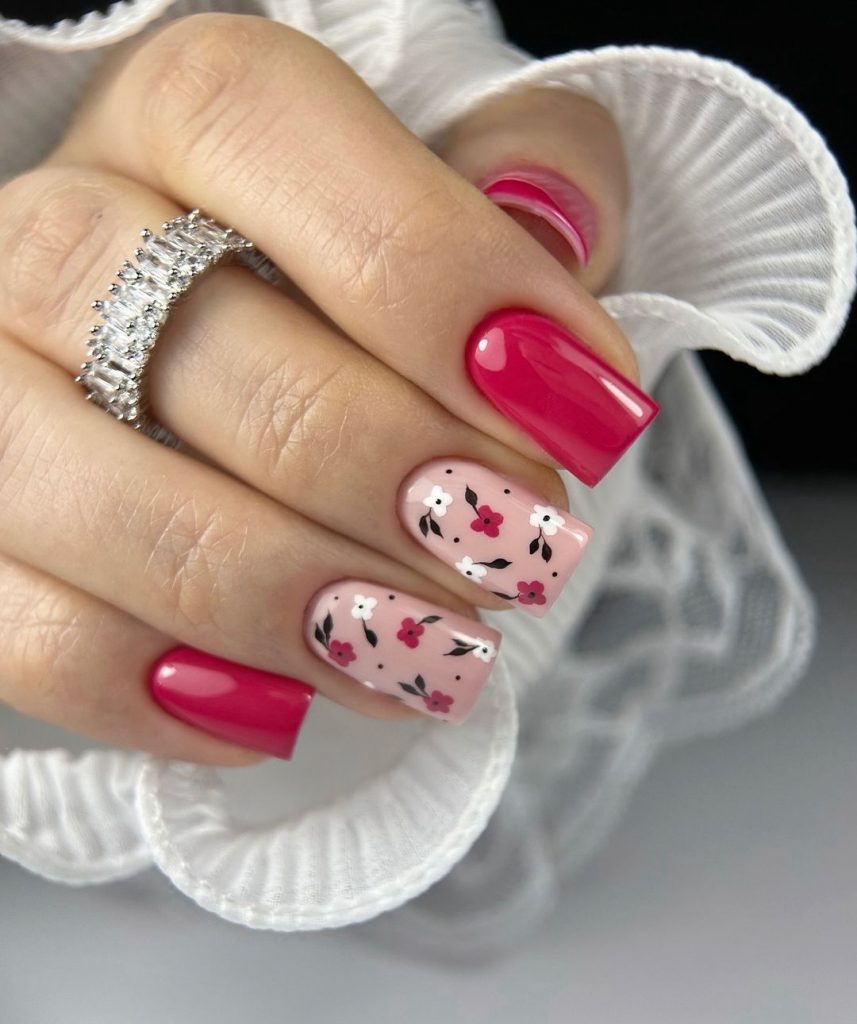
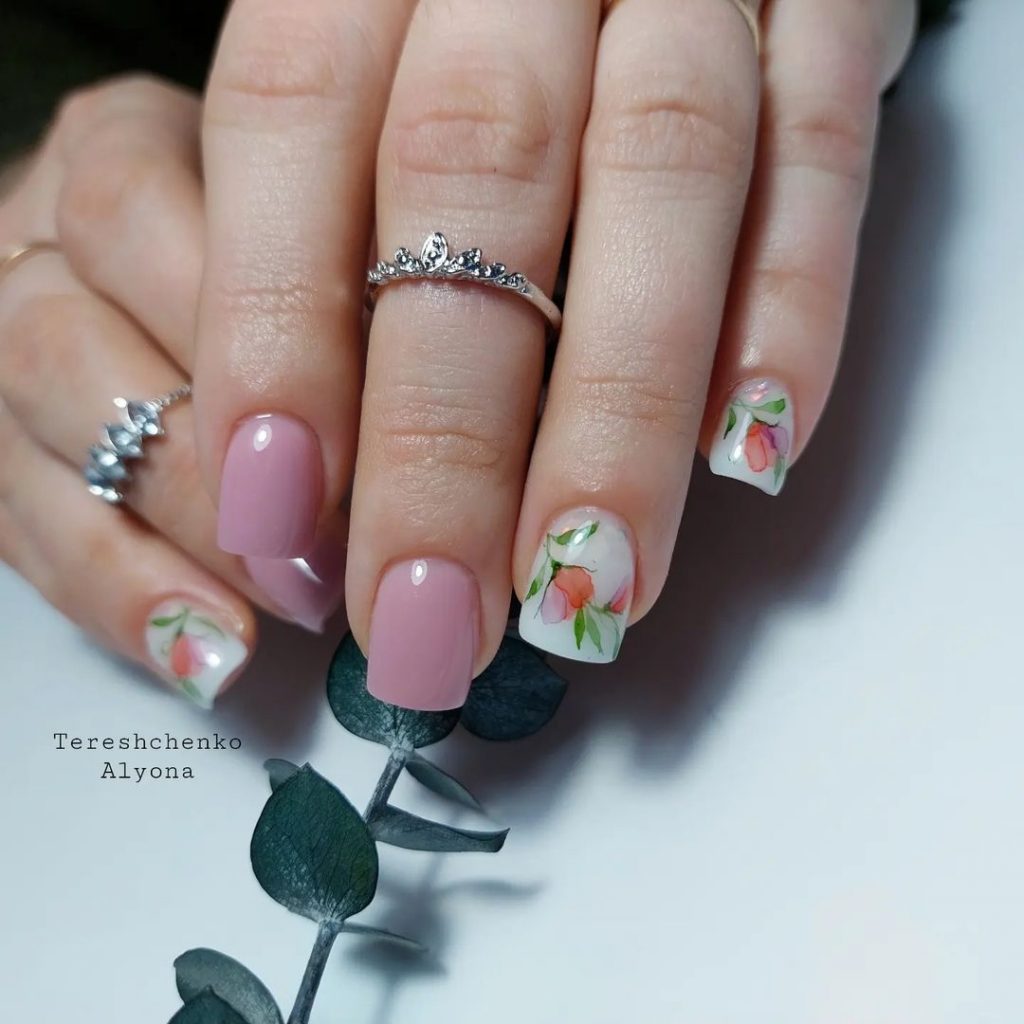
Pink and White Florals
This charming design features a bright pink base with delicate white and pink floral accents. The contrast between the vibrant pink and the soft floral details creates a playful and elegant look, perfect for adding a pop of color to your fall manicure.
Consumables:
- Base Coat: OPI Natural Nail Base Coat
- Nail Polishes: Essie in ‘Ballet Slippers’ (light pink), OPI in ‘Charged Up Cherry’ (bright pink)
- Nail Art Brushes: Fine detail brush for floral designs
- Top Coat: Seche Vite Dry Fast Top Coat
DIY Instructions:
- Apply a base coat to protect your nails.
- Paint your nails with two coats of the bright pink polish.
- Use a detail brush to paint the small white and pink flowers on the accent nails.
- Add black leaves for a bold contrast.
- Finish with a top coat to seal and protect your design.
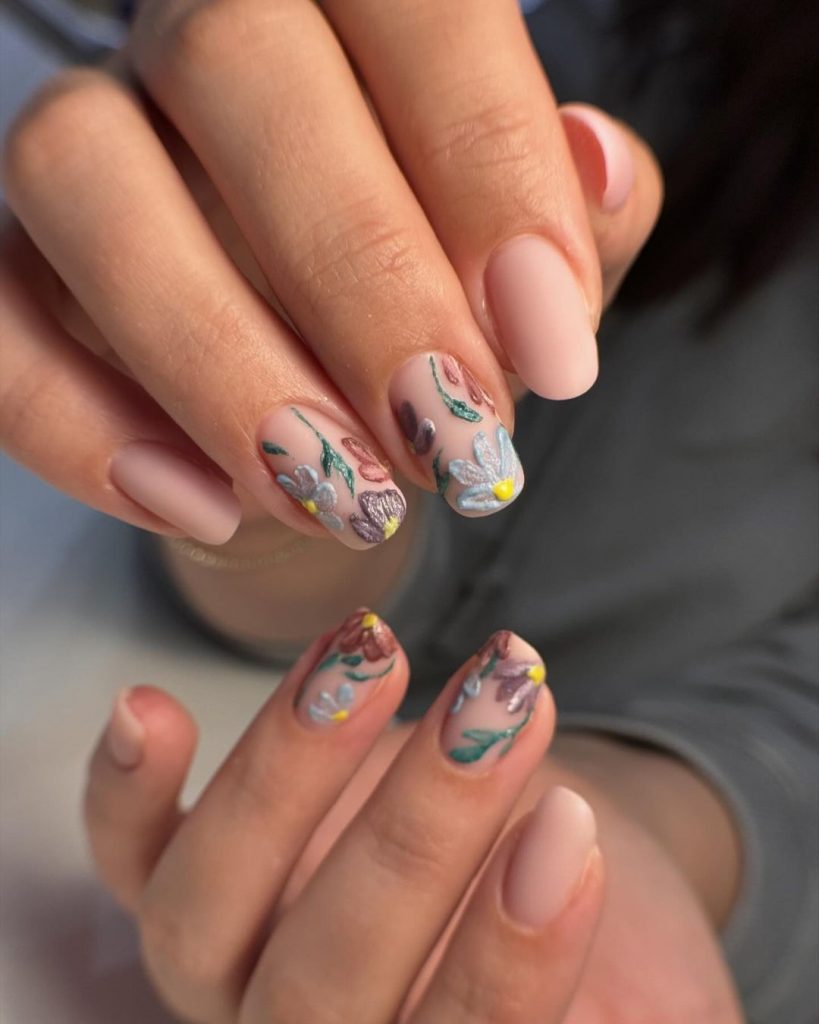
Pastel Embroidered Florals
This design showcases pastel flowers that resemble intricate embroidery on a soft matte base. The combination of delicate flowers in various pastel shades and a matte finish creates a dreamy and sophisticated look.
Consumables:
- Base Coat: Deborah Lippmann Gel Lab Base Coat
- Nail Polishes: OPI in ‘Bubble Bath’ (nude), Various pastel shades for the flowers (purple, pink, blue, yellow)
- Nail Art Brushes: Ultra-thin detail brush for precise work
- Top Coat: Essie Matte About You Matte Finisher
DIY Instructions:
- Apply a base coat to ensure a smooth surface.
- Paint your nails with two coats of the nude polish.
- Use an ultra-thin detail brush to paint the flowers in pastel shades on the accent nails.
- Add green stems and leaves for a more realistic effect.
- Finish with a matte top coat to complete the look.
Red Blossoms on Almond Nails
This striking design features red blossoms on a nude base with almond-shaped nails. The bright red flowers create a vibrant and eye-catching contrast against the nude background, making it perfect for a bold fall manicure.

Consumables:
- Base Coat: Orly Bonder Rubberized Base Coat
- Nail Polishes: Essie in ‘Mademoiselle’ (nude), OPI in ‘Big Apple Red’ (red)
- Nail Art Brushes: Fine detail brush for painting flowers
- Top Coat: Sally Hansen Insta-Dri Top Coat
DIY Instructions:
- Apply a base coat to protect your nails.
- Paint your nails with two coats of the nude polish.
- Use a detail brush to paint the red blossoms on each nail.
- Add green leaves for contrast and a more natural look.
- Seal with a top coat to protect your design and add shine.
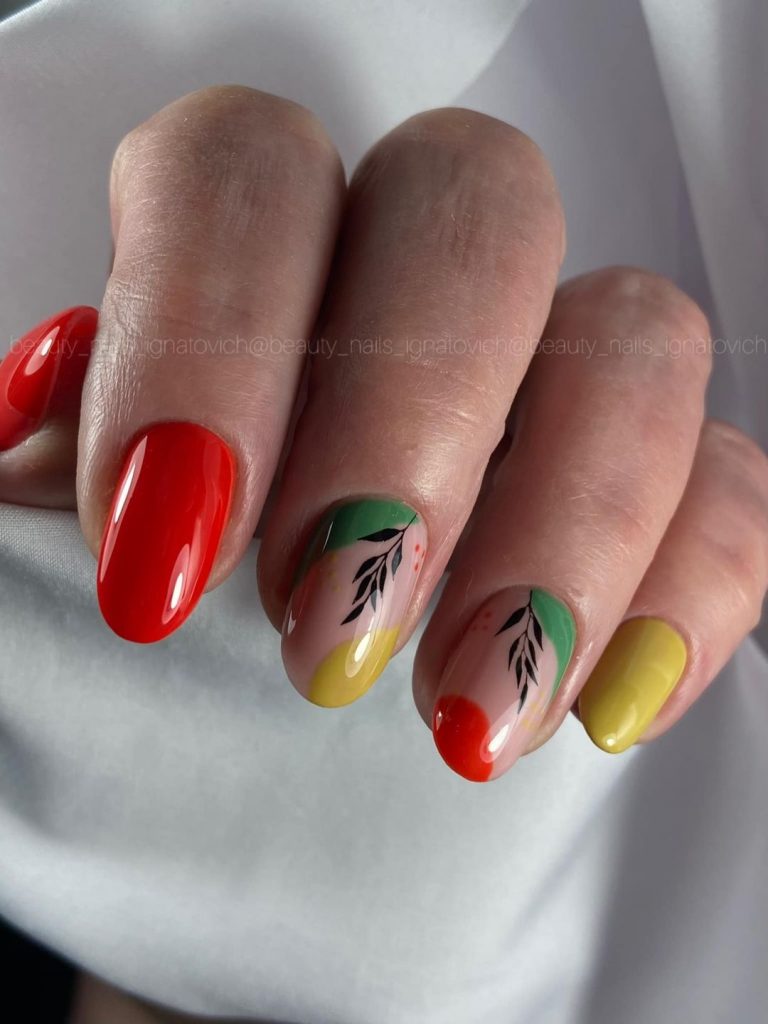
Bold Color Block Florals
This unique design combines bold color blocks with delicate floral accents. The vibrant red, green, and yellow colors create a striking look, while the black floral accents add a touch of sophistication.
Consumables:
- Base Coat: Zoya Anchor Base Coat
- Nail Polishes: Essie in ‘Geranium’ (red), OPI in ‘I’m Not Really a Waitress’ (green), China Glaze in ‘Happy Go Lucky’ (yellow)
- Nail Art Brushes: Fine liner brush for floral accents
- Top Coat: CND Vinylux Weekly Top Coat
DIY Instructions:
- Apply a base coat to protect your nails.
- Paint your nails with the bold color blocks, alternating between red, green, and yellow.
- Use a fine liner brush to add black floral accents to the color blocks.
- Finish with a top coat to seal and protect your design.
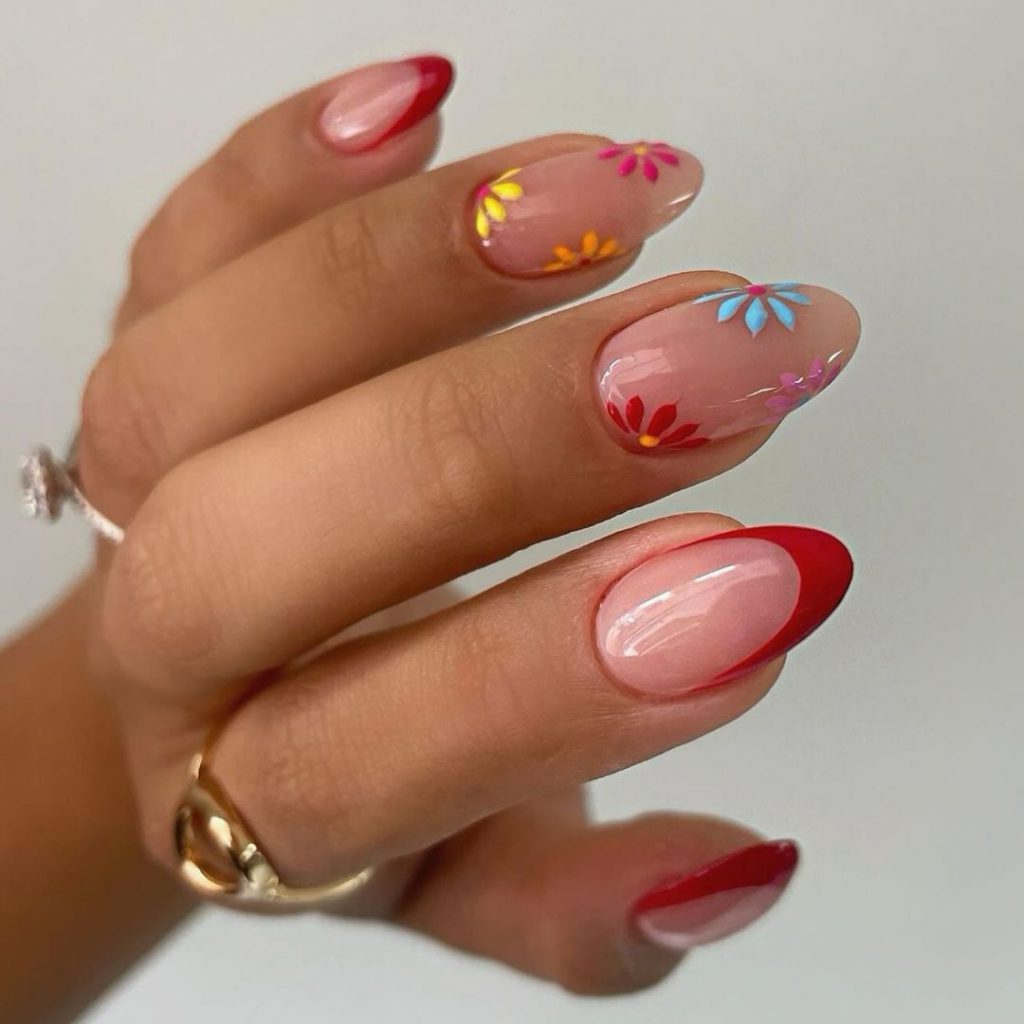
Multicolored Daisy Tips
This delightful design features multicolored daisy tips on a nude base. The bright and cheerful colors of the daisies create a fun and whimsical look, perfect for adding a playful touch to your fall manicure.
Consumables:
- Base Coat: OPI Nail Envy Original
- Nail Polishes: Essie in ‘Ballet Slippers’ (nude), Various bright colors for the daisies (yellow, red, green, white)
- Nail Art Brushes: Fine detail brush for painting daisies
- Top Coat: Seche Vite Dry Fast Top Coat
DIY Instructions:
- Apply a base coat to protect your nails.
- Paint your nails with two coats of the nude polish.
- Use a detail brush to paint the daisy tips in various bright colors on each nail.
- Add white dots around the daisies for added detail.
- Seal with a top coat to protect your design and add shine.
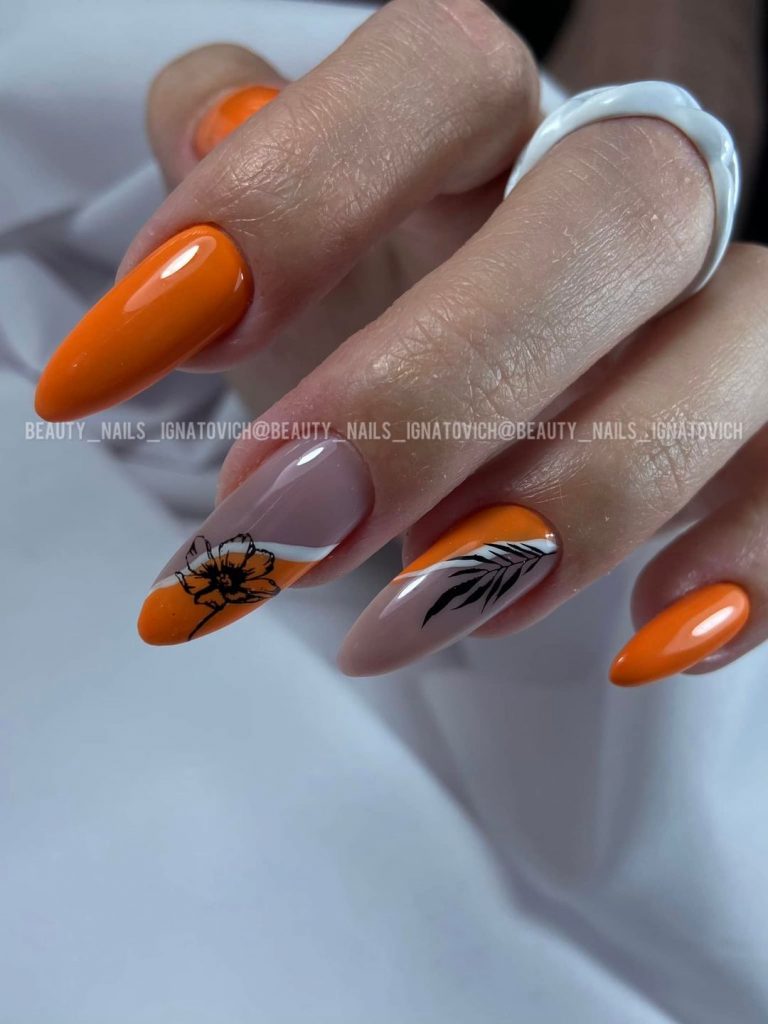
Vibrant Orange and Nude Florals
This striking design features vibrant orange nails with delicate floral accents on a nude base. The bold orange color is perfect for fall, while the black and white floral details add a sophisticated touch.
Consumables:
- Base Coat: OPI Nail Envy Original
- Nail Polishes: Essie in ‘Ballet Slippers’ (nude), OPI in ‘A Good Man-darin is Hard to Find’ (orange), OPI in ‘Alpine Snow’ (white)
- Nail Art Brushes: Fine detail brush for floral designs
- Top Coat: Seche Vite Dry Fast Top Coat
DIY Instructions:
- Apply a base coat to protect your nails.
- Paint your nails with two coats of the orange polish, leaving some nails for the nude base.
- Use a detail brush to paint black and white floral accents on the nude nails.
- Add a thin white stripe to enhance the design.
- Seal with a top coat to protect your design and add shine.
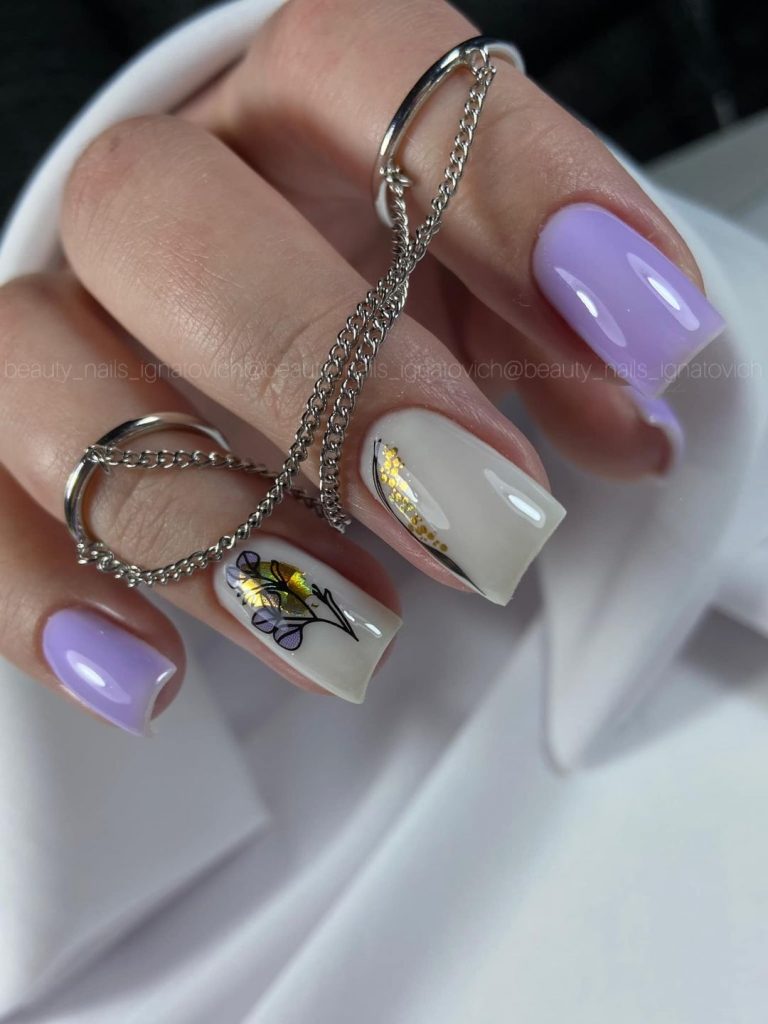
Lilac and Yellow Elegance
This elegant design features a soft lilac base with delicate yellow and purple floral accents. The combination of pastel colors and intricate details creates a sophisticated and charming look.
Consumables:
- Base Coat: Zoya Anchor Base Coat
- Nail Polishes: Essie in ‘Lilacism’ (lilac), OPI in ‘I Just Can’t Cope-acabana’ (yellow)
- Nail Art Brushes: Fine detail brush for painting flowers
- Top Coat: Essie Gel Couture Top Coat
DIY Instructions:
- Apply a base coat to ensure a smooth surface.
- Paint your nails with two coats of the lilac polish.
- Use a detail brush to paint the yellow and purple flowers on the accent nails.
- Add green leaves for a more realistic effect.
- Finish with a top coat to seal and protect your design.
Blue and Gold Florals
This design combines a soft blue base with striking black and gold floral accents. The mix of blue and gold creates a luxurious and modern look, perfect for a stylish fall manicure.
Consumables:
- Base Coat: Deborah Lippmann Gel Lab Base Coat
- Nail Polishes: Essie in ‘Bikini So Teeny’ (blue), OPI in ‘Black Onyx’ (black), China Glaze in ‘Goldie But Goodie’ (gold)
- Nail Art Brushes: Ultra-thin detail brush for precise work
- Top Coat: Sally Hansen Insta-Dri Top Coat
DIY Instructions:
- Apply a base coat to prepare your nails.
- Paint your nails with two coats of the blue polish.
- Use an ultra-thin detail brush to paint black and gold floral accents on the accent nails.
- Add small gold dots for extra detail.
- Seal with a top coat to protect your manicure and add a glossy finish.
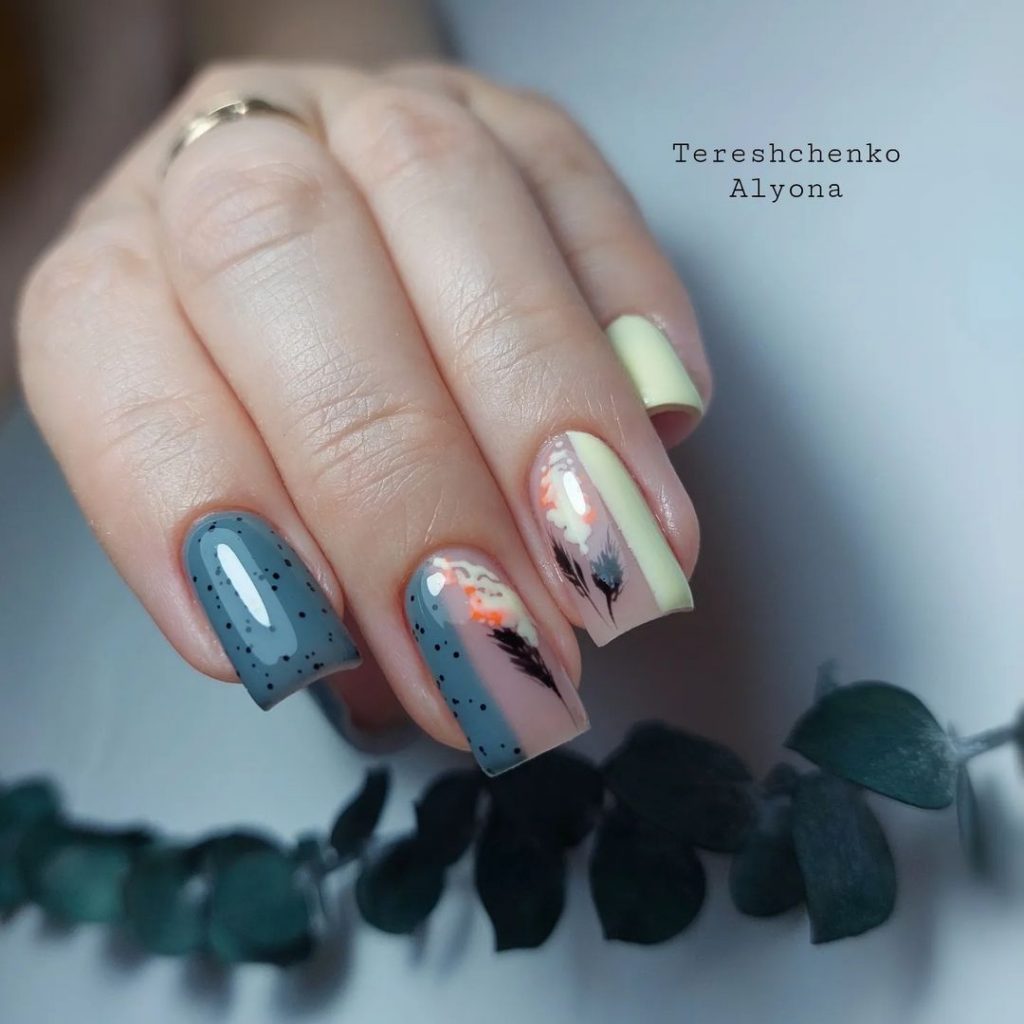
Grey and Peach Blooms
This unique design features a combination of grey and peach nails with delicate black and white floral accents. The mix of colors and floral details creates a sophisticated and trendy look.
Consumables:
- Base Coat: Orly Bonder Rubberized Base Coat
- Nail Polishes: Essie in ‘Chinchilly’ (grey), OPI in ‘Crawfishin’ for a Compliment’ (peach)
- Nail Art Brushes: Fine detail brush for floral designs
- Top Coat: CND Vinylux Weekly Top Coat
DIY Instructions:
- Apply a base coat to protect your nails.
- Paint your nails with alternating coats of grey and peach polish.
- Use a detail brush to paint black and white floral accents on the accent nails.
- Add a touch of peach color to enhance the design.
- Finish with a top coat to seal and protect your design.
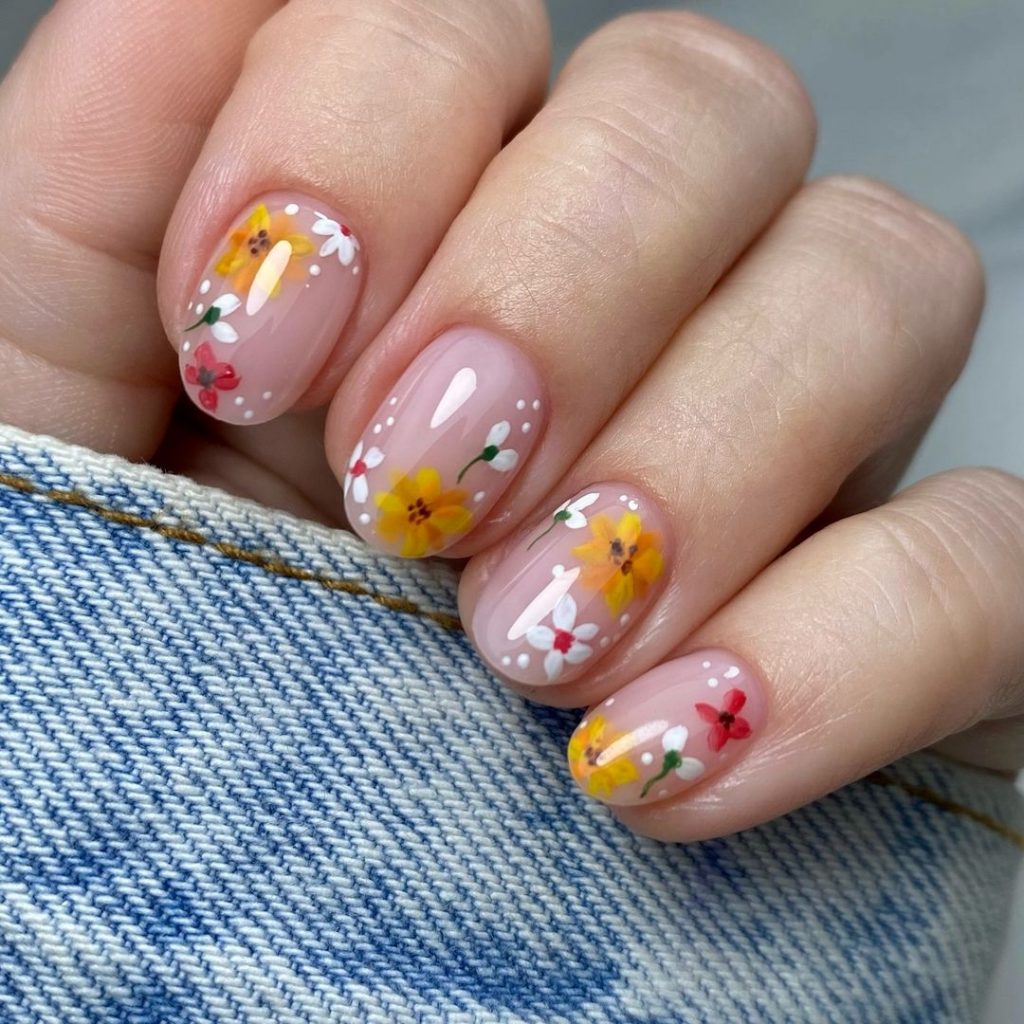
Soft Pink and Floral Tips
This charming design features a soft pink base with delicate floral tips. The combination of the pink base and the colorful floral tips creates a gentle and romantic look, perfect for any occasion.
Consumables:
- Base Coat: OPI Natural Nail Base Coat
- Nail Polishes: Essie in ‘Fiji’ (soft pink), Various bright colors for the flowers (yellow, red, green, white)
- Nail Art Brushes: Fine detail brush for painting flowers
- Top Coat: Seche Vite Dry Fast Top Coat
DIY Instructions:
- Apply a base coat to protect your nails.
- Paint your nails with two coats of the soft pink polish.
- Use a detail brush to paint the floral tips in various bright colors on each nail.
- Add white dots around the flowers for added detail.
- Seal with a top coat to protect your design and add shine.
Save Pin