As the leaves start to fall and the air gets crisper, it’s the perfect time to refresh your nail game with the latest trends for fall 2024. Are you ready to discover the chicest, boldest, and most sophisticated nail designs that will dominate this autumn? Let’s dive into the top nail trends that you’ll want to flaunt this season.
Elegant Ombré with Silver Accents
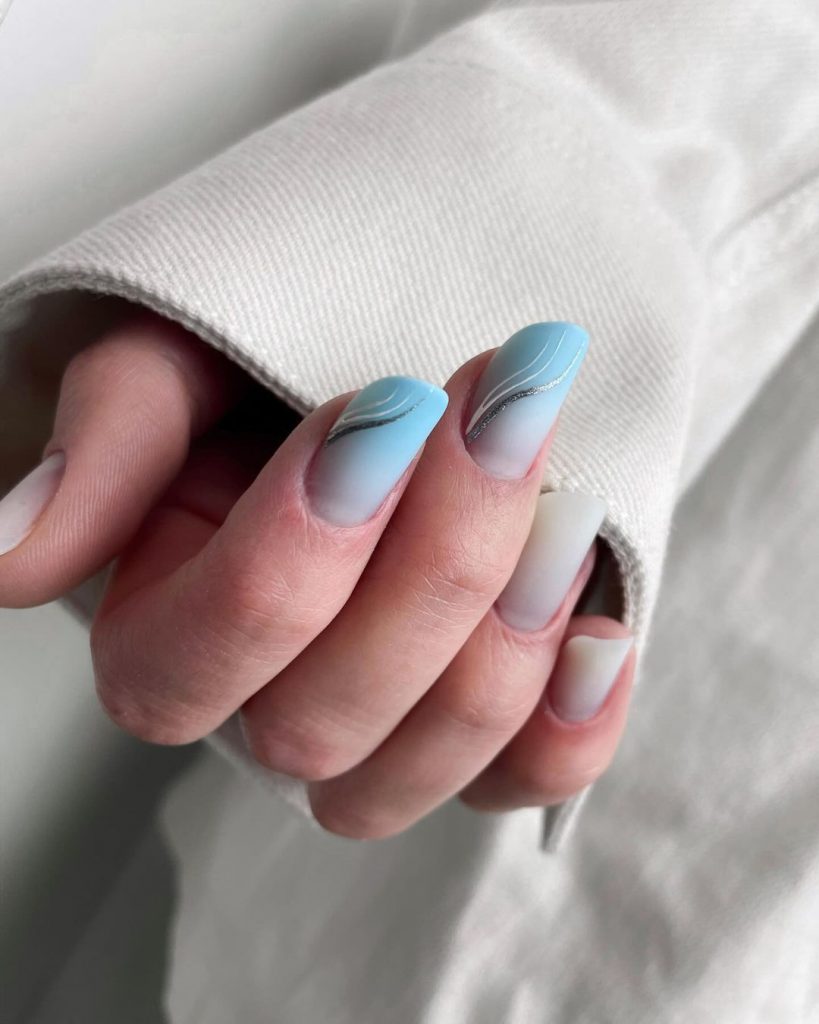
This elegant ombré design transitions beautifully from a soft nude at the base to a serene sky blue at the tips, enhanced with delicate silver accents. The gradient effect is seamlessly blended, creating a soothing visual flow that’s perfect for any occasion. The silver lines add a touch of sophistication and modernity, making this design both chic and versatile. The combination of these elements results in a nail look that is not only trendy but also timeless.
Consumables Needed:
- Base coat: OPI Natural Nail Base Coat
- Nude polish: Essie Ballet Slippers
- Blue polish: OPI GelColor It’s a Boy!
- Silver nail art striping tape
- Top coat: Seche Vite Dry Fast Top Coat
Creation Instructions:
- Apply the base coat to clean, prepped nails.
- Paint the entire nail with the nude polish and let it dry completely.
- Using a makeup sponge, dab the blue polish on the tips, blending towards the middle for the ombré effect.
- Once dry, apply the silver striping tape carefully to create the accents.
- Seal the design with a top coat for a glossy finish and durability.
Green-Tipped French Manicure
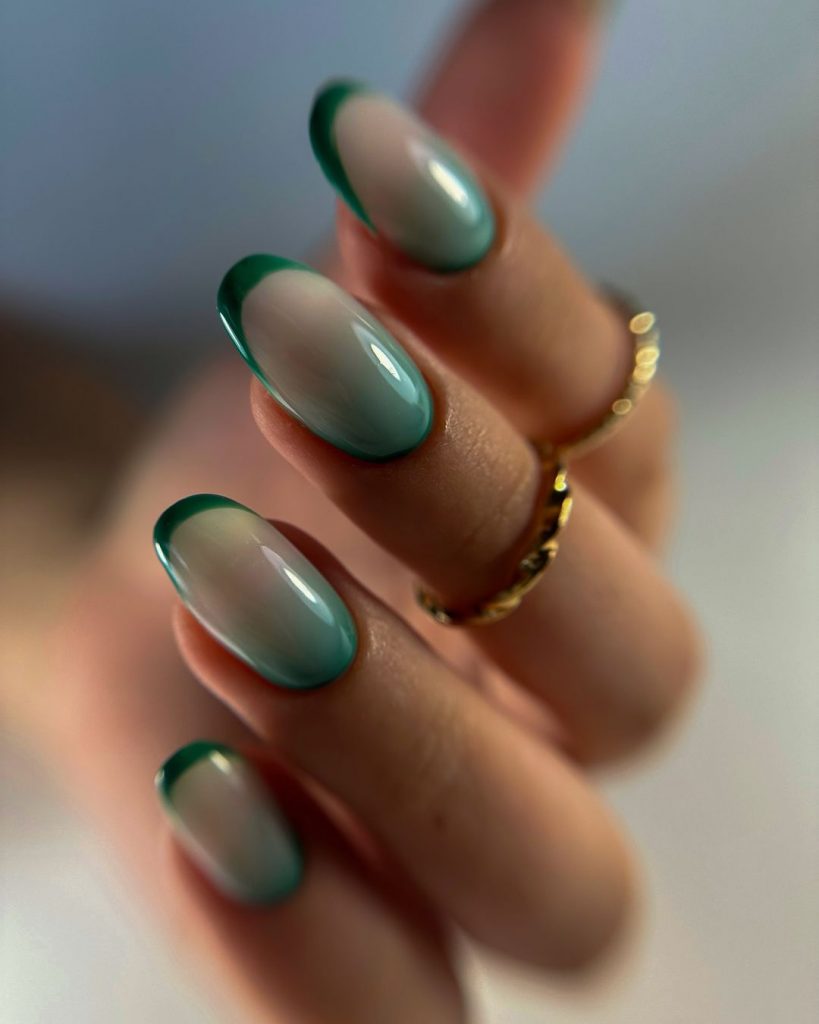
This modern take on the classic French manicure features a stunning green tip that adds a fresh, contemporary twist. The smooth transition from a natural base to the vibrant green tips makes this design perfect for both everyday wear and special occasions. The choice of green gives it a unique edge, setting it apart from the traditional French tip.
Consumables Needed:
- Base coat: OPI Nail Envy
- Nude polish: Essie Mademoiselle
- Green polish: OPI GelColor I’m So Swamped!
- Top coat: Essie Gel Couture Top Coat
Creation Instructions:
- Start with a base coat to protect your nails.
- Apply the nude polish and allow it to dry thoroughly.
- Using the green polish, carefully paint the tips of your nails, maintaining a smooth, even line.
- Finish with a top coat to add shine and extend the life of your manicure.
Bold Red and Black Abstract Design
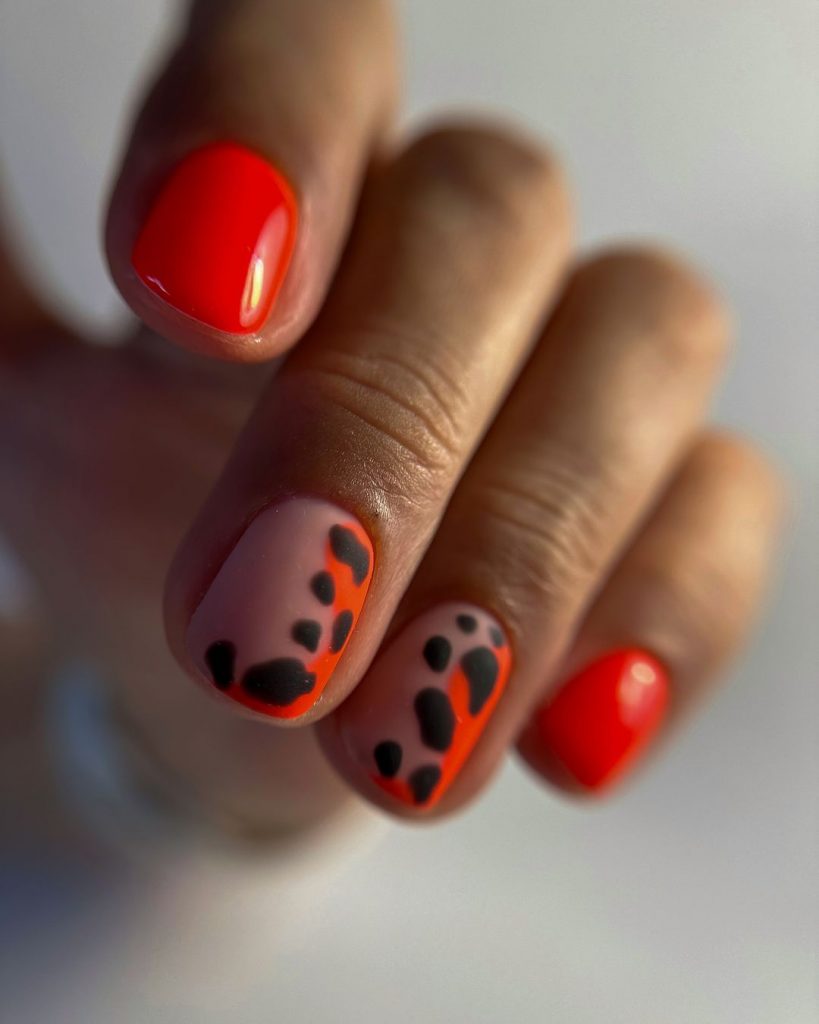
This bold design combines striking red with abstract black patterns, creating a dramatic and eye-catching manicure. The vibrant red base is complemented by the unique black spots, adding a playful yet sophisticated touch. This design is perfect for those looking to make a statement with their nails.
Consumables Needed:
- Base coat: Zoya Naked Manicure Base
- Red polish: Essie Forever Yummy
- Black nail art polish: Sally Hansen I Heart Nail Art Pen
- Top coat: INM Out The Door Top Coat
Creation Instructions:
- Apply a base coat to clean, dry nails.
- Paint your nails with the red polish and let it dry completely.
- Using the black nail art pen, create abstract spots on each nail, varying the size and placement for a unique look.
- Seal with a top coat to protect your design and add shine.
Chic Nude and Brown Combination
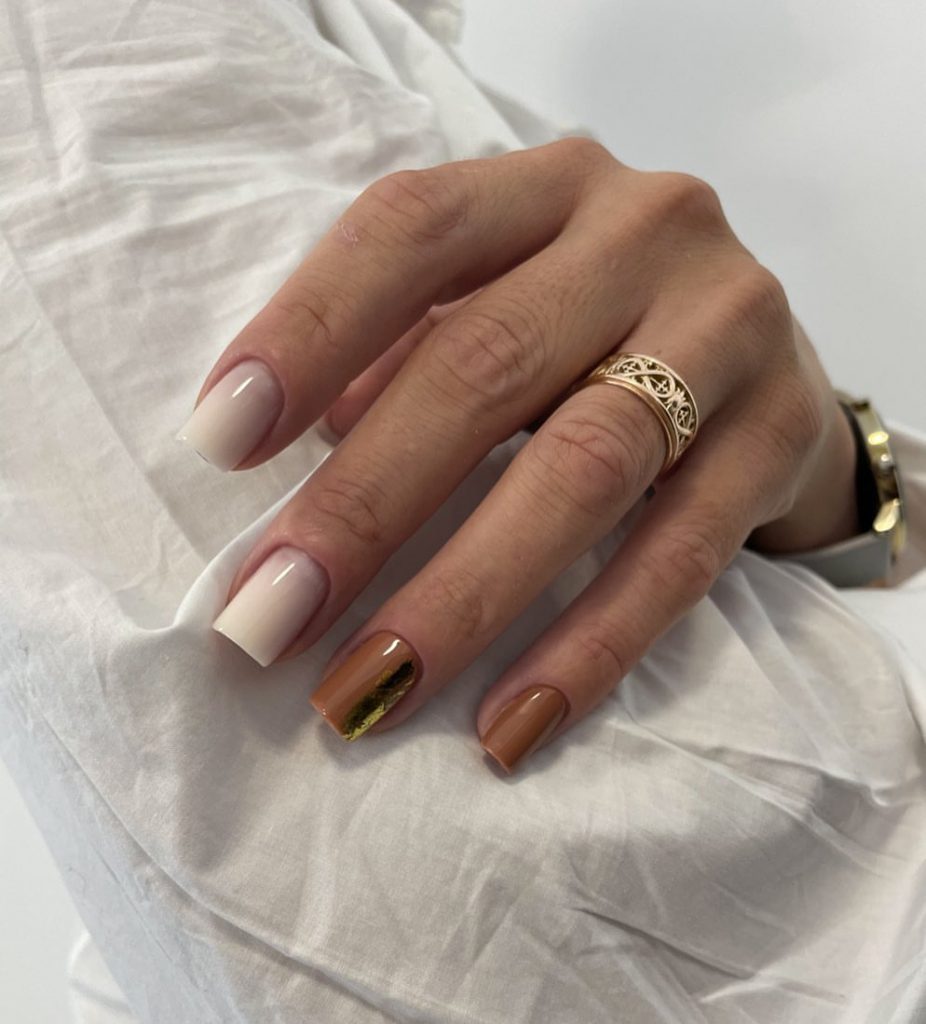
This chic design features a sophisticated combination of nude and brown tones, perfect for the autumn season. The subtle gradient from nude to brown is complemented by a touch of gold foil, adding a luxurious and stylish element. This design is understated yet elegant, making it suitable for any occasion.
Consumables Needed:
- Base coat: Deborah Lippmann Hard Rock Hydrating Base
- Nude polish: OPI Tiramisu for Two
- Brown polish: Essie Partner in Crime
- Gold foil accents
- Top coat: Sally Hansen Miracle Gel Top Coat
Creation Instructions:
- Begin with a base coat to ensure smooth application.
- Apply the nude polish on the entire nail and let it dry.
- Paint the tips with the brown polish, blending slightly towards the middle for a gradient effect.
- Add gold foil accents to one or two nails for a touch of luxury.
- Finish with a top coat to seal and protect your manicure.
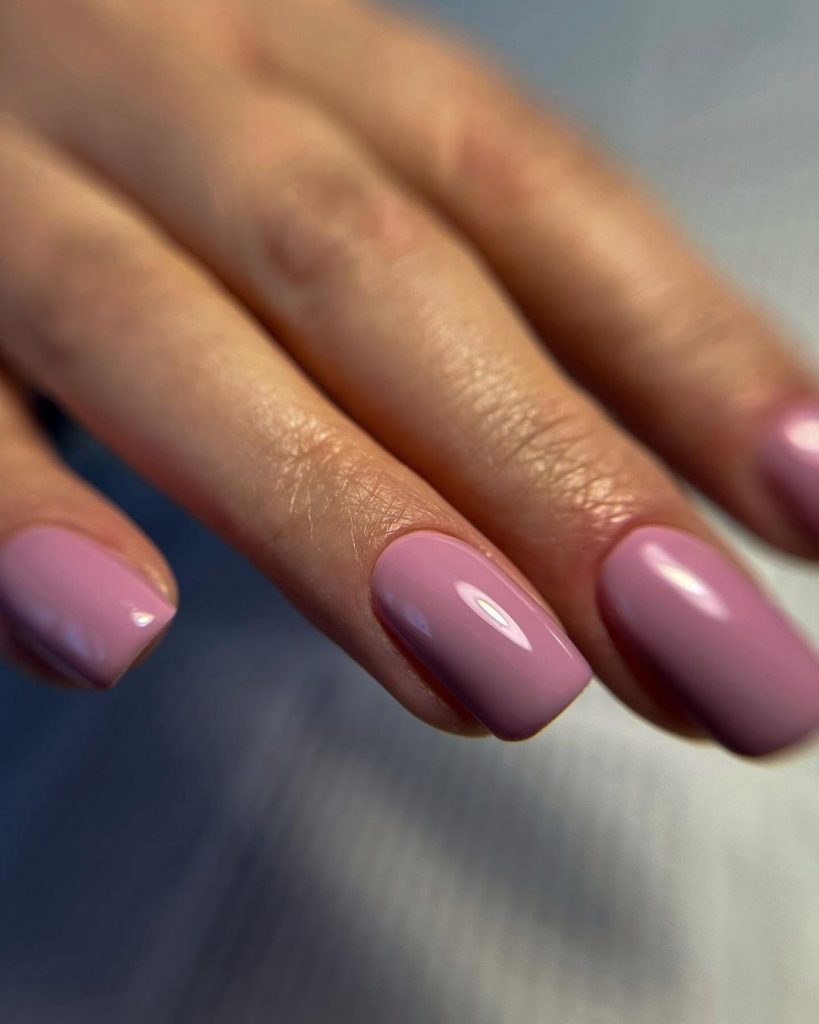
Pretty in Pink Glossy Nails
These pretty pink nails are the epitome of simplicity and elegance. The high-gloss finish enhances the soft pink color, making your nails look polished and refined. This design is perfect for those who prefer a classic and understated look that still makes a statement.
Consumables Needed:
- Base coat: OPI Start to Finish Base & Top Coat
- Pink polish: Zoya Avery
- Top coat: Essie Good To Go Top Coat
Creation Instructions:
- Apply a base coat to clean nails.
- Paint your nails with the pink polish, allowing each layer to dry completely before applying the next.
- Finish with a top coat to achieve a high-gloss finish that will last.
Sophisticated Blue and Marble Design
This sophisticated nail design features a striking combination of cool blue tones and a unique marble accent nail. The almond-shaped nails are painted with a glossy blue polish that gives off a calming vibe. The marble accent, adorned with a line of golden studs, adds an element of luxury and artistic flair to the overall look.

Consumables Needed:
- Base coat: OPI Nail Envy
- Blue polish: OPI GelColor Suzi Says Feng Shui
- Marble effect polish: Sally Hansen Miracle Gel in Greyfitti
- Gold studs
- Top coat: Essie Gel Couture Top Coat
Creation Instructions:
- Start with a base coat to protect your nails.
- Apply the blue polish to most of the nails, leaving one accent nail on each hand for the marble effect.
- Use the marble effect polish on the accent nail and immediately add the gold studs in a line.
- Seal with a top coat to add shine and ensure the longevity of the design.
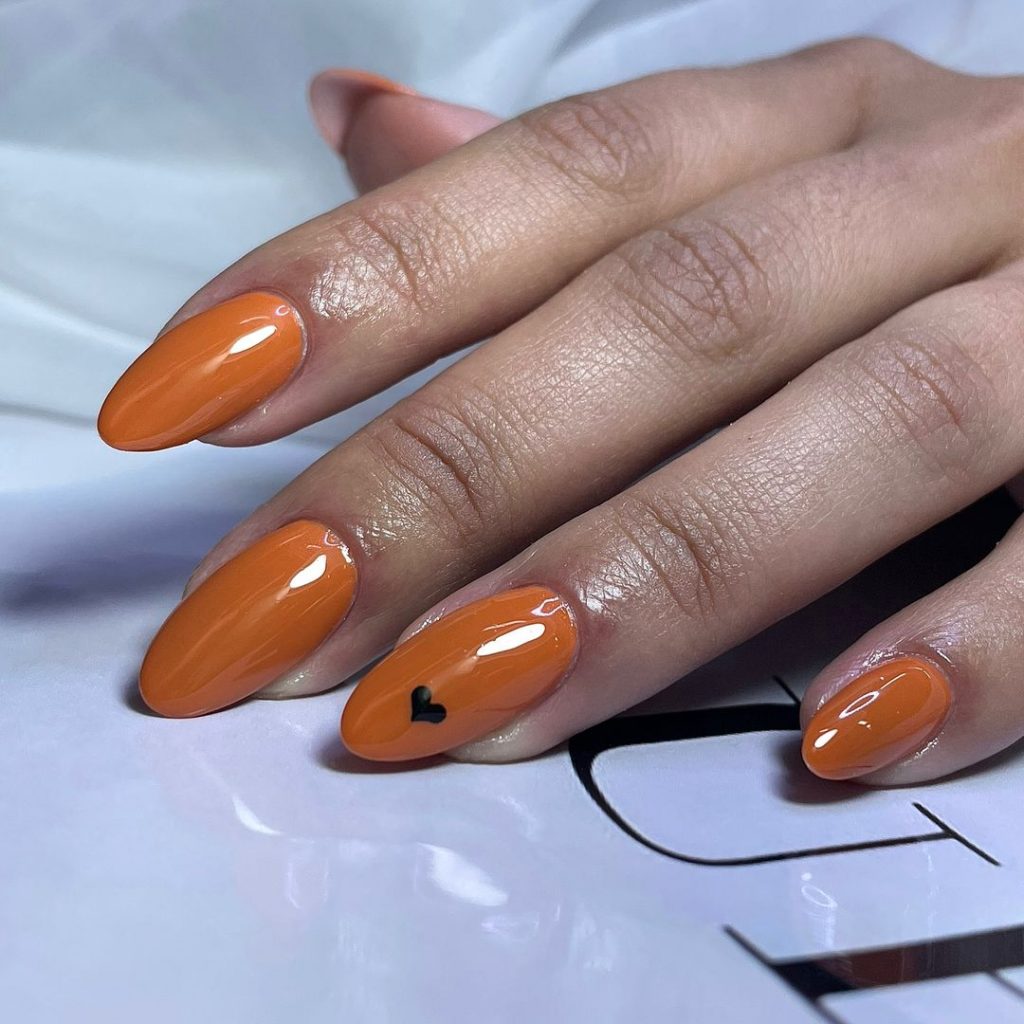
Vibrant Orange with Black Heart Accent
This vibrant design is perfect for fall, featuring a bold orange base with a cute black heart accent on one nail. The almond shape complements the playful and eye-catching color, making it a great choice for those who love to stand out.
Consumables Needed:
- Base coat: Sally Hansen Double Duty Base & Top Coat
- Orange polish: Essie Playing Koi
- Black nail art pen: Sally Hansen I Heart Nail Art Pen
- Top coat: Seche Vite Dry Fast Top Coat
Creation Instructions:
- Apply a base coat to clean, dry nails.
- Paint all your nails with the orange polish and let it dry thoroughly.
- Use the black nail art pen to draw a small heart on the accent nail.
- Finish with a top coat to protect the design and add a glossy finish.
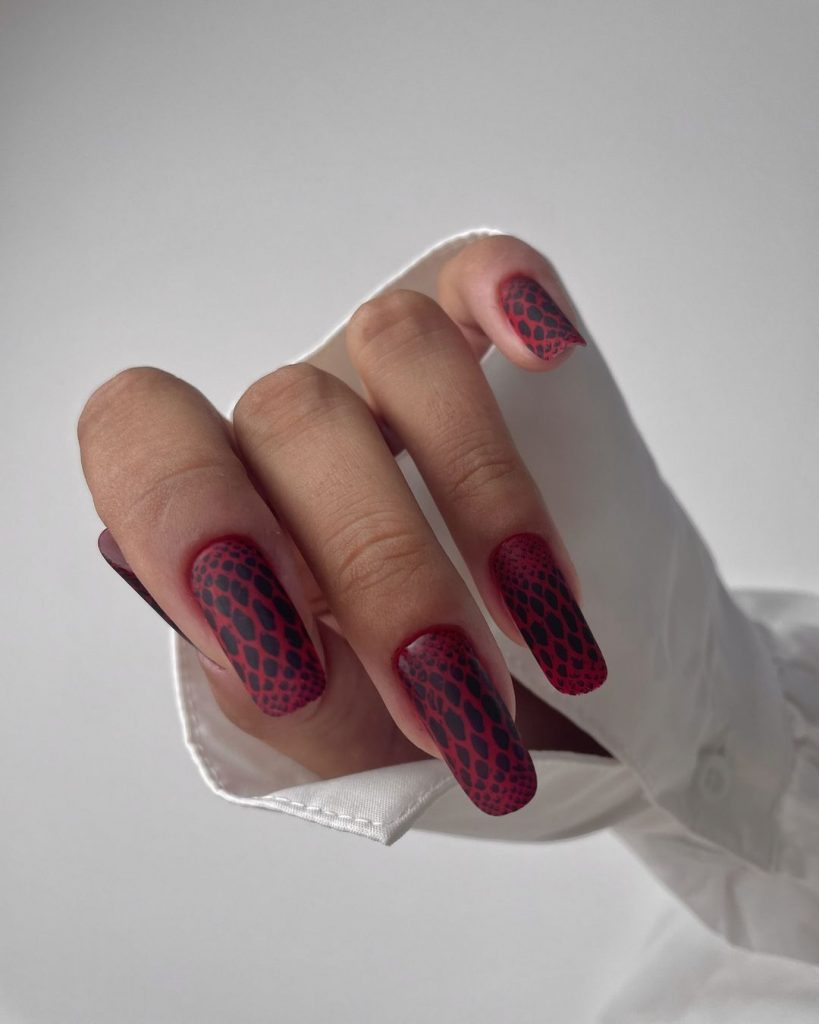
Edgy Red and Black Snake Print
This edgy design features a bold snake print in red and black, perfect for those who want to make a fierce statement. The matte finish adds a sophisticated touch to the dramatic design, making it a great choice for an autumnal look.
Consumables Needed:
- Base coat: OPI Matte Nail Envy
- Red polish: OPI Big Apple Red
- Black snake print stencil or stamp
- Matte top coat: Essie Matte About You Top Coat
Creation Instructions:
- Apply a base coat to protect your nails.
- Paint your nails with the red polish and let it dry completely.
- Use a snake print stencil or stamp with the black polish to create the pattern on each nail.
- Seal with a matte top coat to complete the look.
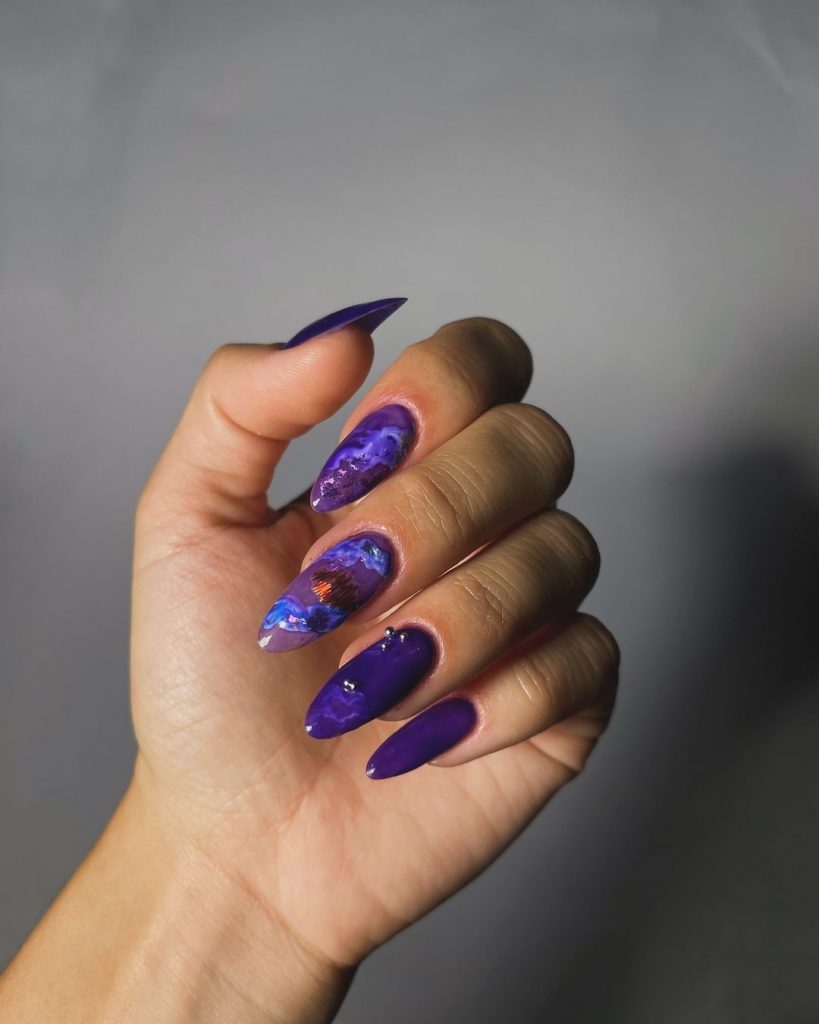
Purple Galaxy Nails
These stunning purple galaxy nails are out of this world! The deep purple base is combined with a swirling galaxy effect, featuring pops of blue and a touch of glitter. This design is perfect for those who love to experiment with cosmic themes.
Consumables Needed:
- Base coat: Deborah Lippmann Hard Rock Hydrating Base
- Purple polish: Zoya Pinta
- Galaxy effect polishes: China Glaze Fairy Dust, OPI Russian Navy
- Small nail art brush
- Top coat: INM Out The Door Top Coat
Creation Instructions:
- Apply a base coat to start.
- Paint your nails with the purple polish and allow it to dry.
- Use a small nail art brush to add the galaxy effect polishes in swirls and dabs, blending them to create a cosmic look.
- Finish with a top coat to seal the design and add shine.
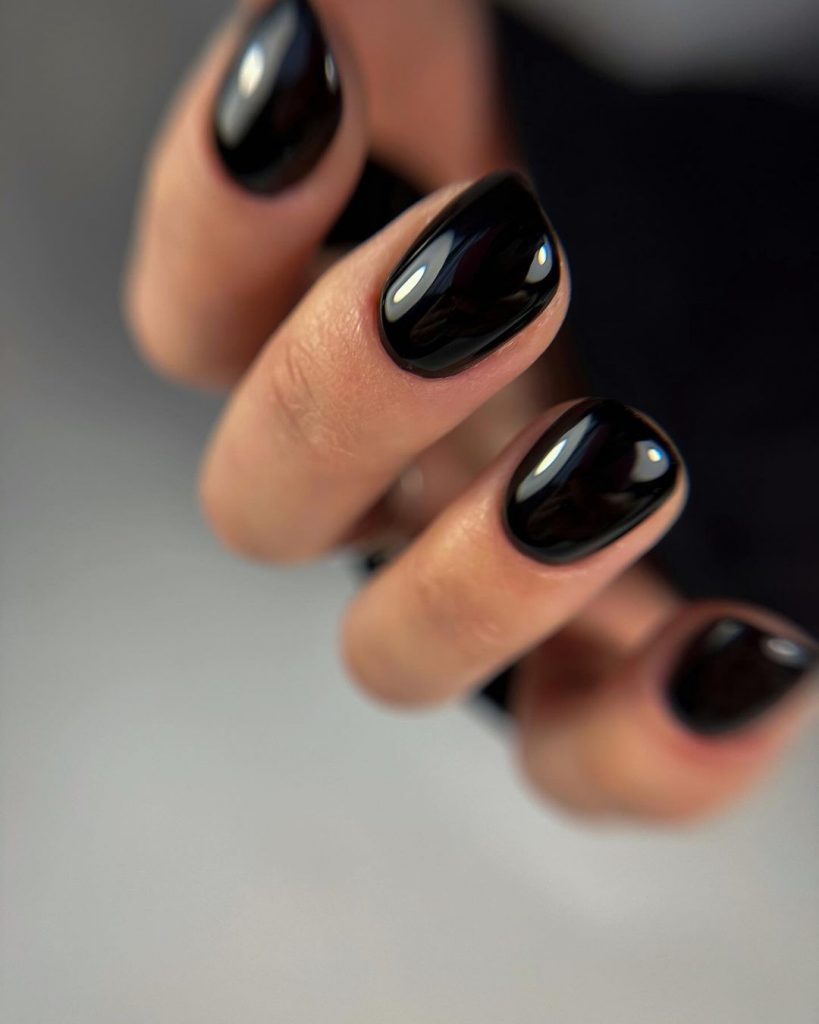
Classic Black Glossy Nails
Nothing beats the timeless elegance of classic black glossy nails. This design is all about simplicity and sophistication, perfect for any occasion. The high-gloss finish adds a sleek and polished look to the short, rounded nails.
Consumables Needed:
- Base coat: OPI Start to Finish Base & Top Coat
- Black polish: Essie Licorice
- Top coat: Sally Hansen Miracle Gel Top Coat
Creation Instructions:
- Begin with a base coat to ensure smooth application.
- Apply two coats of the black polish, allowing each layer to dry completely.
- Seal with a top coat for a high-gloss, durable finish.
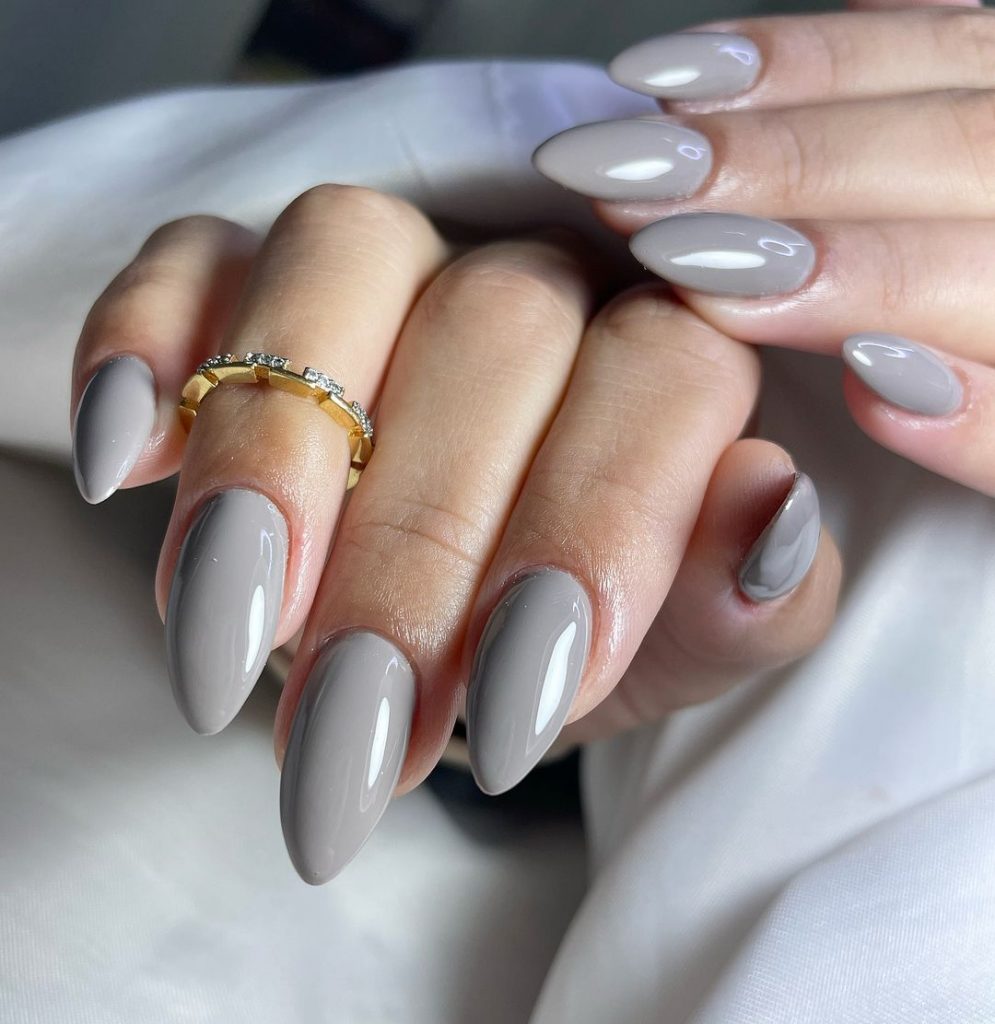
Sophisticated Gray Glossy Nails
This sophisticated design features a sleek gray polish with a glossy finish, perfect for a modern and elegant look. The almond shape adds a feminine touch, while the high-shine finish ensures that your nails look polished and refined. This design is versatile and suitable for any occasion, from professional settings to casual outings.
Consumables Needed:
- Base coat: OPI Nail Envy
- Gray polish: Essie Chinchilly
- Top coat: Seche Vite Dry Fast Top Coat
Creation Instructions:
- Start with a base coat to protect your nails.
- Apply two coats of the gray polish, allowing each layer to dry completely.
- Finish with a top coat to add shine and durability to your manicure.
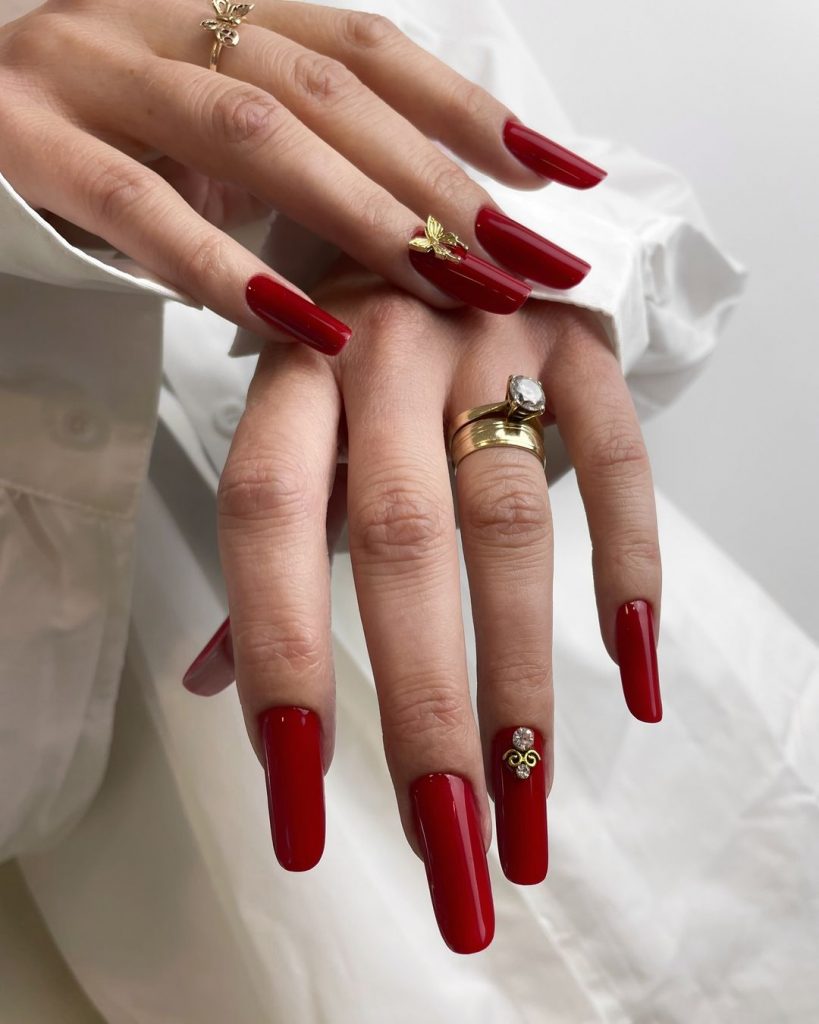
Bold Red with Gold Embellishments
This bold red design features a striking, glossy finish with delicate gold embellishments on a couple of nails, adding a touch of luxury. The long, square shape enhances the dramatic effect, making these nails a statement accessory. Perfect for evening events or a chic day out, this design is both classic and modern.
Consumables Needed:
- Base coat: Deborah Lippmann Hard Rock Hydrating Base
- Red polish: OPI Big Apple Red
- Gold embellishments
- Top coat: Essie Gel Couture Top Coat
Creation Instructions:
- Apply a base coat to clean nails.
- Paint your nails with the red polish, allowing each coat to dry completely.
- Add the gold embellishments to the accent nails using nail glue.
- Finish with a top coat to seal the design and add shine.
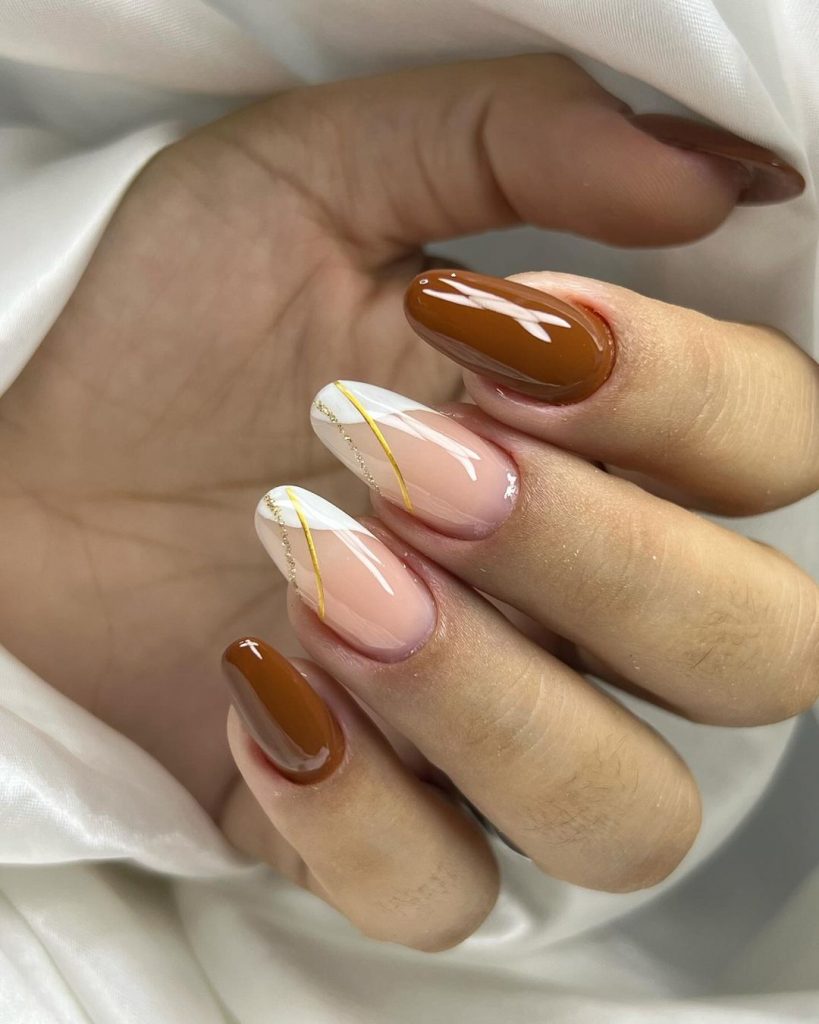
Elegant Brown and Nude with Gold Lines
This elegant design combines rich brown and nude tones, accented with delicate gold lines. The almond shape enhances the sophisticated look, while the gold lines add a touch of luxury. This manicure is perfect for fall, capturing the season’s warm and cozy vibes.
Consumables Needed:
- Base coat: OPI Natural Nail Base Coat
- Brown polish: Essie Wicked
- Nude polish: OPI Tiramisu for Two
- Gold striping tape
- Top coat: Sally Hansen Miracle Gel Top Coat
Creation Instructions:
- Apply a base coat to start.
- Paint your nails with the nude polish, leaving a couple of nails for the brown polish.
- Once dry, use the gold striping tape to create delicate lines on the nails.
- Finish with a top coat to protect the design and add a glossy finish.
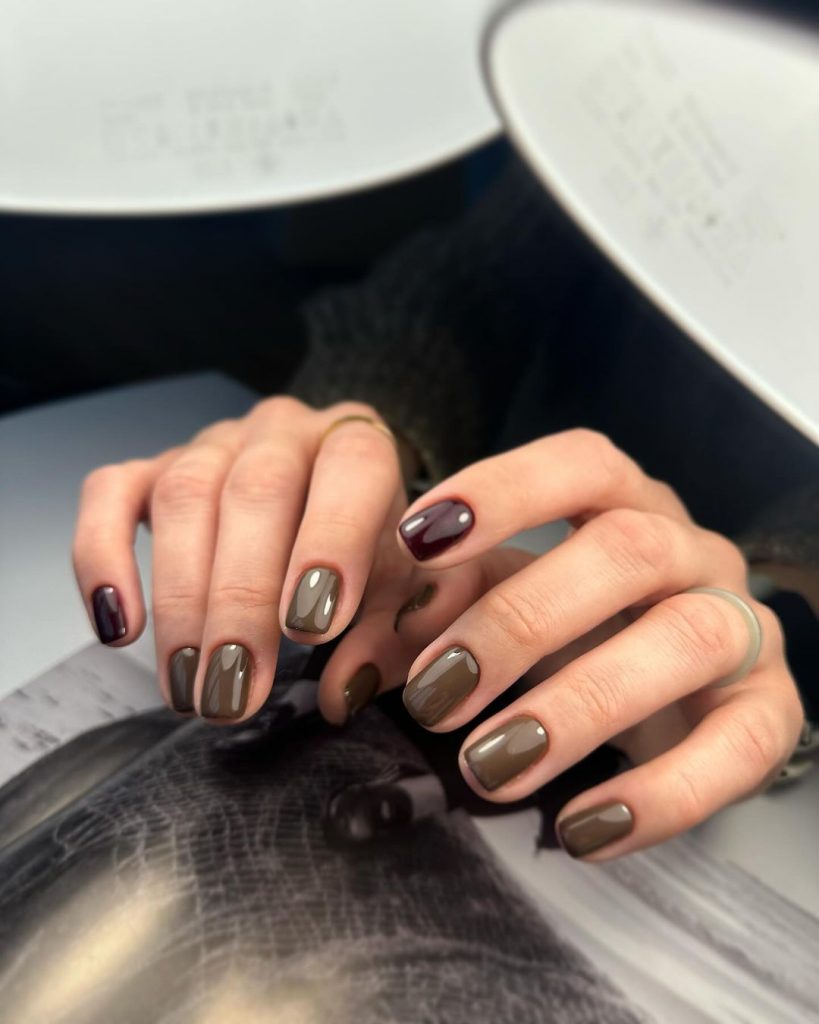
Modern Mixed-Tone Short Nails
This modern design features a mix of brown and nude tones on short, rounded nails. The glossy finish adds sophistication to the playful color combination, making it perfect for those who want a trendy yet understated look. The mix of colors is subtle yet eye-catching, ideal for everyday wear.
Consumables Needed:
- Base coat: OPI Start to Finish Base & Top Coat
- Brown polish: Essie Mink Muffs
- Nude polish: Zoya Avery
- Top coat: Seche Vite Dry Fast Top Coat
Creation Instructions:
- Apply a base coat to clean, dry nails.
- Paint alternating nails with brown and nude polish.
- Finish with a top coat to add shine and protect your manicure.
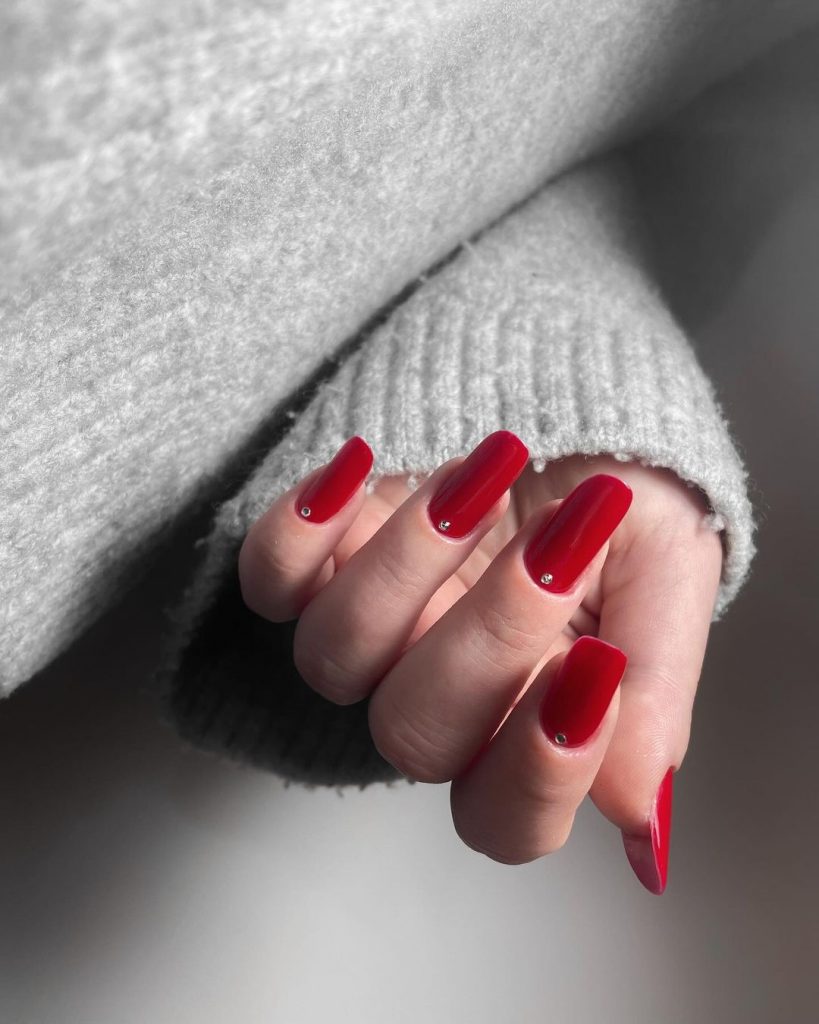
Classic Red with Subtle Gems
This classic red design is elevated with the addition of subtle gem accents, making it both timeless and elegant. The long, square shape is complemented by the high-gloss finish, while the small gems add a touch of glamour. Perfect for any occasion, this design is a go-to for a polished look.
Consumables Needed:
- Base coat: Sally Hansen Double Duty Base & Top Coat
- Red polish: Essie Forever Yummy
- Small gems
- Top coat: INM Out The Door Top Coat
Creation Instructions:
- Apply a base coat to start.
- Paint your nails with the red polish, allowing each coat to dry completely.
- Add the small gems to the base of one or two nails using nail glue.
- Finish with a top coat to seal the design and add a glossy finish.
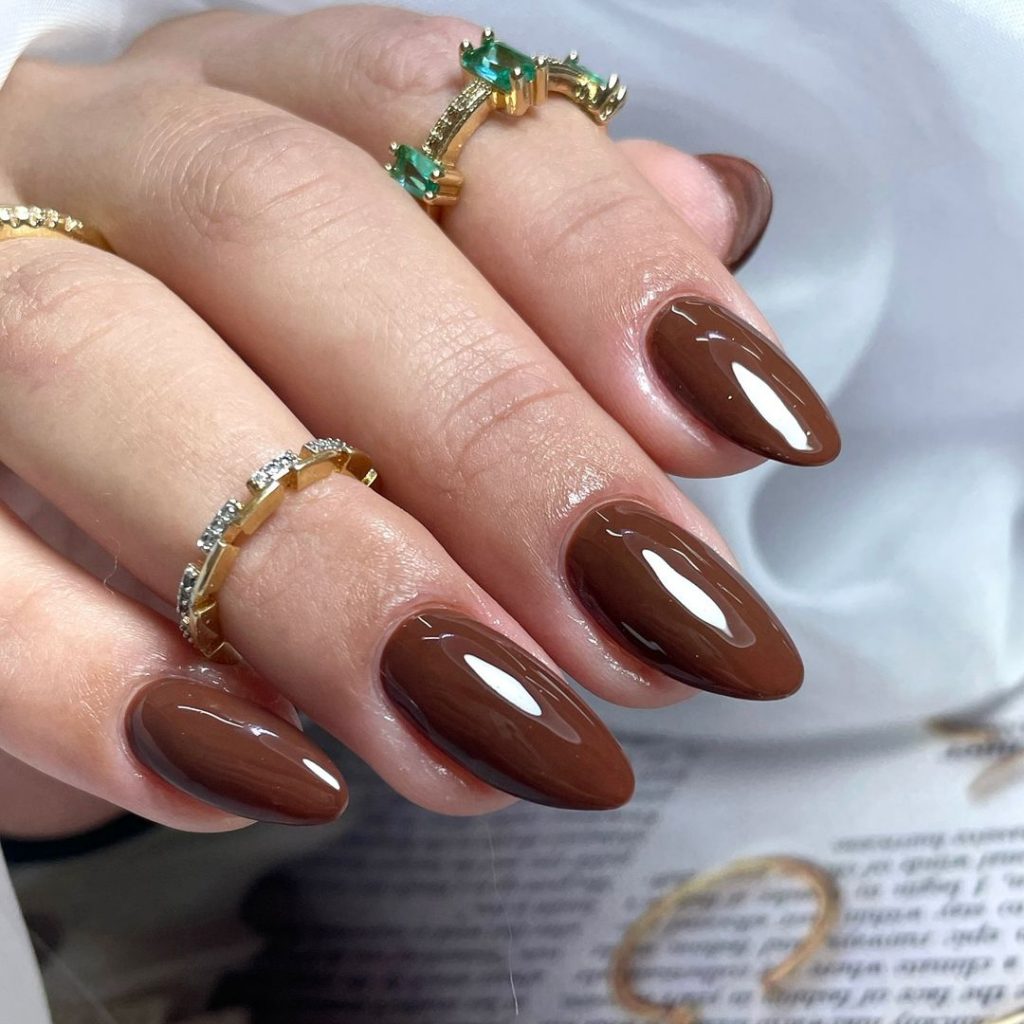
Glossy Brown Almond Nails
These glossy brown almond nails exude elegance and sophistication. The rich brown color is perfect for the autumn season, providing a warm and inviting look. The high-gloss finish adds a touch of luxury, making these nails ideal for both professional and casual settings.
Consumables Needed:
- Base coat: OPI Natural Nail Base Coat
- Brown polish: Essie Mink Muffs
- Top coat: Seche Vite Dry Fast Top Coat
Creation Instructions:
- Apply a base coat to protect your nails.
- Paint your nails with two coats of the brown polish, allowing each coat to dry completely.
- Finish with a top coat to add shine and durability to your manicure.
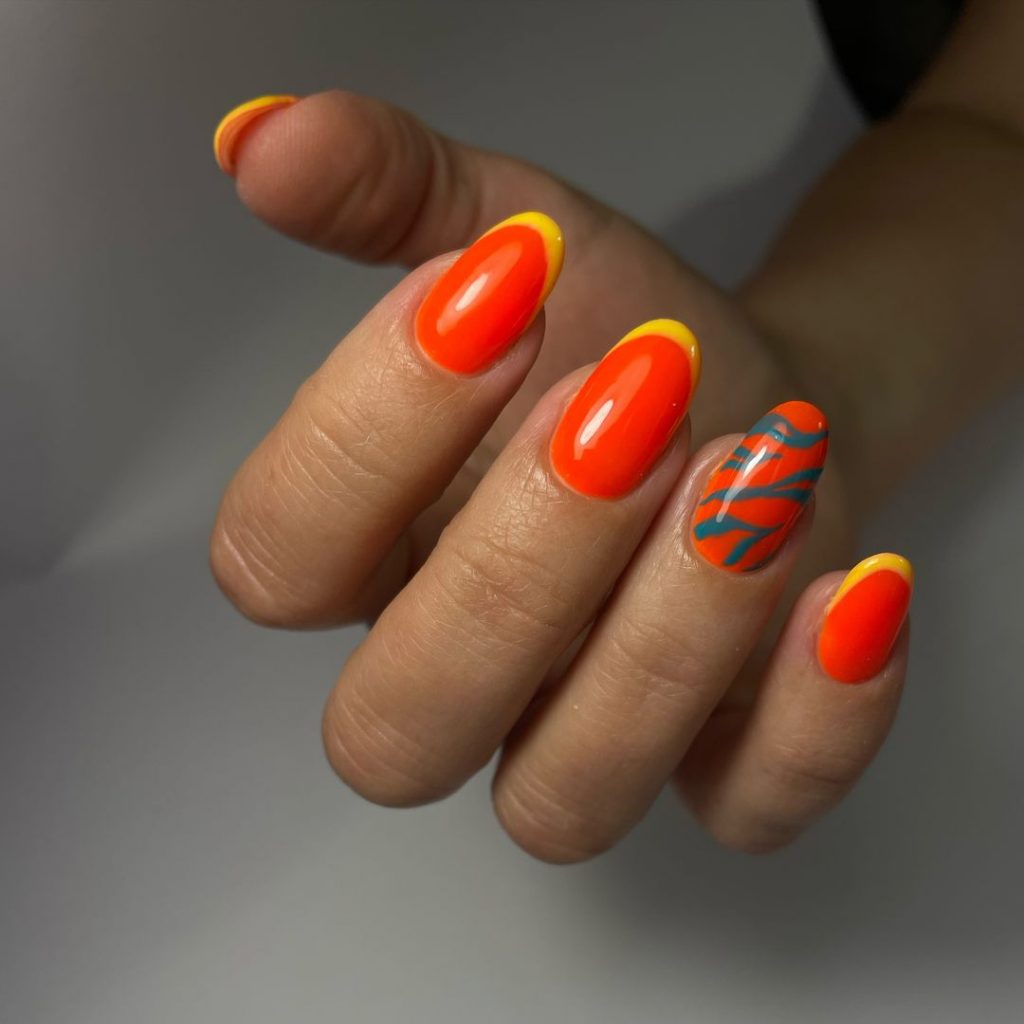
Vibrant Orange and Yellow French Tips
This vibrant design features a striking combination of orange and yellow French tips, with an accent nail adorned with a wavy blue pattern. The bold colors and playful design make this manicure perfect for those who love to stand out. The almond shape adds a feminine touch to the overall look.
Consumables Needed:
- Base coat: Sally Hansen Double Duty Base & Top Coat
- Orange polish: Essie Meet Me At Sunset
- Yellow polish: OPI Sun, Sea, and Sand in My Pants
- Blue nail art pen: Sally Hansen I Heart Nail Art Pen
- Top coat: INM Out The Door Top Coat
Creation Instructions:
- Apply a base coat to clean nails.
- Paint your nails with the orange polish, allowing each coat to dry completely.
- Use the yellow polish to create French tips on each nail.
- Add the blue wavy pattern to the accent nail using the nail art pen.
- Finish with a top coat to seal the design and add a glossy finish.
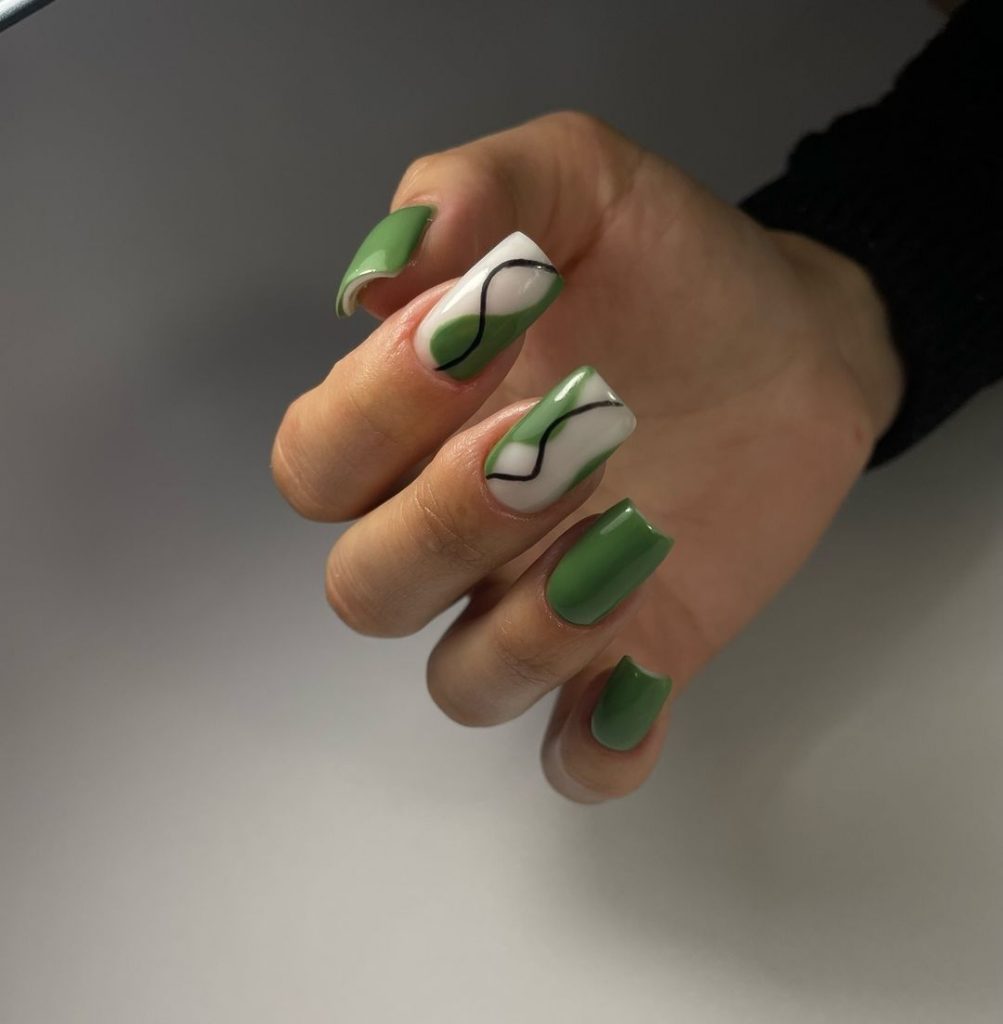
Green and White Geometric Nails
This modern design features a mix of green and white polishes with black geometric lines. The square shape and glossy finish make this manicure both trendy and chic. The geometric pattern adds a touch of artistry, perfect for those who appreciate unique designs.
Consumables Needed:
- Base coat: Deborah Lippmann Hard Rock Hydrating Base
- Green polish: OPI This Isn’t Greenland
- White polish: Essie Blanc
- Black nail art pen: Sally Hansen I Heart Nail Art Pen
- Top coat: Essie Gel Couture Top Coat
Creation Instructions:
- Apply a base coat to start.
- Paint your nails with alternating green and white polish.
- Use the black nail art pen to create geometric lines on the white nails.
- Finish with a top coat to protect the design and add shine.
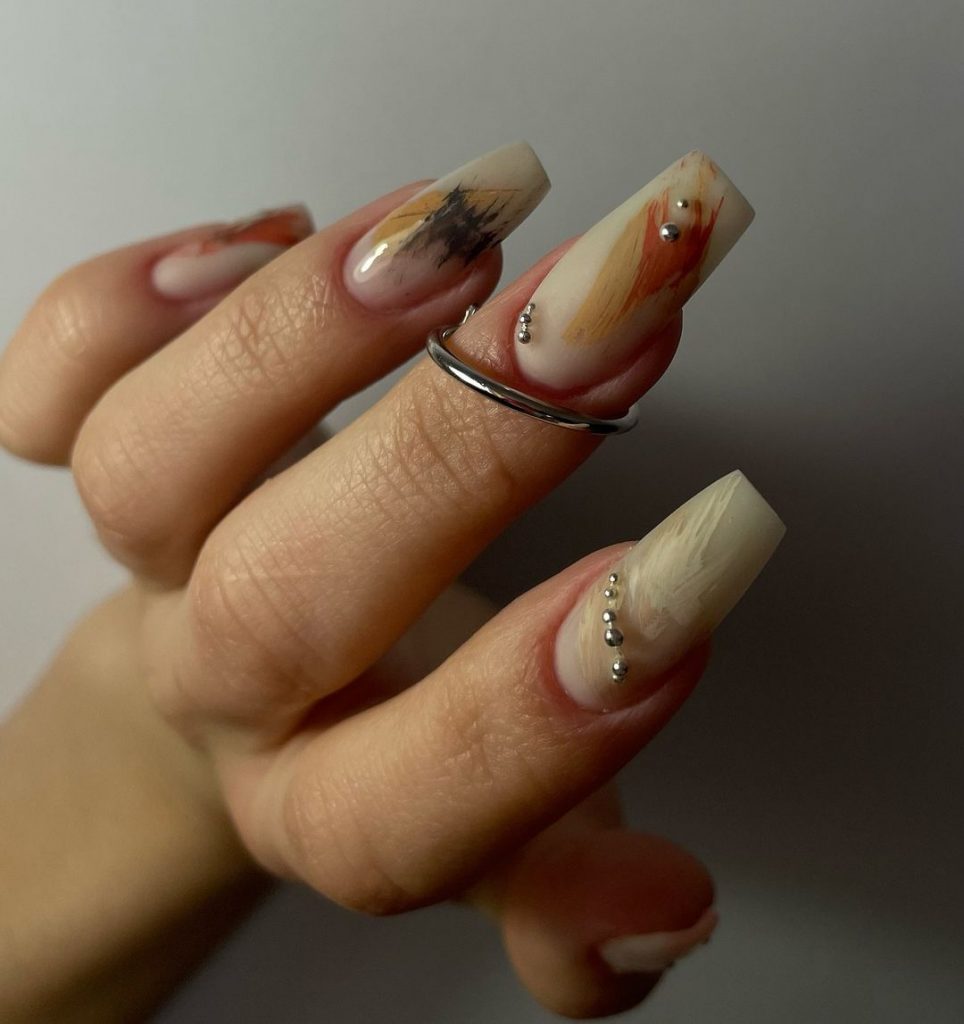
Abstract Fall Nails with Silver Accents
These abstract fall nails feature warm, earthy tones with subtle silver accents. The mix of colors and abstract patterns creates a unique and artistic look, perfect for the autumn season. The square shape and glossy finish add a modern touch to the overall design.
Consumables Needed:
- Base coat: OPI Start to Finish Base & Top Coat
- Nude polish: Essie Ballet Slippers
- Brown polish: OPI Chocolate Moose
- Orange polish: Essie Meet Me At Sunset
- Silver nail art studs
- Top coat: Sally Hansen Miracle Gel Top Coat
Creation Instructions:
- Apply a base coat to clean nails.
- Paint your nails with the nude polish, allowing each coat to dry completely.
- Use the brown and orange polishes to create abstract patterns on each nail.
- Add the silver studs to a few nails for a touch of sparkle.
- Finish with a top coat to seal the design and add a glossy finish.
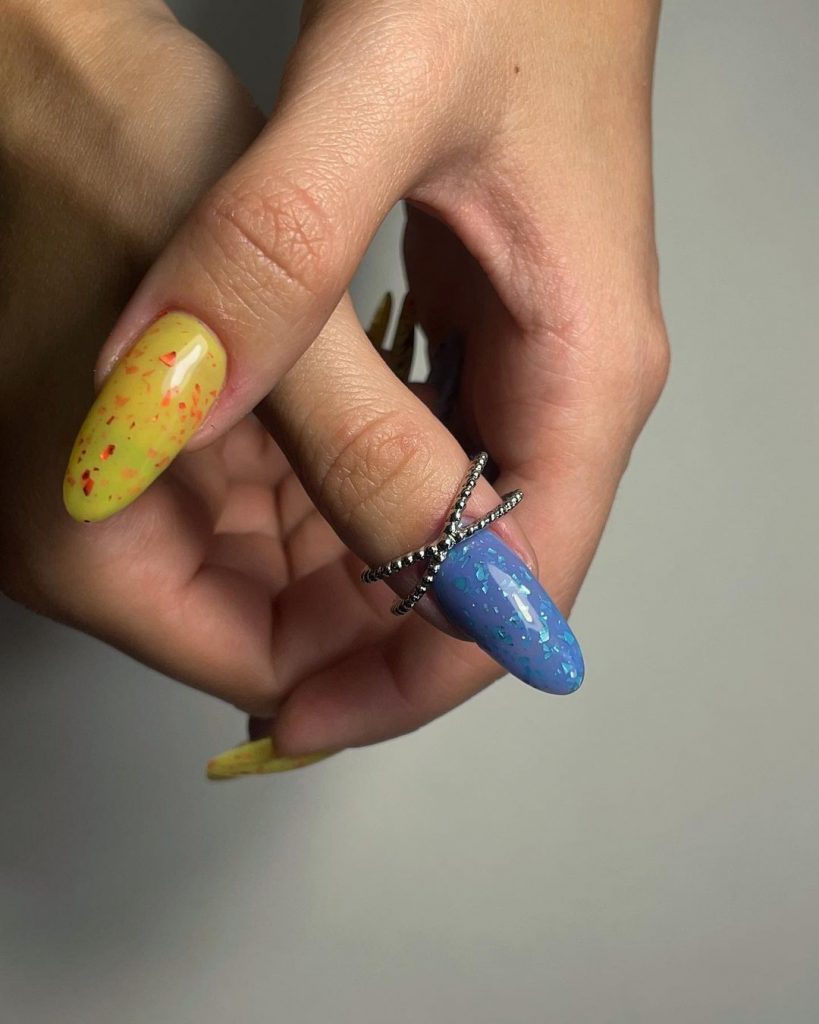
Fun Speckled Nails in Yellow and Blue
This fun and playful design features speckled nails in bright yellow and blue. The mix of colors and speckled effect creates a cheerful and vibrant look, perfect for those who love to experiment with their nail art. The almond shape adds a feminine touch to the overall design.
Consumables Needed:
- Base coat: OPI Nail Envy
- Yellow polish: OPI Exotic Birds Do Not Tweet
- Blue polish: Essie Butler Please
- Speckled effect polish: Sally Hansen Fuzzy Coat
- Top coat: Seche Vite Dry Fast Top Coat
Creation Instructions:
- Apply a base coat to protect your nails.
- Paint your nails with alternating yellow and blue polish.
- Use the speckled effect polish over the yellow and blue nails.
- Finish with a top coat to add shine and durability to your manicure.
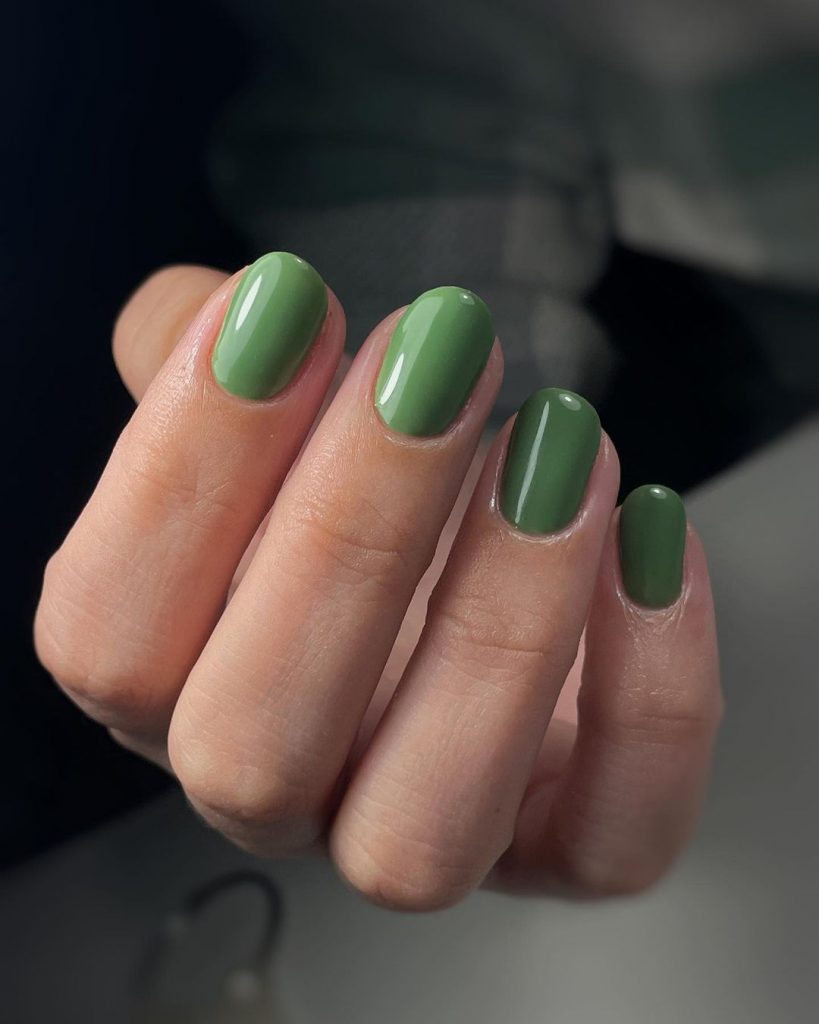
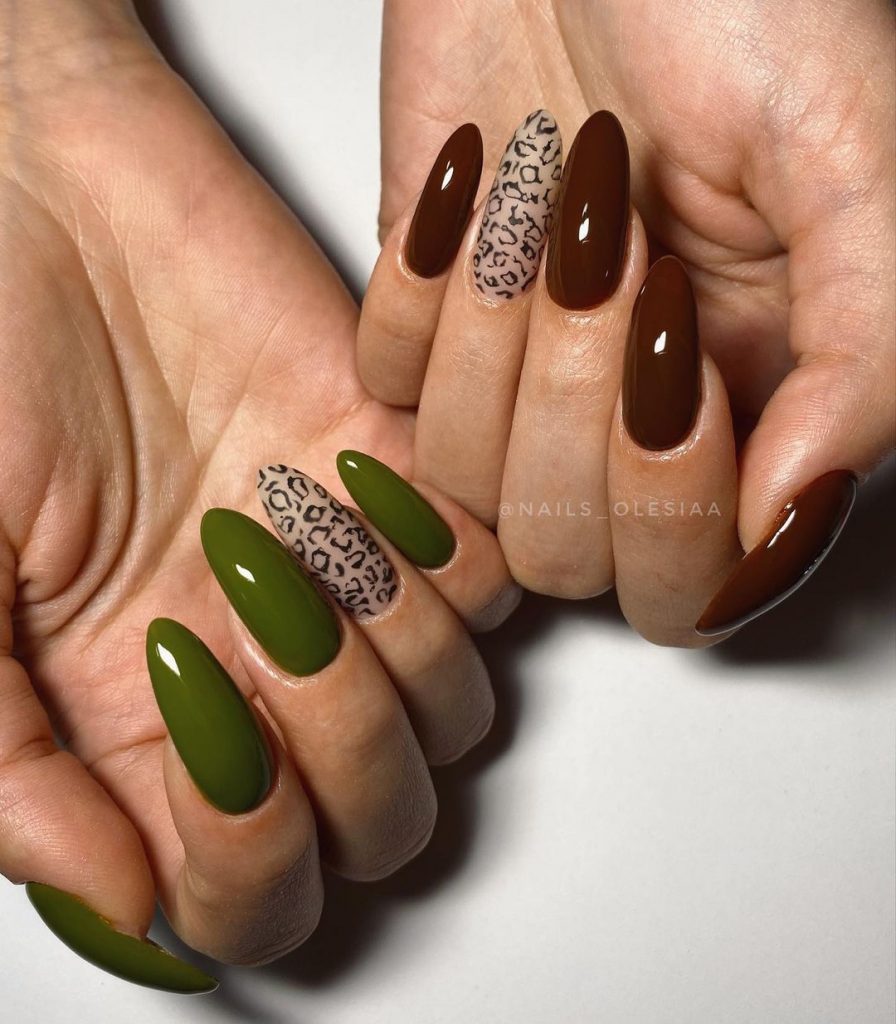
Glossy Green Short Nails
These glossy green short nails offer a simple yet striking look. The rich, solid green color is perfect for fall, giving a fresh and natural vibe. The glossy finish ensures that the nails look polished and sophisticated, making them suitable for both everyday wear and special occasions.
Consumables Needed:
- Base coat: OPI Nail Envy
- Green polish: Essie Going Incognito
- Top coat: Seche Vite Dry Fast Top Coat
Creation Instructions:
- Apply a base coat to protect your nails.
- Paint your nails with two coats of the green polish, allowing each coat to dry completely.
- Finish with a top coat to add shine and durability to your manicure.
Earthy Tones with Leopard Accent
This design features a mix of earthy tones with a standout leopard accent nail. The combination of rich brown and olive green creates a harmonious look, while the leopard print adds a touch of wildness. The almond shape enhances the elegant and sophisticated feel of this manicure.
Consumables Needed:
- Base coat: Sally Hansen Double Duty Base & Top Coat
- Brown polish: Essie Partner in Crime
- Green polish: OPI Olive for Green
- Nude polish: Essie Ballet Slippers
- Black nail art pen: Sally Hansen I Heart Nail Art Pen
- Top coat: INM Out The Door Top Coat
Creation Instructions:
- Apply a base coat to clean nails.
- Paint the nails with alternating brown and green polish.
- Use the nude polish for the accent nails and create the leopard print using the black nail art pen.
- Finish with a top coat to seal the design and add a glossy finish.
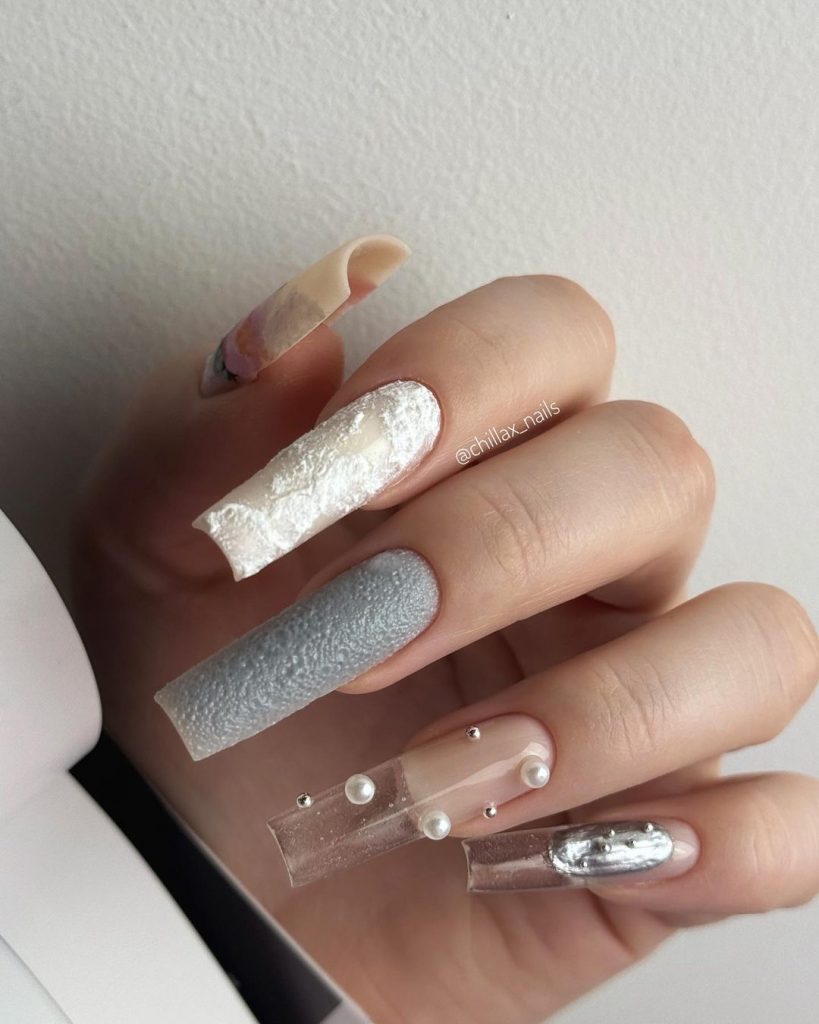
Wonderland Textured Nails
These nails bring a winter wonderland to your fingertips with their textured and 3D elements. The combination of matte gray, white, and clear nails with pearls and other textures creates a unique and eye-catching design. This manicure is perfect for those who love to experiment with textures and want a standout look for the colder months.
Consumables Needed:
- Base coat: Deborah Lippmann Hard Rock Hydrating Base
- Gray polish: OPI I Can Never Hut Up
- White textured polish: Sally Hansen Fuzzy Coat in Wool Knot
- Clear polish: Essie Allure
- Pearls and silver studs
- Top coat: Essie Gel Couture Top Coat
Creation Instructions:
- Apply a base coat to start.
- Paint your nails with the gray, white, and clear polishes as shown in the photo.
- Add pearls and silver studs to the clear nails using nail glue.
- Finish with a top coat to protect the design and add a matte or glossy finish as desired.
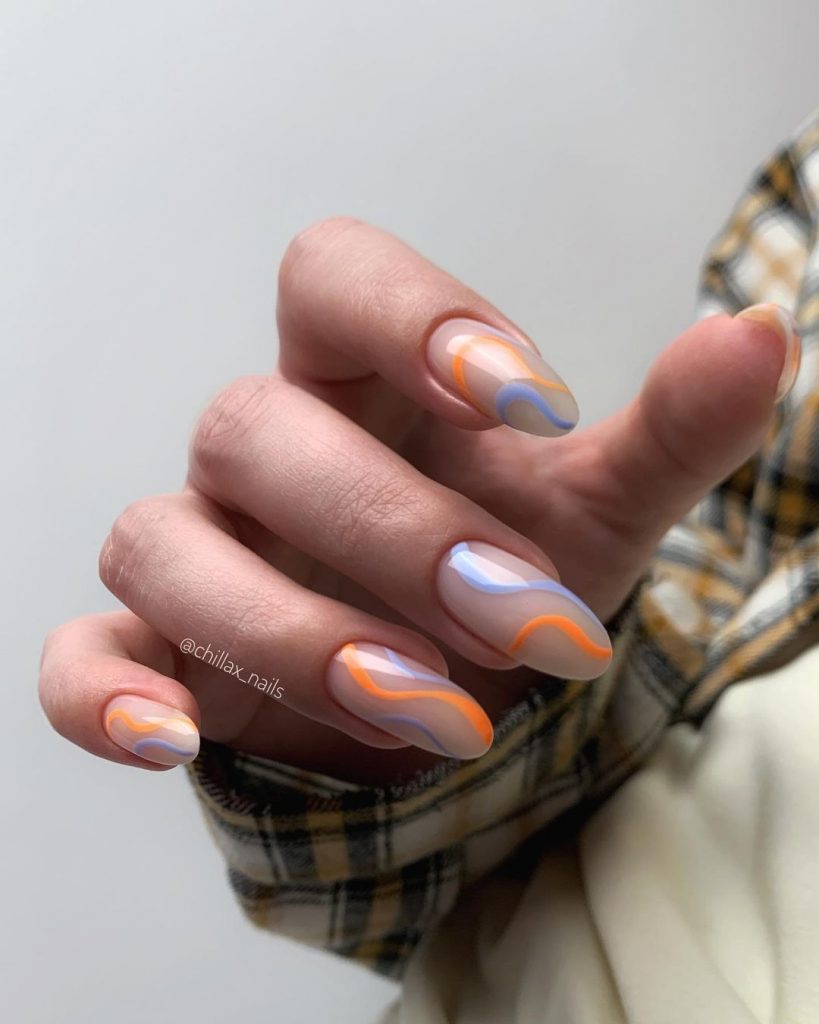
Pastel Waves
These pastel wave nails feature a soft and delicate design with a mix of pastel colors and wavy patterns. The almond shape and glossy finish add a feminine touch, making this manicure perfect for spring or any time you want a light and airy look.
Consumables Needed:
- Base coat: OPI Start to Finish Base & Top Coat
- Pastel polishes: Essie Lilacism, OPI It’s a Boy!, Essie Tart Deco
- Nail art brush
- Top coat: Seche Vite Dry Fast Top Coat
Creation Instructions:
- Apply a base coat to clean nails.
- Paint your nails with a neutral base color.
- Use the nail art brush to create wavy patterns with the pastel polishes.
- Finish with a top coat to seal the design and add a glossy finish.
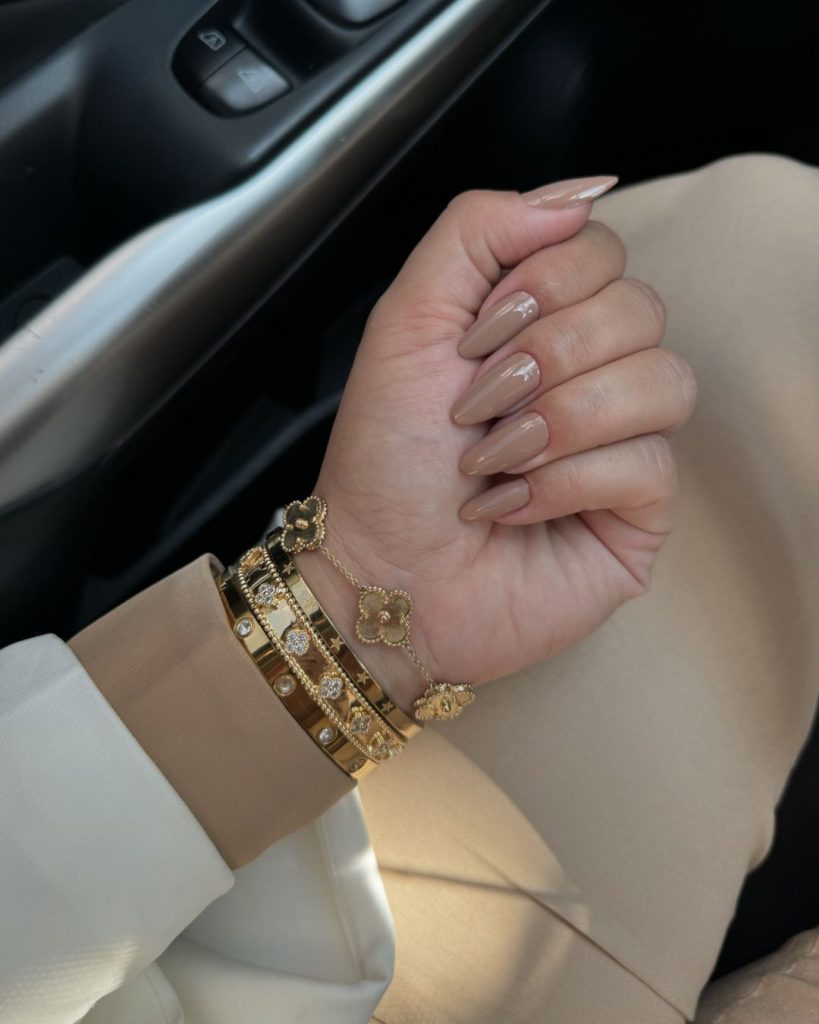
Elegant Nude Almond Nails
These elegant nude almond nails are the epitome of sophistication. The soft nude color is perfect for any occasion, providing a polished and refined look. The almond shape enhances the feminine and delicate feel of this manicure.
Consumables Needed:
- Base coat: Sally Hansen Double Duty Base & Top Coat
- Nude polish: OPI Tiramisu for Two
- Top coat: Essie Gel Couture Top Coat
Creation Instructions:
- Apply a base coat to protect your nails.
- Paint your nails with two coats of the nude polish, allowing each coat to dry completely.
- Finish with a top coat to add shine and durability to your manicure.
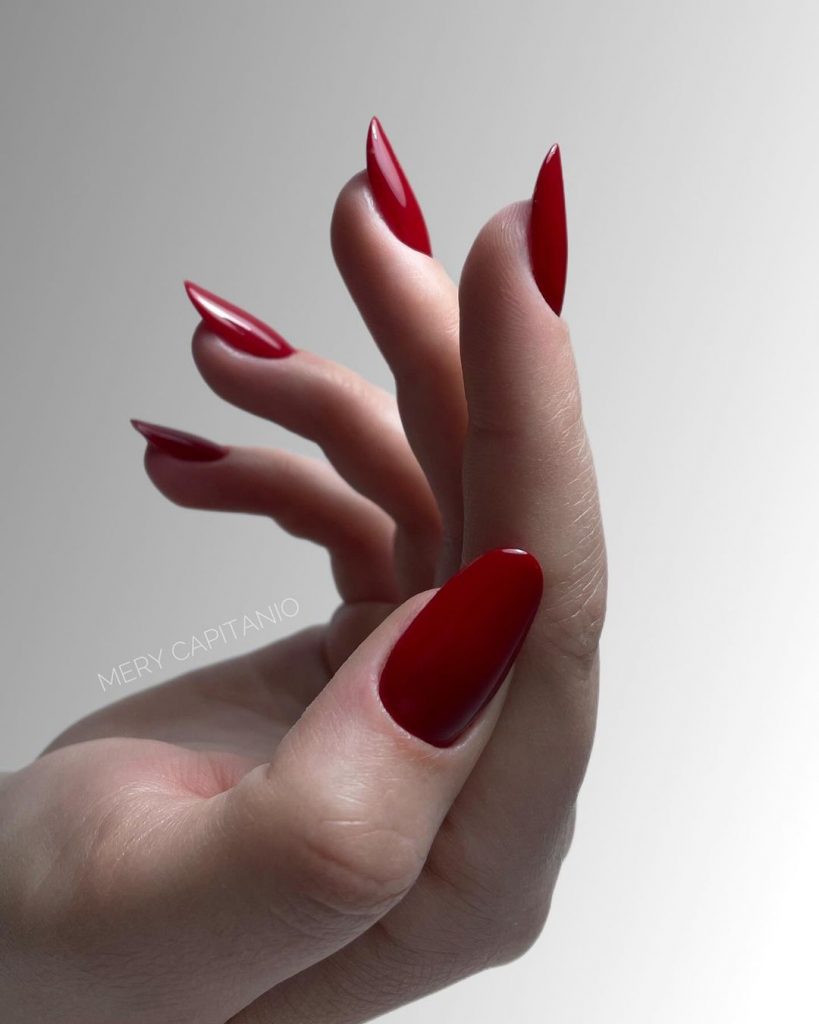
Bold Red Stiletto Nails
These bold red stiletto nails are perfect for making a statement. The striking red color and sharp stiletto shape create a fierce and powerful look. This design is ideal for those who want to stand out and exude confidence.
Consumables Needed:
- Base coat: OPI Natural Nail Base Coat
- Red polish: Essie Really Red
- Top coat: Seche Vite Dry Fast Top Coat
Creation Instructions:
- Apply a base coat to protect your nails.
- Paint your nails with two coats of the red polish, allowing each coat to dry completely.
- Finish with a top coat to add shine and durability to your manicure.
Neon Gradient with Black Lines
This neon gradient design features bright yellow and pink colors with black wavy lines. The square shape and glossy finish make this manicure both trendy and chic. The neon colors and unique pattern are perfect for those who love bold and playful designs.
Consumables Needed:
- Base coat: OPI Start to Finish Base & Top Coat
- Neon yellow polish: OPI Exotic Birds Do Not Tweet
- Neon pink polish: Essie Pink Parka
- Black nail art pen: Sally Hansen I Heart Nail Art Pen
- Top coat: Seche Vite Dry Fast Top Coat
Creation Instructions:
- Apply a base coat to start.
- Paint your nails with a gradient effect using the neon yellow and pink polishes.
- Use the black nail art pen to create wavy lines on each nail.
- Finish with a top coat to seal the design and add a glossy finish.
Save Pin