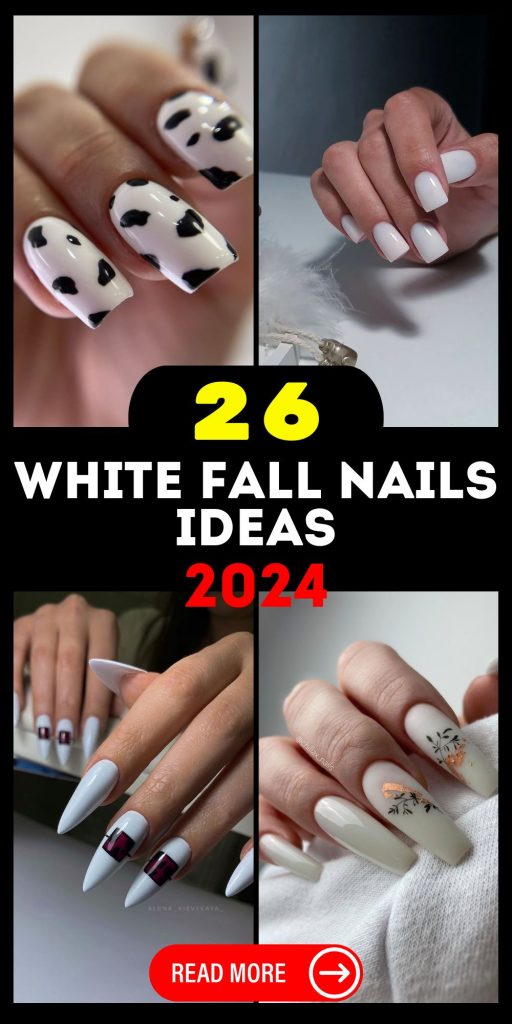
Are you ready to embrace the elegance of white fall nails 2024? As the season shifts, so do our nail inspirations, and white nails are at the forefront of this year’s autumn trends. Whether you’re a fan of almond, square, or oval shapes, or prefer a creamy or milky finish, white nails offer endless possibilities. But what makes them stand out this season? Let’s explore some of the most stunning white nail designs, breaking down each look and offering insights on how you can achieve them at home.
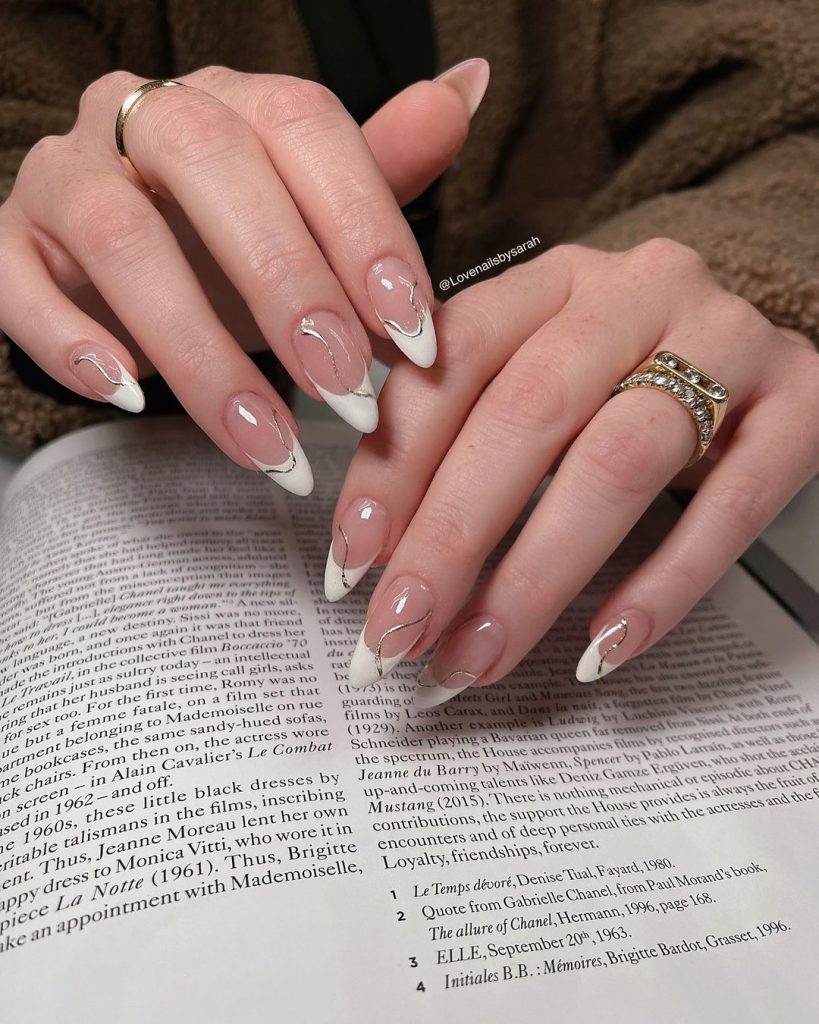
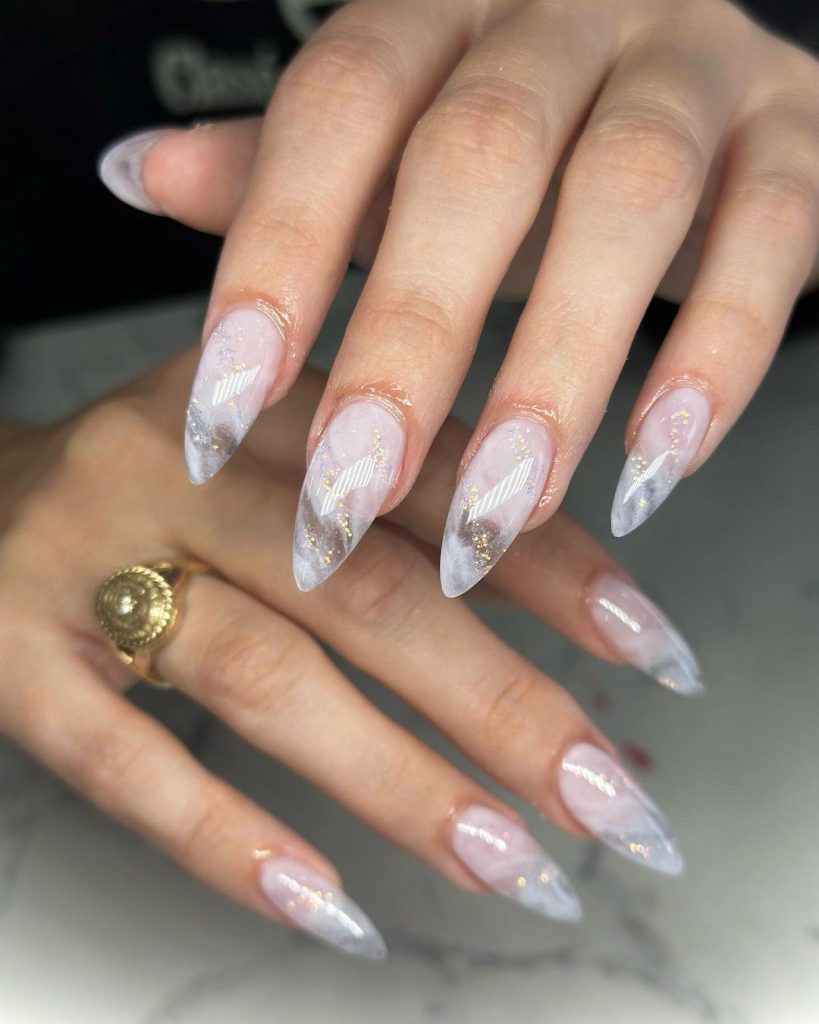
French Twist
This design is a modern twist on the classic French manicure. The crisp white tips are accentuated with a delicate gold design, adding a touch of sophistication to the almond-shaped nails. The creamy base color provides a soft contrast, making the white tips pop even more. This design is both trendy and timeless, perfect for those who love a minimalist yet elegant look.
Tools & Products
- Base color: Essie Ballet Slippers
- Tip color: OPI Alpine Snow
- Gold accents: Sally Hansen Insta-Dri Gold Rush
- Top coat: Seche Vite Dry Fast Top Coat
DIY Tips
Start by shaping your nails into a smooth almond shape. Apply a base coat, followed by two thin layers of the creamy base color. Once dry, use a fine brush to apply the white tip, keeping the line crisp and even. Add the gold design accents using a nail art brush or a dotting tool. Finish with a high-gloss top coat to seal in the design and add extra shine.
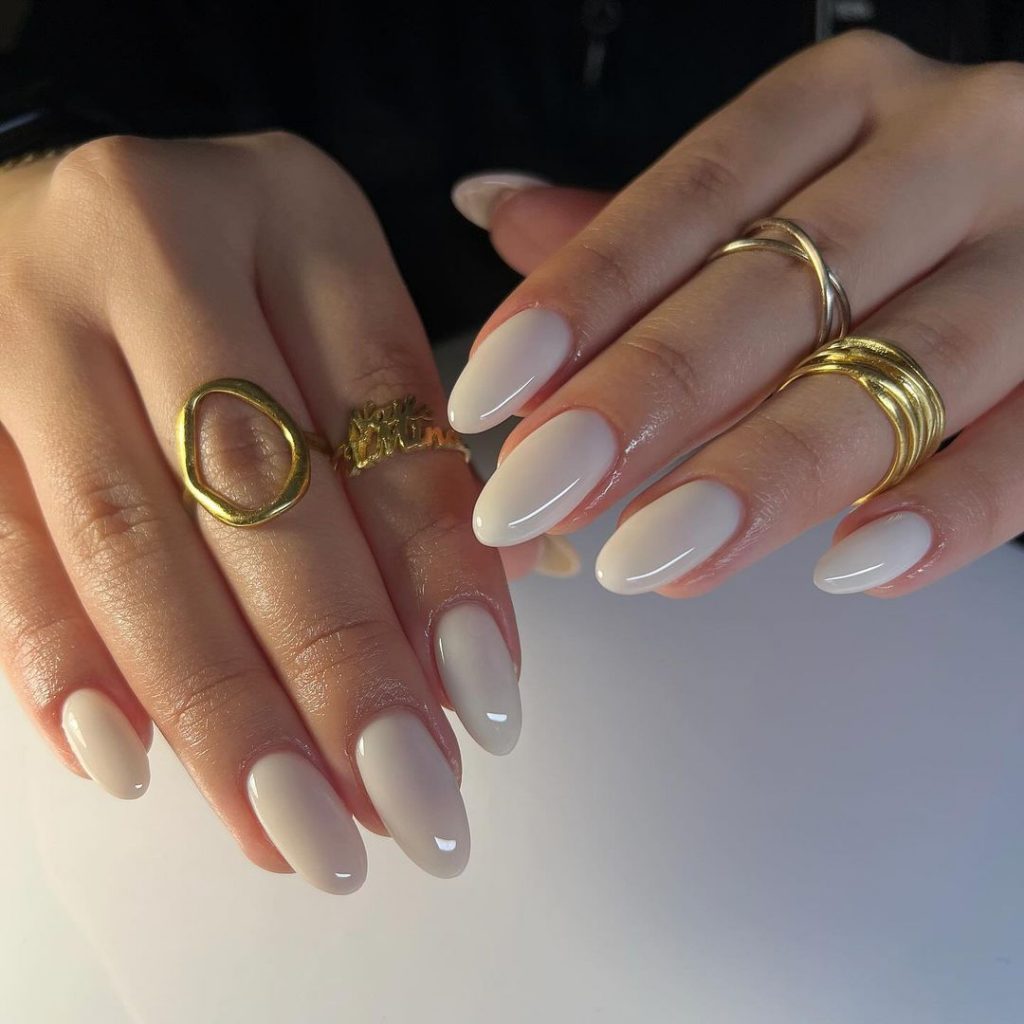
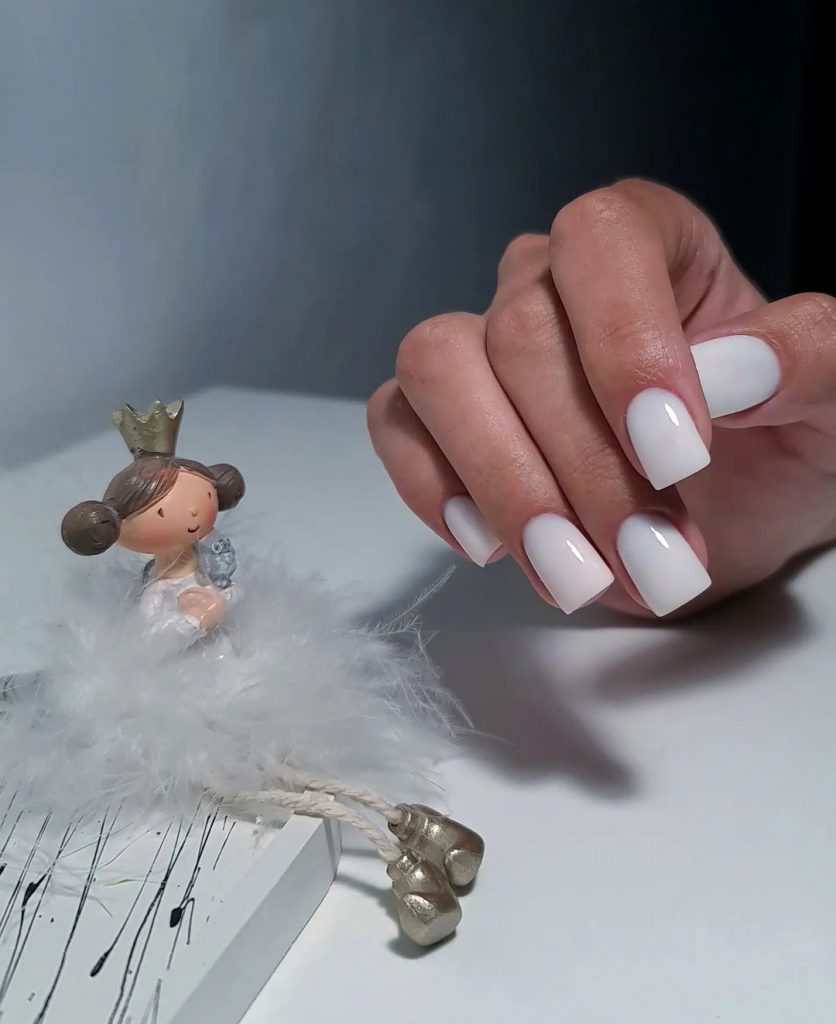
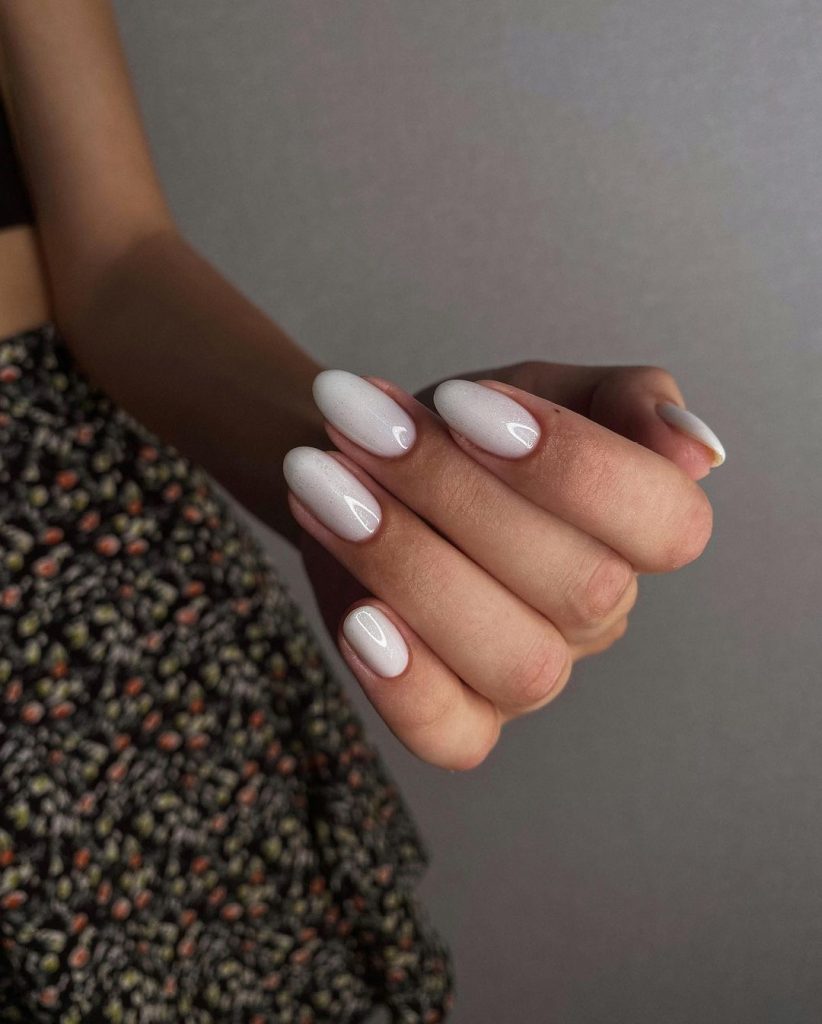
Milky Elegance
This design is a beautiful take on the milky white trend. These nails are all about simplicity and elegance, with a subtle pearl finish that gives them a soft, almost ethereal glow. The almond shape enhances the delicate look, making these nails ideal for both everyday wear and special occasions.
Tools & Products
- Base color: Zoya Snow White
- Top coat: Essie Gel Couture Platinum Grade Finish
- Pearl finish: OPI Infinite Shine in Pearl of Wisdom
DIY Tips
To recreate this look, start by applying a base coat to protect your natural nails. Follow with two coats of milky white polish, allowing each coat to dry thoroughly. For the pearl finish, apply a thin layer of Pearl of Wisdom and let it dry. Seal the look with a high-shine top coat, and you’re ready to dazzle with these trendy nails.
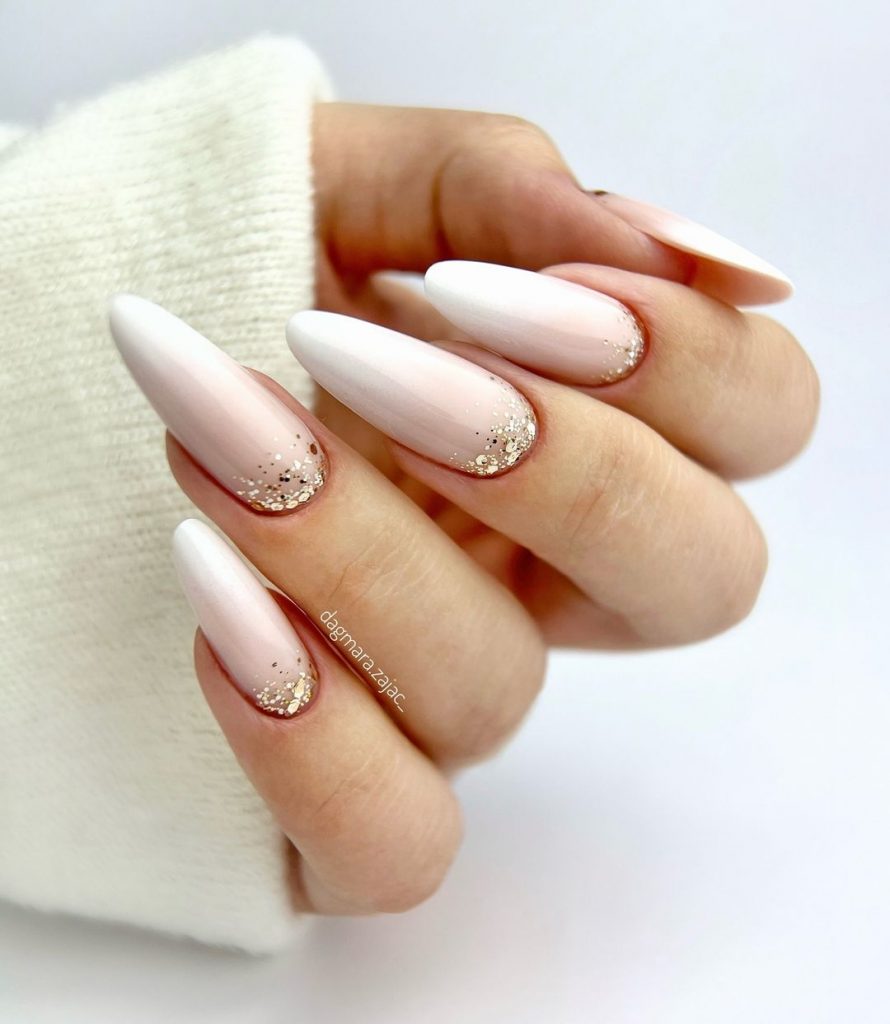
Ombre Glow
This design features a stunning ombre effect, transitioning from a soft milky white at the base to a sparkling gold at the tips. The almond shape is the perfect canvas for this trendy and inspo-worthy look. The glitter adds just the right amount of sparkle, making these nails perfect for autumn evenings or special events.
Tools & Products
- Base color: Essie Marshmallow
- Gold glitter: China Glaze Fairy Dust
- Top coat: Sally Hansen Miracle Gel Top Coat
DIY Tips
Begin by applying the milky white base color, allowing it to dry completely. For the ombre effect, use a makeup sponge to dab the gold glitter polish onto the tips, blending it upward toward the middle of the nail. Finish with a glossy top coat to smooth out the gradient and add a protective layer.
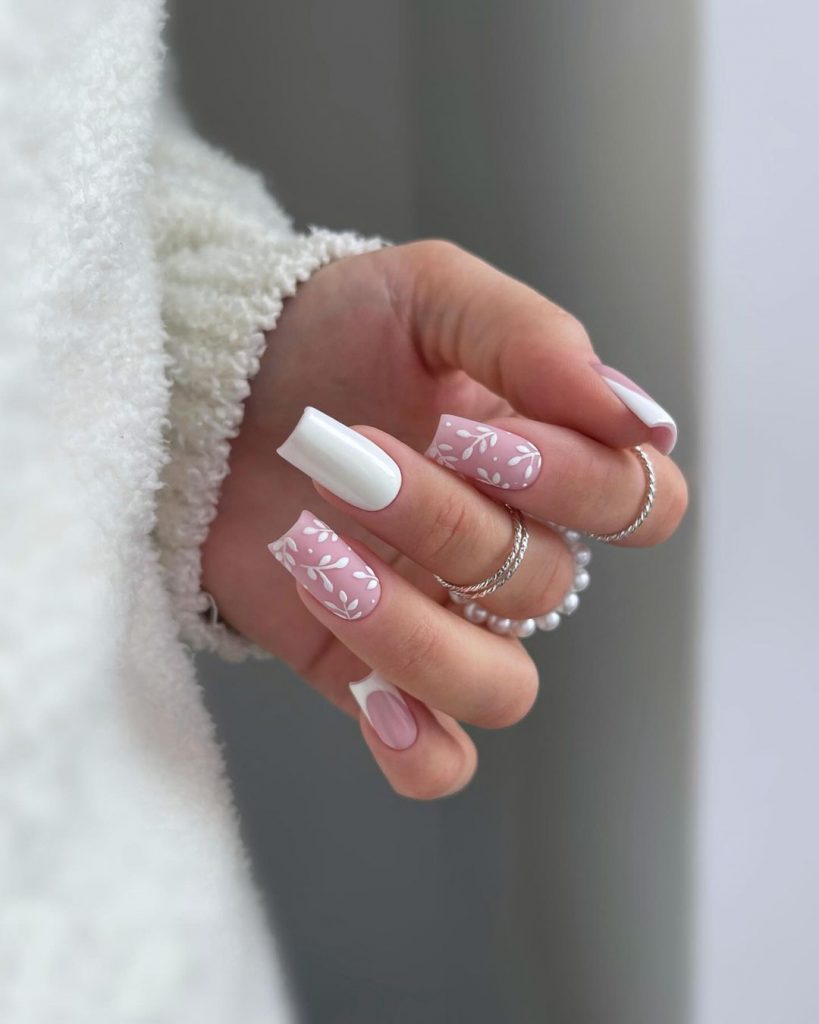
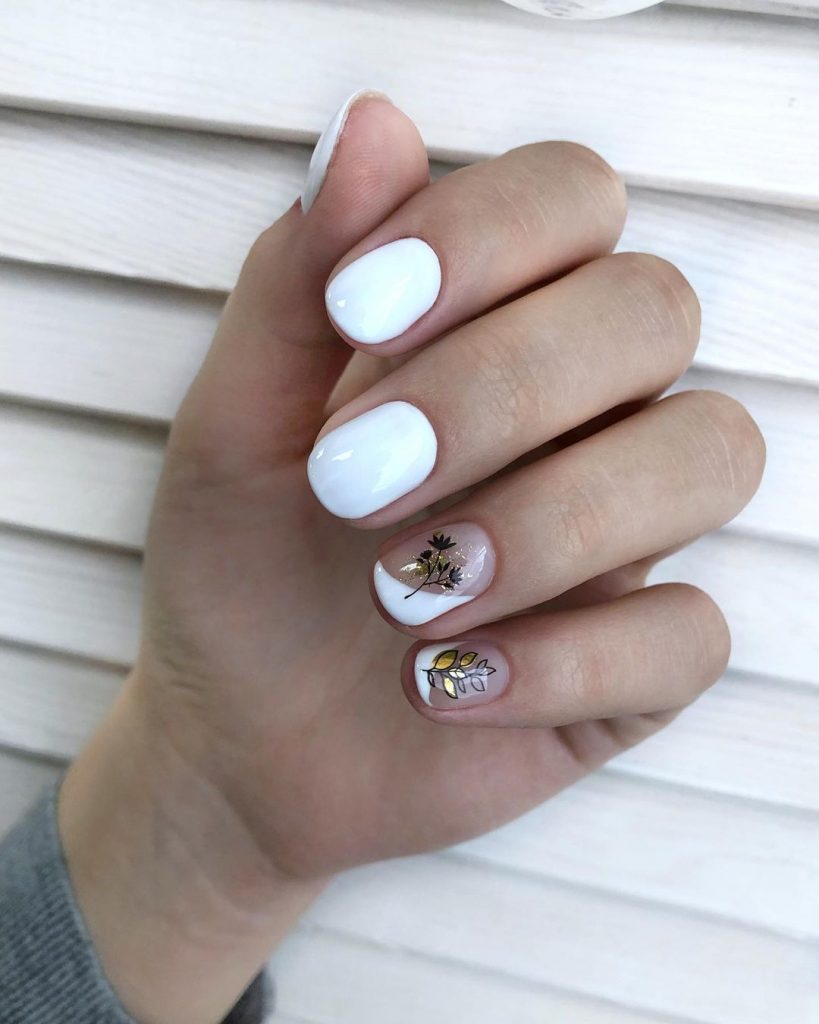
Floral Delight
This design combines cute and simple elements with a trendy twist. The square-shaped nails feature a mix of plain white and delicate floral patterns, making them perfect for those who love a touch of art in their manicure. The contrast between the plain white nails and the intricate design adds depth and interest without overwhelming the look.
Tools & Products
- Base color: OPI Funny Bunny
- Floral design: Sally Hansen Nail Art Pen in White
- Top coat: CND Vinylux Weekly Top Coat
DIY Tips
After shaping your nails into a clean square shape, apply two coats of the base color. Once the base is dry, use the nail art pen to draw the floral patterns on a few accent nails. Keep the rest of the nails plain white for balance. Finish with a top coat to protect your design and add a glossy finish.
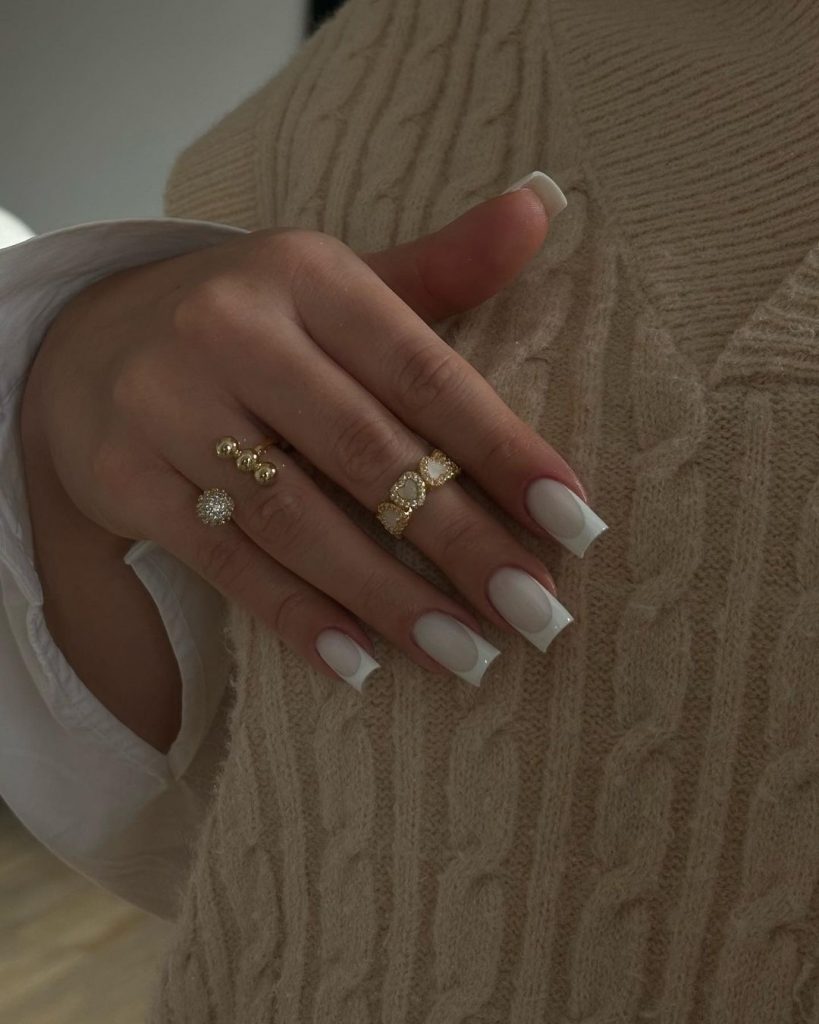
Modern French
This design is a chic and trendy take on the classic French manicure, but with a bold square shape. The white tips are slightly curved, giving them a softer, more modern appearance. Paired with a neutral base, this design is both versatile and elegant, perfect for any occasion.
Tools & Products
- Base color: Orly Bare Rose
- Tip color: Essie Blanc
- Top coat: Revlon Extra Life No Chip Top Coat
DIY Tips
Start by shaping your nails into a sharp square. Apply the base color and let it dry completely. Use a fine brush to apply the white tips, making sure to follow the natural curve of your nails for a softer look. Finish with a durable top coat to ensure your manicure lasts as long as possible.
Sculpted Glam
This nail design is a bold and artistic take on the classic white manicure, featuring a sculpted 3D effect on square-shaped nails. The glossy finish adds depth to the intricate patterns, making this look both trendy and eye-catching. Ideal for those who love to make a statement with their nails, this design is perfect for autumn events where you want your nails to be the center of attention.
Tools & Products
- Base color: OPI Alpine Snow
- Sculpting gel: Bio Sculpture Gel in Clear
- Top coat: Seche Vite Dry Fast Top Coat
DIY Tips
To achieve this sculpted look, start by applying the base color and allowing it to dry completely. Use the sculpting gel to create the 3D patterns, working carefully to ensure precision. Cure each layer under a UV lamp, then finish with a top coat to seal in the design and add a high-gloss finish.
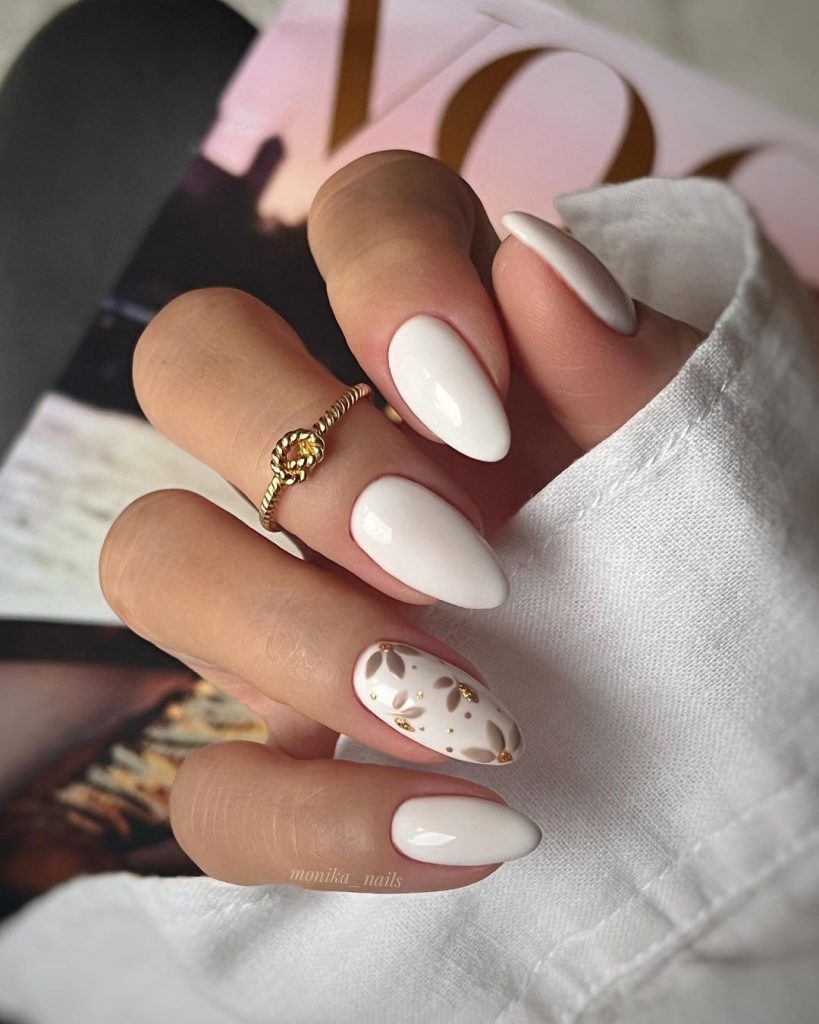
Golden Accent
This design exudes elegance with its milky white base and subtle gold design accent on one nail. The almond shape complements the overall softness of the look, making it perfect for both casual and formal settings. The minimalistic use of gold adds just the right amount of luxury without overwhelming the design.
Tools & Products
- Base color: Zoya Purity
- Gold accents: Ciaté London Gold Digga
- Top coat: Essie Gel Couture Top Coat
DIY Tips
Start by shaping your nails into an almond shape, then apply two coats of the milky white base color. For the accent nail, use a fine brush to add the gold details, ensuring they are evenly spaced and delicate. Finish with a top coat to protect the design and give it a long-lasting shine.
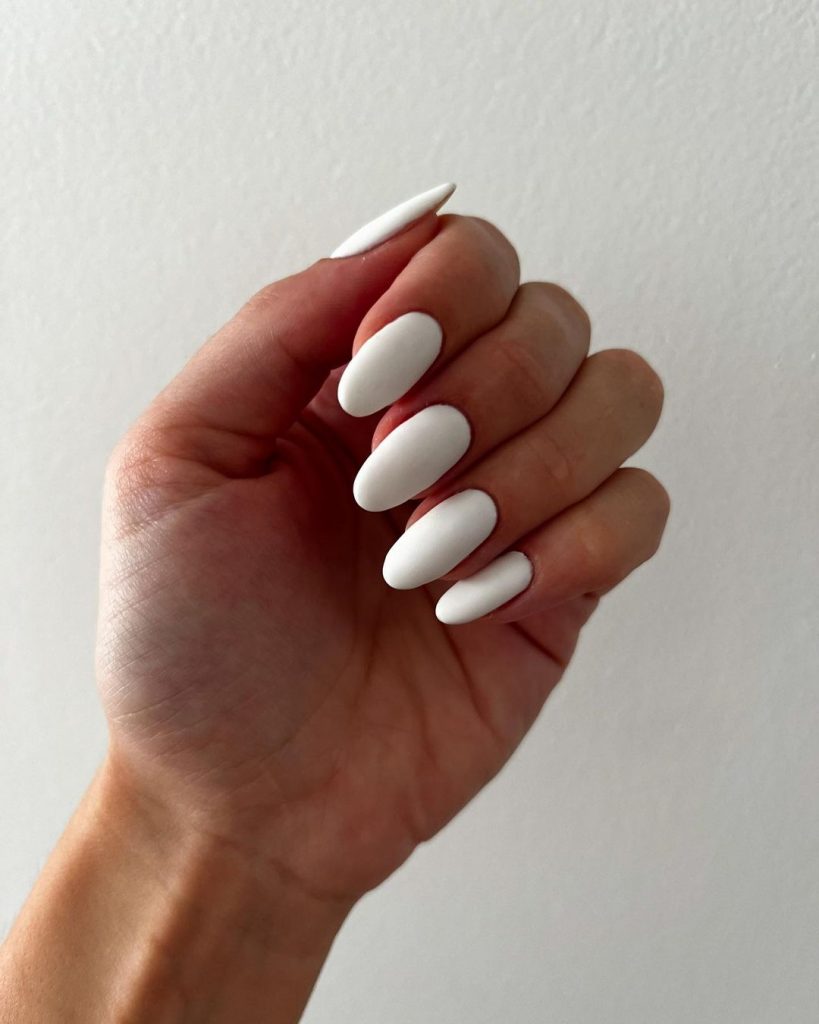
Matte Minimalism
This design showcases the beauty of simplicity with a matte white finish on almond-shaped nails. The absence of any additional designs allows the shape and color to stand out on their own, creating a trendy yet understated look. This simple and plain design is perfect for those who prefer a minimalistic approach to their manicures.
Tools & Products
- Base color: OPI Funny Bunny
- Matte top coat: OPI Matte Top Coat
DIY Tips
Apply the base color in two thin coats, allowing each to dry completely. Once the polish is dry, finish with a matte top coat to achieve that velvety, non-shiny effect. Ensure your nails are smooth and free from any imperfections before applying the matte top coat, as it can accentuate any flaws.
Icy Glamour
This design is a glamorous take on white fall nails 2024, with a frosty, light blue base that is complemented by glittering gold accents. The stiletto shape adds an extra edge to the design, making it perfect for those who love a bold, fashion-forward look. The blend of light blue and gold gives these nails a wintry vibe that’s ideal for the colder months.
Tools & Products
- Base color: Essie Mint Candy Apple
- Gold glitter: Sally Hansen Insta-Dri Gilded Glitz
- Top coat: Sally Hansen Miracle Gel Top Coat
DIY Tips
Begin by shaping your nails into a stiletto shape, then apply the light blue base color. Once it’s dry, use a thin brush to add the gold glitter in delicate patterns, focusing on the tips and base of the nails. Seal the design with a top coat to enhance the shine and protect your manicure.
Classic Chic
The final design is a simple, trendy white manicure on square-shaped nails. The high-gloss finish makes these nails look polished and refined, perfect for both everyday wear and special occasions. This plain white design is a versatile option that complements any outfit, making it a go-to choice for autumn.
Tools & Products
- Base color: Essie Blanc
- Top coat: Seche Vite Dry Fast Top Coat
DIY Tips
Shape your nails into a square shape, then apply two coats of the base color. Ensure that each coat is thin and even to avoid streaks. Finish with a high-gloss top coat to give your nails that polished, salon-quality finish.
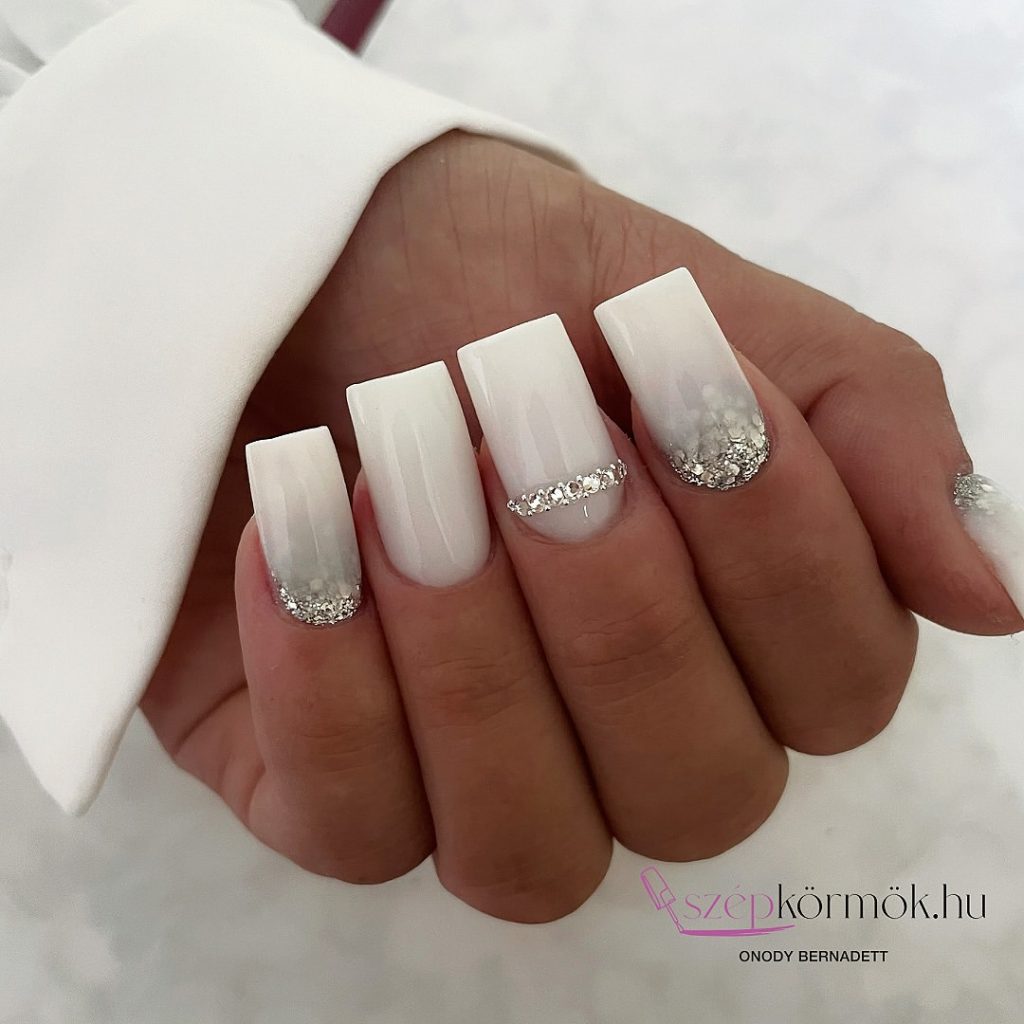
Crystal Elegance
This design is a stunning combination of a milky white base with a glamorous gradient of silver glitter. The square shape adds a modern touch, while the crystals lining the base of the accent nail elevate the entire look. This design is perfect for a sophisticated event or when you want your nails to be the star of the show.
Tools & Products
- Base color: OPI Funny Bunny
- Silver glitter: China Glaze Glistening Snow
- Crystals: Swarovski Crystal Pixie
- Top coat: Essie Gel Couture Top Coat
DIY Tips
Start by shaping your nails into a clean square. Apply two coats of the milky white base color, allowing each coat to dry. Then, use a sponge to apply the silver glitter from the tips upward, creating a gradient effect. Carefully place the crystals at the base of the accent nail using tweezers, and seal everything with a glossy top coat.
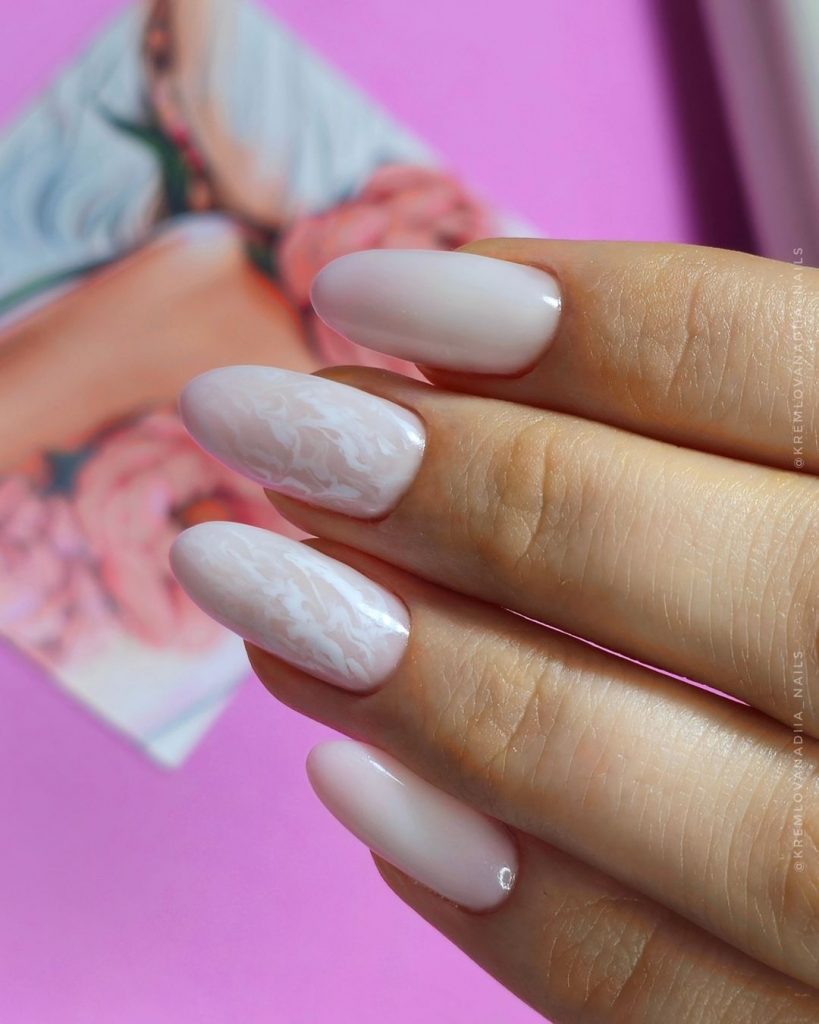
Marble Magic
This design features a soft, milky white base with delicate marble accents on one or two nails. The almond shape is ideal for showcasing the intricate marbling, adding a touch of luxury to this otherwise simple and trendy look. The marble effect gives these nails a modern, chic vibe, perfect for autumn.
Tools & Products
- Base color: Essie Marshmallow
- Marble effect: OPI Infinite Shine in It’s In The Cloud
- Top coat: Sally Hansen Miracle Gel Top Coat
DIY Tips
After shaping your nails into an almond shape, apply the base color. For the marble effect, use a thin brush to create subtle swirls with a slightly darker white or grey polish on the accent nails. Blend the lines lightly to soften the effect. Finish with a top coat to add shine and protect your design.
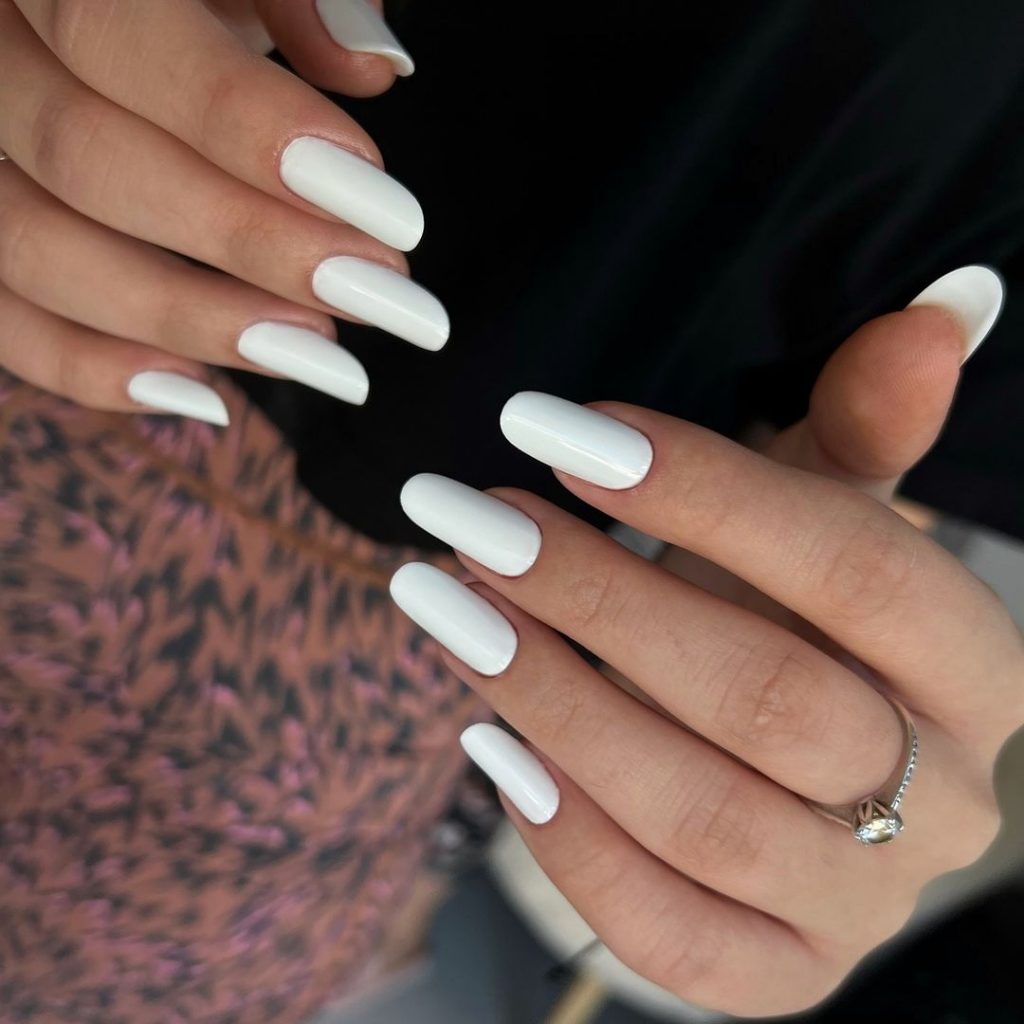
White Perfection
This manicure is the epitome of plain elegance with square-shaped nails in a crisp white finish. The simplicity of this design makes it incredibly versatile and timeless. Whether for a professional setting or a casual day out, these nails exude confidence and style.
Tools & Products
- Base color: OPI Alpine Snow
- Top coat: Seche Vite Dry Fast Top Coat
DIY Tips
Shape your nails into a square and apply two coats of the base color, making sure each layer is thin and even. Finish with a high-gloss top coat to give your nails a polished and long-lasting finish.
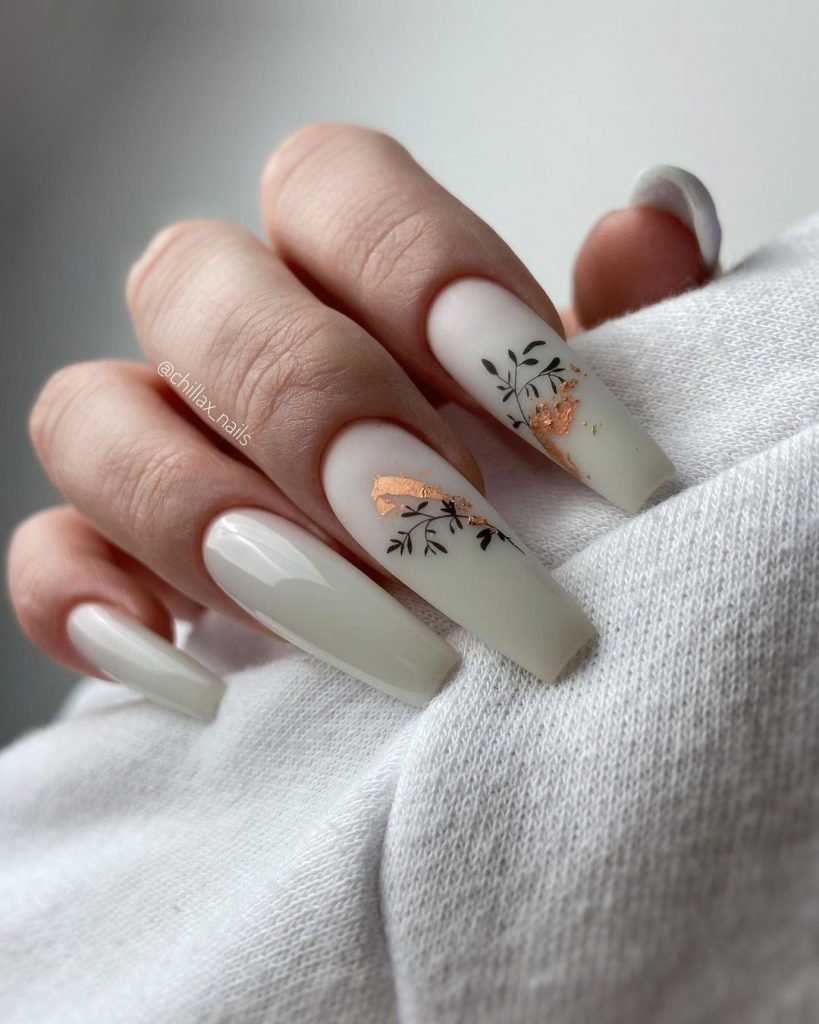
Botanical Bliss
This design brings nature to your fingertips with delicate floral accents on a soft milky white base. The square shape allows ample space for the intricate details, while the subtle hints of gold foil add a luxurious touch. This look is perfect for those who love a mix of elegance and artistic flair.
Tools & Products
- Base color: Essie Blanc
- Floral design: MoYou London Flower Power Plate
- Gold foil: Ciaté London Luxe Foil
- Top coat: OPI Top Coat
DIY Tips
Apply the base color and let it dry completely. Use a stamping tool to transfer the floral design onto your accent nails. Carefully apply the gold foil using a fine brush, focusing on areas that catch the light. Finish with a top coat to seal in the design and add a glossy finish.
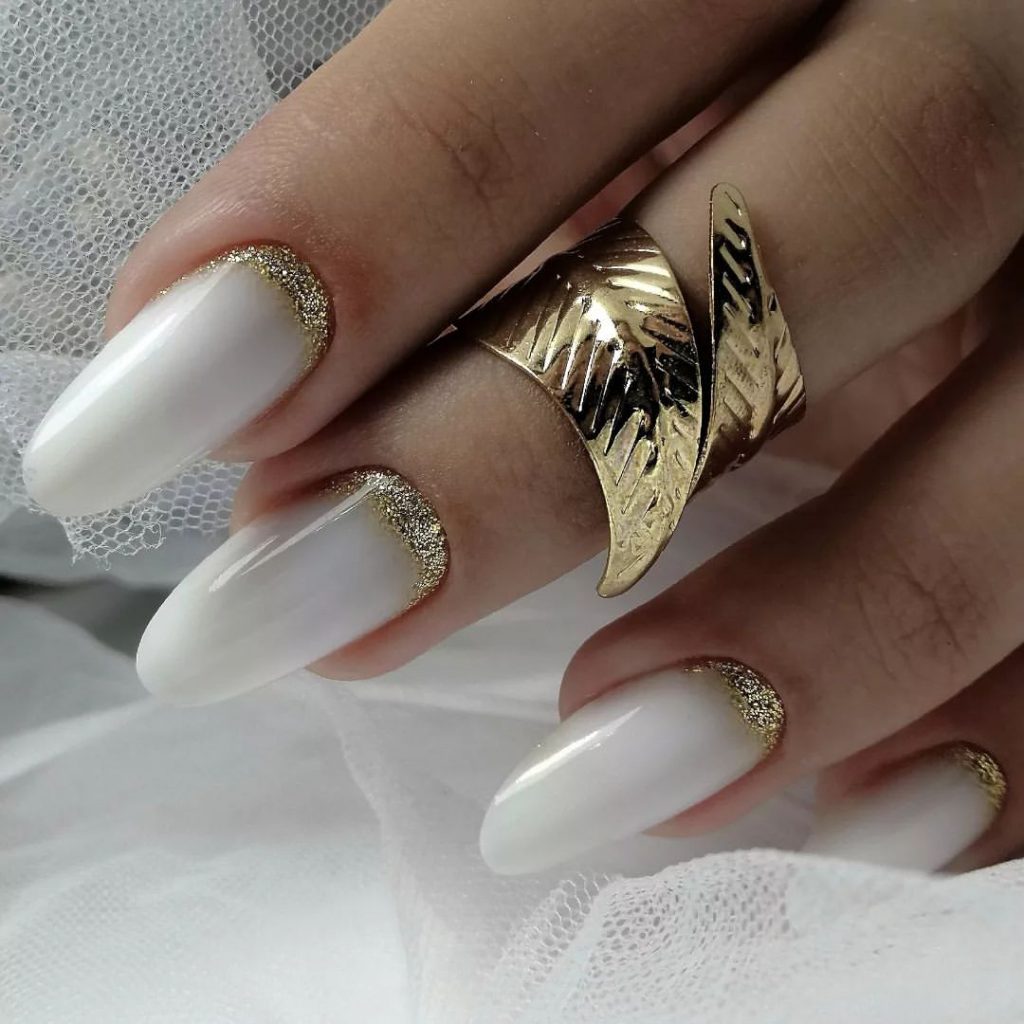
Golden Touch
The final design is a luxurious milky white manicure with gold accents along the cuticle. The almond shape enhances the elegance of the design, making these nails perfect for a chic and polished look. The gold details are understated yet impactful, adding just the right amount of glamour.
Tools & Products
- Base color: Zoya Purity
- Gold glitter: Ciaté London Antique Brooch
- Top coat: Essie Gel Couture Top Coat
DIY Tips
Start by shaping your nails into an almond shape. Apply two coats of the milky white base color. Once dry, use a thin brush to apply the gold glitter along the cuticle line, keeping the application neat and precise. Seal with a top coat to ensure your design lasts.
Subtle Gold Accents
This design is a beautiful blend of simplicity and elegance, featuring a milky white base with subtle gold accents on one nail. The short square shape adds to the minimalistic vibe, making this look perfect for a professional setting or a sophisticated day out.

Tools & Products
- Base color: OPI Funny Bunny
- Gold accents: Ciaté London Luxe Foil
- Top coat: Essie Gel Couture Top Coat
DIY Tips
Start by shaping your nails into a neat square. Apply two coats of the milky white base color, allowing each coat to dry completely. Add the gold accents using a thin brush for precision, focusing on one nail to keep the design subtle. Finish with a top coat to seal the design and add a glossy finish.
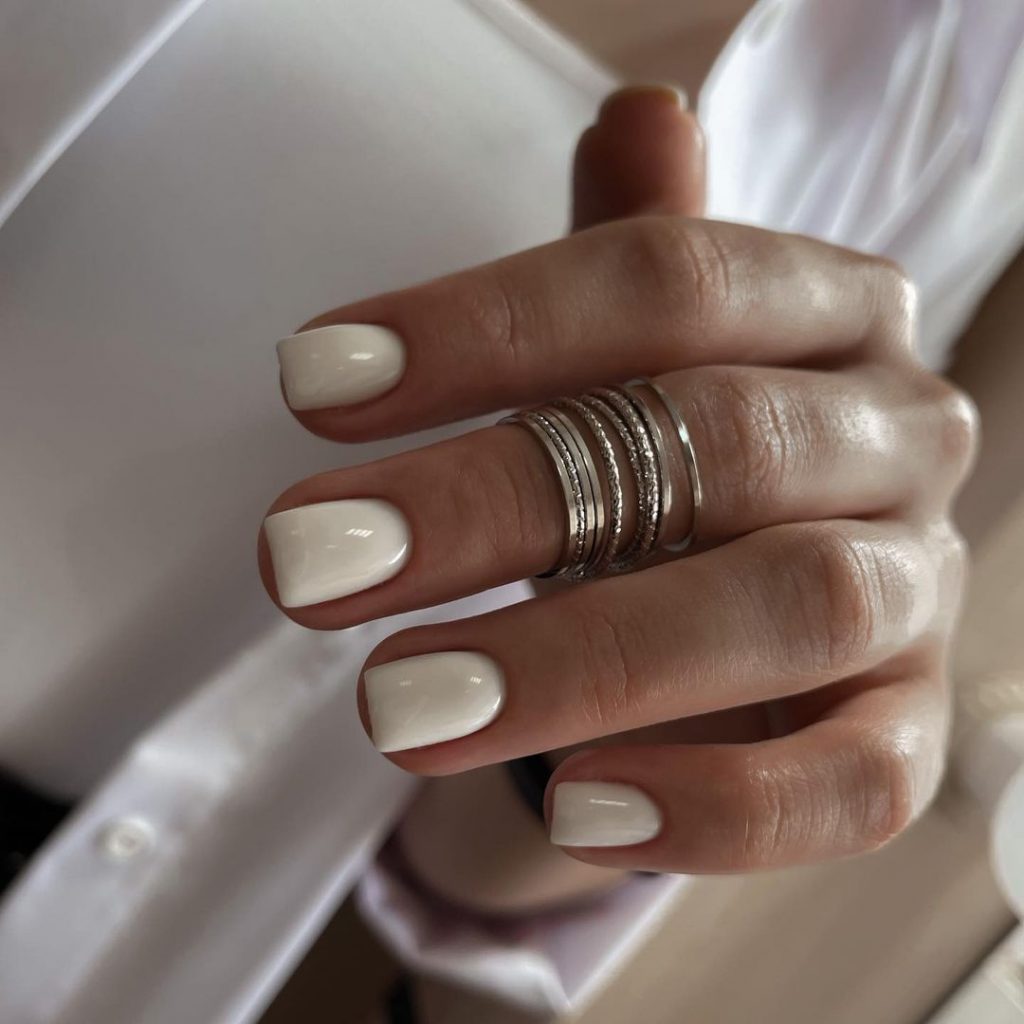
Classic Gloss
This manicure is all about the perfect glossy finish on short nails. The crisp white color paired with the square shape creates a clean, polished look that’s both timeless and versatile. This design is ideal for anyone who loves a simple and trendy manicure.
Tools & Products
- Base color: OPI Alpine Snow
- Top coat: Seche Vite Dry Fast Top Coat
DIY Tips
Shape your nails into a square, then apply two coats of the base color. Make sure each layer is thin to avoid streaks. Finish with a high-gloss top coat to give your nails a salon-quality shine.
Floral Delight
This design adds a playful touch to a milky white base with delicate floral accents. The short nails provide the perfect canvas for the intricate details, making this look both cute and artistic. The floral designs are subtle yet impactful, adding a touch of nature to your manicure.
Tools & Products
- Base color: Essie Blanc
- Floral design: MoYou London Flower Power Plate
- Top coat: OPI Top Coat
DIY Tips
After shaping your nails, apply two coats of the base color. Once dry, use a stamping tool to apply the floral design on a few accent nails. Seal the design with a top coat to protect it and add a glossy finish.
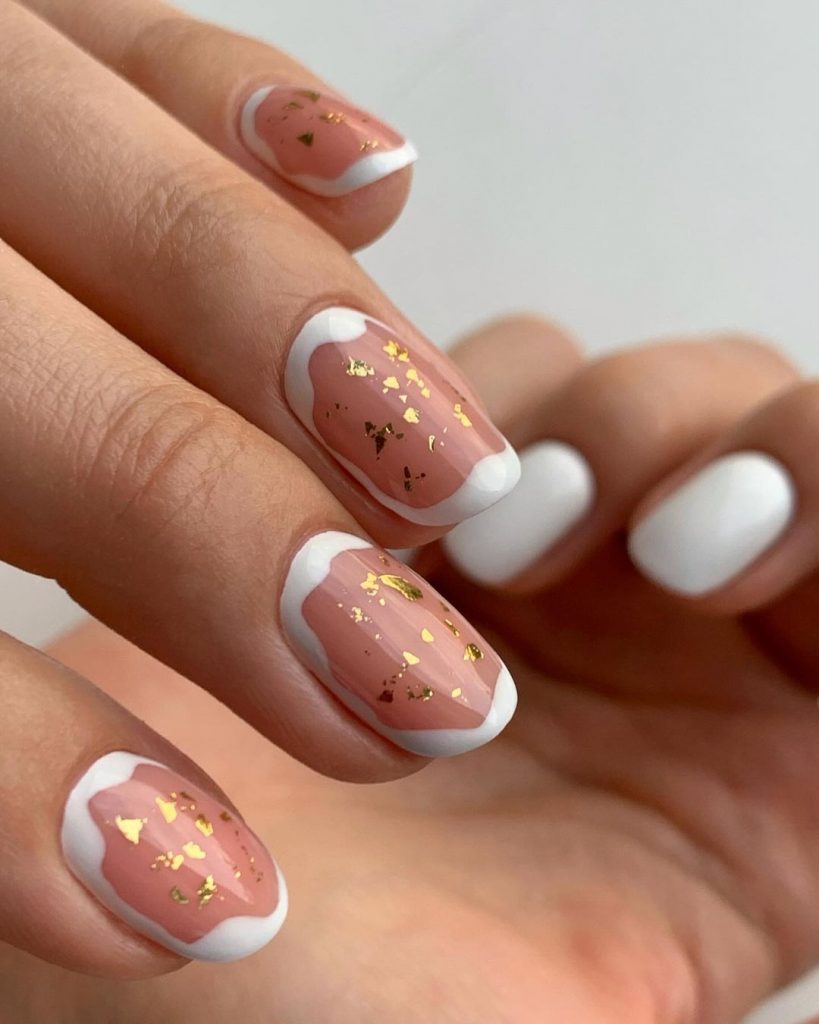
Gold Foil Elegance
This unique design combines a classic white French tip with a transparent base and gold foil accents. The short square shape adds a modern twist, making this look both sophisticated and fashion-forward. The gold foil adds a touch of luxury, making this manicure perfect for special occasions.
Tools & Products
- Base color: OPI Alpine Snow
- Gold foil: Ciaté London Luxe Foil
- Top coat: Seche Vite Dry Fast Top Coat
DIY Tips
Begin by applying a transparent base coat, then use a fine brush to create the white French tips. Carefully apply the gold foil to the nail bed, ensuring it’s evenly distributed. Finish with a top coat to secure the foil and add shine.
Soft White Glow
This design features a soft, milky white base with a slight shimmer, giving the nails a subtle glow. The almond shape adds to the elegance of the look, making it perfect for those who prefer a more understated and chic manicure.
Tools & Products
- Base color: Essie Marshmallow
- Shimmer top coat: Sally Hansen Miracle Gel in Shimmering Snow
- Top coat: OPI Top Coat
DIY Tips
Shape your nails into an almond shape, then apply two coats of the base color. Add the shimmer top coat for a subtle glow, and finish with a regular top coat to protect your manicure and enhance the shine.
Gold Leaf Accent
This design blends the elegance of a milky white manicure with a bold gold leaf accent on one nail. The square shape enhances the clean lines of the design, while the gold leaf adds a touch of luxury and sophistication. This manicure is perfect for those who love a mix of classic and contemporary styles.

Tools & Products
- Base color: OPI Alpine Snow
- Gold leaf: Ciaté London Luxe Foil
- Top coat: Seche Vite Dry Fast Top Coat
DIY Tips
Shape your nails into a square and apply two coats of the base color. For the gold leaf accent, apply a small piece of the foil to the nail while the polish is still tacky, then press gently to adhere. Finish with a top coat to seal the design and add a high-gloss finish.
Bold Contrast
This manicure creates a striking contrast with bold red and milky white nails on a square shape. The simplicity of the white is beautifully offset by the vibrant red, making this design perfect for those who want a bold, eye-catching look.

Tools & Products
- Base colors: OPI Big Apple Red and Essie Blanc
- Top coat: Seche Vite Dry Fast Top Coat
DIY Tips
Shape your nails into a square and apply two coats of each base color, alternating between red and white. Ensure each layer is dry before applying the next. Finish with a top coat to enhance the shine and durability of your manicure.
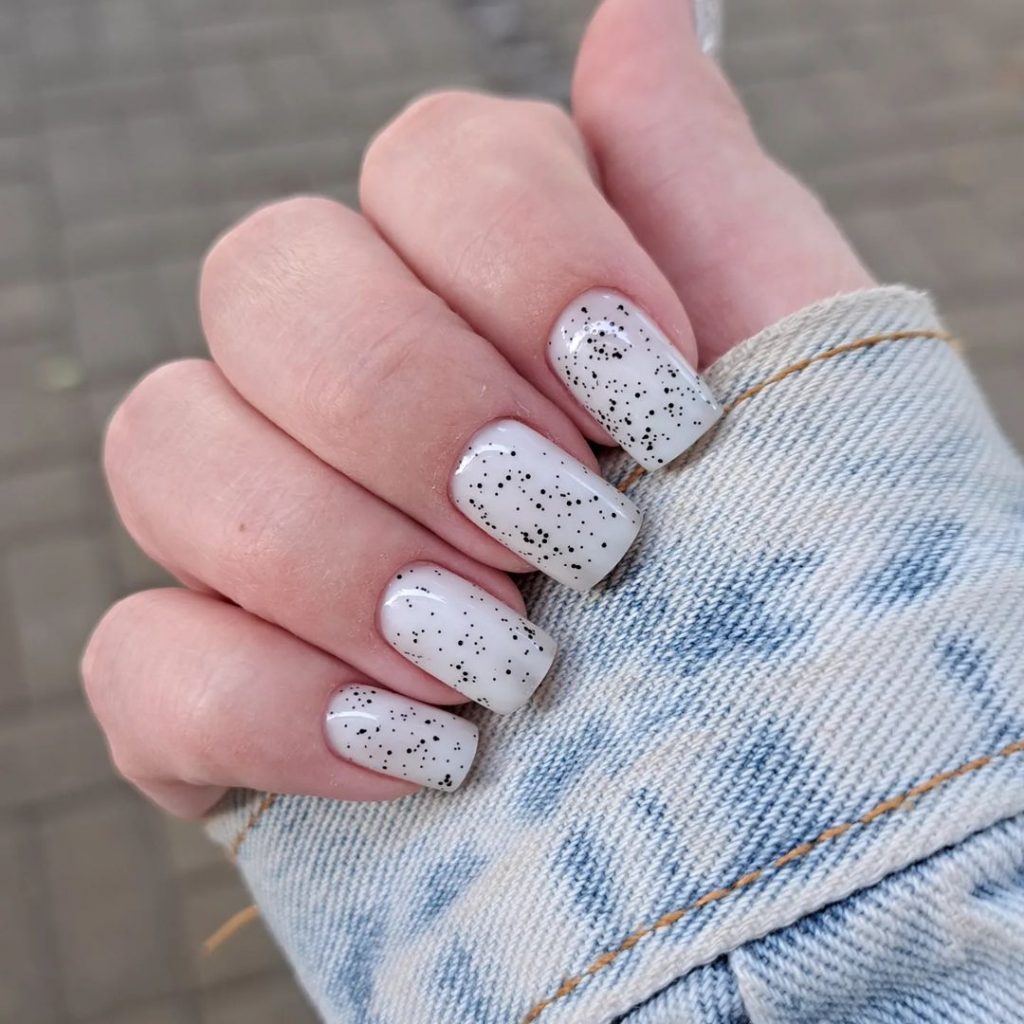
Speckled Chic
This design features a playful take on white fall nails 2024 with black speckled details over a milky white base. The square shape adds a modern touch, while the speckled pattern gives the nails a fun and trendy vibe. This look is ideal for those who enjoy creative yet subtle nail art.
Tools & Products
- Base color: OPI Funny Bunny
- Black speckles: Sally Hansen Insta-Dri in Black to Black
- Top coat: Essie Gel Couture Top Coat
DIY Tips
After shaping your nails, apply two coats of the milky white base color. Once dry, use a small brush or a dotting tool to create the speckled effect with black polish. Seal the design with a top coat to protect your art and add shine.
Abstract Art
This design takes white nails to the next level with an abstract art twist. The stiletto shape provides a dramatic canvas for the white base, which is accented by a bold red and black design. This look is perfect for those who love edgy, fashion-forward manicures.
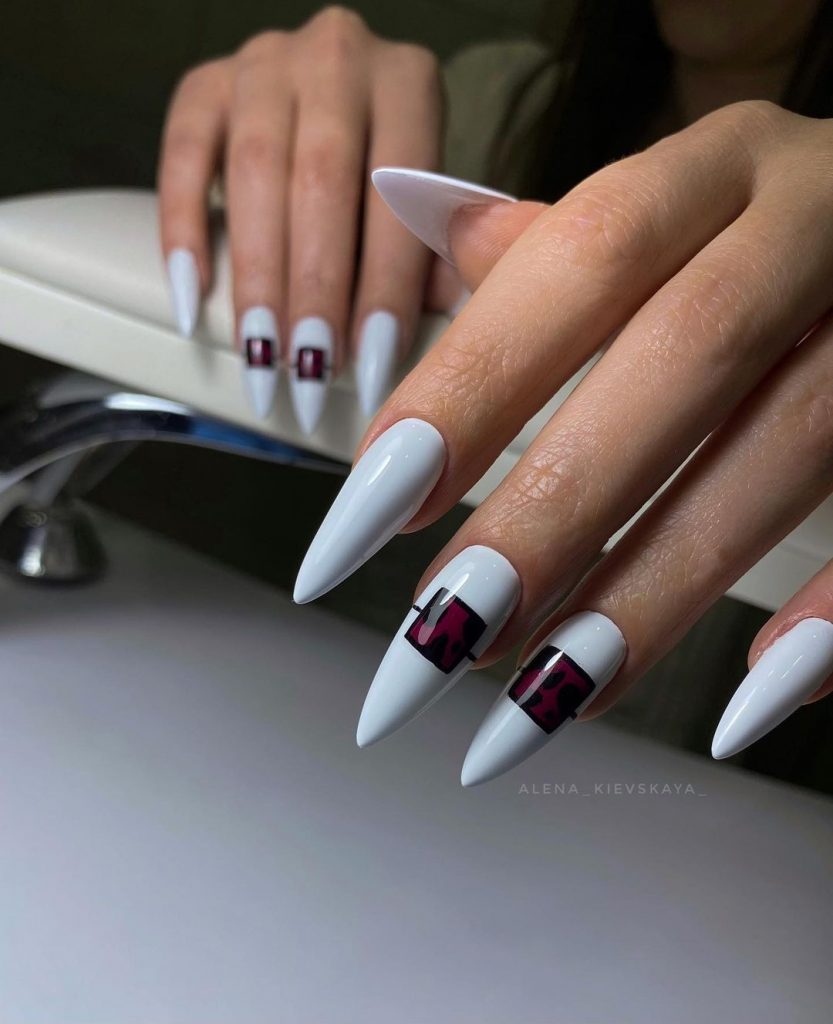
Tools & Products
- Base color: Essie Blanc
- Accent colors: OPI Big Apple Red and Sally Hansen Black Out
- Top coat: Sally Hansen Miracle Gel Top Coat
DIY Tips
Shape your nails into a stiletto shape and apply two coats of the base color. Once dry, use a fine brush to create the abstract designs with red and black polish. Finish with a top coat to add shine and protect your manicure.
Dalmatian Dots
This playful design brings a touch of whimsy to white fall nails 2024 with a Dalmatian-inspired pattern. The square shape adds to the modern feel, while the black spots on a crisp white base create a fun and cute look that’s perfect for any casual occasion.
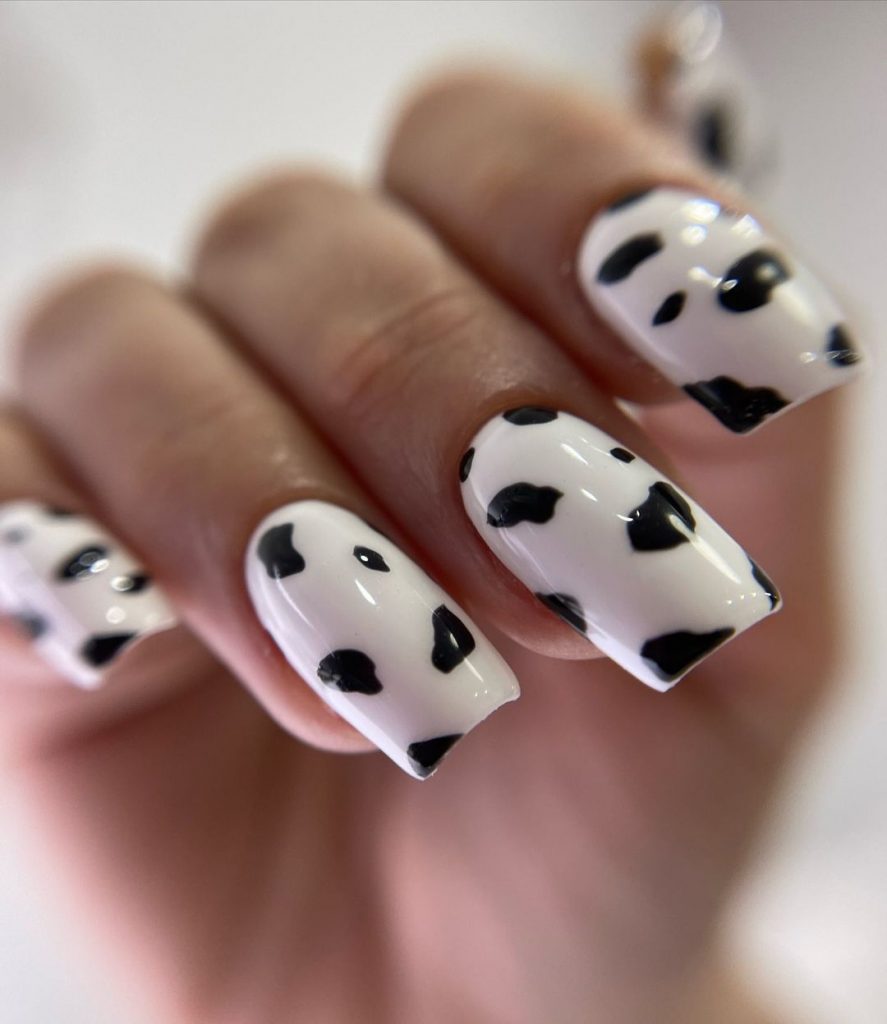
Tools & Products
- Base color: OPI Alpine Snow
- Black spots: Sally Hansen Insta-Dri in Black to Black
- Top coat: Seche Vite Dry Fast Top Coat
DIY Tips
Start by shaping your nails into a square. Apply two coats of the white base color and let it dry. Use a dotting tool to create the black spots, varying their size for a more natural look. Finish with a top coat to seal your design and add a glossy finish.
Blue Floral Accent
This design features a subtle milky white base with a delicate blue floral accent on one nail. The square shape is perfect for showcasing the intricate details, making this look ideal for those who prefer a simple yet trendy manicure with a touch of nature.
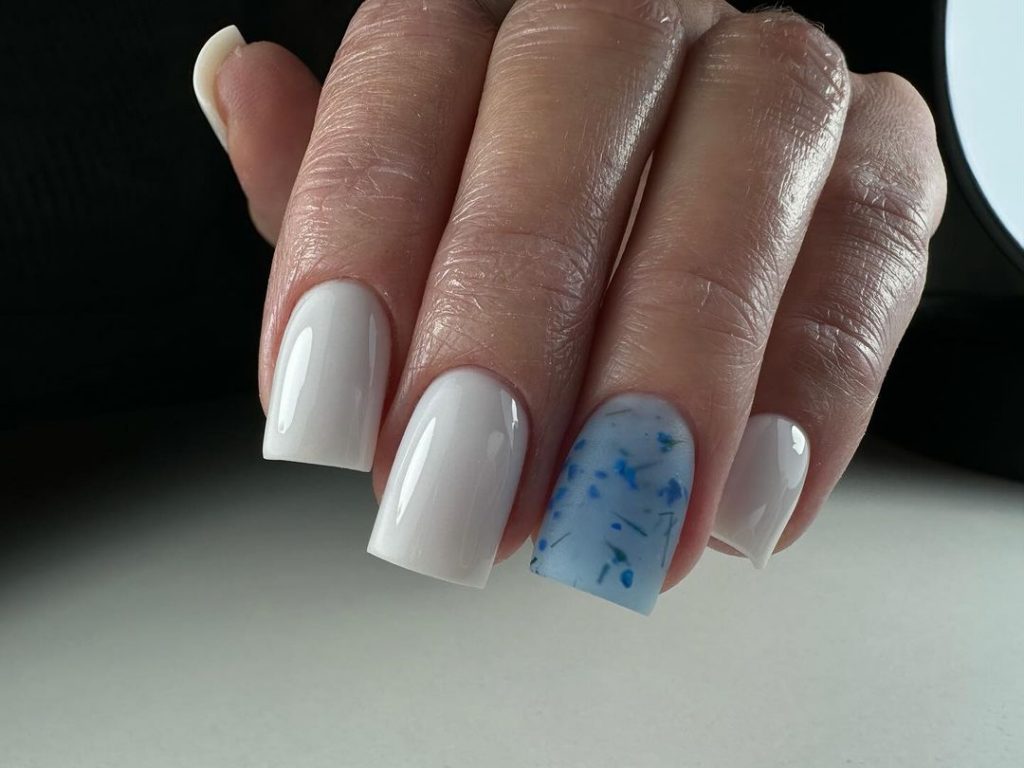
Tools & Products
- Base color: Essie Marshmallow
- Blue floral design: MoYou London Flower Power Plate
- Top coat: OPI Top Coat
DIY Tips
After shaping your nails into a square, apply two coats of the base color. Once dry, use a stamping tool to apply the floral design on the accent nail. Seal the design with a top coat to protect it and add a glossy finish.
Save Pin