Are you ready to dive into the vibrant world of summer ombre nails? This season, it’s all about bold colors, seamless gradients, and a touch of sparkle. But what makes an ombre design truly stand out? How can you achieve these stunning looks at home? From dazzling sparkle french tips to sophisticated rose gold chrome, we’ll explore some of the hottest trends and provide you with insider tips to recreate these styles. Whether you’re a fan of the timeless French manicure or looking to experiment with airbrush art, prepare to be inspired!
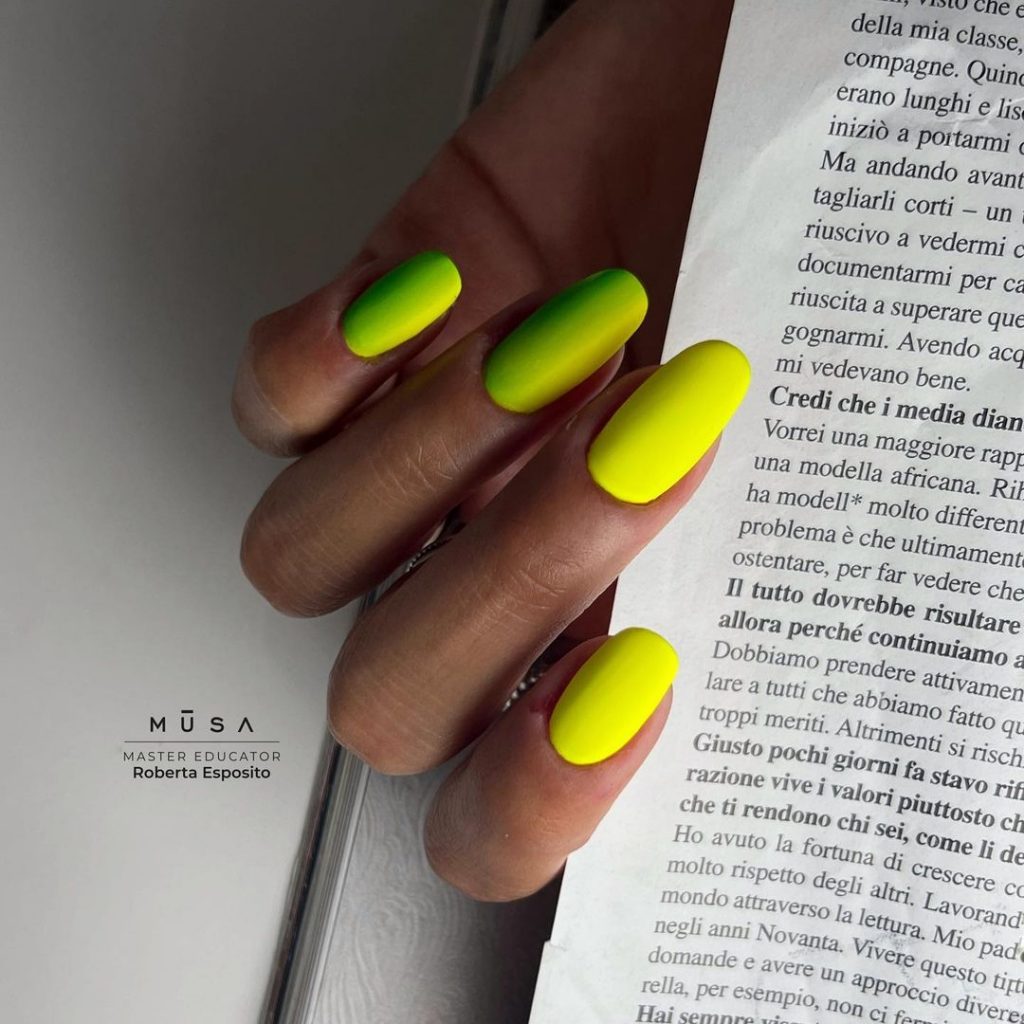
Neon Glow Ombre
The bold transition from a vivid neon green to a mellow yellow captures the essence of summer energy and fun. This nail design is not only striking but also perfectly aligns with the vibrant trends of the 2024 season, making it a top choice for anyone looking to stand out.
Consumables List
- Base coat: Sally Hansen Hard as Nails
- Neon green polish: China Glaze “Lime After Lime”
- Yellow polish: OPI “Exotic Birds Do Not Tweet”
- Top coat: Seche Vite Dry Fast
DIY Instructions
Apply the base coat to protect your nails. Use the neon green polish as the base color and apply two coats. While the second coat is still tacky, use a sponge to dab on the yellow polish starting from the tip and blend towards the middle. Seal with a fast-drying top coat for a long-lasting finish.
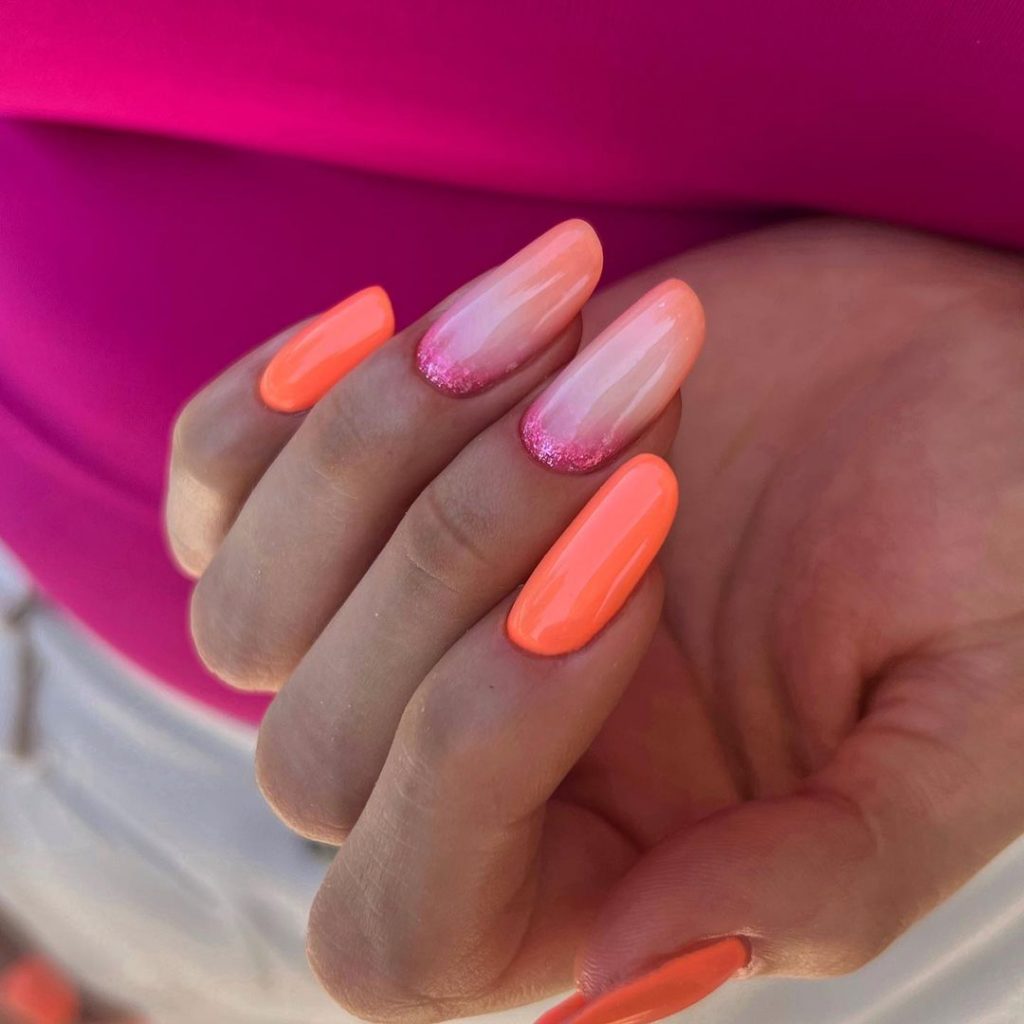
Sparkle French Tips Pink and Orange
This playful variation on the traditional French tip features bright orange and pink hues with a sparkling glitter overlay. It’s an ideal choice for summer outings, blending sparkle french tips pink with a touch of whimsy.
Consumables List
- Base coat: Essie First Base
- Pink polish: Revlon “Pink Nude”
- Orange polish: Essie “Tart Deco”
- Pink glitter: Martha Stewart Crafts Glitter in “Tourmaline”
- Top coat: ORLY Glosser
DIY Instructions
After applying a base coat, paint a stripe of pink at the tip of your nails, followed by a stripe of orange just below it. While the polish is still wet, sprinkle pink glitter over the tips for a sparkly effect. Finish with a glossy top coat to enhance the shine and durability.
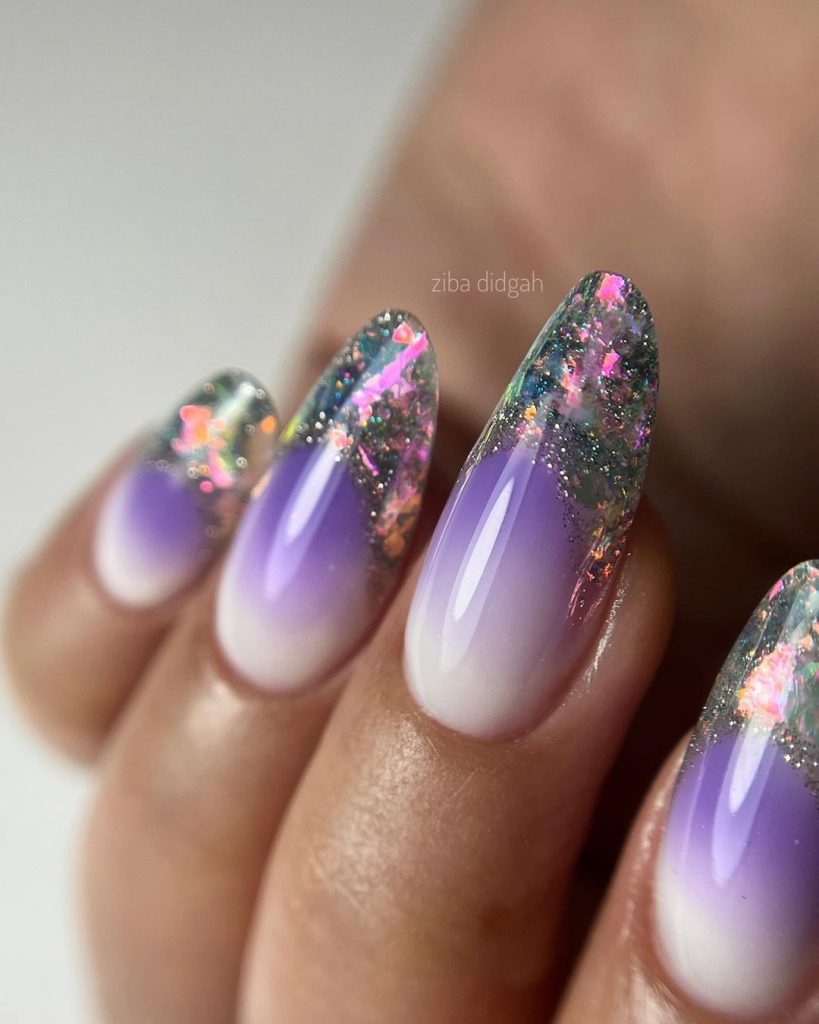
Purple Metallic Marble
Combining a soft purple base with swirling metallic accents, this design reflects a luxurious yet subtle approach to nail art. The use of marble and sparkle elements creates a dynamic look perfect for any summer evening event.
Consumables List
- Base coat: CND Sticky Base
- Purple polish: Zoya “Mae”
- Silver metallic polish: Sally Hansen “Celeb City”
- Marbling tool
- Top coat: INM Out The Door
DIY Instructions
Start with a base coat to protect your nails. Apply a light purple base coat, then while still wet, dot some silver polish in corners. Using a marbling tool, gently swirl the silver through the purple to create a marble effect. Finish with a high-gloss top coat to protect and showcase the metallic details.
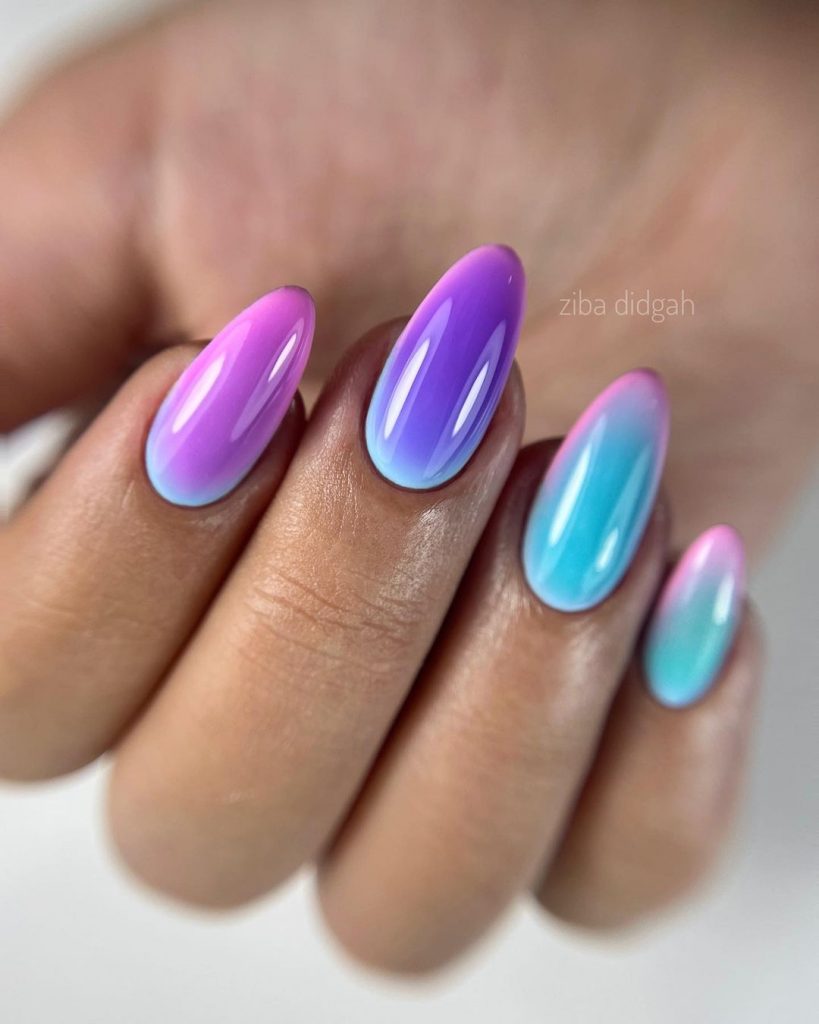
Pastel Ombre Dream
A seamless ombre of pastel purple, pink, and blue evokes the serene colors of a summer sky. This look is perfect for those who appreciate subtlety and elegance in their nail art, incorporating shades of pink and blue in a harmonious blend.
Consumables List
- Base coat: ORLY Bonder
- Purple polish: Essie “Lilacism”
- Pink polish: Essie “Muchi, Muchi”
- Blue polish: Essie “Bikini So Teeny”
- Sponge for ombre
- Top coat: Essie Gel Setter
DIY Instructions
Apply a base coat for longevity. Paint your nails with the lightest color as a base. Then, on a sponge, apply the three polishes side by side and dab onto the nails to create the ombre effect. Repeat if necessary for more vivid color and finish with a gel-look top coat for shine and durability.
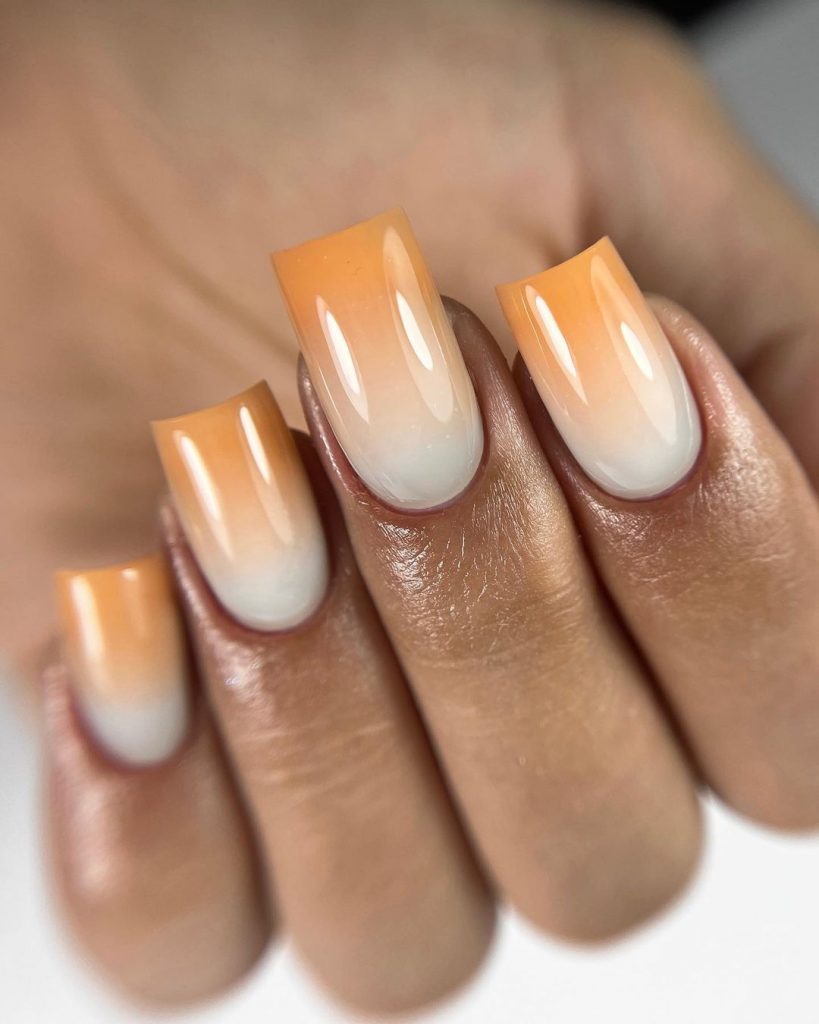
Sunrise Ombre
Reflecting the beautiful hues of a sunrise, this ombre design transitions from a deep orange to a creamy white, symbolizing the peaceful start to a summer day. It’s a sophisticated yet vibrant choice that can transition from day to night.
Consumables List
- Base coat: China Glaze Strong Adhesion
- Orange polish: OPI “A Good Man-darin is Hard to Find”
- White polish: OPI “Alpine Snow”
- Sponge
- Top coat: CND Vinylux Long Wear Top Coat
DIY Instructions
Begin with a base coat to prevent staining. Apply the orange polish as the base color. Using a sponge, apply white polish at the nail tips and gently blend toward the middle to create a smooth gradient effect. Finish with a durable top coat for a glossy effect.
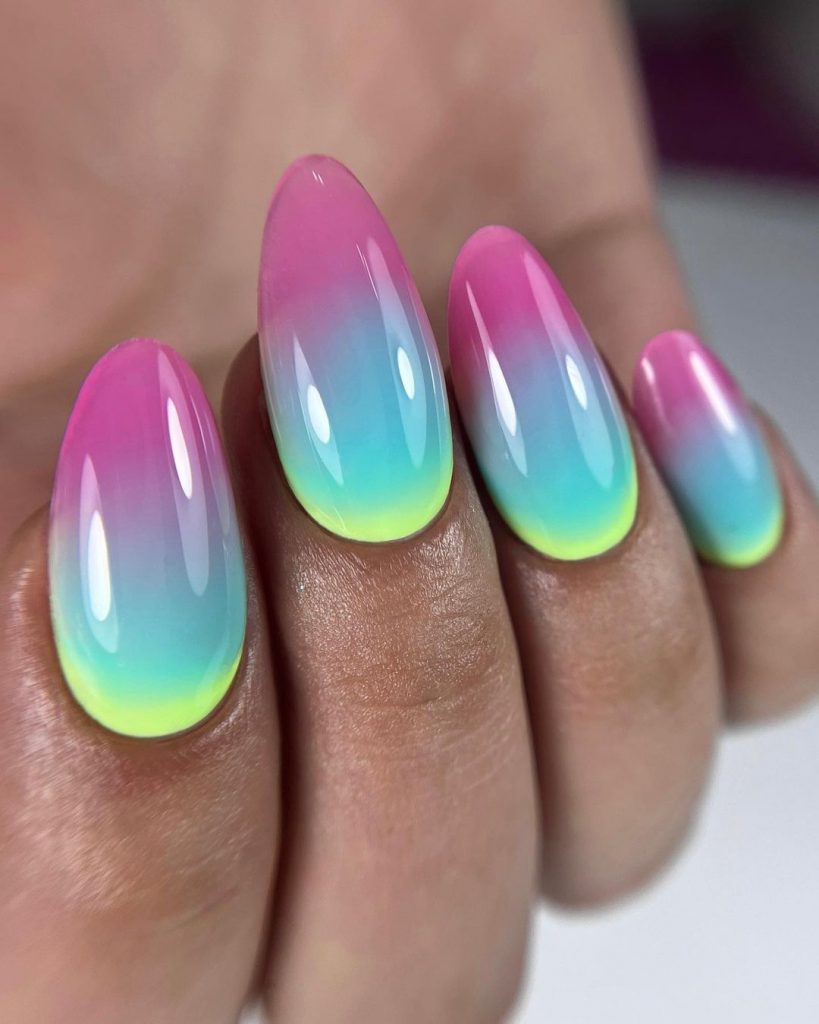
Radiant Rainbow Ombre
This nail design showcases a breathtaking blend of colors, featuring a smooth transition from pink to blue with a glowing yellow at the tips. This look is ideal for those who embrace bold colors and want to make a statement during the summer months.
Consumables List
- Base coat: Orly Rubberized Base
- Pink polish: Essie “Fiesta”
- Blue polish: OPI “Can’t Find My Czechbook”
- Yellow polish: Sally Hansen “Mellow Yellow”
- Top coat: INM Out the Door
DIY Instructions
Apply a base coat to protect your nails. Next, apply a coat of pink polish as your base. Using a sponge, dab on blue and yellow polishes to create a gradient effect, blending them where they meet. Finish with a fast-drying top coat to seal in the design.
Speckled Spring Green
The soothing spring green base accented with specks of black glitter offers a fresh and trendy look. This nail art is subtle yet stylish, perfect for those preferring a more understated yet unique style.
Consumables List
- Base coat: CND Sticky Base Coat
- Green polish: China Glaze “Highlight of My Summer”
- Black glitter polish: OPI “Black Onyx” (speckled)
- Top coat: Essie Good To Go
DIY Instructions
Start with a base coat. Paint your nails with the spring green polish. Once dry, apply a thin layer of black speckled glitter polish for a unique finish. Seal the design with a top coat for durability and gloss.
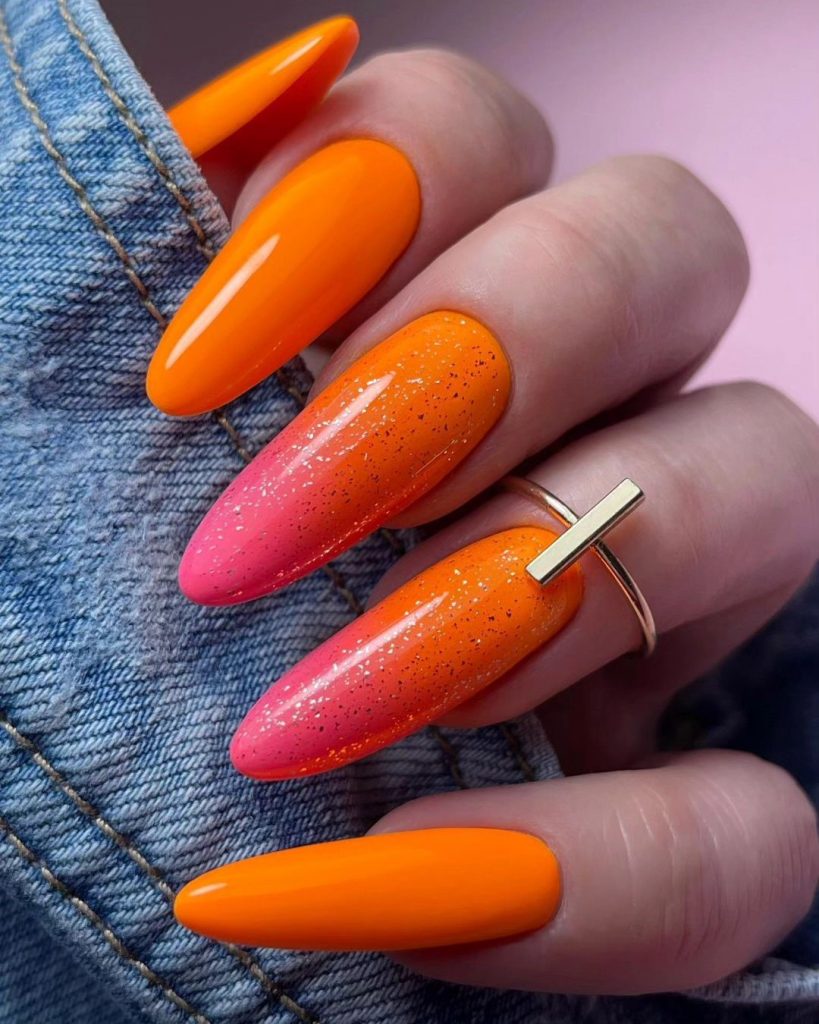
Sunset Gradient Sparkle
Evoking the beauty of a sunset, this design uses vibrant orange and pink hues, accented with a sprinkle of golden glitter. This style is perfect for summer evenings and adds a pop of color to any outfit.
Consumables List
- Base coat: OPI Natural Base Coat
- Orange polish: OPI “Hot & Spicy”
- Pink polish: Essie “Watermelon”
- Gold glitter polish: Zoya “Maria Luisa”
- Top coat: Seche Vite Dry Fast
DIY Instructions
Apply a base coat for nail protection. Paint the base with orange polish, then blend into pink toward the nail tips. Before it dries, lightly dust with gold glitter polish for a sparkling gradient effect. Finish with a high-gloss top coat.
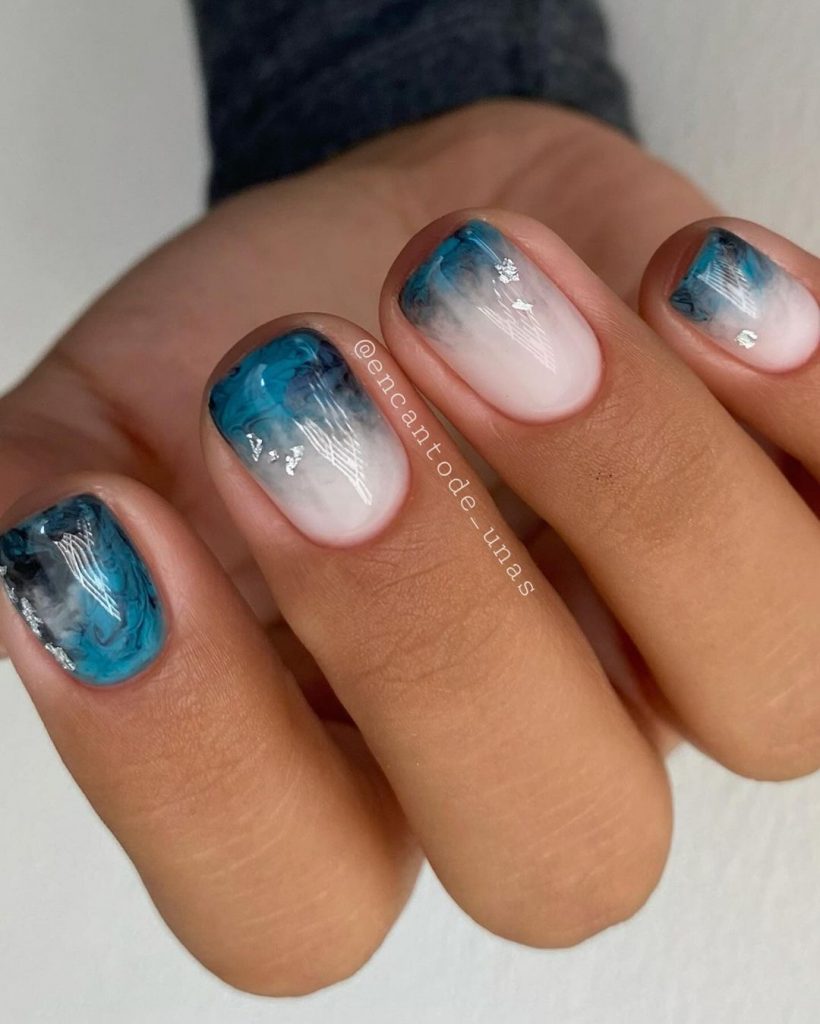
Artistic Blue Marble
This intricate blue marble design mimics the natural veining of stone with swirls of light and dark blues, creating a mesmerizing effect. It’s an artistic choice that showcases sophisticated nail art skills.
Consumables List
- Base coat: OPI Bond Aid
- Light blue polish: Essie “Bikini So Teeny”
- Dark blue polish: Sally Hansen “Blue My Mind”
- Marbling tool
- Top coat: CND Super Shiney
DIY Instructions
After applying a base coat, layer light blue polish as the base. Dot some dark blue polish in small blobs over it. Use a marbling tool to gently swirl the colors together. Finish with a top coat to enhance the marbled effect.
Pink Glow French Fade
Combining the classic French manicure with a modern twist, this design features a soft pink fading into a sparkling white tip. It’s both elegant and playful, making it suitable for any summer occasion.

Consumables List
- Base coat: Essie All in One
- Pink polish: OPI “Mod About You”
- White glitter polish: Sally Hansen “White On Time”
- Sponge
- Top coat: Butter London Hardwear
DIY Instructions
Start with a clear base coat to protect your nails. Apply a light pink polish as the base. Use a sponge to apply white glitter polish on the tips, creating a seamless fade. Finish with a shiny top coat to seal and protect the design.
Lavender Swirl Ombre
This manicure combines soft lavender with white in a delicate swirl pattern that mimics a gentle breeze. Ideal for a sophisticated but playful look, it incorporates subtle glitter accents that catch the light beautifully, enhancing the swirls.

Consumables List
- Base coat: Essie Strong Start
- Lavender polish: OPI “Do You Lilac It?”
- White polish: Essie “Blanc”
- Glitter polish: China Glaze “Fairy Dust”
- Top coat: Glisten & Glow Top Coat
DIY Instructions
Start with a base coat to protect your nails. Apply a base of lavender polish. Once dry, use a thin brush to add white swirls. Before the swirls dry, lightly dab glitter polish over them for a subtle sparkle. Seal with a top coat for shine and durability.
Pastel Rainbow with Art Deco
Featuring a pastel rainbow gradient as the base, this design is elevated with white Art Deco-inspired details that give it a unique and artistic touch. The soft color palette makes it versatile for both casual and formal occasions.
Consumables List
- Base coat: Sally Hansen Miracle Cure
- Pastel polishes: A variety of ORLY pastel shades
- White art polish: Models Own Nail Art Pen in White
- Top coat: Seche Vite Dry Fast Top Coat
DIY Instructions
Apply a base coat. Paint each nail with a different pastel shade to create a rainbow effect. Use a white nail art pen to draw Art Deco designs on each nail. Finish with a top coat to ensure the art stays put.
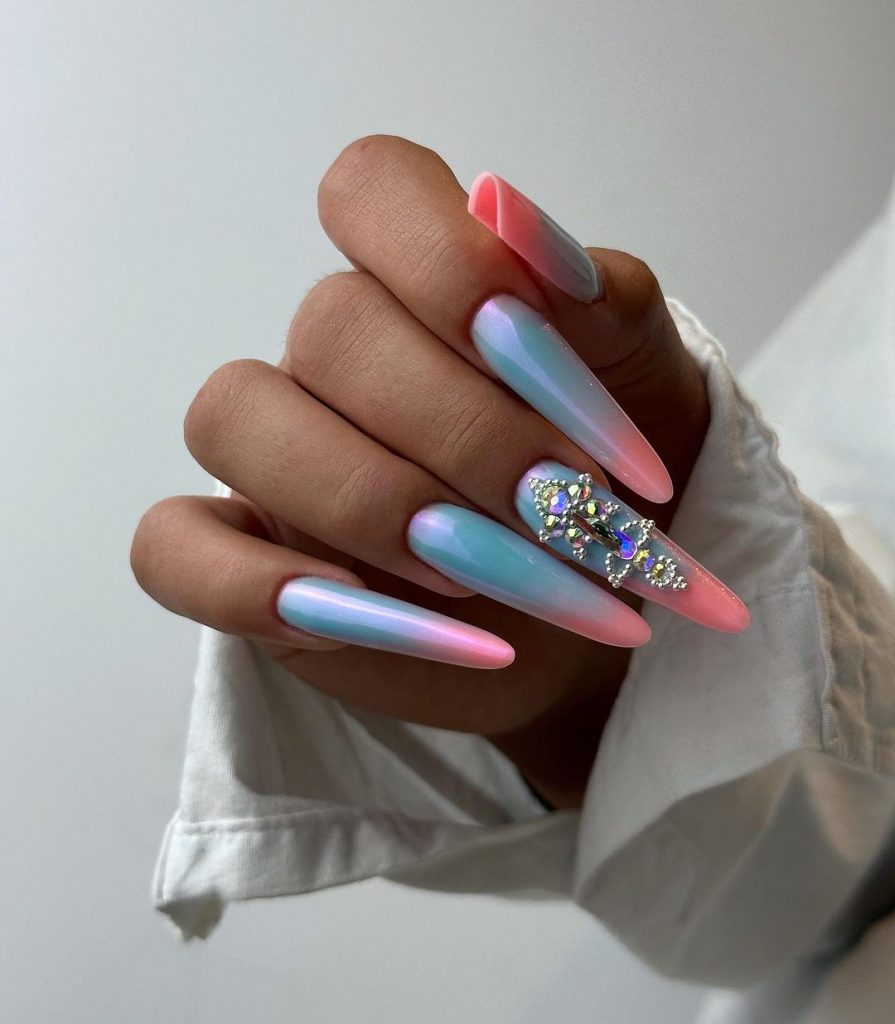
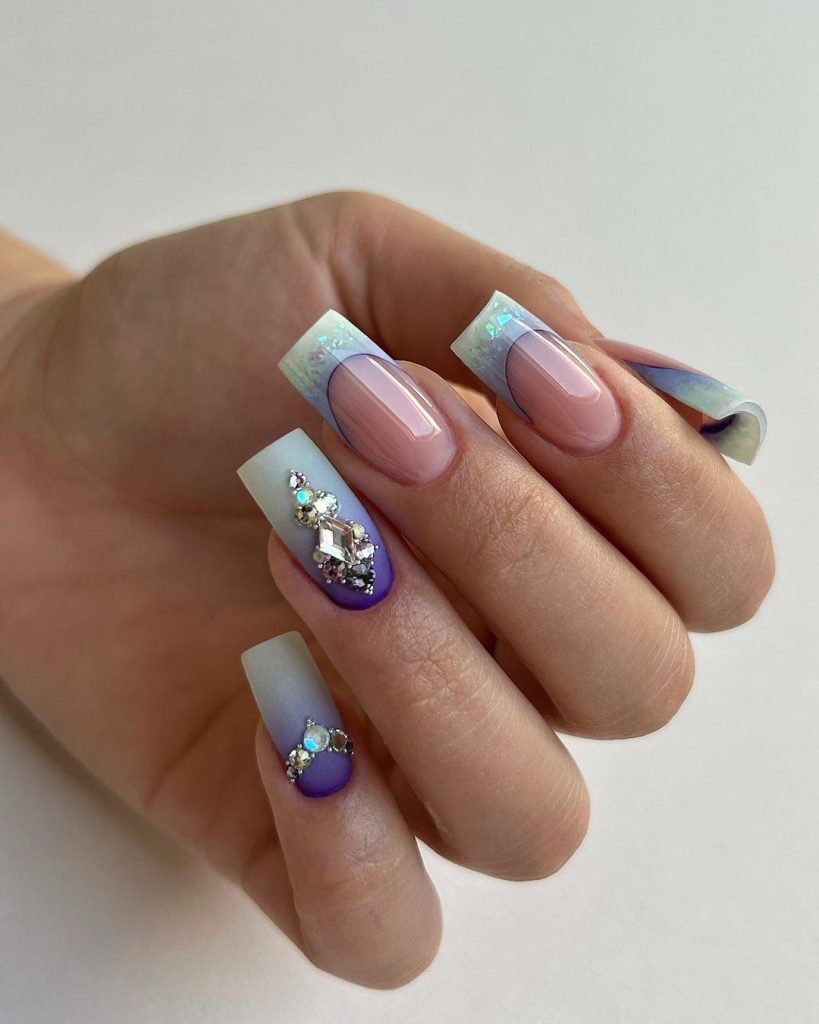
Pink and Blue Gradient with Rhinestones
This stunning design blends pink and blue in a smooth gradient, accented with an elaborate rhinestone cluster for an added element of glamour. It’s perfect for those who love a bit of sparkle and want their hands to make a statement.
Consumables List
- Base coat: OPI Natural Base Coat
- Pink polish: Essie “Muchi, Muchi”
- Blue polish: Essie “Bikini So Teeny”
- Rhinestones
- Top coat: INM Out the Door
DIY Instructions
Start by applying a base coat. Blend pink and blue polishes on a sponge and press onto the nail to create the gradient effect. Apply rhinestones while the polish is tacky. Seal everything with a heavy-duty top coat to keep the stones in place.
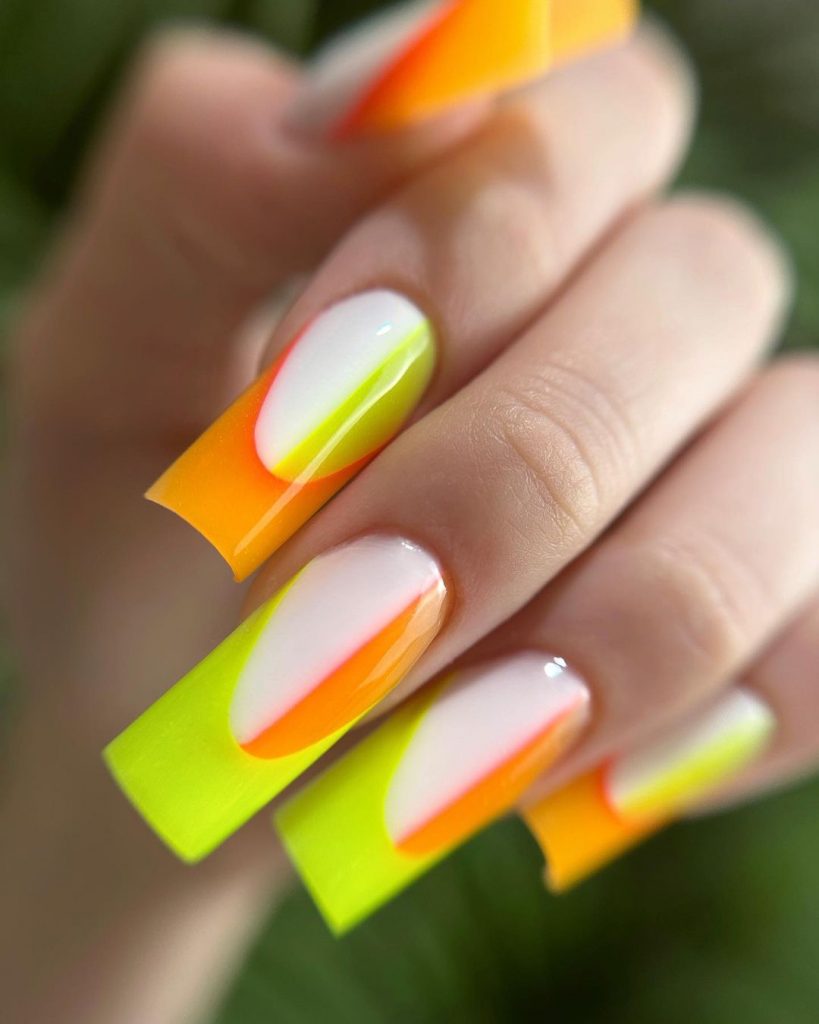
Neon Flame Tips
These nails feature a vibrant, fiery blend of neon colors that resemble flames. The sharp contrast between the bright orange, yellow, and white tips creates an energetic and eye-catching look, ideal for summer festivals or fun nights out.
Consumables List
- Base coat: Orly Bonder
- Neon orange polish: China Glaze “Surfin’ for Boys”
- Neon yellow polish: OPI “I Just Can’t Cope-acabana”
- White polish: Sally Hansen “White On”
- Top coat: CND Vinylux Long Wear Top Coat
DIY Instructions
Apply a base coat to protect your nails. Paint the entire nail with neon orange. Use a sponge to dab on neon yellow and white at the tips, creating a flame effect. Blend the colors slightly where they meet. Finish with a top coat for a glossy look.
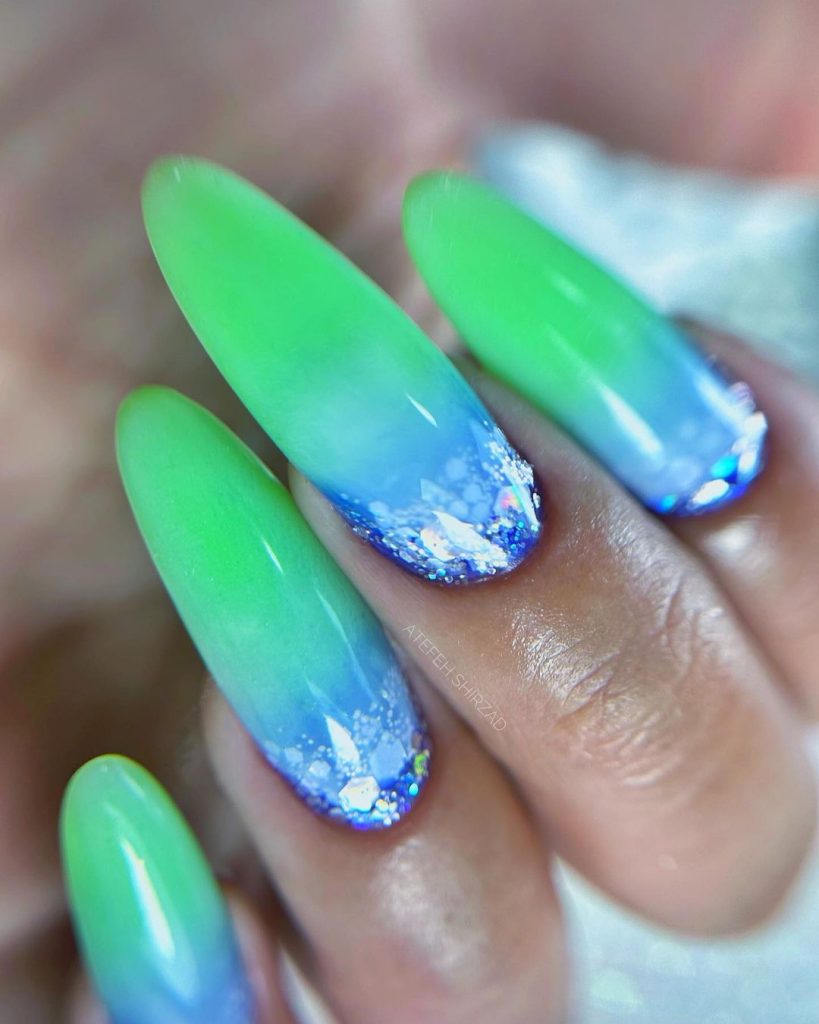
Seafoam and Blue Crystal Ombre
Inspired by ocean waves, this design uses seafoam green and sky blue in a beautiful ombre effect, complemented by blue crystal-like embellishments that add a touch of luxury and depth, mimicking the shimmering sea.
Consumables List
- Base coat: Butter London Nail Foundation
- Seafoam green polish: Essie “Mint Candy Apple”
- Sky blue polish: China Glaze “Bahamian Escape”
- Blue crystals
- Top coat: Orly Glosser
DIY Instructions
Begin with a base coat to smooth imperfections. Apply seafoam green polish as a base, and then blend sky blue from the tips towards the middle using a sponge. While the polish is still wet, carefully place blue crystals at the tip. Seal with a top coat to secure the embellishments.
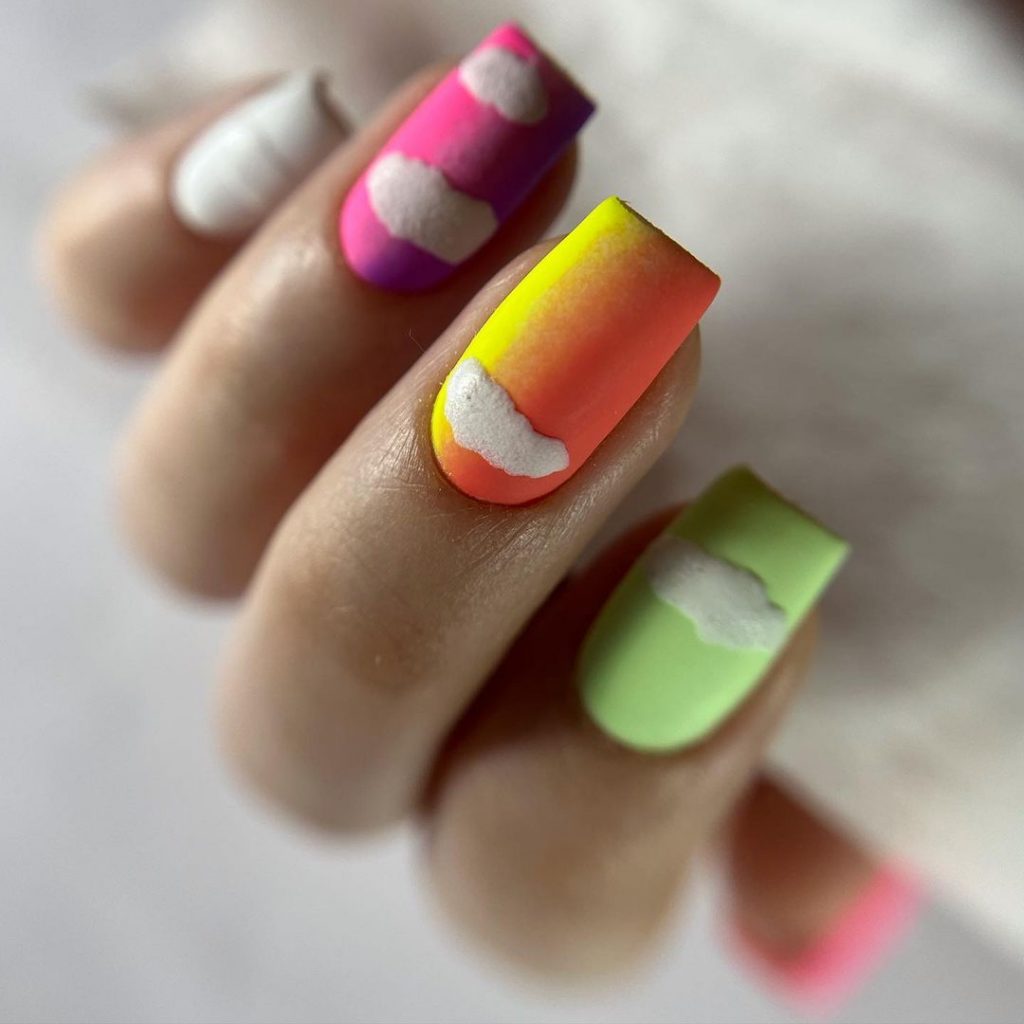
Abstract Neon Clouds
This design features an energetic mix of neon colors, creating a lively summer vibe. The playful cloud shapes in white add a whimsical contrast, making this a standout choice for anyone who loves vibrant and youthful nail art.
Consumables List
- Base coat: Essie All in One
- Neon polishes: Various shades from the OPI Neon Collection
- White polish: OPI “Alpine Snow”
- Top coat: Seche Vite Dry Fast Top Coat
DIY Instructions
Apply a base coat to protect your nails. Next, use a sponge to dab different neon colors onto each nail, creating a blended background. With a small brush, paint white cloud shapes at various points on each nail. Seal with a top coat for a glossy finish and to prevent chipping.
Sunset Ombre Glitter
Simulating the breathtaking colors of a sunset, this nail design uses a smooth ombre transition from yellow to red, embellished with a glittery texture that adds sparkle and depth, perfect for summer evenings.

Consumables List
- Base coat: ORLY Bonder
- Yellow polish: China Glaze “Lemon Fizz”
- Red polish: Essie “Geranium”
- Glitter top coat: Essie “Sparkle on Top”
- Top coat: INM Out the Door
DIY Instructions
Begin with a base coat. Apply yellow polish as the base layer. While still wet, blend red polish from the tips, merging into the yellow. Add a layer of glitter top coat for extra shimmer. Finish with a quick-dry top coat to enhance durability and shine.
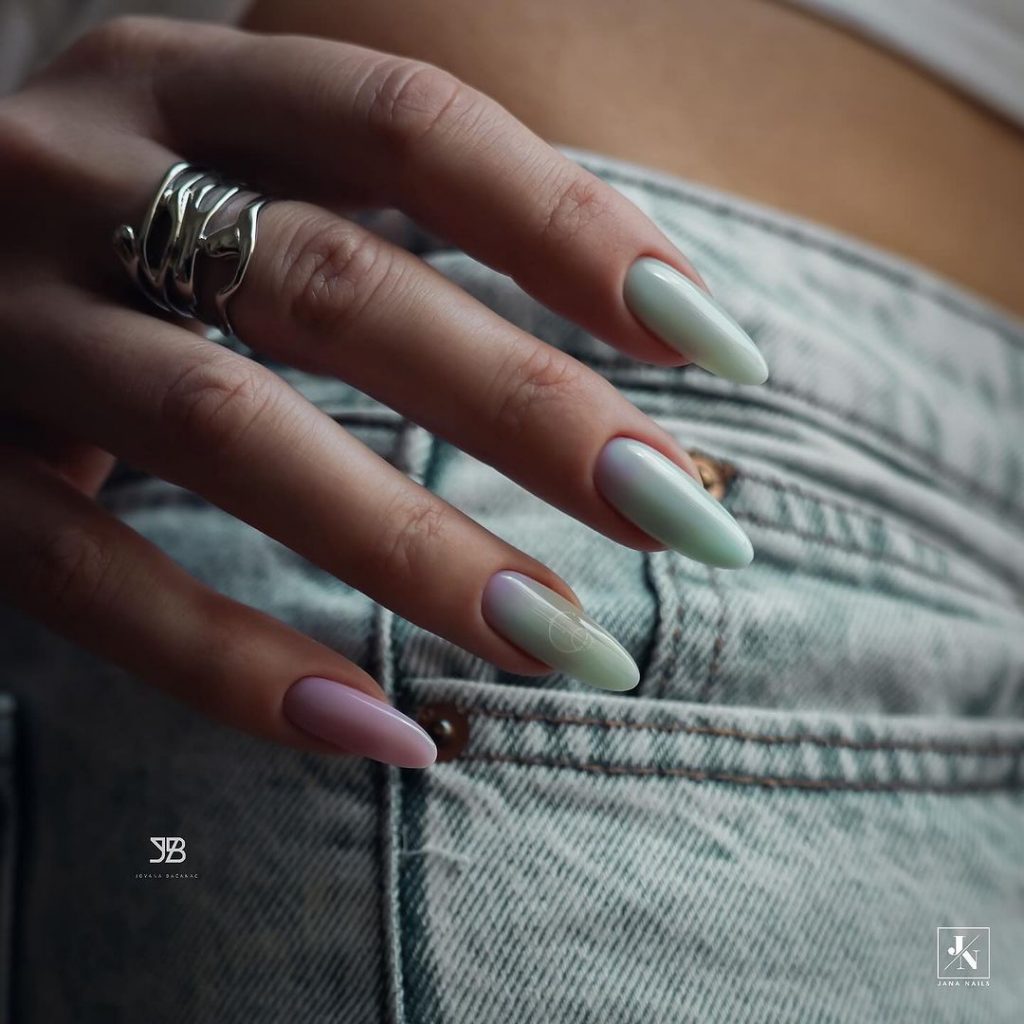
Sophisticated Ombre Pastels
This elegant design features a seamless ombre transition between soft mint and muted lilac, offering a sophisticated and modern twist on the classic pastel look. It’s perfect for formal events or a polished everyday style.
Consumables List
- Base coat: CND Stickey Base Coat
- Mint polish: Essie “Mint Candy Apple”
- Lilac polish: OPI “Do You Lilac It?”
- Top coat: OPI Top Coat
DIY Instructions
Apply a base coat for nail protection. Paint the whole nail with mint polish. Gradually sponge on lilac polish, starting from the tip and blending towards the middle. Finish with a top coat to smooth the gradient and add a glossy finish.
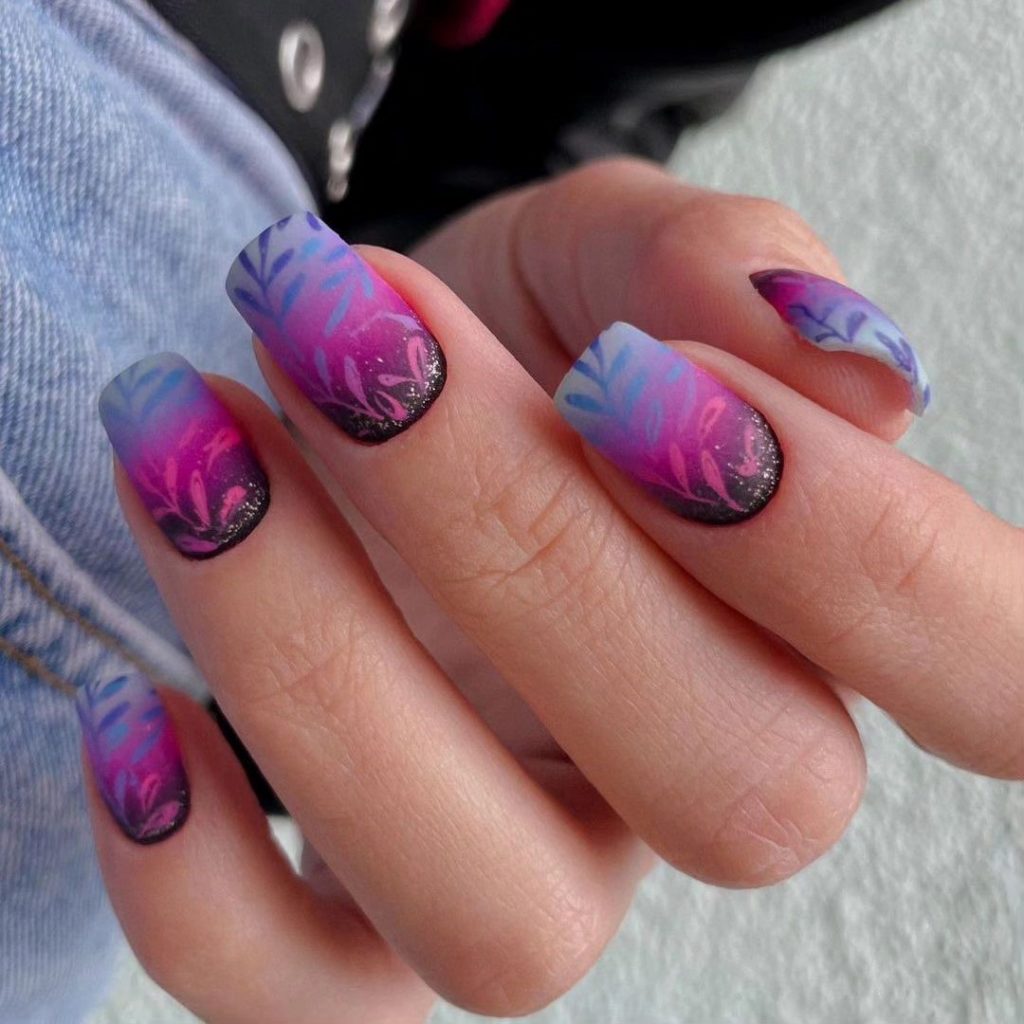
Tropical Sunset Palms
Inspired by tropical sunsets, this design features a pink and blue ombre background with black palm silhouettes, evoking the serene atmosphere of a beach at dusk. The design combines vibrant colors with artistic detailing, ideal for summer vacations.
Consumables List
- Base coat: Essie First Base
- Pink polish: OPI “Kiss Me I’m Brazilian”
- Blue polish: Sally Hansen “Pacific Blue”
- Black polish for art: Acrylic paint or a black nail art pen
- Top coat: Sally Hansen Insta-Dri Anti-Chip
DIY Instructions
Start with a base coat. Create an ombre effect with pink and blue polishes using a sponge. Once dry, use a fine brush or nail art pen to add black palm tree silhouettes. Finish with a fast-drying top coat to protect your artwork.
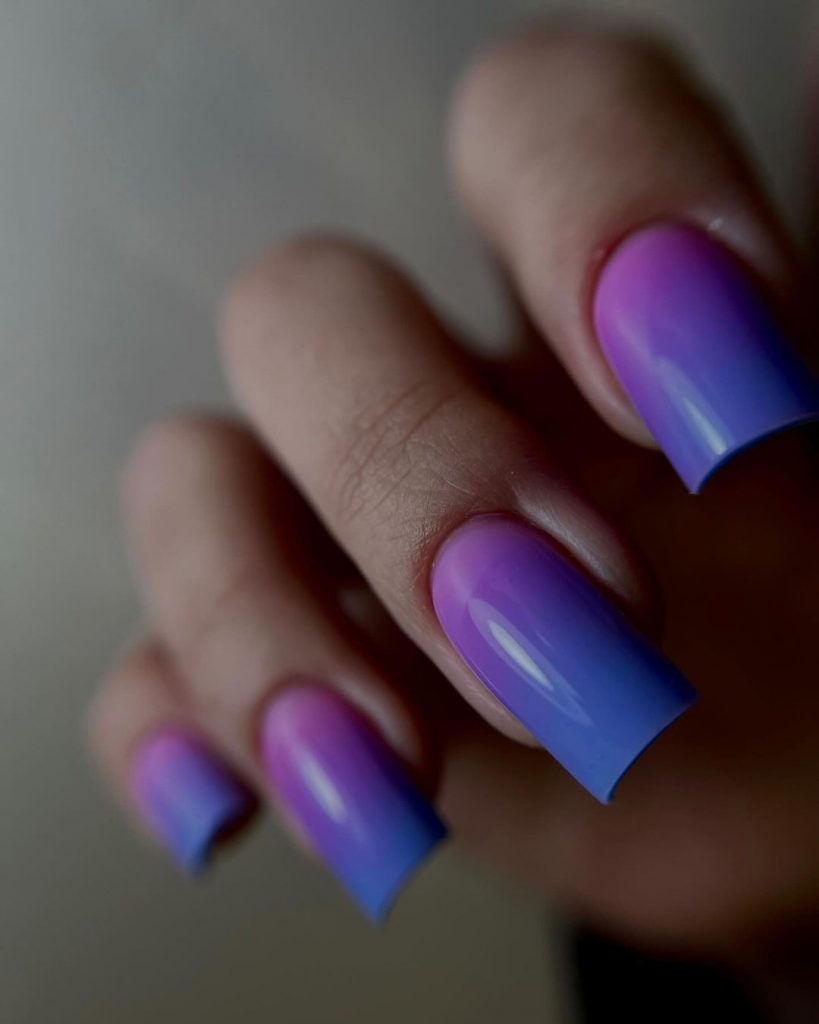
Gradient Purple Elegance
This nail art presents a beautiful gradient of light to dark purple, creating a simple yet elegant look. The smooth transition gives depth to the nails, making them appear longer and more refined.
Consumables List
- Base coat: Butter London Nail Foundation
- Light purple polish: Essie “Lilacism”
- Dark purple polish: OPI “Purple Palazzo Pants”
- Top coat: CND Super Shiney
DIY Instructions
Apply a base coat to protect your nails. Begin with the lightest purple at the base of your nails and use a sponge to apply the darker shade towards the tips, blending for a smooth transition. Finish with a top coat to enhance the depth and shine of the gradient.
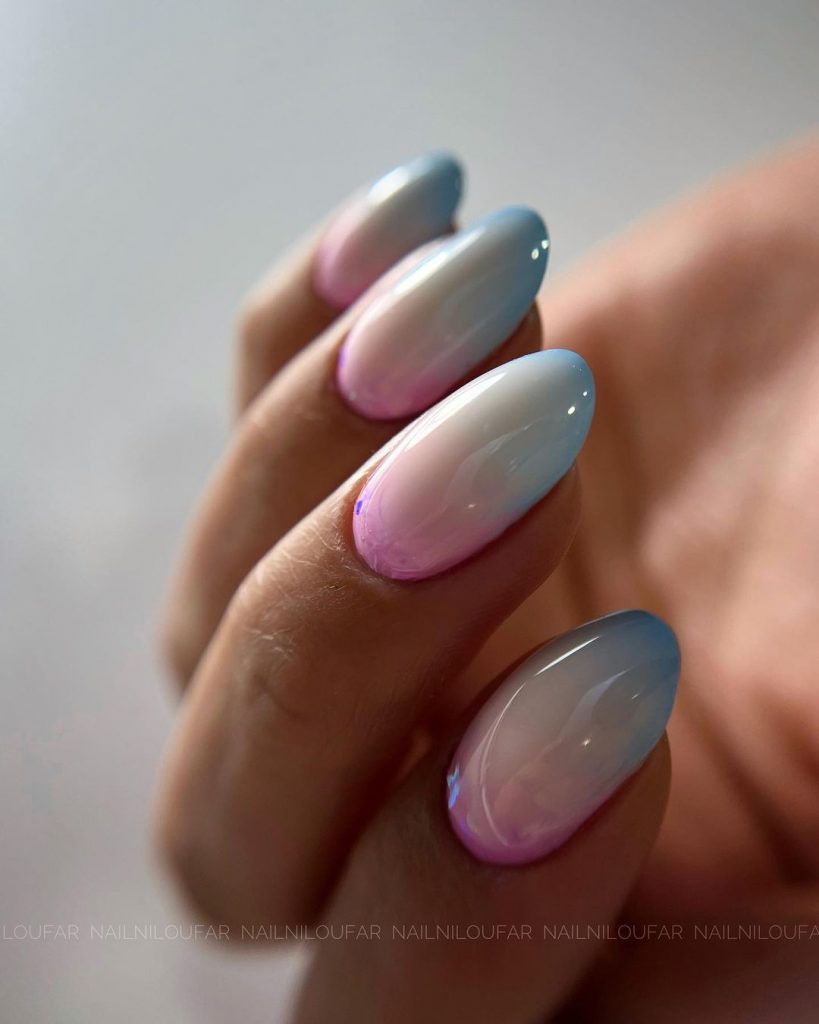
Dreamy Pastel Ombre
This nail design showcases a serene blend of sky blue, soft pink, and lavender in a smooth ombre transition, evoking the colors of a tranquil dawn. The subtle interplay of these pastel shades makes it a perfect choice for spring and early summer.
Consumables List
- Base coat: OPI Natural Nail Base Coat
- Sky blue polish: Essie “Bikini So Teeny”
- Soft pink polish: OPI “Pink-ing of You”
- Lavender polish: Essie “Lilacism”
- Top coat: Sally Hansen Mega Shine Top Coat
DIY Instructions
Apply the base coat to protect the natural nail. Start with a layer of sky blue polish at the base of the nail, then sponge on the soft pink and lavender towards the tips to create the ombre effect. Blend carefully to ensure a seamless transition. Finish with a top coat for a glossy look and extended wear.
Elegant Purple Jewels
Featuring a chic matte finish with shimmering accents, this design pairs a muted lilac base with stunning jewel embellishments for a touch of luxury. The glossy tips add a subtle contrast, enhancing the overall sophistication of the look.
Consumables List
- Base coat: Essie Matte About You
- Lilac polish: OPI “Do You Lilac It?”
- Clear gloss polish (for tips): Essie “Gel Setter”
- Jewel embellishments
- Top coat: Seche Vite Dry Fast Top Coat
DIY Instructions
Begin with a matte base coat to achieve a flat finish. Apply two coats of lilac polish, allowing it to dry completely. Add a strip of clear gloss at the tips, then carefully place jewel embellishments along the boundary between the matte and glossy sections. Seal with a top coat over the jewels for durability.
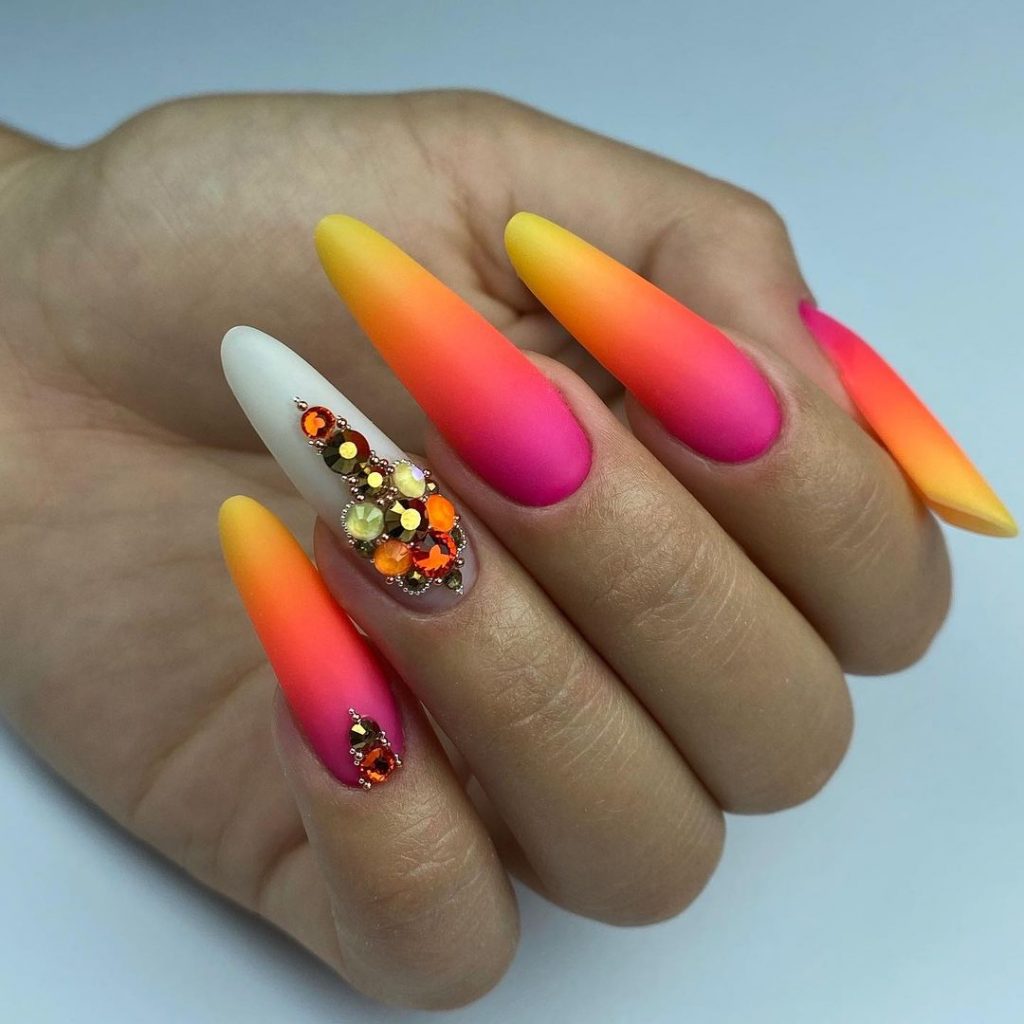
Vibrant Sunset Flames
This dramatic nail art features a fiery gradient of yellow, orange, and hot pink, reminiscent of a tropical sunset. Accentuated with rhinestone embellishments, it’s a bold choice for summer parties or any event where making a statement is key.
Consumables List
- Base coat: CND Stickey Base Coat
- Yellow polish: China Glaze “Sun Upon My Skin”
- Orange polish: Essie “Saturday Disco Fever”
- Hot pink polish: OPI “Hotter Than You Pink”
- Rhinestones
- Top coat: INM Out the Door
DIY Instructions
Apply the base coat for longevity. Paint a yellow base, then while still wet, sponge on orange and hot pink to create the gradient effect. Strategically place rhinestones to enhance the fiery look. Finish with a quick-dry top coat to seal in the design and add shine.
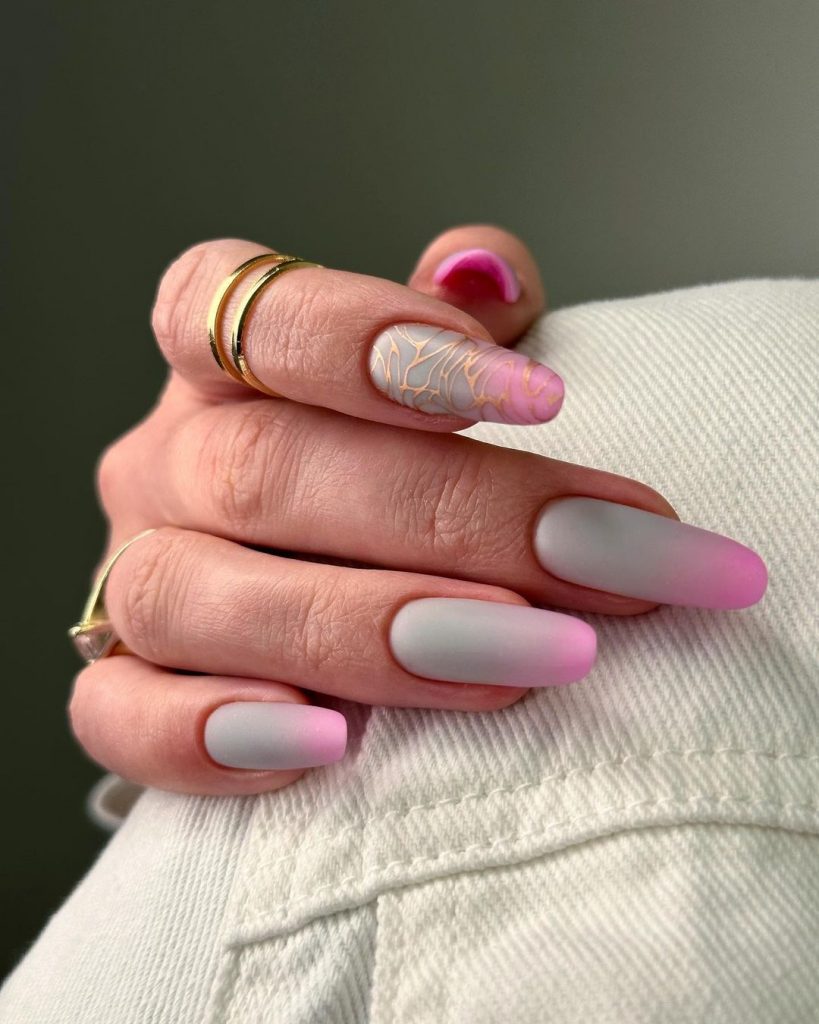
Soft Gradient Elegance
This nail design elegantly combines shades of soft pink and muted gray in a smooth gradient, topped with delicate white line art for an added artistic touch. It’s subtle yet chic, perfect for those who prefer understated elegance.
Consumables List
- Base coat: OPI Bond Aid
- Soft pink polish: Essie “Romper Room”
- Muted gray polish: Zoya “Dove”
- White art polish: Sally Hansen Nail Art Pen in White
- Top coat: CND Super Shiney
DIY Instructions
Start with a base coat to protect your nails. Apply the soft pink polish as a base, then gently sponge on the muted gray from the tips, blending back into pink for a seamless gradient. Use a white nail art pen to draw delicate lines or patterns. Seal with a high-gloss top coat for durability and a sophisticated shine.
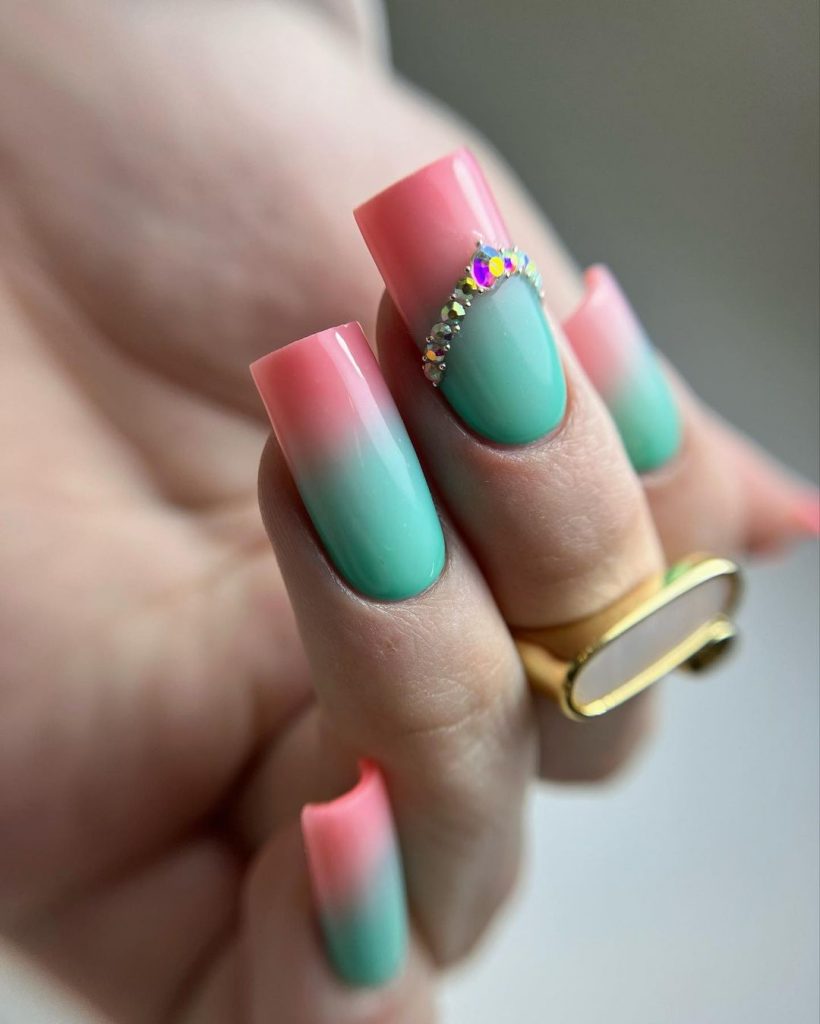
Tropical Ombre with Rhinestone Accents
This design features a refreshing ombre from mint green to pink, evoking tropical vibes. The rhinestone accents along the smile line add a sparkling touch, making it a playful yet refined option for summer.
Consumables List
- Base coat: Orly Rubberized Base
- Mint green polish: Essie “Mint Candy Apple”
- Pink polish: OPI “Kiss Me I’m Brazilian”
- Rhinestones
- Top coat: Essie Gel Setter
DIY Instructions
Apply a base coat to smooth the nail surface. Paint a base of mint green, then use a sponge to apply pink polish at the tips, blending towards the middle for an ombre effect. Place rhinestones at the transition for added bling. Finish with a top coat to secure the design and enhance the shine.
Save Pin