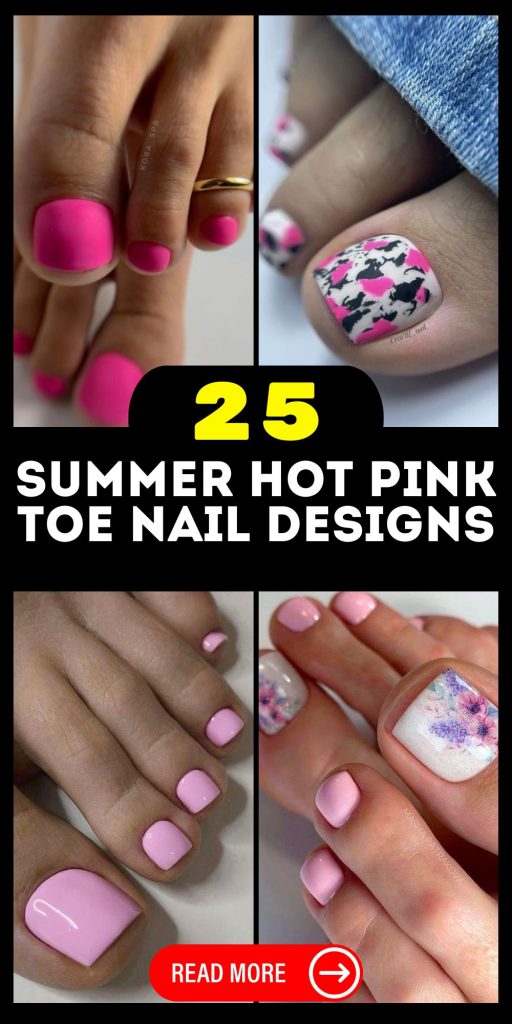
Summer is the perfect time to show off your toes in open sandals and flip-flops, making it the ideal season for stunning summer hot pink toe nail designs. Are you looking for inspiration to elevate your toenails to beach-ready perfection? From short gel styles to acrylic wonders, we’ll cover it all. Dive into these vibrant, bright designs that will make your toes the star of your summer look.
Neon Pink Delight
The neon pink delight is a standout design perfect for summer. The vibrant hot pink hue exudes energy and fun, making it an ideal choice for beach outings and pool parties. The toenail design includes a unique accent nail featuring a blue glitter overlay, adding a touch of sparkle and bling to the overall look.
- Consumables:
- Neon pink polish (e.g., OPI Neon Collection)
- Blue glitter polish (e.g., Sally Hansen Glitter Effect)
- Base coat (e.g., Essie First Base)
- Top coat (e.g., Seche Vite Dry Fast)
DIY Instructions:
-
- Start with clean, filed toenails and apply a base coat.
- Apply two coats of neon pink polish to all toenails except the accent nail.
- On the accent nail, apply blue glitter polish.
- Seal with a top coat for a glossy finish.
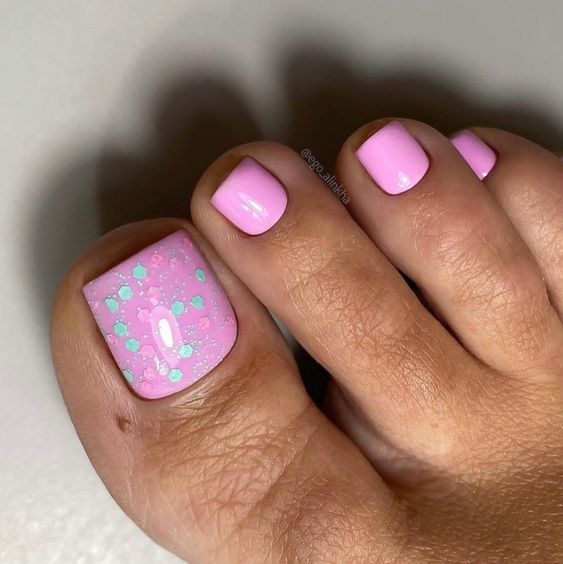
Pastel Pink Perfection
The pastel pink perfection design is soft and subtle, perfect for those who prefer a more natural look. The light pink shade is complemented by a unique accent nail featuring green dots, adding a playful touch to this cute pedicure.
- Consumables:
- Pastel pink polish (e.g., Essie Ballet Slippers)
- Green dotting polish (e.g., Orly Fresh Start)
- Dotting tool
- Base coat (e.g., Orly Bonder)
- Top coat (e.g., Sally Hansen Miracle Gel)
DIY Instructions:
-
- Prepare your nails with a base coat.
- Apply two coats of pastel pink polish.
- Using a dotting tool, create green dots on the accent nail.
- Finish with a top coat for durability.
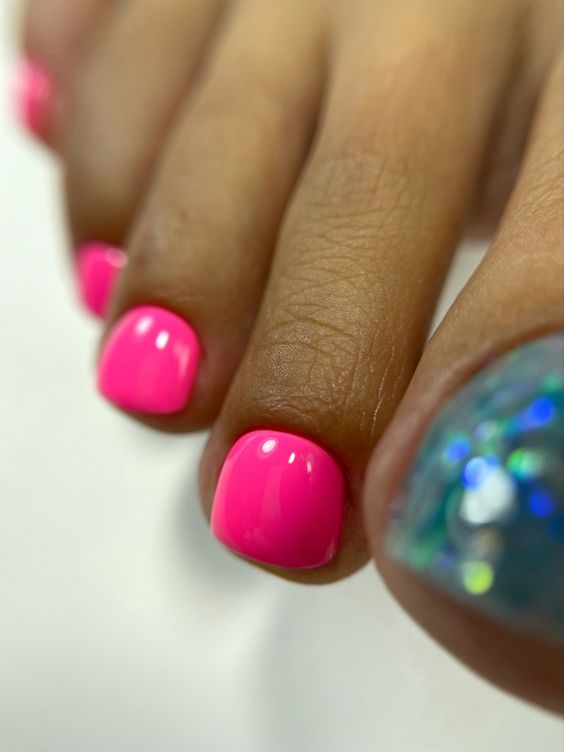
Hot Pink Classic
For those who love classic looks, the hot pink classic is a timeless choice. This design features a solid, vibrant hot pink that is perfect for any summer occasion. The glossy finish makes the color pop, making your toenails beach-ready.

- Consumables:
- Hot pink polish (e.g., China Glaze Shocking Pink)
- Base coat (e.g., Zoya Anchor)
- Top coat (e.g., Glisten & Glow)
DIY Instructions:
-
- Apply a base coat to clean toenails.
- Follow with two coats of hot pink polish.
- Seal with a top coat for a glossy finish.
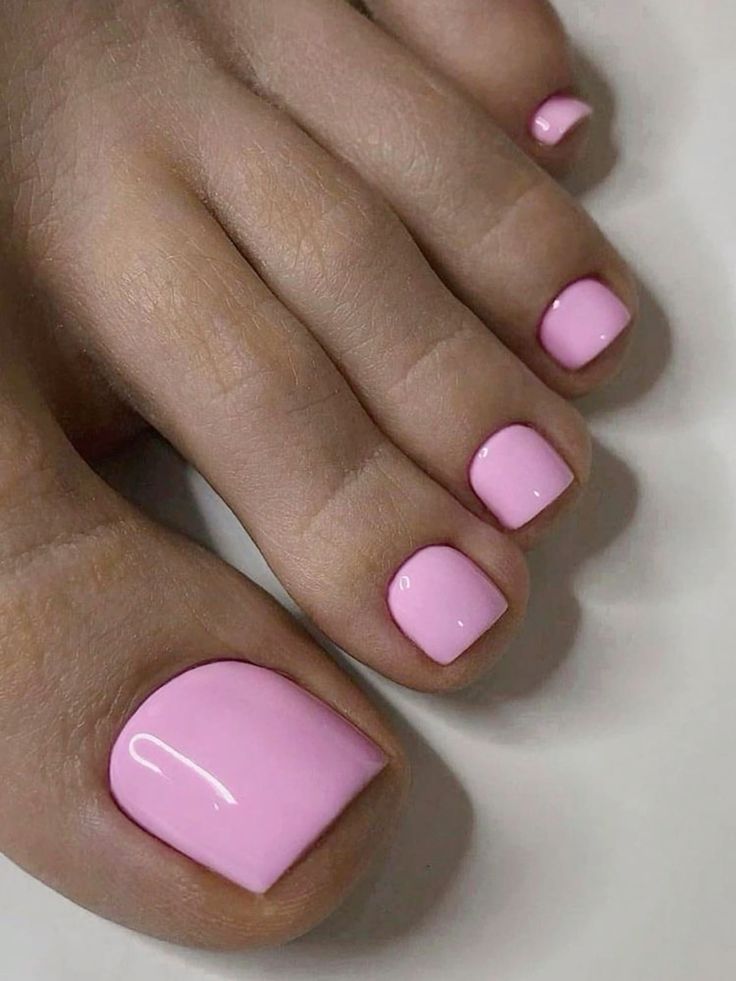
Pale Pink Elegance
The pale pink elegance design is for those who prefer understated beauty. The light pink polish offers a soft, elegant look, perfect for any summer outfit. This pedicure is simple yet sophisticated.
- Consumables:
- Pale pink polish (e.g., OPI Bubble Bath)
- Base coat (e.g., Deborah Lippmann Gel Lab)
- Top coat (e.g., Essie Gel Setter)
DIY Instructions:
-
- Start with a base coat.
- Apply two coats of pale pink polish.
- Finish with a top coat for a pretty, long-lasting shine.
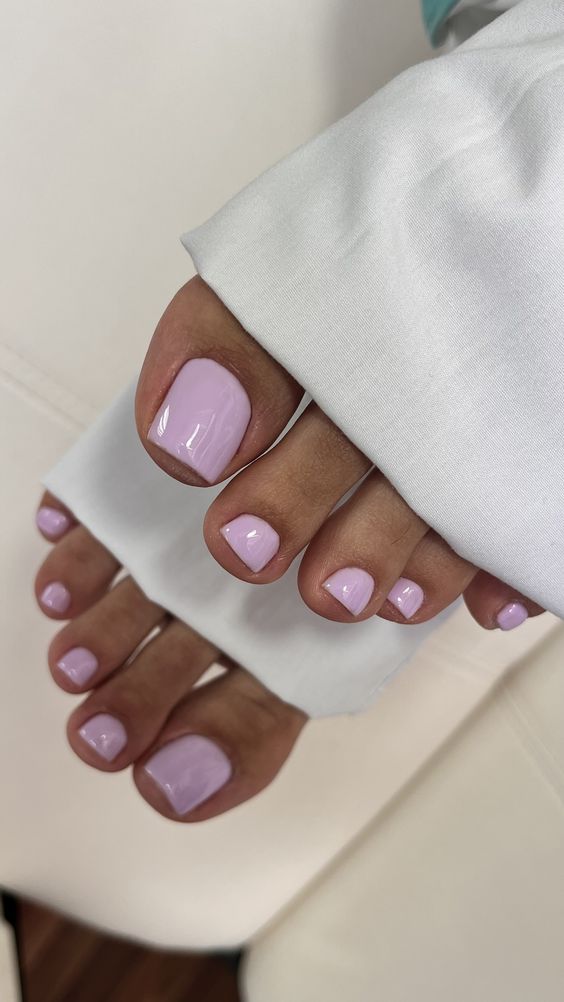
Lilac Dream
The lilac dream design is a summer trend that combines light purple with a milky finish. This pedicure is perfect for those who love a bit of whimsy and art on their nails. The design is fresh and cute, ideal for summer outings.
- Consumables:
- Lilac polish (e.g., Zoya Heather)
- Base coat (e.g., OPI Natural Nail)
- Top coat (e.g., Orly Sec’n Dry)
DIY Instructions:
-
- Apply a base coat to your nails.
- Paint your toenails with two coats of lilac polish.
- Finish with a top coat to achieve a glossy effect.
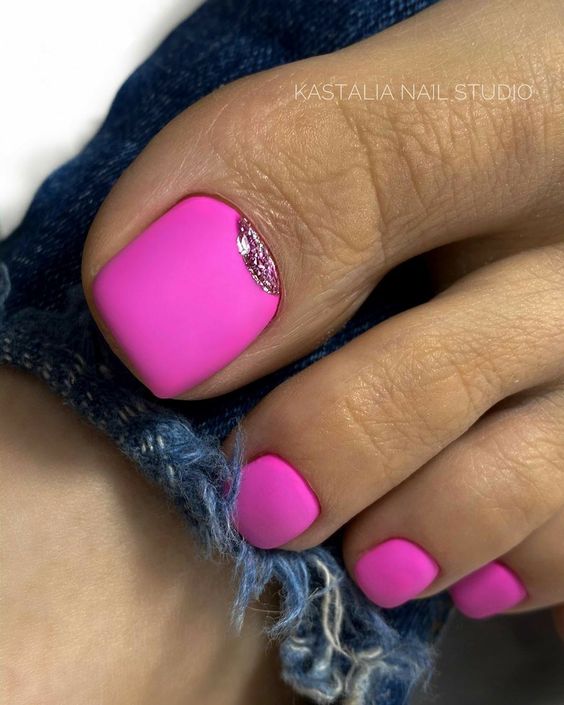
Hot Pink with Glitter Accent
The hot pink with glitter accent design is a bold and striking choice for summer. The vibrant hot pink color captures the essence of summer fun, while the glitter accent on the big toenail adds a touch of glamour. This design is perfect for those who want to make a statement with their toenails.
- Consumables:
- Hot pink polish (e.g., Essie Off Tropic)
- Glitter polish (e.g., China Glaze Fairy Dust)
- Base coat (e.g., OPI Nail Envy)
- Top coat (e.g., Seche Vite)
DIY Instructions:
-
- Start with a base coat on all nails.
- Apply two coats of hot pink polish.
- On the big toenail, add a glitter accent using glitter polish.
- Seal with a top coat for a long-lasting finish.
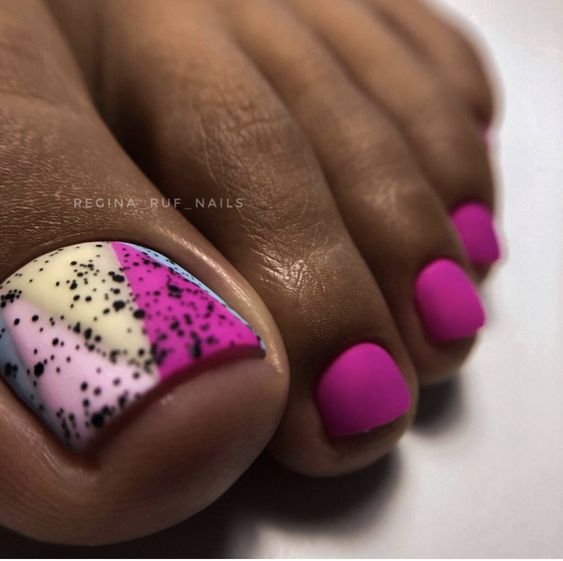
Speckled Neon Design
The speckled neon design is an eye-catching and artistic look. The combination of hot pink, light blue, and white with black speckles creates a unique and playful design. This style is perfect for a fun day at the beach.
- Consumables:
- Hot pink polish (e.g., Orly Beach Cruiser)
- Light blue polish (e.g., Sally Hansen Babe Blue)
- White polish (e.g., Essie Blanc)
- Black speckle polish (e.g., Splatter Paint by Nails Inc)
- Base coat (e.g., Zoya Anchor)
- Top coat (e.g., Essie Gel Couture)
DIY Instructions:
-
- Apply a base coat to all nails.
- Paint the big toenail in sections with hot pink, light blue, and white polish.
- Add black speckles on top of the color blocks.
- Finish with a top coat for a smooth finish.
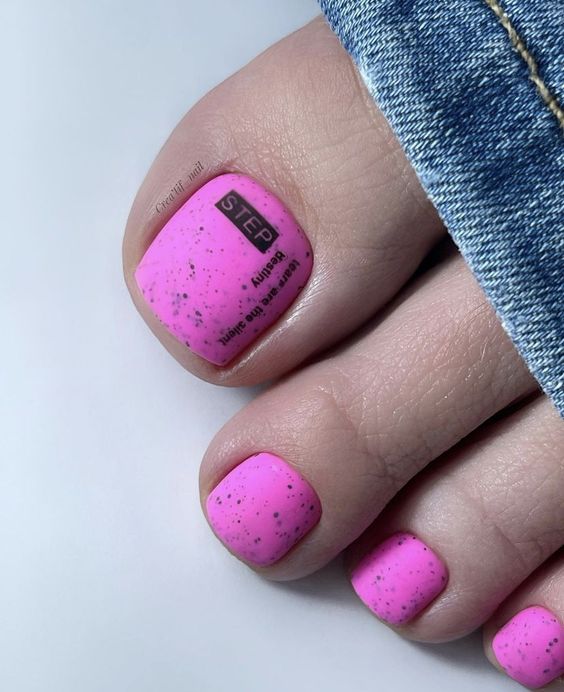
Pink and Black Contrast
The pink and black contrast design is chic and modern. The hot pink base is adorned with a subtle black text accent, giving it a unique edge. This design is perfect for those who love minimalist yet impactful nail art.
- Consumables:
- Hot pink polish (e.g., OPI Suzi Has a Swede Tooth)
- Black polish for text (e.g., Essie Licorice)
- Base coat (e.g., Deborah Lippmann All About That Base)
- Top coat (e.g., Sally Hansen Insta-Dri)
DIY Instructions:
-
- Start with a base coat.
- Apply two coats of hot pink polish.
- Use black polish to add the text accent on the big toenail.
- Seal with a top coat for durability.
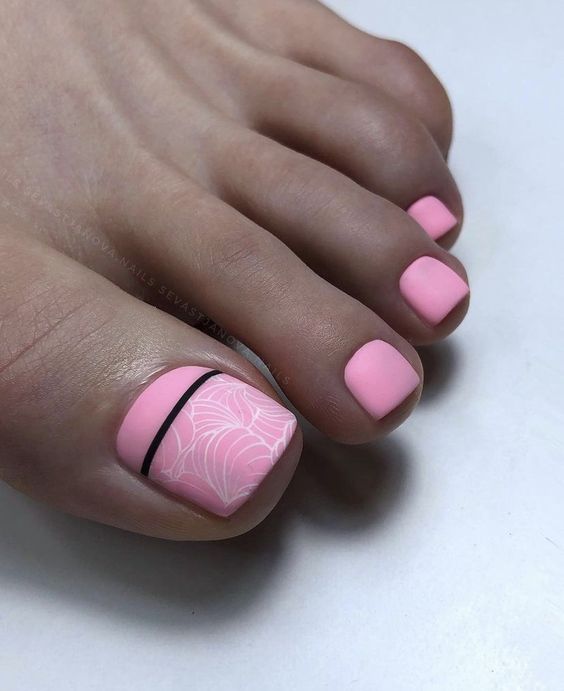
Matte Pink with Line Art
The matte pink with line art design is elegant and sophisticated. The soft matte pink is complemented by a delicate black line art on the big toenail, making it perfect for those who prefer a subtle yet stylish look.
- Consumables:
- Matte pink polish (e.g., Zoya Matte Velvet in Loredana)
- Black polish for line art (e.g., Orly Jet Black)
- Base coat (e.g., OPI Nail Envy)
- Matte top coat (e.g., Butter London Matte Finish)
DIY Instructions:
-
- Apply a base coat to all nails.
- Paint all nails with matte pink polish.
- Use a fine brush to create black line art on the big toenail.
- Finish with a matte top coat.
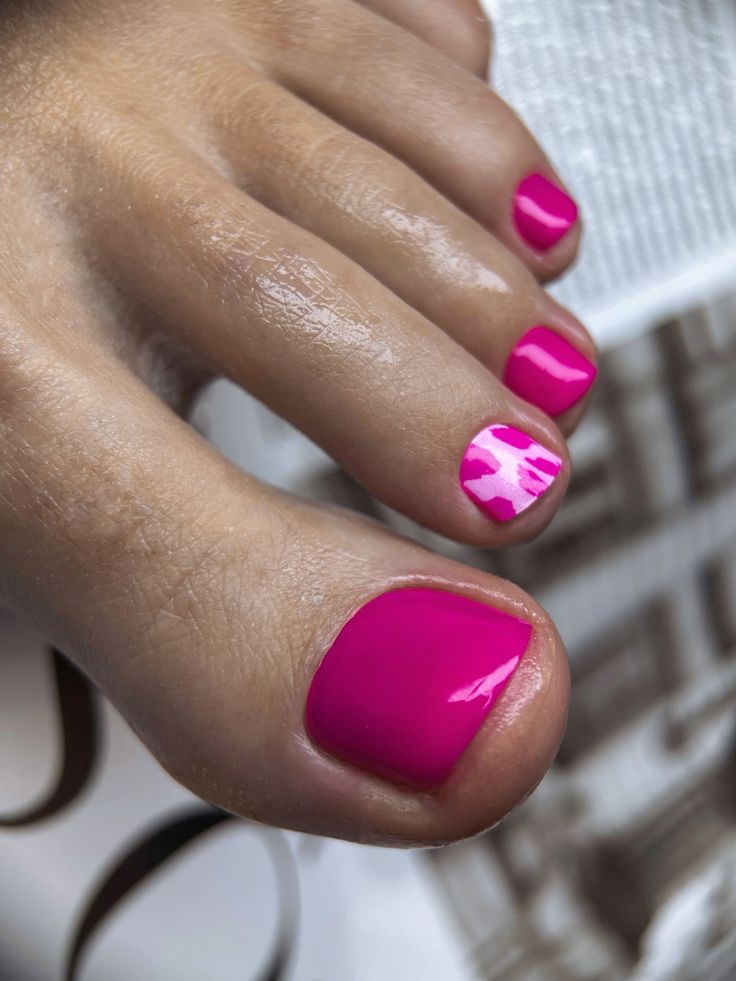
Hot Pink and White Camo
The hot pink and white camo design is bold and trendy. The bright hot pink is paired with a camo accent in white, creating a striking contrast that’s perfect for summer adventures.
- Consumables:
- Hot pink polish (e.g., China Glaze Shocking Pink)
- White polish (e.g., OPI Alpine Snow)
- Base coat (e.g., Essie First Base)
- Top coat (e.g., Seche Vite Dry Fast)
DIY Instructions:
-
- Start with a base coat on all nails.
- Apply two coats of hot pink polish.
- On the accent nail, create a camo pattern using white polish.
- Seal with a top coat for a glossy finish.
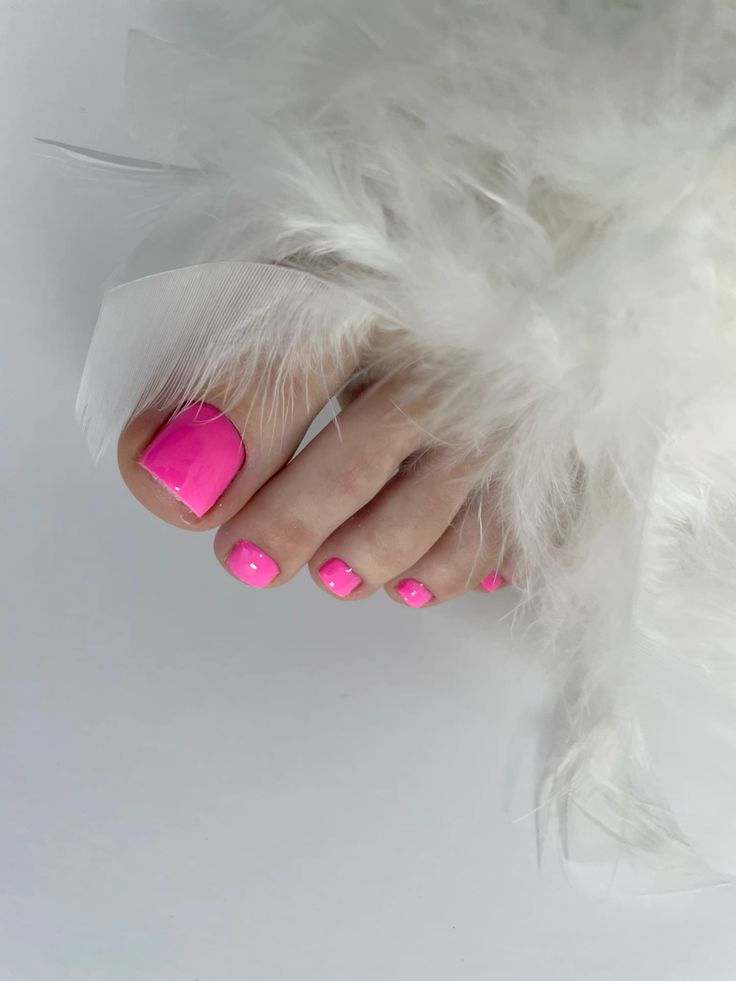
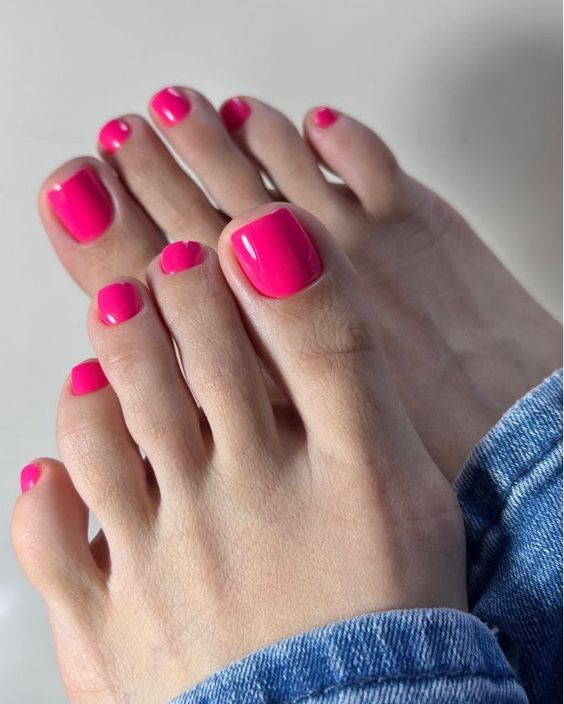
Hot Pink Simplicity
The hot pink simplicity design is classic and vibrant, perfect for summer. The bright hot pink polish stands out beautifully, making it a versatile choice that pairs well with any summer outfit.
- Consumables:
- Hot pink polish (e.g., China Glaze Shocking Pink)
- Base coat (e.g., Essie First Base)
- Top coat (e.g., Seche Vite Dry Fast)
- DIY Instructions:
- Start with a base coat to protect your nails.
- Apply two coats of hot pink polish for an opaque finish.
- Seal with a top coat for added shine and durability.
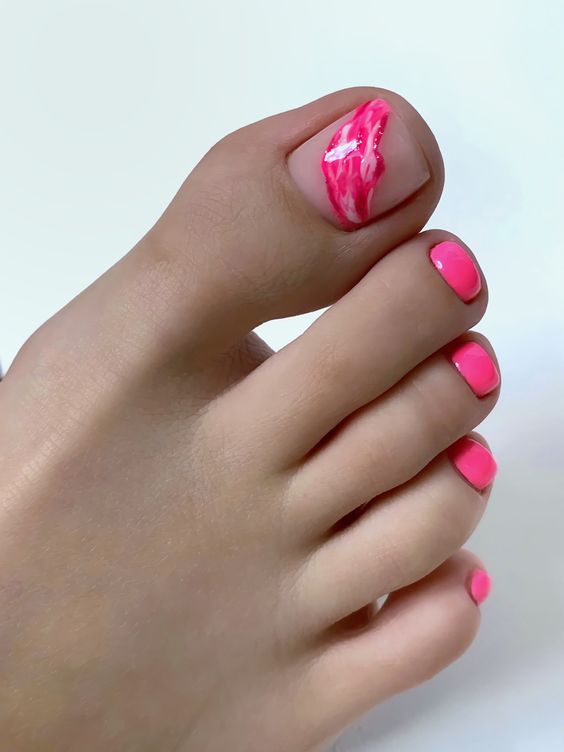
Pink Wave Art
The pink wave art design is trendy and eye-catching, featuring a wavy pattern in varying shades of pink. This design is perfect for those who love creative and unique nail art.

- Consumables:
- Light pink polish (e.g., Essie Fiji)
- Dark pink polish (e.g., OPI Strawberry Margarita)
- Nail art brush
- Base coat (e.g., Deborah Lippmann All About That Base)
- Top coat (e.g., Sally Hansen Insta-Dri)
DIY Instructions:
-
- Apply a base coat to all nails.
- Paint the nails with light pink polish as the base color.
- Use a nail art brush to create wavy patterns with dark pink polish.
- Finish with a top coat to protect the design.
Marble Pink Accent
The marble pink accent design features a striking marble pattern on the big toenail, combined with a vibrant hot pink on the rest of the nails. This design is both elegant and bold, making it perfect for summer.
- Consumables:
- Hot pink polish (e.g., OPI Suzi Has a Swede Tooth)
- White polish (e.g., Essie Blanc)
- Pink marble polish (e.g., Sally Hansen Insta-Dri)
- Base coat (e.g., Zoya Anchor)
- Top coat (e.g., Essie Gel Couture)
DIY Instructions:
-
- Start with a base coat.
- Paint all nails with hot pink polish.
- On the big toenail, create a marble effect using white and pink marble polishes.
- Seal with a top coat.
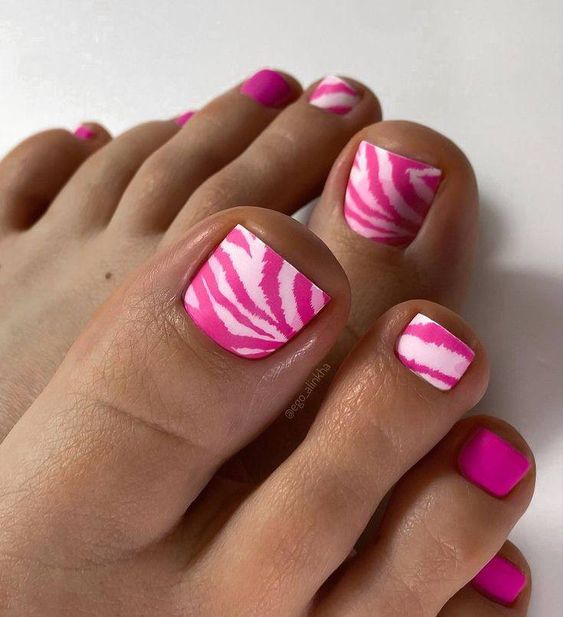
Zebra Pink Design
The zebra pink design combines hot pink with white zebra stripes, creating a fun and playful look perfect for summer. This design is great for those who want to add a wild touch to their pedicure.
- Consumables:
- Hot pink polish (e.g., China Glaze Pool Party)
- White polish (e.g., OPI Alpine Snow)
- Nail art brush
- Base coat (e.g., Orly Bonder)
- Top coat (e.g., Glisten & Glow)
DIY Instructions:
-
- Apply a base coat to all nails.
- Paint the nails with hot pink polish.
- Use a nail art brush to create white zebra stripes on the big toenail.
- Finish with a top coat.
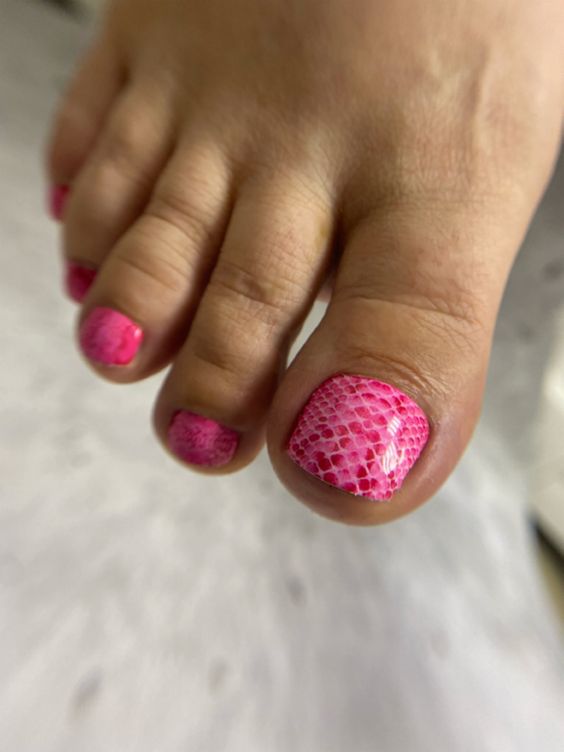
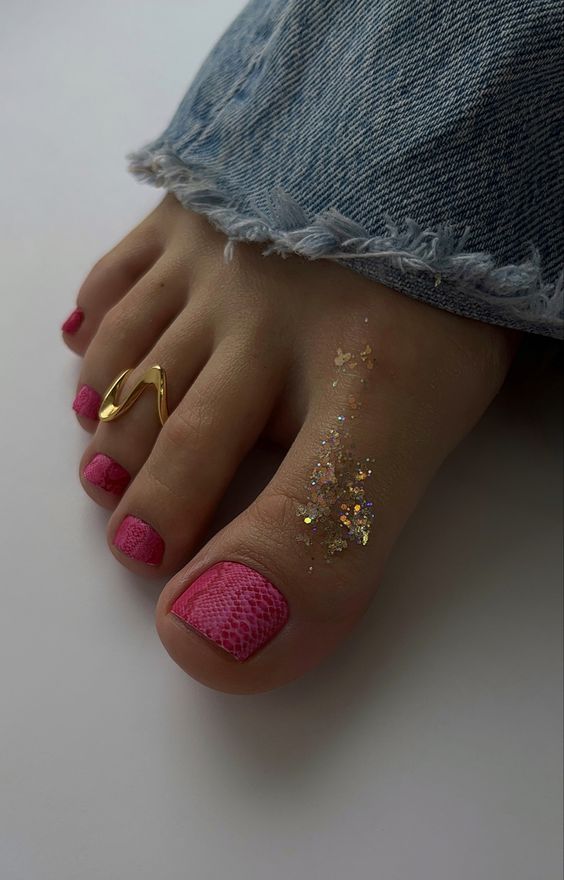
Snake Skin Pink
The snake skin pink design features a textured snake skin pattern in a vibrant hot pink color. This design is bold and unique, perfect for making a statement with your summer pedicure.
- Consumables:
- Hot pink polish (e.g., Orly Hot Shot)
- Snake skin texture polish (e.g., Nails Inc Snakeskin Effect)
- Base coat (e.g., Essie First Base)
- Top coat (e.g., Seche Vite)
DIY Instructions:
-
- Start with a base coat on all nails.
- Apply two coats of hot pink polish.
- Use the snake skin texture polish on the big toenail.
- Seal with a top coat for durability.
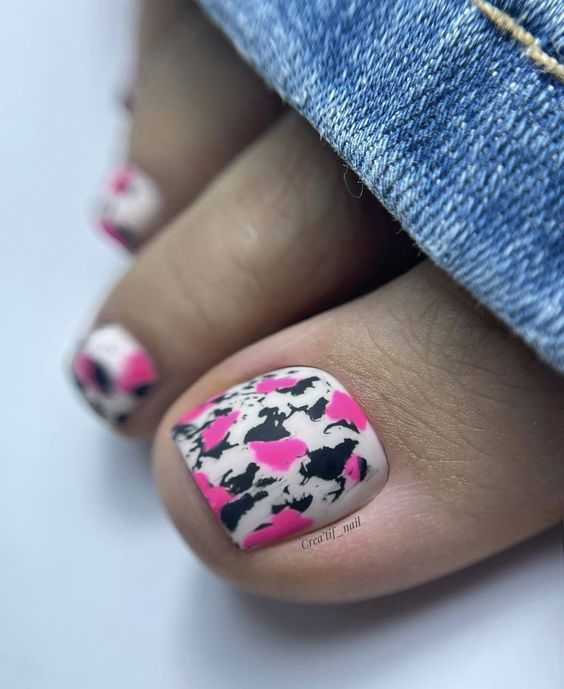
Black and Pink Abstract
The black and pink abstract design is a bold and artistic choice. The mix of hot pink, white, and black creates a striking pattern that stands out, making it perfect for those who love edgy nail art.
- Consumables:
- Hot pink polish (e.g., Essie Hot Tropics)
- White polish (e.g., OPI Alpine Snow)
- Black polish (e.g., Orly Liquid Vinyl)
- Base coat (e.g., Zoya Anchor)
- Top coat (e.g., Seche Vite Dry Fast)
DIY Instructions:
-
- Start with a base coat.
- Apply white polish as the base color.
- Use a thin brush to add abstract patterns with hot pink and black polish.
- Seal with a top coat for a glossy finish.
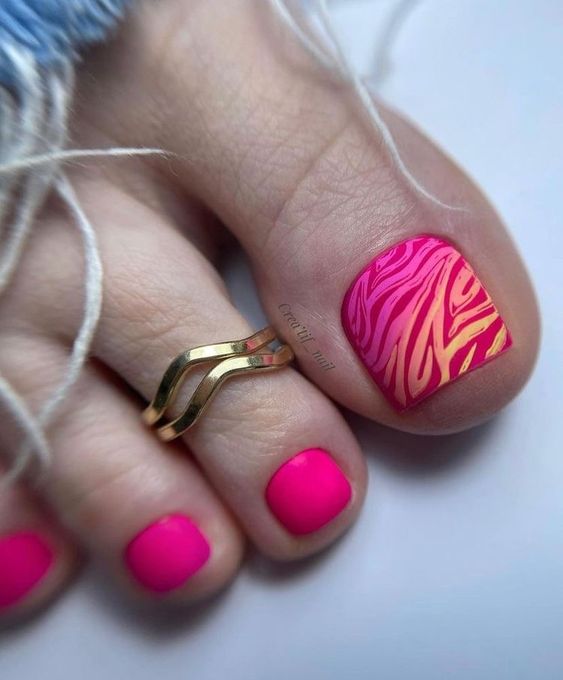
Neon Pink with Golden Swirls
The neon pink with golden swirls design is vibrant and luxurious. The hot pink base is beautifully accented with golden swirl patterns, making this design perfect for summer parties and events.
- Consumables:
- Neon pink polish (e.g., China Glaze Pool Party)
- Gold polish (e.g., Essie Good as Gold)
- Nail art brush
- Base coat (e.g., Deborah Lippmann All About That Base)
- Top coat (e.g., Essie Gel Couture)
DIY Instructions:
-
- Apply a base coat to all nails.
- Paint the nails with neon pink polish.
- Use a nail art brush to create golden swirl patterns on the big toenail.
- Finish with a top coat to protect the design.
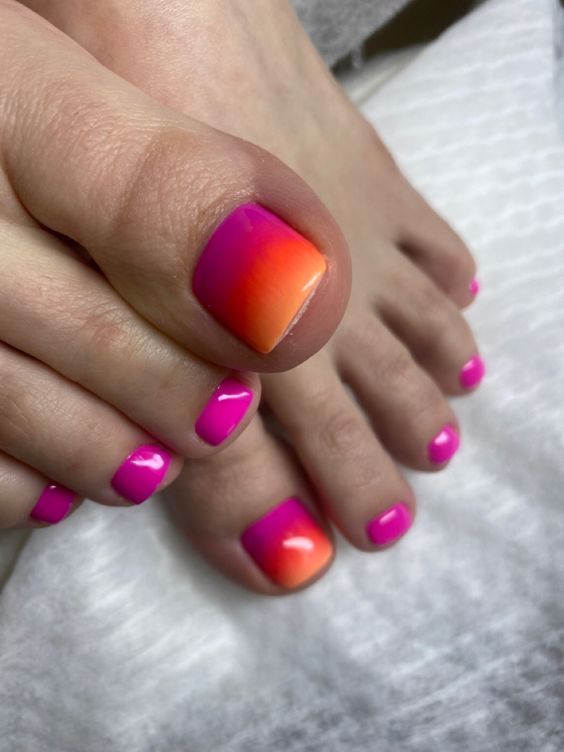
Sunset Gradient
The sunset gradient design captures the beauty of a summer sunset. The gradient from hot pink to orange creates a warm, tropical look that’s perfect for summer evenings.
- Consumables:
- Hot pink polish (e.g., Orly Hot Shot)
- Orange polish (e.g., OPI A Good Man-darin is Hard to Find)
- Makeup sponge for gradient
- Base coat (e.g., Essie First Base)
- Top coat (e.g., Seche Vite)
DIY Instructions:
-
- Start with a base coat.
- Apply the gradient using a makeup sponge, blending hot pink and orange polishes.
- Seal with a top coat for a smooth finish.
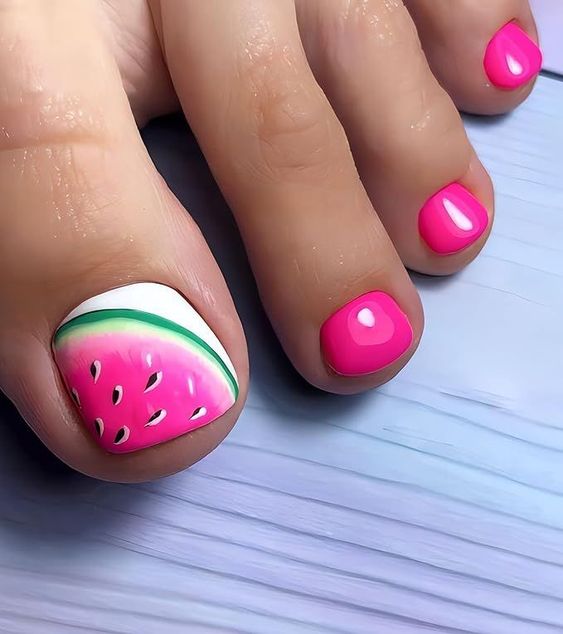
Watermelon Delight
The watermelon delight design is fun and fresh, perfect for summer. The big toenail features a detailed watermelon slice, while the rest of the nails are painted in a vibrant hot pink.
- Consumables:
- Hot pink polish (e.g., China Glaze Shocking Pink)
- White polish (e.g., OPI Alpine Snow)
- Green polish (e.g., Essie Mojito Madness)
- Black polish for seeds (e.g., Orly Liquid Vinyl)
- Nail art brush
- Base coat (e.g., Zoya Anchor)
- Top coat (e.g., Seche Vite Dry Fast)
DIY Instructions:
-
- Start with a base coat on all nails.
- Paint the big toenail white and the rest hot pink.
- Use green polish to create the rind and black polish for the seeds on the big toenail.
- Seal with a top coat.
Glossy Pink Perfection
The glossy pink perfection design is a simple yet stunning choice. The high-gloss hot pink polish makes the nails shine, perfect for any summer occasion.
- Consumables:
- Hot pink polish (e.g., OPI Strawberry Margarita)
- Base coat (e.g., Deborah Lippmann All About That Base)
- Top coat (e.g., Seche Vite)
DIY Instructions:
-
- Apply a base coat to clean toenails.
- Apply two coats of hot pink polish for an even, opaque finish.
- Finish with a top coat for a high-gloss look.
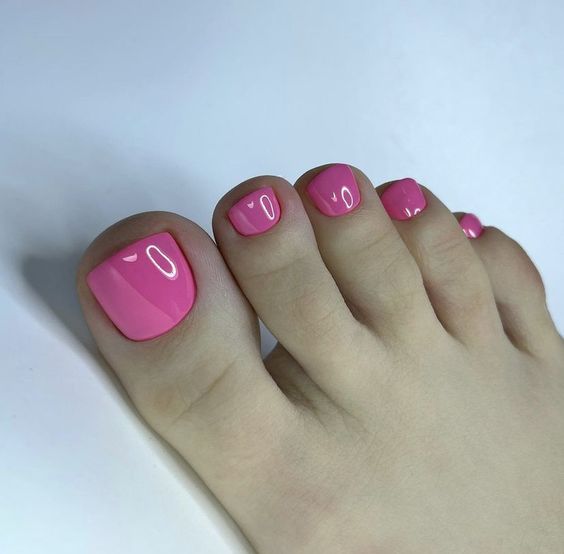
Glossy Hot Pink
The glossy hot pink design is perfect for those who love simplicity with a touch of elegance. The high-gloss finish enhances the vibrant hot pink color, making it ideal for any summer outfit.
- Consumables:
- Hot pink polish (e.g., OPI Strawberry Margarita)
- Base coat (e.g., Deborah Lippmann All About That Base)
- Top coat (e.g., Seche Vite Dry Fast)
DIY Instructions:
-
- Apply a base coat to clean toenails.
- Follow with two coats of hot pink polish for an even, opaque finish.
- Finish with a top coat for a high-gloss look.
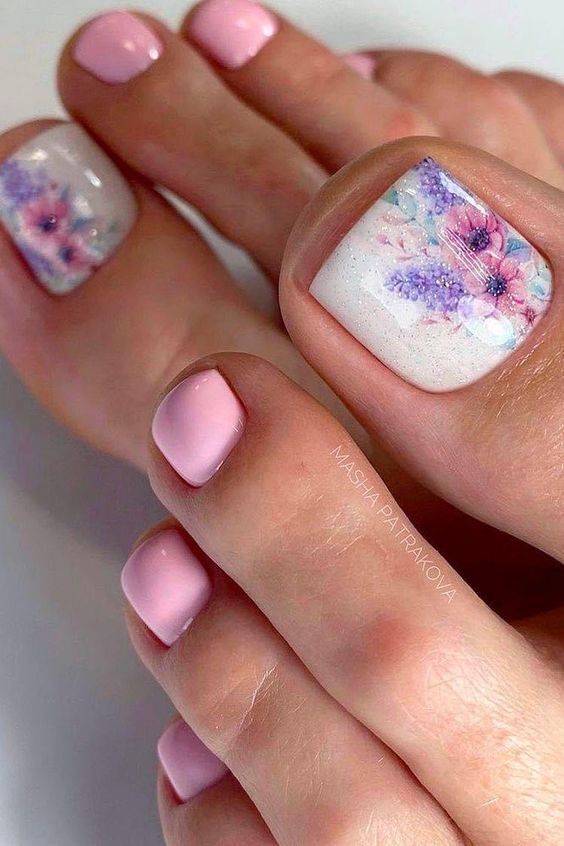
Floral Pastel Pink
The floral pastel pink design combines soft pink nails with a beautiful floral accent on the big toenail. The delicate flowers add a touch of nature to this elegant pedicure.
- Consumables:
- Pastel pink polish (e.g., Essie Ballet Slippers)
- White polish (e.g., OPI Alpine Snow)
- Floral decals or nail art brush
- Base coat (e.g., Zoya Anchor)
- Top coat (e.g., Essie Gel Couture)
DIY Instructions:
-
- Start with a base coat on all nails.
- Apply pastel pink polish to all nails.
- Use white polish and floral decals to create the flower design on the big toenail.
- Seal with a top coat.
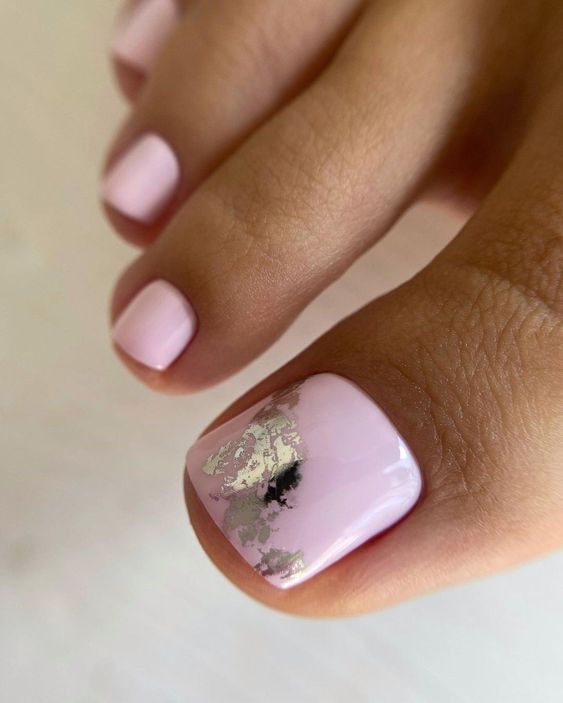
Soft Pink with Silver Foil
The soft pink with silver foil design is a chic and modern look. The soft pink base is enhanced with a touch of silver foil on the big toenail, adding a hint of luxury.
- Consumables:
- Soft pink polish (e.g., OPI Bubble Bath)
- Silver foil
- Base coat (e.g., Essie First Base)
- Top coat (e.g., Seche Vite)
DIY Instructions:
-
- Apply a base coat to all nails.
- Paint the nails with soft pink polish.
- Apply silver foil to the big toenail while the polish is still tacky.
- Finish with a top coat to seal the foil.
Pink Snake Skin with Glitter
The pink snake skin with glitter design is bold and glamorous. The textured snake skin effect on the big toenail, combined with glitter accents, makes this pedicure perfect for a night out.
- Consumables:
- Hot pink polish (e.g., Orly Hot Shot)
- Snake skin texture polish
- Glitter polish (e.g., China Glaze Fairy Dust)
- Base coat (e.g., Zoya Anchor)
- Top coat (e.g., Seche Vite)
DIY Instructions:
-
- Start with a base coat.
- Apply hot pink polish to all nails.
- Use snake skin texture polish on the big toenail.
- Add glitter accents to the design.
- Seal with a top coat.
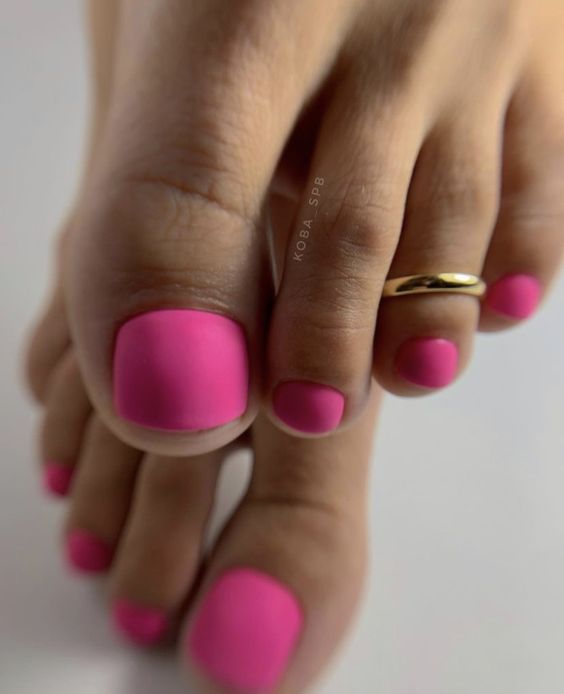
Matte Hot Pink
The matte hot pink design is a trendy and modern choice. The matte finish gives a sophisticated look to the vibrant hot pink color, perfect for those who prefer a unique finish.
- Consumables:
- Hot pink polish (e.g., China Glaze Pool Party)
- Base coat (e.g., Essie First Base)
- Matte top coat (e.g., Butter London Matte Finish)
DIY Instructions:
-
- Apply a base coat to clean toenails.
- Follow with two coats of hot pink polish.
- Finish with a matte top coat for a smooth, non-glossy look.
Save Pin