Nails

Summer Coffin Nails 2024: A Fresh Take on Seasonal Chic 24 Ideas

As the gentle warmth of summer graces our spirits, it’s time to let our nails mirror the vibrancy of the season. In the landscape of 2024, coffin nails have taken center stage, providing a canvas for trendy and inspiring designs that cater to every whim—from the beach to the holiday soirée. Let’s unveil the freshest nail art ideas that are making waves this summer.

Subtle Neon Elegance

At the forefront of our summer parade is this masterpiece, a harmonious blend of simplicity and neon brightness. This coffin shape provides an elongated elegance, while the ombre effect whispers of summer sunsets. The light pink base blooms into a crescendo of neon yellow, a nod to summer’s limitless energy.

Photo credit by: tsglamour

The Artisan’s Palette

  • Base Polish: Start with a high-quality light pink gel like ‘Baby Pink Bliss’ from the Summer Gel Collection.
  • Neon Polish: For that eye-catching transition, ‘Solar Flare Yellow’ will do the trick.
  • Top Coat: A durable layer of ‘Sunset Seal’ top coat will ensure longevity.

DIY Nail Art Tips

For the aspiring nail artist at home, begin with two coats of your light pink base. While tacky, gently sponge on your neon yellow from the mid-nail to the tip. Finish with a top coat for a gel-like shine.

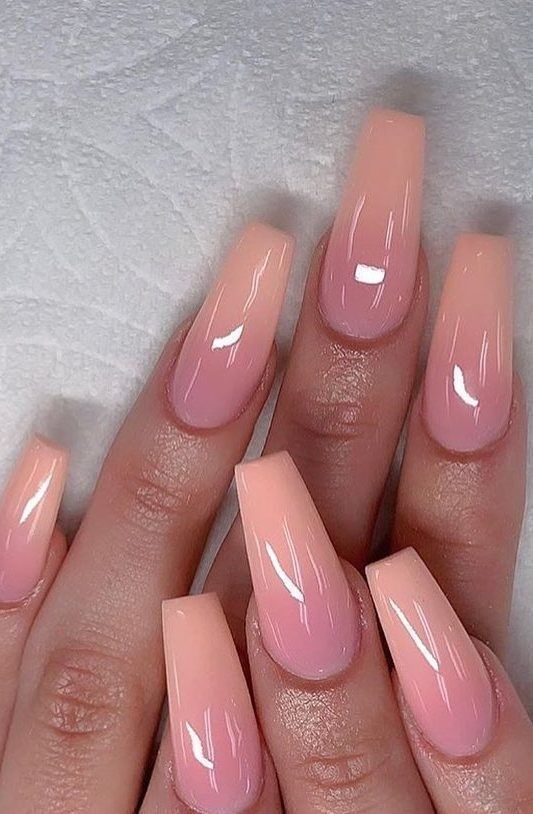
Cute and Simple Elegance

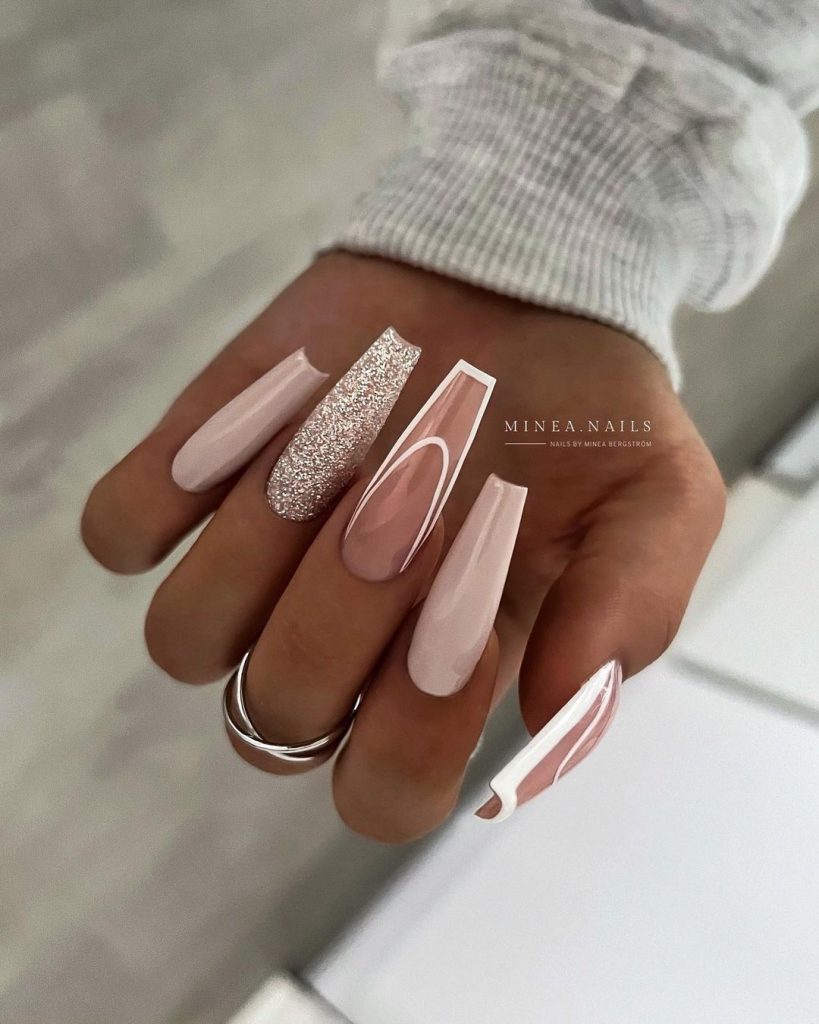
This look is the epitome of cute and simple charm. The medium length of these coffin nails offers a versatile canvas, perfect for a variety of occasions. With a gentle light pink hue gracing each nail, this manicure whispers elegance with every gesture. The subtle color choice makes these nails a delightful inspo gel option for those seeking understated sophistication. A touch of white along the tips adds a fresh, modern twist to the classic French tip, redefining what short almond nails can be.

Photo credit by: 𝐉𝐢𝐥𝐥 ⚡️

Consumables List:

  • High-quality gel base coat for a sturdy foundation.
  • Light pink gel polish, ideal for a soft base color.
  • Pure white gel polish for the tips.
  • A glossy topcoat for a protective shine.
  • Cuticle oil for a nourishing finish.

Brands and Recommendations:

  • Try “EverGel” for the base and top coats, known for their durability.
  • “Pink Whisper” by NailTrendz for the perfect pink.
  • “Snow Cap” by LuxePolish for a crisp white tip.

DIY Instructions:

  1. Apply the base coat and cure under a UV lamp for 60 seconds.
  2. Apply two coats of the light pink gel polish, curing after each application.
  3. Use a fine-tip brush to apply the white gel polish on the tips, then cure.
  4. Finish with a glossy topcoat for extra shine and cure.
  5. Nourish your cuticles with oil to complete the manicure.

With these steps, your nails will be ready to shine for any summer adventure, from a casual day out to a breezy evening on the beach.

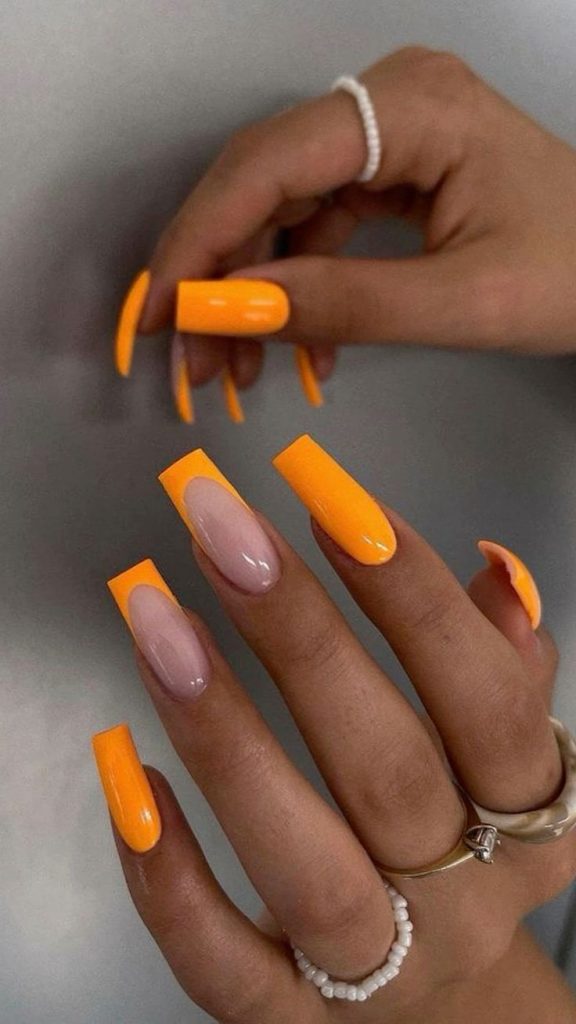
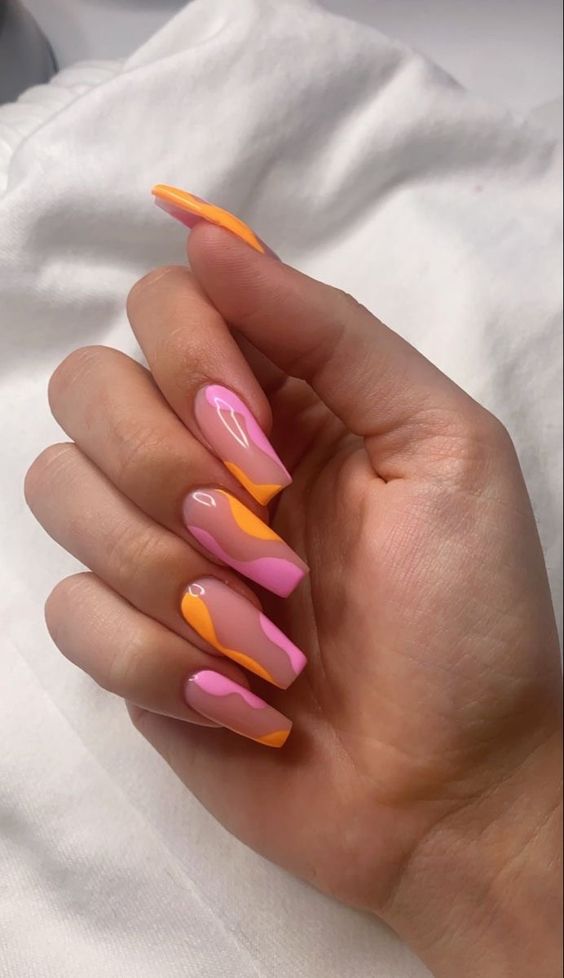
Vibrant Summer Sunset

Drowning in the warm hues of a summer sunset, this coffin-shaped creation captures the essence of the season. The ombré effect moves from fiery orange to pink, reminiscent of the evening horizon. The distinctive feature of this design is a bold choice in favor of neon shades, which makes each nail a bright decoration. Perfect for those looking for a trendy and colorful manicure, this style is sure to attract attention and spark conversation.

Photo credit by: https://www.pinterest.com/

Consumables List:

  • Neon orange and red gel polish for a vivid ombre.
  • A sponge for the ombre effect.
  • A no-wipe topcoat for a lasting, glossy finish.

Brands and Recommendations:

  • “Neon Blaze” and “Summer Fling” from GelArt for the ombre polishes.
  • “ShineSeal” topcoat for that perfect glossy look without tackiness.

DIY Instructions:

  1. Apply your base coat; cure it.
  2. Paint half of your nail with neon orange and the other half with red; don’t cure yet.
  3. Use a sponge to dab and blend where the colors meet; then cure.
  4. Seal with a no-wipe topcoat; cure for lasting vibrance.

These steps will give you a radiant summer coffin nails 2024 look that’s perfect for both day-to-night transitions and vibrant holiday celebrations.
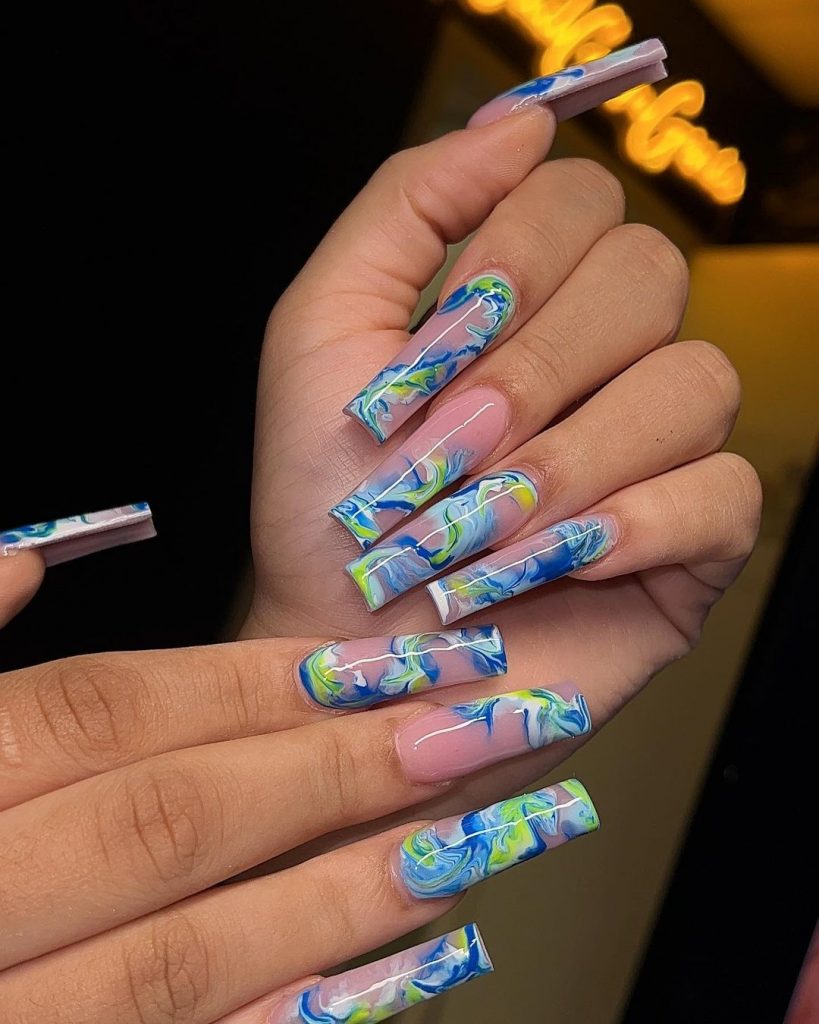
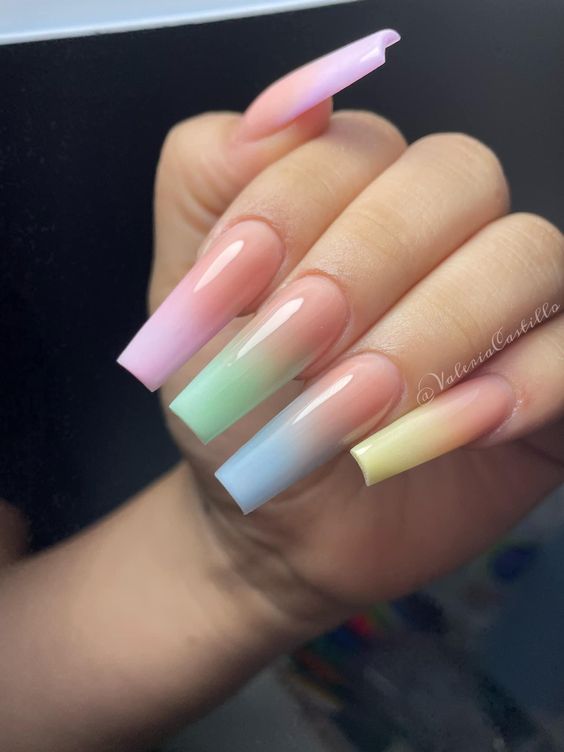
Pastel Perfection

Here we see a pastel paradise, with each nail showcasing a soft gradient of blue, green, pink, and yellow — the colors of summer skies and lemonade stands. This coffin shape design with its medium length is as pretty as it is practical, embodying a youthful spirit. The pastel ombre creates a seamless transition of colors, making it a perfect inspo gel choice for those who love a playful yet polished look.

Photo credit by: wimzia.com

Consumables List:

  • Pastel gel polishes in blue, green, pink, and yellow.
  • A soft-bristled ombre brush for blending.
  • A matte topcoat for a contemporary finish.

Brands and Recommendations:

  • Pastel palette by “ColorFusion Gels” for the soft shades.
  • “Mattify” by NailPros for the topcoat to achieve a suede-like finish.

DIY Instructions:

  1. Begin with a base coat; cure.
  2. Apply each pastel color in sections on the nail.
  3. While wet, blend with an ombre brush; cure.
  4. Finish with a matte topcoat for a unique touch; cure.

This manicure is a summer daydream, ideal for short almond nails and a perfect match for a light, breezy sundress or a beachside outing.

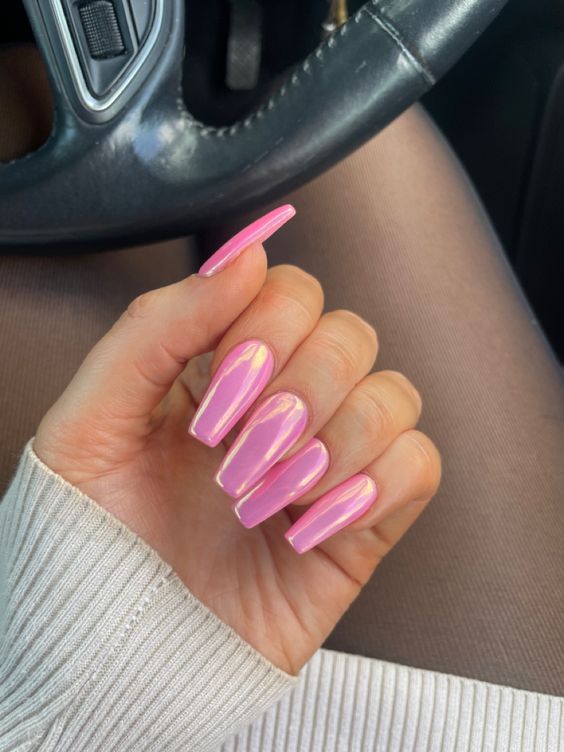
Bold and Beautiful Fuchsia

Stepping into the bold realm, this design boasts a bright fuchsia that is as trendy as it is timeless. The coffin nails’ long length serves as an excellent canvas for this saturated shade, making it a daring choice for those with a flair for the dramatic. This shade of pink isn’t just pretty; it’s a power statement, perfect for someone with a vibrant personality and a fearless approach to summer style.
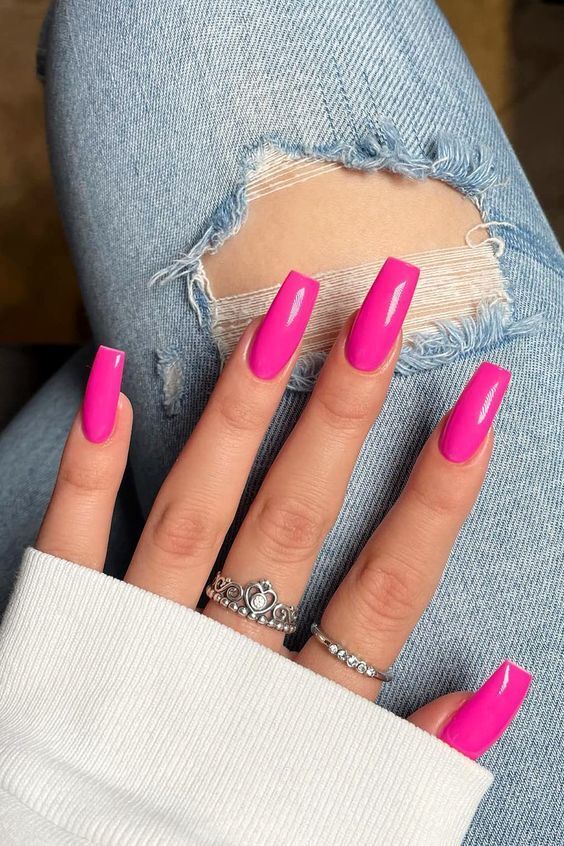
Photo credit by: wimzia.com

Consumables List:

  • Rich fuchsia gel polish.
  • A high-shine topcoat for that glass-like finish.

Brands and Recommendations:

  • “Fuchsia Fury” by VibrantVarnish for a striking color pay-off.
  • “GlassTop” coat by ShineMax for unparalleled brilliance.

DIY Instructions:

  1. Apply your base coat; cure.
  2. Lay down two coats of fuchsia polish, curing after each.
  3. Apply a high-shine topcoat; cure for durability.

Paired with your favorite summer cocktail dress, these nails will make you the life of any party or a standout at the beach holiday.

A Burst of Summer Red

As a professional manicurist, I can’t help but be mesmerized by the bold statement of a fiery red. The vivid red hue captures the essence of summer passion, while the coffin shape lends an edgy yet elegant feel to the fingertips. This is not just a manicure; it’s a declaration of confidence and style, perfect for those long summer nights out.
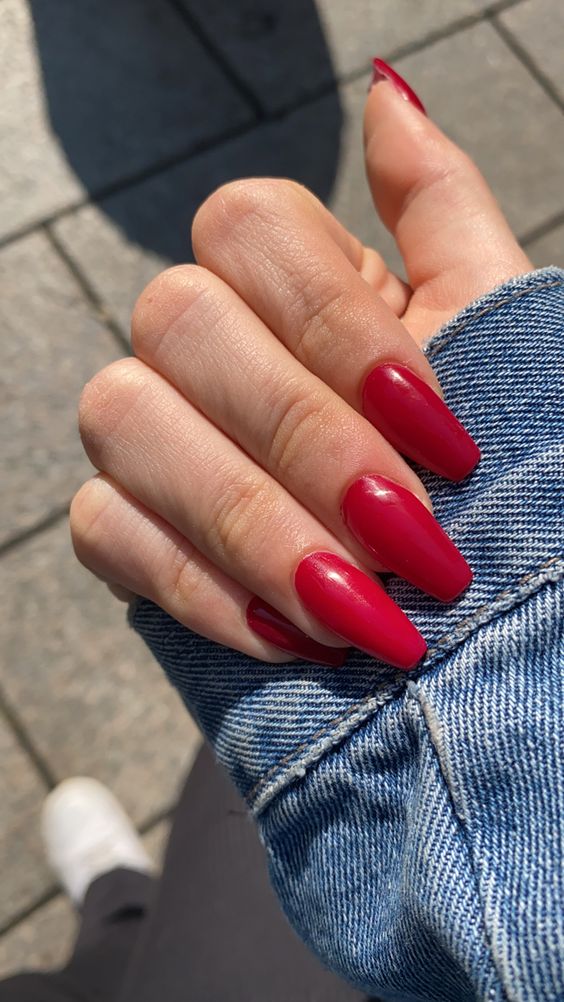
Photo credit by: Meg
  • Consumables:
    • Base coat: StayStrong Base
    • Red polish: Eternal Flame by ColorStay
    • Topcoat: SuperShine Finish
    • Cuticle oil: NourishMe Essentials
  • Recommendation: For the base and top coats, choose ones that promise longevity to keep your manicure as vibrant as a summer day. And always care for your cuticles with a nourishing oil.

To recreate this red allure at home, start with a clean, shaped nail. Apply a strong base coat, followed by two coats of your chosen red. Seal with a glossy topcoat for that gel-like finish. It’s a simple yet trendy look that can go with any summer outfit.

Elegance in Soft Pink

Showcases an elegant light pink that whispers sweet summer serenity. The medium length is a versatile choice, offering the femininity of longer nails without the impracticality. It’s a simple design, yet it speaks volumes about the wearer’s preppy and polished taste.

Photo credit by: Evaggeliaa
  • Consumables:
    • Base coat: FoundationBase
    • Light pink polish: Blush Petal by PinkSerenity
    • Topcoat: MatteAboutYou Finish
    • Accent stone: CrystalGems Miniatures
  • Recommendation: Opt for a matte finish to give a modern twist to this light pink hue, and don’t shy away from adding an accent stone for a bit of sparkle.

For those yearning for a DIY, prep your nails with a quality base coat, followed by your light pink polish. If you’re craving a matte effect, go for a matte topcoat, or keep it shiny for that classic gel appeal. Add an accent stone for a pop of glamour.

The Gradient of Sunset

The ombre design mirrors the breathtaking colors of a summer sunset, transitioning from a soft pink to a purple tip. The coffin shape remains a canvas for art, with each nail portraying a different shade of the setting sun. It’s a trendy choice for those seeking a bit more drama and creativity.
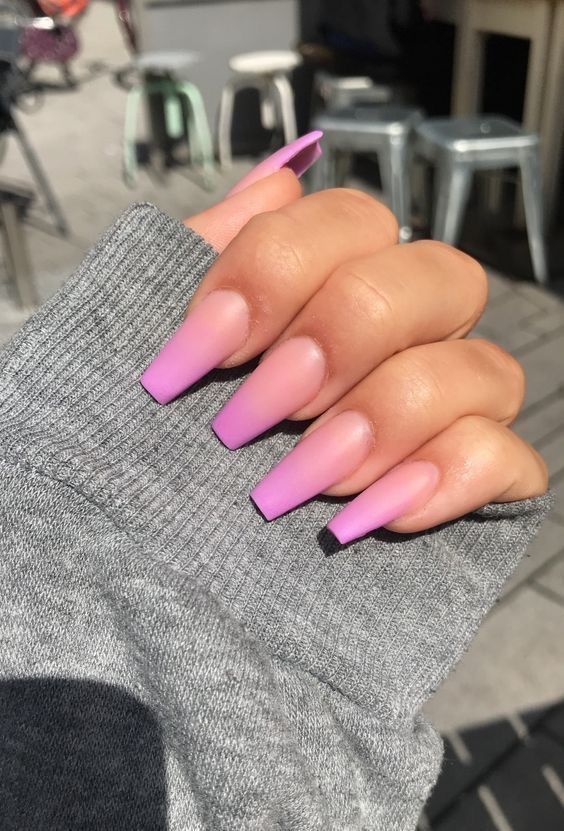
Photo credit by: Ivett Vekony
  • Consumables:
    • Base coat: PrimeTime Base
    • Pink polish: Sunrise Blush by DayBreak
    • Purple polish: Twilight Hues by Nightfall
    • Topcoat: GlassShield Finish
    • Sponge: BlendEase for gradient
  • Recommendation: When blending colors, work quickly with a sponge to create a seamless ombre effect. A glassy topcoat will ensure the gradients shine through.

To achieve this at home, apply a base coat and then your lighter color. While still tacky, sponge on the darker shade for that ombre look, blending as you go. Finish with a topcoat for a gel-like shine that catches every summer ray.

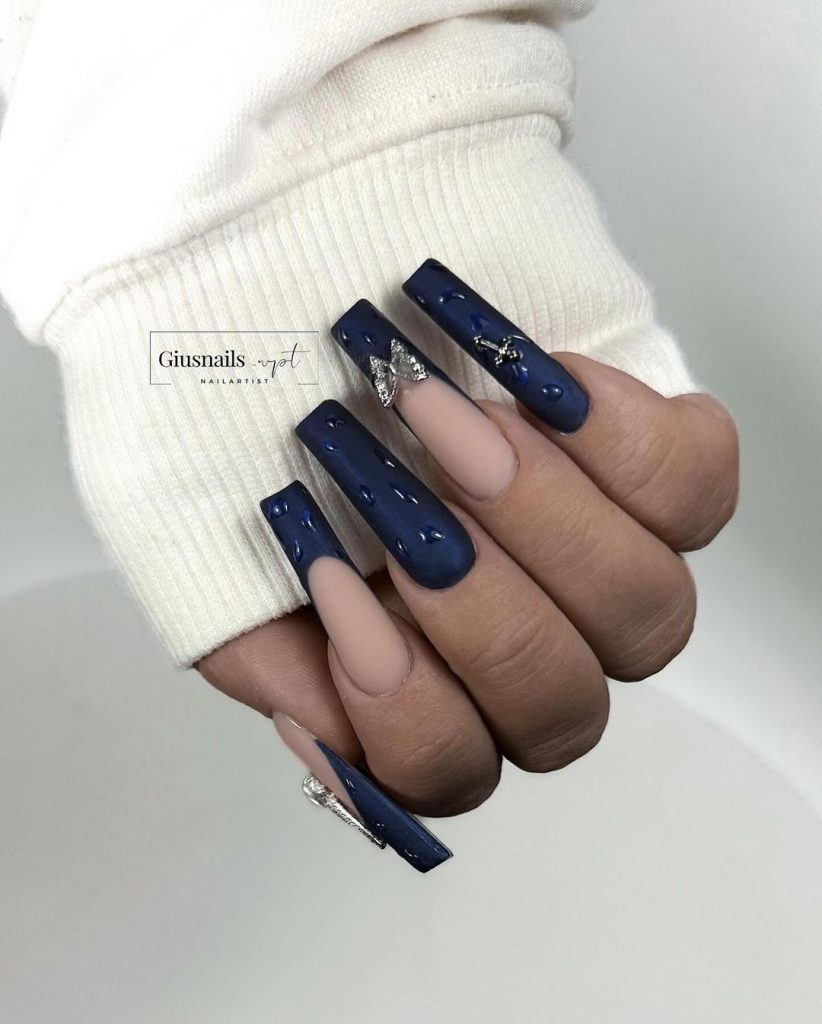
Dazzling Blue Sparkles

If ever there was a manicure that captured the sparkle of the ocean, it’s the blue and glitter extravaganza. The coffin nails are coated in a deep blue, with one accent nail taking center stage with its glitzy art. This design is for those who carry the spirit of the sea and sky in their hearts.
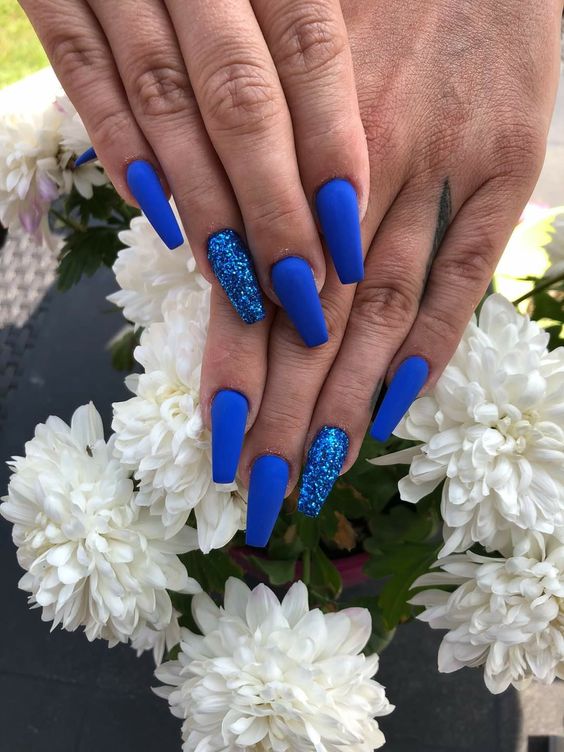
Photo credit by: Tutti Frutti
  • Consumables:
    • Base coat: AnchorHold Base
    • Blue polish: OceanDepth by SeaSiren
    • Glitter overlay: StarryNights Sparkle
    • Topcoat: EverGleam Finish
    • Recommendation: The key here is balance – while the blue is bold, the glitter should not overwhelm. Apply the glitter overlay with precision to just one or two nails for an elegant pop.

To get this look, begin with a solid base, and then paint on the deep blue. Choose a finger for the glitter accent – usually the ring finger works best – and apply a layer of sparkle. Finish with a high-gloss topcoat to seal the deal. It’s a manicure that says you’re ready for every wave of fun this summer.

Vibrant Green Energy

We see a manicure that’s as fresh as a neon summer lawn. Bright green and white combine with subtle embellishments to create a playful yet sophisticated style. The coffin shape lends itself well to this energetic color, making it a show-stopper for any summer festivity.
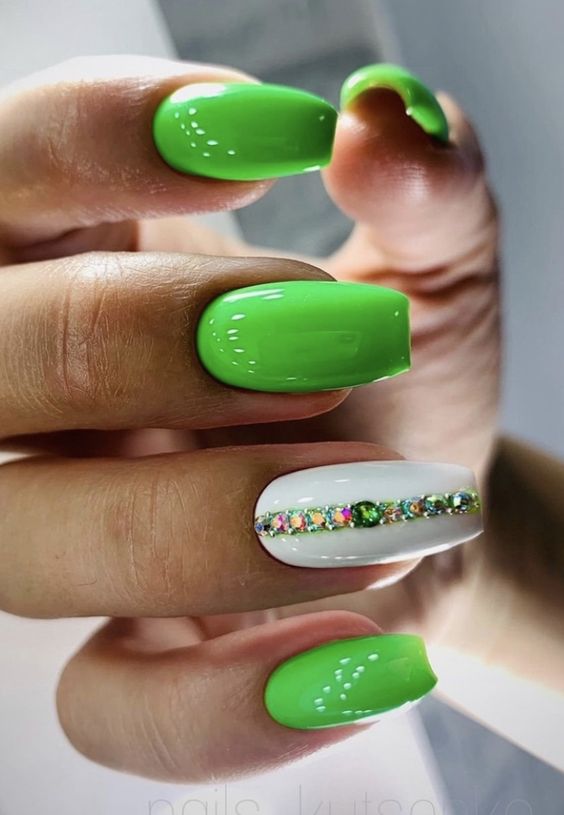
Photo credit by: Tutti Frutti
  • Consumables:
    • Base coat: ProBond Primer
    • Green polish: LimeZest by VividVibrance
    • White polish: PurestSnow by WinterWhites
    • Rhinestones: GemFiesta Mix
    • Topcoat: SealTheDeal Finish
  • Recommendation: Green can be daring, but when paired with white, it strikes a harmonious balance. Use a fine tool to place rhinestones for a controlled and delicate application.

Crafting this trendy design at home requires a steady hand and a splash of creativity. Start with the green as your base and add a white tip or feature nail. Then, carefully place rhinestones in a design that speaks to you. Finish with a topcoat to lock in your summer creation.

Pastel Pink Perfection

The nails depicted are the epitome of pretty and preppy, with a pastel pink that evokes the softness of a summer’s dawn. The coffin shape remains timeless, and the added shimmer brings a playful yet professional touch.

Photo credit by: Sophs
  • Consumables:
    • Base coat: PerfectStart Primer
    • Pink shimmer polish: DawnGlow by LustrousDusk
    • Topcoat: ShineBright Finish
  • Recommendation: This pastel pink shade with a hint of shimmer is ideal for a medium length, and I find that a high-gloss topcoat brings out the best in its reflective qualities.

At home, layer the pastel pink shimmer polish over a strong base coat and finish with a topcoat that promises shine and endurance. It’s a trendy choice for a subtle yet enchanting summer look.

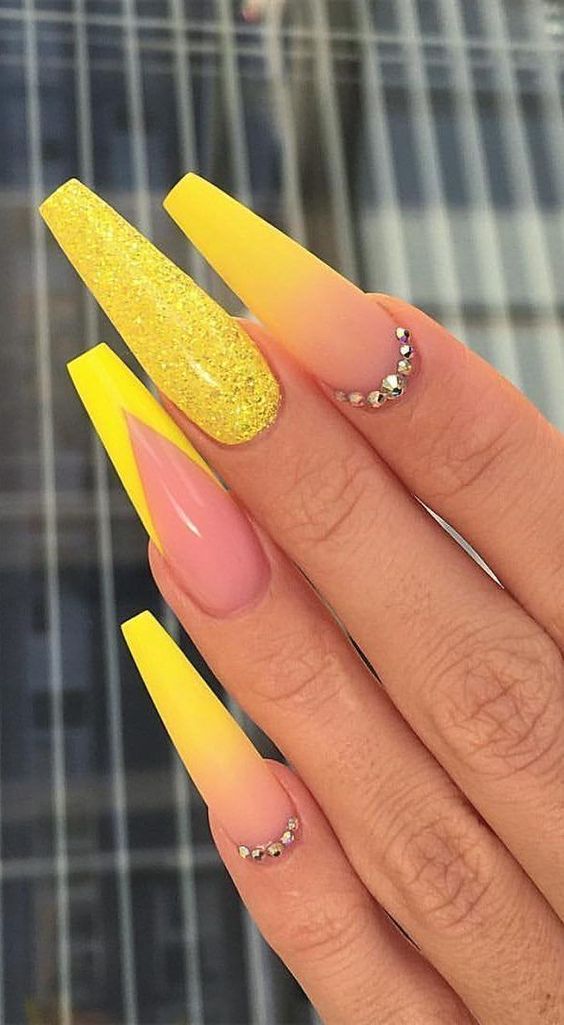
Sunny Yellow Strokes

The coffin nails are like rays of sunshine on your fingertips. The yellow and white combination, along with the creative striped design, makes for a cute, trendy, and colorful statement that’s impossible to miss.
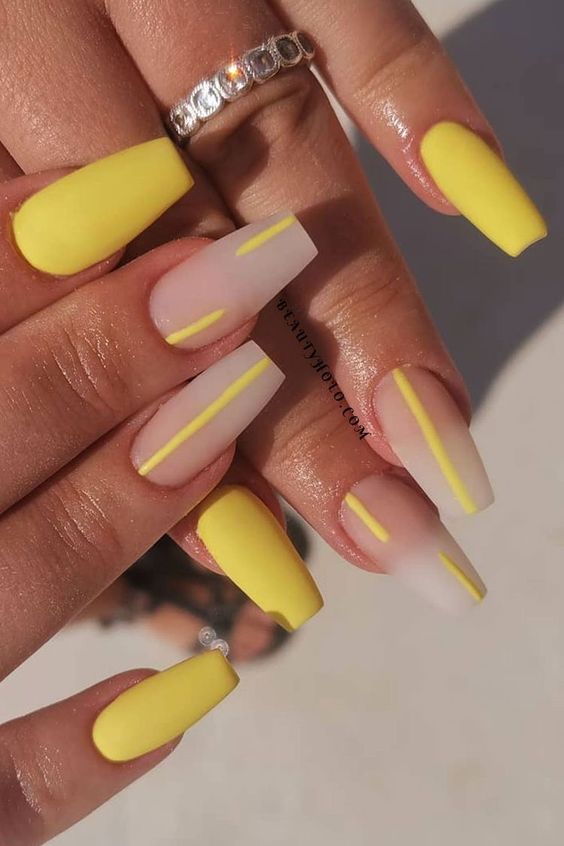
Photo credit by: https://www.pinterest.com/
  • Consumables:
    • Base coat: PrimeProtect Base
    • Yellow polish: SolarFlare by SunKissed
    • White polish: SnowTip by WinterPalette
    • Striping tape: FineLine Precision
    • Topcoat: UltraSeal Finish
  • Recommendation: To create those crisp lines, use striping tape, and always wait for the polish to fully dry before removal. A durable topcoat is crucial for preserving your design.

To achieve this design, start with your base coat, apply the yellow polish, and let it dry. Then place the striping tape and apply white polish. Remove the tape carefully, and seal with a topcoat for that long-lasting gel effect.

Glittering Goldenrod Statement

The nails make a bold statement with a vibrant yellow and glittering gold. It’s a look that screams holiday vibes and summer fun. A single nail of glitter acts as a sparkling centerpiece, surrounded by sunny yellow and a soft pink that adds a touch of subtlety to the boldness.

Photo credit by: @𝐣𝐣𝐣𝐚𝐳𝐦𝐢𝐧𝐞𝐞
  • Consumables:
    • Base coat:

StayPut Adhesion

  • Yellow polish: Solar Flare by Sunburst Collection
  • Pink polish: Rosy Whisper by Gentle Petals
  • Glitter: GoldRush Sequins
  • Topcoat: DiamondHard Protector
  • Recommendation: Solar Flare is your go-to for that electric yellow, and GoldRush Sequins adds that special holiday twinkle. Don’t forget Rosy Whisper to soften and balance the overall look.

Begin with a base coat for staying power, then apply the yellow and pink polishes to alternate nails. For the glitter nail, either use a glitter polish or apply a layer of sequins to a sticky base. The topcoat is the grand finale that encapsulates the luster and ensures durability, perfect for any summer escapade.

Citrus Charm

The nails are like a refreshing slice of orange on a hot day. The bold orange pops against a muted nude, each nail a statement in the summer coffin nails 2024 collection. This design is for those who embrace the trendy and the bright with open arms.

Photo credit by: liv
  • Consumables:
    • Base coat: PrimeShield Foundation
    • Orange polish: CitrusBlast by FruitFiesta
    • Nude polish: BareEssence by NaturalNudes
    • Topcoat: UltraGloss Finish
  • Recommendation: CitrusBlast for its true orange vibrancy and BareEssence for its complementing soft backdrop, which makes the orange stand out even more.

For a DIY version, lay down your base coat, then apply the orange polish to the desired nails. Use the nude shade to provide a subtle contrast. The key is to keep the colors bright but balanced. Finish with a topcoat to seal in the freshness of your summer masterpiece.

A Citrus Splash for Sunny Days

The first image, immediately transports us to a tropical paradise with its zesty orange and green citrus-inspired designs. Each nail is a slice of summer, boasting bright, colorful artwork that perfectly embodies the season. The thumb and ring finger stand out with a palm tree silhouette and orange slices that scream holiday vibes, while the other nails feature complementary patterns with a white base that makes the designs pop. It’s a bold statement that captures the essence of 2024’s trending colors.

Photo credit by: @thenailritual

Consumables for Creating Citrus Splash Nails

  • White base gel polish: A canvas for your art
  • Orange and green gel colors: For vibrant citrus patterns
  • Black detailing gel: To define the palm tree silhouette
  • Fine-tip art brush: For precise detailing
  • Top coat: To seal and protect the design Professional tip: Opt for high-pigment gels to achieve the vividness of a sun-kissed fruit.

DIY Manicure Guide

Start with a clean, prepped nail and apply a white base coat. Cure it under a UV lamp. Then, with a fine-tip brush, paint your orange slices on alternate nails. For the palm tree, use black gel polish and a steady hand to draw the silhouette. Finish with a glossy top coat to enhance the colors and give a gel-like finish.

Chic and Sheer

We embrace the understated elegance of a sheer light pink manicure. The medium-length coffin shape provides a graceful canvas for a soft, translucent ombre, creating an allure of natural, but polished sophistication. This look proves that simple can be stunningly pretty, making it a versatile choice for everyday wear or special occasions.

Photo credit by: @thenailshop.sb

Consumables for Creating a Chic and Sheer Look

  • Light pink gel polish: For a delicate blush of color
  • Clear gel polish: To achieve the ombre effect
  • Sponge: To blend the polishes seamlessly
  • Top coat: For a smooth, glossy finish Professional tip: Use a sponge to dab the light pink upwards to create a flawless ombre.

DIY Manicure Guide

After prepping your nails, apply a clear base. Then, apply the light pink gel polish halfway up the nail. Quickly blend with a clear gel using a sponge. Cure and seal with a top coat for a lasting sheer beauty.

Avocado Dream

Inspiration straight from your favorite brunch spot: avocado on toast. This playful and trendy summer nail look is done in a whimsical green and white color scheme, complete with a gold accent that adds a touch of luxury. The medium length gives room for design, yet remains practical for everyday activities.

Photo credit by: @thenailshop.sb

Consumables for Creating Avocado Dream Nails

  • Green gel polishes: In various shades for the avocado effect
  • White gel polish: For the base and details
  • Gold foil: For the embellishments
  • Fine-tip art brush and dotting tool: For detail work
  • Top coat: To secure the foil and add shine Professional tip: Layer different shades of green to mimic the natural tones of an avocado.

DIY Manicure Guide

Apply a white gel base and cure. With a green gel polish, create the avocado base. Add darker green strokes for depth. Apply gold foil on the accent nail for a chic touch. Finish with a top coat to protect your edible design.

Playful Pink Waves

The flirtatious waves of pink and white take the shape of the coffin nail to new heights. The designs dance across the nails, reminiscent of the foam-tipped waves of a pink seaside sunset. The bold and playful contrast between the neon pink and the soft white creates an effect that’s both eye-catching and inspo-worthy for a summer soiree.

Photo credit by: @beautynailsclip

Consumables for Creating Playful Pink Waves

  • Neon pink gel polish: For the waves
  • White gel polish: For contrast and base
  • Detailing brush: To draw the wave patterns
  • Top coat: To seal the design Professional tip: Keep the waves thin and delicate for a subtle, yet trendy look.

DIY Manicure Guide

Begin with a white base coat, then with a detailing brush, paint neon pink waves from the tip to the middle of the nail. Allow some white to peek through for a bright, layered look. Cure and apply a top coat for a gel finish that lasts.

Elegant Earth Tones

We delve into the earthy elegance of coffin-shaped nails painted in a gradient of brown to nude colors. This design speaks to the minimalist, embodying simple, chic trendiness without sacrificing a speck of the season’s warmth. The subtle ombre captures a medium length, proving that beauty often lies in the natural tones that compliment every skin color.

Photo credit by: @clawsxcollxtion

Consumables for Creating Elegant Earth Tones

  • Brown gel polish: For the base of the ombre
  • Nude gel polish: To blend into the ombre
  • Top coat: For a glossy, protective finish Professional tip: The key to a perfect ombre is in the blending—use a light hand and a sponge to diffuse the colors.

DIY Manicure Guide

Start with a darker brown base, then before it cures, apply the nude polish at the cuticle and gently sponge upwards to blend into the brown. Cure and apply a top coat to achieve that gel gloss.

Swirling Skies

In the image, we are transported to a realm where blue and green colors merge together like a summer sky with the sea. Long nails became the canvas for this airy spectacle, and white clouds soften the bright colors, turning each nail into a unique masterpiece. This is the perfect look for those who want their hands to tell a story of summer freedom.

Photo credit by: @nailgemgenie

Consumables for Creating Swirling Skies

  • Blue and green gel polishes: To create the marbled base
  • White gel polish: For the swirling clouds
  • Swirling tool: To mix the colors on the nail
  • Top coat: To lock in the design Professional tip: Work quickly with the swirling tool to mix the colors before the gel begins to set.

DIY Manicure Guide

Apply a blue base, then dot on green and white while still wet. Use a swirling tool to create the marbled effect. Cure under a lamp and finish with a top coat for durability and shine.

Understated Glitter

As anexample of a sophisticated manicure, you can see light pink nails with one accent nail covered in glitter. The result is a manicure that is both sophisticated and ready to sparkle in the summer sun. Simple but with a touch of glam, it’s perfect for a sophisticated summer evening.

Photo credit by: @justnails_professional

Consumables for Creating Understated Glitter

  • Light pink gel polish: For a uniform base
  • Glitter gel polish: For the statement nail
  • Top coat: For a smooth finish Professional tip: A thick layer of glitter gel polish will give a full-coverage look that doesn’t need extra stones or embellishments.

DIY Manicure Guide

Start with two coats of light pink gel polish on all nails. Apply a generous coat of glitter gel on the ring finger. Cure and seal with a top coat for lasting wear.

Midnight Elegance

For those attracted to the night sky, this is the quintessential way to wear navy blue on long nails. Adorned with silver accents and stones, this look is as mysterious as it is elegant, reminiscent of a starry night. Perfect for making a statement or complementing an ombré evening dress.

Photo credit by: @justnails_professional

Consumables for Creating Midnight Elegance

  • Dark blue gel polish: Base for the starry night look
  • Silver glitter gel polish: For the sparkling accents
  • Rhinestones: For added glamour
  • Top coat: To set everything in place Professional tip: Use a dotting tool for precise placement of the rhinestones.

DIY Manicure Guide

Paint your nails with dark blue gel polish. On accent nails, apply silver glitter polish and place rhinestones. Cure and finish with a top coat.

Summer Zest

We find a playful interplay of yellow and purple, with neon accents that catch the eye. These nails are the visual epitome of bright summer living and fashionable boldness. It’s a colorful and inspiring choice for the bold of spirit.

Photo credit by: @beauty_nails_inspo

Consumables for Creating Summer Zest

  • Yellow and purple gel polishes: For the base colors
  • Neon gel polish: For the bright accents
  • Top coat: To ensure vibrancy and protection Professional tip: Alternate the base colors to add diversity to the look.

DIY Manicure Guide

Apply alternating bases of yellow and purple. Use neon gel polish to add a vibrant tip. Cure and apply a top coat to enhance the colors and add a gel finish.

Wild and Free

Finally, it stands out with bold pink and black zebra stripes topped with a sparkling silver nail. It’s a fierce look that is all about making a statement and leaving a lasting impression. This design is a tribute to adventurous naturals who are not afraid to reflect their inner roar on their nails.

Photo credit by: @beauty_nails_inspo

Consumables for Creating Wild and Free

  • Pink and black gel polishes: For the zebra pattern
  • Silver glitter gel polish: For the shimmering nail
  • Striping brush: To achieve fine, precise stripes
  • Top coat: For a finished sheen that lasts Professional tip: Keep your hand steady for the stripes, and don’t worry if they aren’t perfectly uniform—irregularity adds to the wild charm.

DIY Manicure Guide

Begin with a pink base and use a striping brush to draw black zebra patterns. For the accent nail, apply silver glitter gel polish for that sparkling effect. Cure all nails and apply a top coat for endurance and shine.

Save Pin

Victoriya

Introducing Victoria, a talented writer and fashion enthusiast. With a passion for creativity and an impeccable sense of style, Victoria brings a fresh perspective to the world of fashion and beauty. Her captivating articles are filled with expert advice, insightful tips, and inspiring content to help readers elevate their personal style and embrace their inner beauty. From fashion trends to skincare routines and makeup techniques, Victoria's expertise shines through as she guides readers on a transformative journey of self-expression and empowerment. Join Victoria as she shares her knowledge, passion, and love for all things fashion and beauty, and get ready to unlock your true style potential under her expert guidance.

Related Articles

Leave a Reply

Your email address will not be published. Required fields are marked *

Back to top button