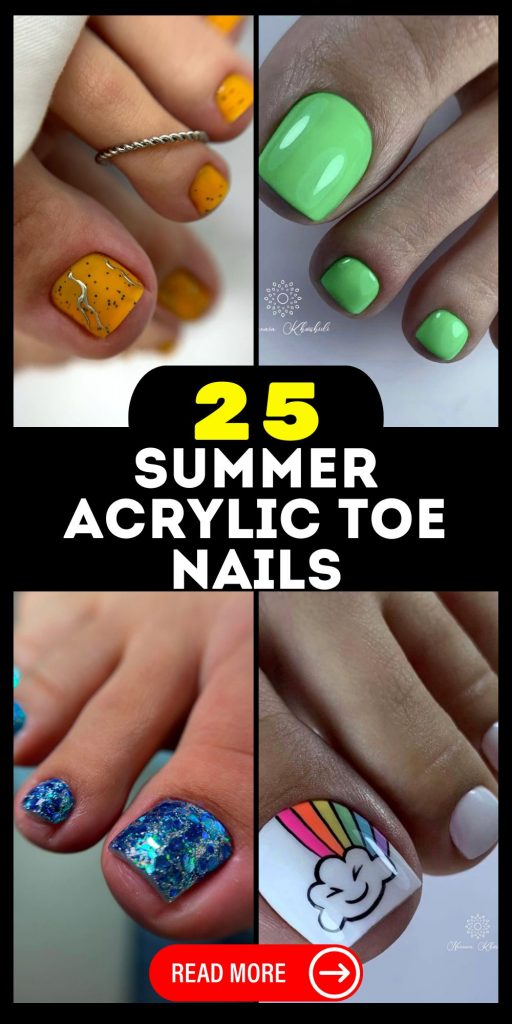
Summer Acrylic Toe Nails 25 Ideas: Your Ultimate Guide to Trendy and Classy Designs
When the warm weather hits, it’s time to let your toes shine with some fabulous summer acrylic toe nails. Whether you prefer bright colors, classy designs, or a touch of bling, there’s a summer look for everyone. In this article, we’ll explore a variety of stunning toenail ideas, complete with detailed descriptions and practical tips to achieve each look at home. Let’s dive into the world of summer toe nail art!
Chic White Floral Pattern
As a professional manicurist, I can say that white nails are a timeless choice for summer, and adding a floral pattern brings a fresh, elegant twist. The delicate white flowers on a neutral base create a classy and sophisticated look that is perfect for any occasion.
Consumables:
-
- White nail polish (OPI Alpine Snow)
- Nude base polish (Essie Ballet Slippers)
- Fine nail art brush (Winstonia Kolinsky)
- Top coat (Seche Vite)
Recommendations:
-
- Ensure the white polish is opaque with two coats.
- Use a fine brush for precise floral details.
- Finish with a high-gloss top coat to seal the design.
DIY Instructions:
-
- Apply two coats of nude base polish.
- Using the fine brush, draw small white flowers on each toenail.
- Allow the design to dry, then apply a top coat for a glossy finish.
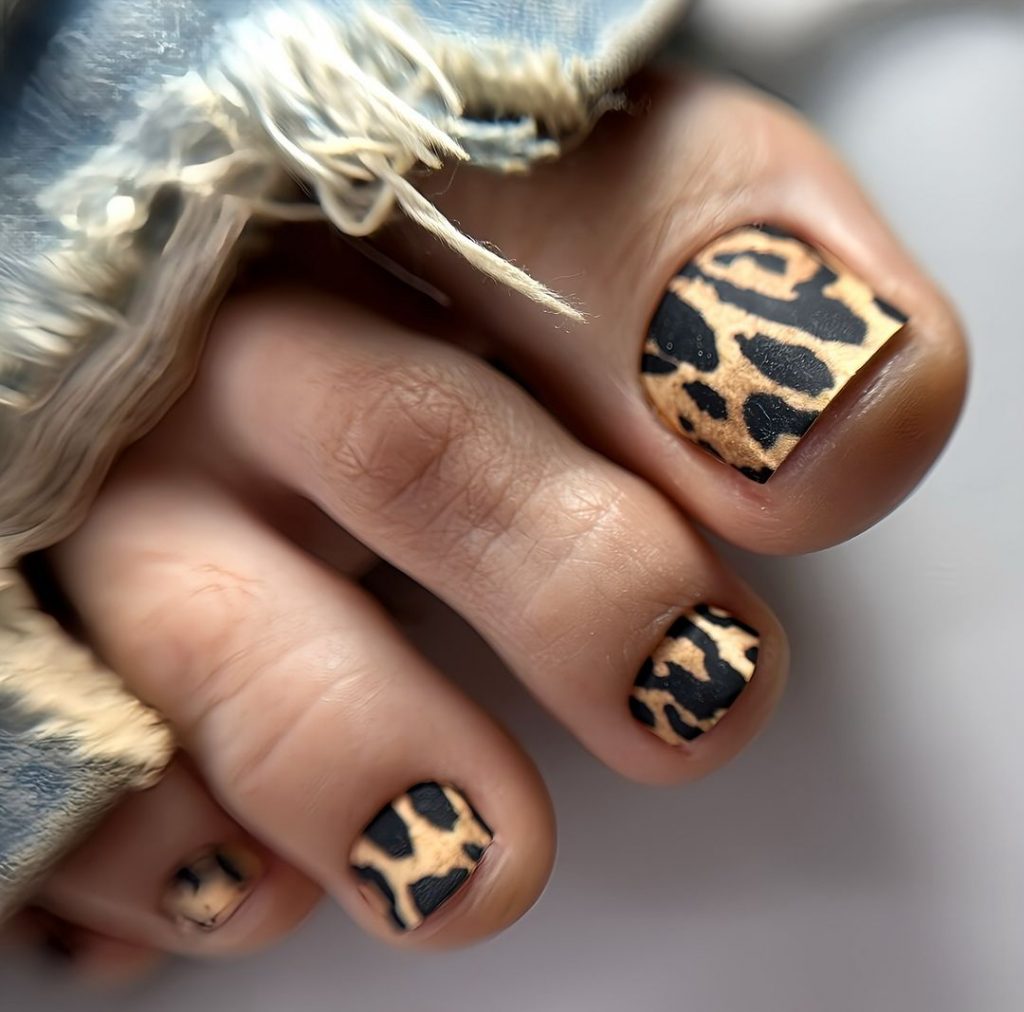
Bold Leopard Print
For those looking to make a statement, leopard print designs are the way to go. This bold and edgy pattern on a natural base is perfect for adding a wild touch to your summer look. It’s a great way to show off your fierce and fun side.
Consumables:
-
- Beige base polish (Sally Hansen Bare It All)
- Black polish (China Glaze Liquid Leather)
- Gold polish (Zoya Ziv)
- Nail art brush (Twinkled T)
Recommendations:
-
- Use the beige polish as the base to ensure the leopard spots stand out.
- Apply gold accents sparingly to add a touch of bling.
- Secure the design with a durable top coat.
DIY Instructions:
-
- Paint your toenails with two coats of beige base polish.
- Using the nail art brush, create irregular black spots and outline them with gold polish.
- Let the design dry completely before sealing it with a top coat.
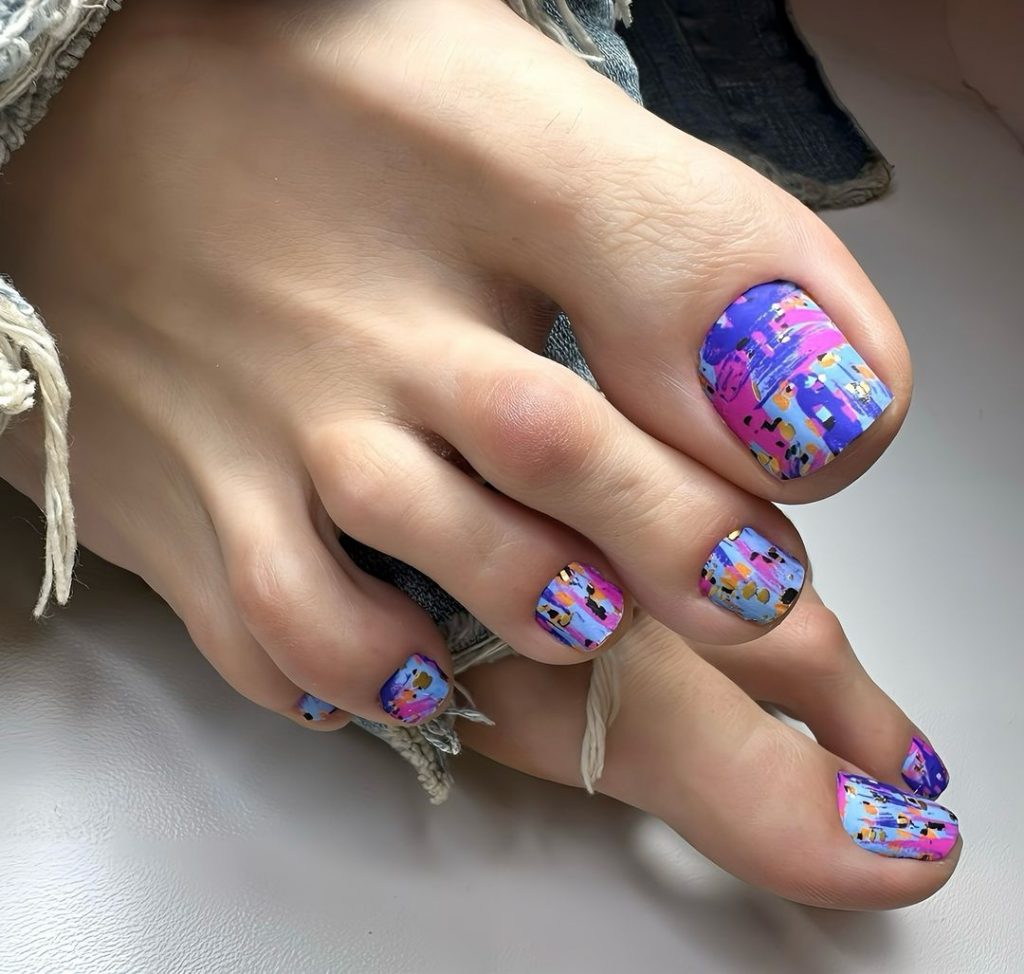
Colorful Abstract Art
Abstract designs are all the rage this summer, and this colorful look is perfect for those who love to experiment with art. The mix of vibrant hues on a neutral base creates a striking and modern design that is sure to turn heads.
Consumables:
-
- White base polish (Essie Blanc)
- Various bright polishes (OPI Infinite Shine Collection)
- Fine nail art brush (Nailbees Detail Brush)
- Top coat (CND Vinylux)
Recommendations:
-
- Choose a range of bright colors for a vibrant look.
- Use a fine brush for detailed abstract patterns.
- Apply a top coat to enhance the longevity of the design.
DIY Instructions:
-
- Apply two coats of white base polish.
- Use the fine brush to paint abstract shapes and lines in various colors.
- Allow the design to dry, then apply a top coat for a glossy finish.
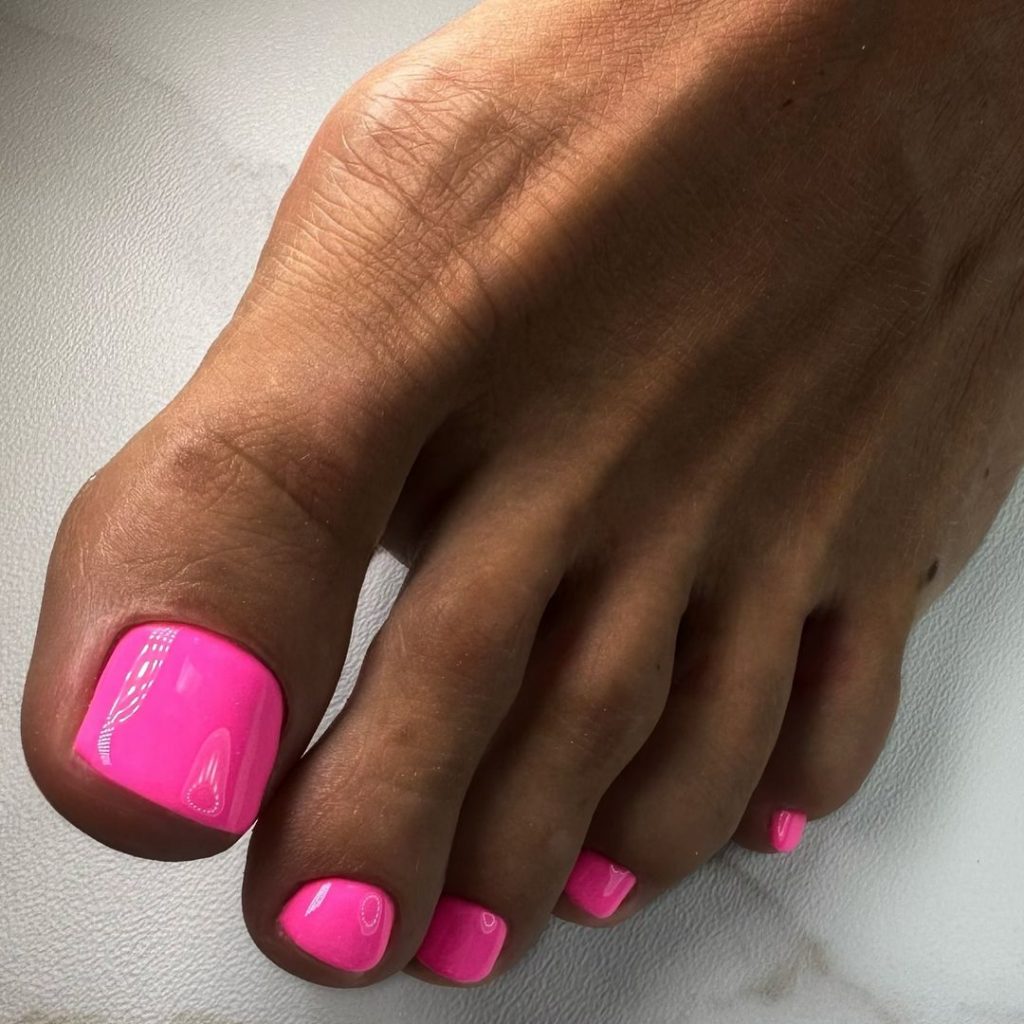
Vibrant Pink Pop
Nothing says summer like bright pink nails. This bold color is perfect for adding a pop of fun to your look. Whether you’re at the beach or a summer party, pink nails are always in style.
Consumables:
-
- Bright pink polish (OPI Hotter Than You Pink)
- Base coat (Orly Bonder)
- Top coat (Out the Door)
Recommendations:
-
- Apply a base coat to prevent staining.
- Use two coats of pink polish for a vibrant finish.
- Seal with a top coat for added shine and protection.
DIY Instructions:
-
- Start with a base coat to protect your nails.
- Apply two coats of bright pink polish.
- Finish with a top coat to ensure longevity and shine.
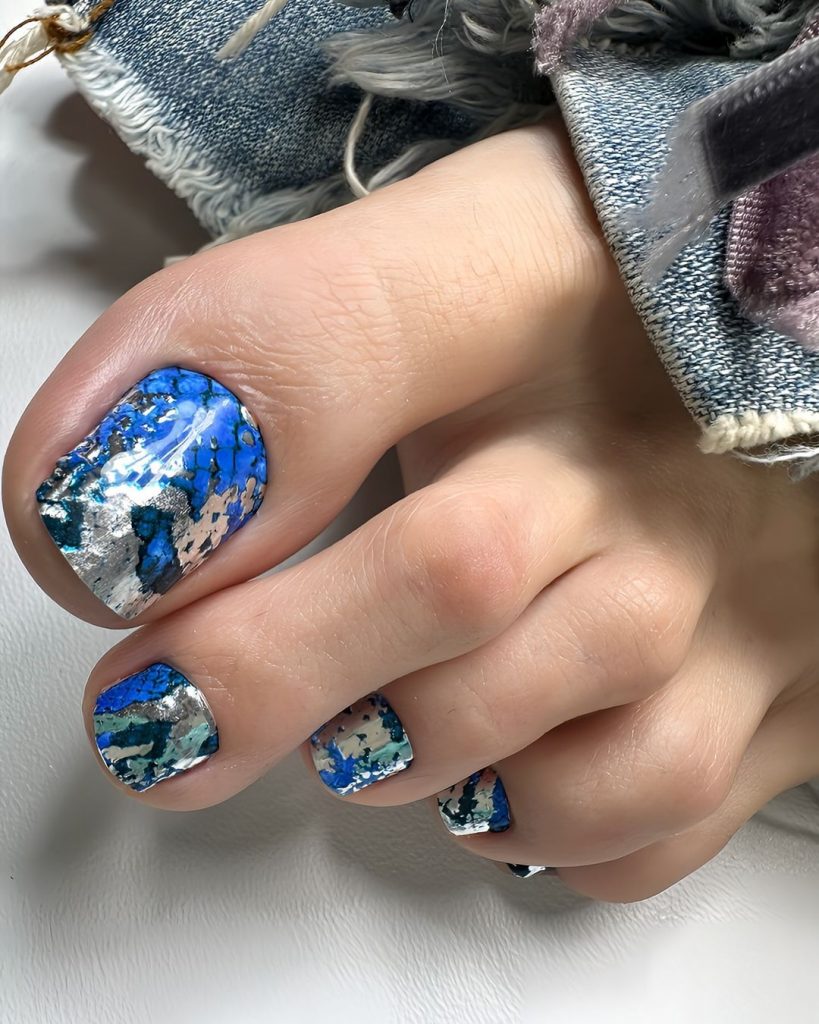
Elegant Blue and Silver Marbling
For a touch of elegance, blue and silver marbling is a perfect choice. This design combines cool tones with a hint of shimmer, creating a sophisticated and trendy look that works well for both day and night.
Consumables:
-
- Light blue polish (Essie Bikini So Teeny)
- Silver polish (Zoya Trixie)
- Marble effect brush (Winstonia Marbling Tool)
- Top coat (Seche Vite)
Recommendations:
-
- Use a light blue base for a soft, summery feel.
- Apply silver polish sparingly to create a marbled effect.
- Seal with a high-gloss top coat.
DIY Instructions:
-
- Paint your toenails with two coats of light blue polish.
- Use the marbling tool to swirl silver polish into the blue.
- Allow to dry, then apply a top coat for a glossy finish.
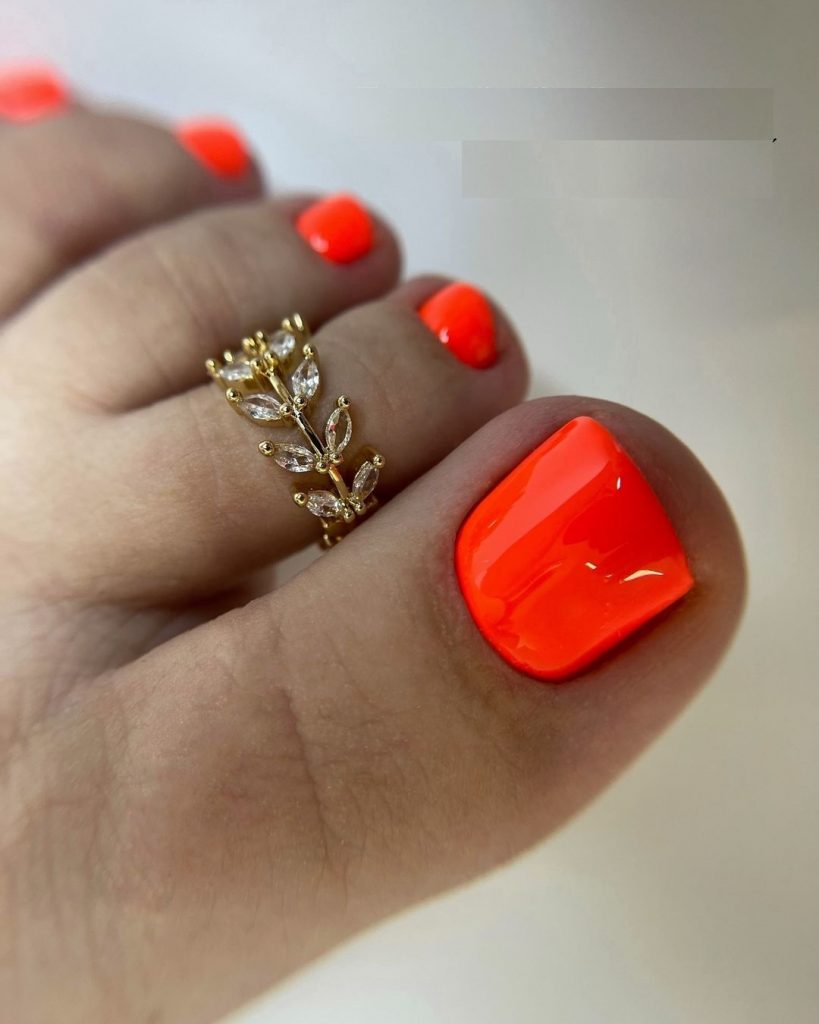
Vibrant Orange with Rhinestone Accents
Nothing screams summer like bright orange nails, and when you add a bit of bling, it takes the look to a whole new level. This vibrant orange polish paired with a delicate rhinestone ring accent creates a stunning and eye-catching design perfect for summer days.
Consumables:
-
- Neon orange polish (Essie “Bright Cider”)
- Rhinestone ring (Amazon Rhinestone Toe Rings)
- Base coat (Sally Hansen Hard as Nails)
- Top coat (INM Out the Door)
Recommendations:
-
- Apply a base coat to protect your nails and ensure the neon polish adheres well.
- Use two coats of the neon orange polish for maximum vibrancy.
- Add the rhinestone ring as a final touch for a bit of sparkle.
DIY Instructions:
-
- Start with a base coat to protect your nails.
- Apply two coats of neon orange polish, allowing each coat to dry thoroughly.
- Place the rhinestone ring on your toe for a finishing touch.
- Seal with a top coat to enhance the shine and longevity of the polish.
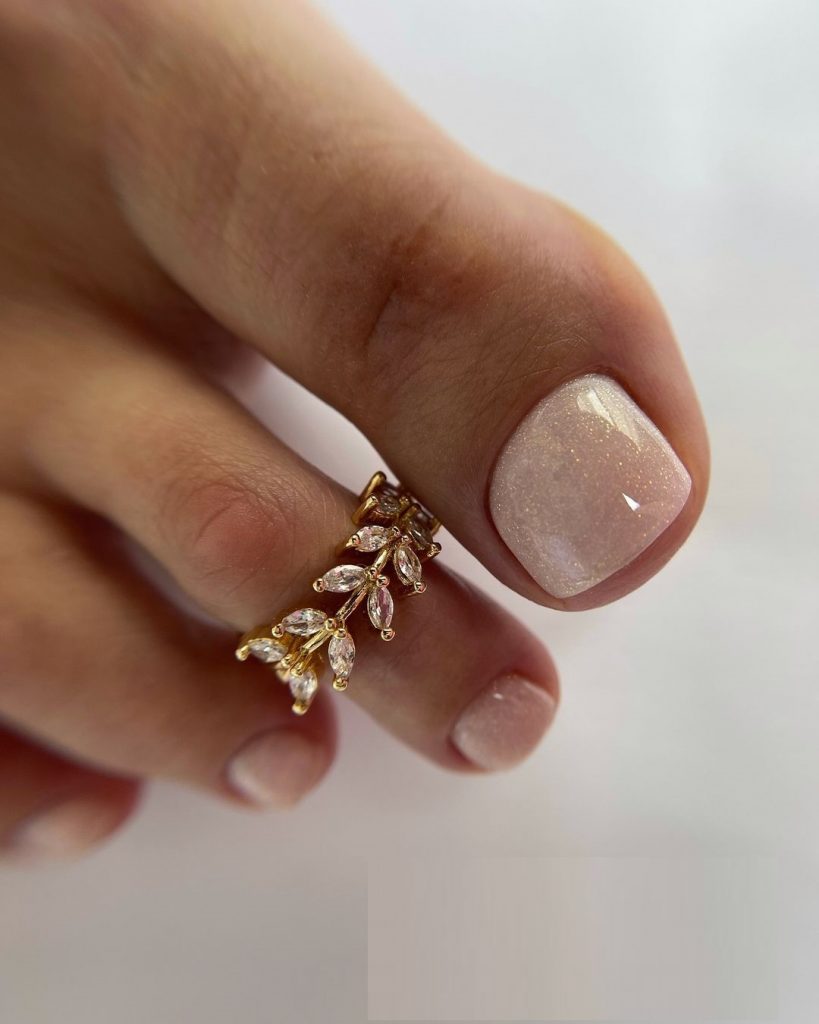
Elegant Nude with Rhinestone Accents
For a more natural and classy look, nude nails with subtle rhinestone accents are a perfect choice. This design is elegant and sophisticated, suitable for both everyday wear and special occasions.
Consumables:
-
- Nude polish (OPI “Bubble Bath”)
- Small rhinestones (Swarovski Nail Crystals)
- Nail glue (Nailene Ultra Quick)
- Top coat (Essie Gel Setter)
Recommendations:
-
- Use a nude polish that complements your skin tone.
- Apply rhinestones sparingly to keep the look elegant and not overwhelming.
- Finish with a top coat to secure the rhinestones and add shine.
DIY Instructions:
-
- Apply two coats of nude polish and let each coat dry completely.
- Use nail glue to attach small rhinestones near the cuticle or along the edges of the nails.
- Seal with a top coat to ensure the rhinestones stay in place and to add a glossy finish.
Classic Red with Gold Accents
Red nails are a timeless classic, and when paired with gold accents, they become even more luxurious. This bold red design is perfect for adding a touch of glamour to your summer look.
Consumables:
-
- Red polish (OPI “Big Apple Red”)
- Gold glitter polish (China Glaze “I’m Not Lion”)
- Fine nail art brush (Winstonia Kolinsky)
- Top coat (Seche Vite)
Recommendations:
-
- Use a vibrant red polish for a bold look.
- Add gold glitter for a touch of sparkle.
- Seal with a top coat to enhance the design.
DIY Instructions:
-
- Apply two coats of red polish.
- Use a fine nail art brush to add gold glitter accents.
- Finish with a top coat for a glossy finish.
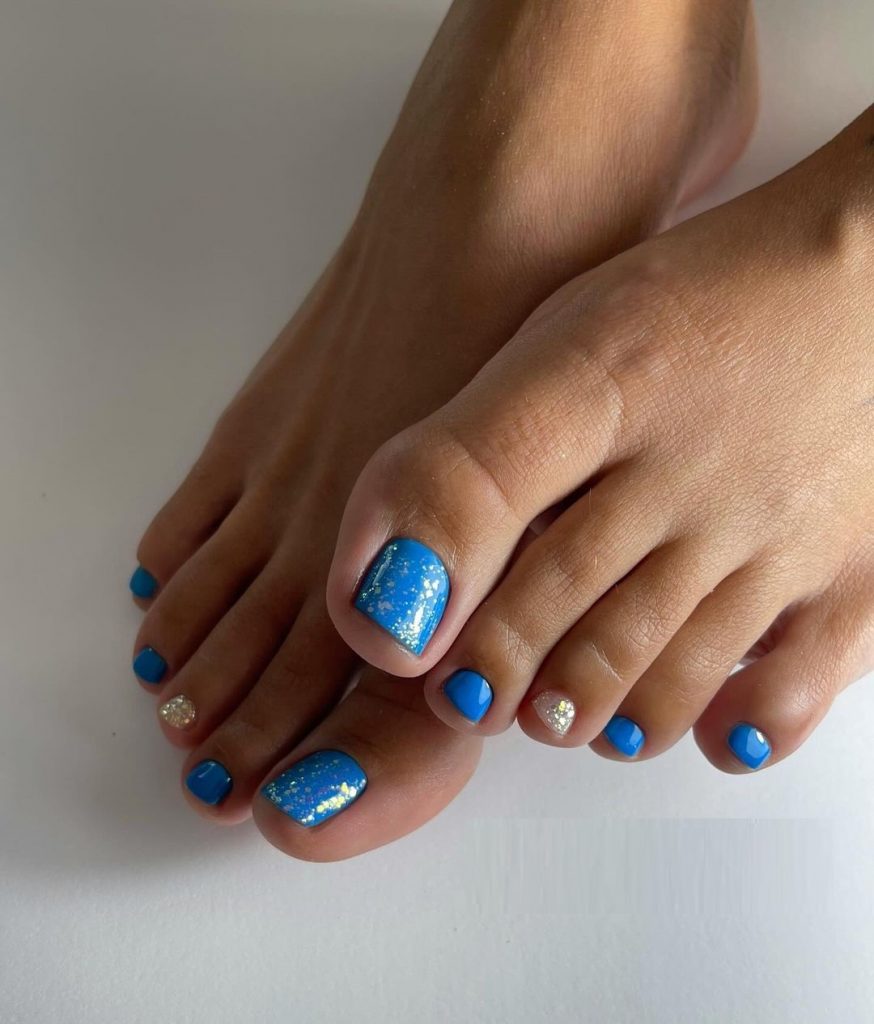
Stunning Blue with Glitter
Blue nails are perfect for summer, and adding a touch of glitter makes them even more stunning. This blue and glitter combination is trendy and fun, ideal for those who love to stand out.
Consumables:
-
- Blue polish (Essie “Butler Please”)
- Silver glitter polish (OPI “Snow Globetrotter”)
- Base coat (Orly Bonder)
- Top coat (CND Vinylux)
Recommendations:
-
- Use a vibrant blue polish for a bold look.
- Add silver glitter for a sparkling effect.
- Seal with a top coat to enhance the design.
DIY Instructions:
-
- Apply a base coat to protect your nails.
- Paint your toenails with two coats of blue polish.
- Apply silver glitter polish to the tips or as an accent nail.
- Finish with a top coat to ensure the design lasts.
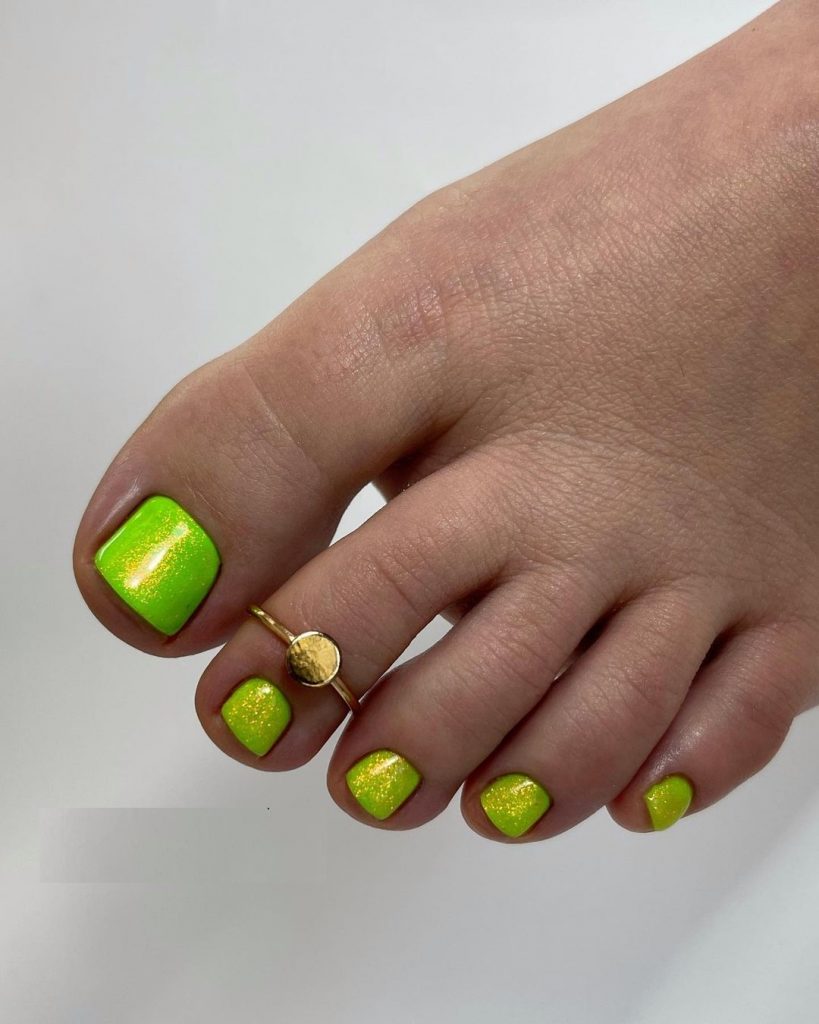
Bright Neon Green
Neon green nails are a fun and bold choice for summer. This bright and trendy color is perfect for adding a pop of excitement to your look.
Consumables:
-
- Neon green polish (China Glaze “Celtic Sun”)
- Base coat (Sally Hansen Hard as Nails)
- Top coat (Seche Vite)
Recommendations:
-
- Apply a base coat to protect your nails and ensure the neon polish adheres well.
- Use two coats of neon green polish for maximum vibrancy.
- Seal with a top coat to enhance the shine and longevity of the polish.
DIY Instructions:
-
- Start with a base coat to protect your nails.
- Apply two coats of neon green polish, allowing each coat to dry thoroughly.
- Finish with a top coat to ensure the design lasts and stays vibrant.
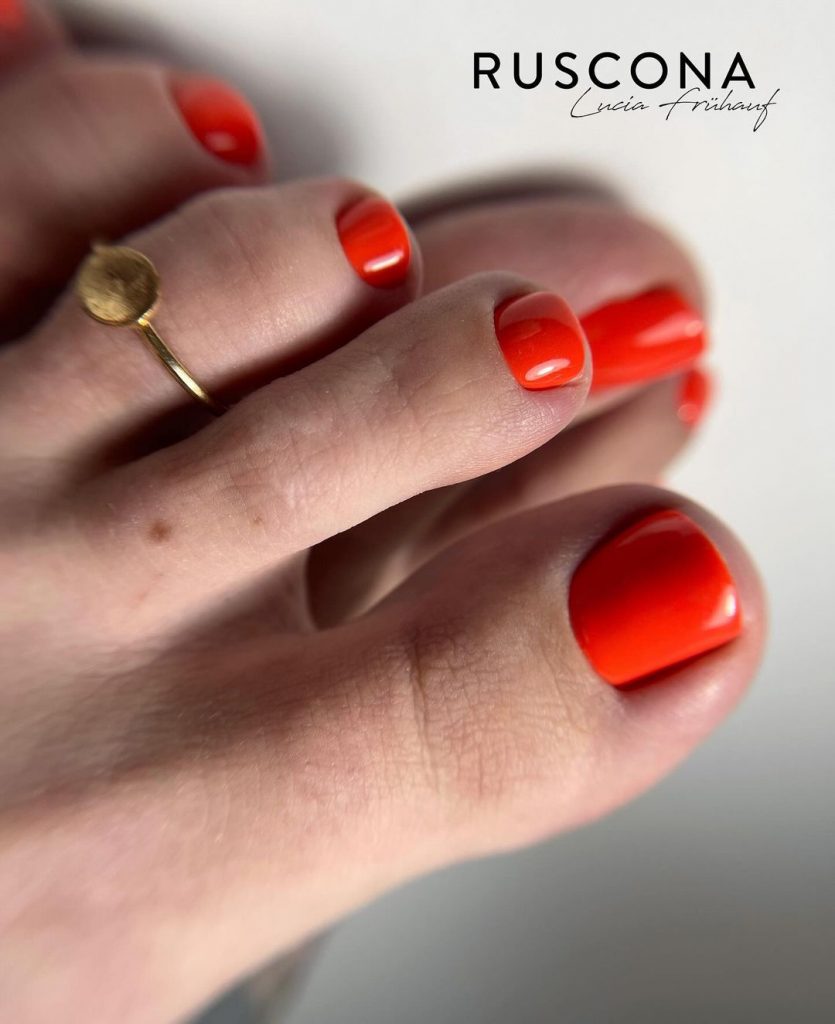
Classic Red Pedicure
Red nails are an evergreen trend that exudes elegance and confidence. This bold red pedicure, complemented with stylish toe rings, makes a powerful statement. It’s perfect for both casual and formal settings, embodying the essence of timeless beauty.

Consumables:
-
- Red polish (OPI “Big Apple Red”)
- Base coat (Essie Here to Stay)
- Top coat (Seche Vite)
- Toe rings (Amazon Sterling Silver Toe Rings)
Recommendations:
-
- Apply a base coat to protect your nails.
- Use two coats of red polish for a vibrant finish.
- Seal with a top coat for added shine and durability.
- Accessorize with delicate toe rings for an extra touch of elegance.
DIY Instructions:
-
- Start with a base coat to prevent staining.
- Apply two even coats of red polish, allowing each to dry thoroughly.
- Finish with a top coat to seal and protect the polish.
- Add toe rings for a chic, sophisticated look.
Fresh Neon Green
Neon green nails are a bold and fun choice for summer. This bright and trendy color is perfect for adding a pop of excitement to your look, making your toes stand out.
Consumables:
-
- Neon green polish (China Glaze “Celtic Sun”)
- Base coat (Orly Bonder)
- Top coat (Seche Vite)
Recommendations:
-
- Apply a base coat to ensure the neon polish adheres well.
- Use two coats of neon green polish for maximum vibrancy.
- Finish with a top coat to enhance the shine and longevity of the polish.
DIY Instructions:
-
- Start with a base coat to protect your nails.
- Apply two coats of neon green polish, allowing each coat to dry thoroughly.
- Finish with a top coat to ensure the design lasts and stays vibrant.
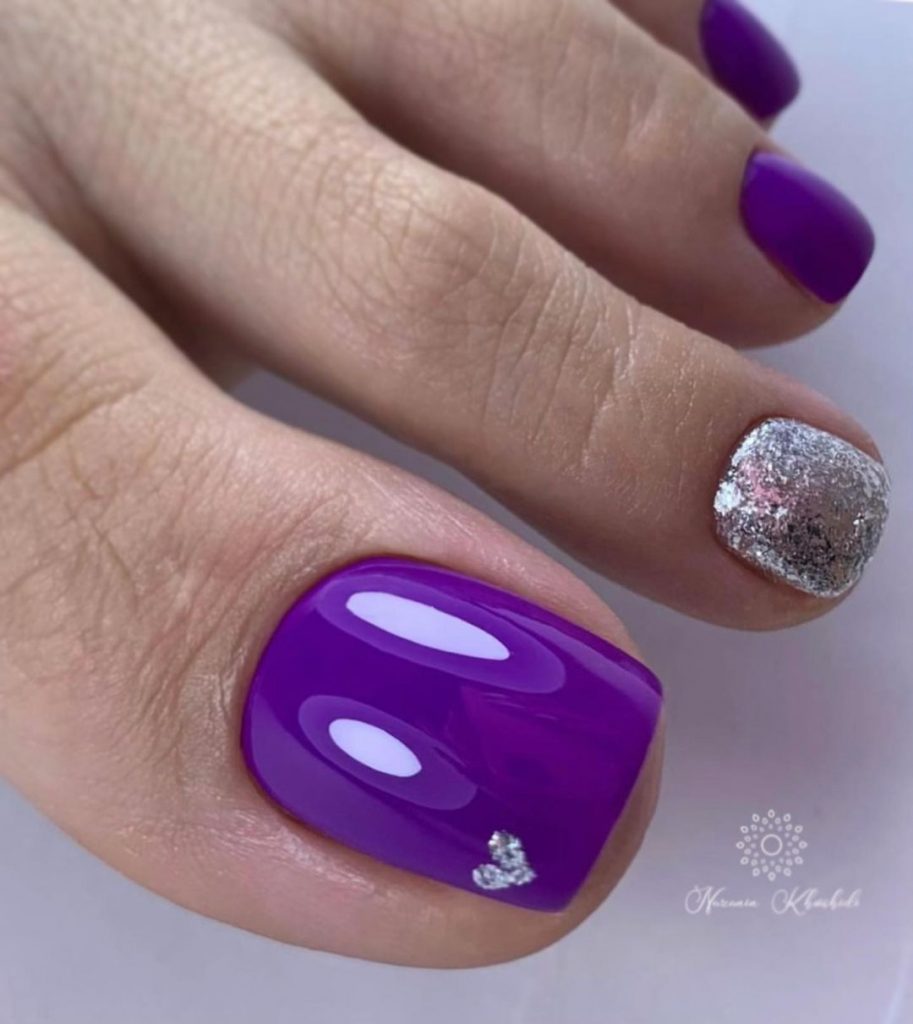
Royal Purple with Silver Glitter Accent
Purple nails with a silver glitter accent create a look that’s both regal and playful. This combination is perfect for adding a touch of glamour to your summer style.
Consumables:
-
- Purple polish (Essie “Sexy Divide”)
- Silver glitter polish (OPI “Crown Me Already”)
- Nail art brush (Winstonia Kolinsky)
- Top coat (CND Vinylux)
Recommendations:
-
- Use a rich purple polish for a royal effect.
- Apply silver glitter to one accent nail for a sparkling finish.
- Seal with a top coat to enhance the design and longevity.
DIY Instructions:
-
- Paint your toenails with two coats of purple polish.
- Apply silver glitter polish to one accent nail.
- Use a nail art brush for precise application.
- Finish with a top coat to ensure the design lasts.
Cute Rainbow Cloud Design
This whimsical rainbow cloud design is perfect for those who love playful and cute nail art. It brings a cheerful and vibrant vibe to your summer look.

Consumables:
-
- White polish (OPI “Alpine Snow”)
- Various bright polishes (OPI Infinite Shine Collection)
- Fine nail art brush (Nailbees Detail Brush)
- Top coat (Essie Good to Go)
Recommendations:
-
- Use white polish as a base for a clean look.
- Apply rainbow colors carefully to avoid smudging.
- Finish with a top coat to seal the design and add shine.
DIY Instructions:
-
- Apply two coats of white polish as a base.
- Use a fine brush to paint the rainbow and cloud design on the big toe.
- Let the design dry completely, then apply a top coat for a glossy finish.
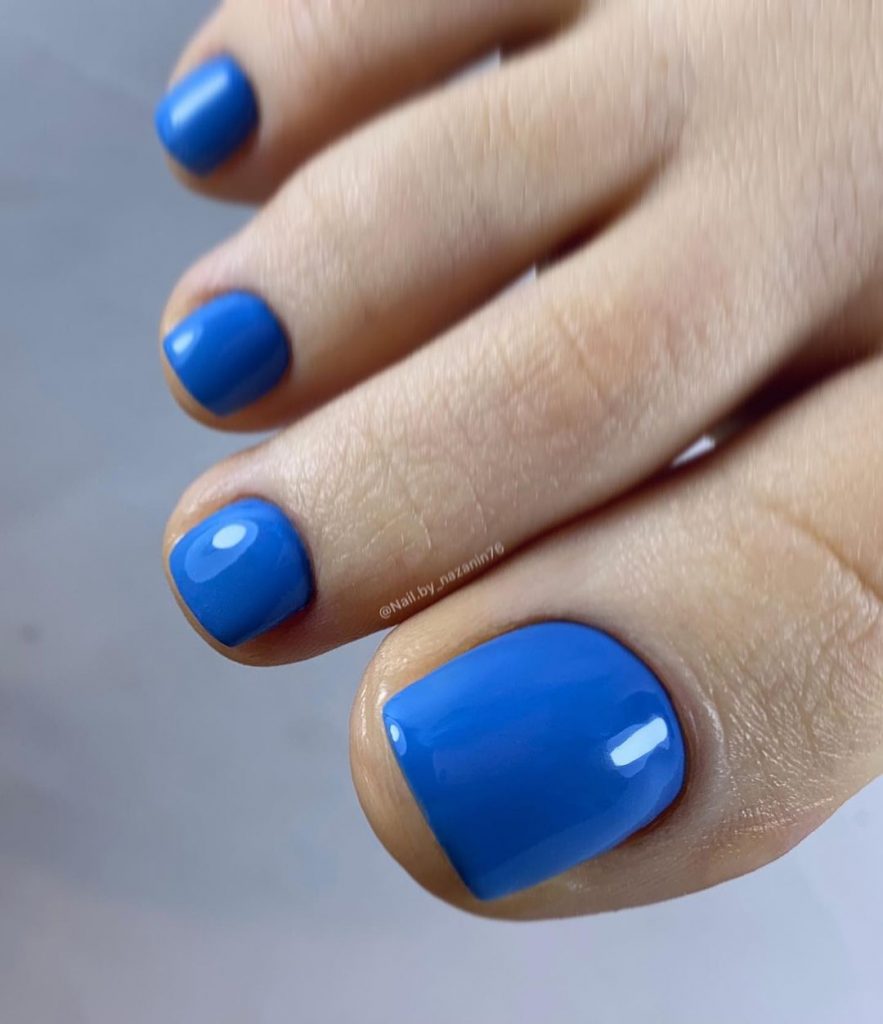
Bright Blue Pedicure
A bright blue pedicure is a fantastic way to add a pop of color to your summer look. This bold and vibrant shade is perfect for making a statement.
Consumables:
-
- Blue polish (Essie “Butler Please”)
- Base coat (Orly Bonder)
- Top coat (CND Vinylux)
Recommendations:
-
- Apply a base coat to protect your nails.
- Use two coats of blue polish for a vibrant finish.
- Seal with a top coat to enhance the shine and longevity of the polish.
DIY Instructions:
-
- Start with a base coat to protect your nails.
- Apply two coats of blue polish, allowing each coat to dry thoroughly.
- Finish with a top coat to ensure the design lasts and stays vibrant.
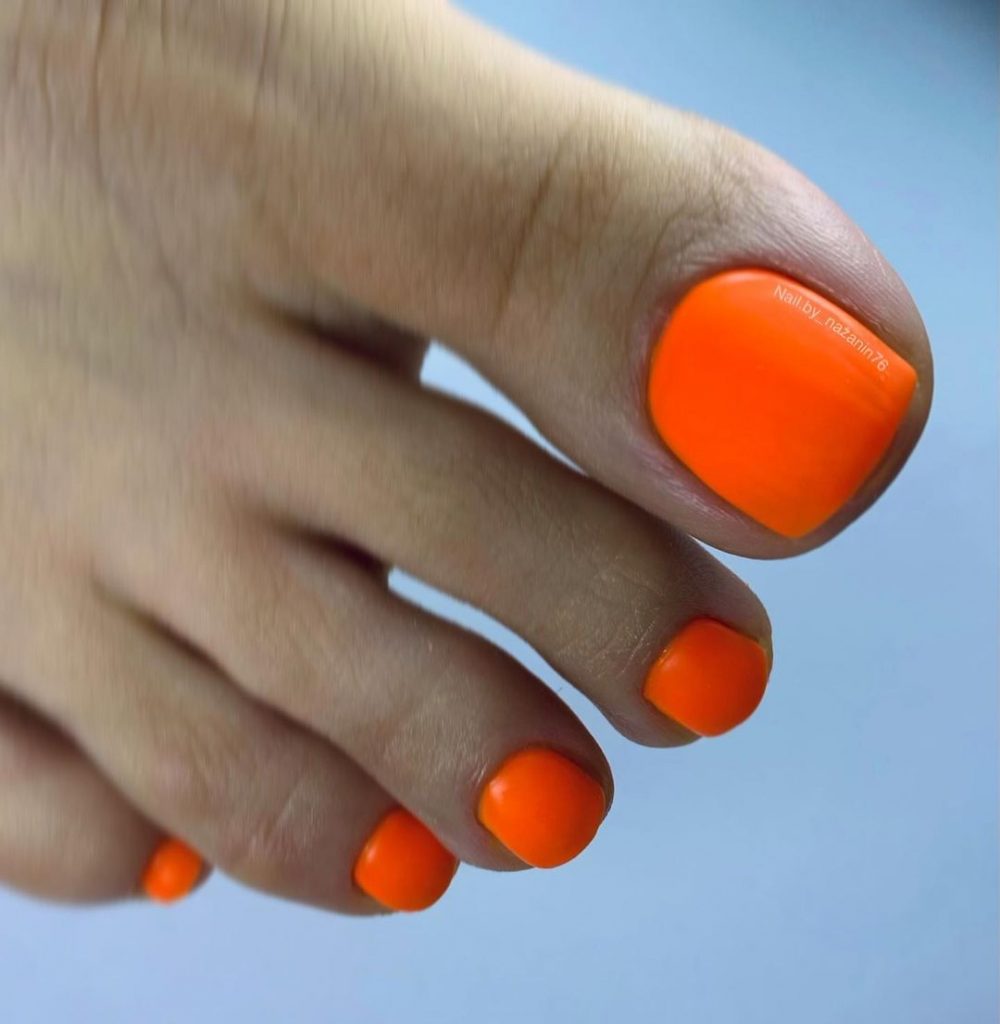
Neon Orange Pop
Neon orange nails are a bold and fun choice for summer. This bright and vibrant color is perfect for adding a pop of excitement to your look, making your toes stand out in any setting.
Consumables:
-
- Neon orange polish (China Glaze “Orange Knockout”)
- Base coat (Sally Hansen Hard as Nails)
- Top coat (Seche Vite)
Recommendations:
-
- Apply a base coat to protect your nails.
- Use two coats of neon orange polish for maximum vibrancy.
- Seal with a top coat to enhance the shine and longevity of the polish.
DIY Instructions:
-
- Start with a base coat to protect your nails.
- Apply two coats of neon orange polish, allowing each coat to dry thoroughly.
- Finish with a top coat to ensure the design lasts and stays vibrant.
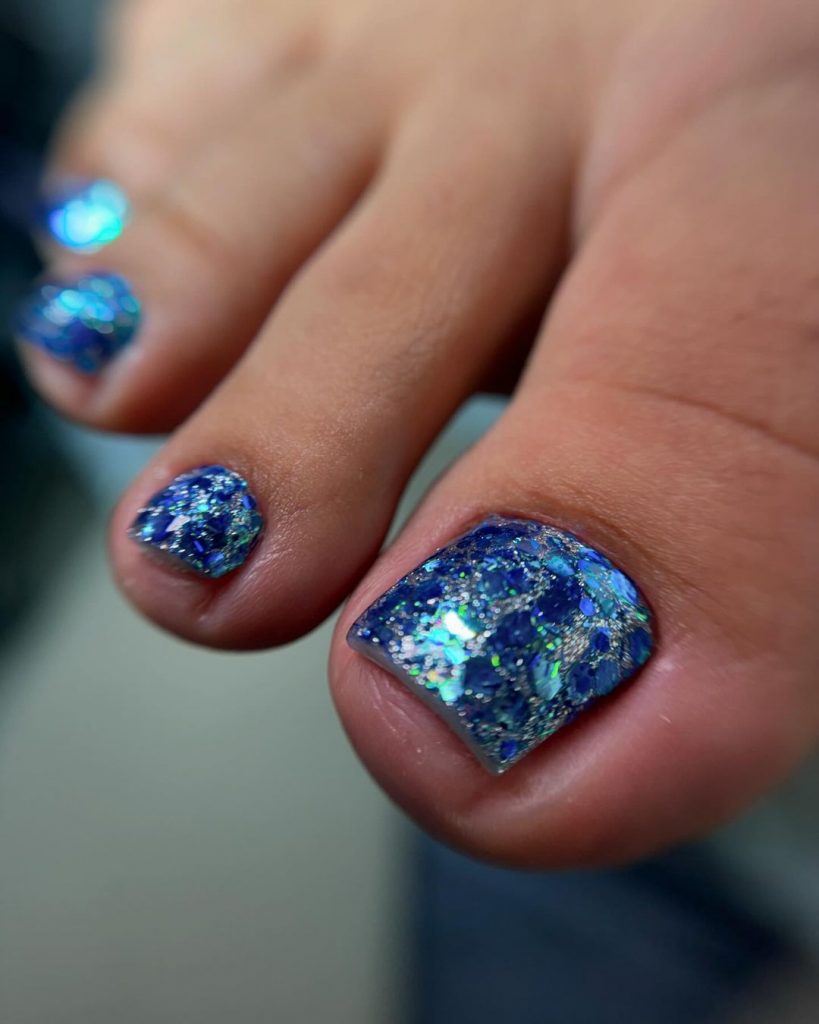
Sparkling Blue Glitter
Blue glitter nails bring a touch of sparkle and glamour to your summer look. This dazzling design is perfect for adding a bit of bling to your toes, making them shine bright in the summer sun.
Consumables:
-
- Blue glitter polish (OPI “Absolutely Alice”)
- Base coat (Essie Here to Stay)
- Top coat (Seche Vite)
Recommendations:
-
- Use a base coat to protect your nails and provide a smooth surface for the glitter polish.
- Apply two coats of blue glitter polish for a full coverage effect.
- Seal with a top coat to enhance the shine and keep the glitter in place.
DIY Instructions:
-
- Start with a base coat to protect your nails.
- Apply two coats of blue glitter polish, ensuring even coverage.
- Finish with a top coat to lock in the glitter and add a glossy finish.
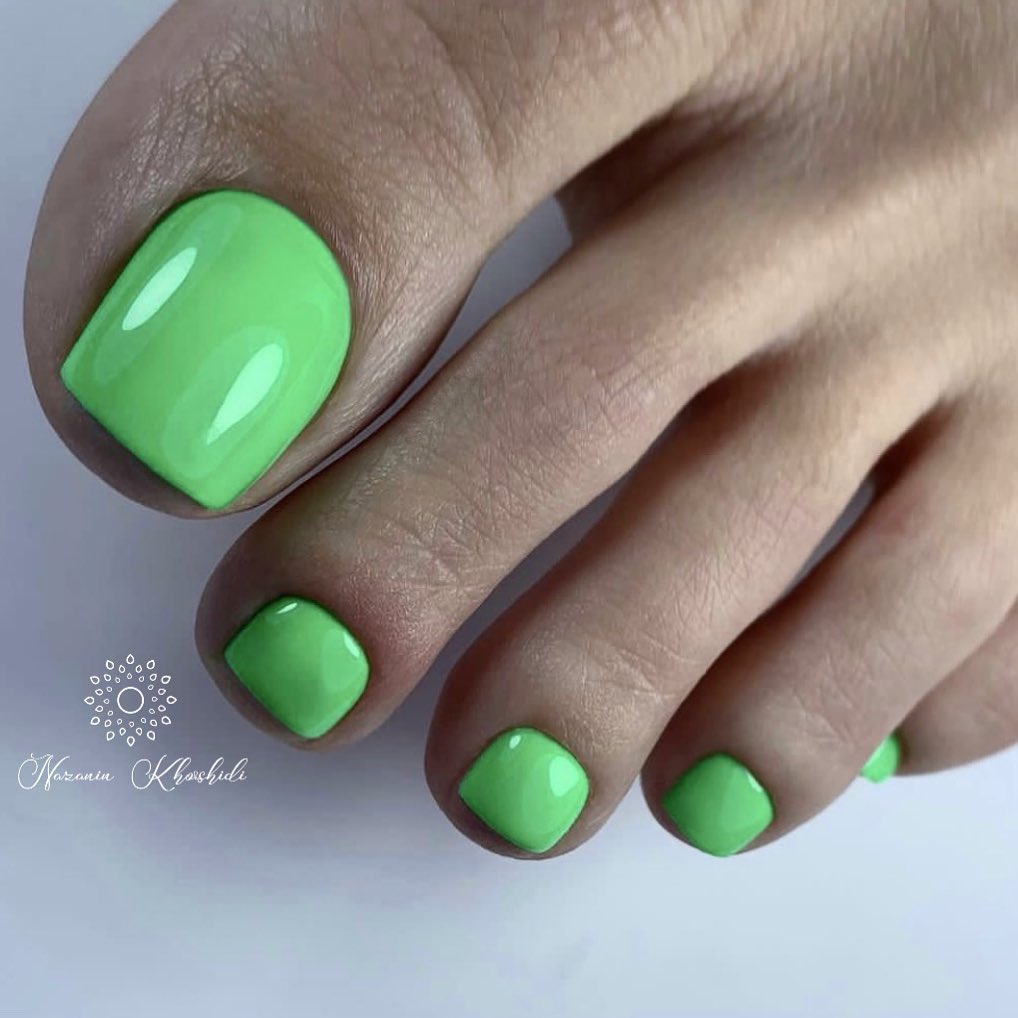
Elegant Green
For a more subdued and elegant look, green nails are a fantastic choice. This muted yet sophisticated color is perfect for adding a touch of class to your summer style.
Consumables:
-
- Green polish (Essie “Going Incognito”)
- Base coat (OPI Natural Nail Base Coat)
- Top coat (Essie Gel Setter)
Recommendations:
-
- Apply a base coat to ensure the green polish adheres well.
- Use two coats of green polish for a rich, even color.
- Finish with a top coat to enhance the shine and longevity of the polish.
DIY Instructions:
-
- Start with a base coat to protect your nails.
- Apply two coats of green polish, allowing each coat to dry thoroughly.
- Finish with a top coat to ensure the design lasts and stays vibrant.
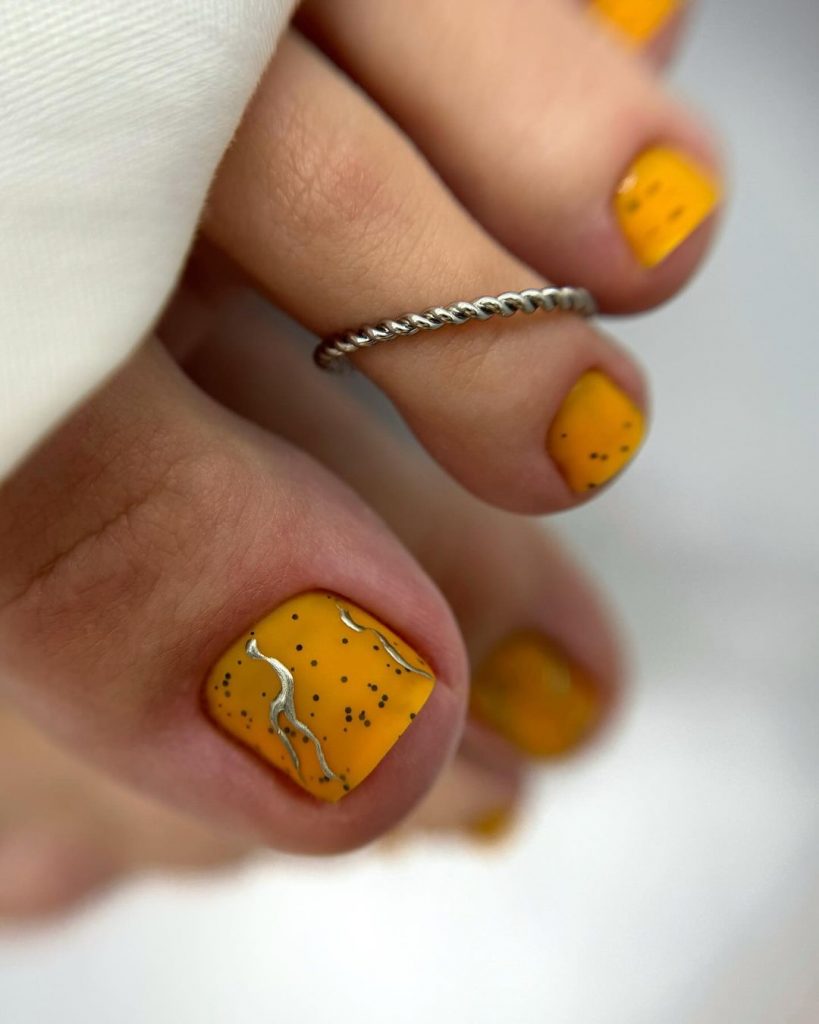
Artistic Yellow with Black Speckles
Yellow nails are a bright and cheerful choice for summer, and adding black speckles creates an artistic and unique design. This playful combination is perfect for those who love to experiment with nail art.
Consumables:
-
- Yellow polish (China Glaze “Happy Go Lucky”)
- Black speckle polish (Sally Hansen “Black Tie”)
- Base coat (Orly Bonder)
- Top coat (CND Vinylux)
Recommendations:
-
- Use a base coat to protect your nails and ensure the polish adheres well.
- Apply two coats of yellow polish for a vibrant base.
- Add black speckles for a fun and artistic touch.
- Finish with a top coat to seal the design.
DIY Instructions:
-
- Apply a base coat to protect your nails.
- Paint your toenails with two coats of yellow polish.
- Add black speckles using the speckle polish.
- Finish with a top coat to enhance the design and add shine.
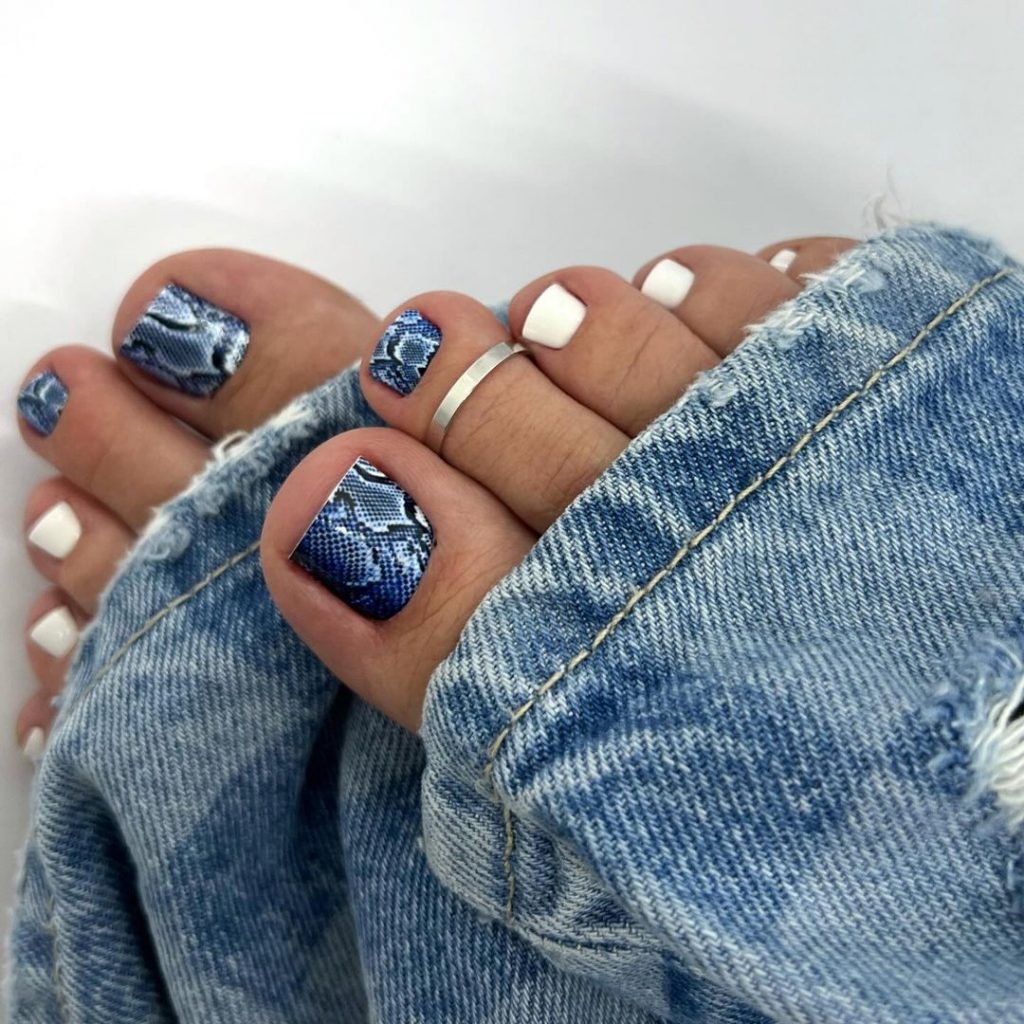
Stylish Blue and White with Snake Skin Pattern
Combining blue and white polish with a snake skin pattern creates a stylish and trendy look. This design is perfect for those who want to make a fashion statement with their toenails.
Consumables:
-
- Blue polish (Essie “Butler Please”)
- White polish (OPI “Alpine Snow”)
- Snake skin pattern stickers (Born Pretty Snake Skin Nail Stickers)
- Base coat (Sally Hansen Hard as Nails)
- Top coat (Seche Vite)
Recommendations:
-
- Use a base coat to protect your nails.
- Apply blue and white polish in alternating patterns.
- Add snake skin pattern stickers for a trendy look.
- Finish with a top coat to seal the design and add shine.
DIY Instructions:
-
- Start with a base coat to protect your nails.
- Paint your toenails with blue and white polish in alternating patterns.
- Apply snake skin pattern stickers to the blue nails.
- Finish with a top coat to ensure the design lasts and stays vibrant.
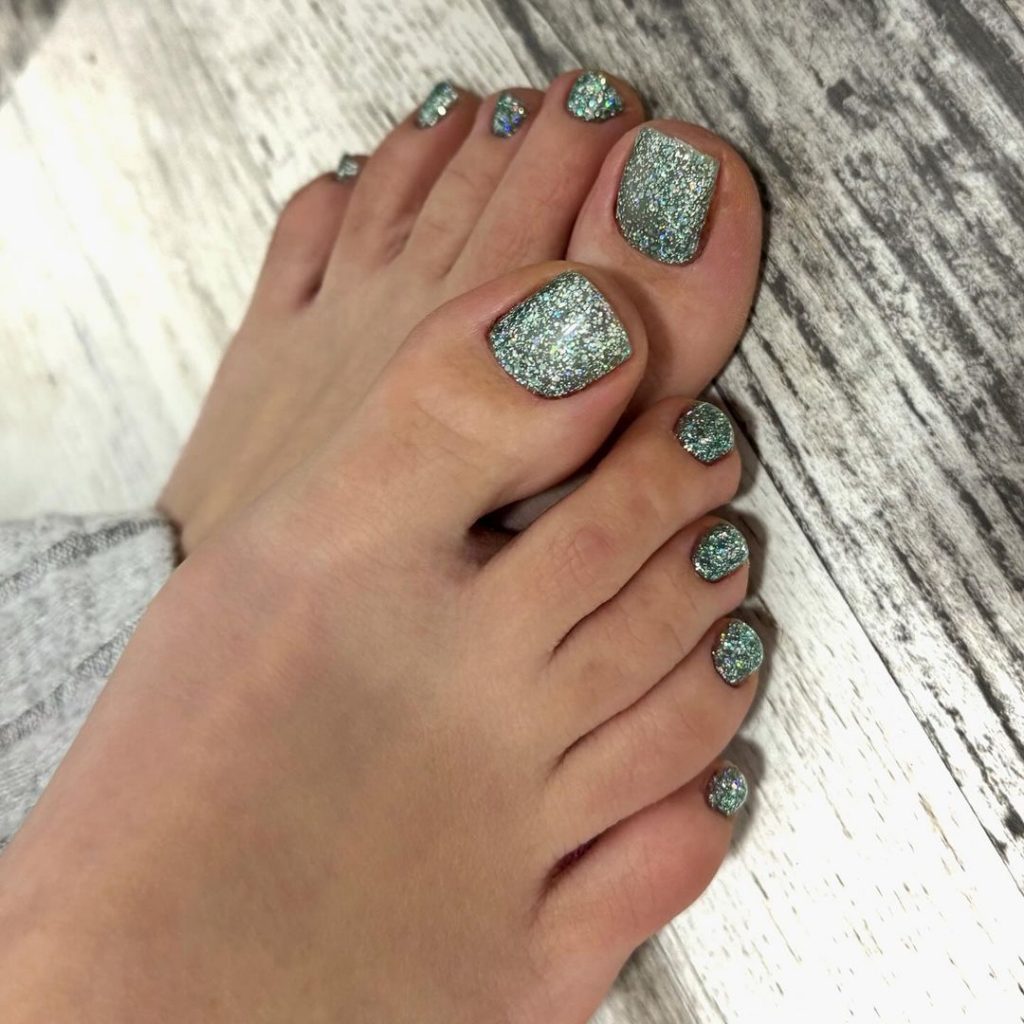
Sparkling Glitter Elegance
These glittery nails bring a touch of sparkle and glamour to your summer look. The shimmering glitter polish makes your toes shine brightly, perfect for any special occasion or just to add a bit of fun to your everyday style.
Consumables:
-
- Silver glitter polish (China Glaze “Fairy Dust”)
- Base coat (Essie Here to Stay)
- Top coat (Seche Vite)
Recommendations:
-
- Apply a base coat to protect your nails.
- Use two coats of glitter polish for maximum coverage.
- Seal with a top coat to enhance the shine and longevity of the polish.
DIY Instructions:
-
- Start with a base coat to protect your nails.
- Apply two coats of glitter polish, ensuring even coverage.
- Finish with a top coat to lock in the glitter and add a glossy finish.
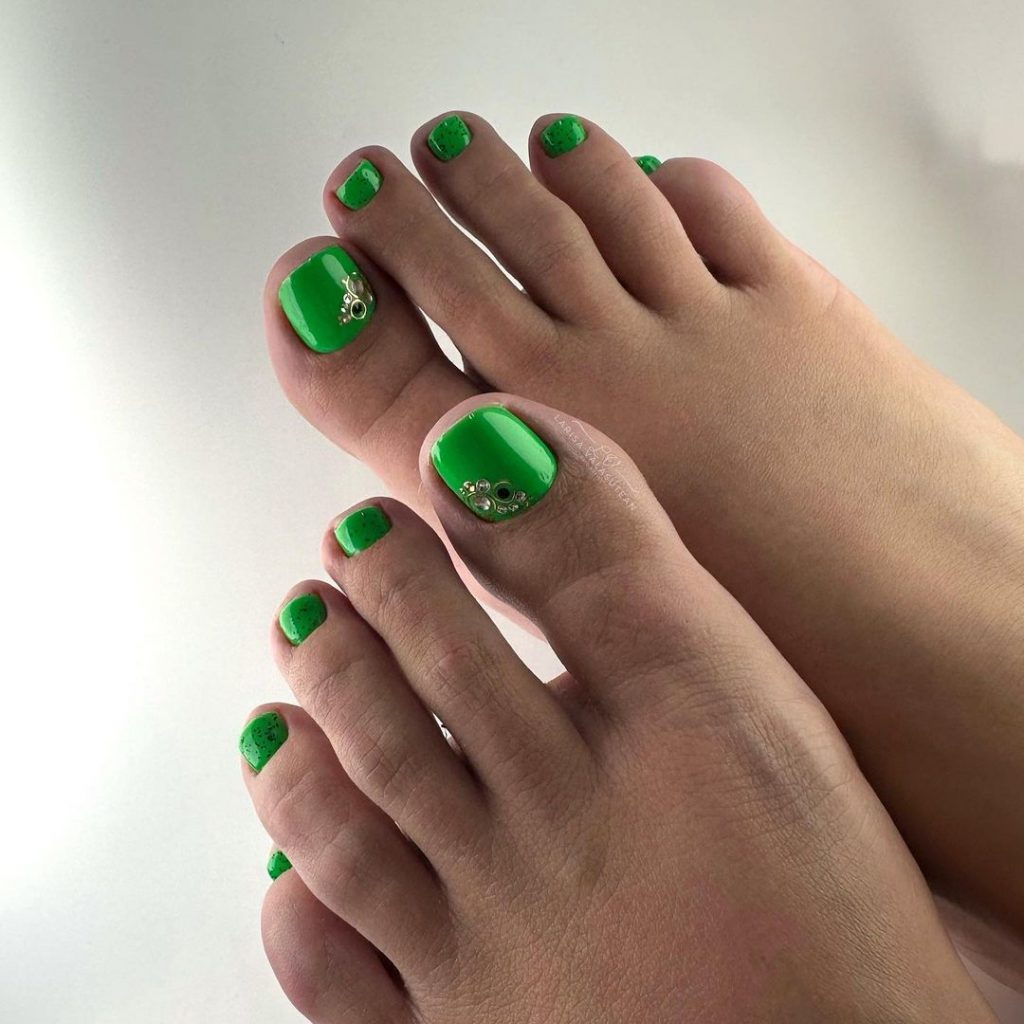
Bold Green with Rhinestones
Green nails are a bold and vibrant choice for summer, and adding rhinestones gives them a touch of elegance. This design is perfect for making a statement while keeping your nails looking classy.
Consumables:
-
- Green polish (Essie “Mojito Madness”)
- Rhinestones (Swarovski Nail Crystals)
- Nail glue (Nailene Ultra Quick)
- Base coat (Orly Bonder)
- Top coat (CND Vinylux)
Recommendations:
-
- Use a base coat to ensure the green polish adheres well.
- Apply two coats of green polish for a rich, even color.
- Add rhinestones for a touch of sparkle and elegance.
- Finish with a top coat to seal the design.
DIY Instructions:
-
- Apply a base coat to protect your nails.
- Paint your toenails with two coats of green polish.
- Use nail glue to attach rhinestones to the big toes.
- Finish with a top coat to enhance the shine and longevity of the design.
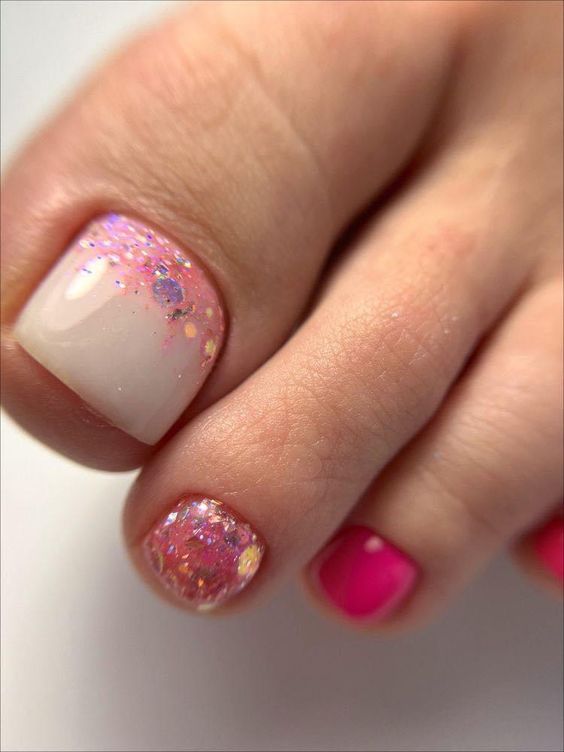
Pink Glitter Delight
This pink glitter design is perfect for adding a touch of fun and femininity to your summer look. The mix of pink and glitter creates a playful and pretty style that’s perfect for any occasion.
Consumables:
-
- Pink polish (OPI “Pink Flamenco”)
- Glitter polish (China Glaze “Dollhouse”)
- Base coat (Sally Hansen Hard as Nails)
- Top coat (Seche Vite)
Recommendations:
-
- Use a base coat to protect your nails.
- Apply two coats of pink polish for a vibrant base.
- Add glitter polish for a sparkling finish.
- Seal with a top coat to enhance the design and add shine.
DIY Instructions:
-
- Apply a base coat to protect your nails.
- Paint your toenails with two coats of pink polish.
- Apply glitter polish to the big toes for an accent.
- Finish with a top coat to ensure the design lasts and stays vibrant.
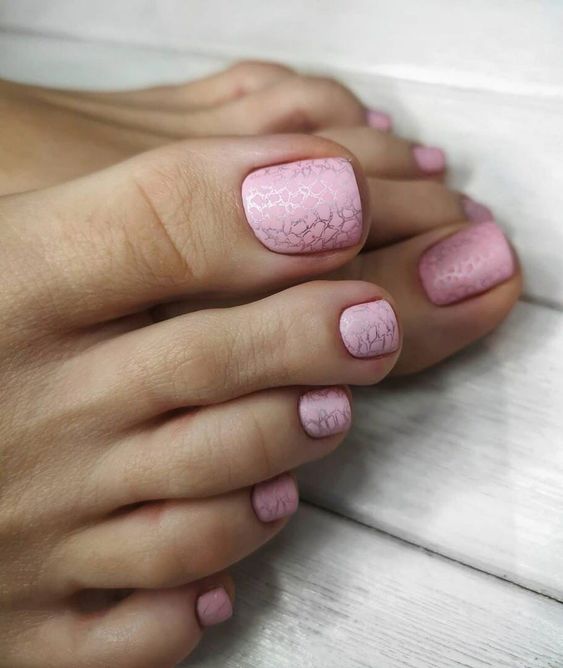
Subtle Pink with Crackle Effect
Pink nails are always a classic choice, and adding a crackle effect gives them a unique and trendy twist. This subtle yet stylish design is perfect for adding a touch of elegance to your summer look.
Consumables:
-
- Pink polish (Essie “Fiji”)
- Crackle top coat (OPI “Black Shatter”)
- Base coat (Orly Bonder)
- Top coat (Essie Gel Setter)
Recommendations:
-
- Apply a base coat to ensure the pink polish adheres well.
- Use two coats of pink polish for a rich, even color.
- Apply crackle top coat for a unique effect.
- Finish with a top coat to seal the design.
DIY Instructions:
-
- Start with a base coat to protect your nails.
- Apply two coats of pink polish, allowing each coat to dry thoroughly.
- Apply crackle top coat for the desired effect.
- Finish with a top coat to ensure the design lasts and stays vibrant.
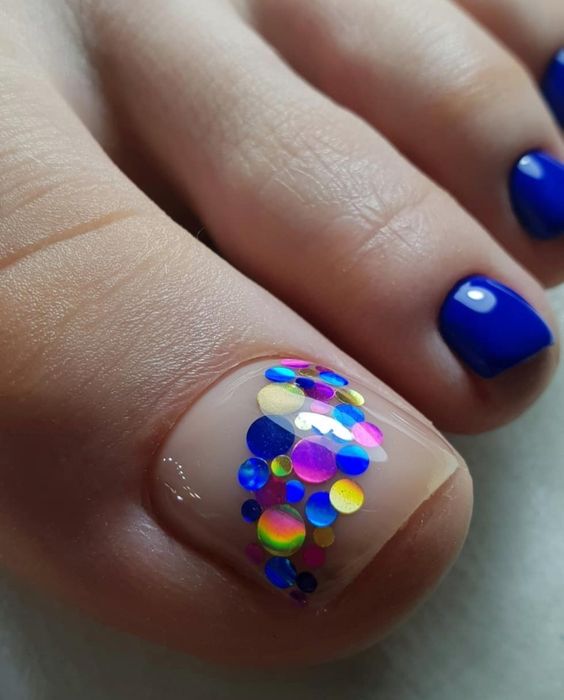
Vibrant Blue with Colorful Dots
Blue nails are a fantastic choice for summer, and adding colorful dots creates a fun and playful design. This vibrant and trendy look is perfect for those who love to experiment with nail art.
Consumables:
-
- Blue polish (Essie “Butler Please”)
- Various colorful polishes (OPI Infinite Shine Collection)
- Dotting tool (Winstonia Dotting Tool)
- Base coat (Sally Hansen Hard as Nails)
- Top coat (CND Vinylux)
Recommendations:
-
- Use a base coat to protect your nails.
- Apply two coats of blue polish for a vibrant base.
- Use a dotting tool to add colorful dots for a playful effect.
- Finish with a top coat to seal the design and add shine.
DIY Instructions:
-
- Apply a base coat to protect your nails.
- Paint your toenails with two coats of blue polish.
- Use a dotting tool to add colorful dots to the big toes.
- Finish with a top coat to enhance the shine and longevity of the design.
Save Pin