Stylish Summer: Top Short Nail Designs for the Hot Season 26 Ideas
Are you looking for the perfect summer nails short that are both simple and classy? Wondering how to incorporate fun, natural, and bright colors into your look this summer? In this article, we’ll explore a variety of stunning nail designs that are ideal for summer break and beyond. Whether you prefer a gel finish, a neon pop, or a simple French design, we’ve got you covered with professional advice, DIY tips, and the latest trends straight from Europe.
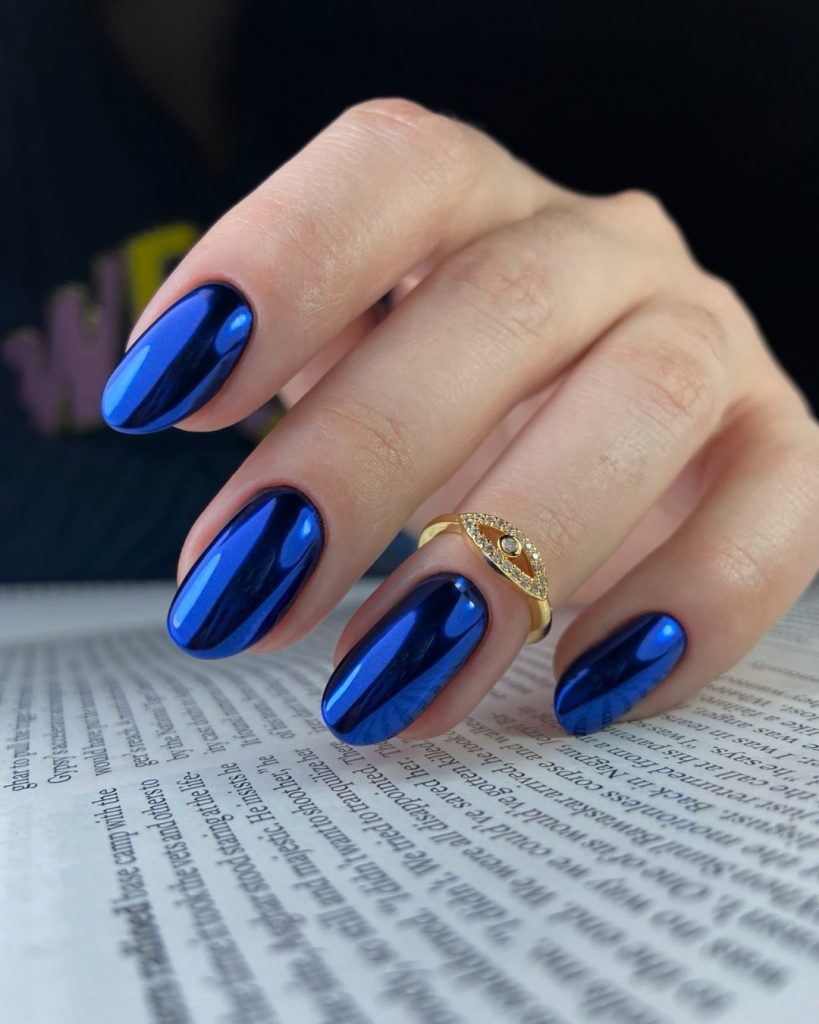
Electric Blue Brilliance
This stunning set of nails features a deep electric blue shade, exuding a sophisticated and bold aura perfect for the summer season. The gel polish used provides a glossy finish that enhances the vivid blue, turning simple short nails into a statement of style. This look is not only trendy but also classy, making it a versatile choice for both daytime and evening events.
Consumables List
- Gel polish: High-quality electric blue
- Base coat: Clear
- Top coat: High-gloss for durability
- UV/LED lamp for curing
Recommendations: For optimal results, opt for professional brands like OPI or Essie, which are renowned for their vibrant colors and long-lasting wear.
DIY Application Tips
- Prepare your nails: Clean, buff, and file your nails to a smooth finish.
- Base coat: Apply a thin layer and cure under the UV/LED lamp for 30 seconds.
- Gel polish application: Apply the electric blue gel polish in two thin layers, curing each layer for 45 seconds.
- Top coat: Seal with a high-gloss top coat and cure for 60 seconds to enhance shine and durability.
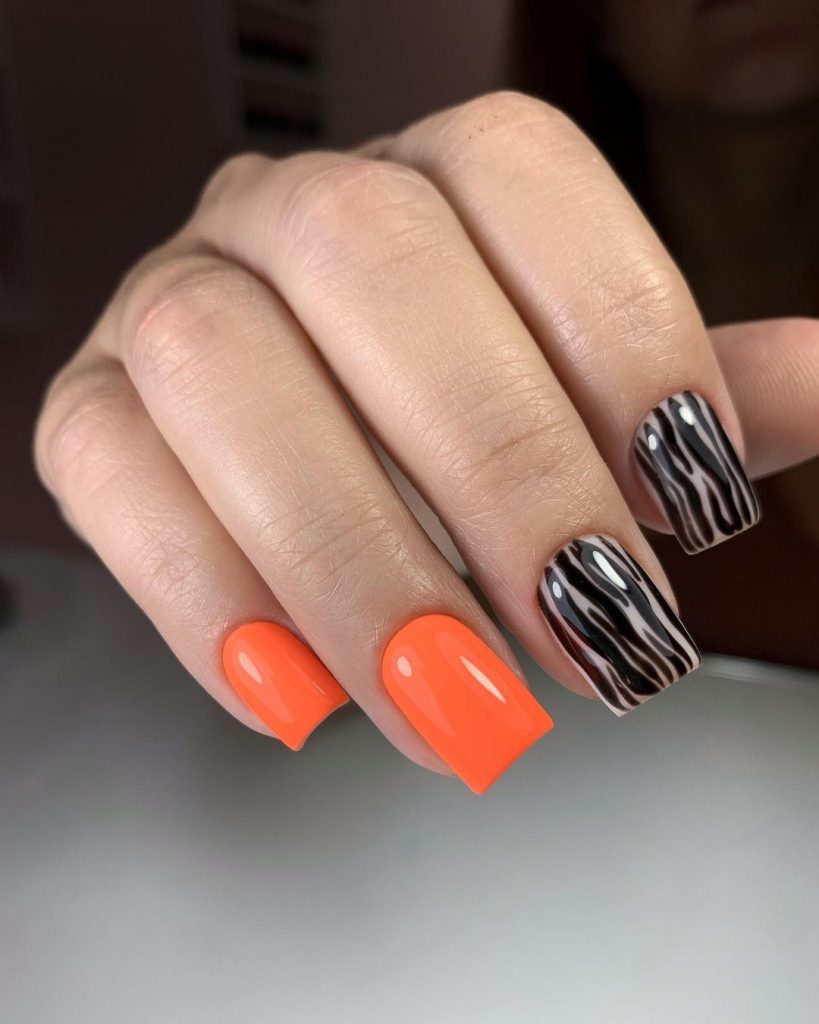
Neon Orange and Artistic Marble
This playful design combines a bright neon orange with a sophisticated marble effect, using black and white gel to create dynamic swirls. This look is perfect for those who enjoy a fun and unique style, embodying the summer vibe with its vivid colors and artistic flair.
Consumables List
- Gel polish: Neon orange, black, and white
- Detailing brush for marble effects
- Top coat: High-gloss
Recommendations: Use a thin detailing brush for precise marble designs, and ensure each layer is cured properly to prevent smudging.
DIY Application Tips
- Base color: Apply two coats of neon orange and cure.
- Marble effect: Using a detailing brush, swirl black and white gel polish to create the marble effect. Cure after application.
- Top coat: Apply for a glossy finish and cure.
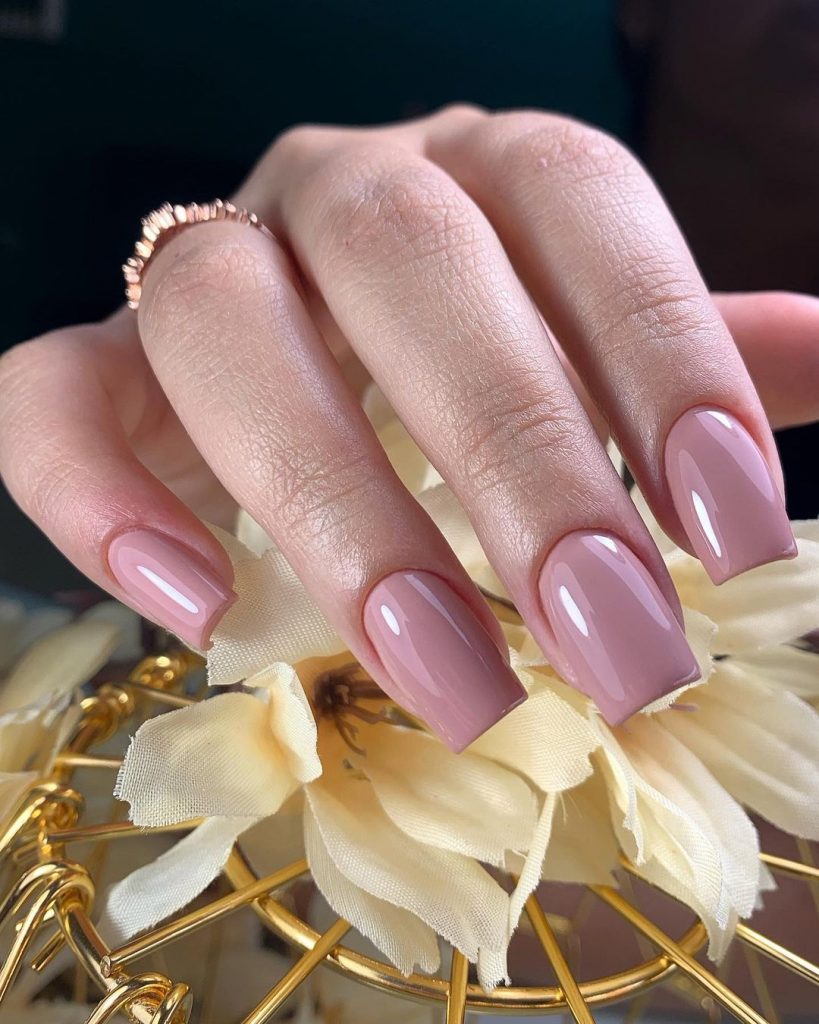
Subtle Pink Elegance
Opt for a classic, understated look with this soft pink gel polish. The gentle pink hue is perfect for those who prefer a more natural and elegant appearance. It’s a versatile choice that complements all skin tones, making it a staple for any summer wardrobe.
Consumables List
- Gel polish: Soft pink
- Top coat: Matte or gloss, depending on preference
Recommendations: A matte top coat can provide a modern twist to this classic look.
DIY Application Tips
- Apply pink gel polish: Two coats for full coverage, cure each coat.
- Choose your finish: Matte or glossy top coat, then cure.
Classic Red with Modern Twist
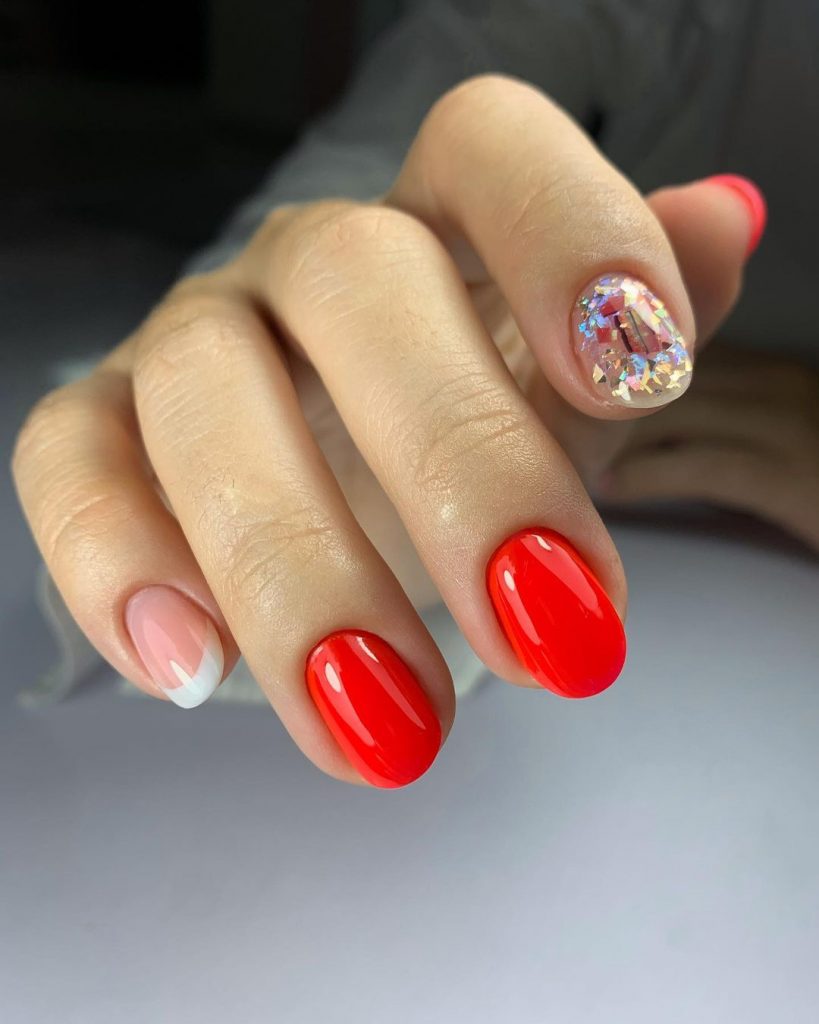
Capture the essence of timeless beauty with a modern twist in this classic red nail design, complemented by a minimalist white French tip and a dazzling crystal accent. This design is chic and elegant, perfect for adding a touch of sophistication to your summer wardrobe. The bright red is eye-catching, while the subtle French detail adds a layer of classy uniqueness.
Consumables List
- Gel polish: Bright red and white for the tips
- Crystals: Small size for accent
- Top coat: High-gloss to seal and protect
Recommendations: Use a precision brush for the French tips to ensure clean lines, and secure the crystals with a dot of clear gel polish before curing.
DIY Application Tips
- Prepare your nails: Clean and shape your nails.
- Apply red gel polish: Two coats on all nails, curing each layer.
- French tip application: Paint a white tip on each nail, use a thin brush for precision.
- Accent with crystals: Add a crystal on the ring finger nail as a focal point.
- Top coat application: Apply a high-gloss top coat to all nails and cure.
Vibrant Pink Ombre with French Detailing
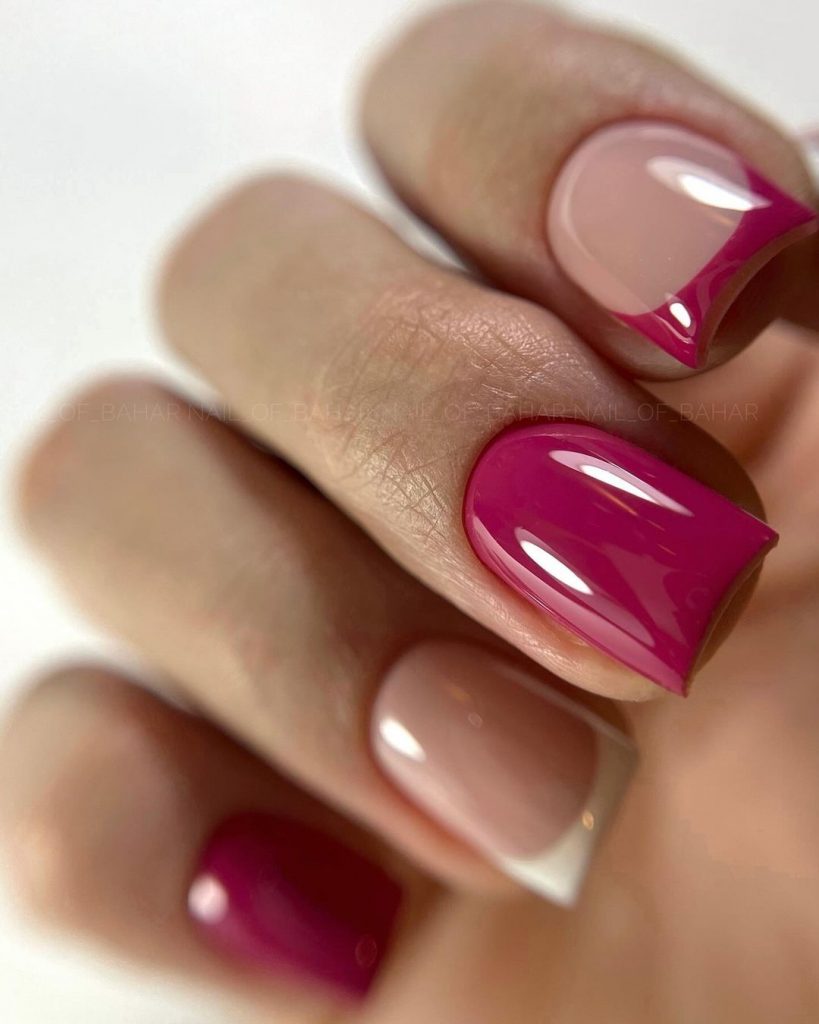
This design features a stunning ombre transition from soft pink to vibrant magenta, enhanced with a French tip overlay that adds an artistic touch. It’s a fun, bright, and trendy look that’s perfect for any summer occasion, from casual outings to more festive gatherings. The gradient effect is both pretty and eye-catching, offering a fresh take on the classic French manicure.
Consumables List
- Gel polish: Soft pink and vibrant magenta
- Top coat: High-gloss for a seamless finish
- Sponge: For the ombre effect
Recommendations: Apply the ombre effect with a sponge for a smooth gradient, and use a fine-tip brush for precise French detailing.
DIY Application Tips
- Base color application: Start with a light pink base and cure.
- Create ombre effect: Dab a sponge with magenta polish and gently press onto the nail tips, blending into the pink base. Cure.
- French tip detailing: Add a thin white line at the tip of the ombre for a refined look.
- Top coat application: Finish with a high-gloss top coat to enhance the colors and ensure durability.
Royal Blue with Gold Accents
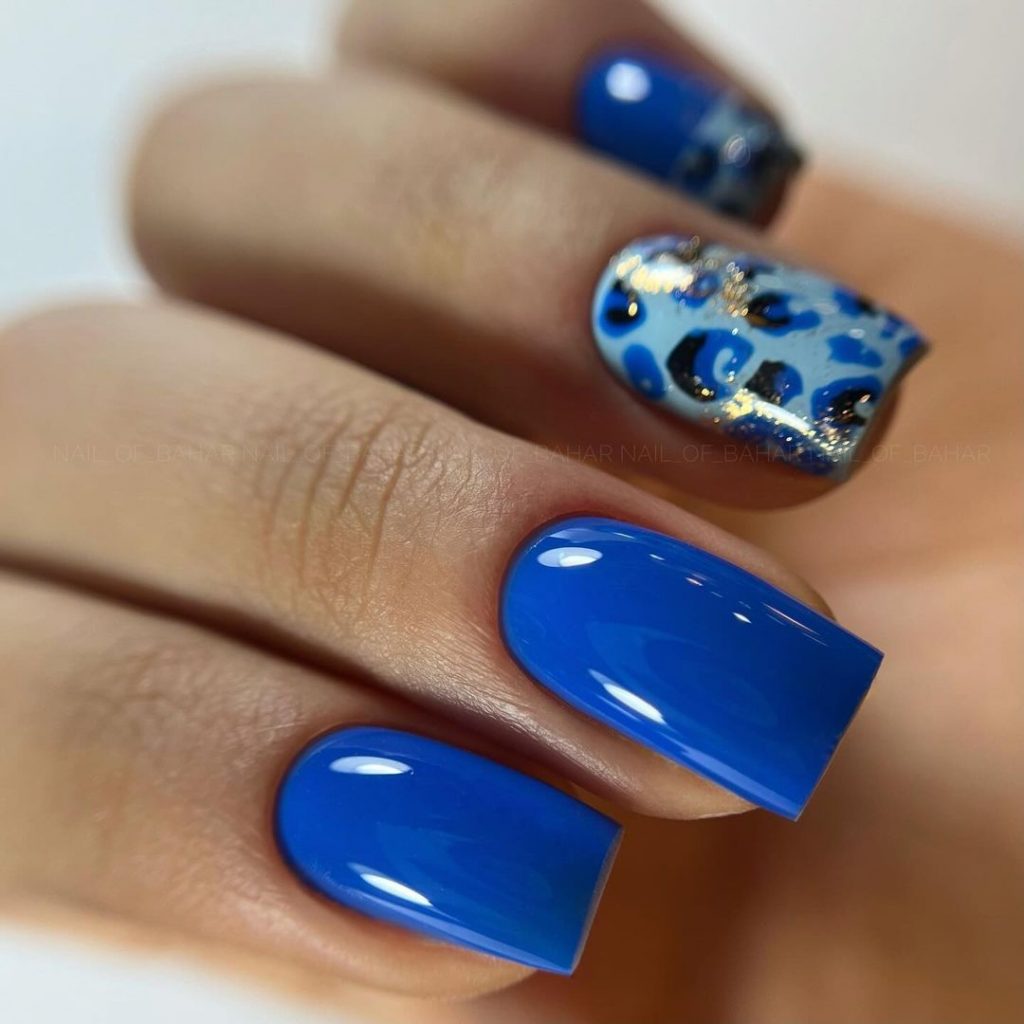
This nail design is a luxurious combination of deep royal blue with intricate gold accents and leopard prints, offering a unique and elegant look. Perfect for those who seek a touch of royalty in their style, this design blends classic colors with exotic patterns.
Consumables List
- Gel polish: Royal blue, gold
- Gold foil or gold leaf
- Top coat: High-gloss
Recommendations: For precise application of the gold accents, use a fine brush and possibly gold leaf adhesive for a lasting effect.
DIY Application Tips
- Apply royal blue gel polish: Two coats for a rich color, curing after each application.
- Design with gold accents: Using a fine brush, apply gold polish or place gold foil on strategic areas.
- Finish with a high-gloss top coat: Ensure longevity and shine.
Emerald Green with Abstract Orange Art
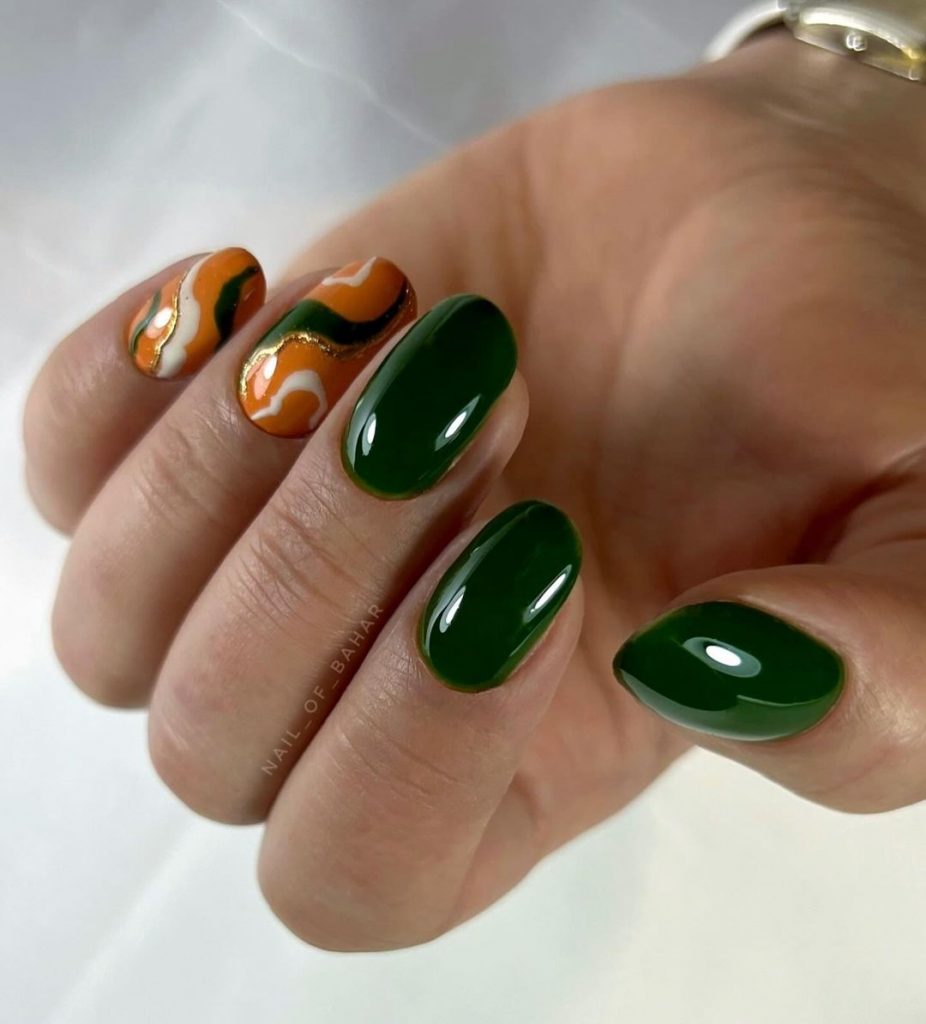
Featuring a vibrant emerald green base with abstract orange and white swirls, this design is a playful yet sophisticated choice for summer. The swirling pattern is reminiscent of abstract art, making it a fun yet chic option.
Consumables List
- Gel polish: Emerald green, white, and orange
- Detailing brush
- Top coat: High-gloss
Recommendations: Use a slow-drying top coat to manipulate the swirls perfectly before curing.
DIY Application Tips
- Base color: Apply two coats of emerald green and cure.
- Create abstract swirls: With a detailing brush, draw swirls using orange and white polish.
- Finish with a high-gloss top coat: For protection and shine.
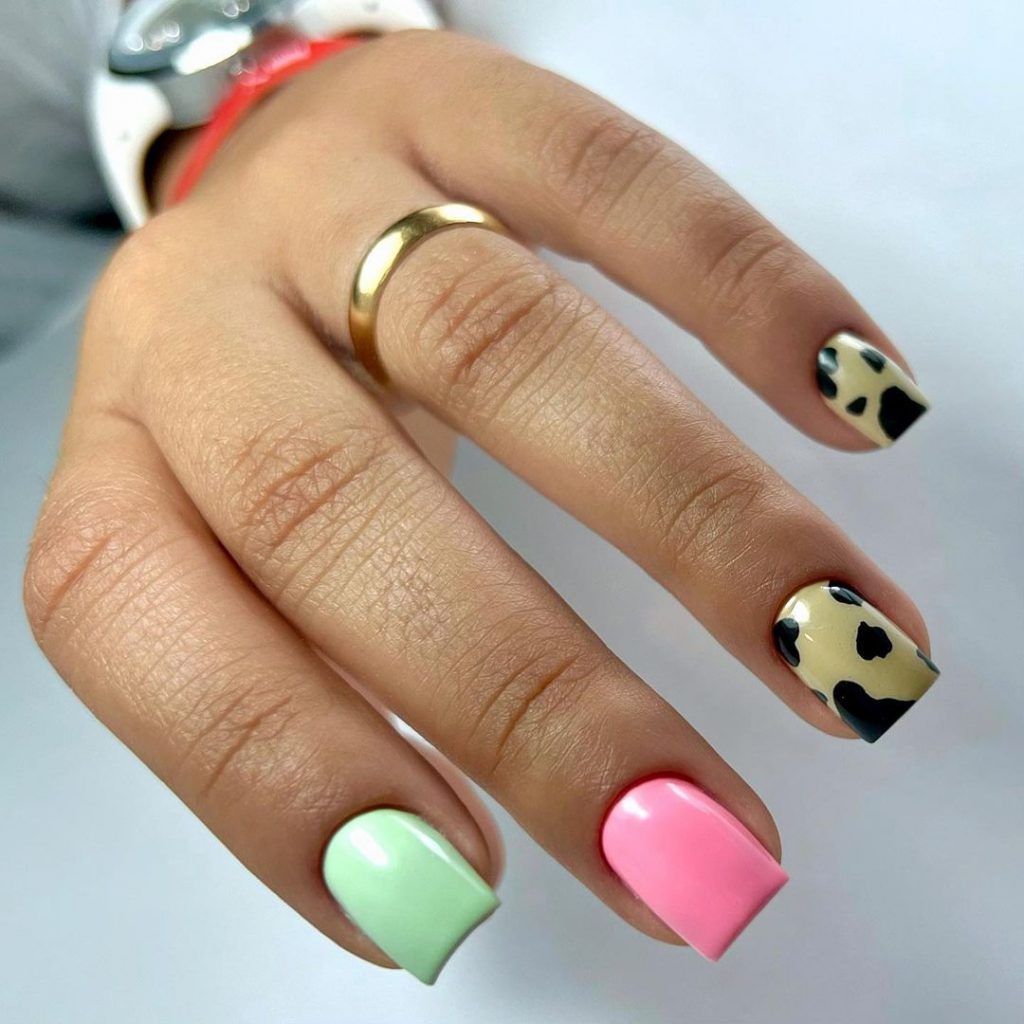
Pastel Play with Cow Print Accents
This playful nail design uses pastel shades of green, pink, and a unique cow print on beige for a cute and trendy look. It’s perfect for summer outings and can easily match various outfits due to its neutral and soft color palette.
Consumables List
- Gel polish: Pastel green, pastel pink, black for cow print
- Top coat: High-gloss
Recommendations: For the cow print, use a dotting tool to create the spots without applying too much pressure.
DIY Application Tips
- Apply pastel base colors: Alternate colors on different nails and cure.
- Add cow print: On one or two accent nails, use a dotting tool to apply black spots.
- Finish with a high-gloss top coat: For a smooth and shiny finish.
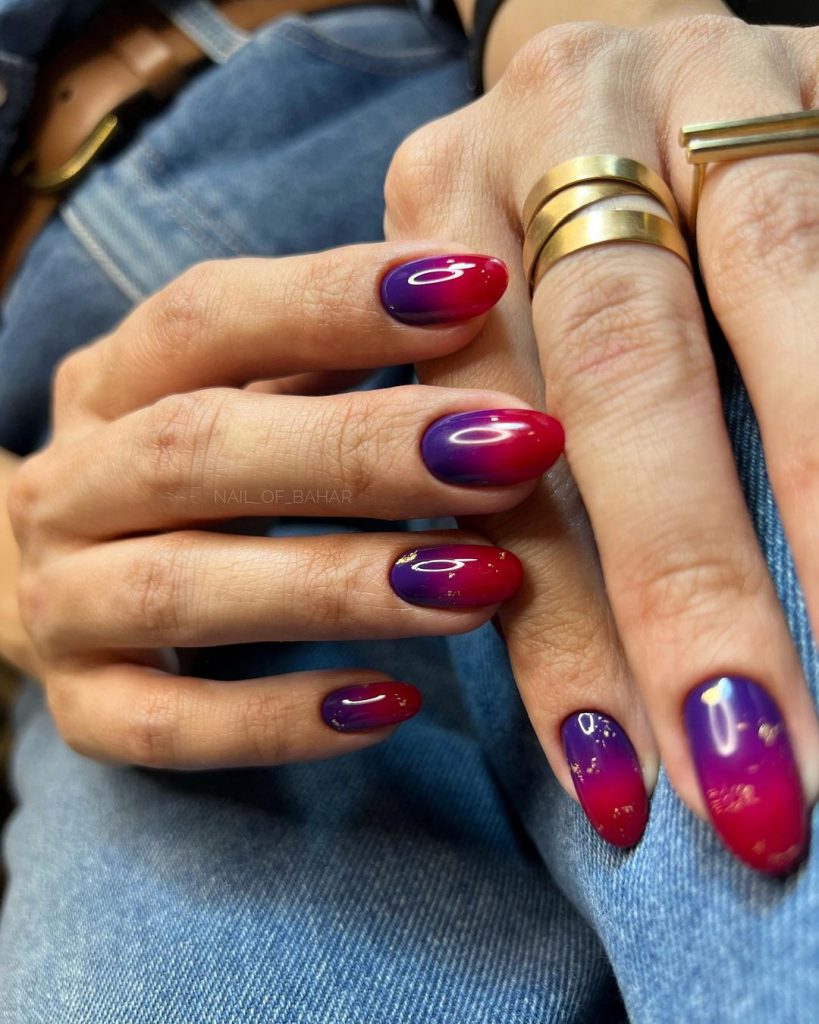
Gradient Purple with Sparkling Details
This gradient design transitions from light lavender to deep purple, adorned with sparkling details that capture the light. It’s pretty, glamorous, and perfect for evening events or a stylish day out during the summer.
Consumables List
- Gel polish: Lavender, deep purple
- Glitter or rhinestones
- Top coat: High-gloss
Recommendations: Use a sponge to create a smooth gradient effect between the purple shades.
DIY Application Tips
- Apply lavender gel polish: As a base, then partially apply deep purple at the tip.
- Blend for gradient effect: Use a sponge to dab and blend where the colors meet.
- Add glitter or rhinestones: While the top coat is tacky, place the decorations.
- Seal with top coat: For durability and extra gloss.
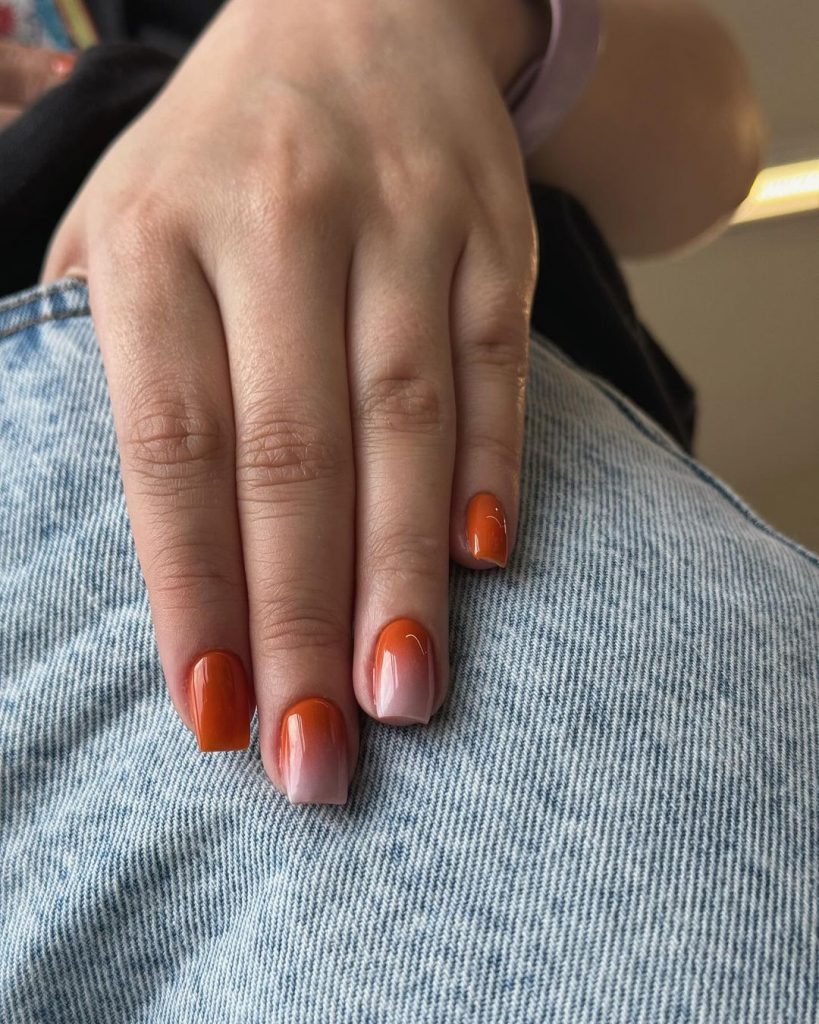
Simple and Elegant Ombre Orange
Featuring a subtle ombre effect from peach to rich orange, this design is elegant and simple. It’s an excellent choice for those who prefer understated beauty but still enjoy a hint of color in their summer nail art.
Consumables List
- Gel polish: Peach and orange
- Top coat: High-gloss
Recommendations: For the best ombre effect, use a clean makeup sponge and dab gently.
DIY Application Tips
- Apply peach gel polish: As the base color.
- Create ombre effect: Apply orange polish on a sponge and dab onto the nail tips, blending upwards.
- Finish with a high-gloss top coat: For a seamless finish.
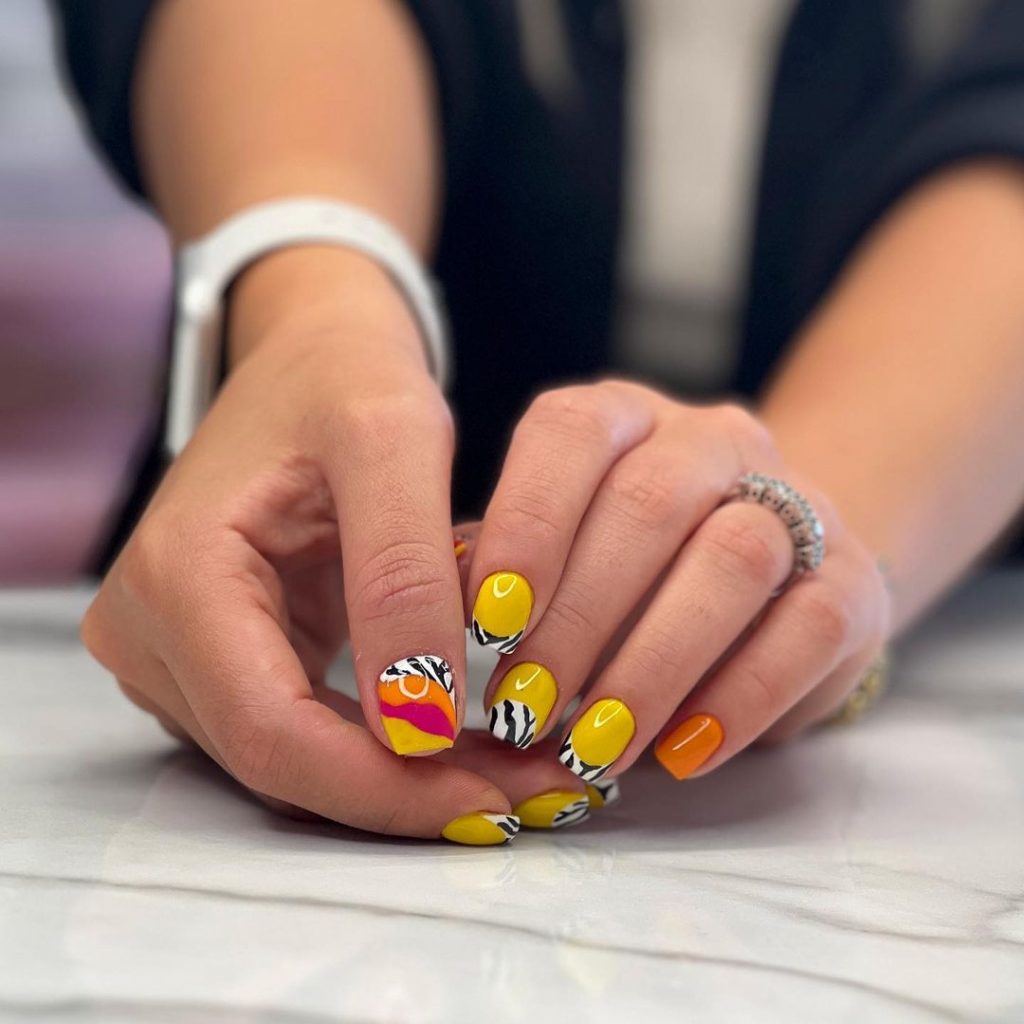
Vibrant Abstract Art
This bold nail design showcases a vibrant mix of yellow, white, and black with a dynamic abstract pattern that captures the essence of summer fun and creativity. Each nail is a canvas displaying a unique segment of the artistic expression, making this set perfect for those who love to stand out.
Consumables List
- Gel polish: Bright yellow, pure white, jet black
- Detailing brush for intricate designs
- Top coat: High-gloss for a protective finish
Recommendations: For clear lines and crisp details, use a fine detailing brush and a steady hand.
DIY Application Tips
- Base color application: Apply a bright yellow as the base.
- Pattern creation: Use black and white polishes to paint abstract designs.
- Seal with top coat: Apply a high-gloss top coat for durability and shine.
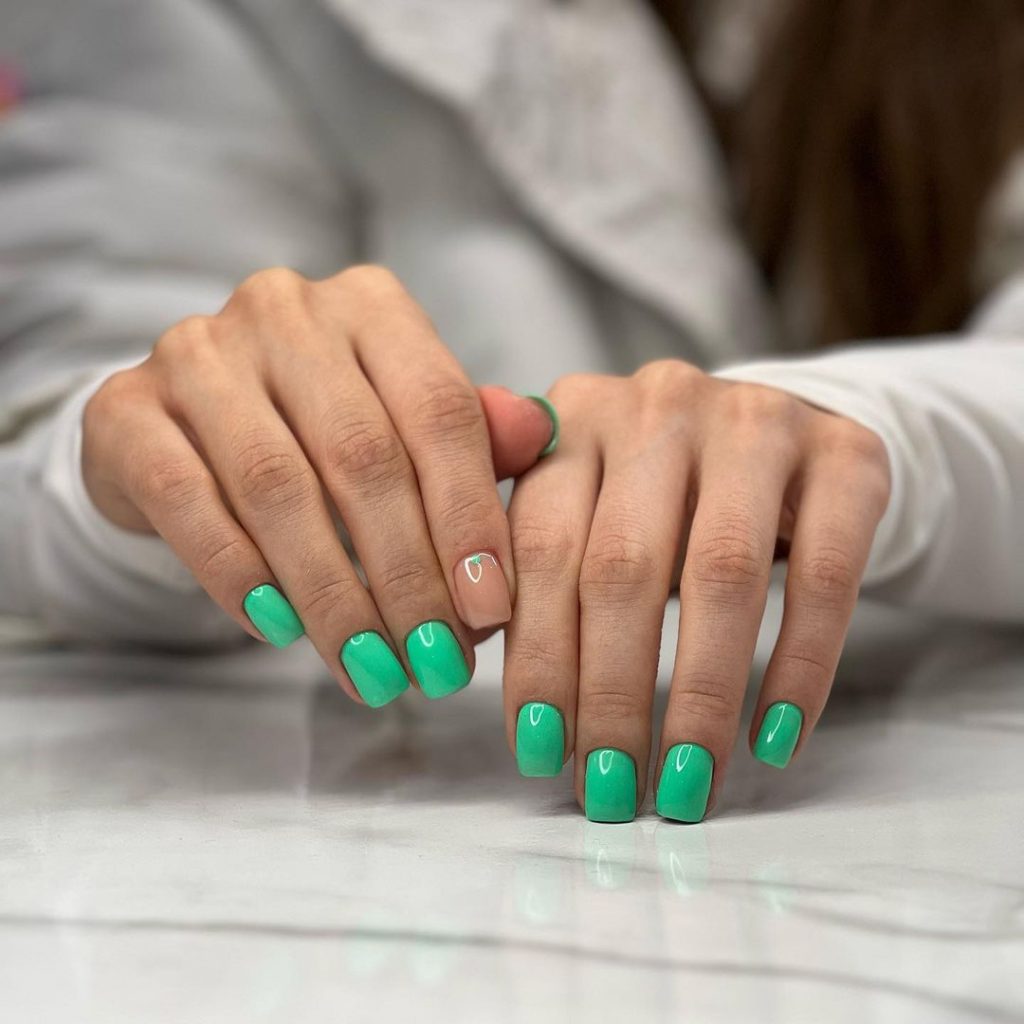
Fresh Green Tones
Embrace the summer with these fresh green tones ranging from soft mint to vibrant teal, exquisitely applied for a sleek, modern look. The design is minimalist yet chic, featuring a single metallic stripe on one nail as a stylish highlight.
Consumables List
- Gel polish: Mint green, teal
- Metallic strip for accent
- Top coat: High-gloss
Recommendations: Metallic strips can be applied using tweezers for precision and sealed with a top coat to prevent lifting.
DIY Application Tips
- Apply green polish: Alternate the shades on different nails.
- Accent with metallic strip: Add a strip to one nail for a sophisticated touch.
- Top coat for finish: Seal with a glossy top coat for a smooth feel and lasting wear.
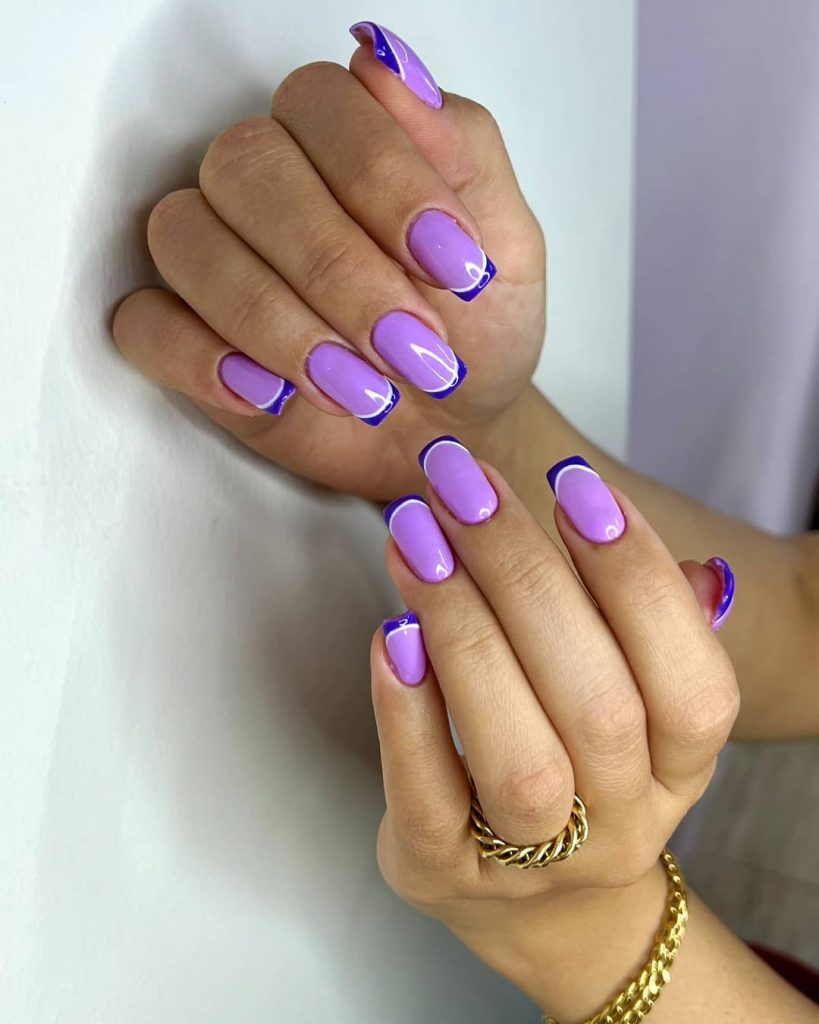
Lavender French Tips
This design modernizes the classic French tip by using a soft lavender shade, enhanced with a bold purple line for a pop of color. It’s a simple yet effective way to wear a traditional style in a more playful and colorful way.
Consumables List
- Gel polish: Soft lavender, deep purple
- Top coat: High-gloss for shine and protection
Recommendations: Apply the French tip freehand with a brush for a personal touch or use tip guides for perfect lines.
DIY Application Tips
- Lavender base: Apply two coats of lavender polish.
- Purple French tip: Add a thin line of purple at the tips.
- Finish with top coat: A high-gloss top coat enhances the colors and ensures durability.
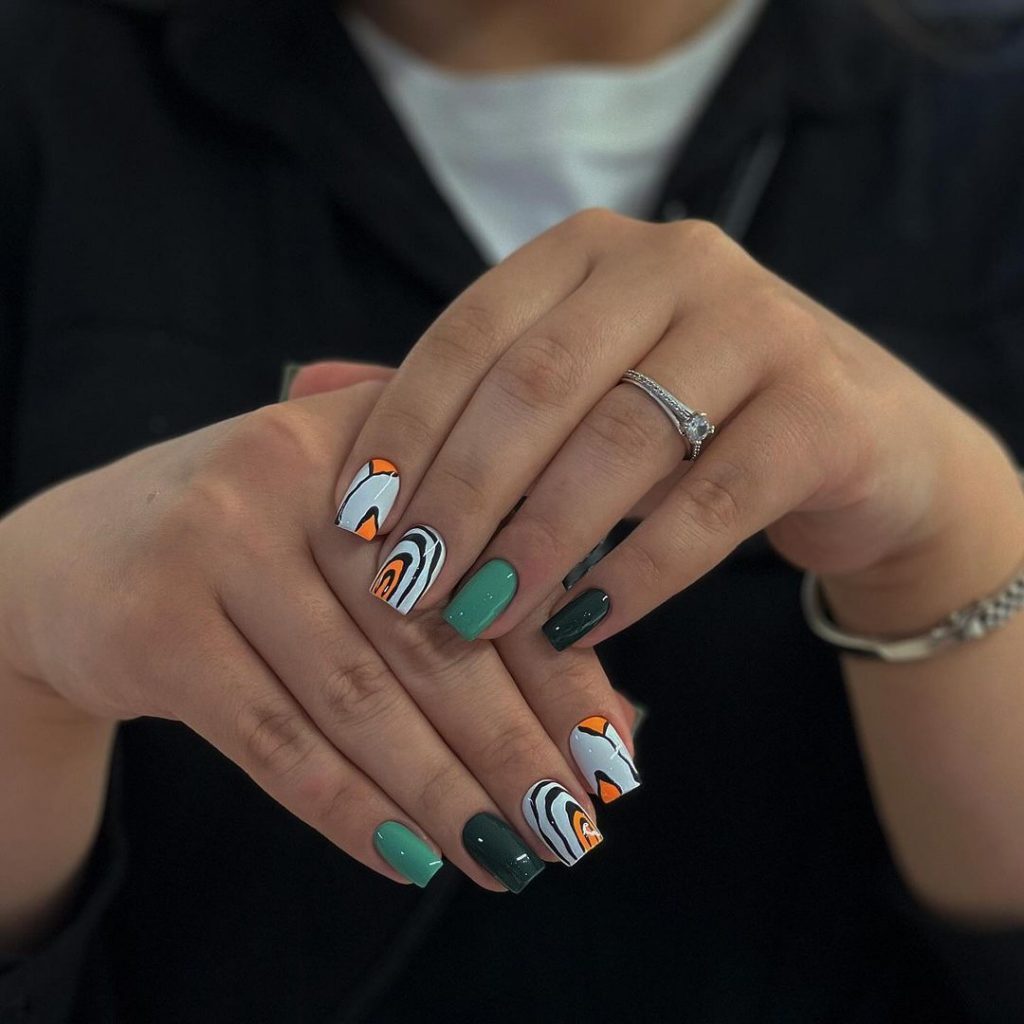
Abstract Geometric in Earth Tones
Showcasing an innovative mix of earthy greens and whites with bold geometric patterns, this nail art is for those who appreciate a statement piece that blends art with fashion. The design uses sharp lines and contrasting colors to create a stunning visual impact.
Consumables List
- Gel polish: Various shades of green, white, black
- Detailing brush
- Top coat: High-gloss
Recommendations: Practice the pattern on paper before applying to nails to ensure confidence in line work.
DIY Application Tips
- Base color: Choose a light green as the base.
- Geometric patterns: Use a detailing brush to add sharp lines and shapes with black and white.
- Apply top coat: Finish with a glossy top coat for a refined look.
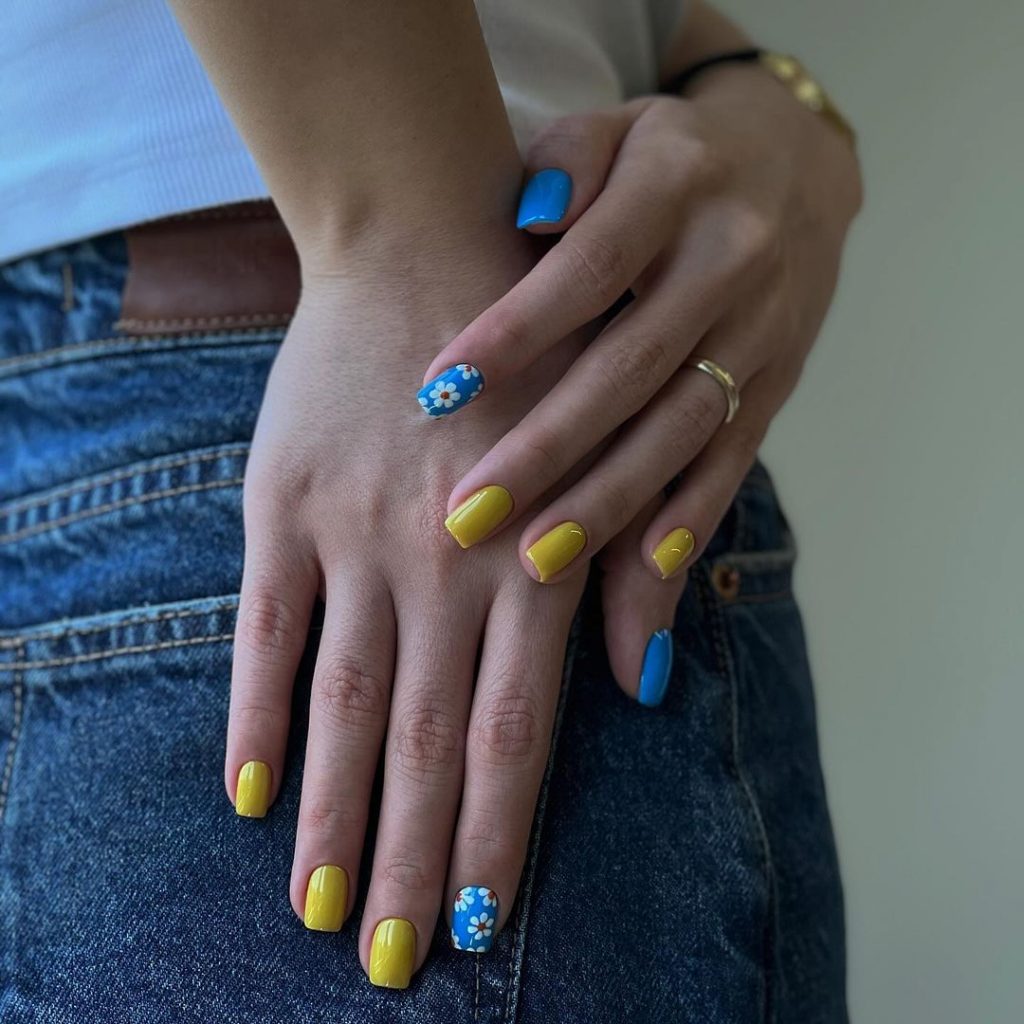
Sunny Floral Accents
This cheerful design features a bright yellow base with playful blue accents and delicate floral patterns, ideal for welcoming the warm summer days. The floral accents add a feminine touch, making it perfect for any casual or dressy occasion.
Consumables List
- Gel polish: Bright yellow, sky blue
- Detailing brush for flowers
- Top coat: High-gloss
Recommendations: Use a thin brush for the flowers and dotting tools for the centers to create a detailed and realistic floral design.
DIY Application Tips
- Yellow base: Apply two coats of yellow gel polish.
- Floral designs: Use a small brush to paint blue flowers.
- Seal with top coat: Apply a glossy top coat to protect your artwork and add shine.
Golden Luxury
This exquisite nail design features a luxurious blend of gold accents and soft peach tones. The intricate floral detailing and golden embellishments exude elegance and sophistication, making this set perfect for special occasions or anyone wanting to add a touch of glamour to their everyday style.
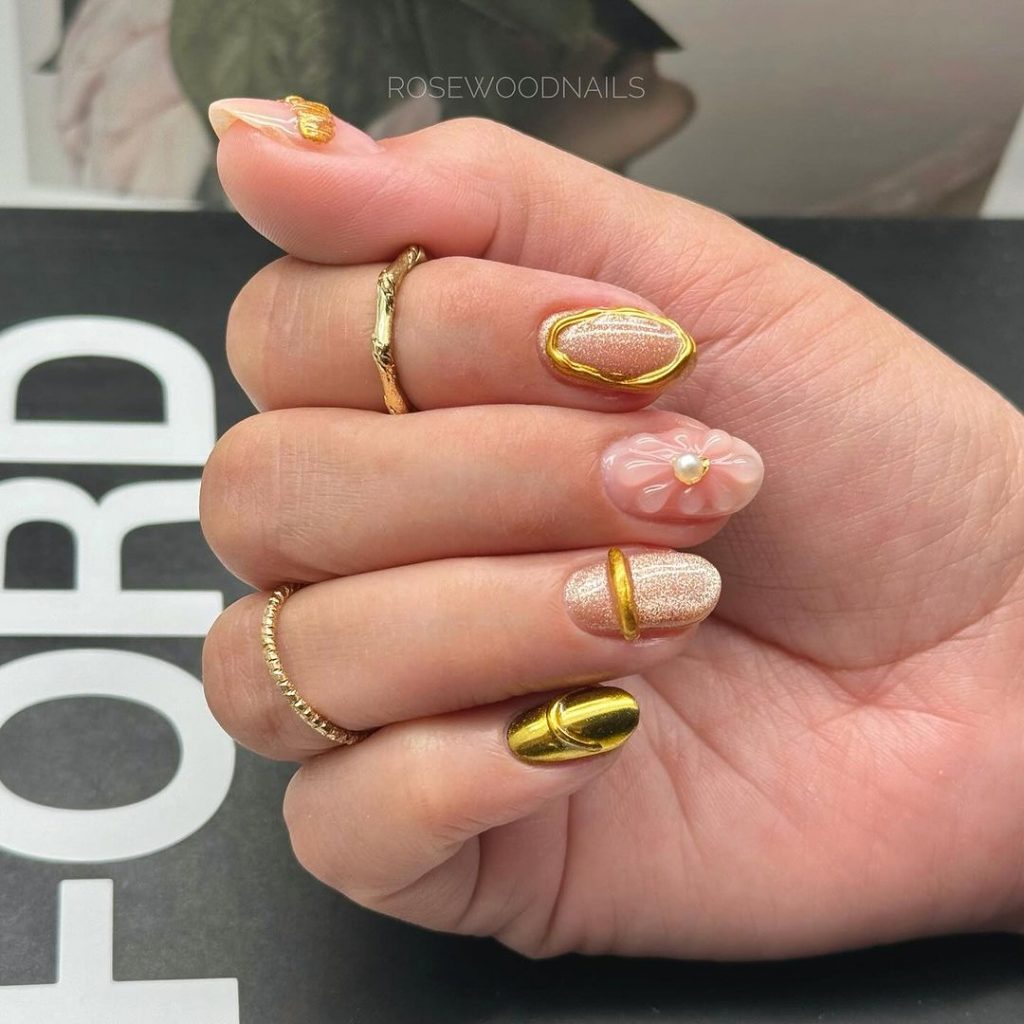
Consumables List
- Gel polish: Soft peach and shimmering gold
- Gold foil and tiny pearls for embellishments
- Top coat: High-gloss for a durable, shiny finish
Recommendations: Apply the gold foil carefully with tweezers and secure the pearls with a tiny dot of clear polish.
DIY Application Tips
- Apply peach gel polish: Two coats, curing between each.
- Add gold foil: Place on strategic areas for a luxurious look.
- Embellish with pearls: Apply at the center of the floral design.
- Seal with top coat: Ensure everything is well-protected and glossy.
Classic White Sophistication
This design celebrates the timeless elegance of simple white polish on short, neatly manicured nails. The glossy finish enhances the purity of the white, making it a versatile choice that’s perfect for both formal events and casual outings.
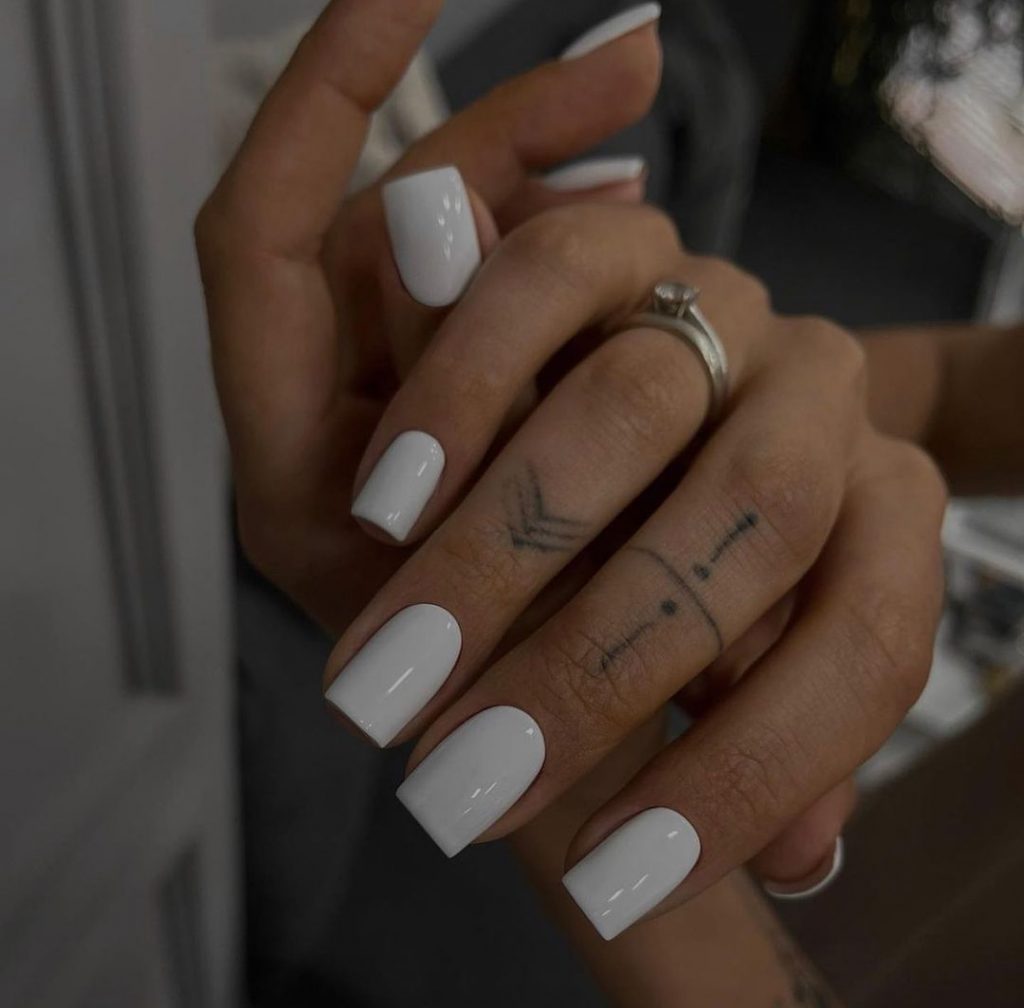
Consumables List
- Gel polish: Pure white
- Top coat: High-gloss for extra shine and protection
Recommendations: Use a high-quality white gel polish for an opaque and even finish.
DIY Application Tips
- Apply white gel polish: Two coats to ensure full coverage.
- Finish with a glossy top coat: For a durable and shiny surface.
Bold Leopard and Hot Pink
Unleash your wild side with this daring combination of hot pink and bold leopard prints on a vivid yellow background. This nail design is perfect for making a statement and adding a pop of color to your summer wardrobe.
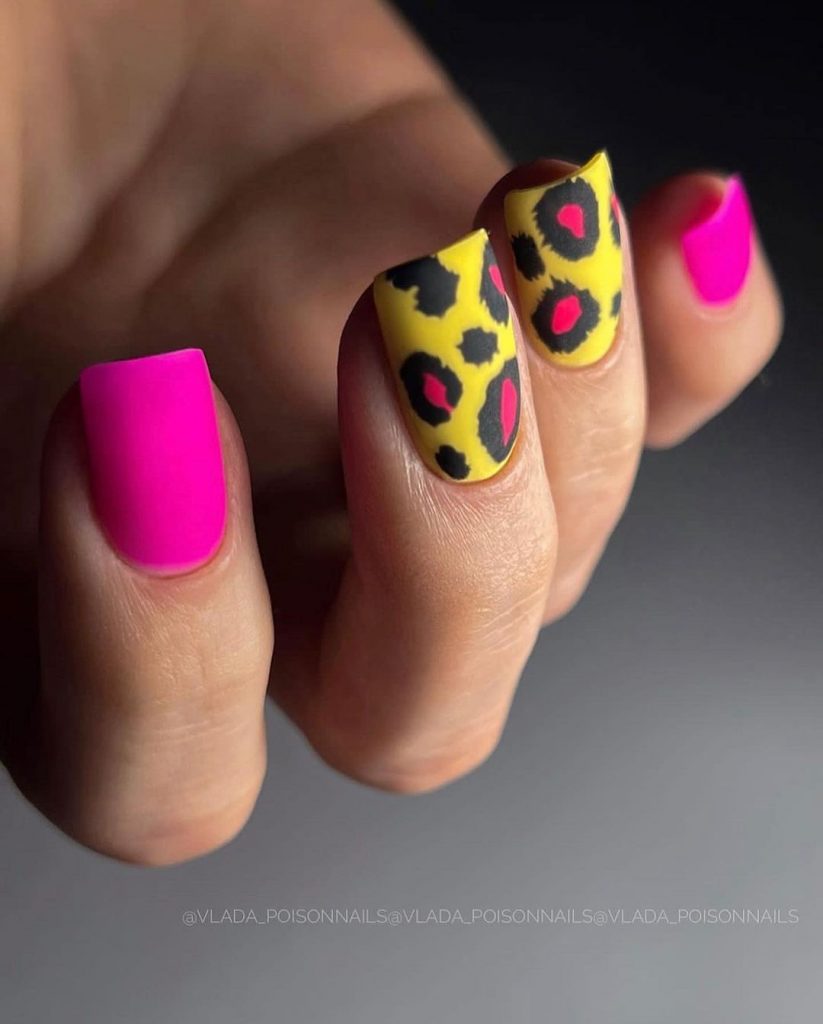
Consumables List
- Gel polish: Hot pink, black for leopard spots, and bright yellow
- Detailing brush for precise spot application
- Top coat: High-gloss for a striking finish
Recommendations: Use a small dotting tool or the tip of a brush for perfect leopard spots.
DIY Application Tips
- Apply yellow gel polish: Two coats as the base color.
- Create leopard spots: Dot on black spots, then add hot pink accents.
- Apply a high-gloss top coat: To seal the design and enhance durability.
Neon Orange French with Crystal Embellishments
This vibrant design features a modern twist on the French manicure with neon orange tips, complemented by subtle nude bases and delicate crystal embellishments. It’s playful yet elegant, ideal for those looking to combine classic chic with a touch of zest.
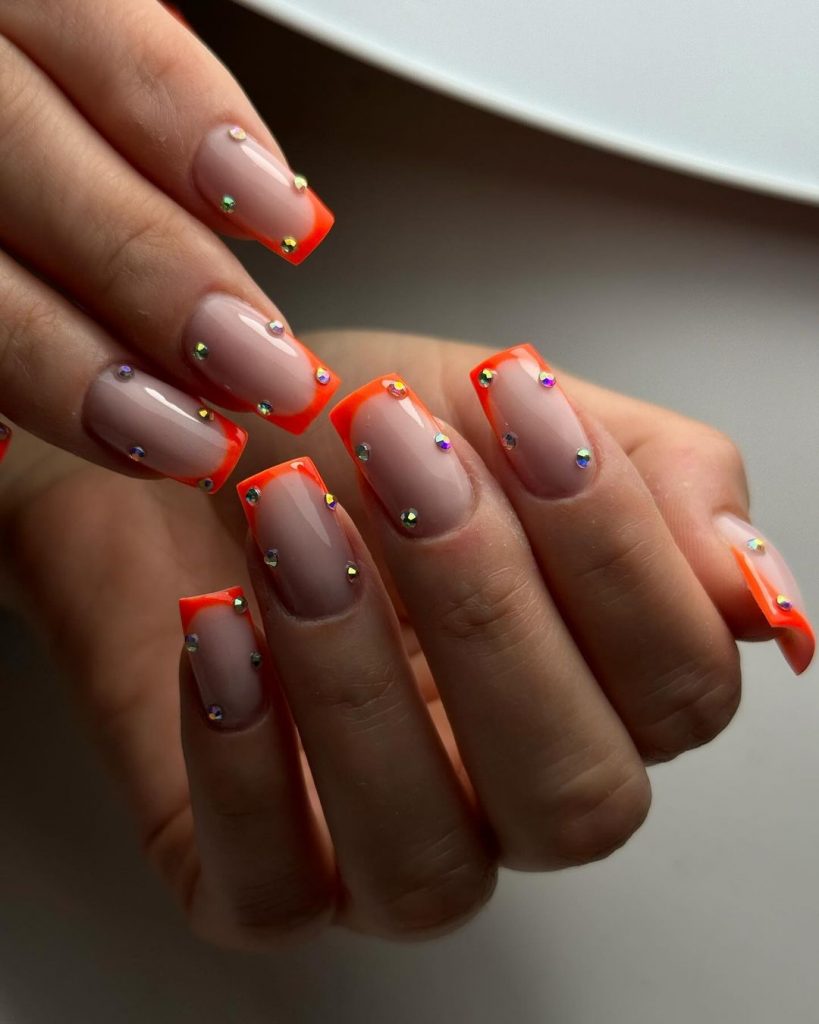
Consumables List
- Gel polish: Neon orange and nude
- Crystals: Small size for a subtle sparkle
- Top coat: High-gloss for protection and shine
Recommendations: Apply crystals with precision tweezers and seal with a top coat to hold them in place.
DIY Application Tips
- Apply nude gel polish: As the base coat on all nails.
- Neon orange tips: Paint the tips carefully or use striping tape for a clean line.
- Embellish with crystals: Near the cuticle or on the orange line.
- Seal with top coat: For lasting wear and a glossy finish.
Serene Green Minimalism
This nail design opts for a minimalistic approach with a smooth, matte finish in a soothing shade of green. The simple yet striking color is an excellent choice for those who prefer understated elegance with a contemporary twist.
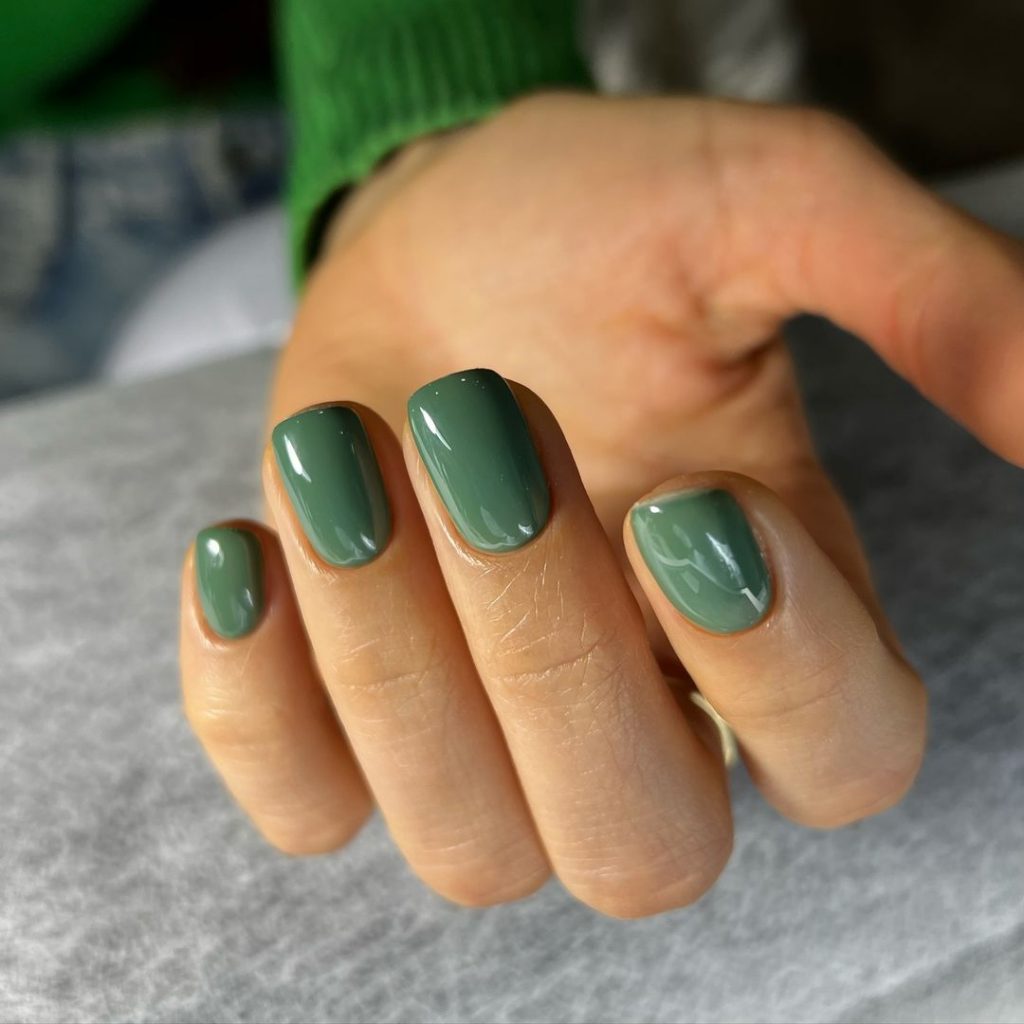
Consumables List
- Gel polish: Serene green
- Top coat: Matte for a modern finish
Recommendations: Choose a matte top coat to enhance the contemporary look of the minimalist design.
DIY Application Tips
- Apply green gel polish: Two coats for opaque coverage.
- Finish with a matte top coat: To achieve the stylish matte effect.
Sunny Yellow Nails
These nails feature a vibrant yellow that captures the essence of summer. The color is bold and eye-catching, perfect for adding a pop of brightness to your day. The glossy finish enhances the overall simplicity and elegance of this sunny shade.
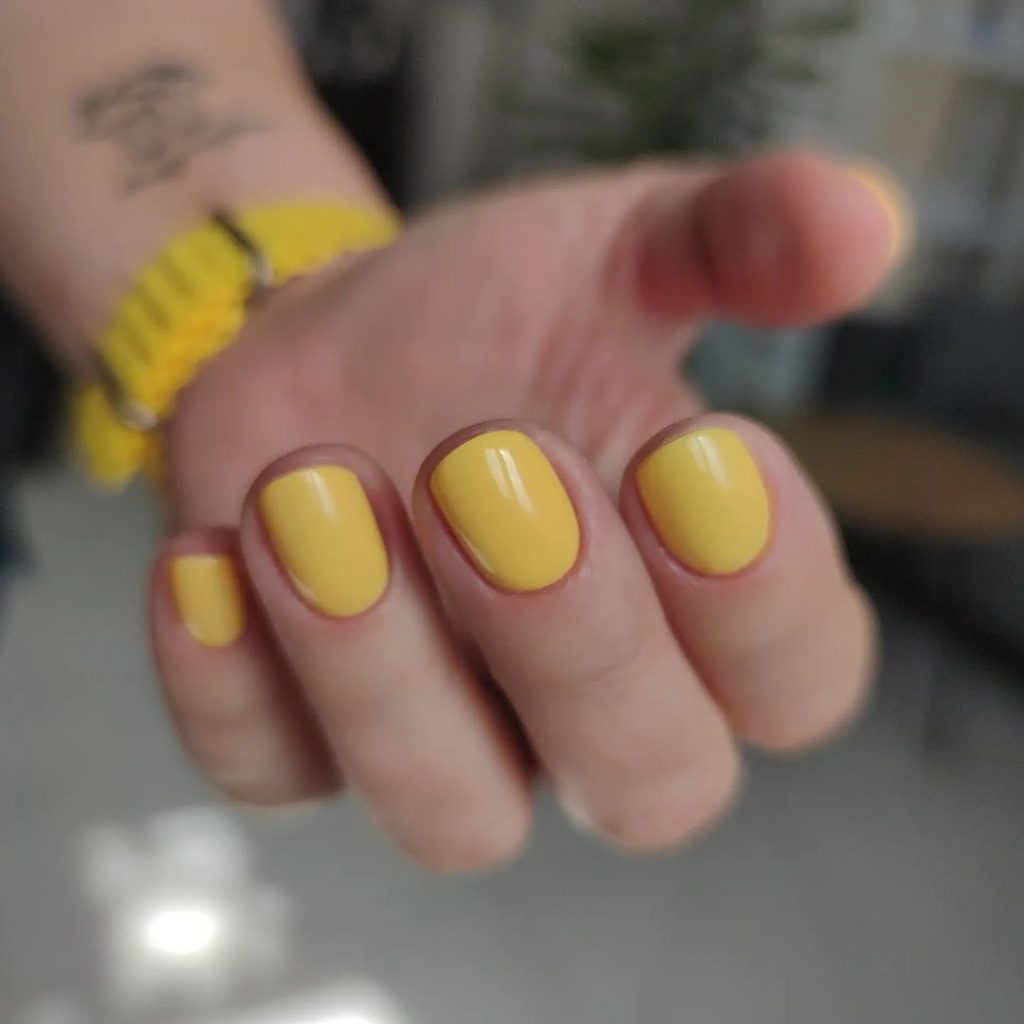
Consumables List
- Gel polish: Sunny yellow
- Top coat: High-gloss
Recommendations: Use a base coat to prevent staining from the yellow pigment and apply two layers of color for full coverage.
DIY Application Tips
- Apply base coat: Protects the nail and ensures color adhesion.
- Yellow gel polish application: Two coats for a vibrant look.
- Finish with high-gloss top coat: Adds durability and shine.
Classic and Modern Blue
This design effortlessly blends traditional and modern with a nude base and striking blue tips. The minimalist approach highlights the nails’ natural beauty while adding a bold color splash that’s both stylish and refined.
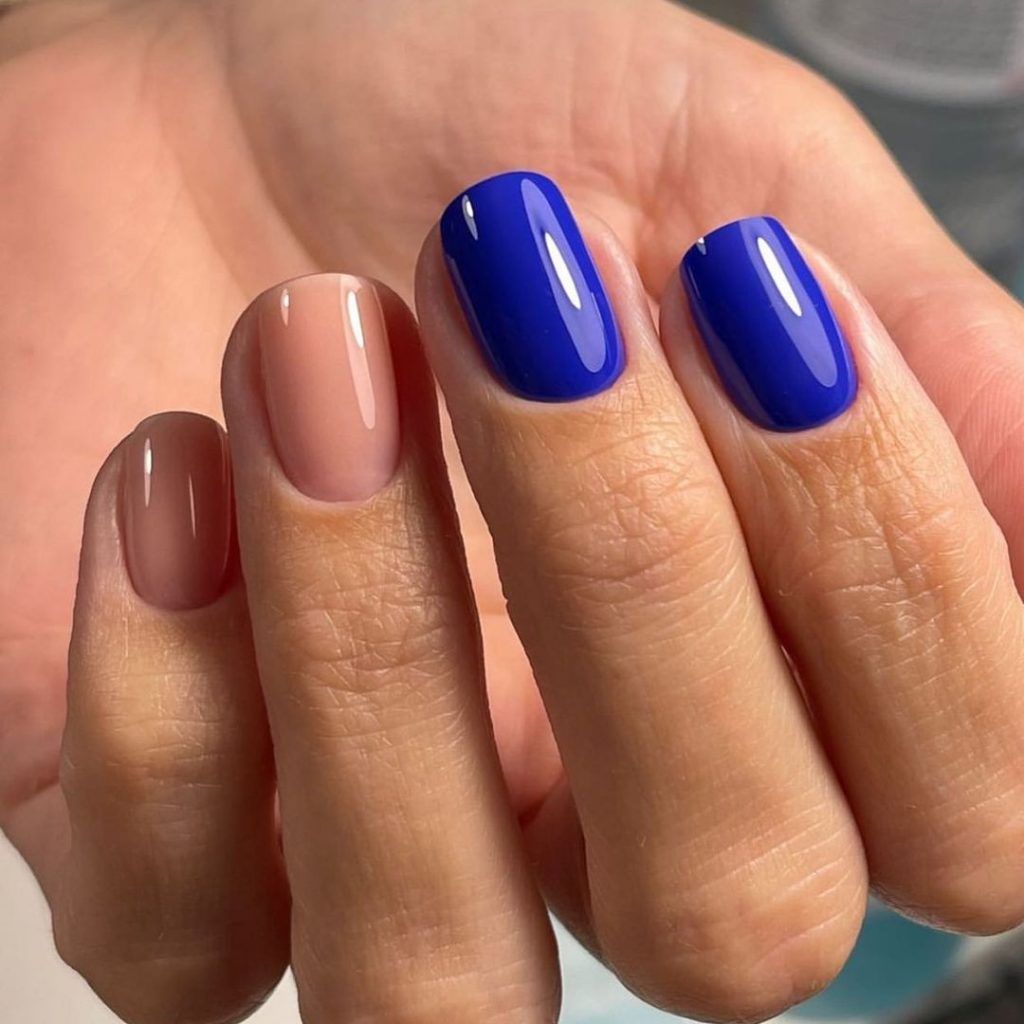
Consumables List
- Gel polish: Nude and deep blue
- Top coat: High-gloss
Recommendations: Apply the blue with a striping brush for precision and a flawless finish.
DIY Application Tips
- Nude base application: Two coats for an even, natural look.
- Blue tip detailing: Use a striping brush to apply the blue neatly.
- Seal with top coat: Ensures longevity and shine.
Floral and Peach Elegance
These nails boast a soft peach background adorned with white and green floral patterns. The intricate artistry is subtle yet captivating, perfect for any occasion that calls for a touch of natural beauty and sophistication.
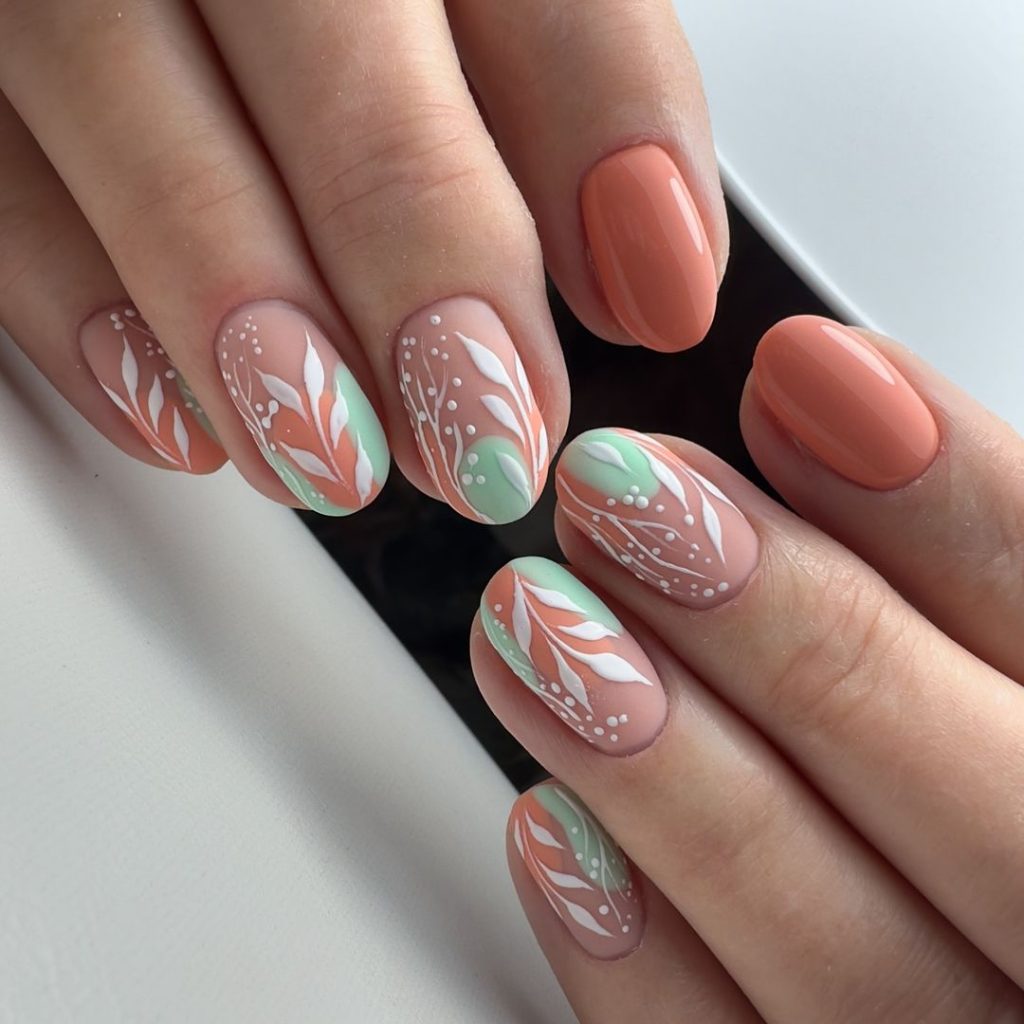
Consumables List
- Gel polish: Peach, white, and green
- Detailing brush: For the floral designs
- Top coat: High-gloss
Recommendations: Thinning the polish with a gel medium can help achieve more precise and delicate lines for the floral details.
DIY Application Tips
- Apply peach base: Smooth and even coverage is key.
- Paint floral design: Use a fine brush to detail each flower.
- Finish with a glossy top coat: Protects the artwork and enhances shine.
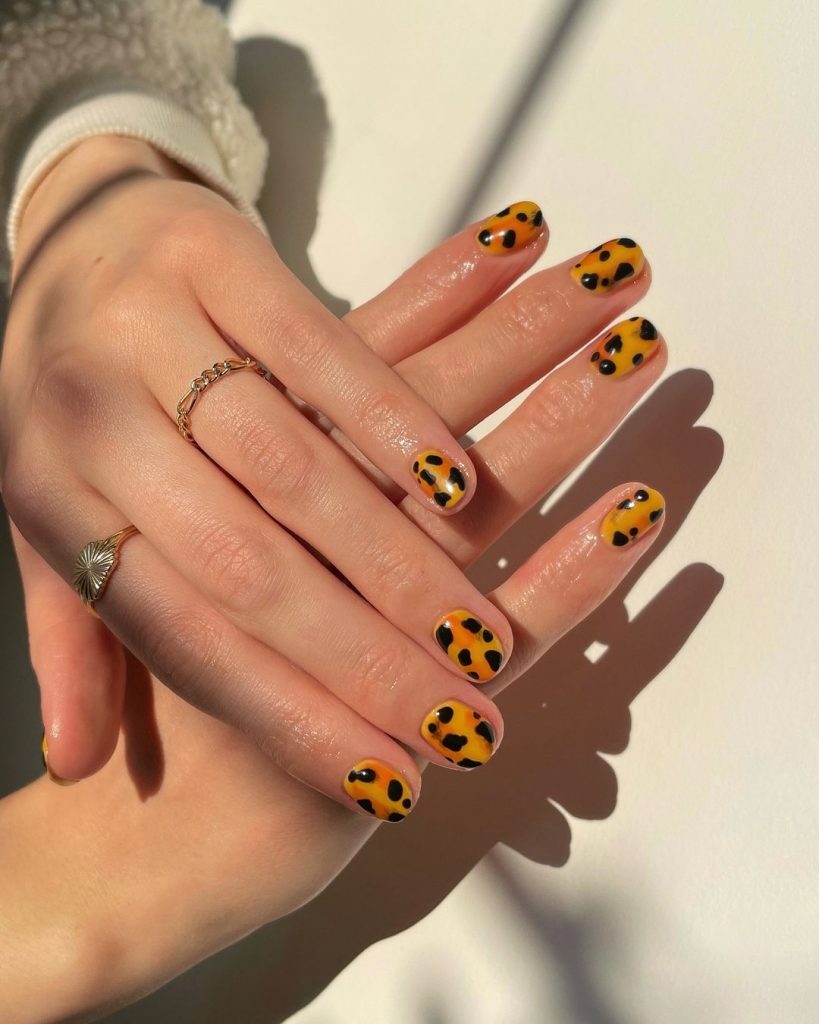
Vibrant Leopard Print
This daring design features a bright yellow base with black and red leopard spots. It’s playful, bold, and perfectly suited for making a fashion statement or jazzing up a casual look.
Consumables List
- Gel polish: Bright yellow, black, and red
- Detailing brush or dotting tool
- Top coat: High-gloss
Recommendations: Use a dotting tool for more uniform and precise spots.
DIY Application Tips
- Yellow base application: Two coats for a bright base.
- Add leopard spots: Use black for the outline and fill with red.
- Glossy top coat application: For durability and a vibrant finish.
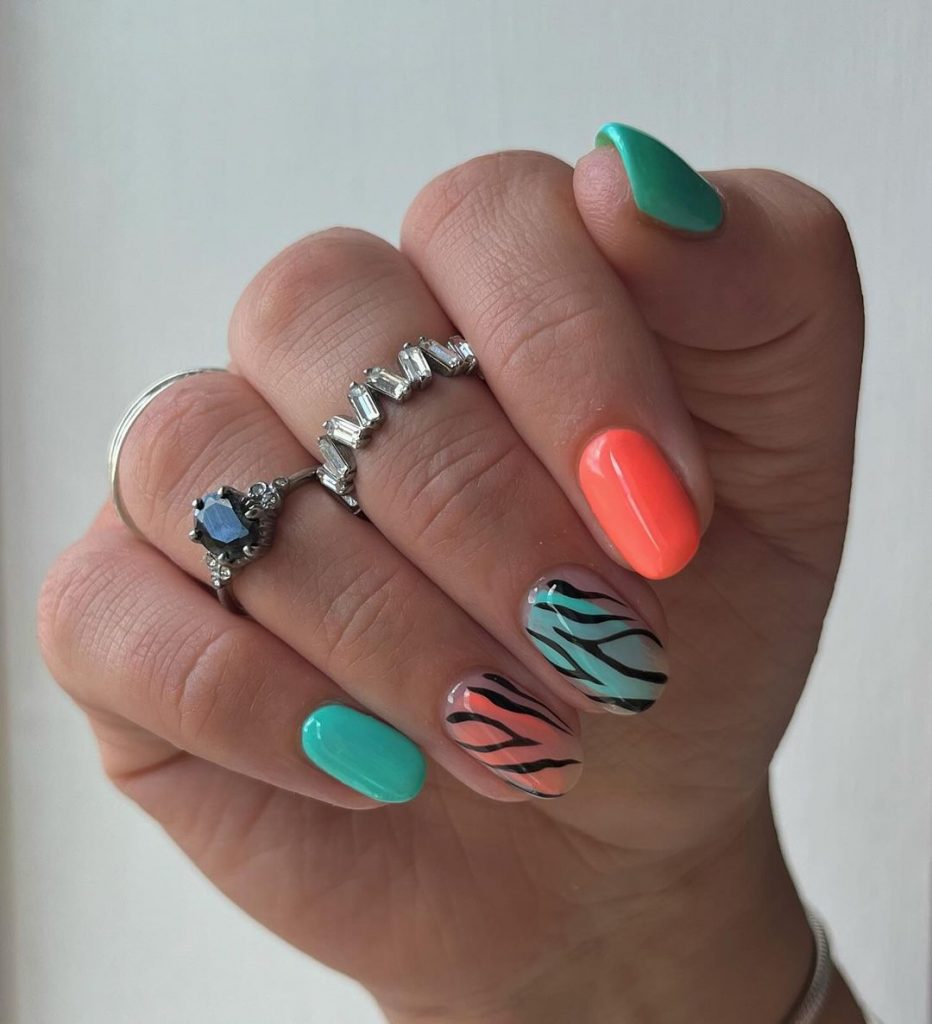
Summer Vibes with Neon Accents
Embrace the summer with these eye-catching nails, featuring neon green, orange, and black with white striping for a dynamic and trendy look. This design is perfect for those who love vibrant colors and unique patterns.
Consumables List
- Gel polish: Neon green, orange, and black
- Striping tape: White
- Top coat: High-gloss
Recommendations: Use striping tape for crisp lines and prevent the colors from bleeding.
DIY Application Tips
- Apply neon base colors: Alternate the colors on different nails for variety.
- Use striping tape for designs: Create sharp, clean lines.
- Seal with top coat: Ensures the design lasts longer and stays glossy.
Professional Insights on Nail Design
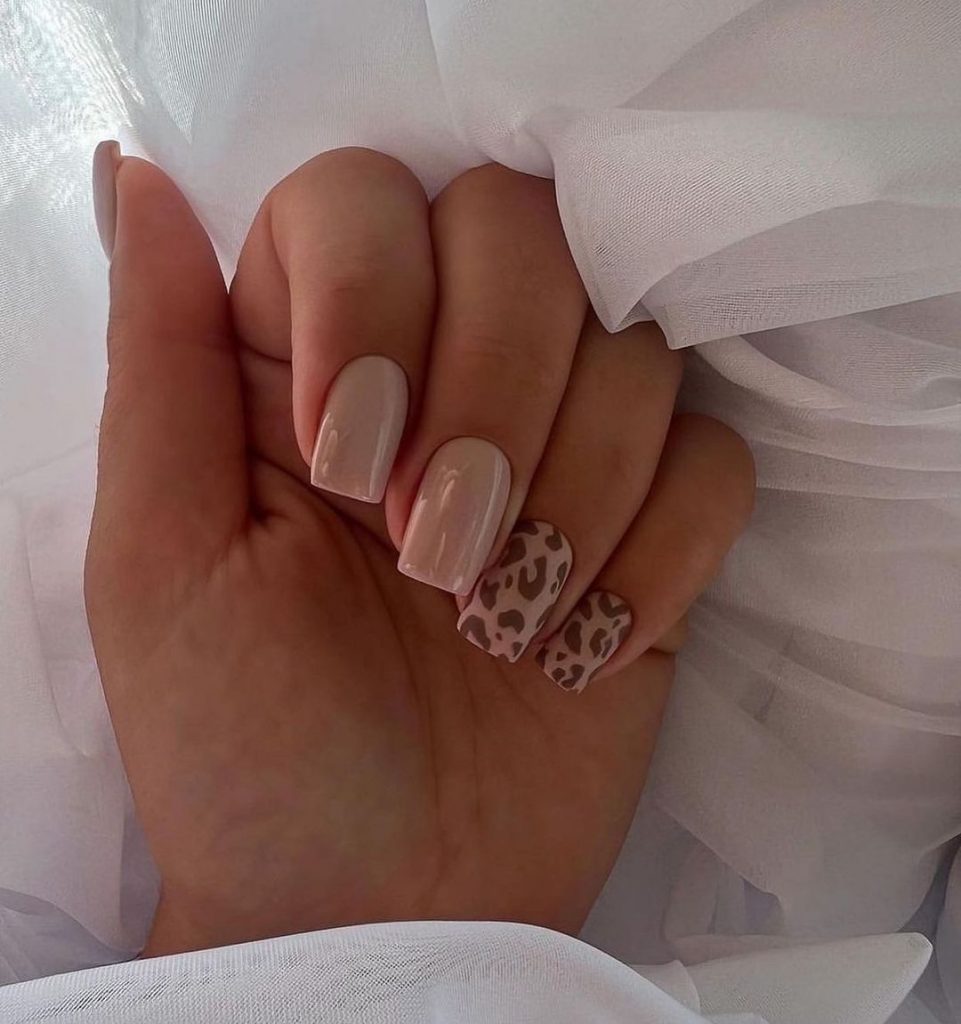
The choice of a pale nude base enhances the natural beauty of the nails, while the leopard print on the accent nails introduces a playful and trendy element without overwhelming the simplicity of the design. This nail art is a testament to the saying that sometimes, less is indeed more, offering a perfect balance between understated elegance and fashionable flair.
Consumables List
- Gel polish: Pale nude and white for the base of the accent nails
- Brown and black gel polish: For the leopard spots
- Top coat: High-gloss for a radiant finish
Recommendations: For the leopard print, use a fine detailing brush to create the spots, ensuring each one has a unique shape and size for a more natural look.
DIY Application Tips
- Apply the nude gel polish: Start with a clean, buffed nail surface. Apply two thin coats of the pale nude gel polish, curing between each layer.
- Create the leopard print: On the accent nails, apply a white base and cure. Then, with a fine brush, dab on irregular brown spots. Outline these spots partially with black to mimic the natural pattern of leopard skin, and cure again.
- Finish with a high-gloss top coat: Apply generously to all nails, ensuring the edges and tips are well-covered to prevent chipping and to give a professional, glossy finish.
Save Pin
