When it comes to fall nails, almond shapes are stealing the spotlight in 2024. Are you ready to explore the chic, fun, and versatile world of almond-shaped nails? This article dives into the latest trends, designs, and colors that will make your nails the talk of the town this fall. From professional insights to practical DIY tips, we’ve got you covered.
Mint Green Elegance
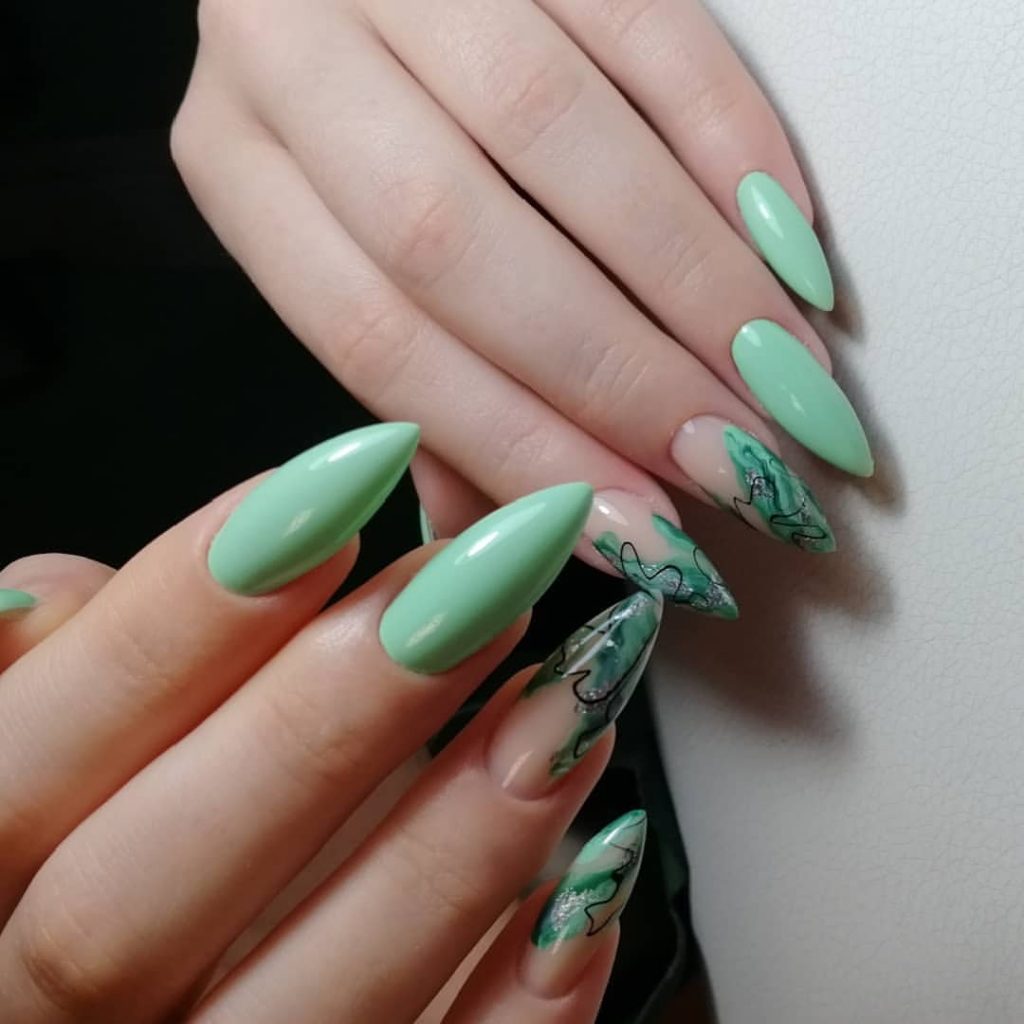
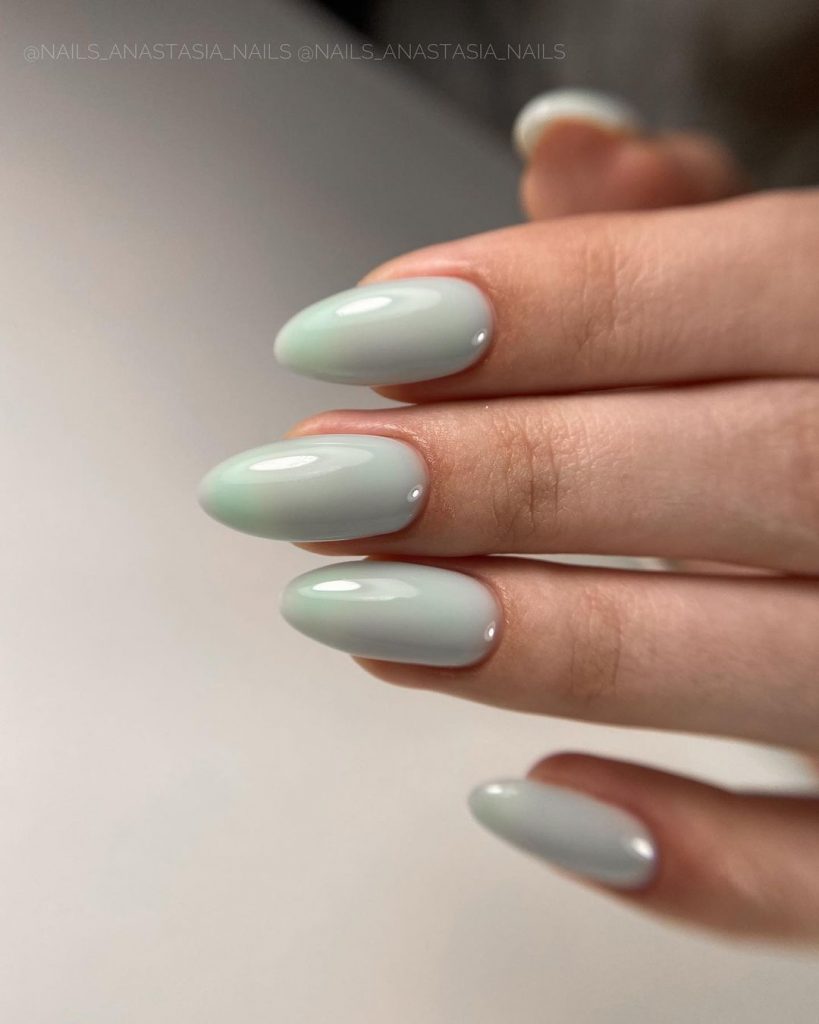
Mint green nails are making a statement this fall with their refreshing and chic appearance. The smooth, glossy finish of this design offers a sophisticated look, while the almond shape elongates the fingers, creating a graceful silhouette. The accents of marbleized green and silver add a touch of artistic flair, making this manicure perfect for those who want to stand out.
Consumables:
- Mint green nail polish (e.g., Essie Mint Candy Apple)
- Clear base coat (e.g., OPI Natural Nail Base Coat)
- Marble effect polish (e.g., China Glaze Marbled)
- Silver nail foil
- Top coat (e.g., Seche Vite Dry Fast Top Nail Coat)
Mint green is a versatile color that complements various skin tones and can be paired with both casual and formal outfits. The marble accents add a unique touch, making this design both elegant and fun.
DIY Instructions:
- Apply a clear base coat to protect your nails.
- Apply two coats of mint green nail polish and let it dry completely.
- Create the marble effect by dabbing marble effect polish onto the nails and blending with a small brush.
- Add silver foil accents for an extra touch of glam.
- Seal the design with a top coat to ensure longevity and shine.
Blushing Florals
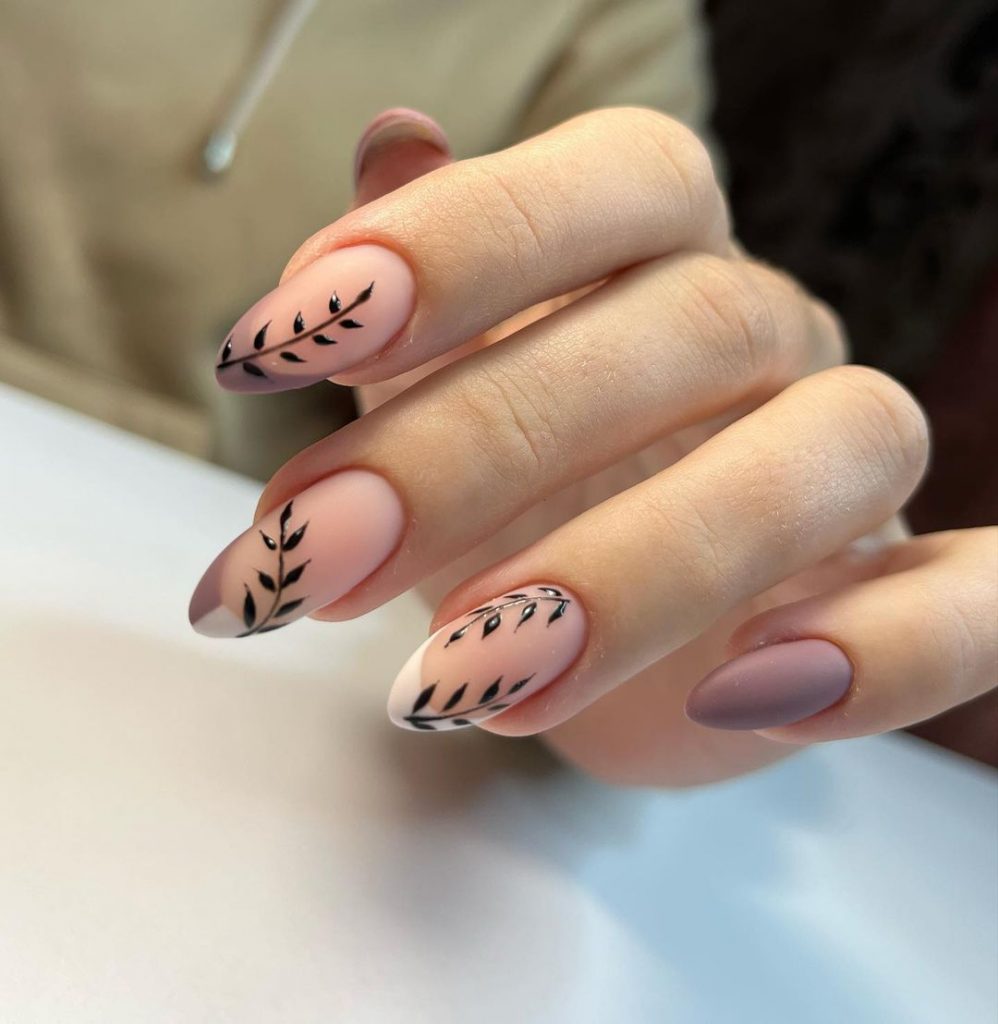
This design features a soft pink matte base with delicate black leaf patterns, perfect for a minimalist yet trendy look. The almond shape adds a touch of elegance, making these nails suitable for both everyday wear and special occasions.
Consumables:
- Matte pink nail polish (e.g., OPI Matte Pink)
- Black nail art pen (e.g., Sally Hansen I Heart Nail Art Pen)
- Clear base coat
- Top coat
The matte finish adds a sophisticated touch to the design, while the black leaf patterns provide a chic and trendy contrast. This nail art is perfect for those who prefer a subtle yet stylish look.
DIY Instructions:
- Apply a clear base coat to your nails.
- Paint your nails with two coats of matte pink nail polish and let it dry.
- Use a black nail art pen to draw delicate leaf patterns on each nail.
- Allow the design to dry completely before sealing it with a top coat.
Nude Simplicity
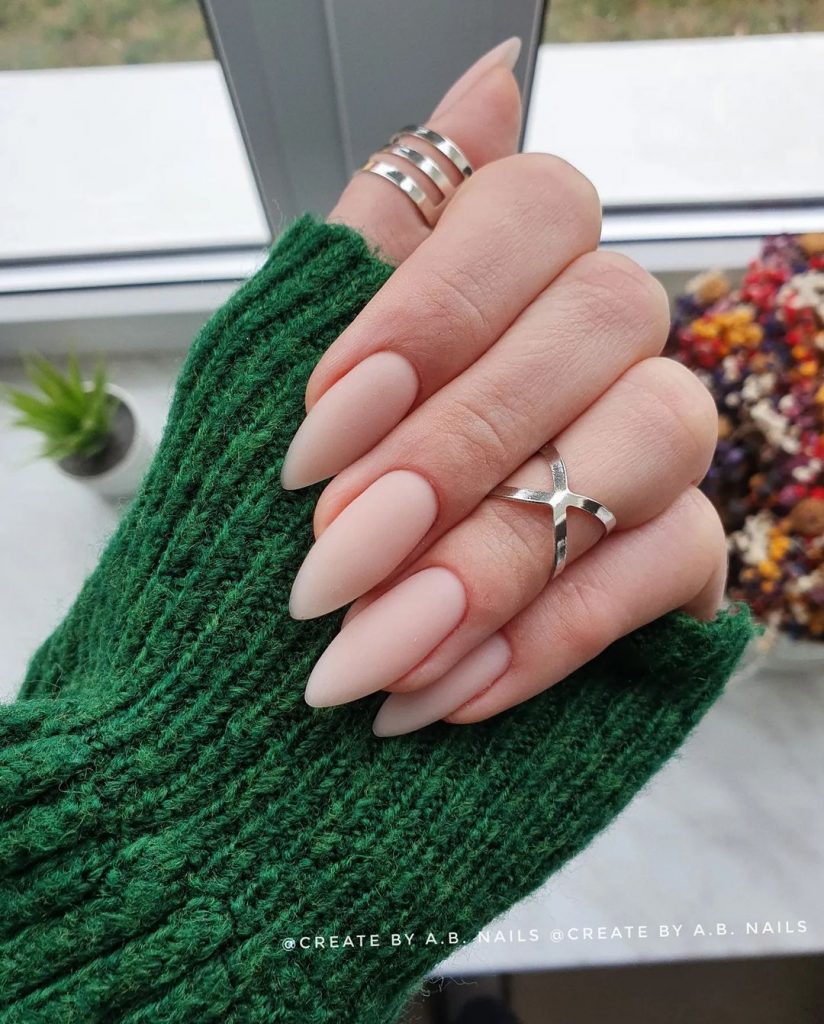
For those who appreciate simplicity and elegance, this nude almond-shaped design is a must-try. The smooth, matte finish adds a touch of sophistication, making it a perfect choice for any occasion.
Consumables:
- Nude matte nail polish (e.g., Essie Bare With Me)
- Clear base coat
- Top coat
This nude matte design is both classy and versatile, suitable for any setting from professional to casual. Its understated elegance makes it a timeless choice for fall.
DIY Instructions:
- Start with a clear base coat to protect your nails.
- Apply two coats of nude matte nail polish and let it dry thoroughly.
- Finish with a top coat to enhance the durability of the manicure.
Monochrome Polka Dots
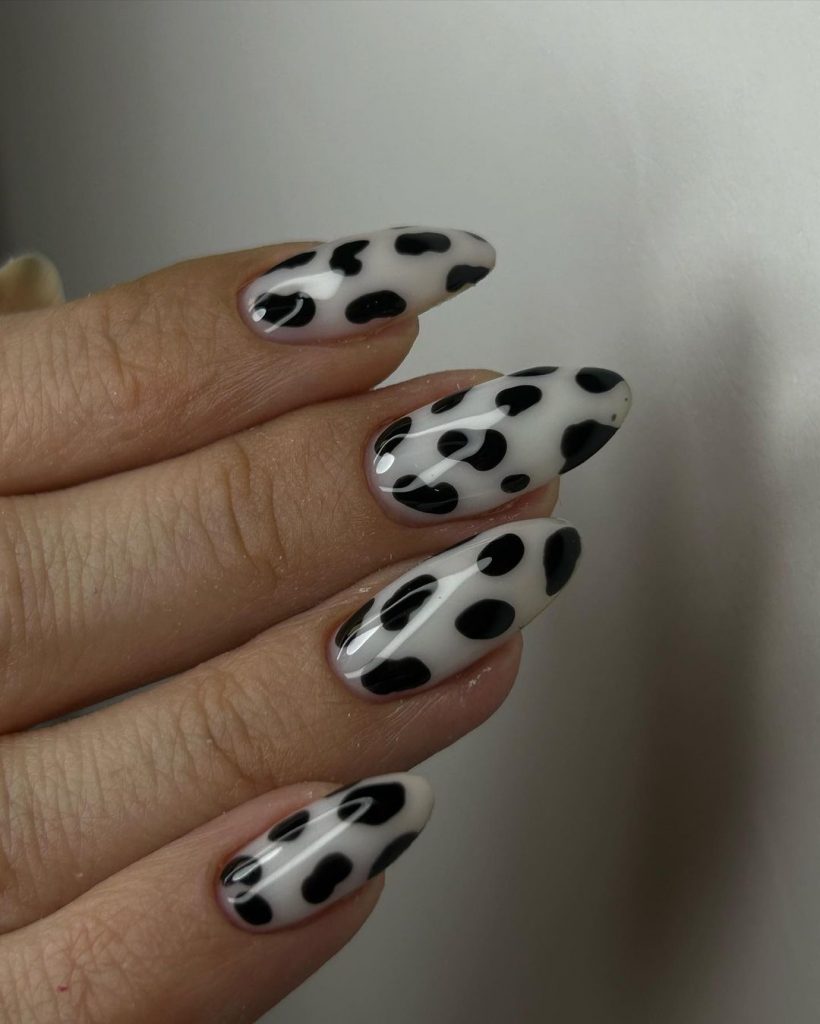
Black and white polka dots bring a playful and fun element to your fall nails. This design is both simple and striking, making it an excellent choice for those who love bold yet easy-to-achieve nail art.
Consumables:
- White nail polish (e.g., OPI Alpine Snow)
- Black nail polish (e.g., OPI Black Onyx)
- Dotting tool or bobby pin
- Clear base coat
- Top coat
The monochrome polka dot design is timeless and chic, providing a fun twist to the classic black and white color palette. It’s an ideal choice for those looking to add a bit of flair to their nails without going overboard.
DIY Instructions:
- Apply a clear base coat to start.
- Paint your nails with two coats of white nail polish and let them dry.
- Use a dotting tool or a bobby pin dipped in black nail polish to create polka dots on each nail.
- Allow the design to dry completely, then seal with a top coat.
Autumn Leaves
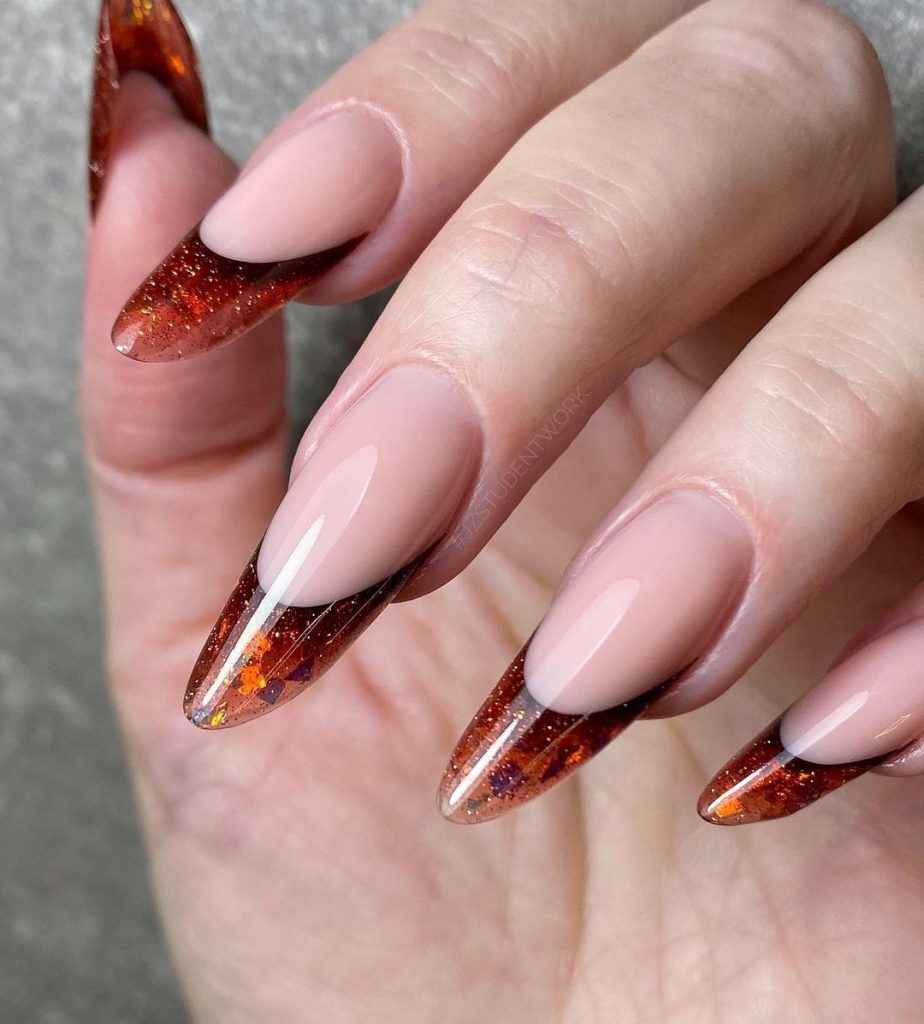
Embrace the autumn season with these stunning nails featuring a mix of nude and dark brown tones, accented with glittering autumn leaves. This design captures the essence of fall and adds a touch of sparkle to your look.
Consumables:
- Nude nail polish (e.g., Essie Topless & Barefoot)
- Dark brown nail polish (e.g., OPI Suzi Loves Cowboys)
- Autumn leaf nail stickers or decals
- Glitter top coat
- Clear base coat
- Top coat
This design is perfect for capturing the warm and cozy vibes of fall. The combination of nude and dark brown with glittery leaves creates a beautiful contrast that is both trendy and seasonal.
DIY Instructions:
- Apply a clear base coat to your nails.
- Paint your nails with alternating coats of nude and dark brown nail polish, allowing each coat to dry completely.
- Apply autumn leaf nail stickers or decals to each nail.
- Finish with a glitter top coat for added sparkle and a regular top coat to seal the design.
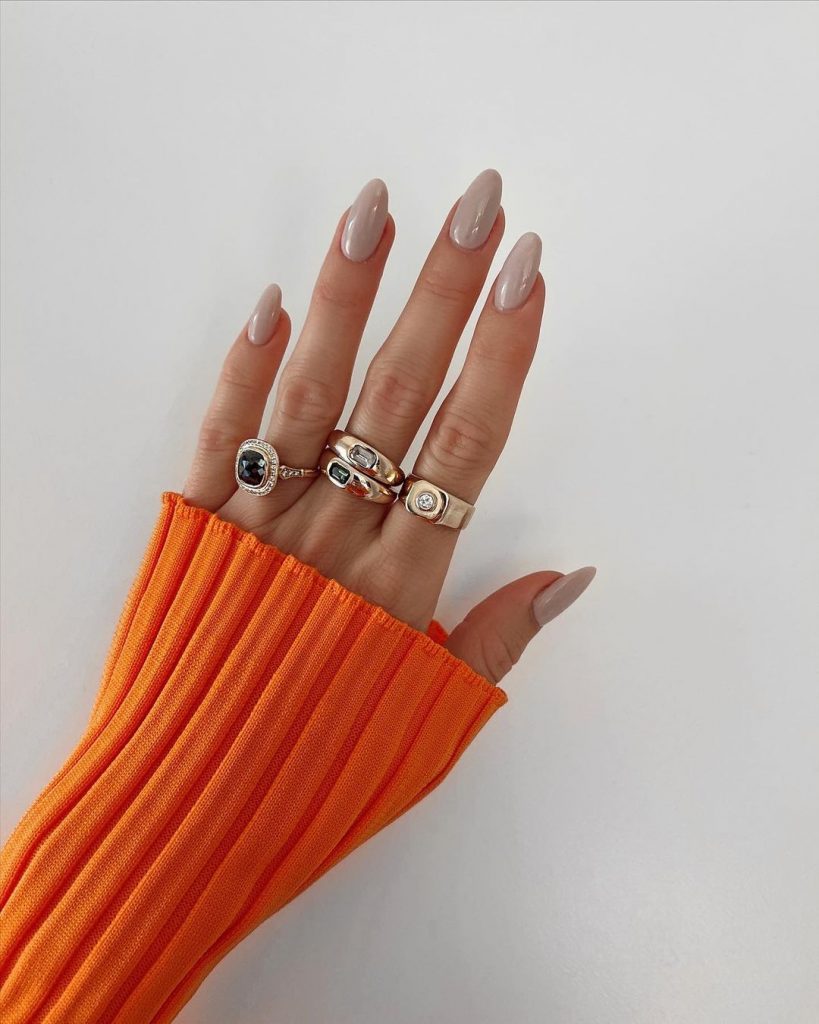
Iridescent Glow
These nails feature a soft, iridescent finish that gives off a subtle glow, perfect for adding a touch of elegance to any fall outfit. The almond shape accentuates the natural length of the nails, making them look elongated and refined. This minimalist yet sophisticated look is ideal for both casual and formal settings, offering a versatile option for any occasion.
Consumables:
- Iridescent nail polish (e.g., Essie Shine of the Times)
- Clear base coat (e.g., OPI Natural Nail Base Coat)
- Top coat (e.g., Seche Vite Dry Fast Top Nail Coat)
The iridescent finish adds a beautiful shimmer that catches the light and changes color, making your nails look magical. This design is perfect for those who prefer a more understated, classy look.
DIY Instructions:
- Apply a clear base coat to protect your nails.
- Apply two coats of iridescent nail polish, allowing each coat to dry completely.
- Finish with a top coat to seal the polish and enhance the shine.
Golden Glam
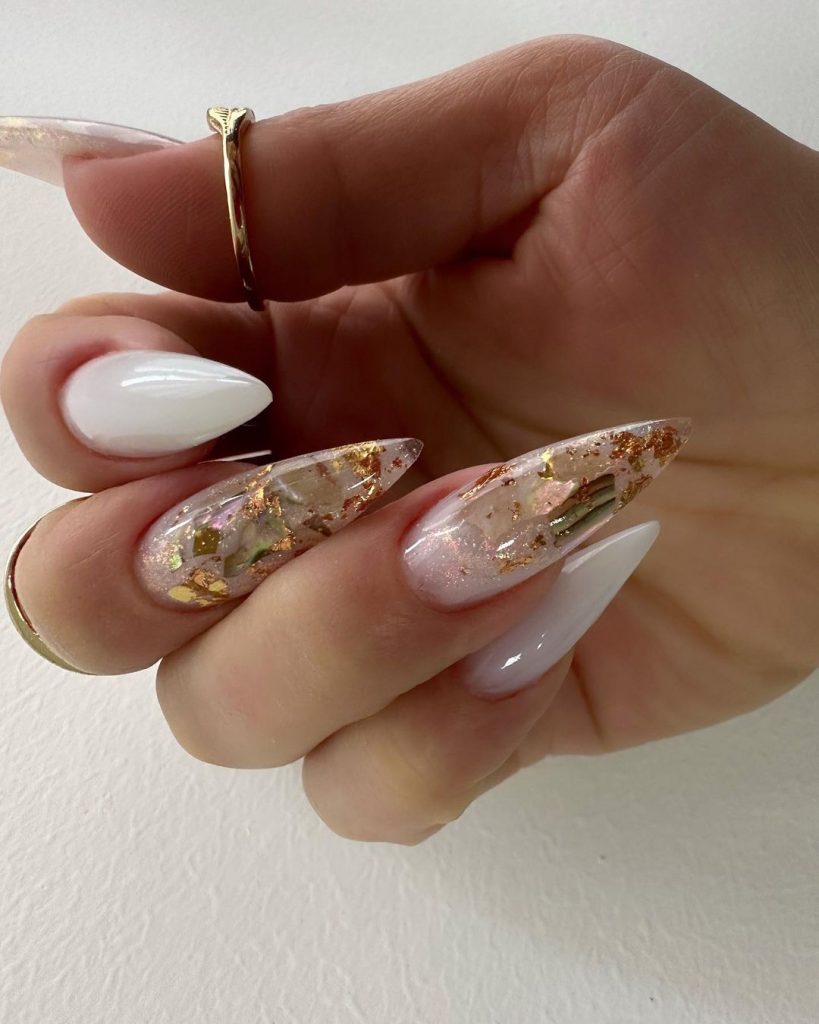
These nails are a showstopper with their blend of white and gold flakes, creating a luxurious and glamorous look. The almond shape, combined with the clear base and golden accents, gives a sophisticated and high-end feel. This design is perfect for special occasions and adds a touch of opulence to any ensemble.
Consumables:
- White nail polish (e.g., OPI Alpine Snow)
- Gold flake nail polish or gold foil (e.g., Zoya Gilty Pleasures)
- Clear base coat
- Top coat
The combination of white and gold is timeless and elegant. The gold flakes add a touch of luxury, making these nails perfect for events where you want to make a statement.
DIY Instructions:
- Apply a clear base coat to your nails.
- Paint your nails with two coats of white nail polish and let them dry.
- Apply gold flakes to the nails while the polish is still slightly tacky.
- Finish with a top coat to secure the gold flakes and add shine.
Pink Waves
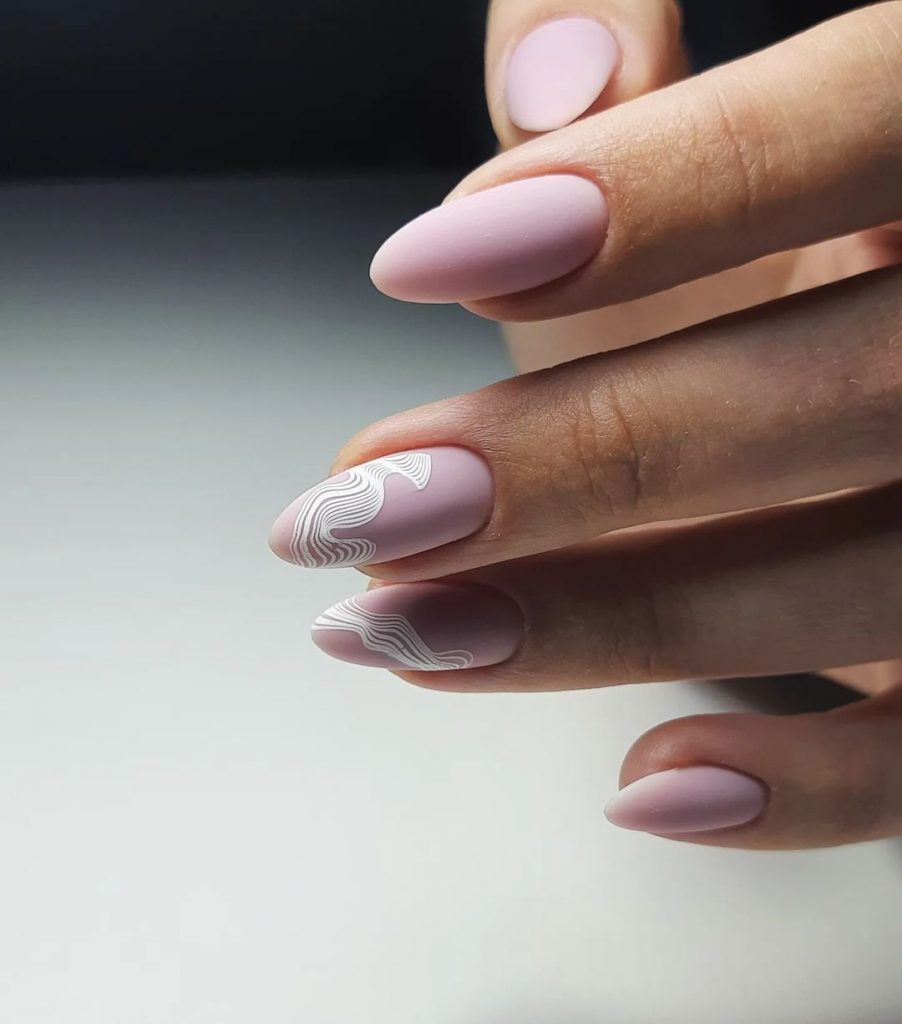
A soft pink matte base with delicate white wave patterns makes these nails a perfect choice for a chic and modern look. The almond shape adds elegance, while the simple yet artistic design offers a trendy and minimalist style.
Consumables:
- Matte pink nail polish (e.g., Essie Matte About You)
- White nail art pen (e.g., Sally Hansen I Heart Nail Art Pen)
- Clear base coat
- Top coat
This design is perfect for those who appreciate minimalism but still want a touch of creativity. The matte finish gives a sophisticated look, while the wave patterns add an artistic flair.
DIY Instructions:
- Apply a clear base coat to your nails.
- Paint your nails with two coats of matte pink nail polish and let it dry.
- Use a white nail art pen to draw delicate wave patterns on each nail.
- Allow the design to dry completely before sealing it with a top coat.
Pastel Perfection
These nails feature a beautiful mix of pastel colors, perfect for adding a pop of color to your fall wardrobe. The glossy finish enhances the soft hues, making your nails look vibrant and stylish. The almond shape adds a touch of elegance, making this design suitable for both casual and formal occasions.

Consumables:
- Pastel nail polishes in various colors (e.g., Essie Lilacism, Bikini So Teeny, Mint Candy Apple)
- Clear base coat
- Top coat
The pastel colors are perfect for transitioning into fall, providing a soft and cheerful look. This design is versatile and can be mixed and matched with different outfits for a fun and playful style.
DIY Instructions:
- Apply a clear base coat to protect your nails.
- Paint each nail with a different pastel color, applying two coats for full coverage.
- Finish with a top coat to add shine and protect the polish.
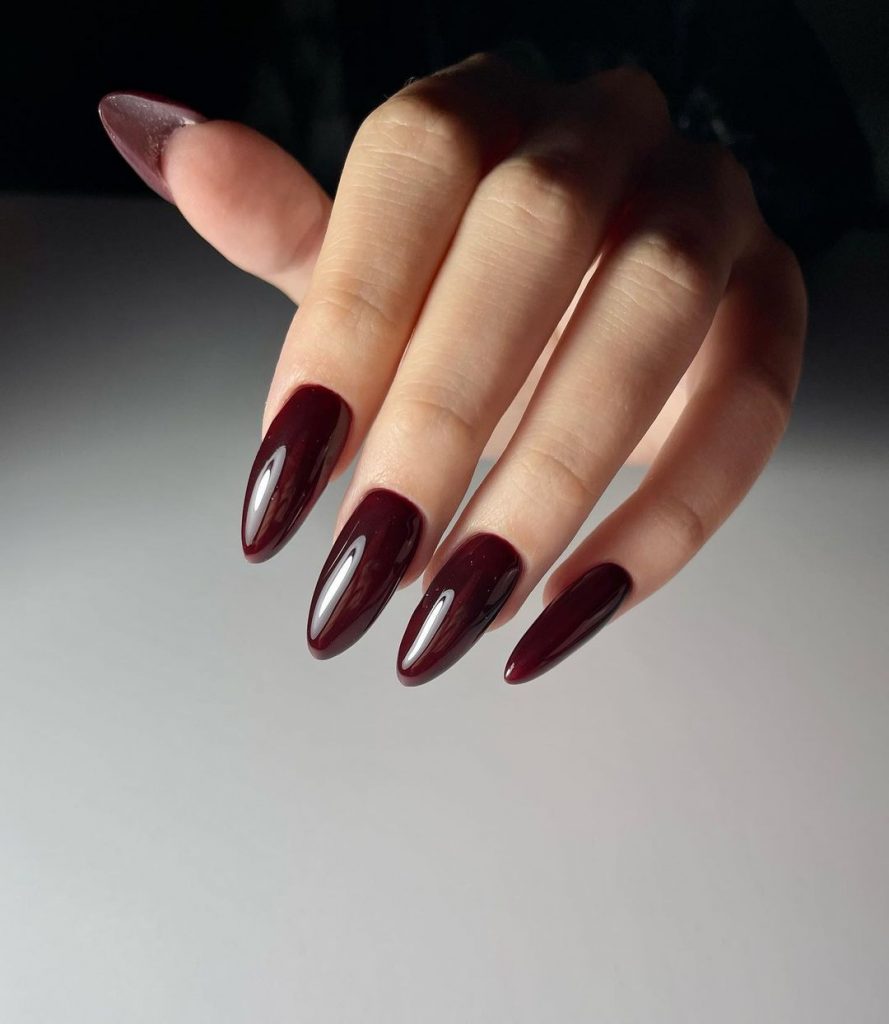
Dark Burgundy
Rich and sophisticated, these dark burgundy nails are perfect for fall. The deep, glossy color exudes elegance and is perfect for adding a touch of drama to your look. The almond shape further enhances the chic and refined appearance of this manicure.
Consumables:
- Dark burgundy nail polish (e.g., OPI Malaga Wine)
- Clear base coat
- Top coat
The deep burgundy color is a classic fall shade that never goes out of style. It’s bold yet elegant, making it perfect for any occasion from a night out to a formal event.
DIY Instructions:
- Start with a clear base coat to protect your nails.
- Apply two coats of dark burgundy nail polish and let it dry thoroughly.
- Seal the manicure with a top coat to enhance the shine and durability.
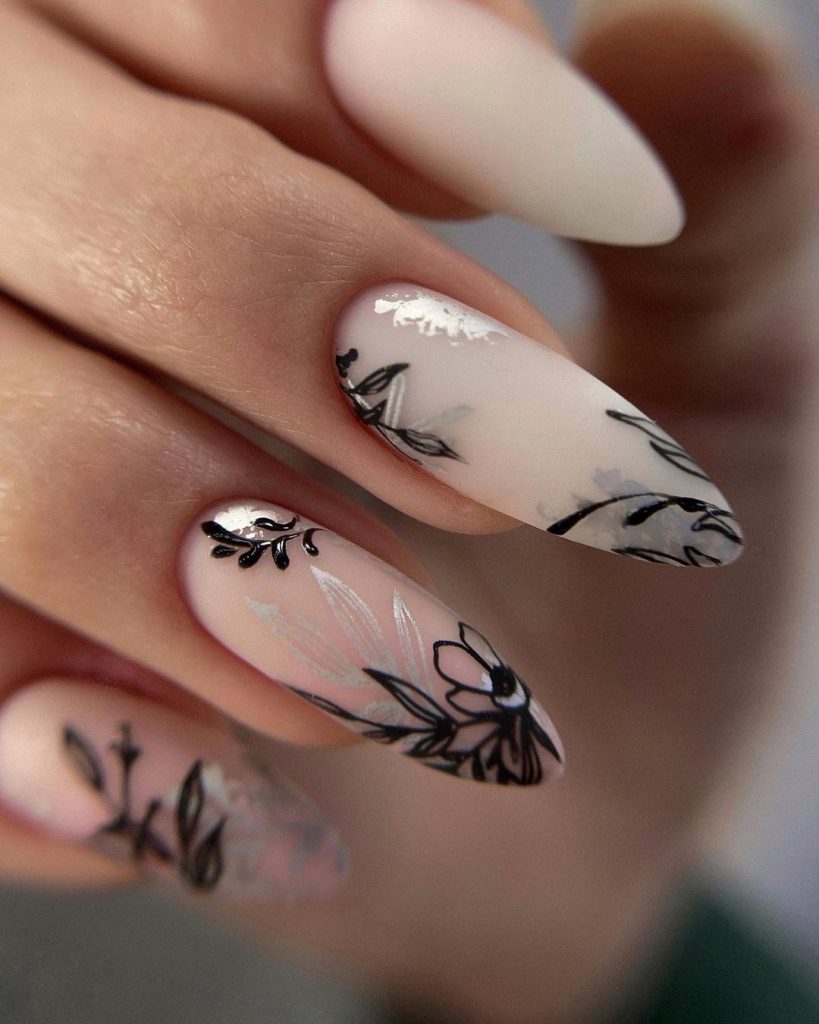
Floral Fantasy
This nail design features a soft nude base with intricate black floral patterns, giving a delicate and feminine look. The matte finish adds a touch of sophistication, while the almond shape enhances the elegance of the nails. This design is perfect for those who appreciate a subtle yet artistic manicure.
Consumables:
- Nude matte nail polish (e.g., Essie Topless & Barefoot)
- Black nail art pen (e.g., Sally Hansen I Heart Nail Art Pen)
- Clear base coat
- Top coat
The combination of nude and black is timeless, and the floral patterns add a romantic and artistic touch. This design is perfect for both everyday wear and special occasions, providing a classy and elegant look.
DIY Instructions:
- Apply a clear base coat to protect your nails.
- Paint your nails with two coats of nude matte nail polish and let it dry.
- Use a black nail art pen to draw intricate floral patterns on each nail.
- Allow the design to dry completely before sealing it with a top coat.
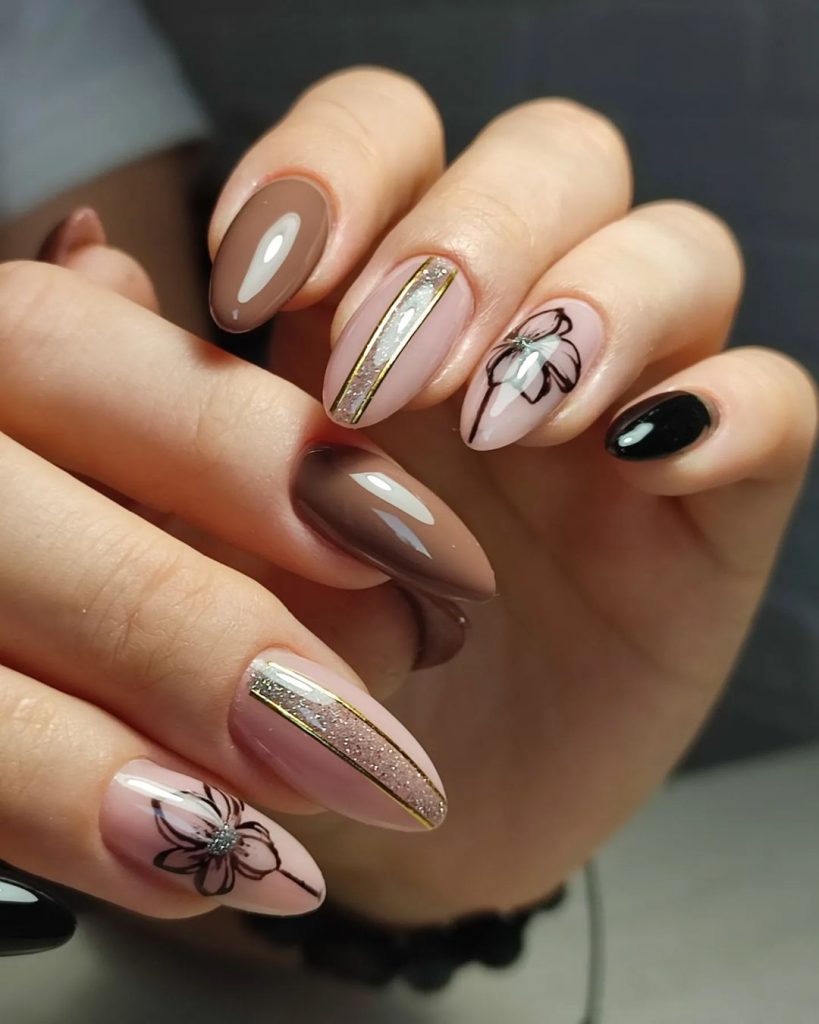
Glitter and Glam
This nail design combines glossy nude and dark brown polishes with a touch of gold glitter, creating a glamorous and eye-catching look. The almond shape and glossy finish make the nails look sophisticated and chic. Perfect for a night out or a special event, this design is sure to turn heads.
Consumables:
- Nude nail polish (e.g., Essie Topless & Barefoot)
- Dark brown nail polish (e.g., OPI Suzi Loves Cowboys)
- Gold glitter nail polish (e.g., Zoya Gilty Pleasures)
- Clear base coat
- Top coat
The mix of nude, dark brown, and gold glitter creates a rich and luxurious look. This design is perfect for adding a touch of glamour to your outfit, making it ideal for special occasions or festive events.
DIY Instructions:
- Apply a clear base coat to your nails.
- Paint your nails with alternating coats of nude and dark brown nail polish, allowing each coat to dry completely.
- Apply gold glitter polish to the accent nails for a touch of sparkle.
- Finish with a top coat to seal the design and add shine.
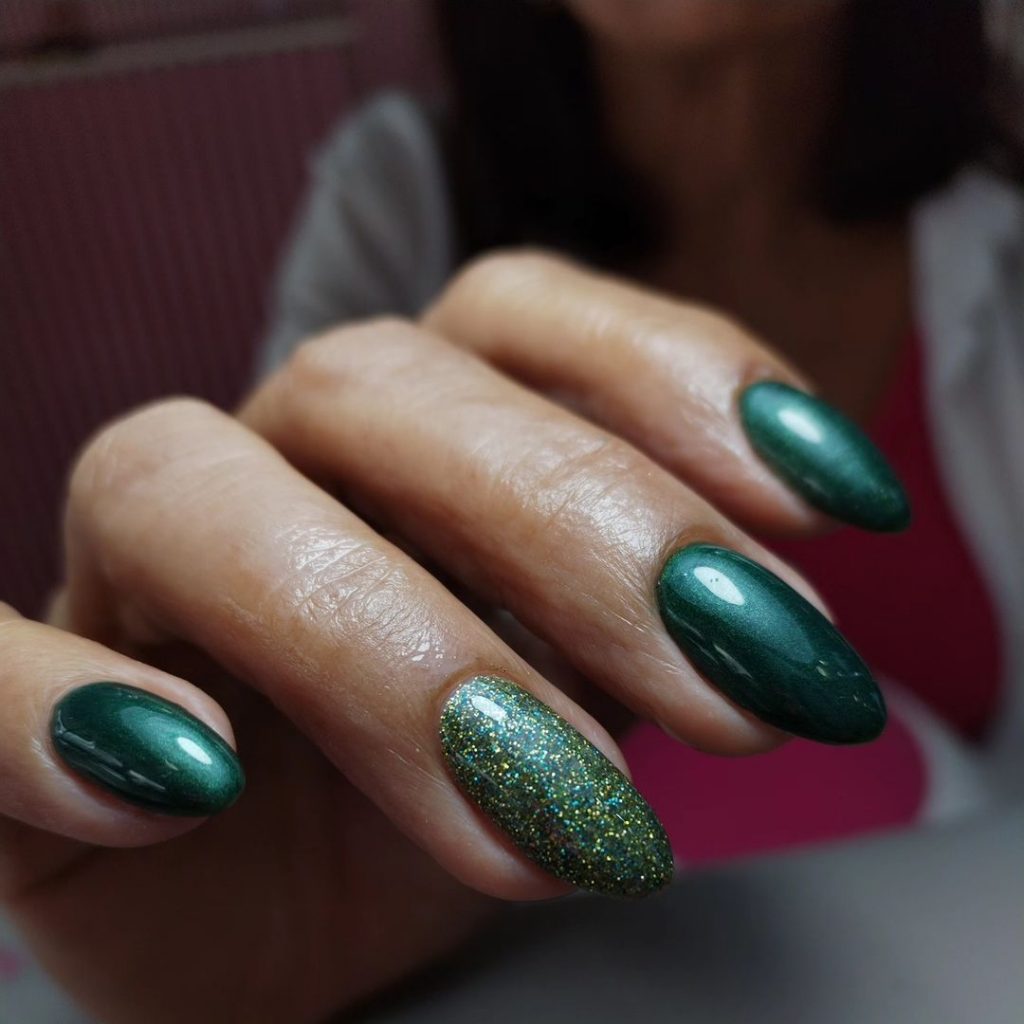
Emerald Elegance
These nails feature a deep emerald green polish with a touch of glitter, perfect for adding a rich and elegant look to your fall manicure. The almond shape and glossy finish enhance the sophistication of the design, making it a standout choice for any occasion.
Consumables:
- Emerald green nail polish (e.g., Essie Going Incognito)
- Green glitter polish (e.g., China Glaze Emerald Sparkle)
- Clear base coat
- Top coat
The emerald green color is both bold and sophisticated, perfect for the fall season. The glitter accent adds a touch of glamour, making this design versatile enough for both day and night looks.
DIY Instructions:
- Apply a clear base coat to protect your nails.
- Paint your nails with two coats of emerald green polish and let it dry completely.
- Apply green glitter polish to one or two accent nails for added sparkle.
- Finish with a top coat to seal the design and enhance the shine.
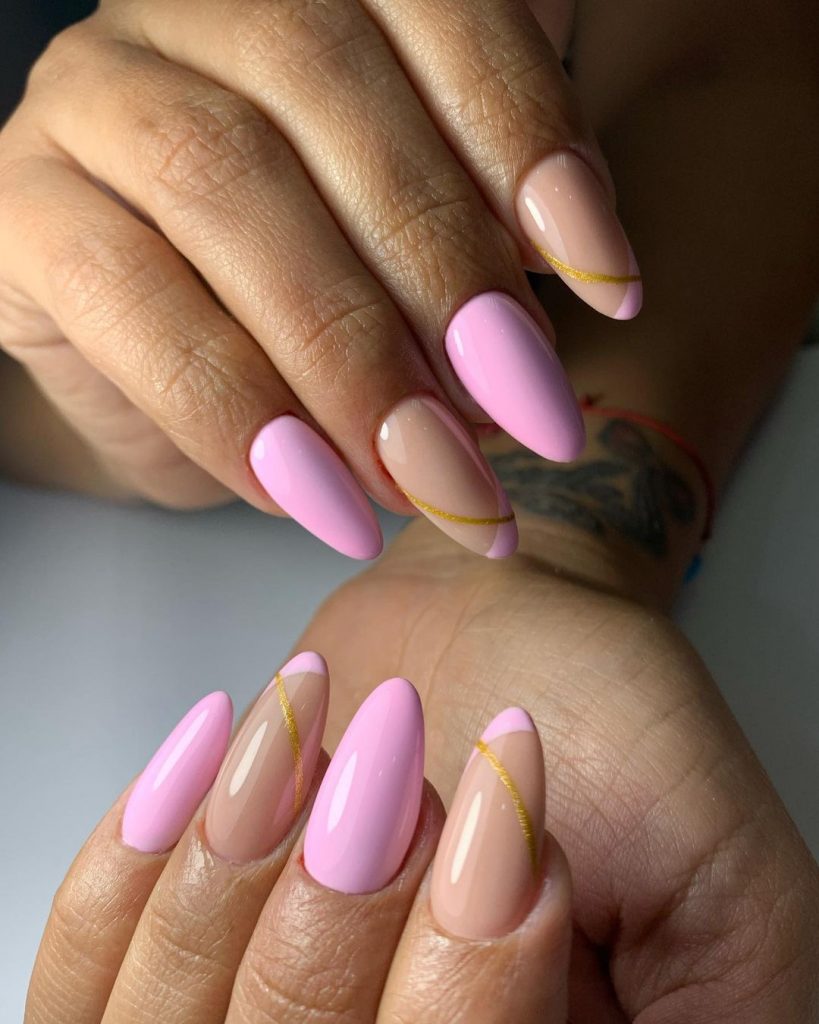
Pink Perfection
This nail design features a lovely combination of nude and pink with delicate gold lines, creating a chic and feminine look. The almond shape and glossy finish make these nails perfect for any occasion, from casual outings to more formal events.
Consumables:
- Nude nail polish (e.g., OPI Bubble Bath)
- Pink nail polish (e.g., Essie Fiji)
- Gold striping tape
- Clear base coat
- Top coat
The blend of nude and pink with gold accents creates a beautiful and sophisticated look. This design is perfect for those who love a touch of elegance and glamour in their manicures.
DIY Instructions:
- Apply a clear base coat to protect your nails.
- Paint your nails with alternating coats of nude and pink nail polish, allowing each coat to dry completely.
- Apply gold striping tape to create delicate lines on the nails.
- Finish with a top coat to seal the design and add shine.
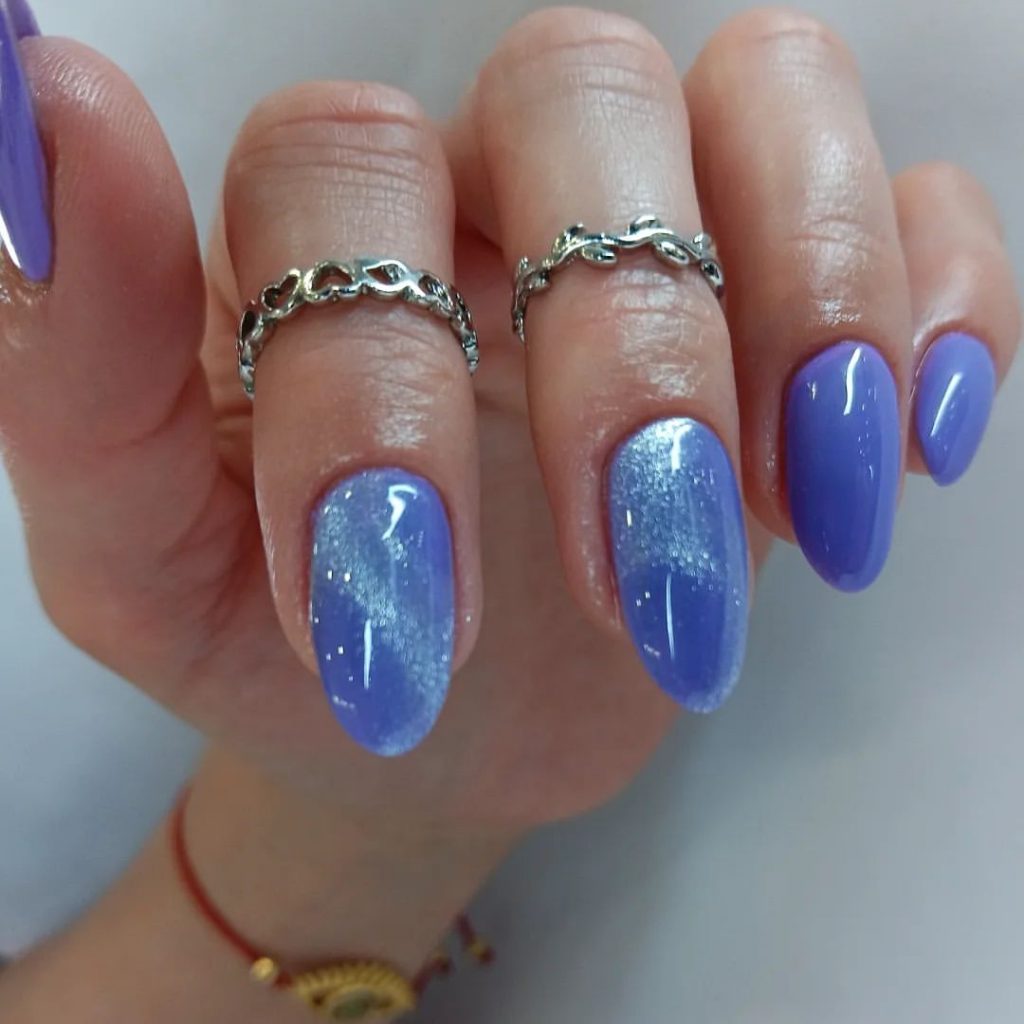
Lavender Dreams
These nails showcase a stunning lavender hue with a touch of shimmer, perfect for adding a dreamy and elegant look to your fall manicure. The almond shape and glossy finish enhance the sophistication of the design, making it a standout choice for any occasion.
Consumables:
- Lavender nail polish (e.g., Essie Lilacism)
- Shimmer top coat (e.g., OPI Fairy Dust)
- Clear base coat
- Top coat
The lavender color is both calming and sophisticated, making it a perfect choice for the fall season. The shimmer adds a touch of magic, making this design ideal for both day and night looks.
DIY Instructions:
- Apply a clear base coat to protect your nails.
- Paint your nails with two coats of lavender polish and let it dry completely.
- Apply a shimmer top coat for added sparkle.
- Finish with a top coat to seal the design and enhance the shine.
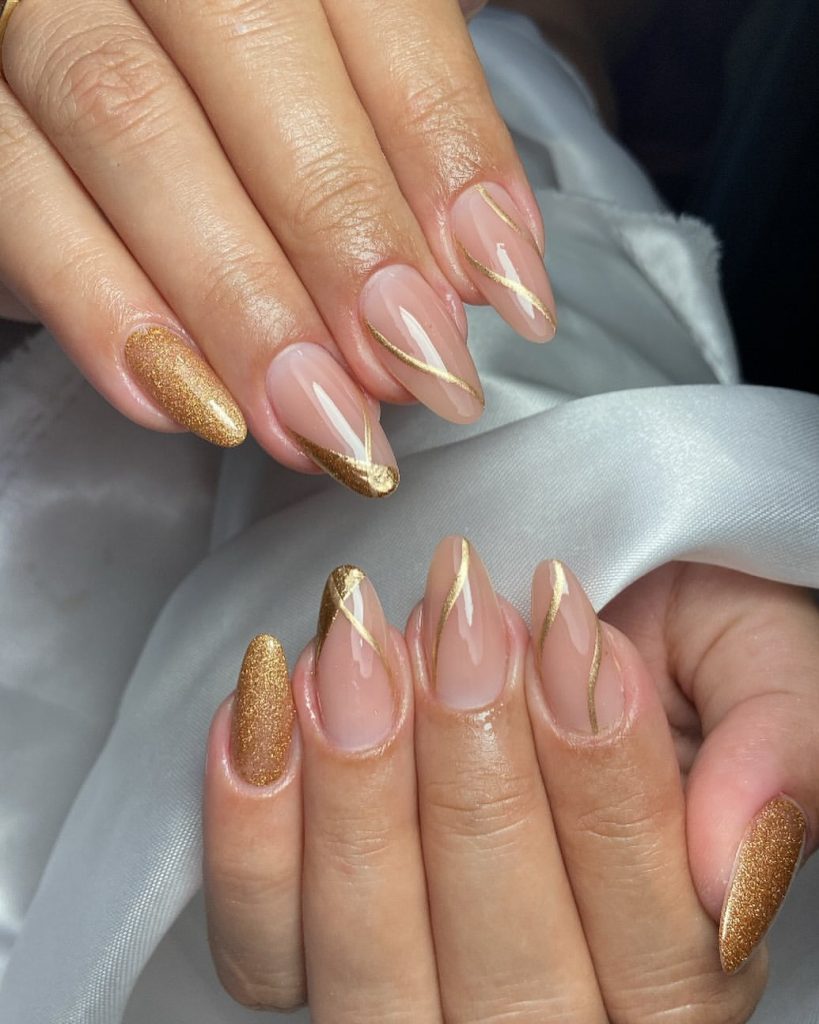
Golden Glamour
These nails showcase a stunning combination of nude and gold, perfect for an elegant and glamorous look. The almond shape enhances the natural beauty of the nails, while the gold glitter and delicate lines add a touch of sophistication and shine. This design is ideal for both casual and formal occasions, making your nails look effortlessly chic.
Consumables:
- Nude nail polish (e.g., Essie Ballet Slippers)
- Gold glitter nail polish (e.g., Zoya Gilty Pleasures)
- Gold striping tape
- Clear base coat
- Top coat
The combination of nude and gold is timeless and elegant. The gold glitter adds a touch of luxury, making this design perfect for special occasions or festive events.
DIY Instructions:
- Apply a clear base coat to protect your nails.
- Paint your nails with two coats of nude nail polish and let them dry.
- Use gold striping tape to create delicate lines and apply gold glitter polish on accent nails.
- Finish with a top coat to seal the design and add shine.
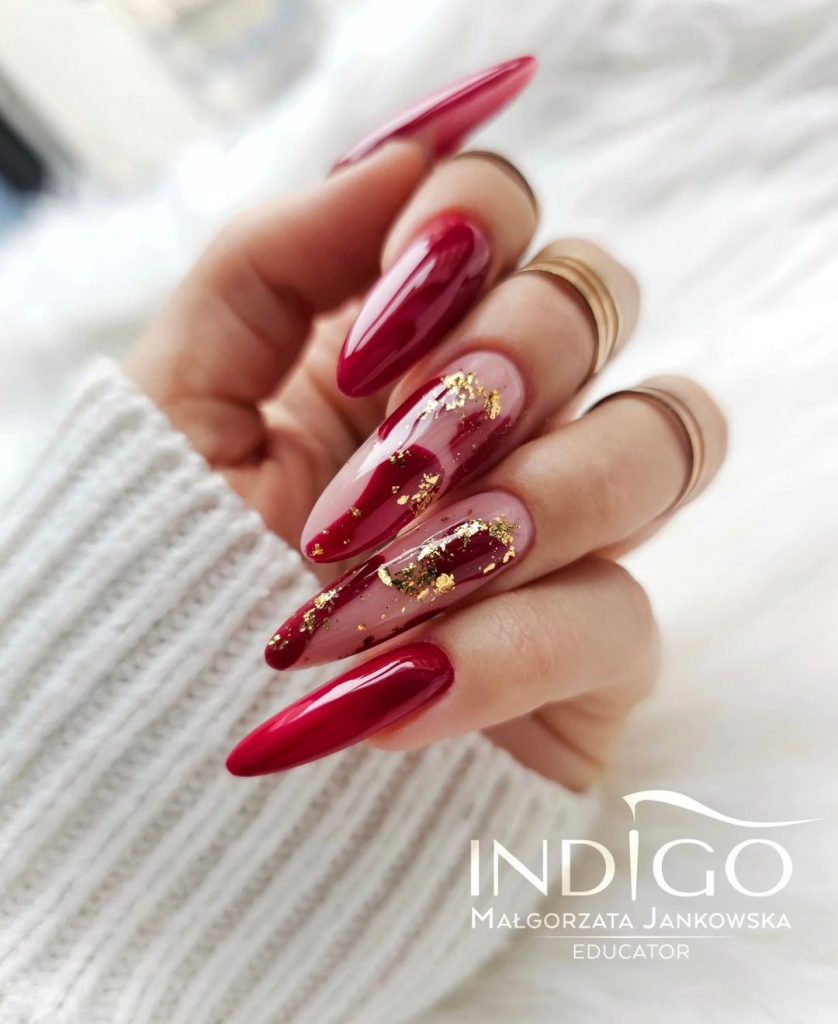
Ruby Red Delight
These nails feature a bold and beautiful ruby red polish with gold foil accents, creating a striking and luxurious look. The almond shape and glossy finish add a touch of sophistication, making this design perfect for making a statement. Ideal for the holiday season or any special event, these nails are sure to turn heads.
Consumables:
- Ruby red nail polish (e.g., OPI Big Apple Red)
- Gold foil flakes
- Clear base coat
- Top coat
The rich red color is perfect for fall and the holiday season. The gold foil adds a festive touch, making these nails ideal for celebrations and special occasions.
DIY Instructions:
- Apply a clear base coat to protect your nails.
- Paint your nails with two coats of ruby red nail polish and let them dry.
- Apply gold foil flakes to the accent nails while the polish is still tacky.
- Finish with a top coat to seal the design and enhance the shine.
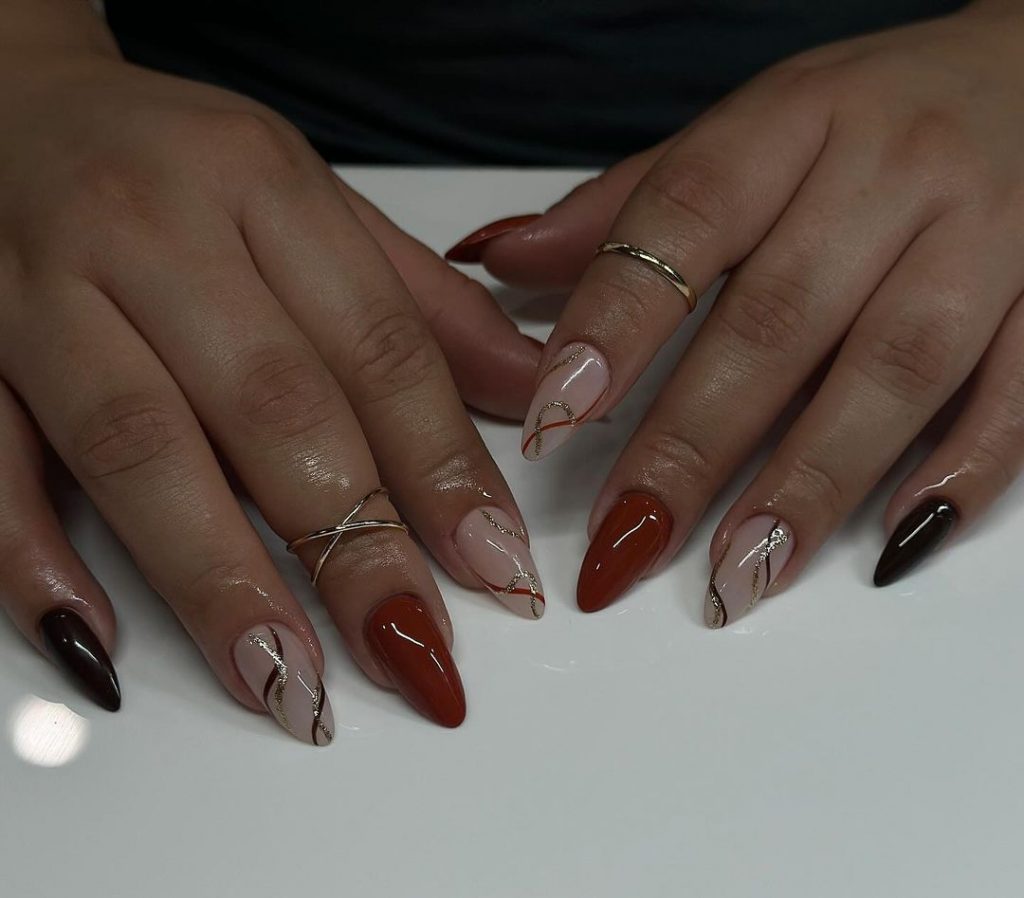
Autumn Harvest
These nails showcase a warm and cozy color palette with shades of brown, orange, and nude, accented with gold lines. The almond shape and glossy finish create a sophisticated look that is perfect for the fall season. This design is versatile and can be worn for both casual and formal occasions.
Consumables:
- Nude nail polish (e.g., Essie Ballet Slippers)
- Brown nail polish (e.g., OPI Chocolate Moose)
- Orange nail polish (e.g., Essie Playing Koi)
- Gold striping tape
- Clear base coat
- Top coat
The warm colors are perfect for fall, and the gold lines add a touch of elegance. This design is ideal for those who want to embrace the autumn season with style.
DIY Instructions:
- Apply a clear base coat to protect your nails.
- Paint your nails with alternating coats of nude, brown, and orange nail polish, allowing each coat to dry completely.
- Use gold striping tape to create delicate lines on the nails.
- Finish with a top coat to seal the design and add shine.
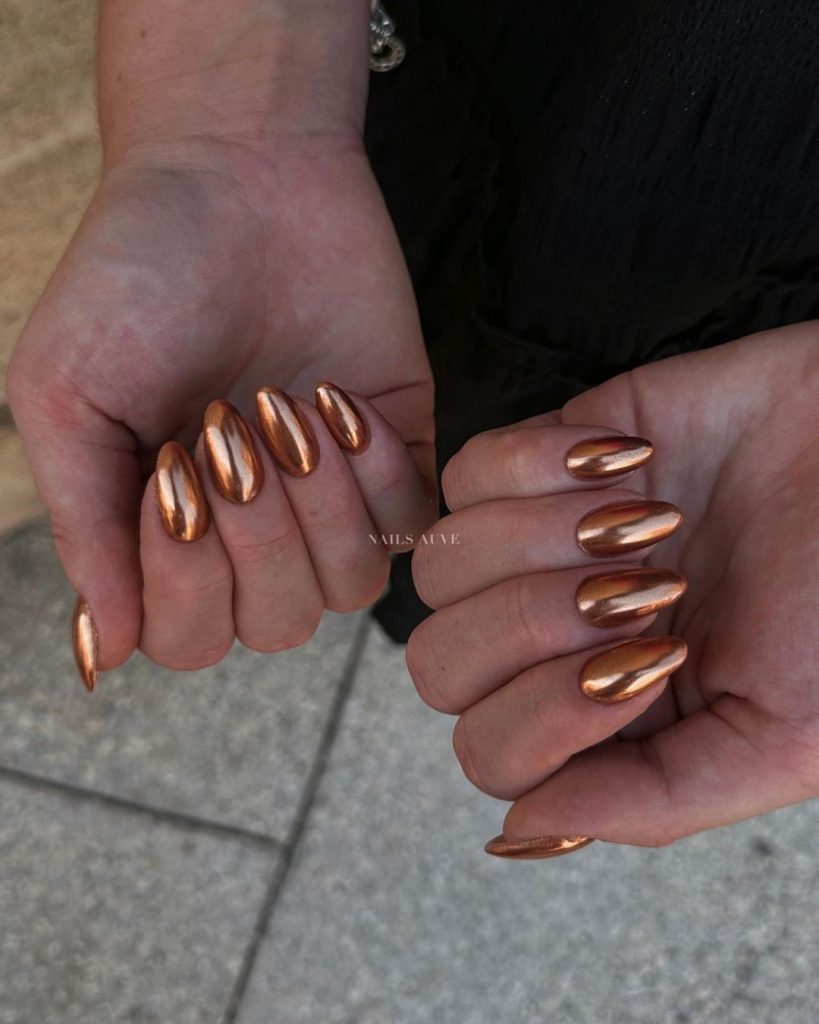
Copper Shine
These nails feature a beautiful copper chrome finish, perfect for adding a touch of metallic shine to your fall manicure. The almond shape and glossy finish enhance the sophistication of the design, making it a standout choice for any occasion. This design is perfect for those who love a bold and trendy look.
Consumables:
- Copper chrome nail polish (e.g., Essie Penny Talk)
- Clear base coat
- Top coat
The copper chrome finish is bold and trendy, making it perfect for those who want to make a statement with their nails. This design is versatile and can be paired with various outfits for a chic and stylish look.
DIY Instructions:
- Apply a clear base coat to protect your nails.
- Paint your nails with two coats of copper chrome nail polish and let them dry.
- Finish with a top coat to seal the design and enhance the shine.
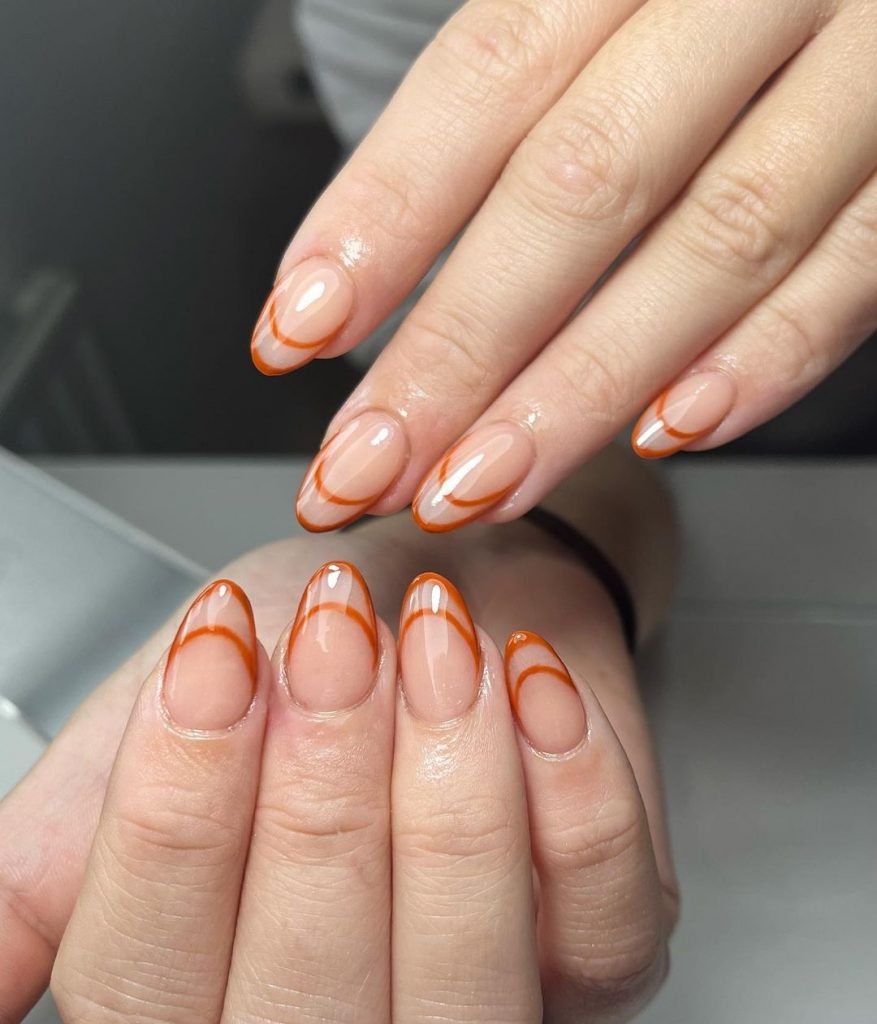
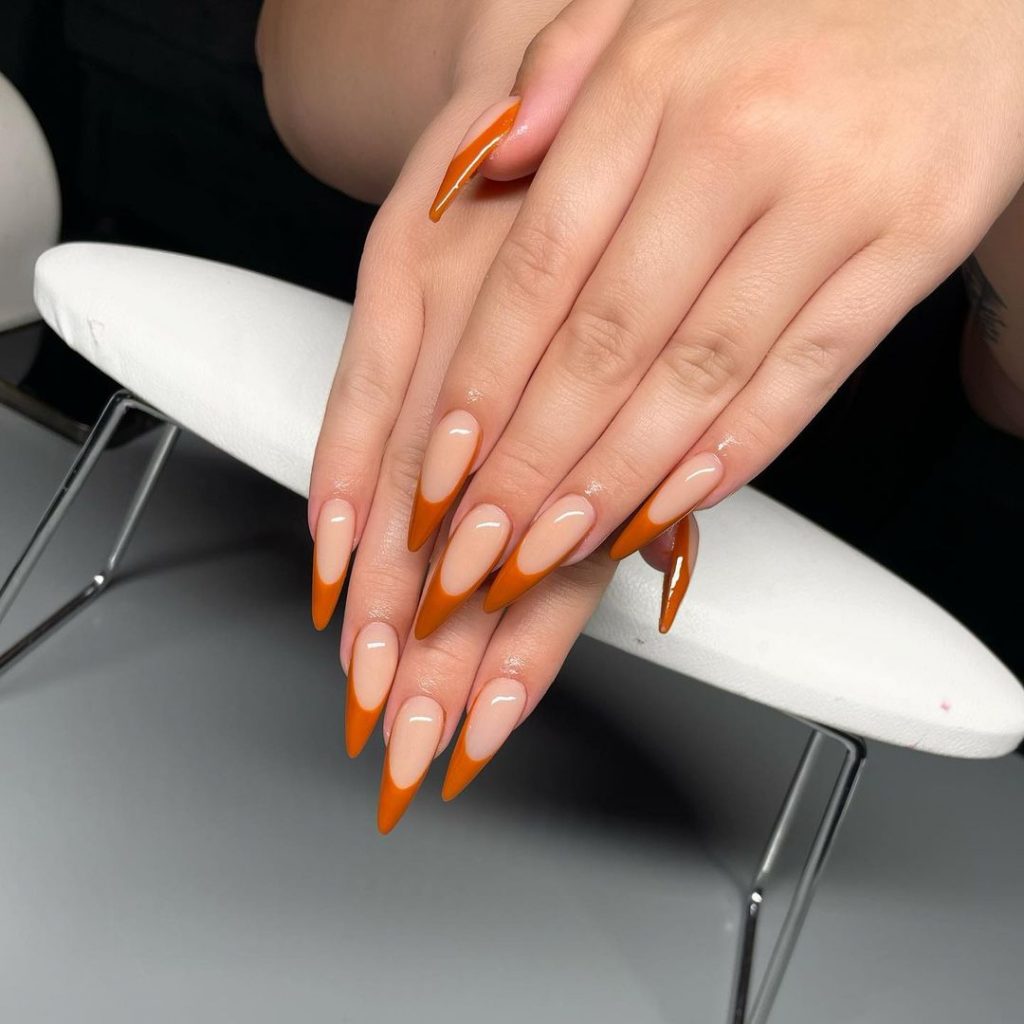
Tangerine Twist
These nails showcase a fun and vibrant tangerine color with a unique twist design, perfect for adding a pop of color to your fall manicure. The almond shape and glossy finish create a playful and stylish look that is sure to stand out.
Consumables:
- Tangerine nail polish (e.g., Essie Meet Me at Sunset)
- Clear base coat
- Top coat
The tangerine color is bright and cheerful, making it perfect for adding a pop of color to your fall look. The unique twist design adds a playful touch, making this design ideal for those who love fun and trendy nails.
DIY Instructions:
- Apply a clear base coat to protect your nails.
- Paint your nails with two coats of tangerine nail polish and let them dry.
- Use a fine brush to create the twist design on the nails.
- Finish with a top coat to seal the design and add shine.
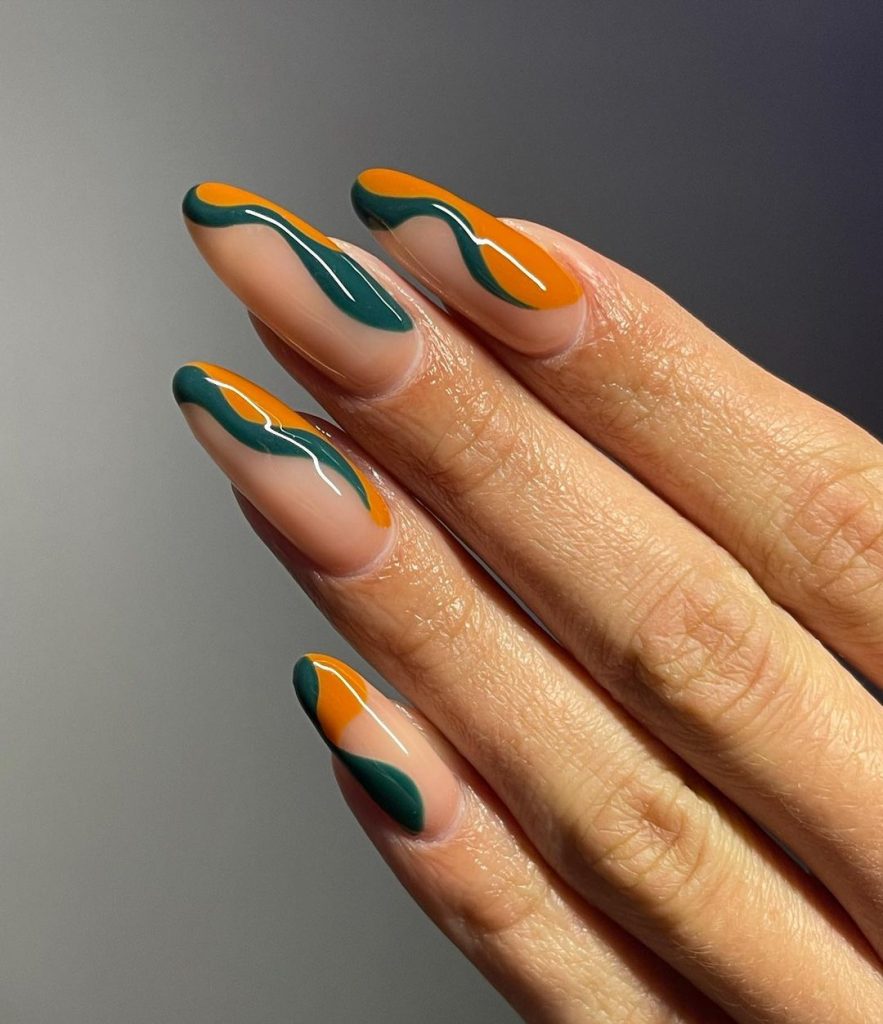
Forest and Sunset
These nails feature a striking combination of forest green and sunset orange, creating a bold and vibrant design. The swirling patterns add a dynamic and artistic touch, making this manicure perfect for those who love to make a statement. The almond shape enhances the overall elegance, while the glossy finish ensures the colors pop.
Consumables:
- Forest green nail polish (e.g., OPI Stay Off the Lawn)
- Sunset orange nail polish (e.g., Essie Playing Koi)
- Clear base coat
- Top coat
The contrast between the green and orange is eye-catching and perfect for the fall season. The swirling patterns add a unique and artistic flair, making this design a standout choice for those who love bold and vibrant nails.
DIY Instructions:
- Apply a clear base coat to protect your nails.
- Paint your nails with a nude base color and let it dry.
- Use a fine brush to create swirling patterns with the green and orange polishes.
- Finish with a top coat to seal the design and add shine.
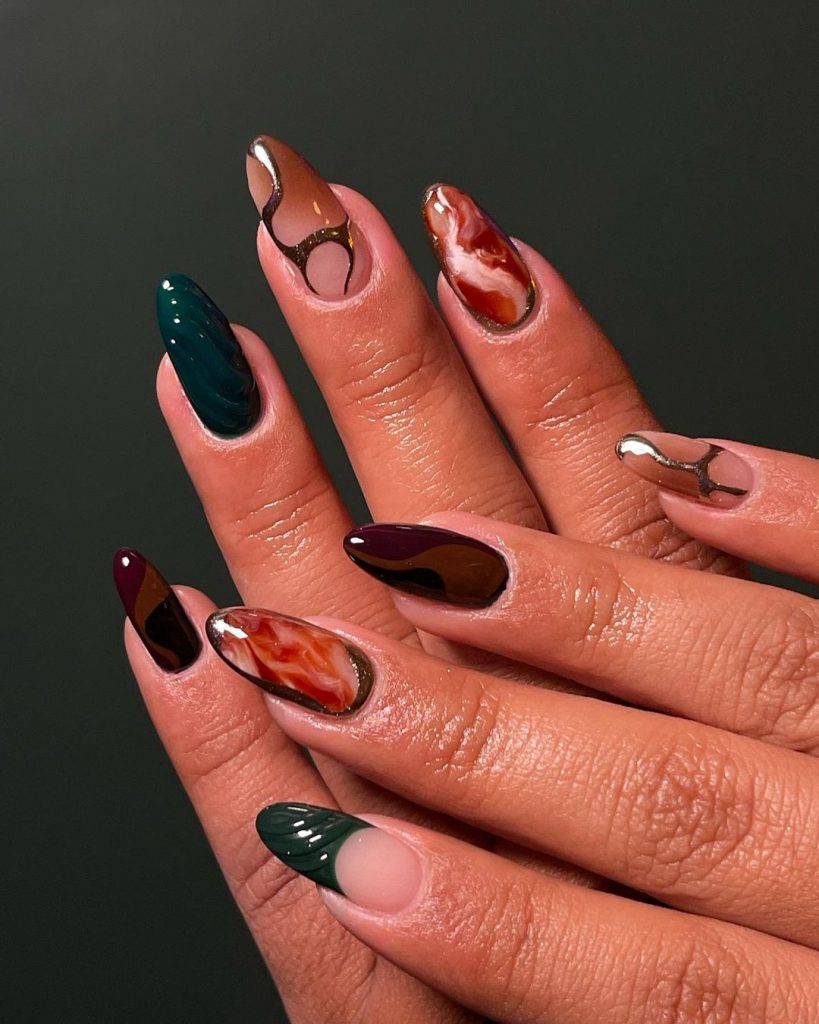
Earthy Tones
These nails showcase a mix of earthy tones, including rich browns, deep greens, and warm terracottas. The marbled effect on some nails adds a touch of artistry, while the almond shape provides elegance. This design is perfect for those who appreciate the natural beauty of fall colors.
Consumables:
- Brown nail polish (e.g., OPI Chocolate Moose)
- Deep green nail polish (e.g., Essie Going Incognito)
- Terracotta nail polish (e.g., Zoya Tanzy)
- Clear base coat
- Top coat
The combination of earthy tones is both sophisticated and perfect for fall. The marbled effect adds a touch of creativity, making this design ideal for those who love a natural yet artistic look.
DIY Instructions:
- Apply a clear base coat to protect your nails.
- Paint your nails with alternating colors of brown, green, and terracotta.
- Create a marbled effect on some nails using a fine brush.
- Finish with a top coat to seal the design and enhance the shine.
Pumpkin Spice
This nail design features a rich pumpkin spice color with a sharp and glossy finish. The almond shape elongates the fingers, giving a sophisticated look that is perfect for the fall season. This simple yet bold design is ideal for those who love a classic autumn manicure.
Consumables:
- Pumpkin spice nail polish (e.g., Essie Playing Koi)
- Clear base coat
- Top coat
The pumpkin spice color is a quintessential fall shade, perfect for capturing the essence of the season. The glossy finish adds elegance, making this design perfect for any autumn occasion.
DIY Instructions:
- Apply a clear base coat to protect your nails.
- Paint your nails with two coats of pumpkin spice nail polish and let it dry completely.
- Finish with a top coat to seal the design and add shine.
Nude Perfection
These nails feature a classic nude polish, perfect for a minimalist and sophisticated look. The almond shape adds elegance, while the glossy finish provides a clean and polished appearance. This design is versatile and can be worn for any occasion, from casual to formal.
Consumables:
- Nude nail polish (e.g., OPI Bubble Bath)
- Clear base coat
- Top coat
The nude polish is timeless and elegant, perfect for any season. This minimalist design is ideal for those who prefer a clean and sophisticated look.
DIY Instructions:
- Apply a clear base coat to protect your nails.
- Paint your nails with two coats of nude nail polish and let it dry completely.
- Finish with a top coat to seal the design and enhance the shine.
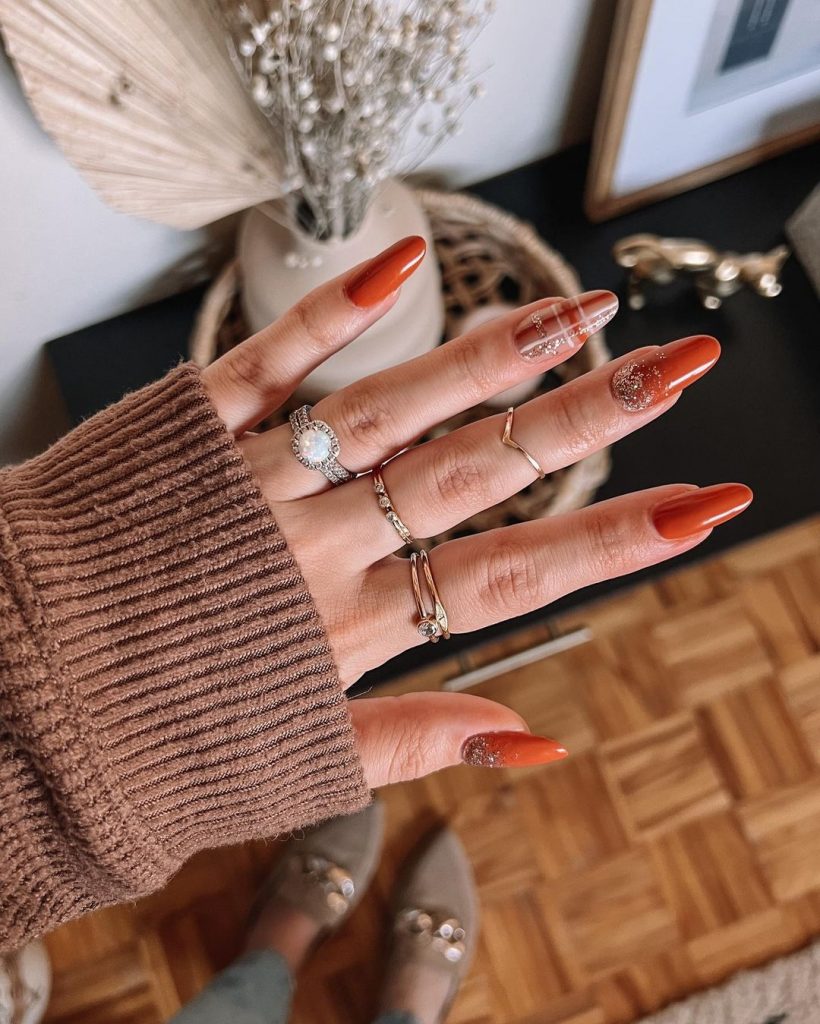
Autumn Glow
This nail design combines a rich burnt orange with glitter accents, creating a warm and festive look perfect for the fall season. The almond shape and glossy finish add elegance, making this design suitable for both casual and special occasions.
Consumables:
- Burnt orange nail polish (e.g., Essie Playing Koi)
- Glitter nail polish (e.g., China Glaze Fairy Dust)
- Clear base coat
- Top coat
The burnt orange color is perfect for fall, and the glitter accents add a festive touch. This design is ideal for those who want a warm and glamorous manicure for the autumn season.
DIY Instructions:
- Apply a clear base coat to protect your nails.
- Paint your nails with two coats of burnt orange nail polish and let it dry completely.
- Apply glitter polish to the accent nails for added sparkle.
- Finish with a top coat to seal the design and enhance the shine.
Save Pin