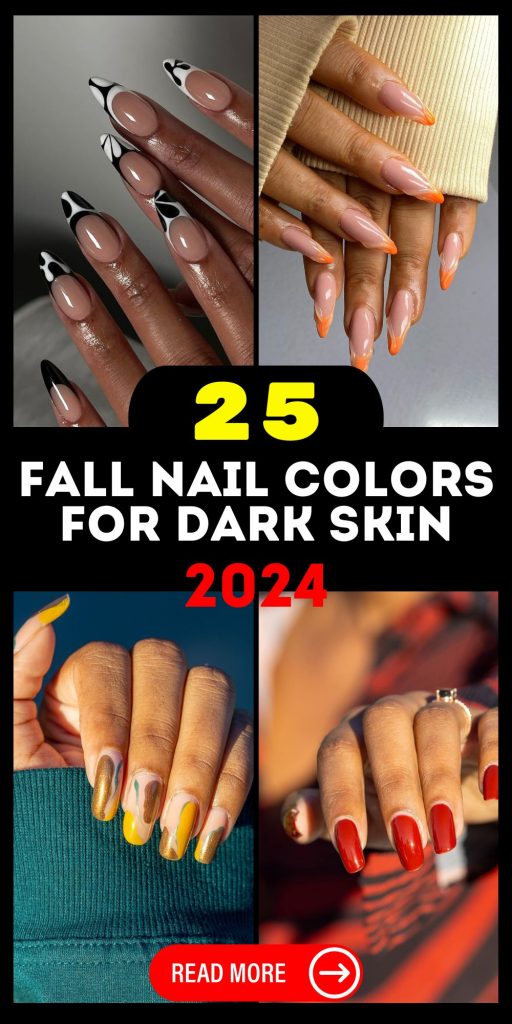
Fall is the season of transformation, where the leaves change their hues and so does our style. One of the most exciting transitions of the season is the shift in nail colors. For those with dark skin, finding the right fall nail colors can make your hands stand out in the best way possible. Are you ready to discover the top shades that will have everyone asking, “Where did you get those done?”
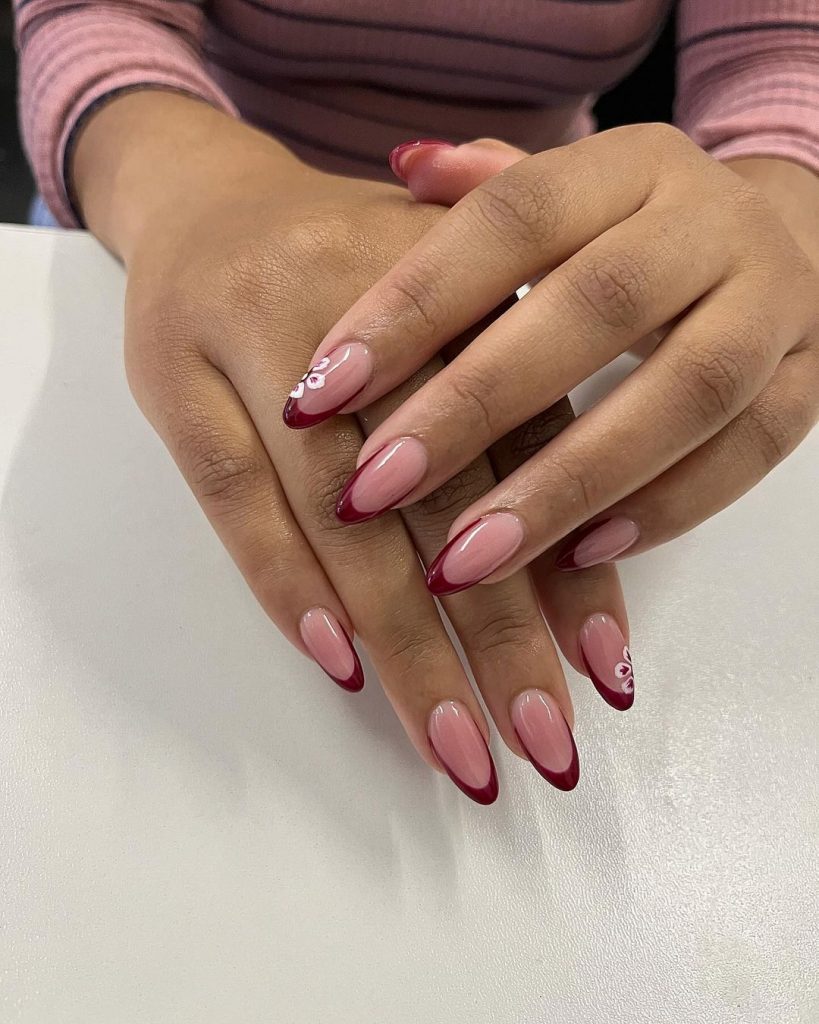
Deep Burgundy Elegance
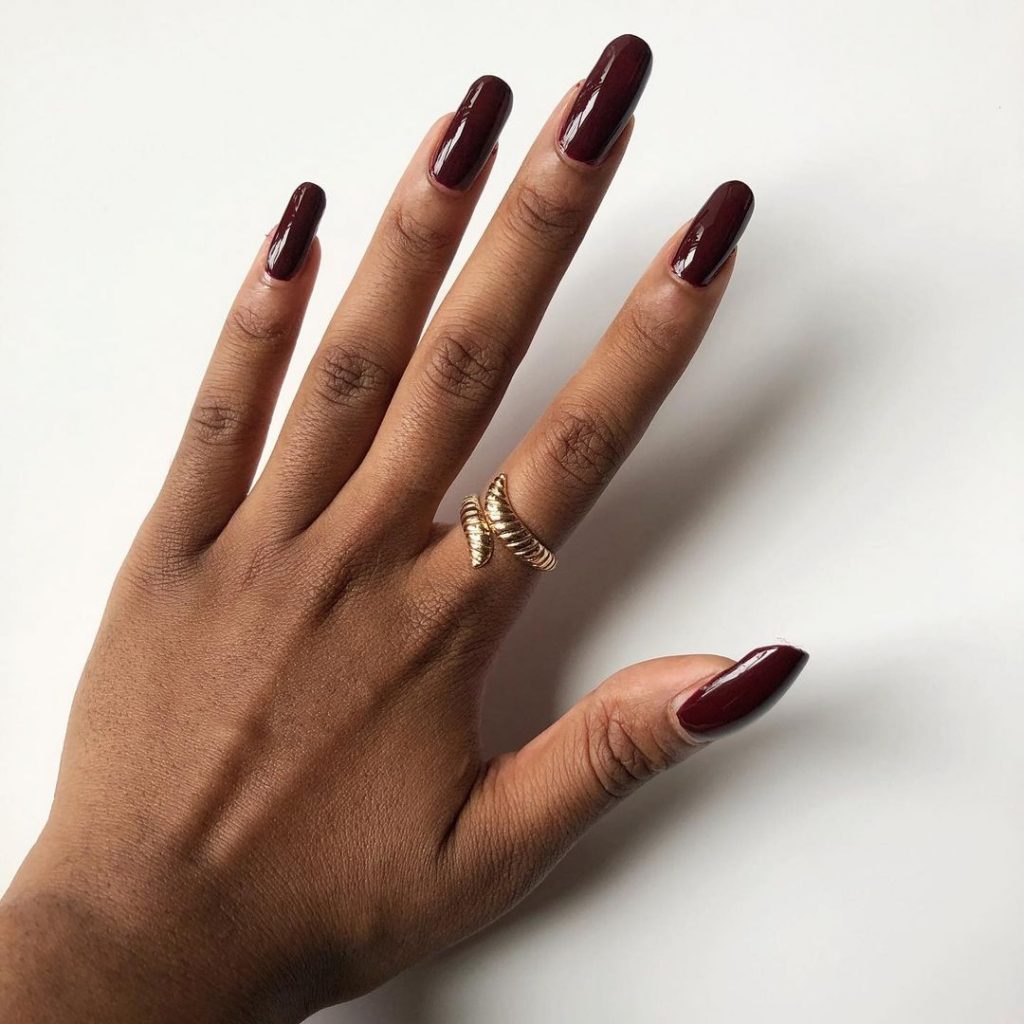
Deep burgundy is a timeless fall color, and for dark skin, it’s a match made in manicure heaven. This rich tone exudes sophistication while perfectly complementing deeper skin tones. The almond-shaped nails, polished to perfection with a high-gloss finish, add an air of elegance. The subtle floral accent on the ring finger adds just the right amount of flair without overpowering the overall look, making it ideal for both everyday wear and special occasions.
Consumables and Recommendations
- Burgundy Nail Polish: Essie “Bordeaux” – a deep, wine-inspired shade.
- Top Coat: Seche Vite Dry Fast Top Nail Coat – for a high-gloss finish that lasts.
- Nail Art Pen: Sally Hansen Nail Art Pen in White – perfect for delicate floral designs.
- Nail Files and Buffers: OPI Crystal Nail File for shaping, and a buffer block for a smooth base.
DIY Instructions
- Prep your nails: File them into an almond shape and buff the surface for a smooth application.
- Apply a base coat: This helps prevent staining and ensures your polish goes on evenly.
- First coat of burgundy polish: Start with a thin layer, let it dry, then apply a second coat for full opacity.
- Create the floral design: Use the nail art pen to draw delicate flowers on your ring finger, or wherever you’d like an accent.
- Seal the deal: Apply the top coat for a glossy, long-lasting finish.
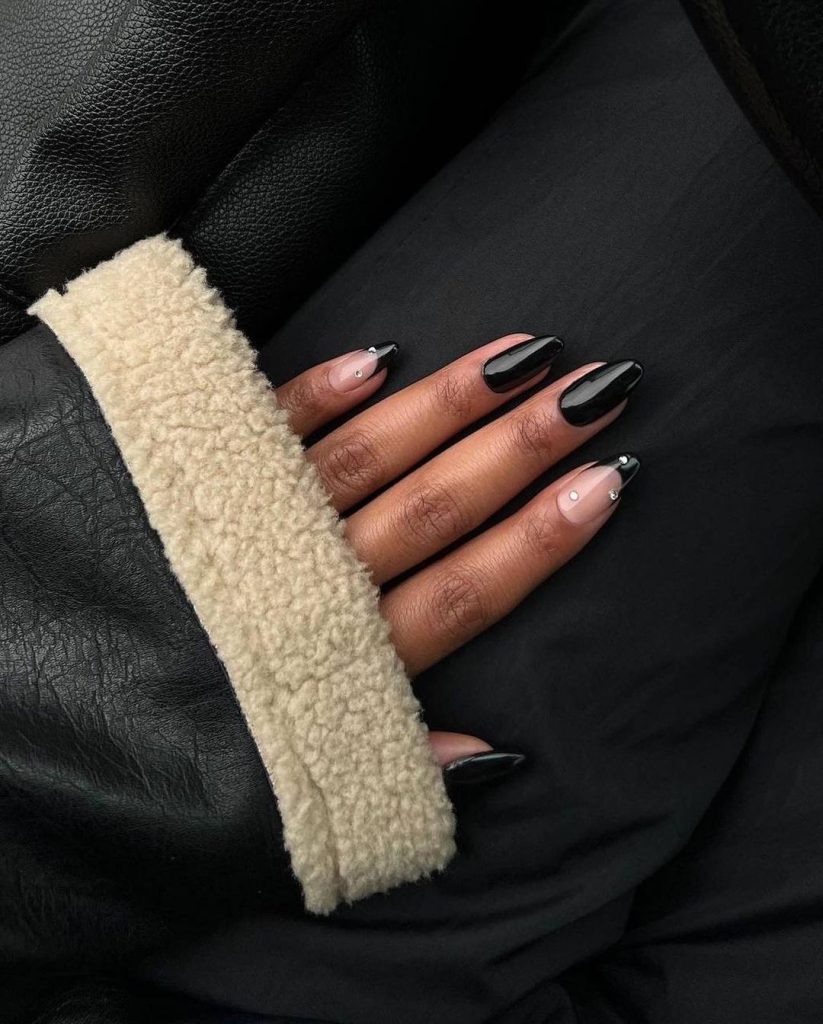
Sleek and Stylish Black
Black nails aren’t just for Halloween—they’re a chic and bold statement for fall. This manicure features a mix of sleek black polish with an understated, single rhinestone accent on the ring finger. The contrast between the glossy black and the subtle shimmer of the rhinestone creates a look that is both edgy and elegant. Perfect for anyone looking to make a bold statement this season, while still keeping things classy.
Consumables and Recommendations
- Black Nail Polish: OPI “Black Onyx” – a rich, jet-black shade.
- Rhinestones: Swarovski Flatback Crystals – for that perfect touch of sparkle.
- Top Coat: Essie Gel Setter Top Coat – for a long-lasting gel finish.
- Tweezers: Tweezerman Slant Tweezers – ideal for precise rhinestone application.
DIY Instructions
- Prep your nails: File and buff your nails for a smooth surface.
- Apply black polish: Start with a thin layer of black polish, and add a second coat for a deep, rich finish.
- Add the rhinestone: While the polish is still slightly tacky, place the rhinestone on the ring finger using tweezers.
- Seal with top coat: Apply a generous layer of top coat to secure the rhinestone and add a glossy finish.
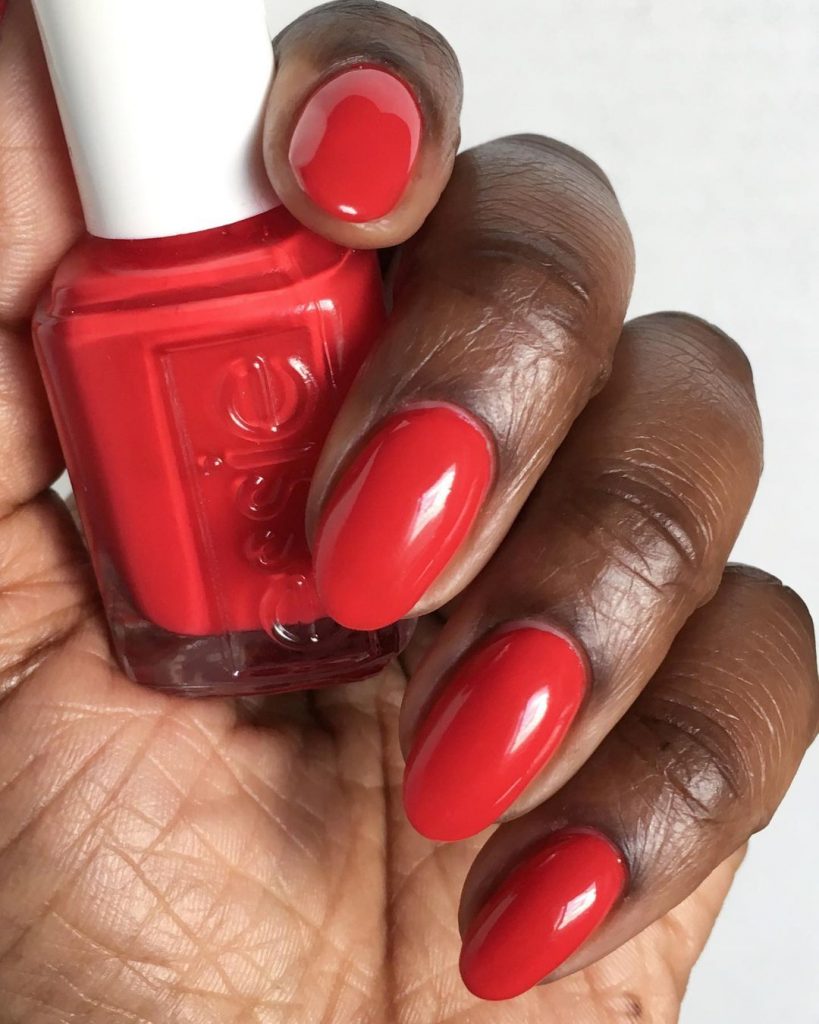
Classic Red Boldness
Red nails are a timeless symbol of power and confidence, and this shade takes it to a whole new level. This vibrant red is perfect for dark skin tones, creating a striking contrast that is both bold and beautiful. The glossy finish adds a touch of sophistication, making it a great choice for those who want a classic look with a bit of a modern twist. This color is versatile enough for both casual and formal occasions, ensuring your nails will stand out wherever you go.
Consumables and Recommendations
- Red Nail Polish: Essie “Really Red” – a vibrant, true red that’s perfect for any occasion.
- Base Coat: Orly Bonder Base Coat – to prevent staining and increase polish adhesion.
- Top Coat: Essie Gel Setter Top Coat – for a long-lasting gel-like finish.
- Nail Polish Remover: Zoya Remove+ – gentle yet effective for quick polish removal.
DIY Instructions
- Start with clean nails: Remove any old polish and shape your nails to your desired length and shape.
- Apply a base coat: This step is crucial to prevent staining and ensure your polish lasts longer.
- Apply two coats of red polish: Allow each coat to dry fully before applying the next to avoid smudging.
- Finish with a top coat: This will give your nails a glossy finish and help your manicure last longer.
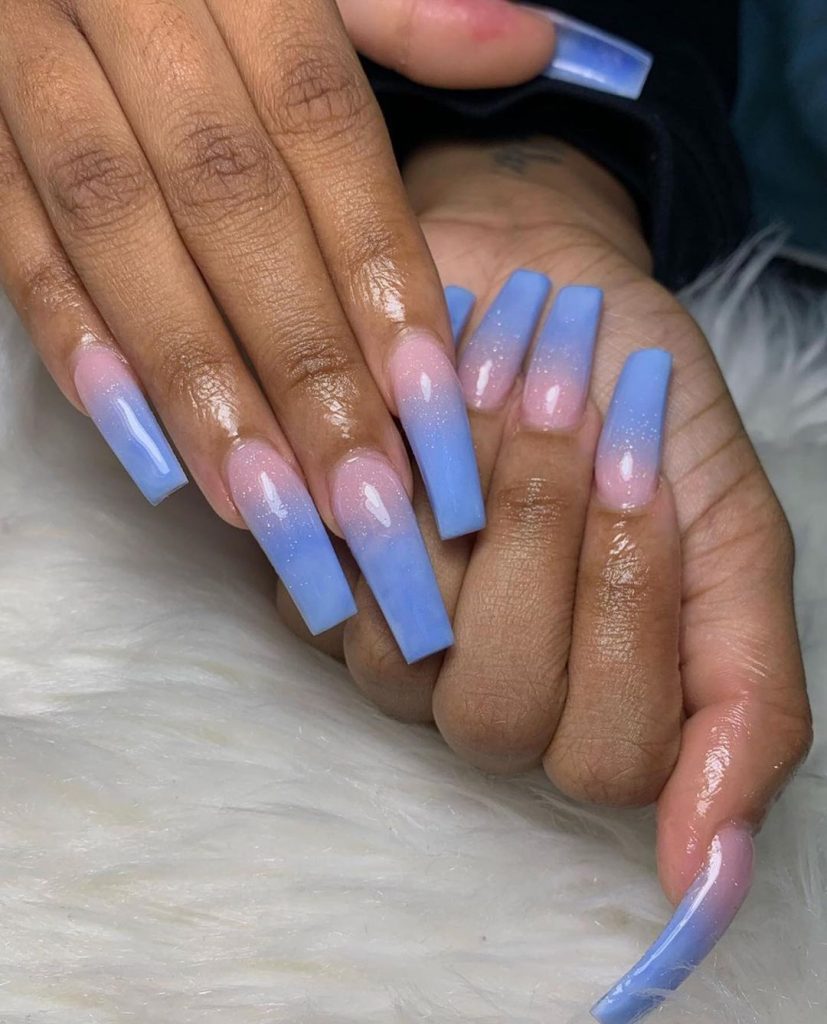
Cool Blue Ombre
Ombre nails bring a gradient of color that’s both trendy and eye-catching. This cool blue ombre transitions beautifully from a soft pink at the base to a deep blue at the tips, creating a striking contrast against dark skin. The coffin shape adds an extra edge to this already bold look. The subtle shimmer throughout the polish gives the nails a dreamy, ethereal quality, perfect for those who want something a bit different for the fall season.
Consumables and Recommendations
- Nail Polish Set: Beetles Gel Polish Ombre Collection – includes all the shades you need for this look.
- Sponge Applicator: Beauty Blender Mini Sponges – perfect for blending colors seamlessly.
- Top Coat: Gelish Top It Off – a gel top coat that ensures long-lasting wear.
- UV/LED Lamp: SUNUV Gel UV LED Nail Lamp – necessary for curing gel polish.
DIY Instructions
- Prepare your nails: Shape them into a coffin shape using a file, then buff the surface.
- Apply a base coat: Cure under a UV/LED lamp for 60 seconds.
- Create the ombre effect: Apply the pink polish to the entire nail, then dab the blue polish onto a sponge and apply to the tips, blending upwards. Cure after each application.
- Seal with a top coat: Cure under the lamp for a glossy finish that lasts.
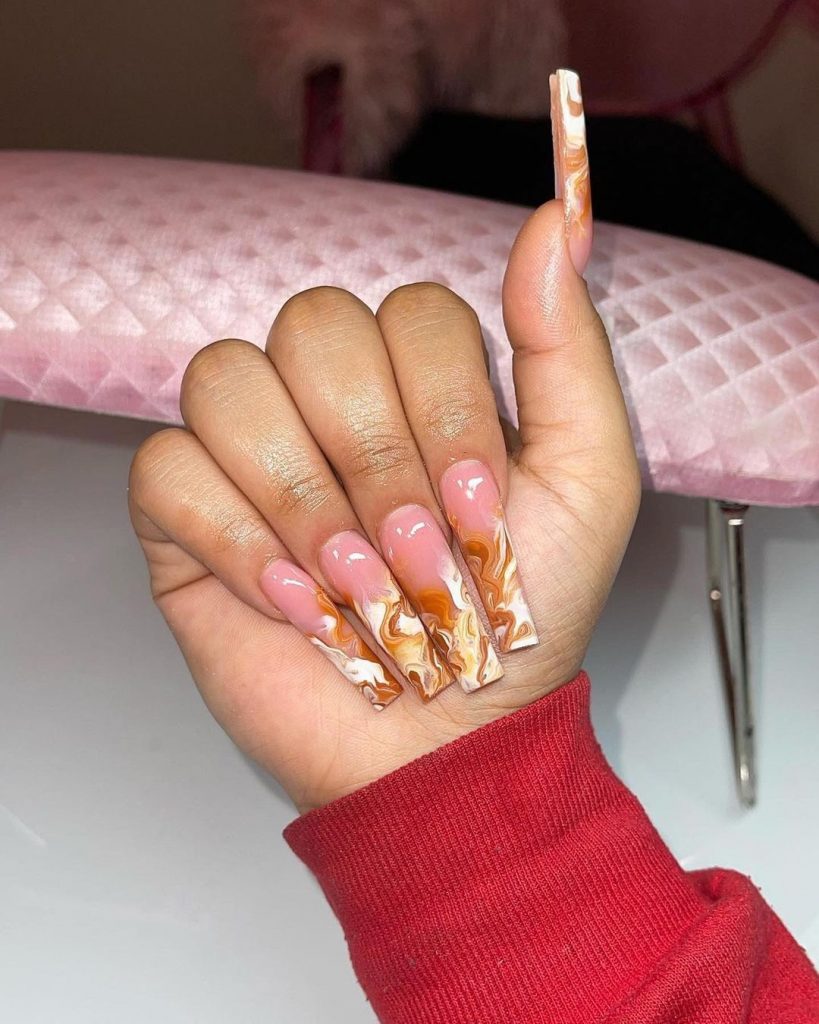
Swirled Autumn Vibes
This nail design brings together the warm tones of autumn in a stunning swirl pattern. The mix of browns, oranges, and creams creates a marbled effect that is both sophisticated and playful. The glossy finish adds to the overall elegance, making this a perfect choice for fall. The coffin-shaped nails provide a perfect canvas for this intricate design, ensuring that every detail stands out beautifully against darker skin tones.
Consumables and Recommendations
- Marble Nail Polish Set: Born Pretty Marble Nail Polish Set – a collection of autumn-inspired shades.
- Detail Brush: Winstonia Nail Art Detailer Brush – for creating precise swirls.
- Top Coat: Seche Vite Dry Fast Top Nail Coat – to add shine and protect the design.
- Nail Prep: Mia Secret Professional Nail Prep – for ensuring the polish adheres properly.
DIY Instructions
- Start by prepping your nails: Shape them into a coffin shape and buff the surface.
- Apply a base coat: This helps protect your natural nails and ensures the polish goes on smoothly.
- Create the swirl design: Use a detail brush to swirl the different colors together on the nail, working quickly before the polish dries.
- Finish with a top coat: This seals in the design and adds a glossy finish that enhances the colors.
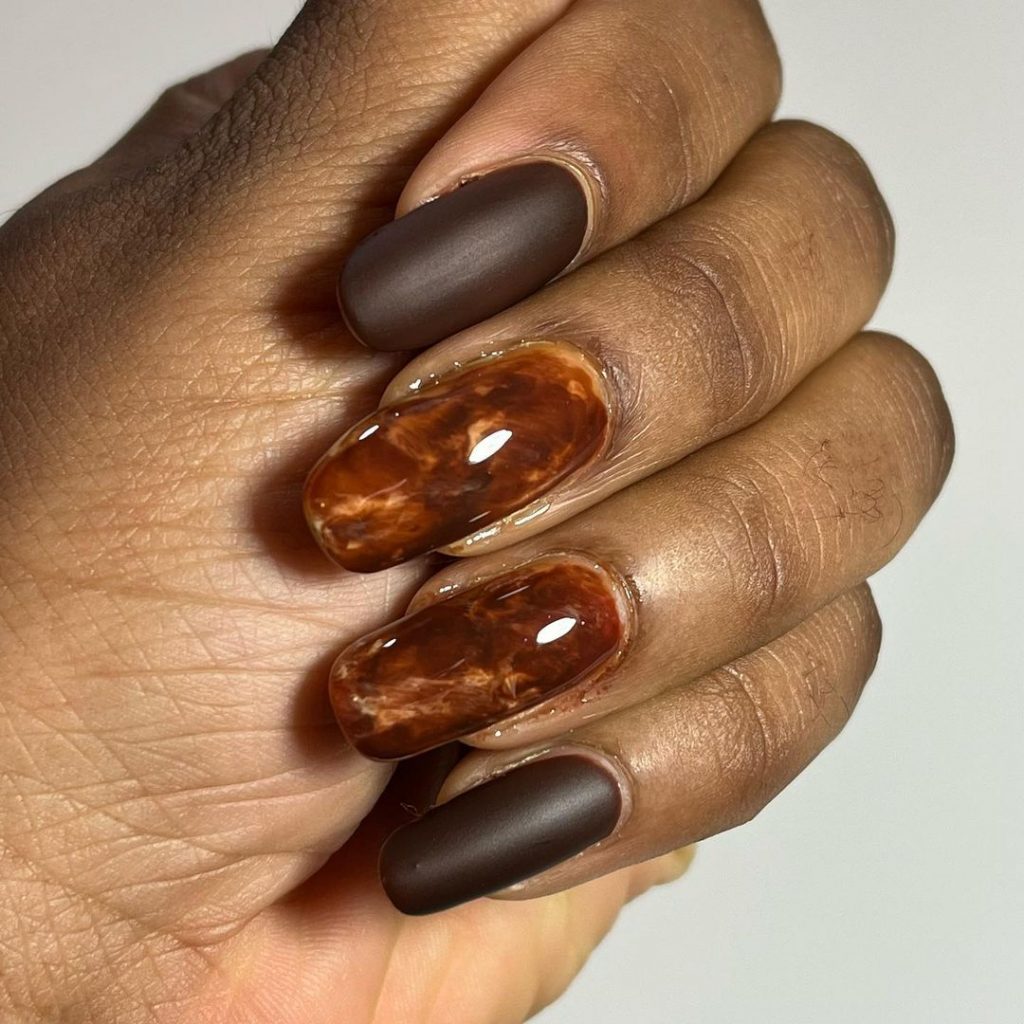
Rich Caramel and Matte Brown Contrast
This nail design is a stunning mix of rich caramel tones and matte brown accents, creating a luxurious and earthy look. The marbleized caramel nails, with their glossy finish, mimic the look of polished stone, adding depth and dimension to the design. The matte brown nails provide a beautiful contrast, giving the overall look a sophisticated and modern twist. This combination is perfect for fall, as it captures the warmth and richness of the season, while still being subtle and elegant.
Consumables and Recommendations
- Caramel Nail Polish: OPI “Ginger’s Revenge” – for that rich, warm caramel tone.
- Matte Brown Polish: Sally Hansen “Commander in Chic” – a deep, matte brown for contrast.
- Marble Effect Tool: Born Pretty Marble Nail Polish Tool Set – for achieving that polished stone effect.
- Top Coat: Seche Vite Dry Fast Top Nail Coat – for the glossy finish on the caramel nails.
- Matte Top Coat: Essie Matte About You – to maintain the matte finish on the brown nails.
DIY Instructions
- Prep your nails: Shape and buff your nails, then apply a base coat.
- Apply the caramel polish: Paint the marble nails with two coats of caramel polish.
- Create the marble effect: Use the marble tool to swirl a slightly darker shade into the caramel for added depth.
- Apply matte brown polish: On the remaining nails, apply the matte brown polish in two coats.
- Finish with top coats: Apply a glossy top coat to the caramel nails and a matte top coat to the brown nails.
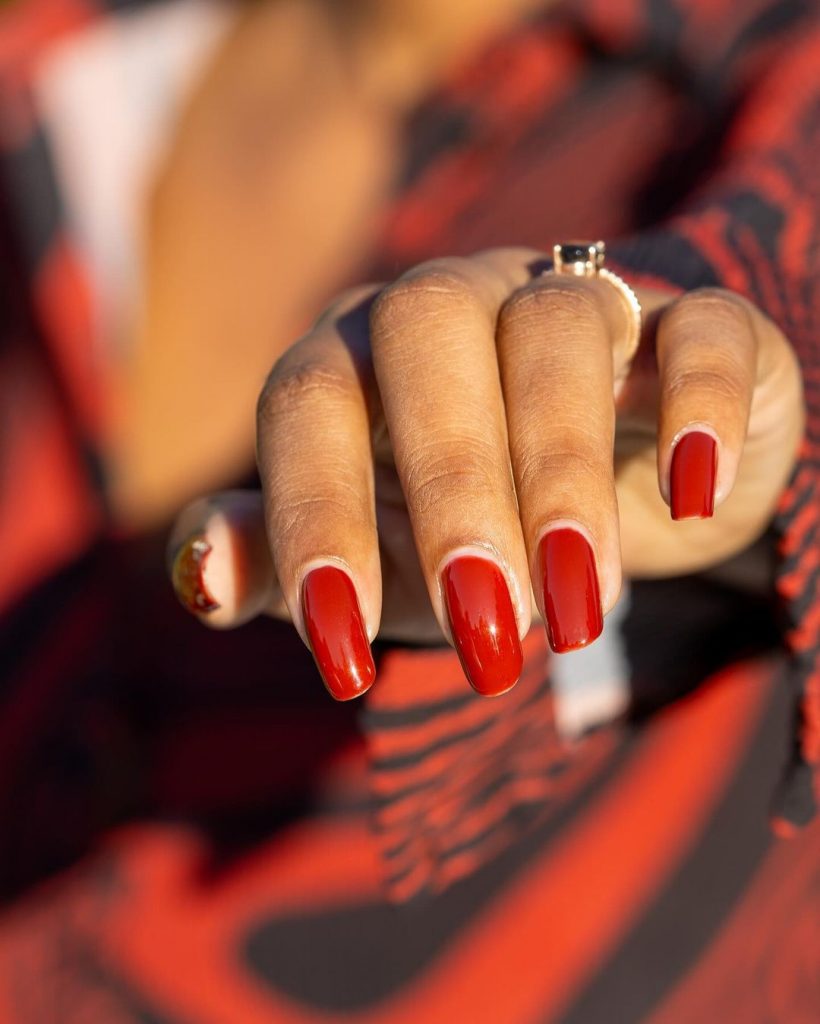
Fiery Red Glam
A classic red nail never goes out of style, especially on darker skin tones where it pops with a fiery intensity. This glossy red manicure is bold, glamorous, and perfect for making a statement. The square-shaped nails add a modern touch to this timeless color, ensuring that your nails will be the center of attention. The sleek, glossy finish enhances the vibrancy of the red, making it ideal for both day and night looks.
Consumables and Recommendations
- Red Nail Polish: Chanel Le Vernis “Rouge Essentiel” – a luxurious, vibrant red.
- Top Coat: Dior Top Coat Abricot – for an ultra-glossy, long-lasting finish.
- Nail Files: Revlon Shape ‘N’ Buff Nail File – for achieving that perfect square shape.
- Cuticle Oil: CND SolarOil – to keep your cuticles hydrated and your manicure looking fresh.
DIY Instructions
- Shape your nails: File them into a square shape and buff the surface.
- Apply a base coat: Protect your nails from staining and ensure the polish adheres well.
- Apply two coats of red polish: Allow each coat to dry before applying the next.
- Finish with a top coat: This will seal the color and give your nails a glossy finish.
- Hydrate your cuticles: Apply cuticle oil to keep them soft and nourished.
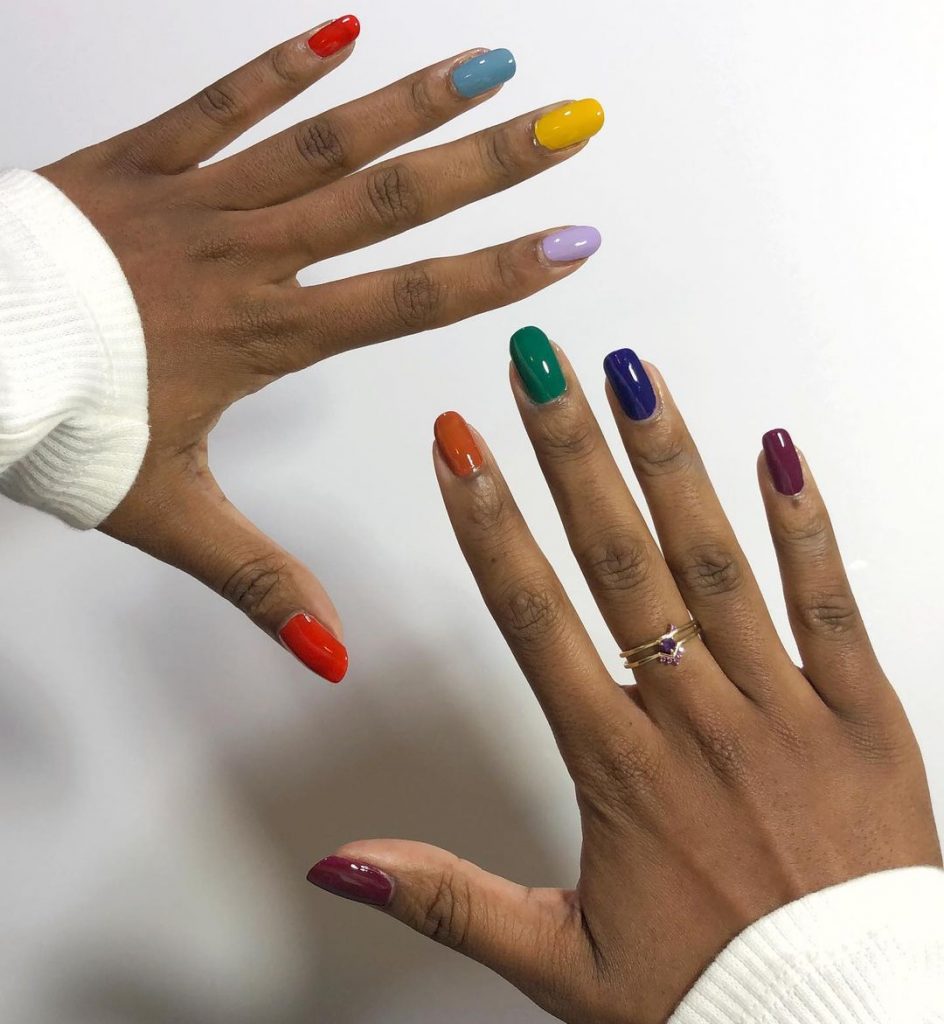
Rainbow Pop
This playful and vibrant nail design features a different bold color on each nail, creating a rainbow effect that is both fun and eye-catching. The mix of primary and secondary colors against dark skin tones creates a stunning contrast, making each shade stand out beautifully. This look is perfect for those who love to experiment with color and aren’t afraid to make a bold statement. The glossy finish on each nail adds to the playful vibe, making this design perfect for both casual and festive occasions.
Consumables and Recommendations
- Nail Polish Set: Essie Expressie Quick Dry Nail Color – includes a wide range of bold, vibrant shades.
- Top Coat: Sally Hansen Miracle Gel Top Coat – for a glossy, long-lasting finish.
- Base Coat: Orly Bonder Base Coat – to ensure the polish goes on smoothly and stays put.
- Nail Polish Remover: Zoya Remove+ – for quick and gentle polish removal when it’s time to change colors.
DIY Instructions
- Prepare your nails: File and buff your nails, then apply a base coat.
- Apply the colors: Paint each nail a different color, applying two coats for full opacity.
- Finish with a top coat: This will seal in the color and give your nails a shiny finish.
- Touch up as needed: Use a small brush dipped in polish remover to clean up any edges.
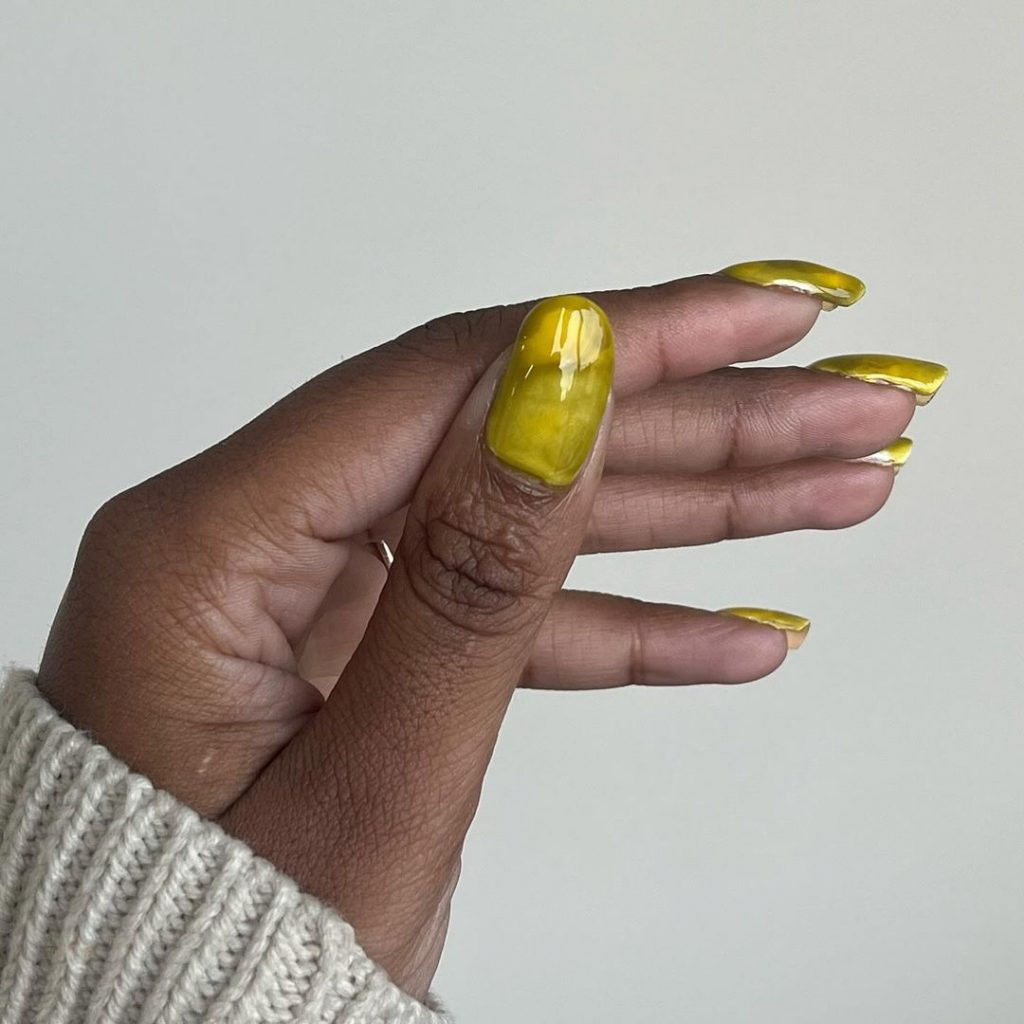
Mustard Yellow Delight
Mustard yellow is a warm, earthy tone that adds a pop of color to your nails while still being subtle enough for everyday wear. This marbled design adds depth and texture to the color, making it more than just a flat shade. The glossy finish enhances the richness of the mustard yellow, making it a perfect choice for fall. This color complements darker skin tones beautifully, bringing out the warmth in both the skin and the polish.
Consumables and Recommendations
- Mustard Yellow Nail Polish: Butter London “Sunbaker” – a rich mustard yellow with a warm undertone.
- Marble Tool: Winstonia Marbleizing Tool – for creating the marbled effect.
- Top Coat: Gelish Top It Off – for a high-shine, long-lasting finish.
- Nail Prep: OPI Bond Aid – to prep the nails for polish and ensure long wear.
DIY Instructions
- Shape your nails: File them into your desired shape and buff the surface.
- Apply the mustard yellow polish: Use two coats for a rich, opaque color.
- Create the marble effect: Use a marble tool to swirl a lighter shade of yellow or white into the mustard polish.
- Finish with a top coat: Apply a glossy top coat to enhance the marble effect and protect your manicure.
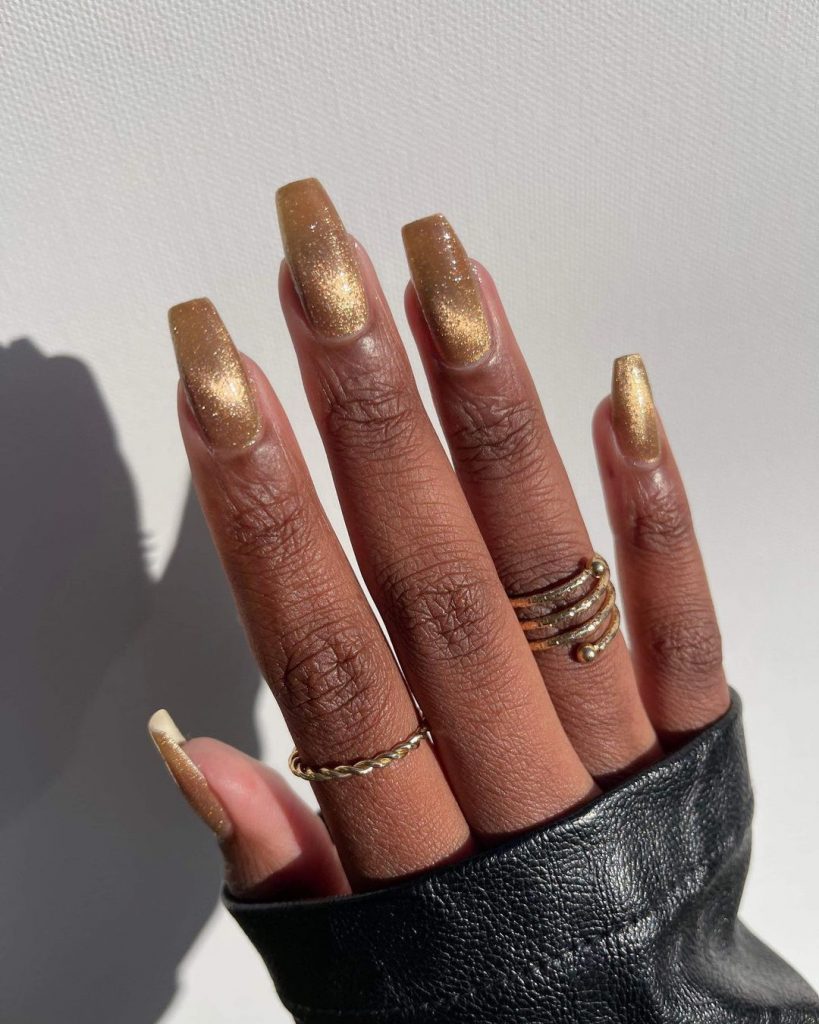
Glittering Gold Glamour
Gold nails are the epitome of luxury, and this glittering design takes it to another level. The coffin-shaped nails provide the perfect canvas for the shimmering gold polish, which catches the light beautifully. This look is perfect for those who love a bit of sparkle and want to add some glamour to their fall manicure. The glittering gold polish against dark skin creates a striking contrast that is both bold and elegant, making this design perfect for special occasions or whenever you want to feel a little extra.
Consumables and Recommendations
- Gold Glitter Polish: Zoya Nail Polish in “Austine” – a shimmering gold with a hint of sparkle.
- Base Coat: Essie First Base – to ensure the polish adheres smoothly.
- Top Coat: Essie Gel Couture Top Coat – for a long-lasting, high-shine finish.
- Nail Strengthener: OPI Nail Envy – to keep your nails strong under the polish.
DIY Instructions
- Prep your nails: File them into a coffin shape and buff the surface.
- Apply a base coat: This will protect your nails and help the polish adhere.
- Apply the gold glitter polish: Use two to three coats for full coverage, allowing each coat to dry before applying the next.
- Finish with a top coat: This will seal in the glitter and add extra shine.
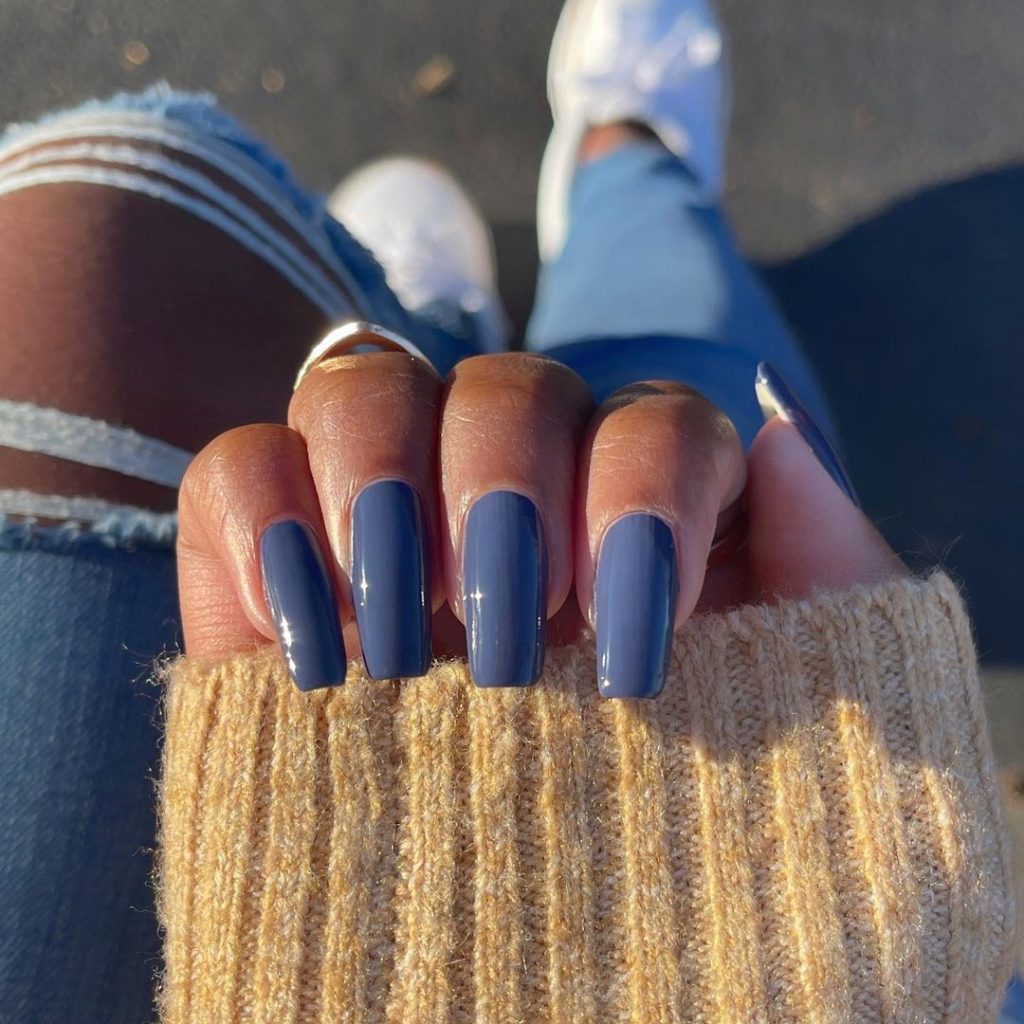
Dusty Blue Perfection
This dusty blue nail polish is a perfect blend of subtlety and sophistication. The shade is muted yet striking, making it an ideal choice for fall. The glossy finish adds depth to the color, giving the nails a polished and refined look. On darker skin tones, this color provides a beautiful contrast, making the nails stand out without being too bold. The square shape of the nails further enhances the modern feel of this manicure, making it perfect for both casual and formal settings.
Consumables and Recommendations
- Blue Nail Polish: Essie “Winning Streak” – a soft, dusty blue perfect for fall.
- Base Coat: OPI Natural Nail Base Coat – to protect and prepare the nails.
- Top Coat: Essie Gel Couture Top Coat – for a long-lasting glossy finish.
- Cuticle Oil: Burt’s Bees Lemon Butter Cuticle Cream – to keep cuticles nourished and healthy.
DIY Instructions
- Shape your nails: File them into a square shape and buff the surface.
- Apply a base coat: This will protect your nails and ensure the polish adheres well.
- Apply two coats of blue polish: Allow each coat to dry before applying the next for a smooth finish.
- Finish with a top coat: This will give your nails a high-shine finish and help your manicure last longer.
- Nourish your cuticles: Apply cuticle oil daily to keep them healthy and hydrated.
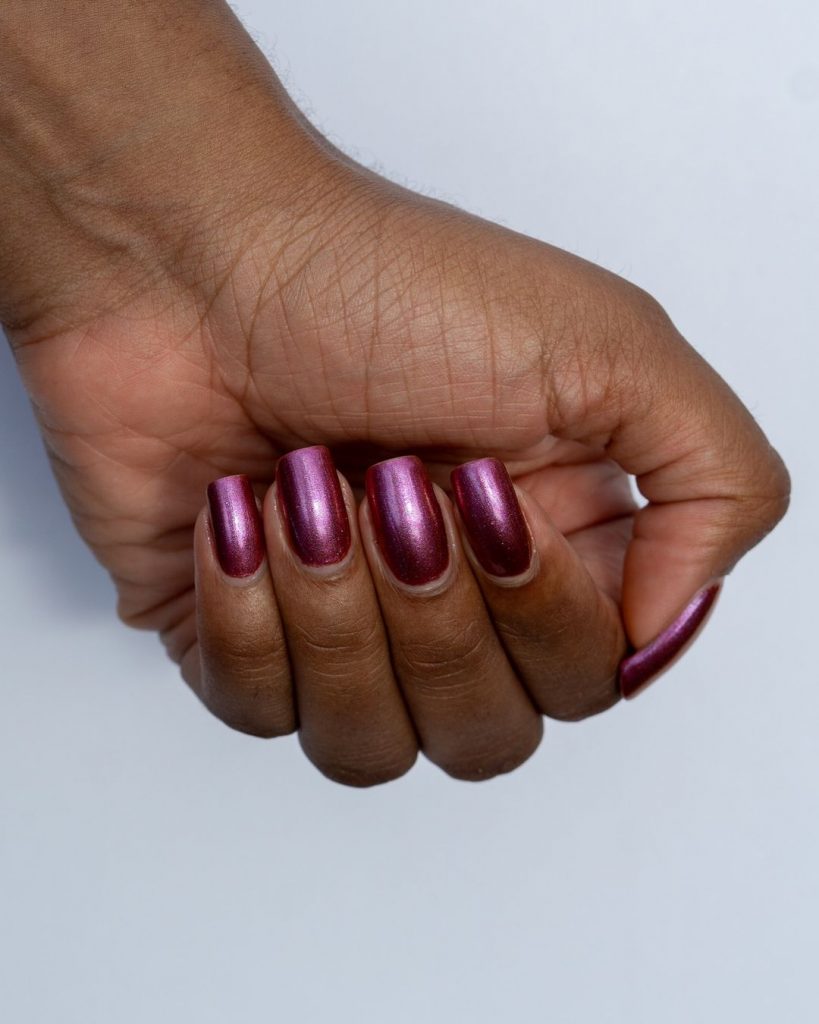
Metallic Mauve Magic
This metallic mauve nail polish is a gorgeous blend of purple and pink tones, with a shimmering finish that catches the light beautifully. The color is both bold and elegant, making it a great choice for those who want something a little different this fall. The metallic sheen adds an extra touch of glamour, while the medium length of the nails keeps the look grounded and wearable. This color is especially flattering on darker skin tones, as it adds a hint of warmth and vibrancy to the hands.
Consumables and Recommendations
- Mauve Nail Polish: Sally Hansen “Molten Mauve” – a shimmering mauve with a metallic finish.
- Base Coat: Zoya Anchor Base Coat – to ensure a smooth application.
- Top Coat: OPI Top Coat – for a high-shine, protective finish.
- Nail Strengthener: Essie Treat Love & Color – to keep nails strong and healthy under polish.
DIY Instructions
- Prep your nails: File and buff your nails, then apply a base coat.
- Apply the mauve polish: Use two coats for full coverage, allowing each coat to dry fully.
- Finish with a top coat: This will seal in the color and add a glossy finish that enhances the metallic sheen.
- Strengthen your nails: Apply a nail strengthener regularly to keep your nails healthy.
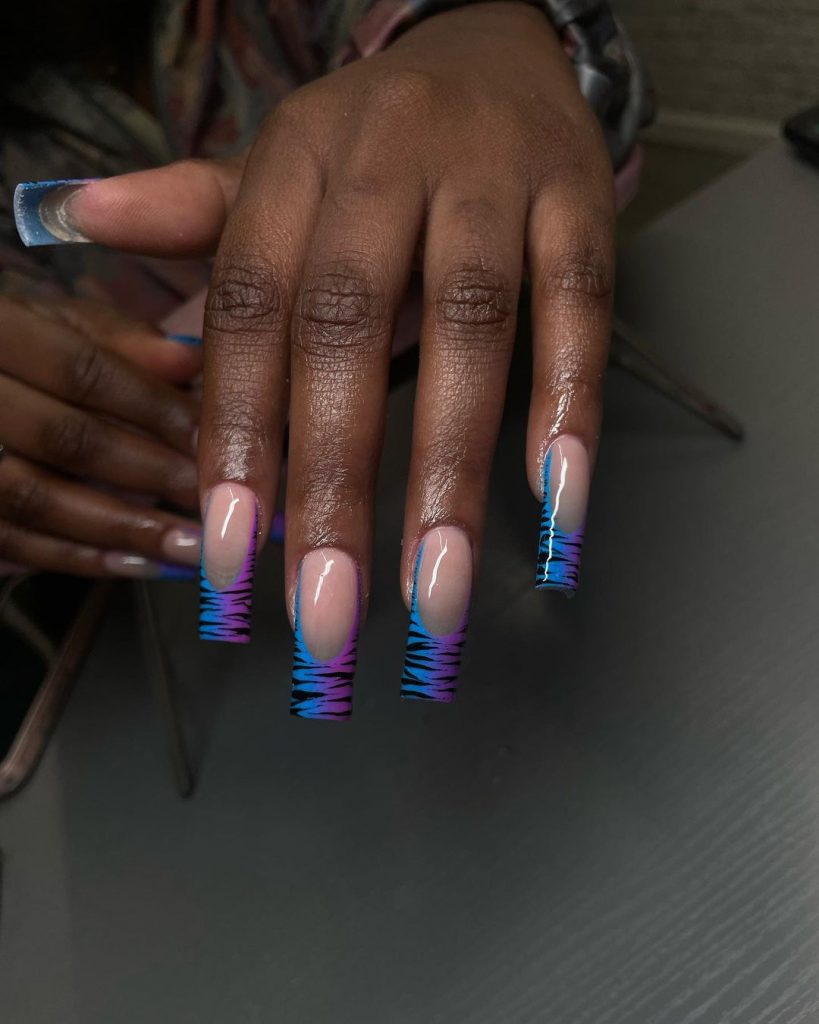
Electric Zebra Stripes
This bold and electric zebra stripe design is perfect for those who want to stand out. The design features a striking contrast between the nude base and the vibrant blue and purple stripes, creating a fun and edgy look. The long, square-shaped nails provide a perfect canvas for this intricate design, making it a statement manicure for the fall season. This look is ideal for anyone who loves bold patterns and isn’t afraid to show off their creative side.
Consumables and Recommendations
- Nail Polish Set: Orly Electric Escape – includes vibrant blue and purple shades.
- Nail Art Brush: Winstonia Nail Art Brush Set – perfect for creating precise zebra stripes.
- Top Coat: Sally Hansen Insta-Dri Top Coat – for a quick-dry, glossy finish.
- Nail Tape: Born Pretty Nail Art Tape – to help create clean, sharp lines for the zebra pattern.
DIY Instructions
- Prep your nails: Shape and buff your nails, then apply a base coat.
- Apply the nude base color: Let it dry completely before moving on to the design.
- Create the zebra stripes: Use the nail art brush to paint on the blue and purple stripes, alternating colors for a vibrant effect.
- Seal with a top coat: Apply a generous layer to protect the design and add shine.
- Use nail tape: If you’re not confident in freehand stripes, use nail tape as a guide for clean lines.
Classic Burgundy Allure
Burgundy nails are a fall classic, and this deep, rich shade is no exception. The color is bold yet sophisticated, making it perfect for both everyday wear and special occasions. The almond-shaped nails add an elegant touch to this timeless look, while the glossy finish ensures that the color stays vibrant and fresh. On darker skin tones, burgundy provides a striking contrast that is both chic and understated.
Consumables and Recommendations
- Burgundy Nail Polish: Essie “Wicked” – a deep, dark red with a glossy finish.
- Base Coat: Butter London Nail Foundation – to create a smooth, even base.
- Top Coat: Seche Vite Dry Fast Top Coat – for a long-lasting, high-shine finish.
- Nail Oil: CND SolarOil – to keep your cuticles soft and nourished.
DIY Instructions
- Shape your nails: File them into an almond shape and buff the surface.
- Apply a base coat: This will help the polish adhere and prevent chipping.
- Apply two coats of burgundy polish: Allow each coat to dry before applying the next.
- Finish with a top coat: This will seal the color and add a glossy finish.
- Maintain your manicure: Use nail oil daily to keep your nails and cuticles healthy.
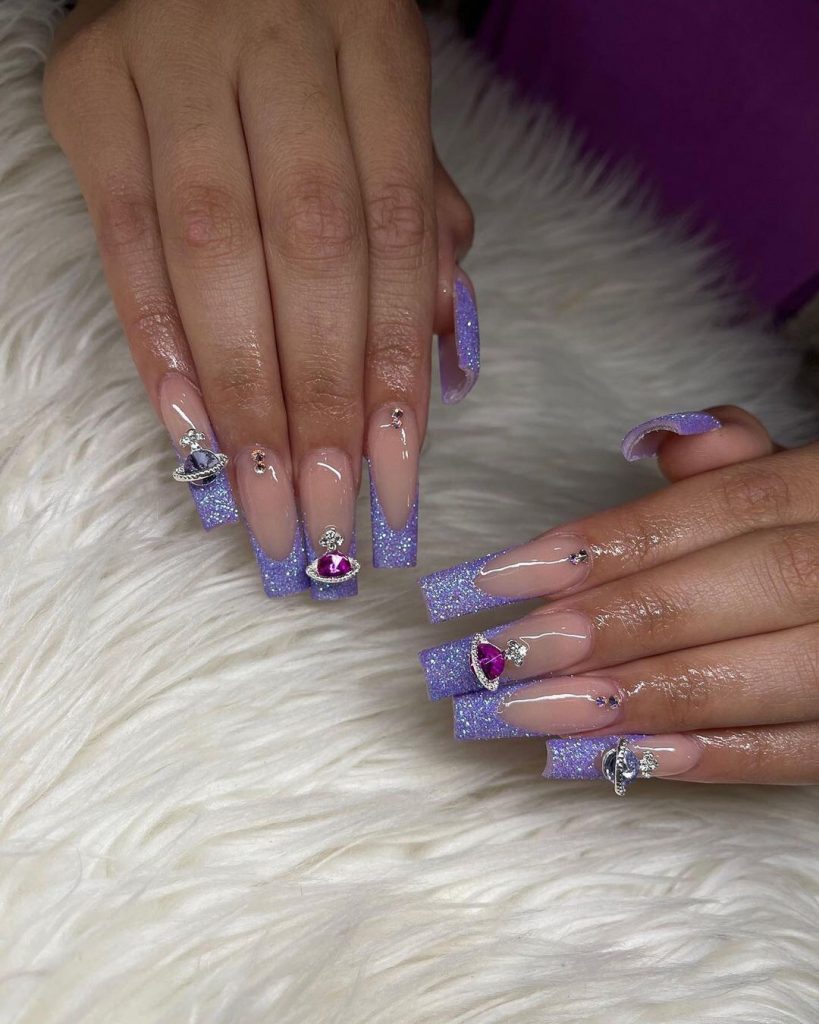
Lavender Glitter Extravaganza
This lavender glitter manicure is the perfect combination of sparkle and sophistication. The coffin-shaped nails are adorned with a soft lavender glitter that catches the light beautifully, making this design ideal for anyone who loves a bit of glam. The added rhinestone accents on some of the nails take this look to the next level, creating a luxurious and eye-catching effect. This manicure is perfect for special occasions or whenever you want to add some sparkle to your look.
Consumables and Recommendations
- Lavender Glitter Polish: Zoya “Amethyst” – a soft lavender glitter polish.
- Rhinestones: Swarovski Flatback Crystals – for that extra touch of luxury.
- Top Coat: Essie Gel Setter Top Coat – for a high-shine, long-lasting finish.
- Nail Glue: Kiss Precision Nail Glue – to secure the rhinestones in place.
DIY Instructions
- Prep your nails: File and buff your nails, then apply a base coat.
- Apply the lavender glitter polish: Use two to three coats for full coverage, allowing each coat to dry before applying the next.
- Add rhinestones: Use nail glue to carefully place the rhinestones on the nails.
- Finish with a top coat: This will seal in the glitter and rhinestones, and add extra shine.
- Keep it glamorous: Reapply top coat every few days to keep the glitter and rhinestones looking fresh.
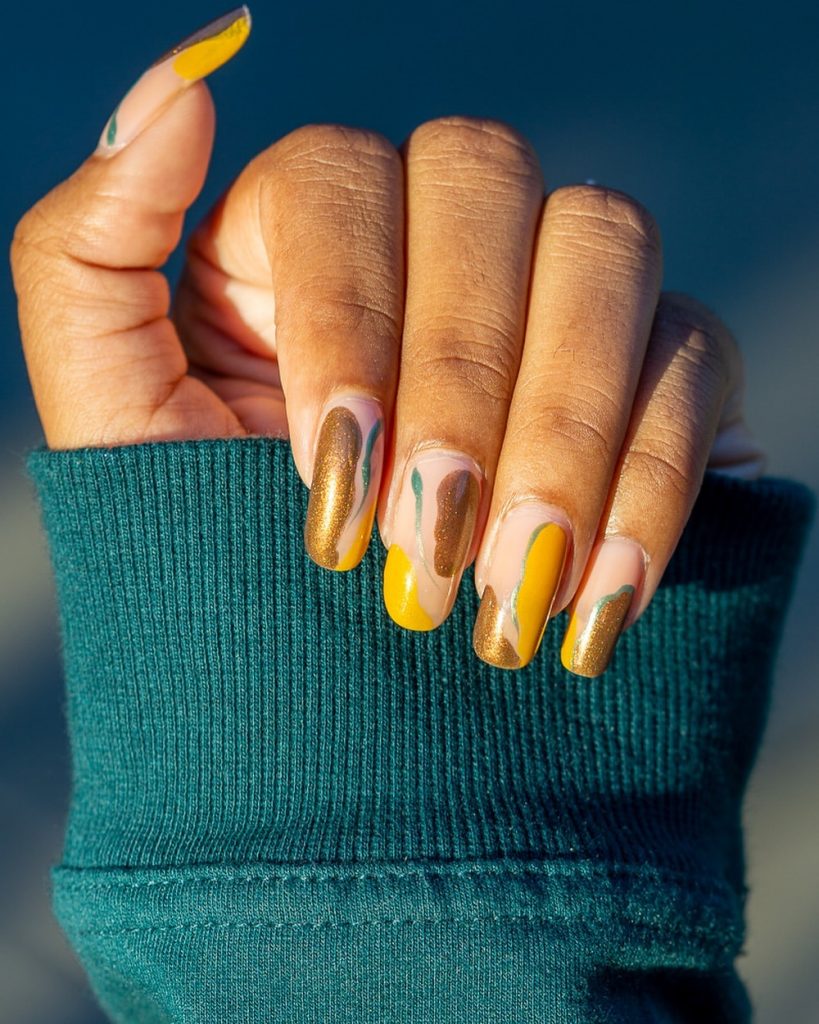
Earthy Tones and Abstract Art
This manicure is a perfect blend of earthy tones and abstract design, creating a look that is both artistic and on-trend for fall. The nails feature a mix of mustard yellow, olive green, and metallic bronze, with each color swirled together in an abstract pattern. The glossy finish adds depth and dimension to the design, while the almond shape of the nails keeps the look soft and elegant. This manicure is ideal for those who want to embrace the fall season with a unique and creative style.
Consumables and Recommendations
- Mustard Yellow Polish: Essie “Fall for NYC” – a warm, mustard yellow.
- Olive Green Polish: OPI “Suzi – The First Lady of Nails” – a rich olive green.
- Metallic Bronze Polish: Zoya “Aggie” – a shimmering bronze.
- Top Coat: Seche Vite Dry Fast Top Coat – for a glossy, long-lasting finish.
- Detail Brush: Winstonia Nail Art Detailer Brush – for creating the abstract swirls.
DIY Instructions
- Prep your nails: File and buff your nails, then apply a base coat.
- Apply the base colors: Paint each nail with a different base color—mustard yellow, olive green, or metallic bronze.
- Create the abstract swirls: Use a detail brush to swirl the colors together on each nail, creating a unique pattern.
- Finish with a top coat: Seal in the design with a glossy top coat.
- Touch up as needed: Clean up the edges with a small brush dipped in polish remover.
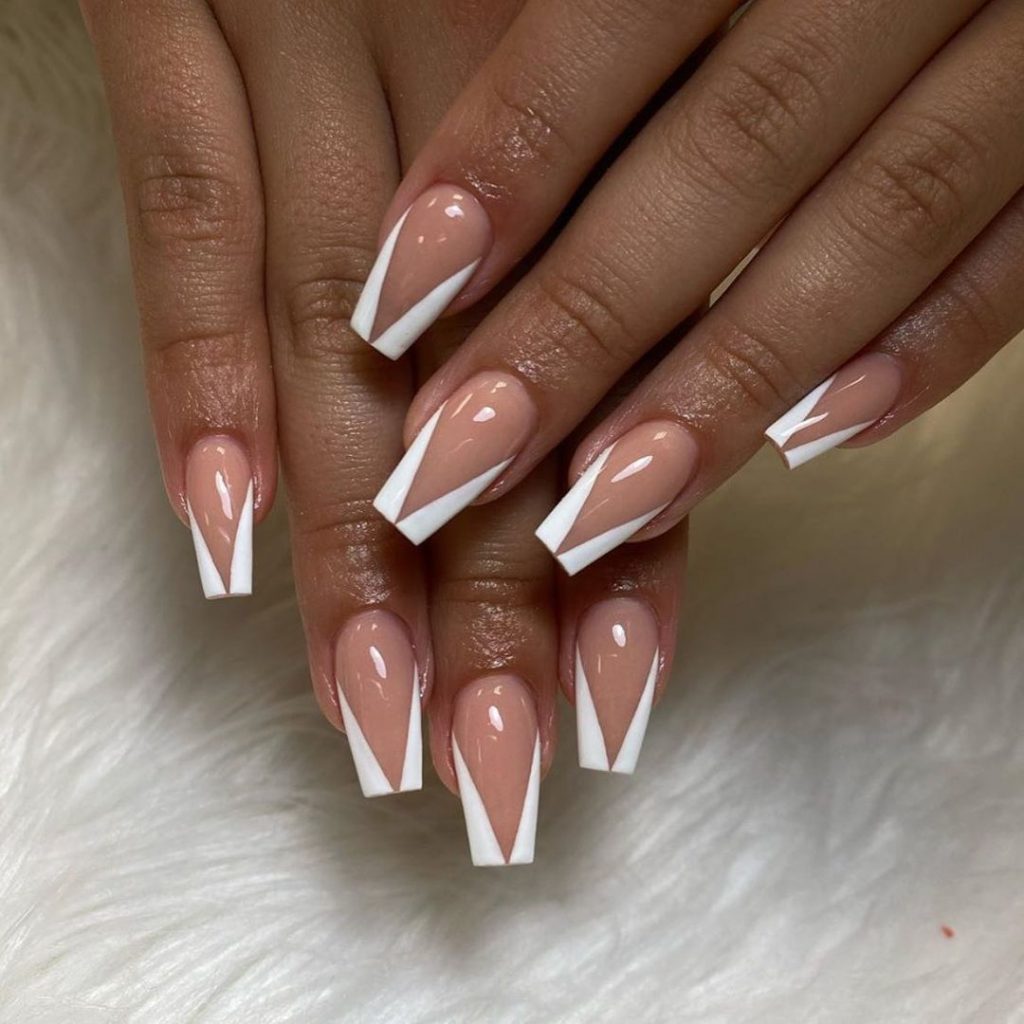
Geometric French Tip
This modern take on the classic French tip features bold, geometric lines that add a contemporary twist to the timeless design. The nails are painted with a nude base, and the tips are accented with sharp, white triangles that create a clean and sophisticated look. The square shape of the nails enhances the geometric design, making it perfect for those who love minimalistic yet striking manicures.
Consumables and Recommendations
- Nude Polish: OPI “Samoan Sand” – a soft, neutral nude.
- White Polish: Essie “Blanc” – a pure, bright white.
- Striping Tape: Born Pretty Nail Art Striping Tape – to create clean, sharp lines.
- Top Coat: Essie Gel Couture Top Coat – for a long-lasting, glossy finish.
- Base Coat: Orly Bonder Base Coat – to ensure the polish adheres well.
DIY Instructions
- Shape your nails: File them into a square shape and buff the surface.
- Apply the nude base: Paint your nails with two coats of nude polish and let them dry completely.
- Create the geometric tips: Use striping tape to section off the tips of your nails, then fill in with white polish.
- Remove the tape and finish with a top coat: Seal the design with a glossy top coat for a sleek finish.
- Perfect the lines: Use a detail brush to clean up any edges if necessary.
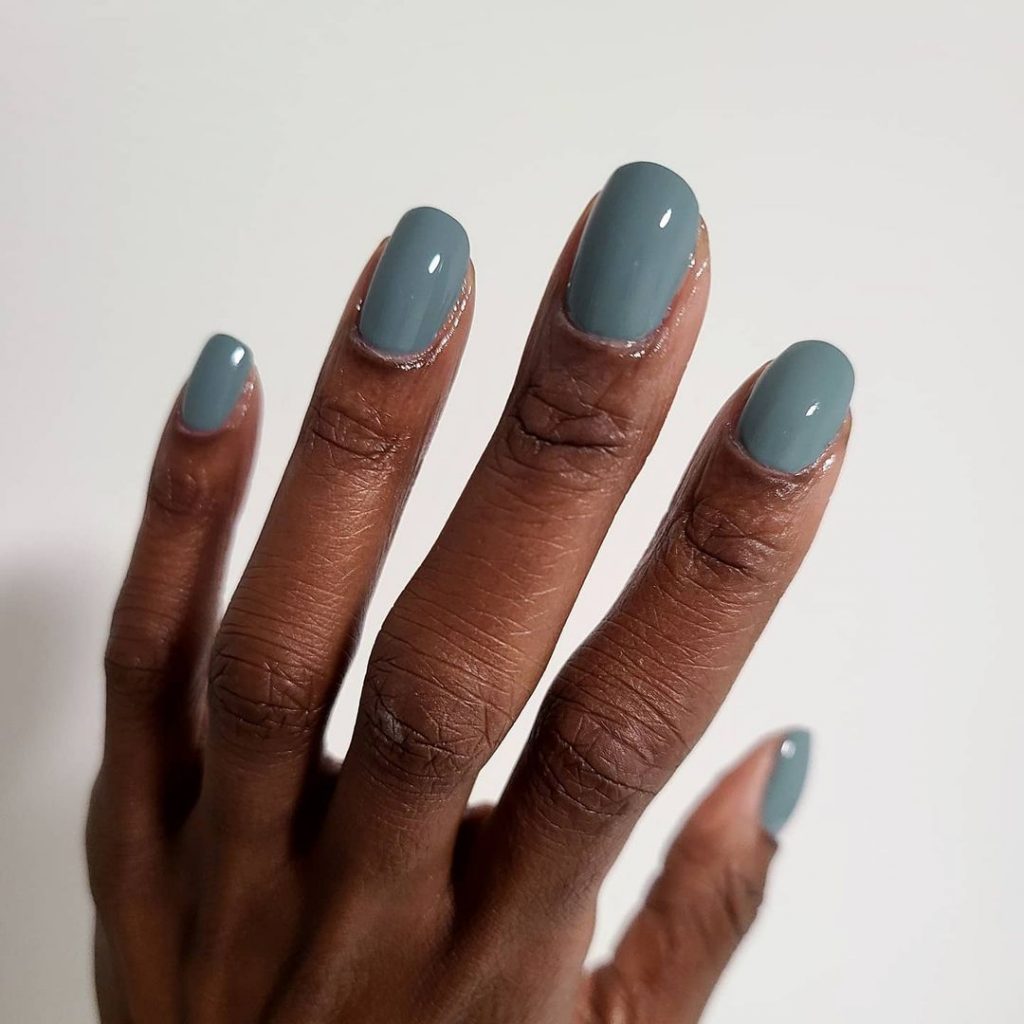
Muted Teal Simplicity
This muted teal manicure is simple yet sophisticated, making it an ideal choice for fall. The color is a soft, dusty teal that complements darker skin tones beautifully, adding a subtle pop of color without being too bold. The nails are kept short and rounded, giving the manicure a clean and polished look. This shade is perfect for both everyday wear and more formal occasions, making it a versatile addition to your fall nail color palette.
Consumables and Recommendations
- Teal Polish: Zoya “Wednesday” – a muted teal with a soft finish.
- Base Coat: OPI Natural Nail Base Coat – to protect your nails and ensure smooth application.
- Top Coat: Butter London Hardwear Shine UV Top Coat – for a long-lasting, high-shine finish.
- Cuticle Oil: CND SolarOil – to keep your cuticles hydrated and healthy.
DIY Instructions
- Shape your nails: File them into a short, rounded shape and buff the surface.
- Apply a base coat: This will protect your nails and help the polish last longer.
- Apply two coats of teal polish: Allow each coat to dry fully before applying the next.
- Finish with a top coat: This will add shine and protect your manicure from chipping.
- Hydrate your cuticles: Apply cuticle oil daily to keep them soft and nourished.
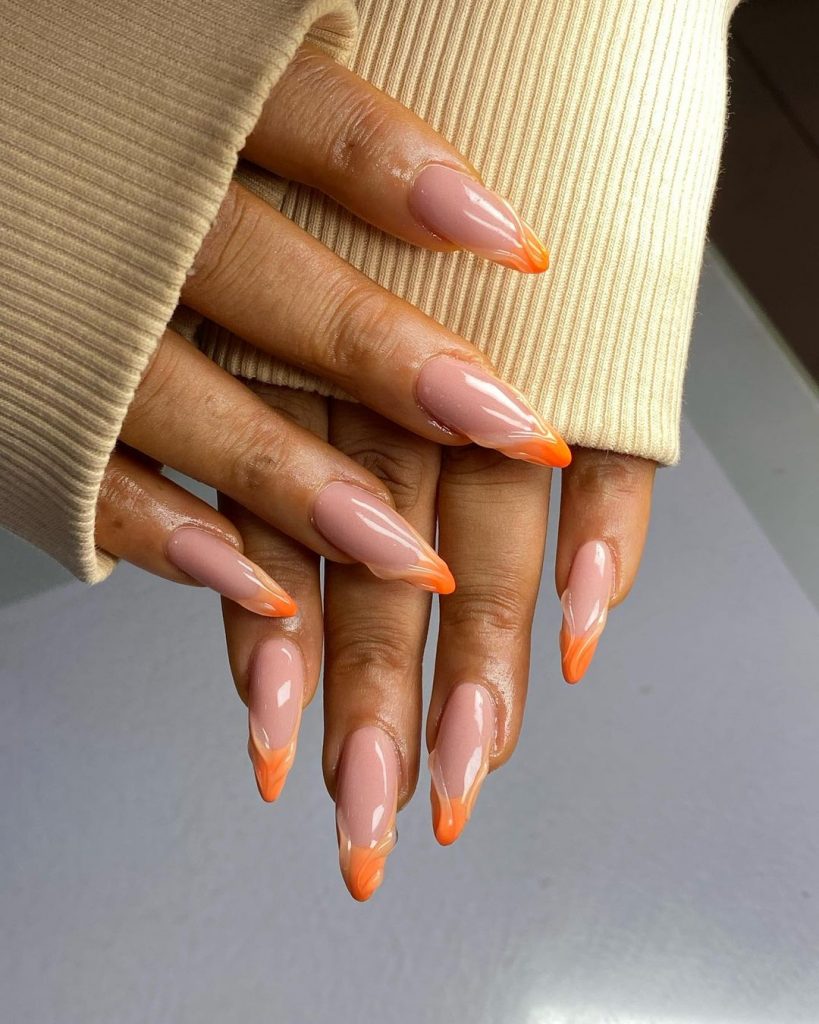
Neon Orange Flame Tips
This manicure is a fiery and fun twist on the classic French tip. The nails feature a nude base with neon orange flame tips that create a bold and playful look. The almond shape of the nails adds an extra touch of elegance, balancing out the vibrant color with a sophisticated silhouette. This design is perfect for those who want to add a bit of heat to their fall nail look, combining both trendy and timeless elements.
Consumables and Recommendations
- Nude Polish: OPI “Bare My Soul” – a neutral, soft nude.
- Neon Orange Polish: China Glaze “Orange Knockout” – a bright, neon orange.
- Detail Brush: Winstonia Nail Art Detailer Brush – for creating the flame design.
- Top Coat: Essie Gel Couture Top Coat – to seal the design and add shine.
- Nail Prep: CND Stickey Base Coat – to ensure the polish adheres well.
DIY Instructions
- Prep your nails: File them into an almond shape and buff the surface.
- Apply the nude base: Paint your nails with two coats of nude polish and let them dry.
- Create the flame tips: Use a detail brush to paint neon orange flames on the tips of each nail.
- Seal with a top coat: Apply a glossy top coat to protect the design and enhance the color.
- Clean up as needed: Use a small brush dipped in polish remover to clean up any excess polish around the nails.
Burgundy Florals
This burgundy floral manicure is a beautiful blend of deep, rich colors and delicate floral designs, making it a perfect choice for fall. The nails are painted with a combination of burgundy and soft pink, with intricate floral designs on some nails. The almond shape adds to the elegance of this look, while the glossy finish ensures the colors stay vibrant and fresh. This manicure is ideal for those who love a classic look with a touch of artistry.

Consumables and Recommendations
- Burgundy Polish: Essie “Bordeaux” – a deep, rich burgundy.
- Pink Polish: OPI “Bubble Bath” – a soft, delicate pink.
- Detail Brush: Winstonia Nail Art Detailer Brush – for creating the floral designs.
- Top Coat: Seche Vite Dry Fast Top Coat – to seal the design and add shine.
- Nail Adhesive: Kiss Precision Nail Glue – for attaching any small embellishments like beads or rhinestones.
DIY Instructions
- Shape your nails: File them into an almond shape and buff the surface.
- Apply the base colors: Paint some nails with burgundy polish and others with soft pink.
- Create the floral design: Use a detail brush to paint delicate flowers on the pink nails.
- Seal with a top coat: Apply a glossy top coat to protect the design and add shine.
- Embellish as desired: If you want to add extra details like small beads or rhinestones, use nail adhesive to secure them in place.
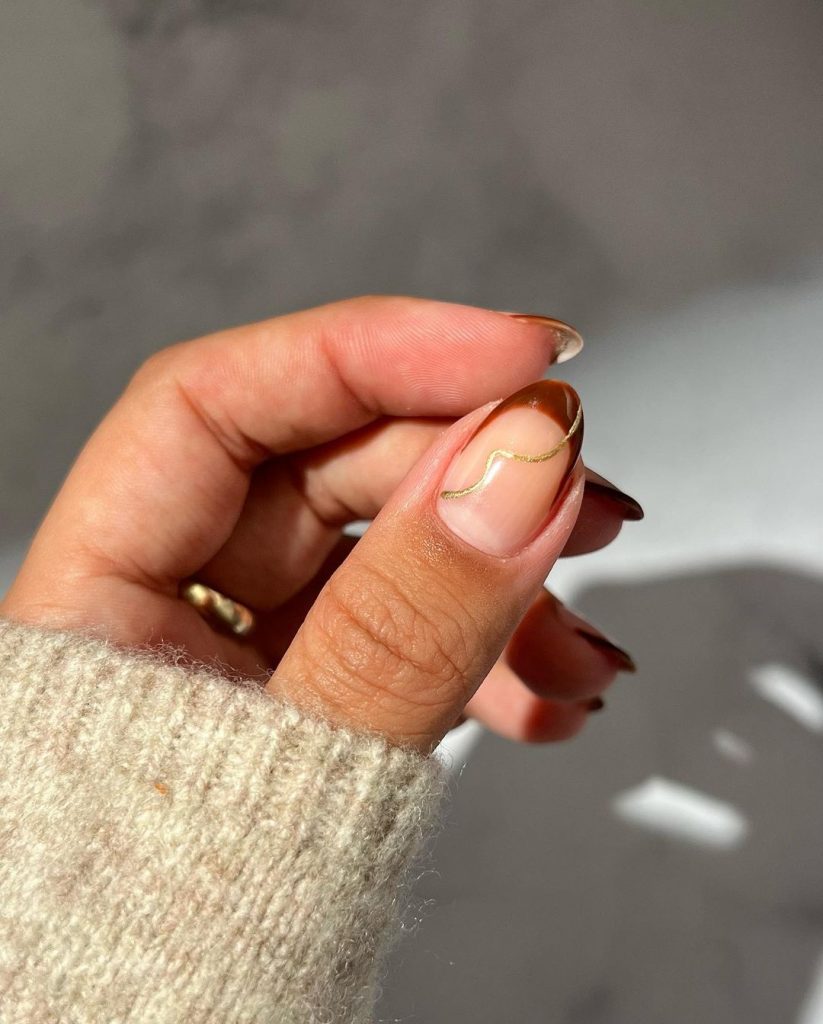
Minimalist Gold Accent
This minimalist nail design is a stunning blend of simplicity and elegance, featuring a nude base with delicate gold accents. The nails are short and almond-shaped, with a single gold wave running across the tip of each nail, adding a touch of sophistication without being overwhelming. The subtlety of this design makes it perfect for any occasion, from casual to formal. This manicure is especially flattering on darker skin tones, where the gold accents create a beautiful contrast against the nude base.
Consumables and Recommendations
- Nude Polish: OPI “Be There in a Prosecco” – a neutral, creamy nude.
- Gold Nail Art Pen: Sally Hansen Nail Art Pen in Gold – for precise and clean gold accents.
- Top Coat: Essie Gel Couture Top Coat – to seal in the design and add shine.
- Base Coat: Orly Bonder Base Coat – to help the polish adhere better.
DIY Instructions
- Prep your nails: File them into a short, almond shape and buff the surface.
- Apply the nude base: Paint your nails with two coats of nude polish and let them dry completely.
- Add the gold accent: Use a gold nail art pen to draw a thin wave across the tip of each nail.
- Seal with a top coat: Apply a glossy top coat to protect the design and give it a polished finish.
- Touch up as needed: Use a small brush to clean up any edges and ensure the design looks clean.
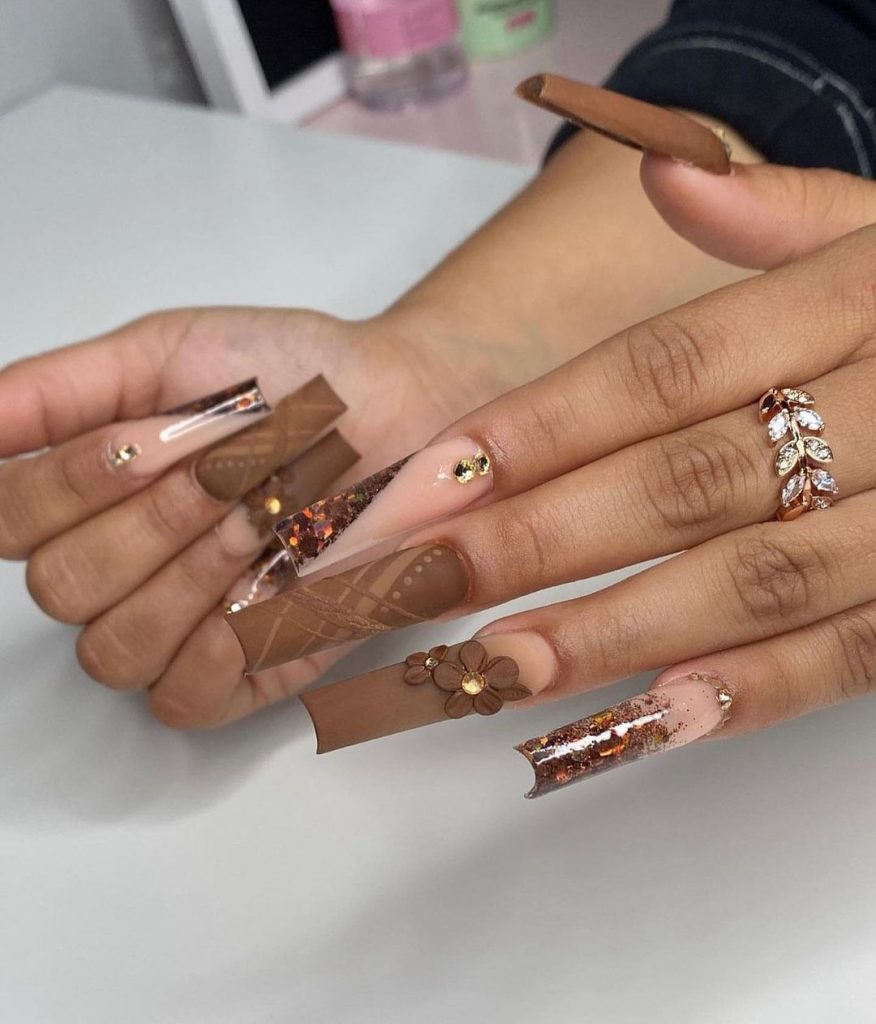
Luxurious Chocolate and Gold
This luxurious nail design combines rich chocolate tones with sparkling gold accents for a truly opulent look. The long, coffin-shaped nails feature a mix of matte chocolate, glossy finishes, and glittery gold embellishments. Some nails are adorned with intricate floral designs and gold rhinestones, adding an extra layer of glamour to the overall look. This manicure is perfect for those who love a bold and luxurious style, especially during the fall season.
Consumables and Recommendations
- Chocolate Polish: Zoya “Louise” – a deep, rich chocolate brown.
- Gold Glitter Polish: OPI “GoldenEye” – a sparkling gold glitter.
- Rhinestones: Swarovski Flatback Crystals – for added sparkle.
- Top Coat: Seche Vite Dry Fast Top Coat – to seal the design and add shine.
- Nail Adhesive: Kiss Precision Nail Glue – to secure the rhinestones and floral embellishments.
DIY Instructions
- Prep your nails: File them into a long, coffin shape and buff the surface.
- Apply the chocolate base: Paint your nails with the chocolate polish, leaving some nails for the gold accents.
- Add the gold glitter: Apply the gold glitter polish on select nails, and add rhinestones and floral designs using nail adhesive.
- Finish with a top coat: Seal the entire design with a glossy top coat to enhance the shine and protect the manicure.
- Clean up as needed: Use a small brush to perfect the edges and ensure the design looks flawless.
Warm Peach Perfection
This warm peach manicure is a perfect way to bring a touch of summer into the fall season. The nails are short and rounded, painted in a soft peach shade that complements darker skin tones beautifully. The simplicity of this design makes it versatile and suitable for both everyday wear and special occasions. The glossy finish adds a fresh, clean look, making this manicure ideal for anyone who loves a natural and understated style.

Consumables and Recommendations
- Peach Polish: Essie “Peach Side Babe” – a warm, soft peach.
- Base Coat: OPI Natural Nail Base Coat – to protect your nails and ensure smooth application.
- Top Coat: Butter London Hardwear Shine UV Top Coat – for a long-lasting, high-shine finish.
- Cuticle Oil: CND SolarOil – to keep your cuticles hydrated and healthy.
DIY Instructions
- Shape your nails: File them into a short, rounded shape and buff the surface.
- Apply a base coat: This will protect your nails and help the polish last longer.
- Apply two coats of peach polish: Allow each coat to dry fully before applying the next.
- Finish with a top coat: This will add shine and protect your manicure from chipping.
- Hydrate your cuticles: Apply cuticle oil daily to keep them soft and nourished.
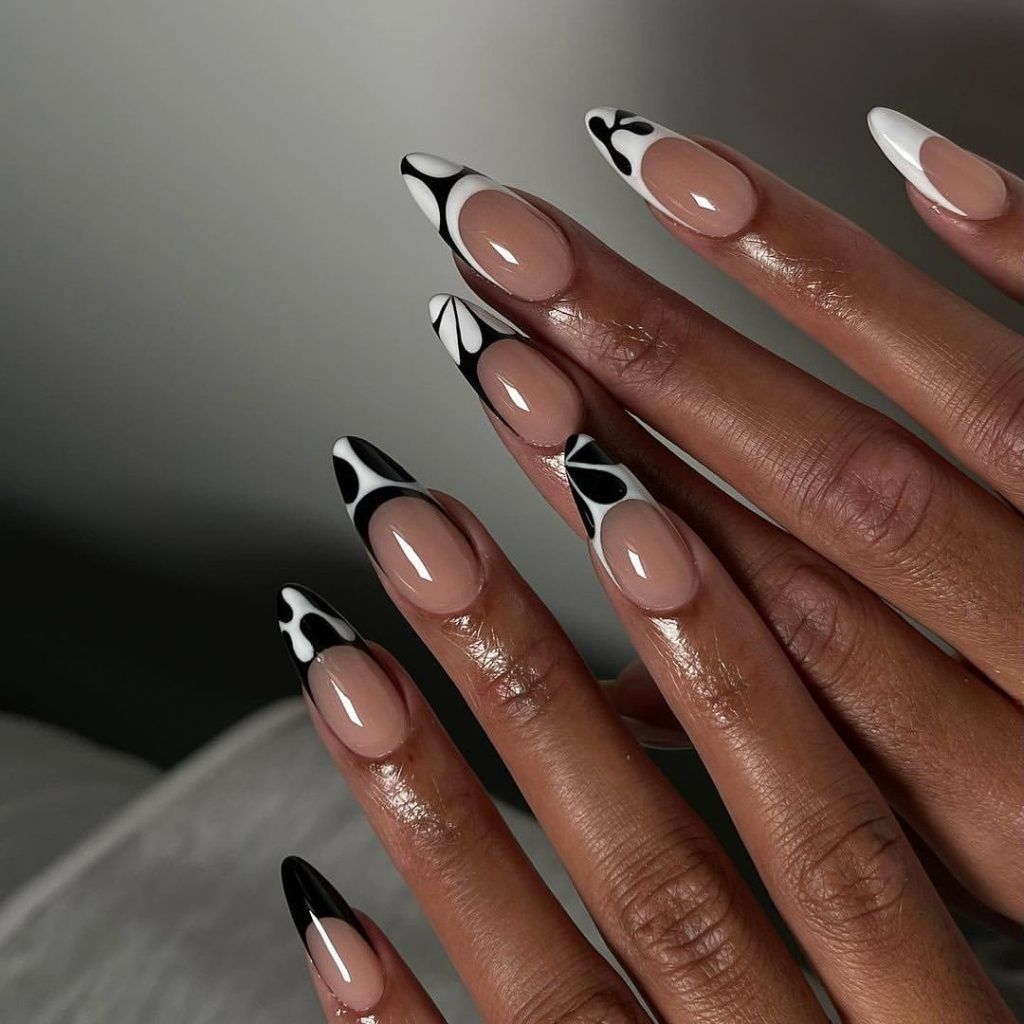
Monochrome Abstract Art
This striking monochrome nail design features a mix of black and white patterns that create a bold and artistic look. The long, almond-shaped nails are painted with a nude base, and each nail is adorned with unique black and white designs, ranging from polka dots to abstract swirls. The high contrast between the black, white, and nude makes this manicure a statement piece, perfect for those who love to experiment with their nail art.
Consumables and Recommendations
- Nude Polish: OPI “Samoan Sand” – a soft, neutral nude.
- Black and White Polish: Essie “Licorice” for black and “Blanc” for white – classic shades for a monochrome look.
- Detail Brush: Winstonia Nail Art Detailer Brush – for creating precise patterns.
- Top Coat: Essie Gel Couture Top Coat – to seal in the design and add shine.
- Base Coat: Orly Bonder Base Coat – to ensure the polish adheres well.
DIY Instructions
- Prep your nails: File them into a long, almond shape and buff the surface.
- Apply the nude base: Paint your nails with two coats of nude polish and let them dry completely.
- Create the monochrome designs: Use a detail brush to paint black and white patterns on each nail, varying the design for an artistic effect.
- Seal with a top coat: Apply a glossy top coat to protect the design and give it a polished finish.
- Perfect the details: Use a small brush to clean up any edges and ensure the design looks crisp.
Frosted Pink Elegance
This frosted pink manicure is the epitome of elegance and subtlety. The long, almond-shaped nails are painted with a soft pink shade and accented with delicate white dots, creating a frosted, snow-like effect. The matte finish adds a touch of sophistication, making this manicure perfect for winter or any special occasion. This design is ideal for those who love a soft and feminine look that still makes a statement.

Consumables and Recommendations
- Pink Polish: Essie “Ballet Slippers” – a soft, pale pink.
- White Polish: OPI “Alpine Snow” – a crisp, clean white for the dot accents.
- Dotting Tool: Born Pretty Nail Art Dotting Tool – for creating precise dots.
- Matte Top Coat: Zoya Matte Velvet Top Coat – to give the manicure a frosted finish.
- Base Coat: Butter London Nail Foundation – to create a smooth, even base.
DIY Instructions
- Prep your nails: File them into a long, almond shape and buff the surface.
- Apply the pink base: Paint your nails with two coats of pink polish and let them dry completely.
- Add the white dots: Use a dotting tool to create small white dots on each nail, mimicking a frosted effect.
- Finish with a matte top coat: Apply a matte top coat to achieve the frosted finish.
- Perfect the look: Use a small brush to clean up any edges and ensure the design looks flawless.
Save Pin