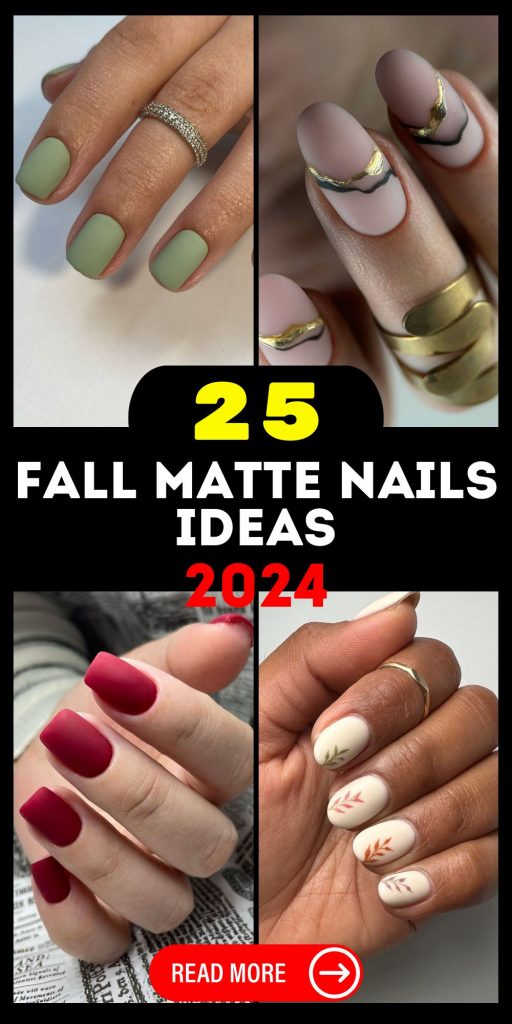
When it comes to fall nails, nothing quite captures the season’s essence like a chic matte finish. As we transition into 2024, the trend is all about embracing rich colors, subtle textures, and understated elegance. Whether you’re into bold dark shades or soft pastels, matte nails offer a sophisticated edge that can elevate any look. From classic black and deep greens to playful pinks and milky whites, there’s a matte manicure to match every style. Ready to dive into the top 25 fall matte nail ideas for 2024? Let’s explore the most stunning designs that will keep your nails on point all season long.
Delicate Floral Matte Design
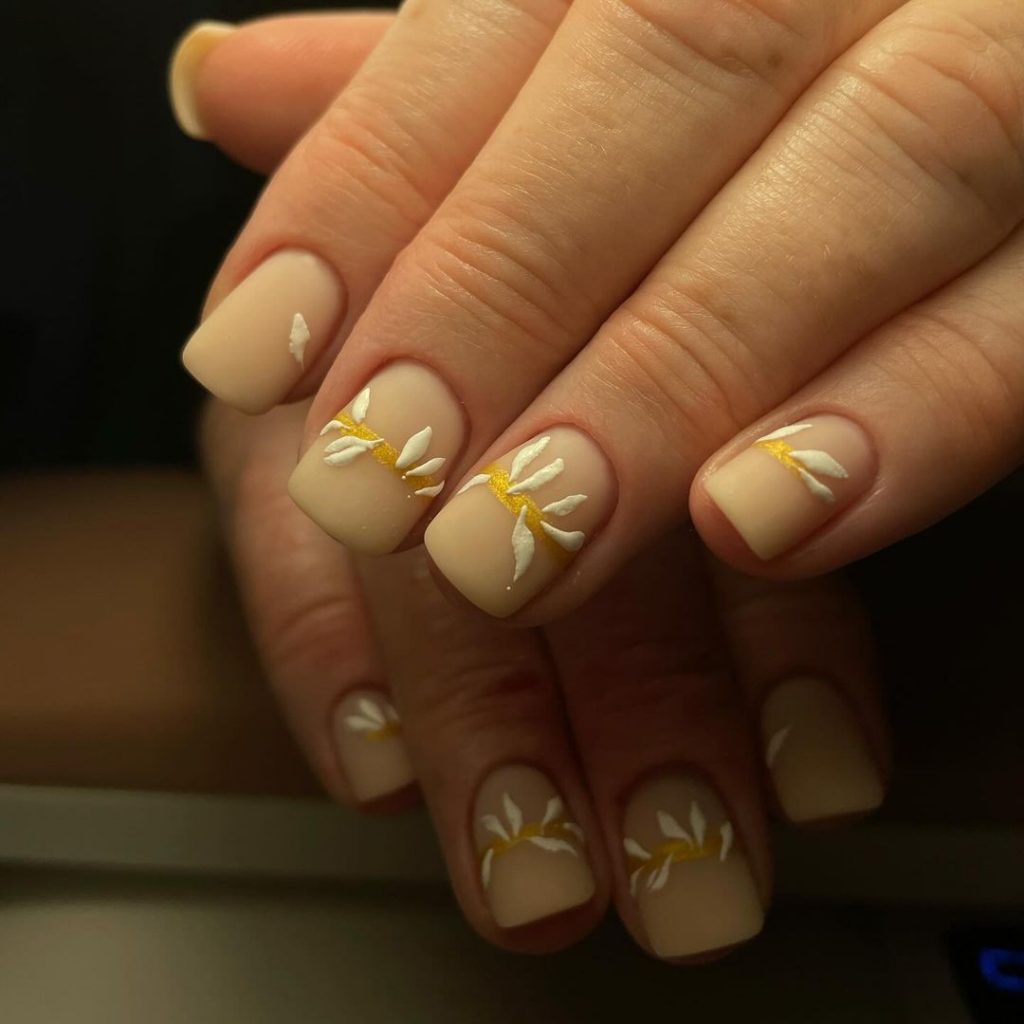
This elegant matte manicure is a perfect blend of simplicity and artistic flair. The neutral beige base serves as a canvas for delicate white floral accents, which are highlighted with a subtle gold stripe. This design is perfect for those who want a minimal yet sophisticated look, with a touch of nature-inspired art. The matte finish adds a modern twist, making this manicure versatile enough for both everyday wear and special occasions.
Consumables
Base Color: OPI “Be There in a Prosecco” for the neutral beige base
White Nail Art: Sally Hansen “I Heart Nail Art Pen” in White for the floral designs
Gold Striping Tape: Ultra-thin gold striping tape or nail art brush with gold polish
Matte Top Coat: Essie “Matte About You” to seal the look
DIY Instructions
- Apply a base coat to protect your nails.
- Paint two coats of the beige polish and allow it to dry completely.
- Use the white nail art pen to draw delicate floral designs on each nail.
- Add a thin gold stripe across each nail using striping tape or a nail art brush.
- Finish with a matte top coat to lock in the design and add a smooth finish.
Soft Gray with Abstract Accents
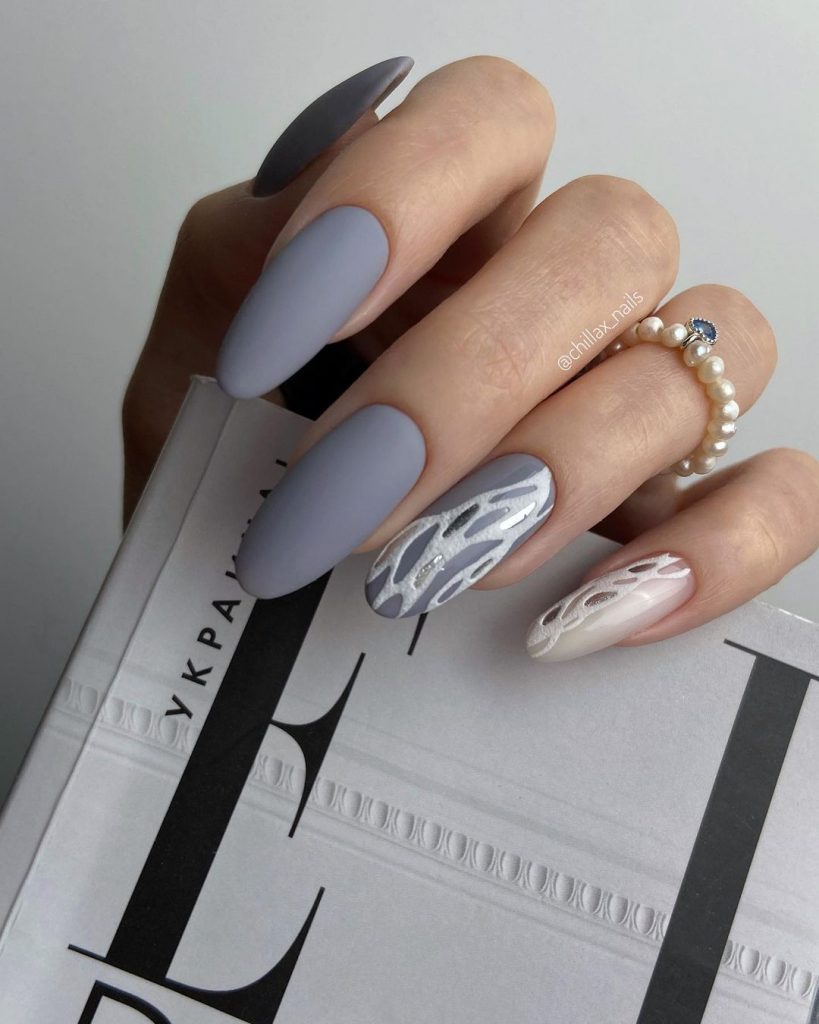
This manicure features a soft gray matte base with abstract, textured accents in shades of white and silver. The contrast between the matte gray and the glossy, textured accents adds depth and interest to the design. This look is perfect for those who appreciate a modern, artistic approach to nail art, with a subtle color palette that still stands out.
Consumables
Base Color: OPI “I Can Never Hut Up” for the soft gray base
Accent Colors: Essie “Blanc” for white and Zoya “Trixie” for silver
Textured Polish: China Glaze “Liquid Leather” for the textured accents
Matte Top Coat: Butter London “Matte Finish” for the gray nails
DIY Instructions
- Apply a base coat to start.
- Paint two coats of the gray polish and let it dry.
- Use a fine nail art brush to create abstract designs with the white and silver polishes on a few accent nails.
- Apply a textured black polish in specific areas to add depth.
- Seal the gray nails with a matte top coat and leave the textured nails as is to maintain the contrast.
Bold Dark Green Matte
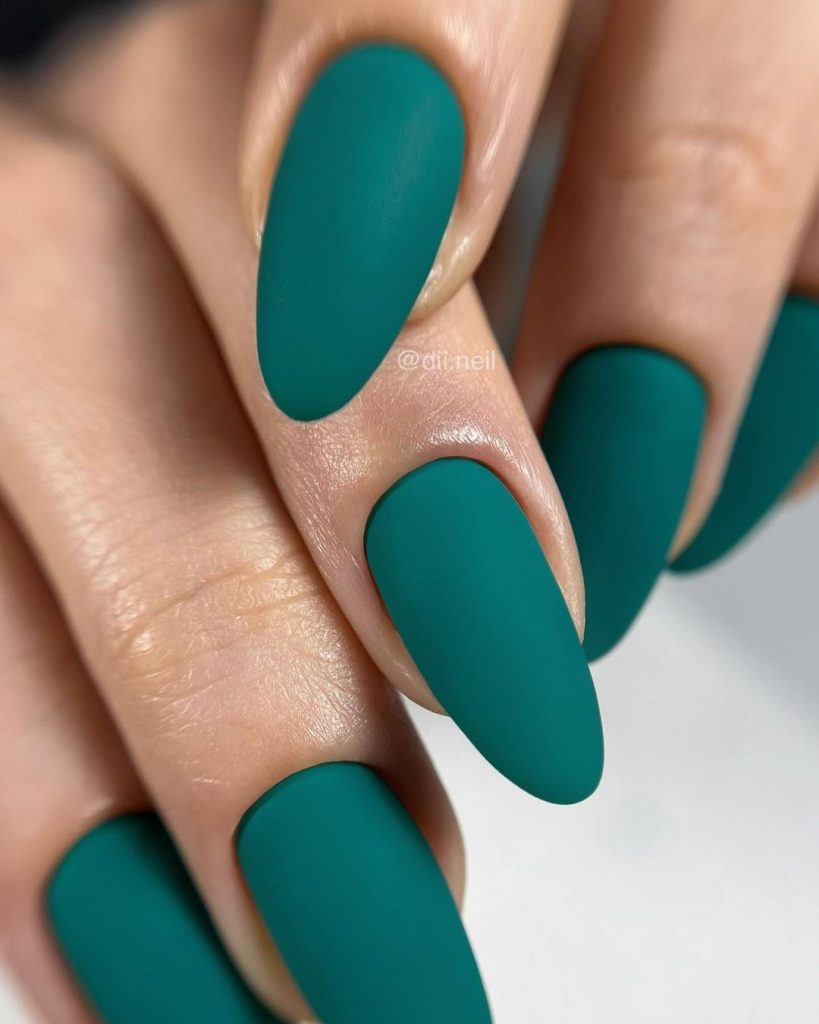
This manicure is all about making a statement with a bold, dark green matte finish. The rich green color is perfect for fall, providing a deep, earthy tone that’s both striking and elegant. This design is simple yet impactful, ideal for those who prefer a single-color manicure that still packs a punch.
Consumables
Base Color: OPI “Stay Off the Lawn!” for the dark green base
Matte Top Coat: Zoya “Matte Velvet Top Coat” for a smooth, matte finish
DIY Instructions
- Start with a base coat to protect your nails.
- Apply two coats of the dark green polish and allow it to dry completely.
- Finish with a matte top coat to achieve the bold, velvety finish.
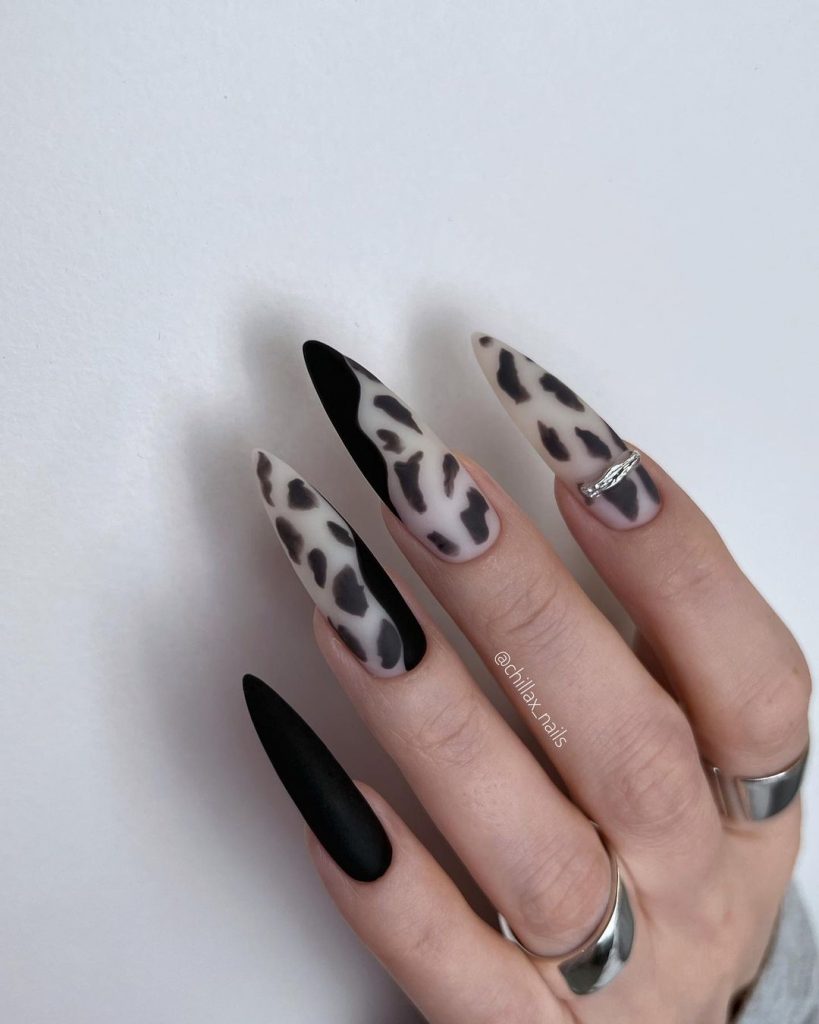
Monochrome Matte Animal Print
This edgy matte manicure combines the ever-popular animal print trend with a monochrome palette. The mix of black and white with a touch of gray creates a sophisticated yet fierce look. The matte finish keeps the design modern and chic, making it perfect for those who love to experiment with bold patterns in a stylish way.
Consumables
Base Colors: Essie “Licorice” for black and OPI “Alpine Snow” for white
Gray Accent: Zoya “Dove” for the gray accents
Matte Top Coat: OPI “Matte Top Coat” to seal the look
DIY Instructions
- Apply a base coat to start.
- Paint some nails black and others white.
- Use a nail art brush or stamping kit to create animal print patterns with the gray polish on the white nails.
- Finish with a matte top coat to add a modern touch to the animal print.
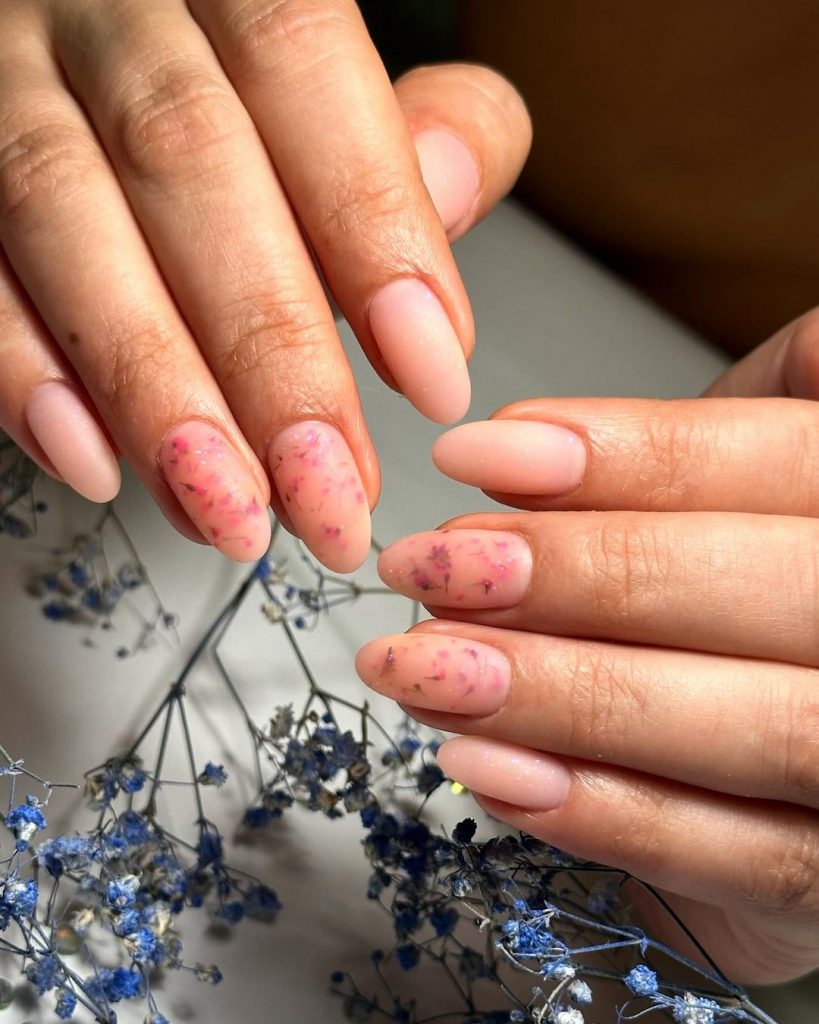
Soft Pink Matte with Floral Speckles
This soft pink matte manicure is elevated with delicate floral speckles, creating a dreamy, romantic look. The muted pink base is perfect for fall, offering a subtle hint of color that is both feminine and refined. The floral speckles add a touch of whimsy, making this design ideal for those who love a gentle, artistic approach to nail art.
Consumables
Base Color: OPI “Mod About You” for the soft pink base
Floral Speckle Polish: Deborah Lippmann “Flower Child” for the speckled effect
Matte Top Coat: Essie “Matte About You” to finish the look
DIY Instructions
- Start with a base coat to protect your nails.
- Apply two coats of the soft pink polish and let it dry.
- Lightly dab the floral speckle polish onto the nails to create a scattered effect.
- Seal the design with a matte top coat to give it a smooth, velvety finish.
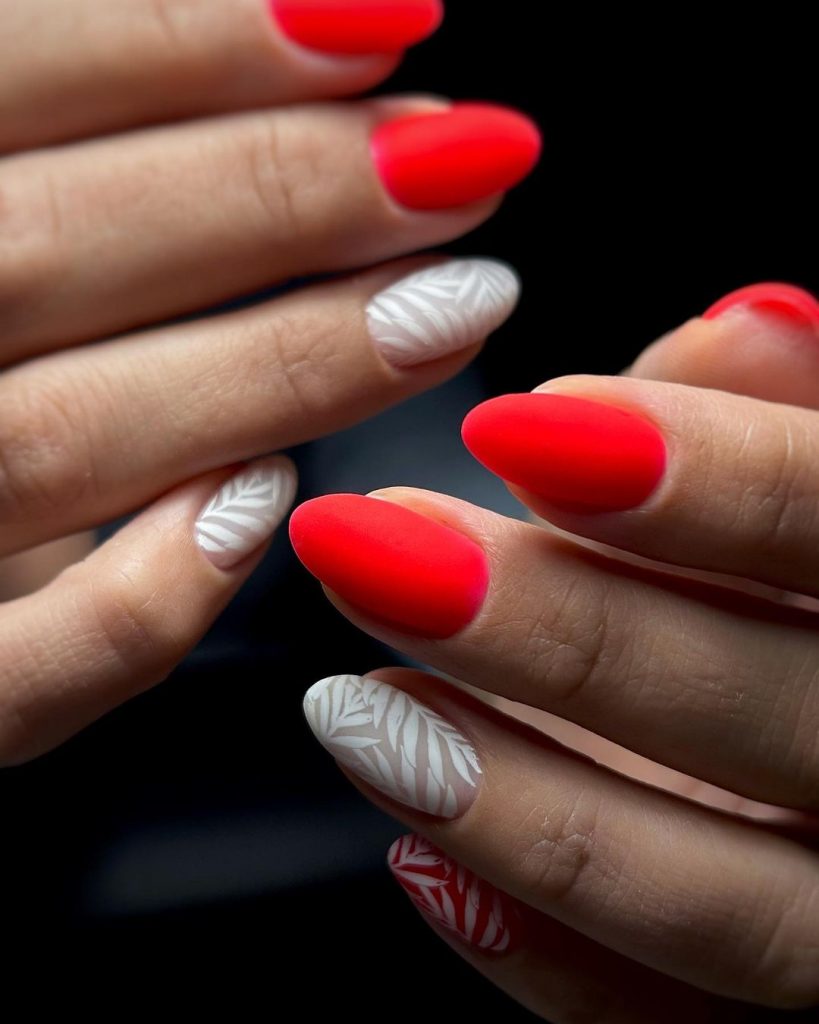
Vibrant Red and Leafy White
If you’re looking to make a bold statement this fall, this vibrant red and milky white matte manicure is the perfect choice. The striking contrast between the fiery red and the soft white, adorned with delicate leaf patterns, creates an eye-catching design that’s both bold and sophisticated. The red color is reminiscent of the fall leaves, making it an ideal choice for the season. The art of the leaf design adds a natural element, balancing the intensity of the red with a more neutral and calming aesthetic.
Consumables
Base Color: OPI “Big Apple Red” for the vibrant red base
White Polish: Essie “Blanc” for the milky white base
Matte Top Coat: Butter London “Matte Finish”
Nail Stamping Plate: Maniology M052 for the leaf patterns
Stamping Polish: Born Pretty “White Knight”
DIY Instructions
- Start with a base coat to protect your nails.
- Apply two coats of the vibrant red polish on selected nails and the white polish on the others.
- Once the polish is dry, use the stamping plate and white stamping polish to add the leaf designs to the white nails.
- Seal everything with a matte top coat to maintain the matte effect and durability.
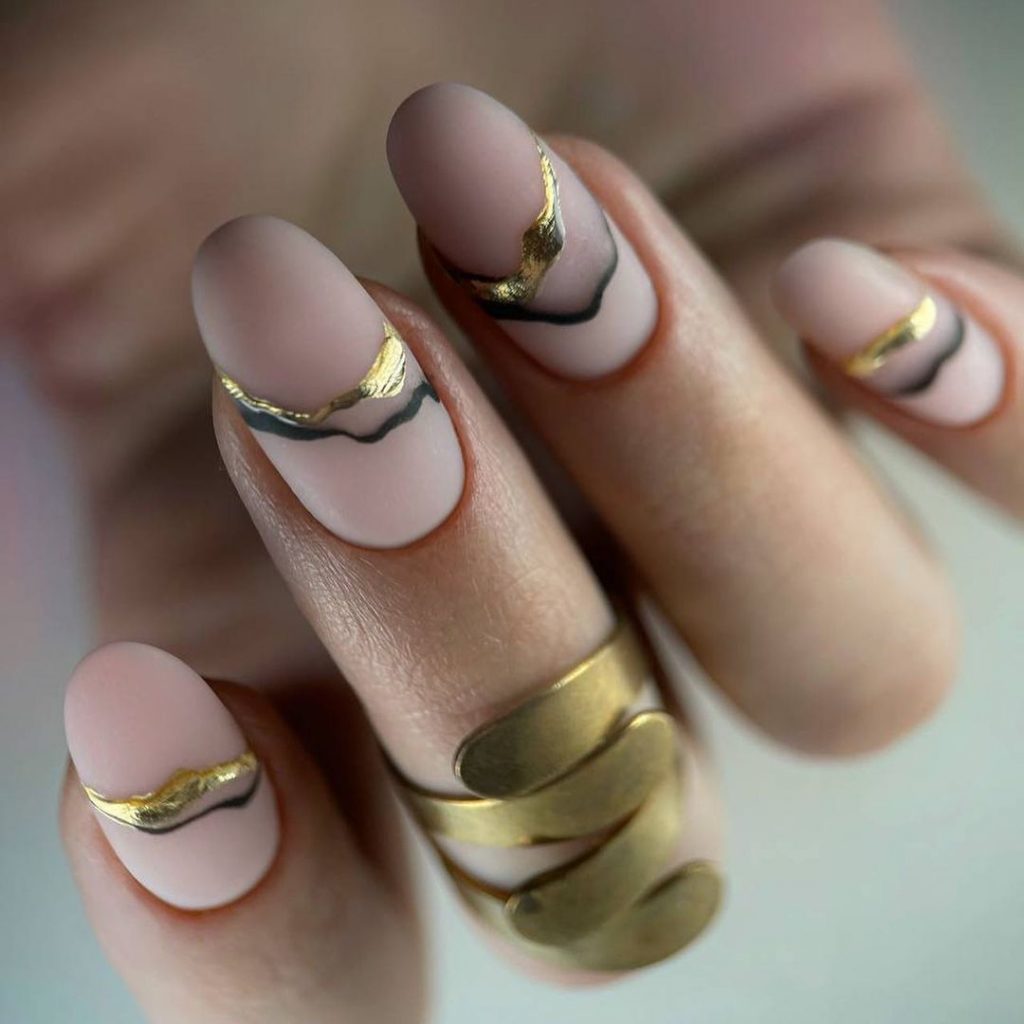
Minimalist Black and Gold
For a more understated yet elegant fall nail look, this minimalist black and gold manicure is a must-try. The soft matte beige base serves as the perfect canvas for the thin, black wavy lines and hints of gold leaf that accentuate the nail tips. This design offers a modern twist on the classic French manicure, making it suitable for those who appreciate subtle yet stylish ideas. The combination of black and gold with a neutral background is timeless, adding a touch of luxury to your fall nail repertoire.
Consumables
Base Color: Zoya “Avril” for a soft beige base
Black Nail Art Pen: Sally Hansen “I Heart Nail Art Pen” in Black
Gold Foil: Nail Art Foil in Gold from Born Pretty
Matte Top Coat: OPI “Matte Top Coat” for the overall matte finish
DIY Instructions
- Apply a base coat to start.
- Paint two layers of the beige polish and let them dry completely.
- Using the black nail art pen, draw thin wavy lines across the tips of your nails.
- Apply the gold foil to the areas around the black lines, using a bit of clear polish as adhesive.
- Finish with a matte top coat to lock in the design and ensure longevity.
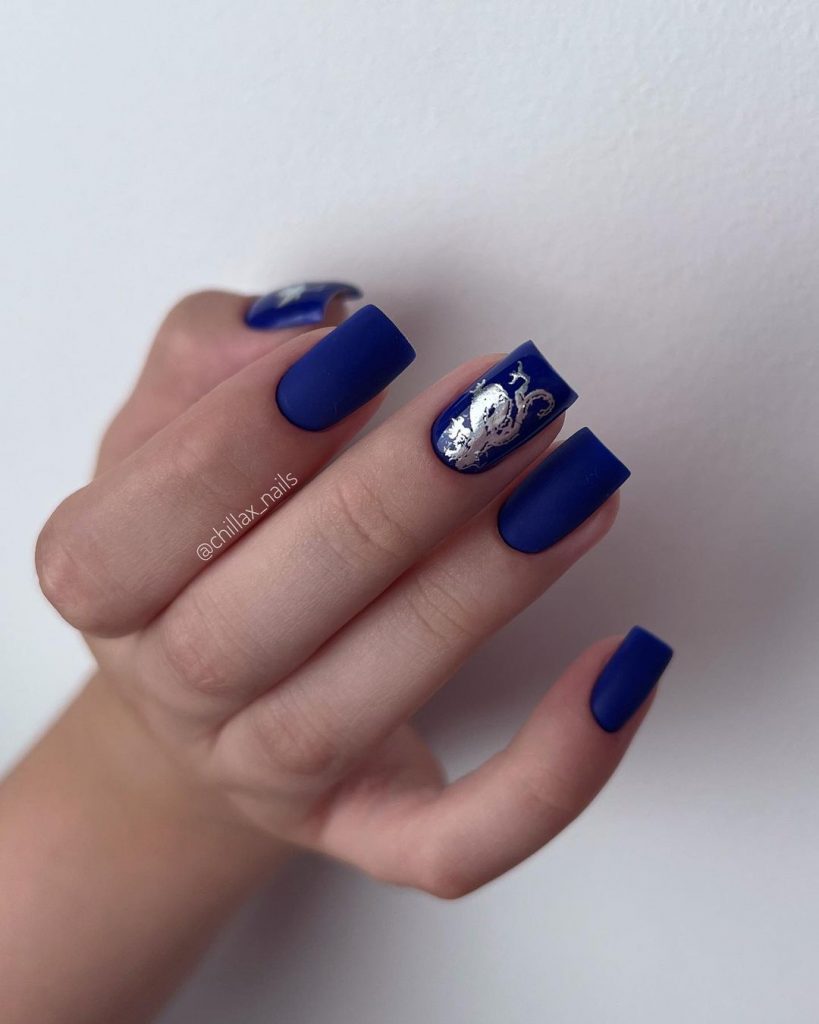
Regal Blue Matte with Silver Accent
Blue is not just a summer color; it transitions beautifully into fall when paired with the right accents. This deep, matte blue manicure is elevated by the silver accent nail that features a delicate design, adding a touch of whimsy and elegance. The rich blue color exudes confidence and sophistication, making it a standout choice for those who want a bold yet refined look. The silver art on the accent nail provides just the right amount of contrast, making this a well-balanced design idea.
Consumables
Base Color: Essie “Aruba Blue” for the rich blue base
Silver Nail Art Stickers: Born Pretty “Moon and Stars” Set
Matte Top Coat: China Glaze “Matte Magic” for the perfect matte finish
DIY Instructions
- Begin with a base coat to protect your nails.
- Apply two coats of the blue polish and allow them to dry.
- Carefully place the silver nail art stickers on the accent nail to create your design.
- Seal the manicure with a matte top coat to enhance the matte effect and secure the stickers.
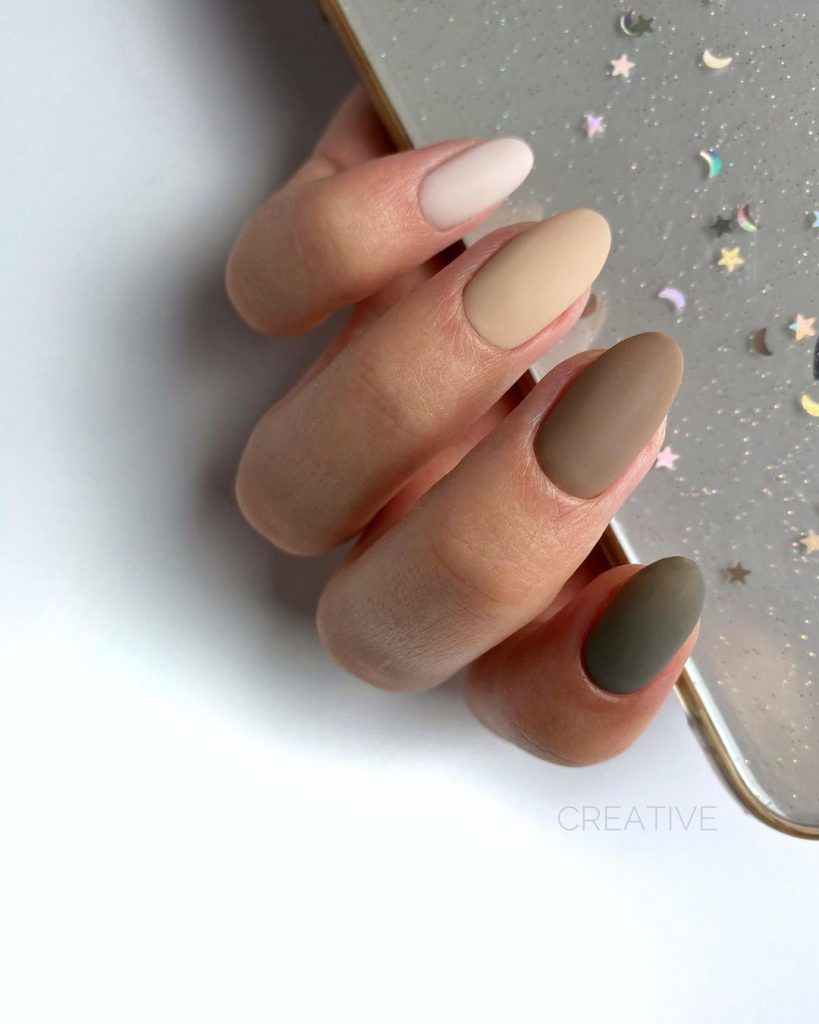
Earthy Matte Neutrals
Neutrals never go out of style, especially in the fall, when earth tones are at their peak. This manicure features a harmonious blend of beige, taupe, and olive green, all in a soft matte finish. The simple yet sophisticated design makes it perfect for any occasion, from casual outings to more formal settings. The colors are understated, making this manicure a versatile choice that complements the season’s wardrobe seamlessly.
Consumables
Base Colors: OPI “Samoan Sand” for beige, Zoya “Chantal” for taupe, and Essie “Power Clutch” for olive green
Matte Top Coat: Essie “Matte About You” for a smooth, matte finish
DIY Instructions
- Start with a base coat to protect your nails.
- Apply two coats of each color on the respective nails, allowing each to dry thoroughly.
- Finish with a matte top coat to give the entire manicure a unified matte finish.
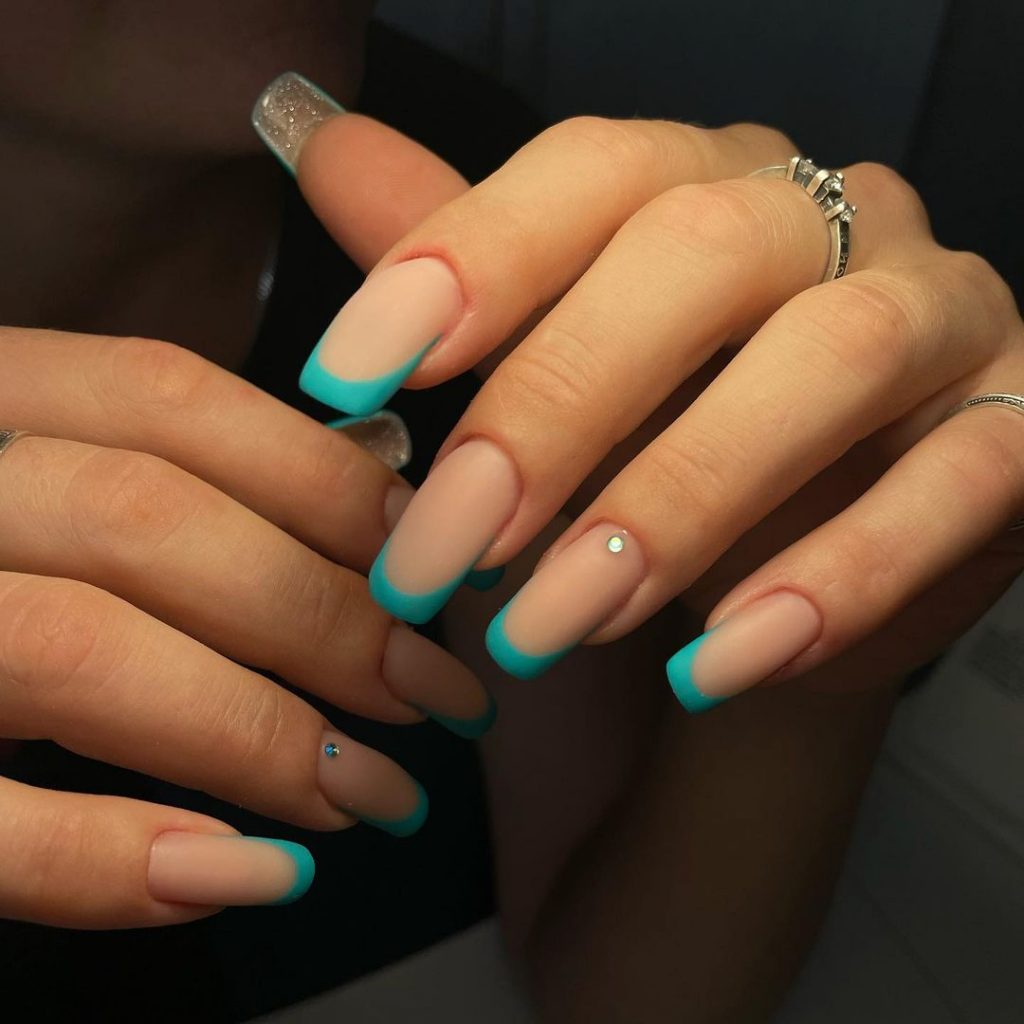
Glossy Tips on Matte French
This modern twist on the classic French manicure combines the best of both worlds: matte and glossy finishes. The nails are painted in a soft nude matte, while the tips are highlighted with a glossy, vibrant turquoise. This design idea adds a pop of color and a bit of shine, making it a fun and playful option for fall. The baby blue tips are both refreshing and stylish, offering a unique take on the traditional French manicure.
Consumables
Base Color: Essie “Ballet Slippers” for the soft nude base
Glossy Tip Polish: OPI “Teal the Cows Come Home” for the vibrant turquoise tips
Matte Top Coat: Butter London “Matte Finish”
Glossy Top Coat: Seche Vite “Dry Fast Top Coat” for the tips
DIY Instructions
- Apply a base coat to start.
- Paint your nails with two coats of the nude polish and let them dry completely.
- Carefully apply the turquoise polish to the tips of your nails, using French tip guides if needed.
- Finish with a matte top coat over the nude portion and a glossy top coat over the tips to complete the look.
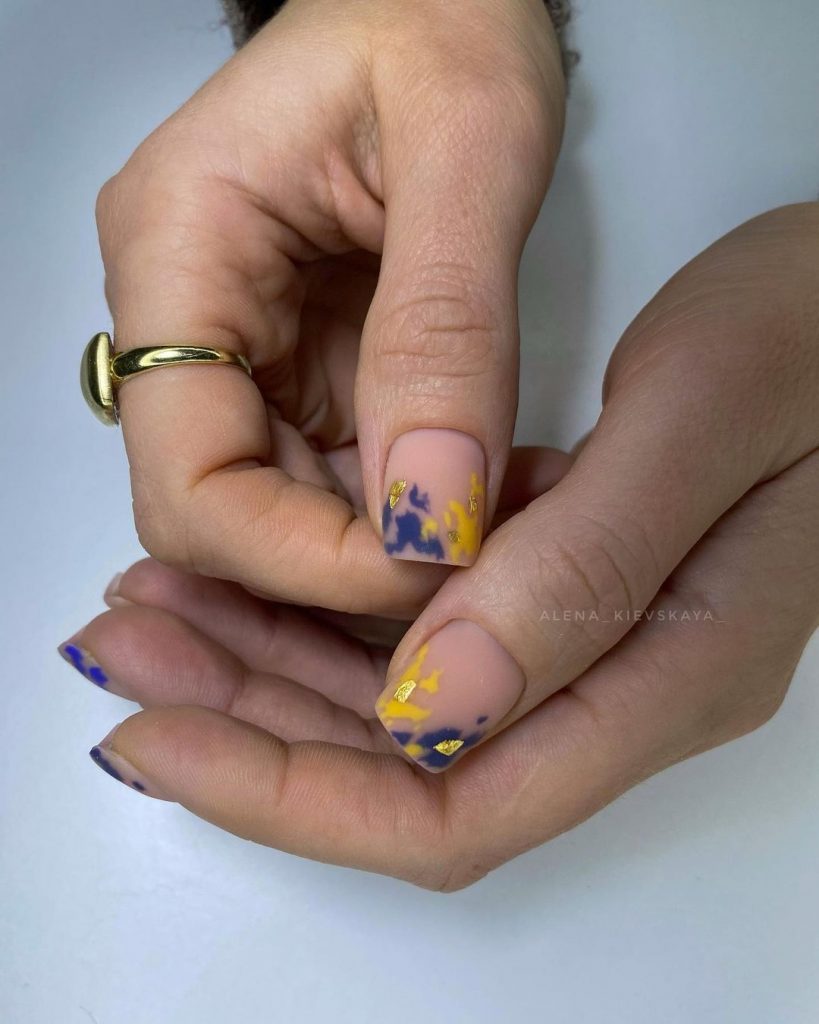
Abstract Yellow and Blue Accents
This bold and artistic manicure is a fantastic way to embrace the creativity of fall 2024. The matte nude base provides a subtle background, allowing the abstract splashes of yellow and blue to take center stage. The gold flakes added to the design offer a luxurious touch, elevating the entire look. This design is perfect for someone who loves to mix colors and textures, making a statement without being overly complicated. The interplay of the dark blue and bright yellow against the neutral background creates a striking contrast that’s both modern and chic.
Consumables
Base Color: OPI “Samurai Breaks a Nail” for the nude base
Yellow Polish: Essie “Hay There”
Blue Polish: OPI “Russia Navy”
Gold Foil: Born Pretty Gold Nail Foil
Matte Top Coat: Zoya “Matte Velvet Top Coat”
DIY Instructions
- Begin with a base coat to protect your nails.
- Apply two coats of the nude polish and let it dry completely.
- Using a small sponge, dab the yellow and blue polishes onto the nails in random areas to create an abstract effect.
- Apply gold foil accents to enhance the design, then finish with a matte top coat to seal everything in place.
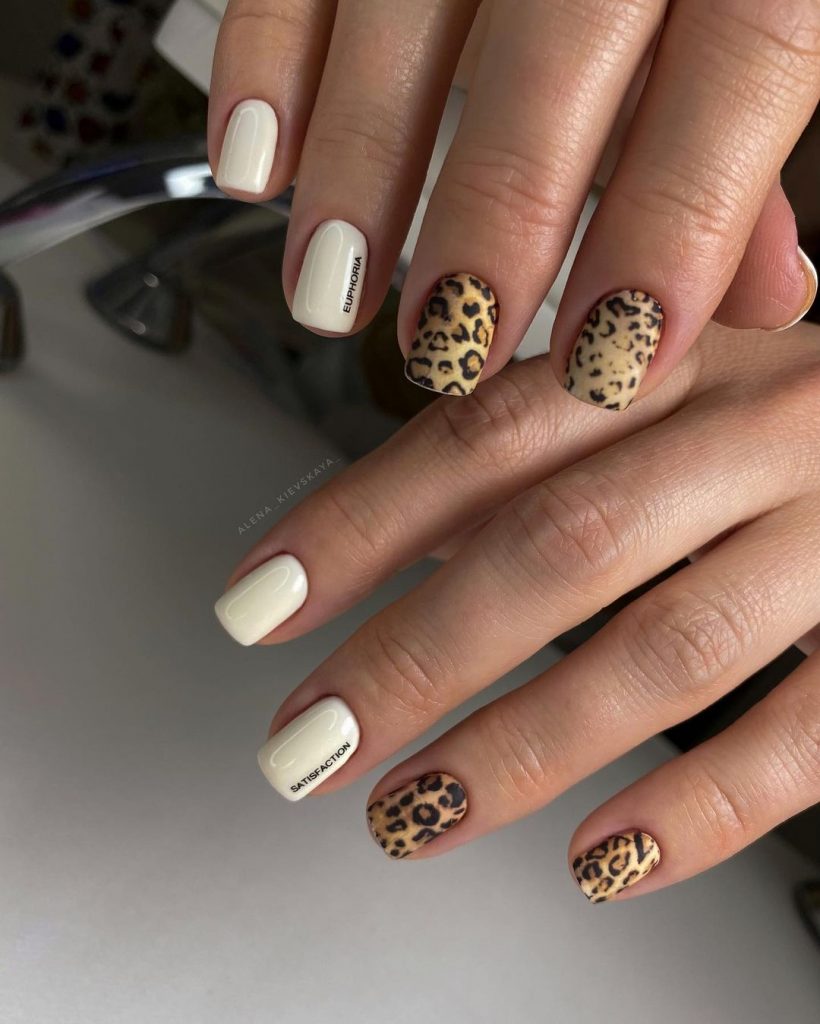
Leopard Print with a Glossy Touch
Leopard print is a timeless design that never goes out of style, and this matte version with a touch of gloss adds a contemporary twist. The combination of the matte white nails with the glossy leopard accents makes for a striking contrast. This look is both simple and sophisticated, perfect for those who want to make a statement while keeping things classy. The black and beige color palette is neutral enough to match any outfit, making this manicure versatile for any occasion.
Consumables
Base Color: OPI “Alpine Snow” for the white base
Leopard Print Stamping Plate: Moyou London “Animal Collection – 01”
Leopard Print Polish: Essie “Licorice” for black spots and “Sand Tropez” for beige
Glossy Top Coat: Seche Vite “Dry Fast Top Coat” for the leopard nails
DIY Instructions
- Start by applying a base coat to your nails.
- Apply two coats of the white polish to most of your nails, leaving one or two for the leopard print.
- Use the stamping plate and polish to create the leopard print on the remaining nails.
- Finish by applying a glossy top coat to the leopard nails and a matte top coat to the white nails to complete the look.
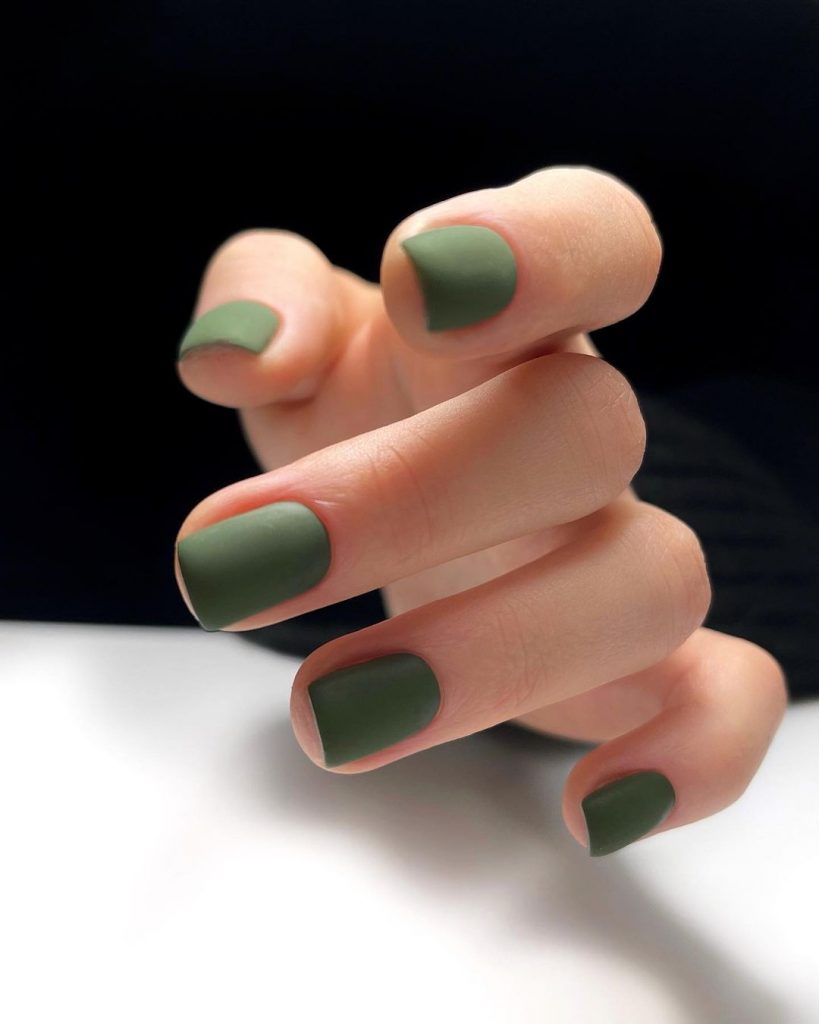
Deep Olive Matte
For a more understated yet chic fall manicure, this deep olive matte is a perfect choice. The solid color exudes a sense of sophistication and pairs beautifully with the muted tones of autumn fashion. This design is simple yet impactful, making it an ideal option for those who prefer a minimalist look. The matte finish adds a modern touch, keeping the nails looking fresh and trendy.
Consumables
Base Color: Zoya “Wyatt” for the deep olive shade
Matte Top Coat: OPI “Matte Top Coat”
DIY Instructions
- Apply a base coat to protect your nails.
- Paint two coats of the olive polish and let it dry.
- Seal the manicure with a matte top coat to achieve the desired finish.
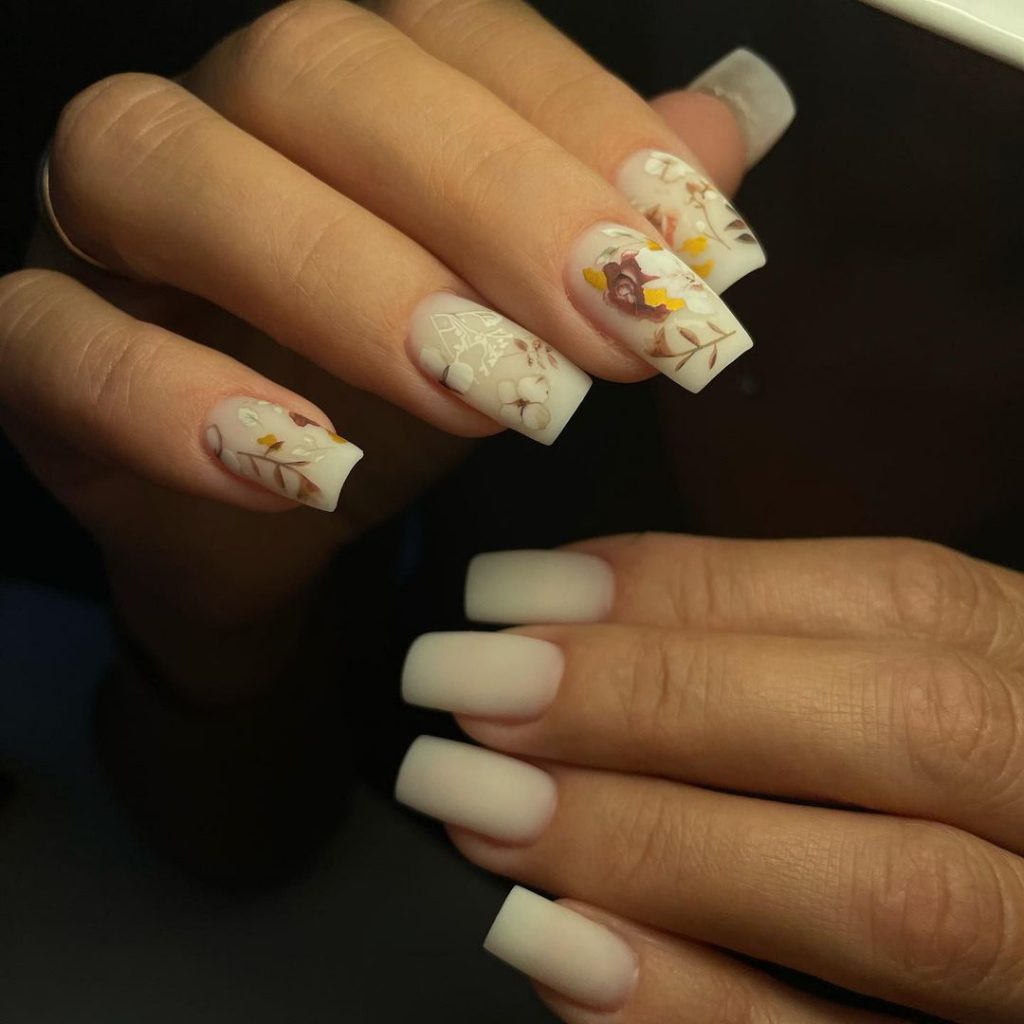
Floral Dream
This cute floral design is the epitome of feminine elegance, perfect for those who want to embrace the softer side of fall. The matte milky white base provides a delicate backdrop for the intricate floral details in shades of brown, yellow, and beige. The art is intricate and detailed, making this a standout design idea for anyone who loves a romantic and natural look. The combination of soft tones and floral patterns makes this manicure both timeless and seasonally appropriate.
Consumables
Base Color: Essie “Marshmallow” for the milky white base
Floral Nail Stickers: Born Pretty “Autumn Leaves” Set
Matte Top Coat: Zoya “Matte Velvet Top Coat”
DIY Instructions
- Begin by applying a base coat.
- Apply two coats of the milky white polish and let it dry.
- Carefully apply the floral nail stickers to create the desired pattern.
- Finish with a matte top coat to seal the stickers and enhance the look.
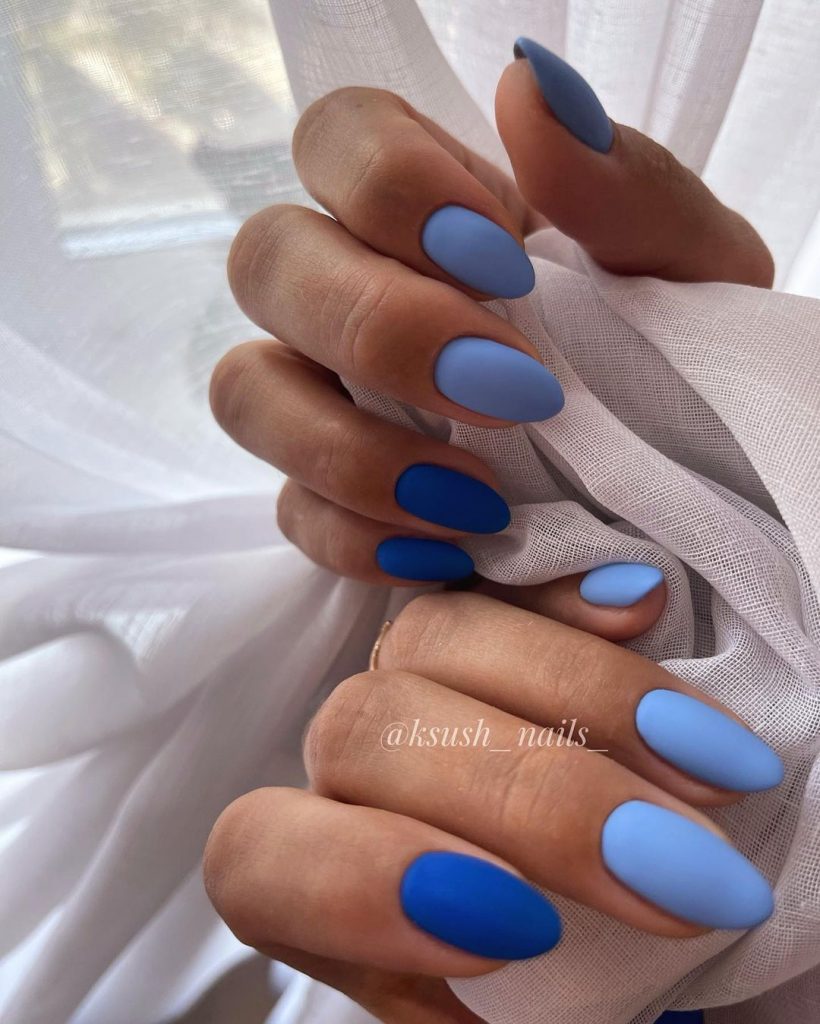
Dual Blue Matte Ombre
Ombre nails are always in trend, and this dual blue matte ombre is no exception. The gradient effect from light to dark blue creates a visually stunning design that’s perfect for the colder months. The matte finish adds a modern twist, making this look both trendy and sophisticated. This manicure is ideal for those who love to play with color but prefer a more toned-down and elegant approach.
Consumables
Base Colors: OPI “Rich Girls & Po-Boys” for the light blue and Essie “Bobbing for Baubles” for the dark blue
Makeup Sponge: For creating the ombre effect
Matte Top Coat: China Glaze “Matte Magic” for the final finish
DIY Instructions
- Start with a base coat to protect your nails.
- Paint your nails with the light blue polish and let it dry.
- Use a makeup sponge to apply the dark blue polish to the tips of your nails, blending it into the light blue for an ombre effect.
- Finish with a matte top coat to seal the design and give it that modern matte look.
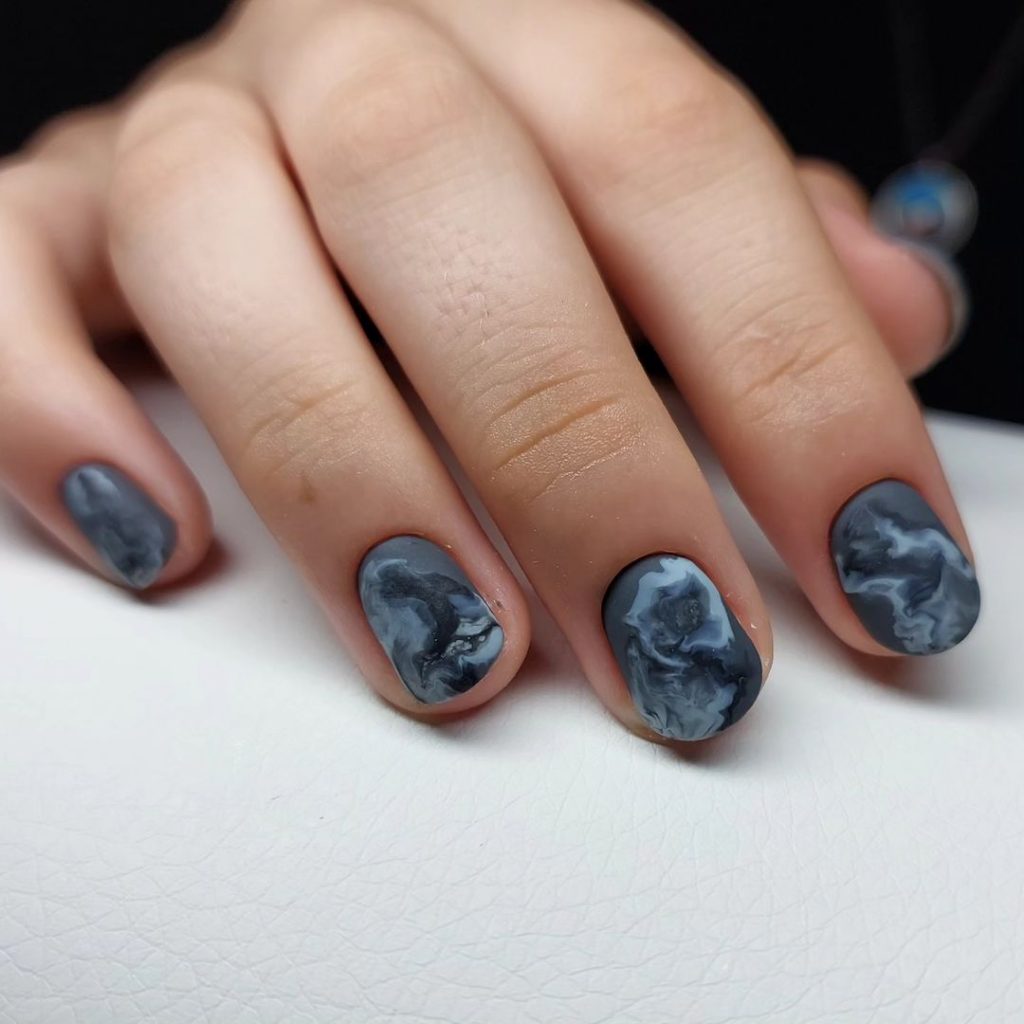
Marble Swirl Gray
Marble nails have been trending for a while, and this gray marble swirl design takes the look to a whole new level for fall 2024. The combination of light and dark gray tones creates a smoky, ethereal effect that is both modern and sophisticated. The matte finish adds depth to the design, making the swirls stand out even more. This art is perfect for those who want a unique, dark manicure that’s still understated and classy.
Consumables
Base Color: OPI “Suzi & The Arctic Fox” for the gray base
Marbling Polish: Essie “Smokin’ Hot” for the darker gray swirls
Matte Top Coat: Butter London “Matte Finish”
Thin Nail Brush: For creating the marble effect
DIY Instructions
- Start by applying a base coat to protect your nails.
- Paint two coats of the gray polish and allow them to dry.
- Use a thin nail brush to create the marble swirls by blending the darker gray polish onto the nails in a random pattern.
- Finish with a matte top coat to enhance the depth and texture of the marble design.
Soft Nude Sparkle
For those who prefer a more subtle, neutral look, this soft nude manicure with a hint of sparkle is an excellent choice. The milky white base is complemented by a delicate shimmer on a couple of nails, adding just the right amount of cute detail. The simple yet elegant leaf design on the accent nail ties the look together, making it perfect for any fall occasion, whether casual or formal.

Consumables
Base Color: Essie “Ballet Slippers” for the nude base
Shimmer Polish: Zoya “Leia” for the subtle sparkle
White Nail Art Pen: Sally Hansen “I Heart Nail Art Pen” in White for the leaf design
Matte Top Coat: Zoya “Matte Velvet Top Coat”
DIY Instructions
- Begin by applying a base coat to protect your nails.
- Apply two coats of the nude polish and let it dry.
- Add a layer of the shimmer polish to the nails you want to highlight with sparkle.
- Use the white nail art pen to draw a delicate leaf on the accent nail.
- Finish with a matte top coat to lock in the design and give it a soft, elegant finish.
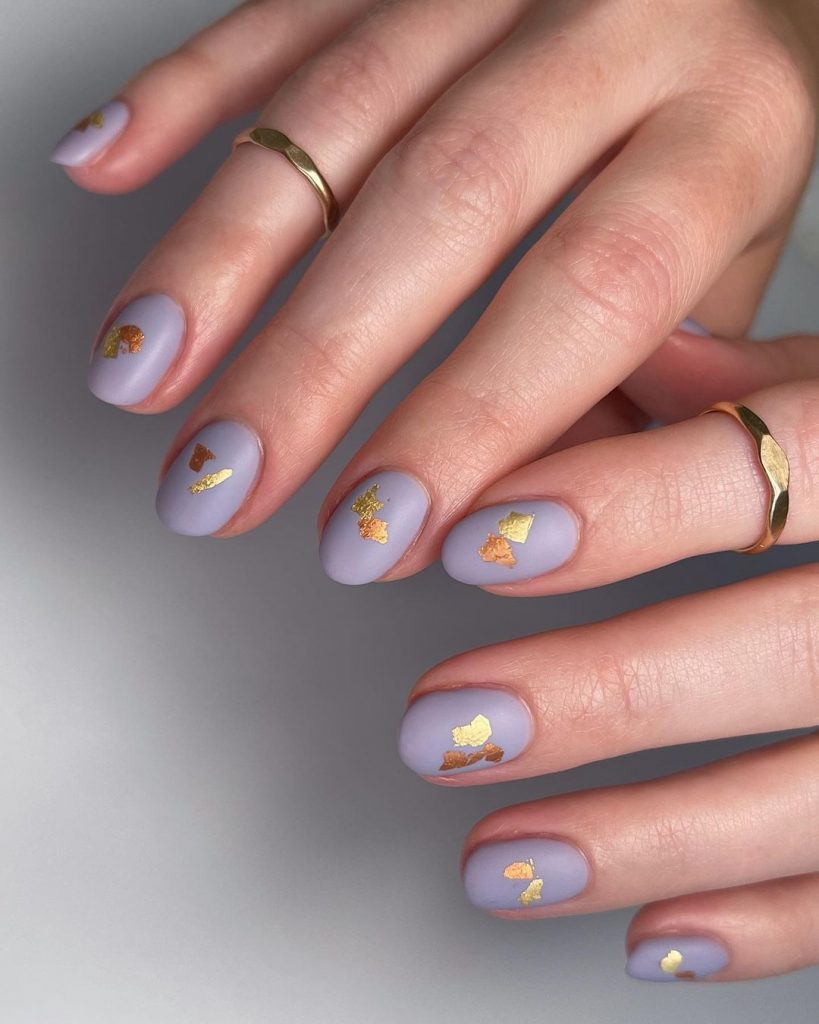
Lavender with Gold Leaf
Lavender is an unexpected but beautiful choice for fall, especially when paired with gold leaf accents. This pastel matte manicure is soft and feminine, with a touch of luxury provided by the scattered gold flakes. The gold adds a warm contrast to the cool lavender, making this manicure stand out. This design idea is perfect for those who love a bit of glamour in their everyday look.
Consumables
Base Color: Essie “Lilacism” for the lavender base
Gold Leaf: Born Pretty Gold Nail Foil
Matte Top Coat: OPI “Matte Top Coat”
DIY Instructions
- Start by applying a base coat to your nails.
- Apply two coats of the lavender polish and let it dry.
- Gently press gold leaf onto your nails in random spots, using a small amount of clear polish as adhesive if needed.
- Finish with a matte top coat to seal the gold leaf and maintain the matte effect.
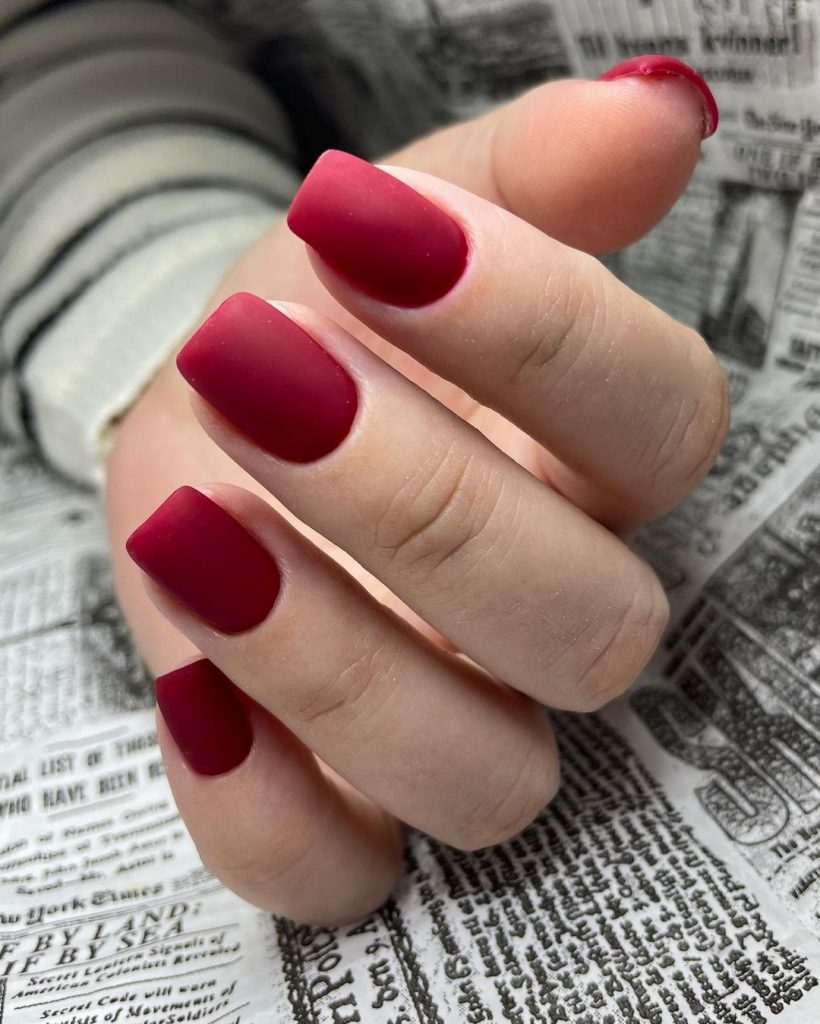
Classic Matte Red
Red nails are a timeless classic, and this deep, matte red manicure is a stunning choice for fall. The rich, bold color is perfect for adding a pop of red to your autumn wardrobe. The matte finish gives it a modern twist, making it both chic and elegant. This simple yet striking manicure is ideal for those who love a bold statement.
Consumables
Base Color: OPI “Big Apple Red” for the classic red base
Matte Top Coat: Essie “Matte About You” for the final finish
DIY Instructions
- Start with a base coat to protect your nails.
- Apply two coats of the red polish and allow it to dry completely.
- Finish with a matte top coat to give your manicure a modern, velvety finish.
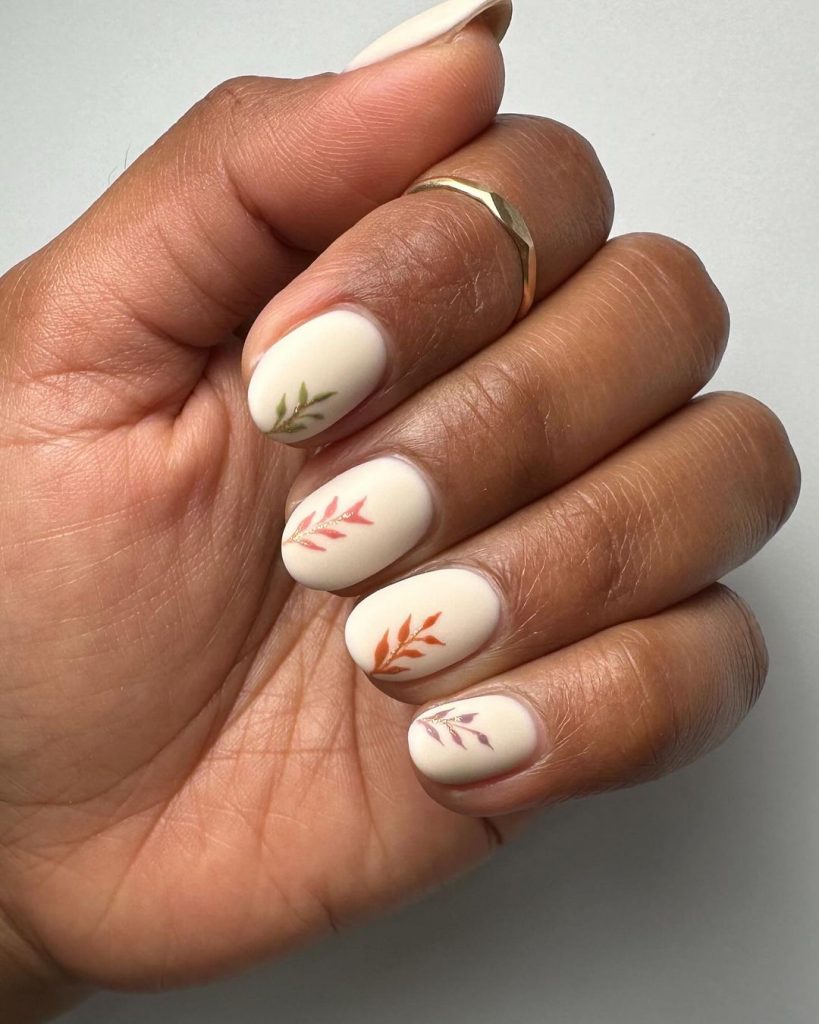
Fall Leaves on Milky White
Nothing says fall like a leaf motif, and this milky white manicure with delicate, multi-colored leaves is perfect for the season. The soft, neutral base allows the leaf art to take center stage, making this a standout design for those who love autumn-inspired nails. The mix of green, red, and orange leaves adds a subtle pop of color, keeping the design balanced and sophisticated.
Consumables
Base Color: OPI “Funny Bunny” for the milky white base
Leaf Nail Stickers: Born Pretty “Fall Leaves” Set
Matte Top Coat: Zoya “Matte Velvet Top Coat”
DIY Instructions
- Apply a base coat to your nails.
- Paint two coats of the milky white polish and let it dry thoroughly.
- Apply the leaf stickers in your desired pattern on each nail.
- Seal the design with a matte top coat to keep the look soft and seasonally appropriate.
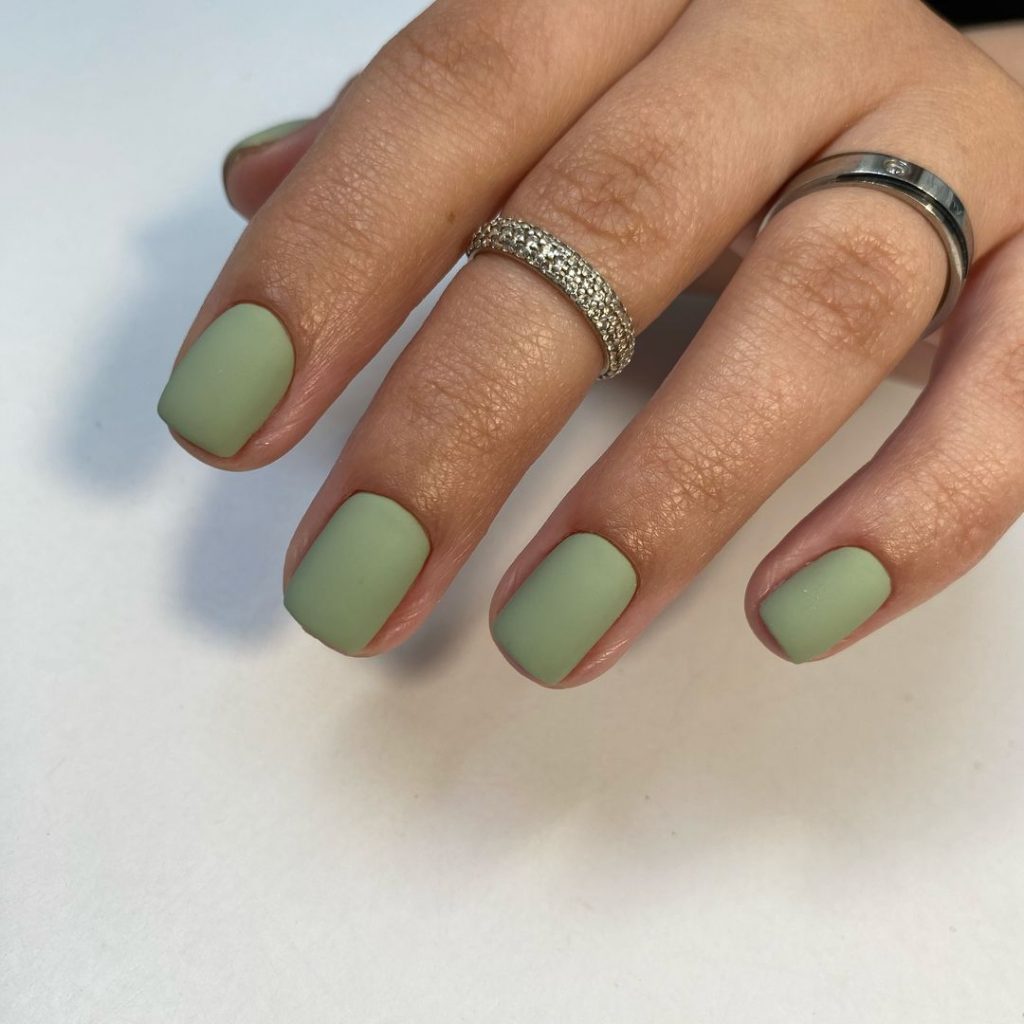
Soft Sage Green Matte
Sage green is one of those colors that effortlessly transitions between seasons, and this matte version is a perfect choice for fall. The soft, muted green adds a touch of freshness while maintaining a subtle, understated elegance. This design is simple yet sophisticated, ideal for those who appreciate minimalism. The matte finish enhances the softness of the color, making it a versatile option that pairs well with both casual and more formal looks.
Consumables
Base Color: Essie “Maximillian Strasse Her” for the sage green base
Matte Top Coat: OPI “Matte Top Coat” for a smooth, matte finish
DIY Instructions
- Begin by applying a base coat to protect your nails.
- Apply two coats of the sage green polish and allow it to dry completely.
- Finish with a matte top coat to achieve that soft, velvety finish.
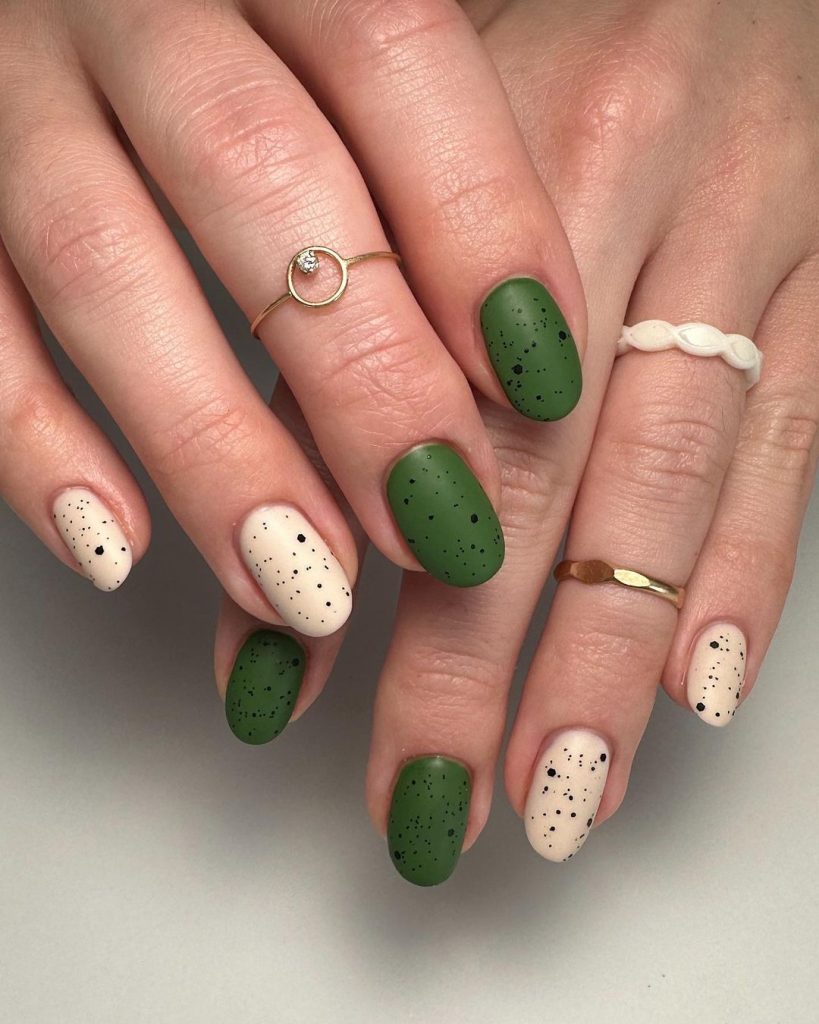
Speckled Green and Cream
This manicure combines the earthy tones of green with a creamy white, accented by a fun speckled design. The green and cream shades are beautifully balanced, and the speckled effect adds a playful touch to an otherwise elegant look. The matte finish keeps the design classy, while the speckles bring a unique twist, making it a great option for those who want to experiment with patterns without going too bold.
Consumables
Base Colors: Zoya “Wyatt” for green and OPI “My Vampire is Buff” for cream
Speckled Polish: China Glaze “Gotta Go” for the speckles
Matte Top Coat: Butter London “Matte Finish”
DIY Instructions
- Start by applying a base coat to your nails.
- Apply two coats of the green polish on some nails and the cream polish on others.
- Use the speckled polish to add random spots to each nail for a playful effect.
- Seal everything with a matte top coat to lock in the design and give it a soft finish.
Brown-Tipped French
This modern take on the classic French manicure features a nude matte base with rich, brown tips. The combination of these warm, earthy tones makes it a perfect choice for fall. The brown tips add a sophisticated twist, keeping the design elegant yet contemporary. This manicure is ideal for those who love the classic French look but want to update it with a seasonal twist.

Consumables
Base Color: Essie “Topless & Barefoot” for the nude base
Tip Color: OPI “You Don’t Know Jacques!” for the brown tips
Matte Top Coat: Zoya “Matte Velvet Top Coat” to complete the look
DIY Instructions
- Apply a base coat to start.
- Paint two coats of the nude polish and let it dry.
- Use French manicure guides or a steady hand to paint the tips with the brown polish.
- Finish with a matte top coat to enhance the modern twist on this classic style.
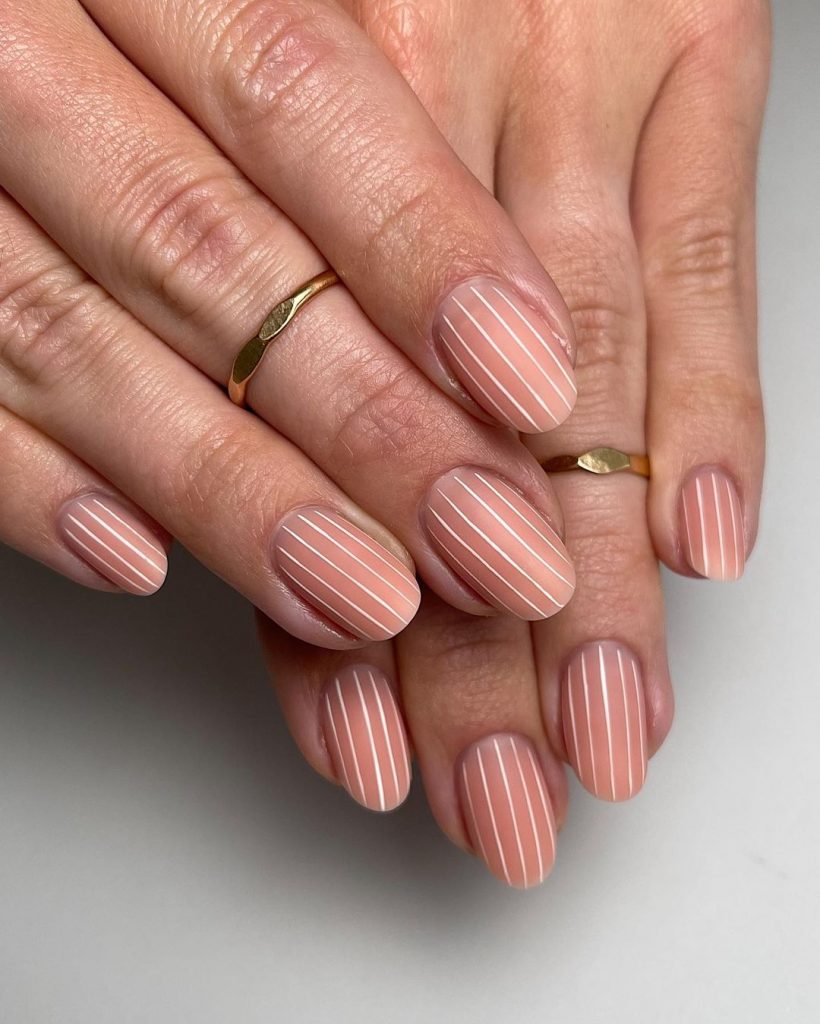
Subtle Stripes
Stripes are a timeless pattern, and this minimalist approach makes them perfect for a chic fall look. The soft, nude base is adorned with thin, white stripes, creating a clean and modern design. The matte finish ensures that the manicure remains understated, making it versatile for both work and play. This design idea is perfect for those who love a classic pattern with a contemporary twist.
Consumables
Base Color: OPI “Bubble Bath” for the soft nude base
White Nail Art Pen: Sally Hansen “I Heart Nail Art Pen” in White for the stripes
Matte Top Coat: Essie “Matte About You”
DIY Instructions
- Start by applying a base coat to your nails.
- Paint two coats of the nude polish and let it dry completely.
- Use the white nail art pen to draw thin stripes vertically across each nail.
- Seal the design with a matte top coat to keep the look polished and modern.
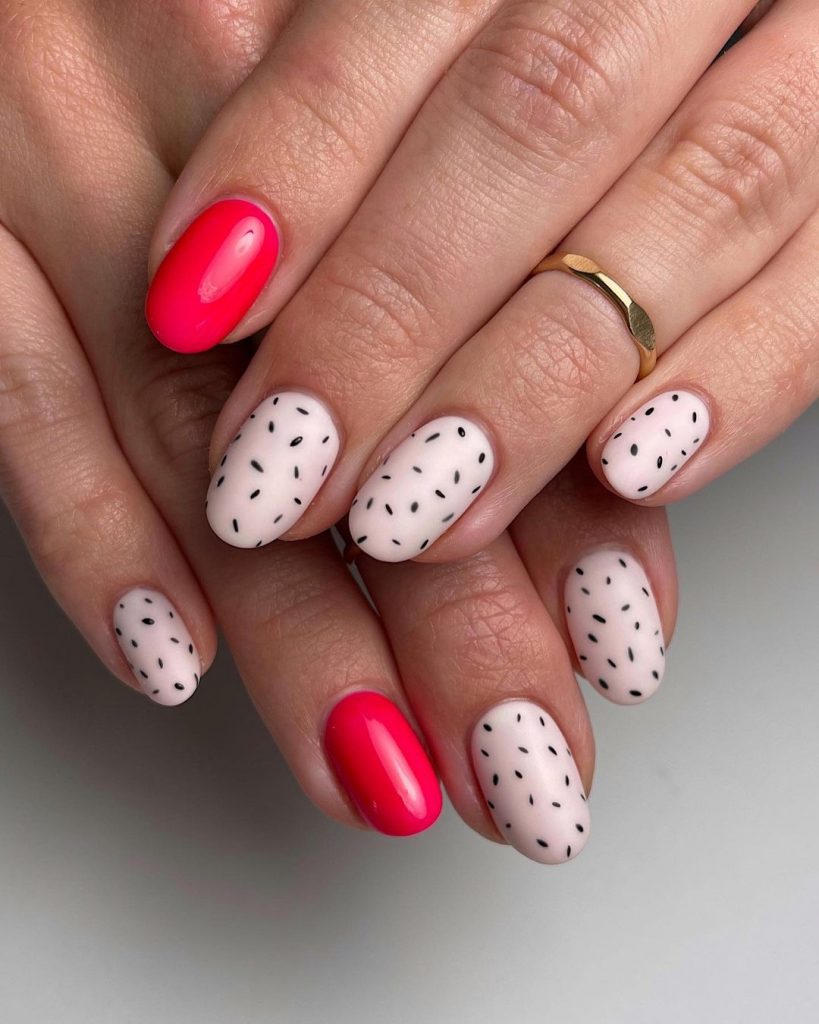
Pink and Polka Dots
This fun and playful design features a bright pink accent nail paired with soft, milky white nails adorned with black polka dots. The contrast between the bright pink and the subtle white creates a vibrant yet balanced look. The matte finish on the polka-dotted nails adds a modern touch, while the glossy pink accent adds a pop of color, making this manicure both cute and trendy.
Consumables
Base Colors: Essie “Ballet Slippers” for the white base and OPI “Pink Flamenco” for the pink accent
Black Nail Art Pen: Sally Hansen “I Heart Nail Art Pen” in Black for the polka dots
Matte Top Coat: China Glaze “Matte Magic” for the polka-dotted nails
Glossy Top Coat: Seche Vite “Dry Fast Top Coat” for the pink accent nail
DIY Instructions
- Start by applying a base coat to your nails.
- Apply two coats of the white polish on most of your nails and the pink polish on one or two accent nails.
- Use the black nail art pen to draw small polka dots on the white nails.
- Finish with a matte top coat on the polka-dotted nails and a glossy top coat on the pink nails to create a fun, contrasting effect.
Save Pin