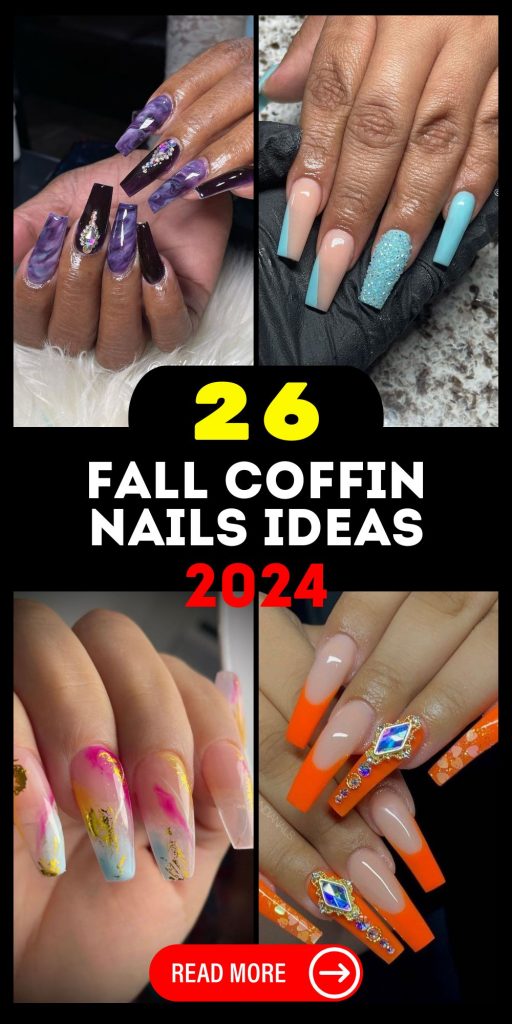
As the leaves begin to turn and the air grows crisp, it’s time to refresh your nail game with some fabulous fall coffin nails 2024. Coffin nails have remained a staple in the nail art world, and this fall, they’re all about bold colors, intricate designs, and a mix of classic and modern trends. But what makes these nails so perfect for autumn? Let’s explore this season’s hottest trends, ideas, and designs that will have your nails looking chic and on point.
Cozy Autumn Vibes
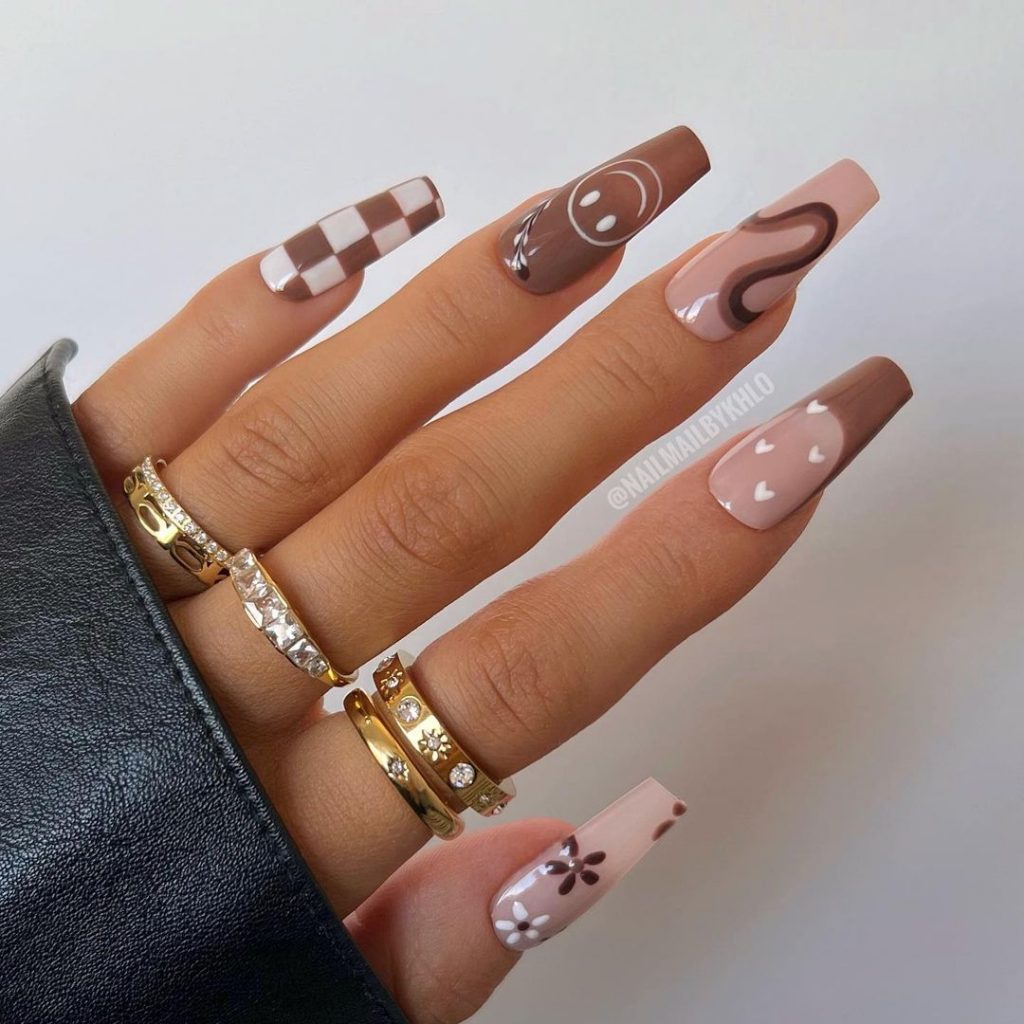
When it comes to embodying the warmth of fall, these brown-toned nails hit the mark perfectly. The combination of rich brown hues with playful patterns, such as checkered prints and smiley faces, adds a touch of whimsy while keeping it sophisticated. The heart accents and abstract swirls balance the design, making it both cute and classy. This look is perfect for those who want to embrace the season with a fun yet refined manicure.
Consumables
- Gel polish in shades of brown (OPI GelColor in “Chocolate Moose”)
- Matte top coat (Essie Matte About You)
- Detailing brushes (Winstonia Fine Detailing Brush Set)
- White nail art pen (Sally Hansen I Heart Nail Art Pen in White)
DIY Tips
- Start by prepping your nails with a base coat.
- Apply two coats of the lightest brown shade.
- Use detailing brushes to create the checkered pattern and swirls, then let them dry.
- Add the white accents using the nail art pen.
- Seal the design with a matte top coat for a trendy finish.
Forest Green Elegance
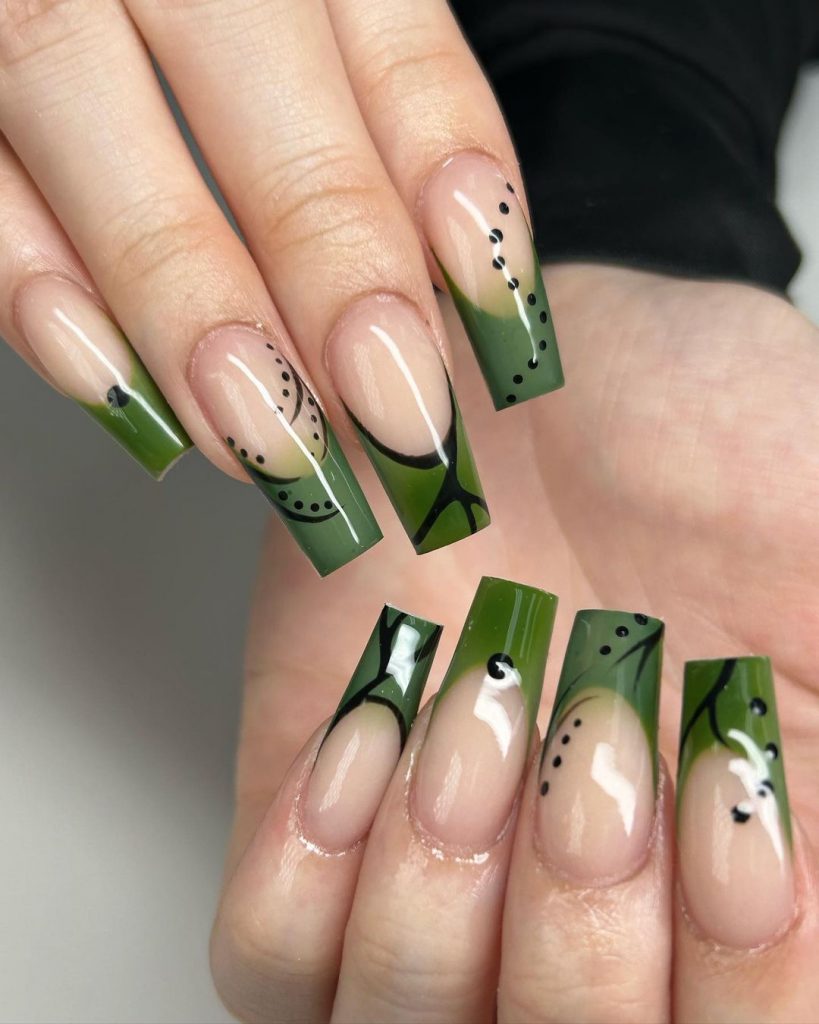
Embrace the deep, natural tones of the season with this stunning green coffin nail design. The blend of nude and green creates a harmonious look that’s perfect for anyone looking to add a touch of nature to their manicure. The delicate black accents add depth to the design, while the use of different shades of green makes this design versatile and eye-catching. Ideal for those who want something a bit more understated yet still trendy.
Consumables
- Gel polish in various shades of green (DND Gel in “Forest Green” and “Olive Branch”)
- Black nail art pen (Sally Hansen I Heart Nail Art Pen in Black)
- Dotting tool (Beetles Nail Art Dotting Tools Set)
DIY Tips
- Begin with a nude base coat to create a neutral backdrop.
- Apply the darkest green polish to the tips, creating a French tip effect.
- Use the black nail art pen to add delicate dots and lines for a subtle accent.
- Finish with a high-shine top coat to make the colors pop.
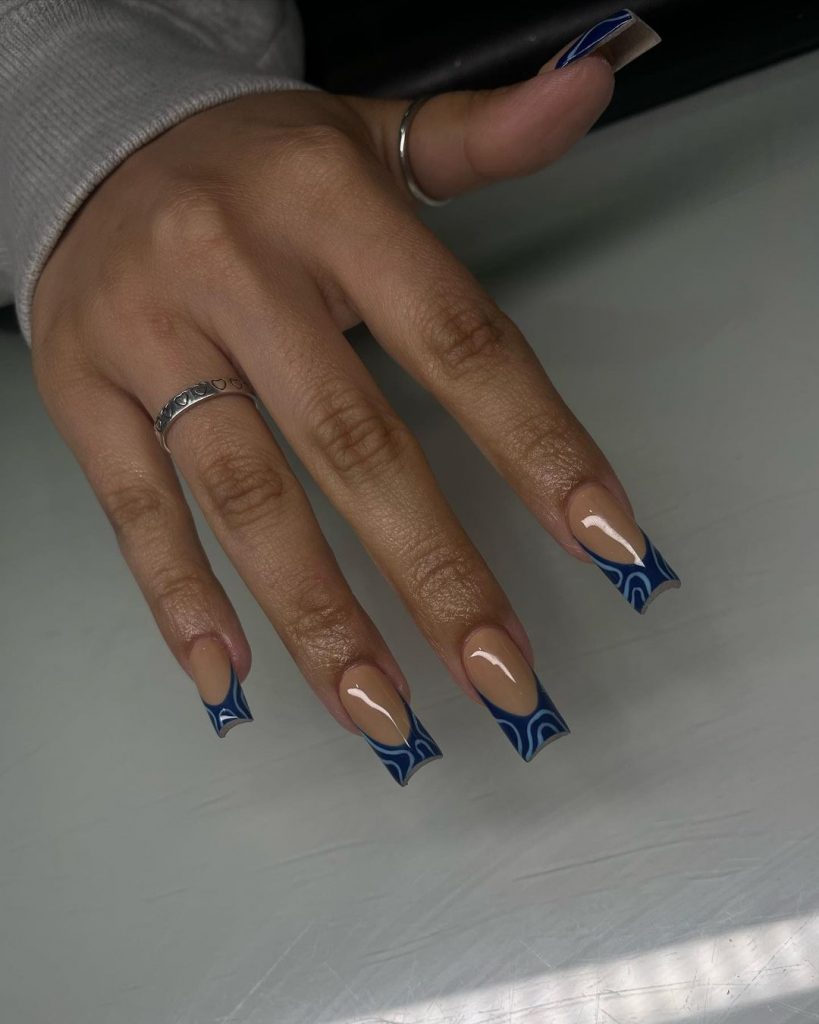
Blue Porcelain Inspiration
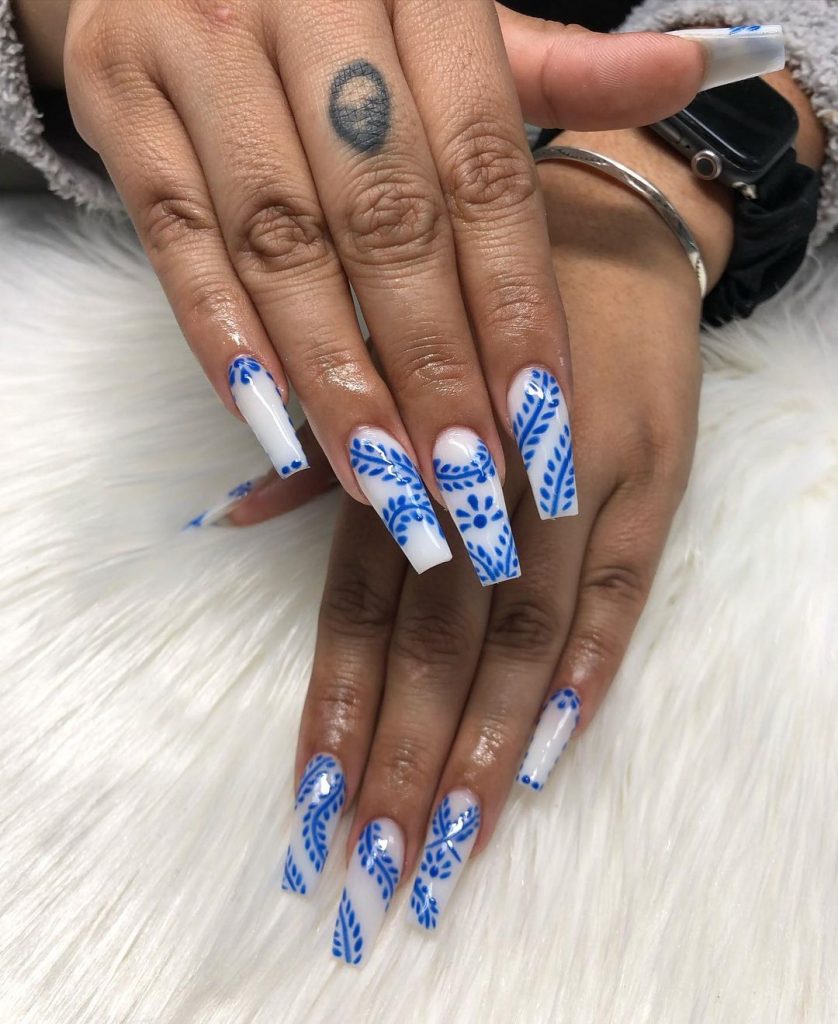
For those who adore a more artistic approach, this blue and white design is reminiscent of delicate porcelain patterns. The intricate detailing and crisp color contrast make this design stand out as a sophisticated yet simple option for fall. The elongated shape of the coffin nails adds elegance to the overall look, making it perfect for any occasion where you want to make a statement.
Consumables
- Gel polish in blue and white (Essie Gel Couture in “Caviar Bar” and “Pre-Show Jitters”)
- Fine detailing brush (Makartt Nail Art Brush Set)
- Nail striping tape (Maniology Nail Art Striping Tape)
DIY Tips
- Apply a white base coat to all nails.
- Using the fine detailing brush, paint the intricate blue patterns, referencing traditional porcelain designs.
- If needed, use striping tape to ensure straight lines.
- Once the design is complete, finish with a glossy top coat.
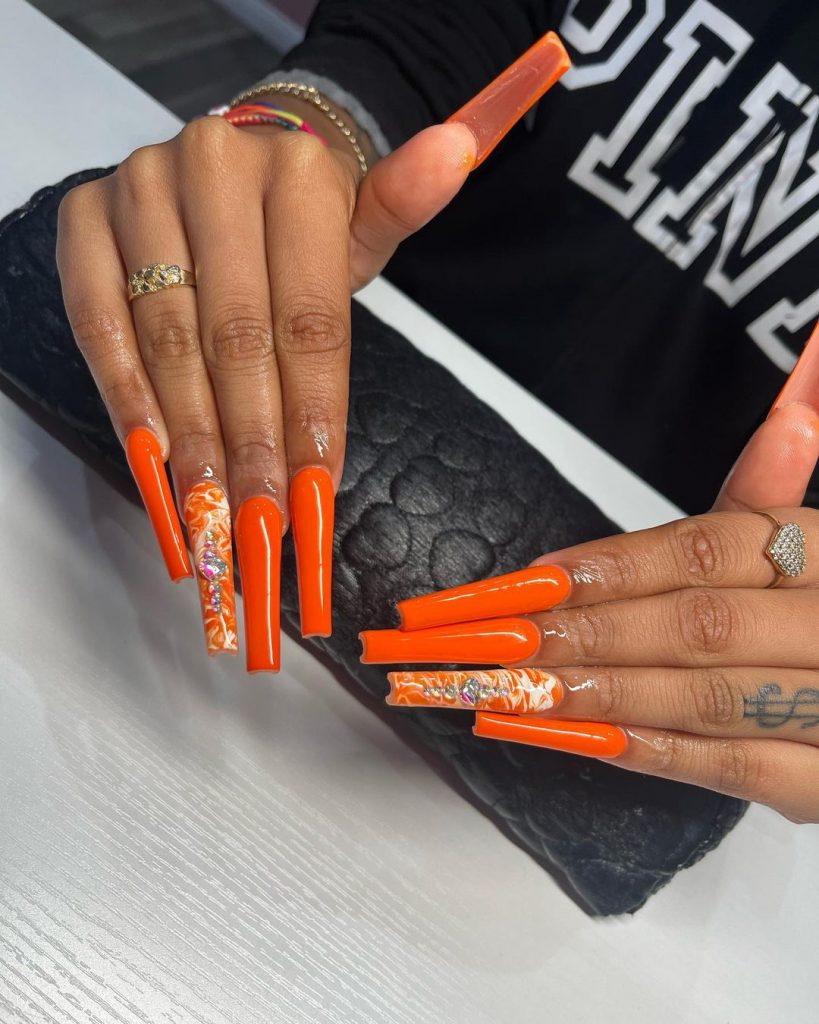
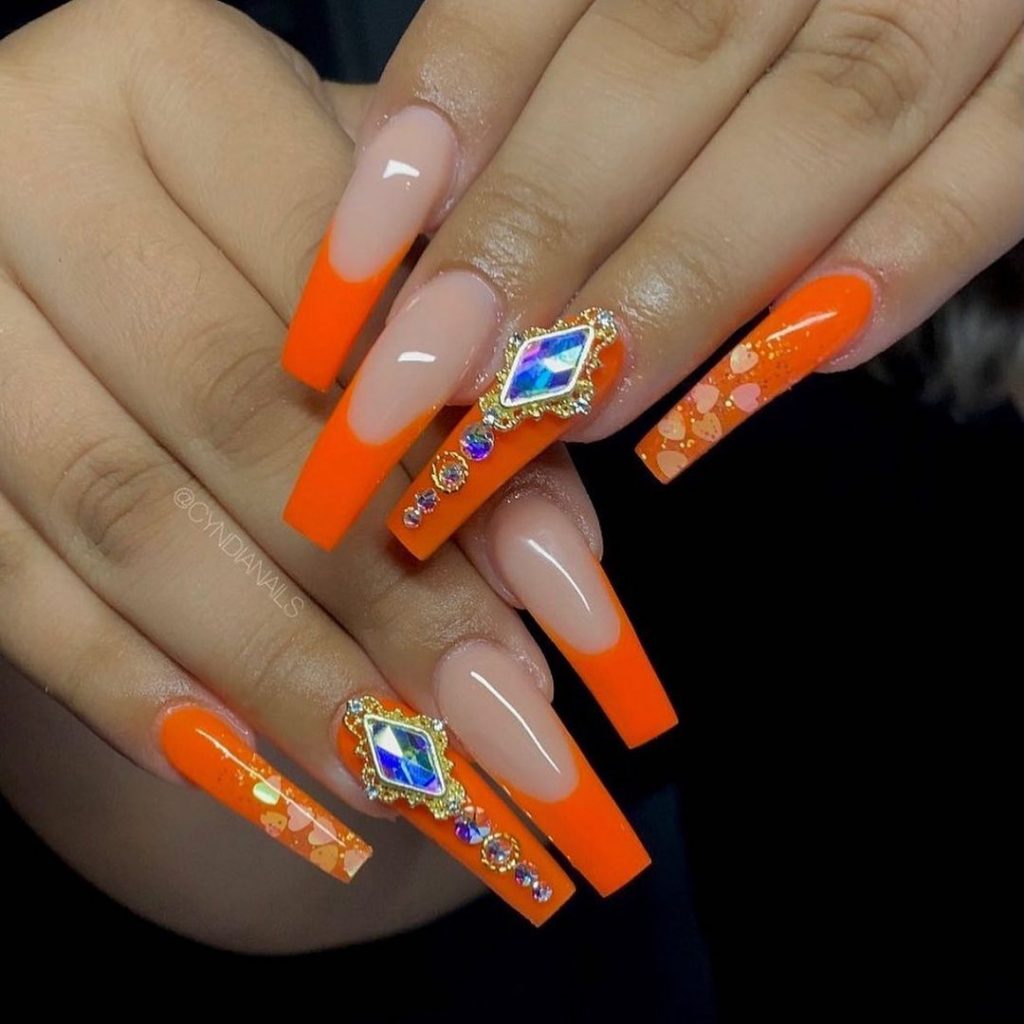
Vibrant Orange Hues
Bring the vibrant energy of fall to your fingertips with these striking orange coffin nails. The bright orange shade, combined with marbled accents and sparkling rhinestones, makes this design a bold choice for those who love to stand out. This look is perfect for those who want to embrace the season’s colors in a long, eye-catching manicure.
Consumables
- Gel polish in bright orange (OPI GelColor in “No Tan Lines”)
- Clear rhinestones (Swarovski Flatback Crystals)
- Marbling tool (KADS Nail Art Marbling Pen)
DIY Tips
- Start with an orange base coat, applying two even layers.
- Use the marbling tool to create the swirled accent nail with white and orange polish.
- Carefully place rhinestones on the wet polish for added sparkle.
- Seal the design with a glossy top coat to secure the rhinestones and add shine.
Subtle Pink Ombre
For a more understated yet elegant look, this baby pink ombre design is the perfect choice. The soft gradient from nude to pink creates a neutral and versatile manicure, ideal for everyday wear. The touch of glitter on the accent nail adds just enough sparkle to keep the design from being too plain, making it a simple yet chic option.
Consumables
- Gel polish in nude and baby pink (DND Gel in “Pinky Promise” and “Bare My Soul”)
- Fine glitter powder (Born Pretty Glitter Powder)
- Sponge for ombre effect (Makartt Sponge Brush Set)
DIY Tips
- Apply a nude base coat and let it dry completely.
- Using the sponge, dab the baby pink polish onto the tips, gradually blending it down to create the ombre effect.
- Add glitter to the accent nail while the polish is still wet.
- Finish with a top coat to smooth out the ombre and add a glossy finish.
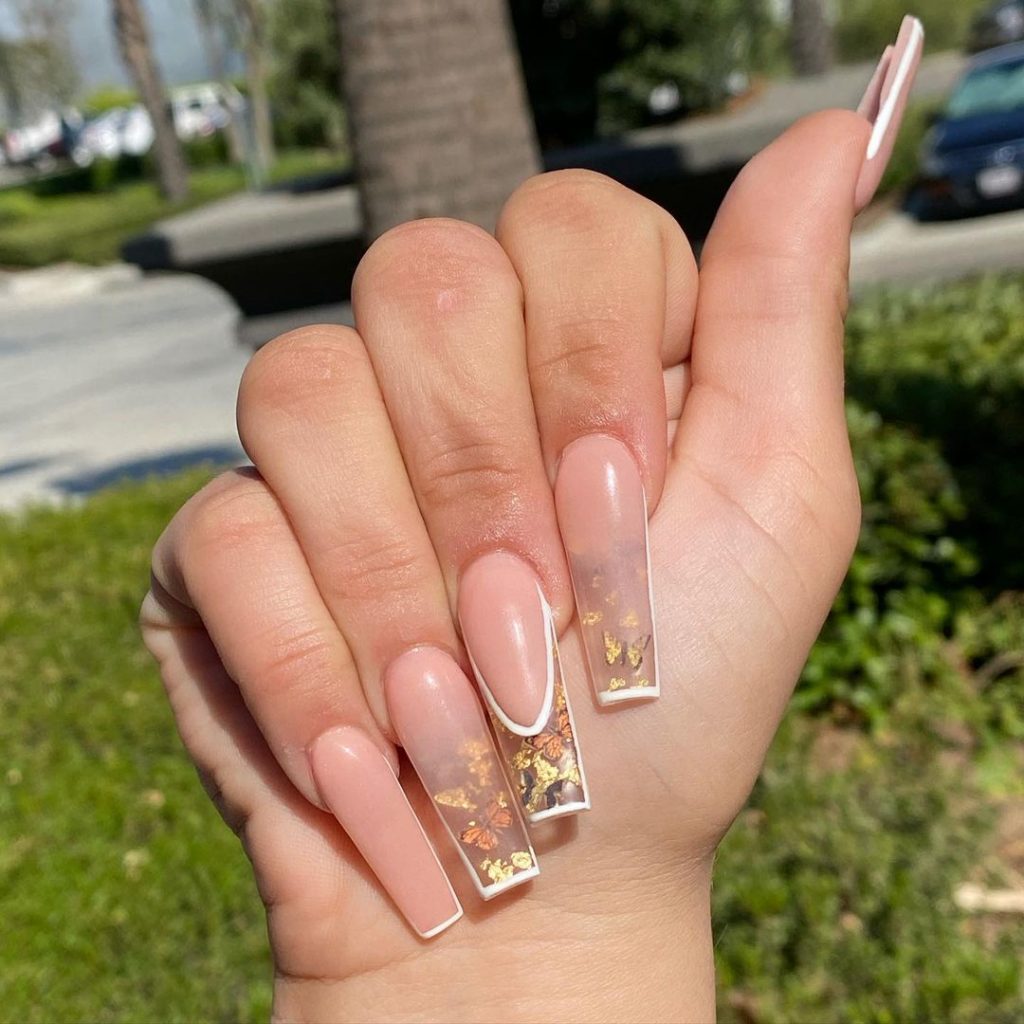
Autumn Clear Tips with Gold Foil
This nail design beautifully captures the essence of autumn with its clear tips and gold foil accents. The combination of a nude base with encapsulated gold leaves gives off a subtle yet elegant vibe. The clear tips add a modern touch, while the delicate French tip design ties the entire look together, making it a perfect choice for a sophisticated fall manicure.
Consumables
- Gel polish in nude (CND Shellac in “Beau”)
- Gold foil flakes (Gold Leaf Foil for Nails by GGA)
- Clear builder gel (IBD Hard Gel in Clear)
- French tip guides (French Manicure Guides by Orly)
DIY Tips
- Apply the nude gel polish as a base and cure under a UV lamp.
- Place the gold foil flakes carefully onto the clear tips using a small brush.
- Apply a clear builder gel over the tips to encapsulate the gold flakes and create the clear effect.
- Use French tip guides to paint a crisp white tip on the nude nails.
- Finish with a high-shine top coat to seal the design.
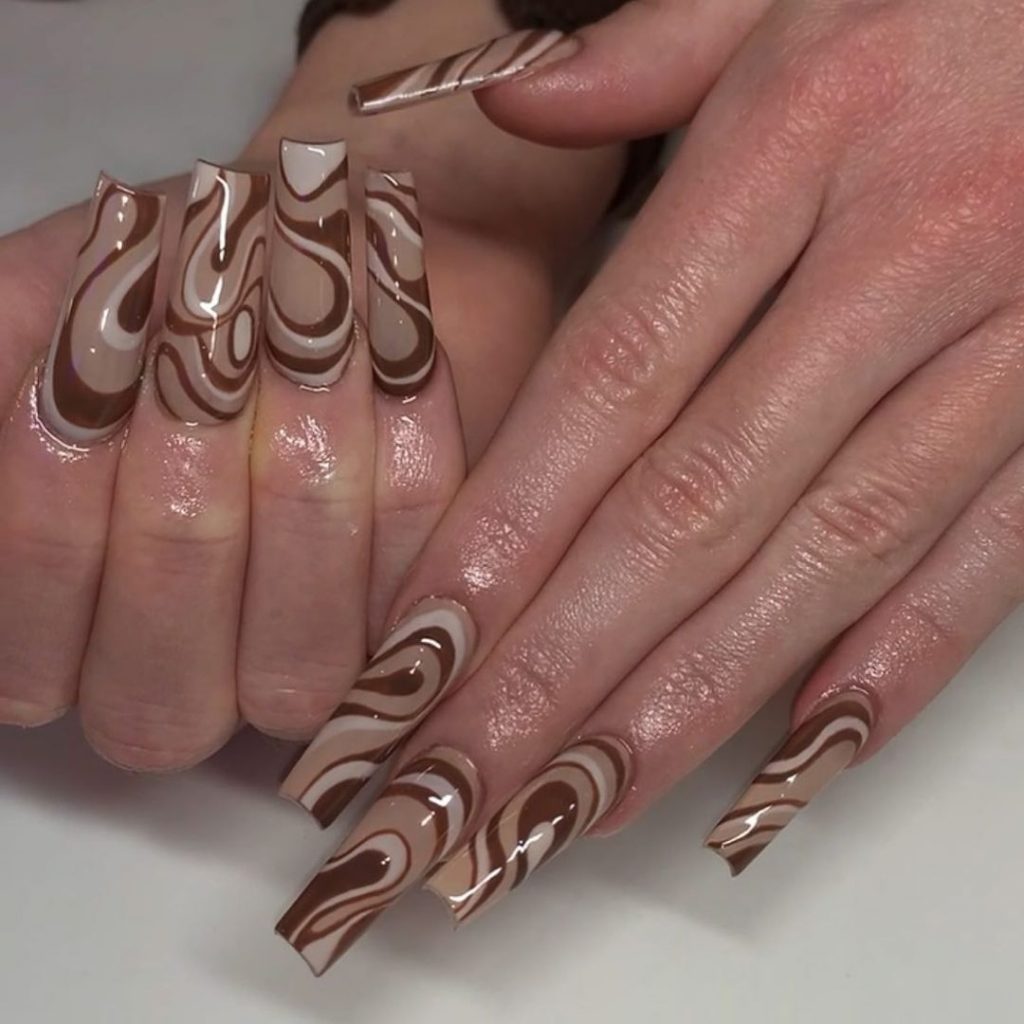
Swirly Brown Waves
These nails are all about embracing the earthy tones of fall with swirls of rich browns and nudes. The seamless blend of colors creates a mesmerizing pattern that adds movement and depth to the design. This look is perfect for those who love the warmth of autumn and want their nails to reflect that cozy feeling.
Consumables
- Gel polish in various shades of brown (OPI GelColor in “Espresso Your Style” and “Samoan Sand”)
- Swirl nail art brushes (Beetles Nail Art Brush Set)
- Clear top coat (Seche Vite Dry Fast Top Nail Coat)
DIY Tips
- Start with a nude base and let it cure under the lamp.
- Use a thin swirl brush to create wavy patterns with different shades of brown, overlapping them slightly for a fluid look.
- Clean up the edges and cure the design.
- Apply a clear top coat to seal in the design and add shine.
Blue Swirl Tips
For a pop of color that’s still understated, these blue swirl tips are an excellent choice. The nude base keeps the design simple, while the vibrant blue swirls at the tips add just enough interest without overpowering the look. This manicure is ideal for those who prefer a minimalist style but still want to experiment with bold colors.
Consumables
- Gel polish in nude (DND Gel in “Pinky Promise”)
- Blue gel polish (Essie Gel Couture in “Caviar Bar”)
- Fine detailing brush (Makartt Nail Art Brush Set)
DIY Tips
- Apply a nude base coat and cure it under a UV lamp.
- Using a fine detailing brush, paint the blue swirls at the tips, ensuring smooth, curved lines.
- Cure the design and add a glossy top coat to complete the look.
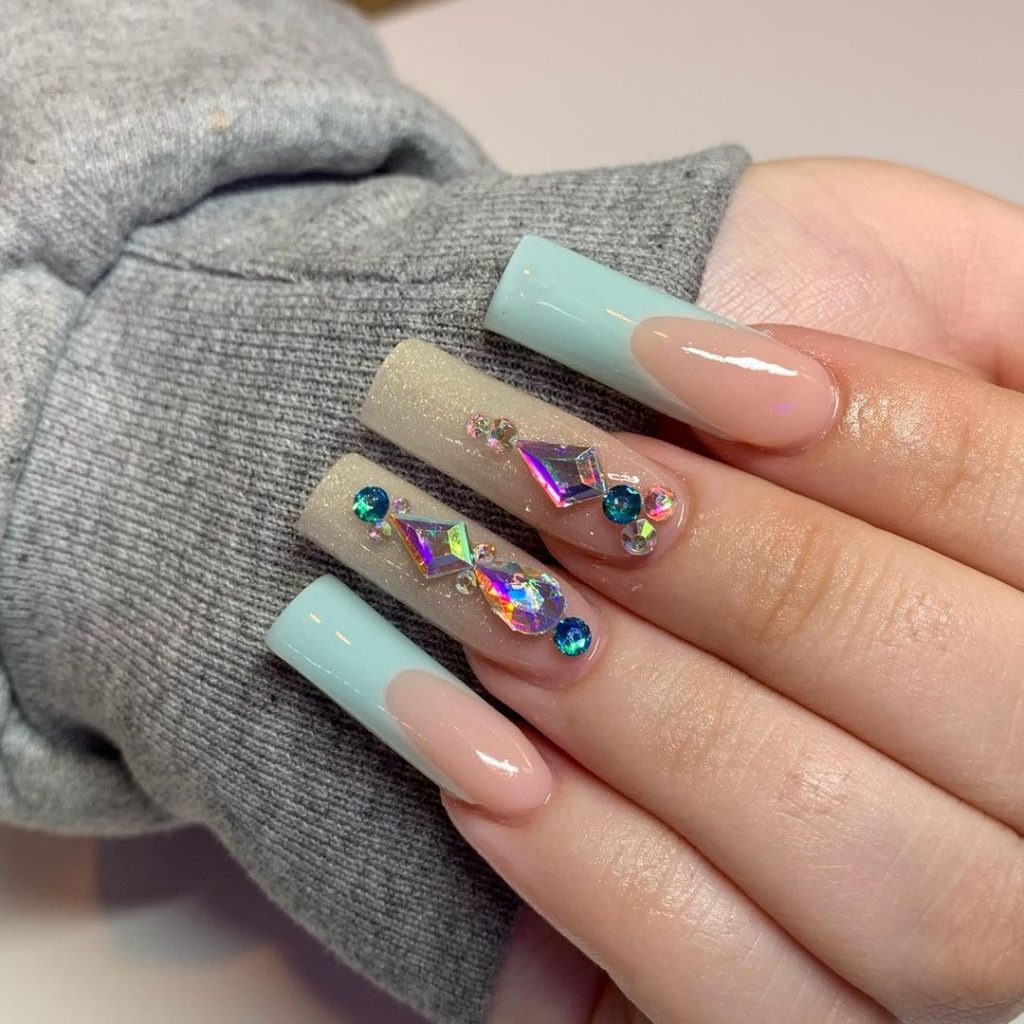
Icy Blue Rhinestone Glam
For those who love a bit of glam, this icy blue rhinestone design is a showstopper. The pale blue ombre paired with glitter and eye-catching rhinestones creates a wintery, luxurious feel. This design is perfect for special occasions or when you want your nails to be the center of attention.
Consumables
- Gel polish in baby blue (OPI GelColor in “Gelato on My Mind”)
- Rhinestones in various sizes (Swarovski Flatback Crystals)
- Glitter powder (Born Pretty Glitter Powder)
- Nail glue for rhinestones (IBD 5 Second Nail Glue)
DIY Tips
- Start with an ombre base using the baby blue gel polish and a sponge to blend the colors.
- Apply a glitter top coat over the entire nail for added sparkle.
- Carefully place the rhinestones onto the wet polish or use nail glue for a more secure hold.
- Seal the design with a top coat, making sure to cover the rhinestones as well.
Edgy Black Flames
These black flame nails bring an edgy, dramatic flair to the classic nude base. The contrast between the soft pink and bold black creates a striking effect that’s perfect for making a statement. This design is great for those who want to add a touch of rebellion to their fall manicure.

Consumables
- Gel polish in nude (CND Shellac in “Bare Chemise”)
- Black gel polish (Gelish in “Black Shadow”)
- Flame nail art stickers or hand-painted flames (Makartt Flame Nail Stickers)
- Clear top coat (OPI GelColor Top Coat)
DIY Tips
- Apply a nude base coat and cure it under a UV lamp.
- Use flame nail art stickers or carefully paint the flames by hand with a thin brush.
- Cure the design and finish with a glossy top coat to seal in the flames and add shine.
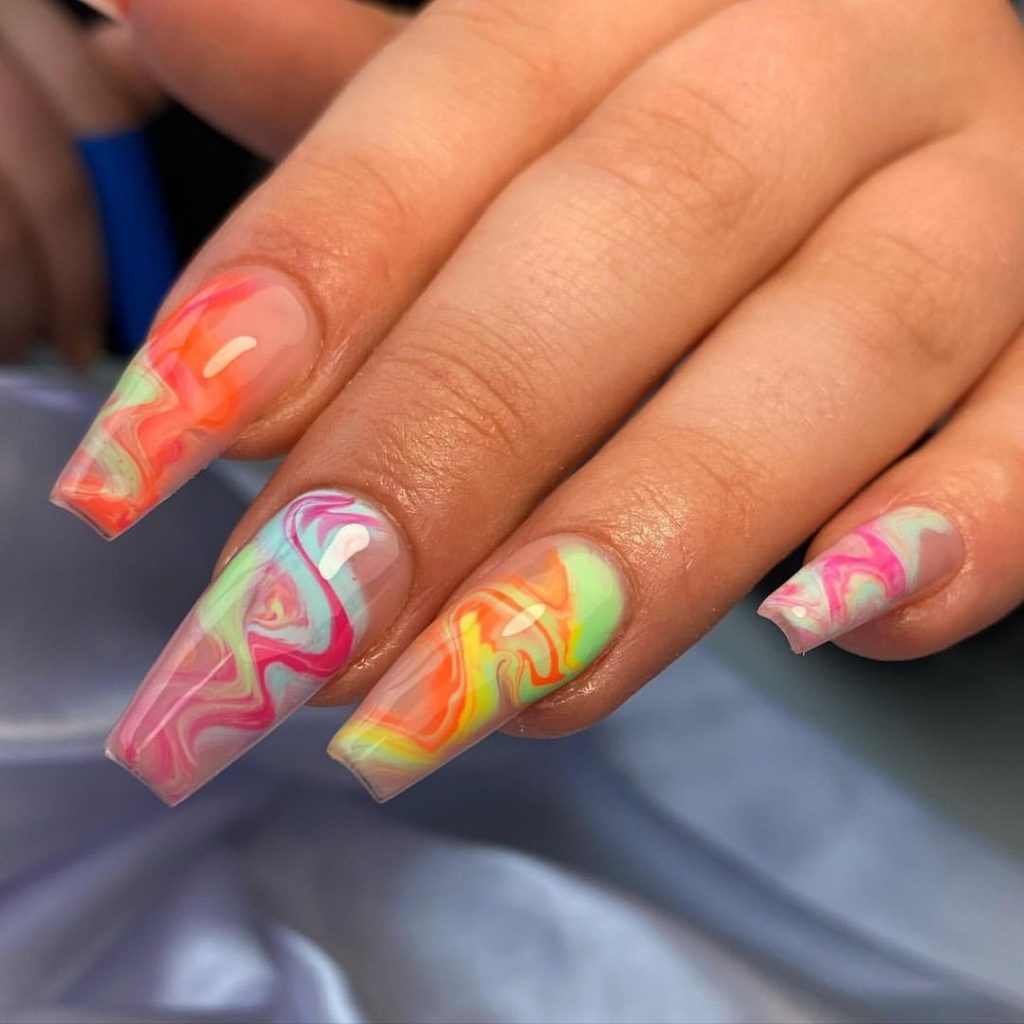
Neon Marble Swirls
This vibrant design features a playful mix of neon marble swirls, bringing a burst of color to your autumn nail game. The combination of neon green, pink, orange, and yellow creates a lively and dynamic effect, perfect for those who love to stand out. The clear base allows the colors to pop even more, making this design a showstopper.
Consumables
- Gel polish in neon colors (DND Gel in “Neon Pink”, “Neon Green”, “Neon Orange”, “Neon Yellow”)
- Clear base gel (Gelish Foundation Base Gel)
- Marble tool or a thin brush (Makartt Nail Art Brush Set)
DIY Tips
- Start with a clear base to enhance the brightness of the neon colors.
- Use a marble tool or thin brush to swirl the neon colors on the nail, creating the desired marble effect.
- Cure under a UV lamp after each layer to set the design.
- Finish with a clear top coat to seal the design and add shine.
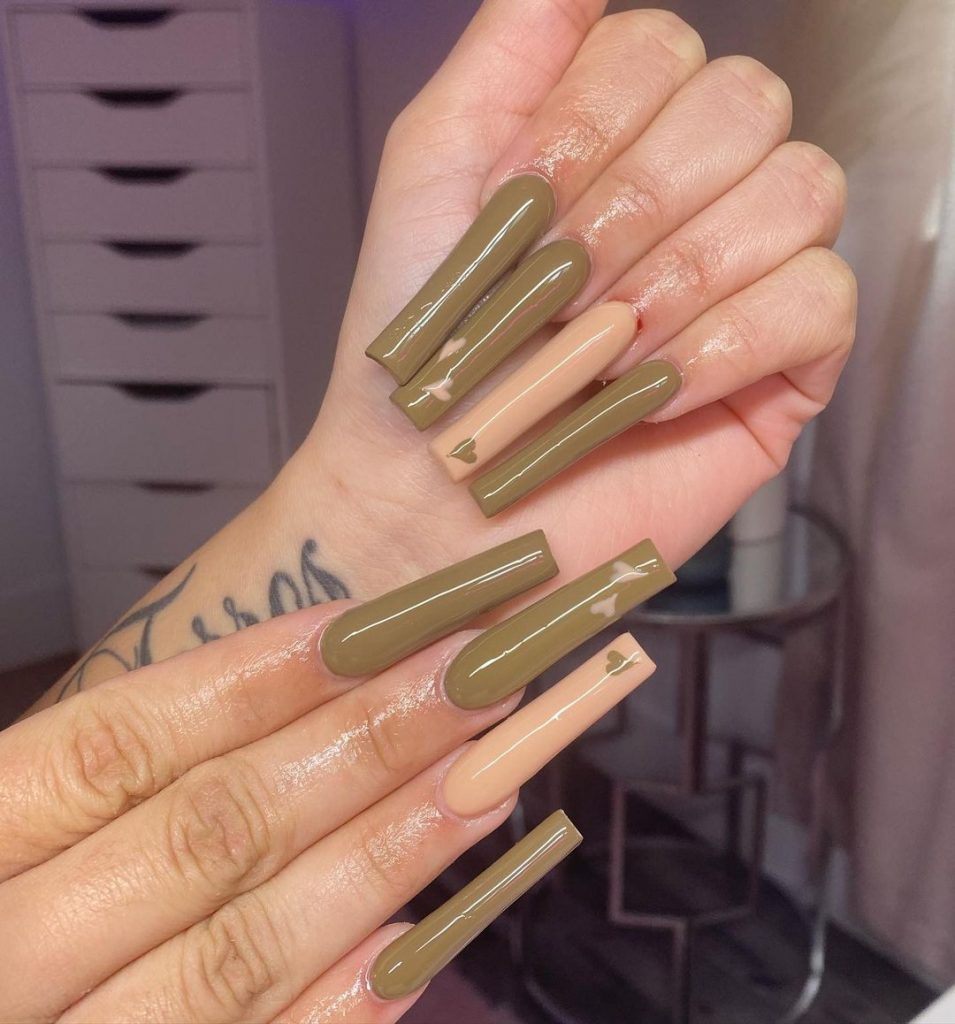
Olive and Nude Elegance
This design combines the earthy tones of olive green with a soft nude base for a refined, sophisticated look. The long, sleek coffin shape adds elegance, while the minimalistic design keeps it modern. This style is perfect for someone who wants a chic yet understated fall manicure.
Consumables
- Gel polish in olive green (CND Vinylux in “Sage Scarf”)
- Gel polish in nude (OPI GelColor in “Bubble Bath”)
- Clear top coat (Seche Vite Dry Fast Top Nail Coat)
DIY Tips
- Apply the nude polish as a base and cure under a UV lamp.
- Carefully paint the olive green polish onto selected nails, leaving some nude for contrast.
- Cure the design and finish with a clear top coat to add a glossy finish.
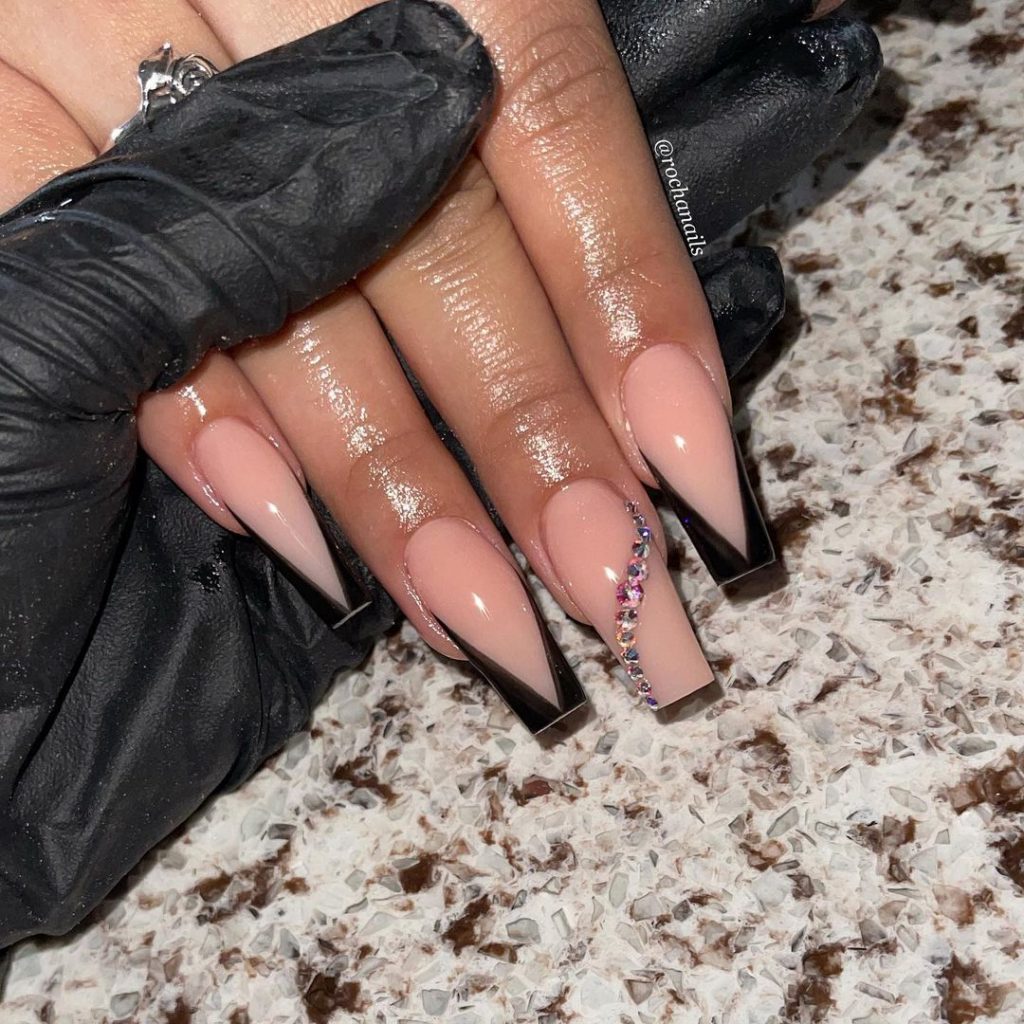
Black French Tip with Rhinestones
This elegant design features a classic black French tip with a twist—rhinestone accents that add a touch of glamour. The sleek black tips contrast beautifully with the nude base, while the rhinestones bring a bit of sparkle, making this a perfect choice for a formal occasion or a night out.
Consumables
- Gel polish in black (Gelish in “Black Shadow”)
- Gel polish in nude (Essie Gel Couture in “Fairy Tailor”)
- Rhinestones (Swarovski Flatback Crystals)
- Nail glue (IBD 5 Second Nail Glue)
DIY Tips
- Start with a nude base and cure it under a UV lamp.
- Use French tip guides to create crisp black tips, then cure again.
- Apply the rhinestones along the edge of the black tips using nail glue.
- Seal the design with a glossy top coat to keep the rhinestones in place.
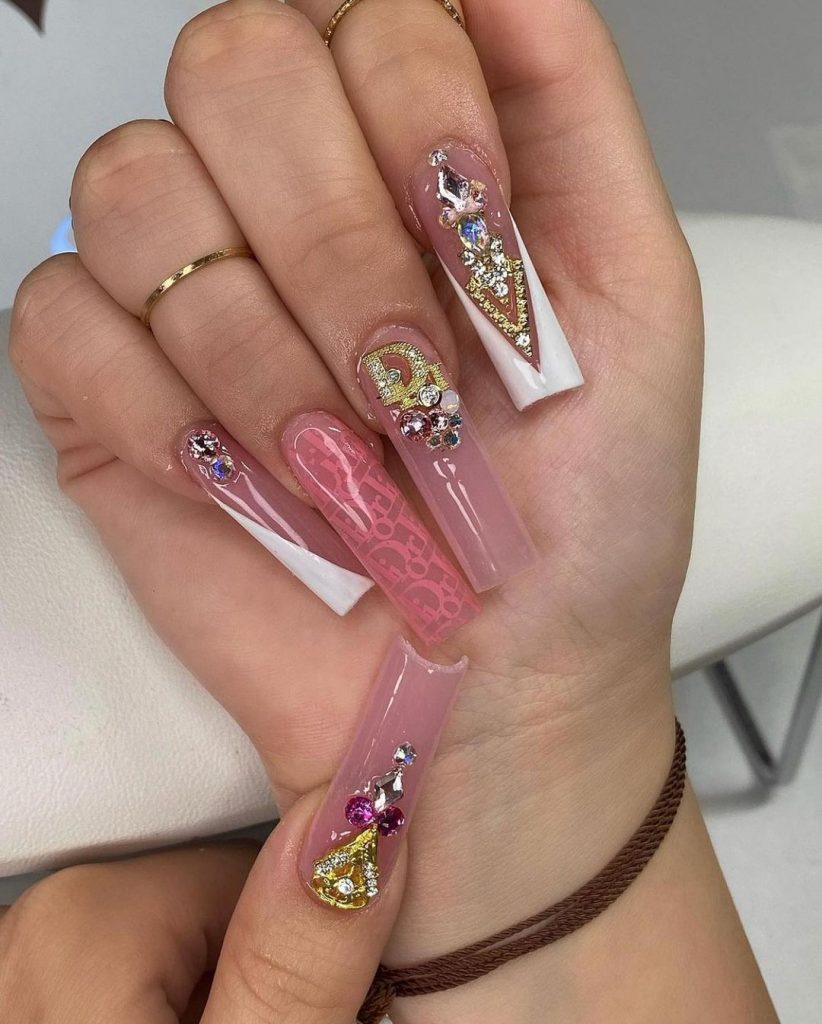
Pink Glam with Gold Accents
This design is a glamorous mix of pink and gold, featuring intricate designs and rhinestones for an ultra-luxe look. The combination of the soft pink base, gold foil accents, and sparkling rhinestones makes this manicure a true work of art, perfect for special occasions or whenever you want to feel extra fancy.
Consumables
- Gel polish in pink (DND Gel in “Bubblegum”)
- Gold foil (Gold Leaf Foil for Nails by GGA)
- Rhinestones in various sizes (Swarovski Flatback Crystals)
- Clear builder gel (IBD Hard Gel in Clear)
DIY Tips
- Apply a pink base and cure under a UV lamp.
- Use clear builder gel to adhere the gold foil and rhinestones to the nails.
- Cure the nails again to set the design.
- Finish with a glossy top coat to add shine and protect the design.
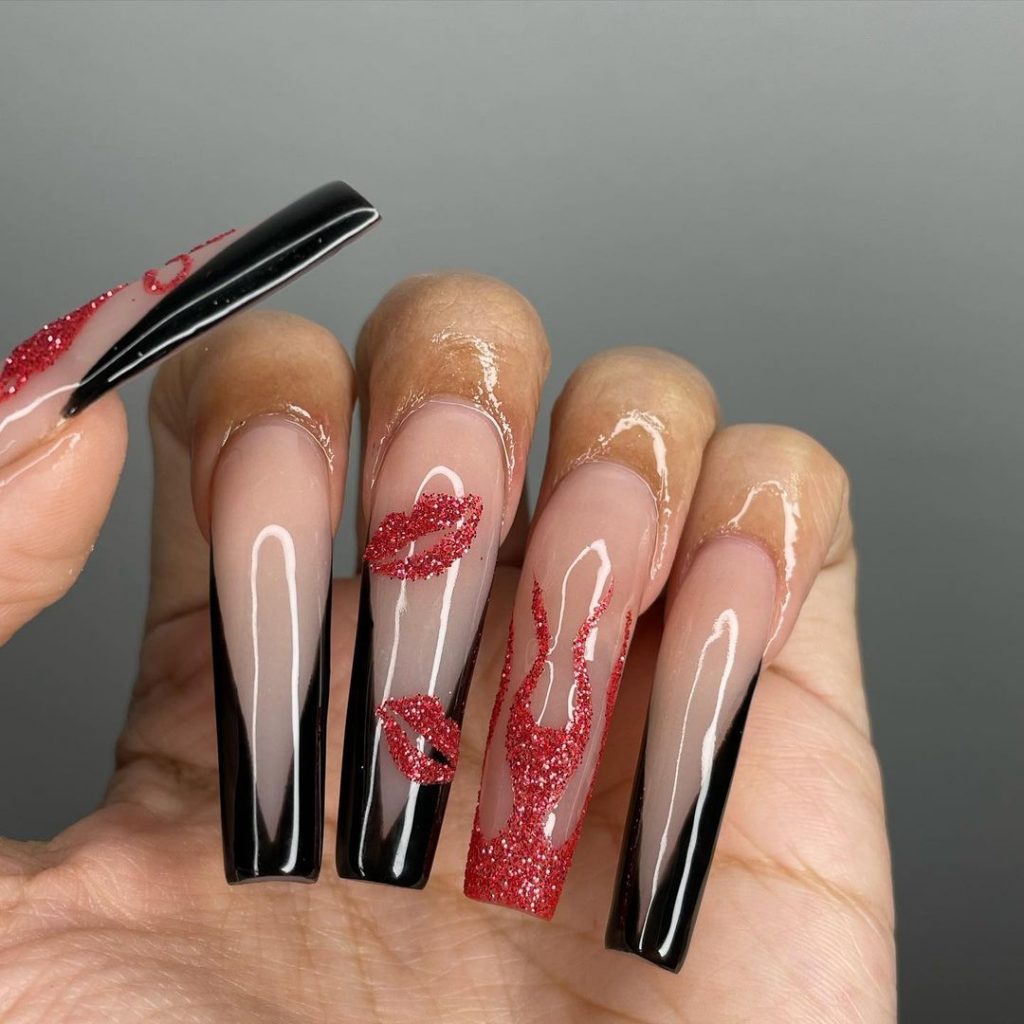
Red Glitter Lips and Flames
This bold design combines sensual red glitter lips and flames with a sleek black French tip, creating a striking and edgy look. The nude base allows the red glitter to pop, making this a daring choice for anyone looking to make a statement with their nails this fall.
Consumables
- Gel polish in nude (OPI GelColor in “Be There in a Prosecco”)
- Black gel polish (CND Shellac in “Black Pool”)
- Red glitter powder (Born Pretty Red Glitter Powder)
- Clear builder gel (Gelish Hard Gel)
DIY Tips
- Start with a nude base and cure it under a UV lamp.
- Create the black French tips using a fine brush or tip guides, then cure.
- Apply clear builder gel to create the lips and flames, then dust with red glitter powder before curing.
- Seal the design with a glossy top coat to protect the glitter and add shine.
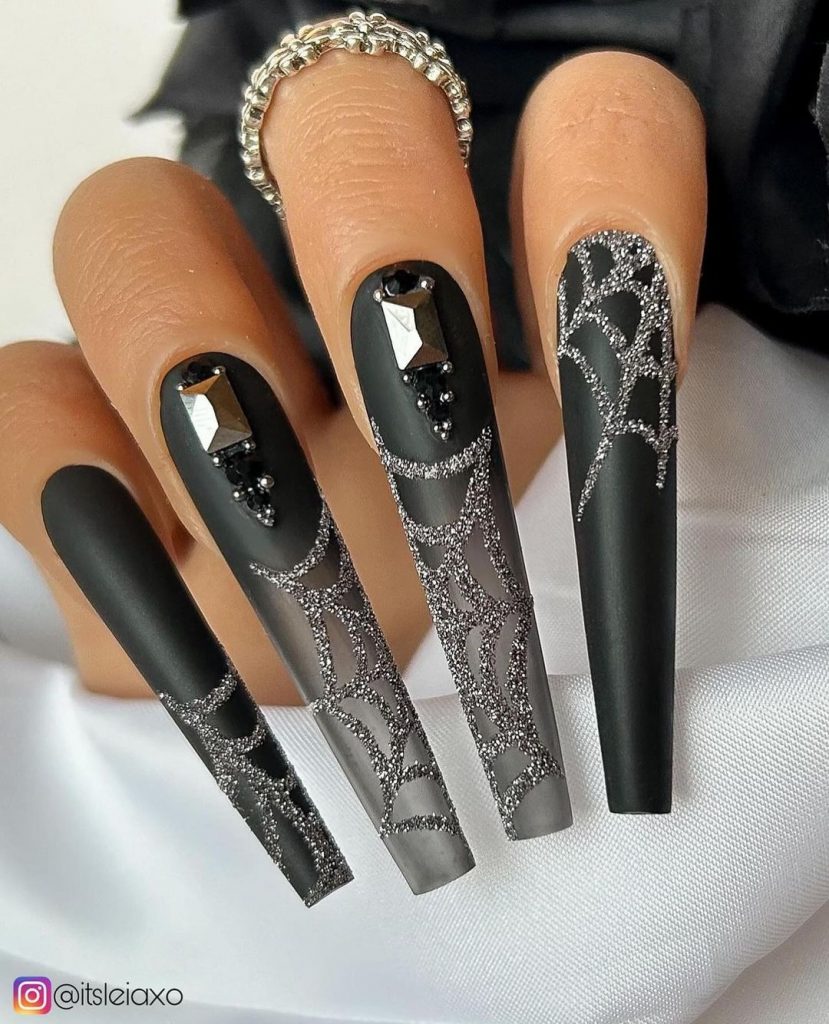
Gothic Webbed Glamour
These nails are a striking blend of gothic elegance and sophisticated detail, featuring matte black as the base with glittery silver spiderwebs delicately drawn across each nail. The addition of geometric black rhinestones gives this design an extra touch of luxury and depth, making it perfect for those who love a dark, dramatic look for fall.
Consumables
- Matte black gel polish (OPI GelColor in “Black Onyx”)
- Silver glitter nail art pen (Sally Hansen I Heart Nail Art Pen in Silver Glitter)
- Black rhinestones (Beetles Black Rhinestones Set)
- Matte top coat (Essie Matte About You)
DIY Tips
- Start with a matte black base, curing it under a UV lamp.
- Use a silver glitter nail art pen to draw spiderweb patterns on each nail.
- Carefully place black rhinestones in a geometric pattern at the base of the nails, securing them with nail glue.
- Finish with a matte top coat to lock in the design and give it a velvety finish.
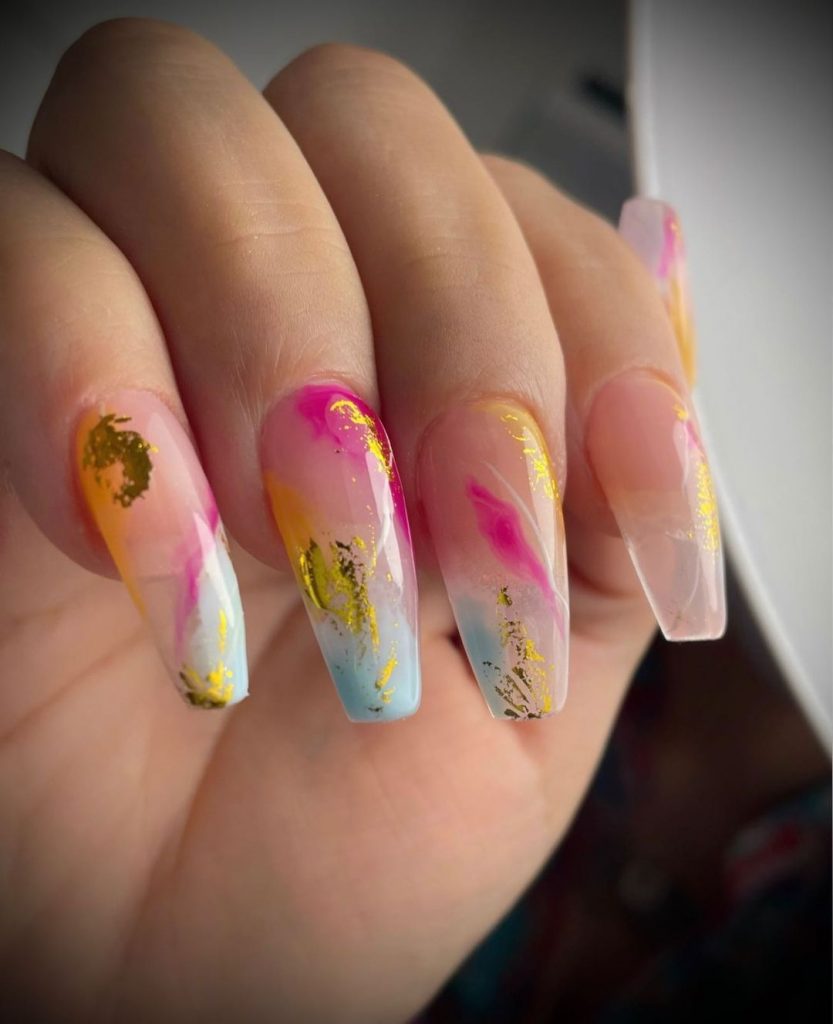
Color Splash Marble
This vibrant, multi-colored marble design is a burst of artistic expression. The mix of bright pink, yellow, blue, and gold foil accents creates a playful yet sophisticated look. This design is perfect for those who want their nails to be a canvas for creativity, with each nail offering a unique swirl of colors.
Consumables
- Gel polish in bright pink, yellow, and blue (DND Gel in “Bright Pink”, “Sunshine Yellow”, “Blue Heaven”)
- Gold foil flakes (Gold Leaf Foil for Nails by GGA)
- Clear base gel (Gelish Foundation Base Gel)
- Marble tool (KADS Nail Art Marbling Pen)
DIY Tips
- Start with a clear base coat and cure under a UV lamp.
- Use a marble tool to blend the bright colors into a swirling pattern on each nail.
- Apply gold foil flakes strategically to add a touch of elegance.
- Seal the design with a glossy top coat for a shiny, polished finish.
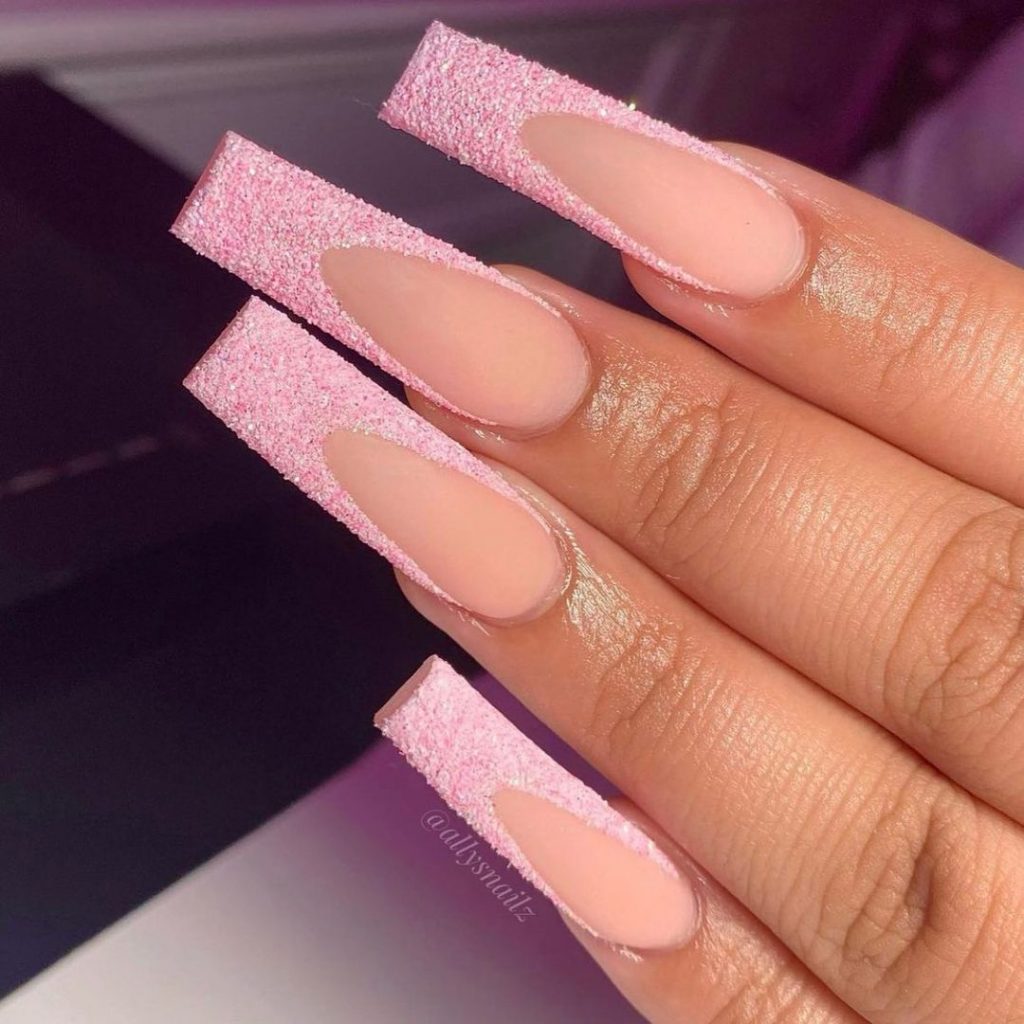
Pink Sugar Glitter
This soft pink design is a delightful combination of sugar glitter and matte texture, creating a sweet and subtle look. The glittery pink tips contrast beautifully with the matte nude base, making it a perfect choice for those who want a soft, feminine manicure with a touch of sparkle.
Consumables
- Gel polish in soft pink (Essie Gel Couture in “Fairy Tailor”)
- Pink sugar glitter powder (Born Pretty Sugar Glitter Powder)
- Matte top coat (OPI Matte Top Coat)
- Clear base gel (CND Shellac Base Coat)
DIY Tips
- Apply the soft pink polish as a base and cure it under a UV lamp.
- Use a sponge to dab the sugar glitter powder onto the tips of the nails.
- Cure again, then apply a matte top coat over the base for a velvety finish.
- Seal the glitter tips with a clear base gel to keep the sugar effect intact.
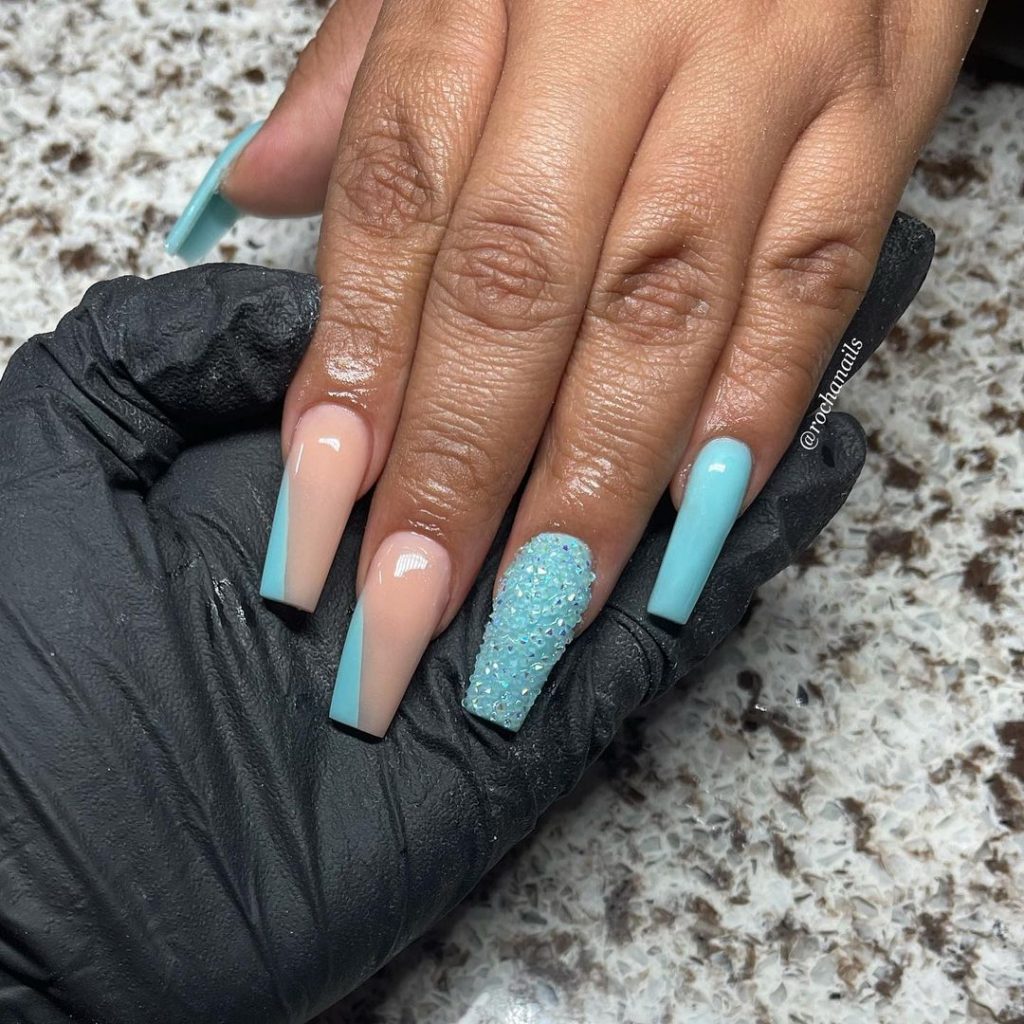
Aqua Blue with Textured Accent
This aqua blue design combines sleek simplicity with an unexpected textured accent. The glossy blue polish is complemented by one accent nail covered in tiny beads, adding a tactile element to the manicure. This design is perfect for someone who wants a simple yet eye-catching look.
Consumables
- Gel polish in aqua blue (OPI GelColor in “Can’t Find My Czechbook”)
- Textured nail beads (Mia Secret Nail Art Beads in Aqua)
- Clear base gel (Gelish Foundation Base Gel)
- Glossy top coat (CND Vinylux Weekly Top Coat)
DIY Tips
- Start by applying the aqua blue polish to all nails and cure under a UV lamp.
- On the accent nail, apply a clear base gel and sprinkle the textured beads over it while still wet.
- Cure the bead-covered nail separately to secure the texture.
- Finish with a glossy top coat to protect the design and add shine.
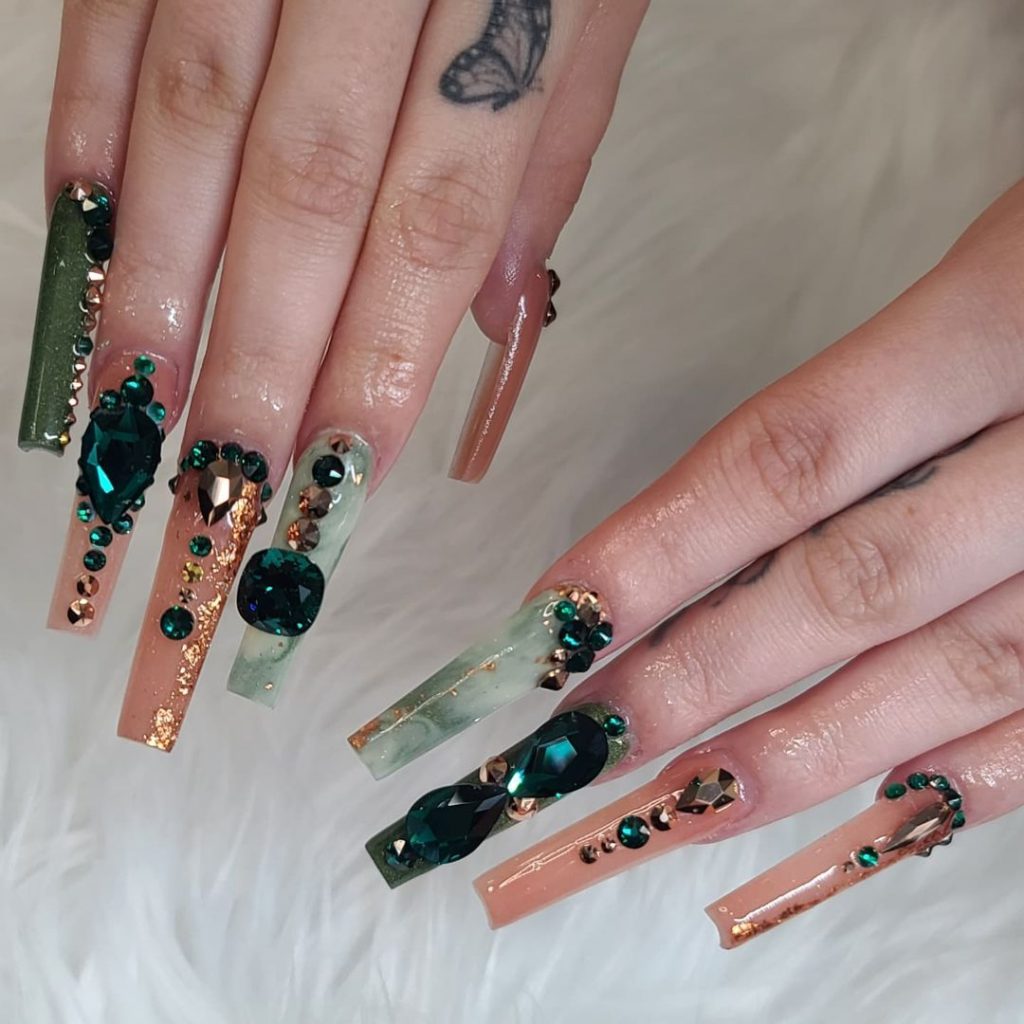
Emerald and Gold Extravaganza
This design is the epitome of luxury, featuring rich emerald green and gold accents adorned with oversized gems. The mix of marble effects, gold foil, and rhinestones creates a lavish look, perfect for special occasions or when you simply want to feel glamorous.
Consumables
- Gel polish in emerald green and nude (Essie Gel Couture in “Jade to Measure” and “Fairy Tailor”)
- Gold foil flakes (Born Pretty Gold Leaf Nail Foil)
- Rhinestones and gems (Swarovski Flatback Crystals)
- Clear builder gel (IBD Hard Gel in Clear)
DIY Tips
- Apply the emerald green and nude polish as a base, alternating between nails.
- Create a marble effect on selected nails by swirling the green polish with a small amount of nude.
- Apply gold foil and secure the rhinestones and gems using clear builder gel.
- Finish with a glossy top coat to seal the design and ensure long-lasting wear.
Icy Blue Crystal Extravaganza
This bold and dazzling design features icy blue nails adorned with oversized crystals and glitter accents. The combination of clear and blue stones creates a frosty, luxurious look that makes a strong statement. Perfect for those who love to make an entrance, this manicure is ideal for special occasions or when you simply want to feel like a queen.

Consumables
- Gel polish in icy blue (Essie Gel Couture in “Perfect Posture”)
- Large and small rhinestones (Swarovski Flatback Crystals)
- Blue glitter powder (Born Pretty Holographic Glitter Powder)
- Clear builder gel (IBD Hard Gel)
DIY Tips
- Apply the icy blue polish as your base and cure under a UV lamp.
- Place the rhinestones strategically on the nails using clear builder gel, focusing on creating an eye-catching arrangement.
- Add glitter to selected nails for extra sparkle, and cure the design.
- Finish with a glossy top coat to seal in the rhinestones and glitter.
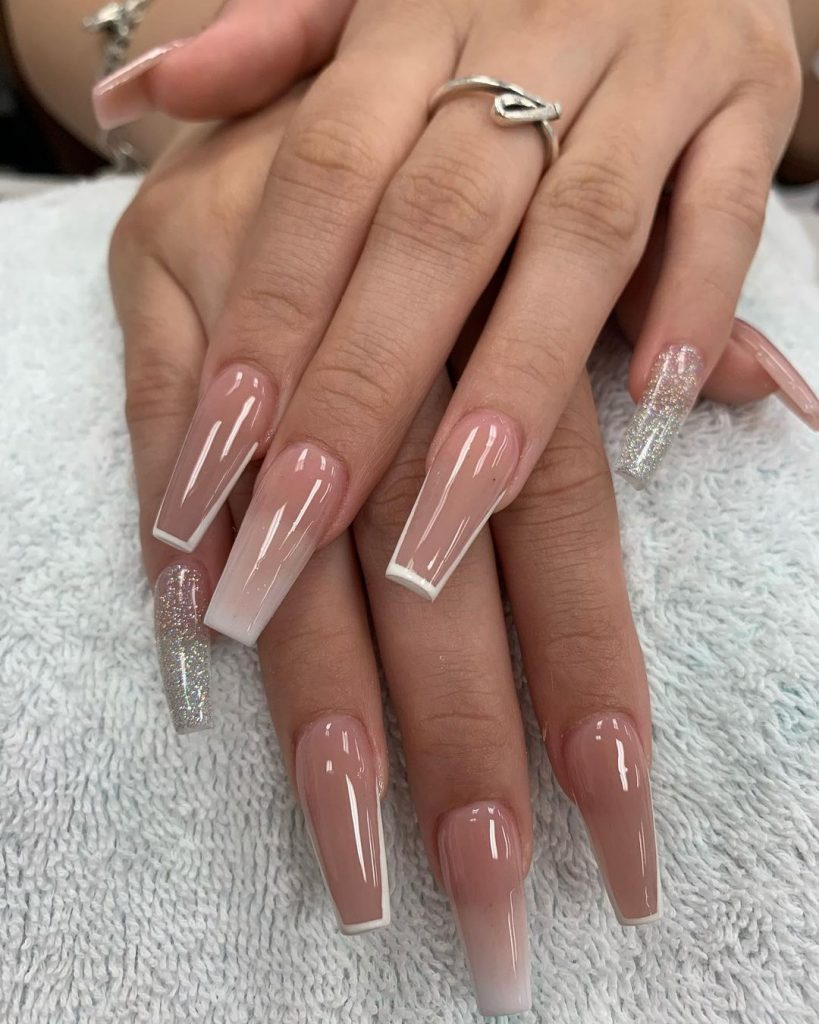
Elegant Milky White Ombre
This milky white ombre design is the epitome of understated elegance. The soft gradient from nude to white is both sophisticated and versatile, making it suitable for any occasion. A touch of rhinestones at the cuticle adds just the right amount of sparkle without overpowering the minimalist design.
Consumables
- Gel polish in nude and white (OPI GelColor in “Put It In Neutral” and “Funny Bunny”)
- Small rhinestones (Swarovski Crystal AB)
- Ombre sponge (Sponge Nail Art Gradient Tool)
- Glossy top coat (CND Vinylux Weekly Top Coat)
DIY Tips
- Use an ombre sponge to blend the nude and white gel polishes, creating a soft gradient effect.
- Cure under a UV lamp, then add small rhinestones at the cuticle area for subtle bling.
- Finish with a glossy top coat to seal the design and enhance the ombre effect.
Neon Orange with Gems
This vibrant design is all about bold colors and luxurious details. The neon orange base instantly grabs attention, while the carefully placed gems add a touch of glamour. The combination of bright color and sparkling stones makes this manicure perfect for someone who loves to stand out in a crowd.
Consumables
- Gel polish in neon orange (DND Gel in “Neon Orange”)
- Large rhinestones and gems (Swarovski Flatback Crystals)
- Nail glue (IBD 5 Second Nail Glue)
- Glossy top coat (Essie Gel Couture Top Coat)
DIY Tips
- Start with a neon orange base, curing it under a UV lamp.
- Use nail glue to attach the rhinestones and gems on the accent nails, focusing on creating a striking arrangement.
- Cure the design, then finish with a glossy top coat to ensure the rhinestones are securely in place.
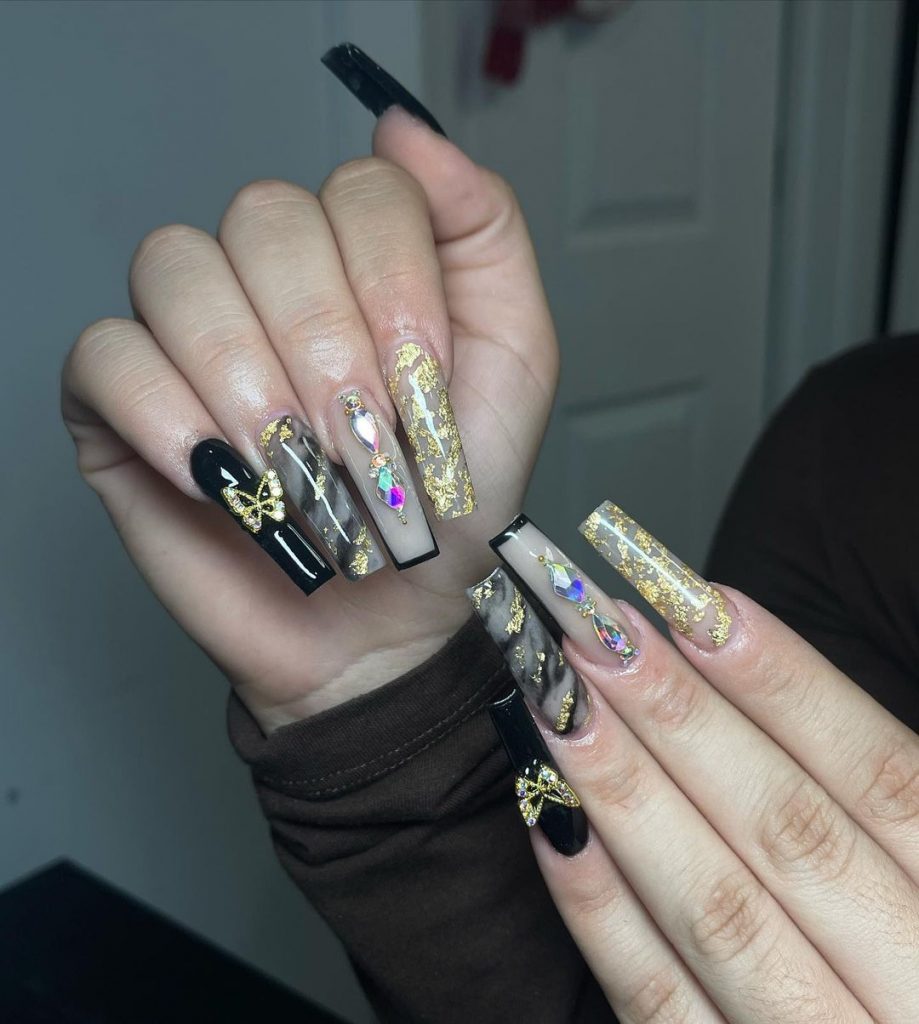
Marble and Gold Leaf Elegance
This design combines the timeless elegance of black marble with the opulence of gold leaf accents. The mix of matte and glossy finishes adds depth and sophistication to the look, while the gold details and rhinestones elevate it to a whole new level of luxury.
Consumables
- Gel polish in black and clear (OPI GelColor in “Black Onyx” and “Bubble Bath”)
- Gold leaf flakes (Born Pretty Gold Leaf Foil)
- Small rhinestones (Swarovski Flatback Crystals)
- Marble tool (KADS Nail Art Marbling Pen)
DIY Tips
- Create a marble effect using black and clear gel polishes, swirling them with a marble tool.
- Apply gold leaf flakes on selected nails while the polish is still tacky, then cure.
- Place small rhinestones on the accent nails using nail glue.
- Seal the design with a glossy top coat for a polished finish.
Purple Marble with Gemstone Accents
This luxurious design features rich purple marble nails accented with sparkling gemstones. The deep, swirling shades of purple create a dramatic and elegant look, while the gems add a touch of extravagance. Perfect for evening events or when you want your nails to be the centerpiece of your outfit.
Consumables
- Gel polish in dark purple and clear (Essie Gel Couture in “Twirling in Tulle” and “Clear As Day”)
- Marble tool (Makartt Nail Art Brush Set)
- Large and small rhinestones (Swarovski Flatback Crystals)
- Clear builder gel (IBD Hard Gel)
DIY Tips
- Create a marble effect using dark purple and clear gel polishes, blending them with a marble tool.
- Apply large rhinestones on the accent nails using clear builder gel, securing them in place.
- Cure the nails and finish with a glossy top coat to lock in the design and add shine.
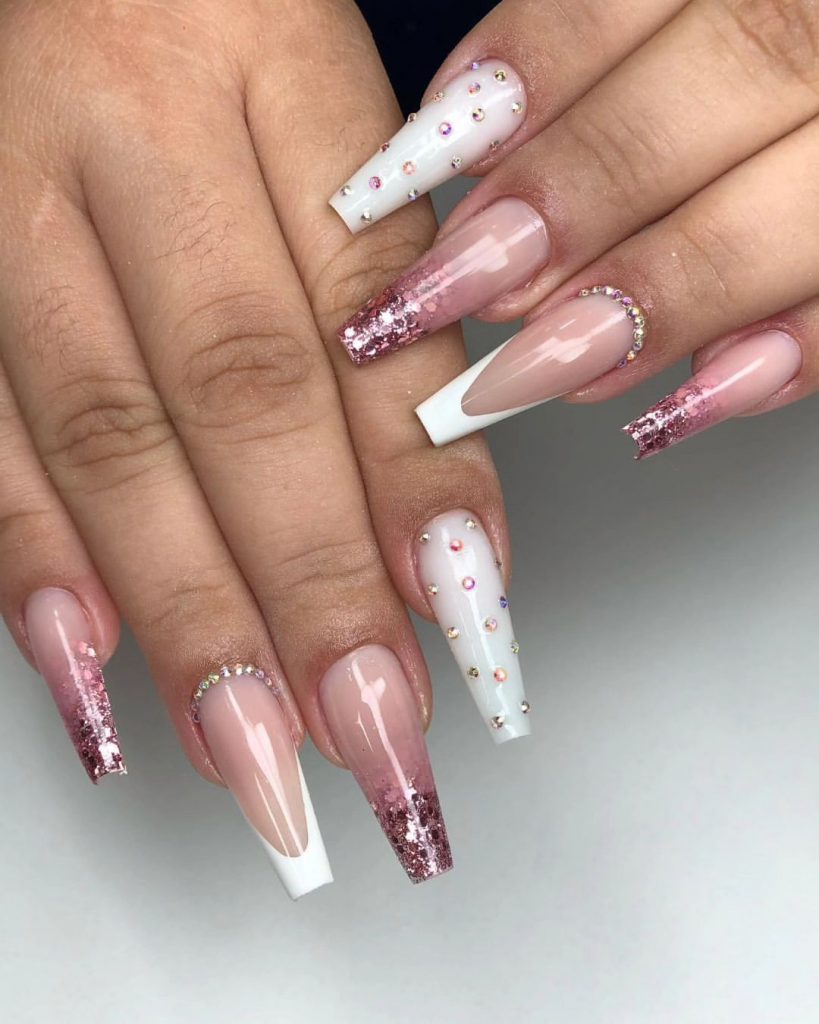
Pink Glitter and French Tips
This design combines classic French tips with a modern twist of pink glitter. The mix of traditional white tips and glittery pink accents creates a look that is both timeless and trendy. Small rhinestones add a touch of sparkle, making this manicure perfect for both everyday wear and special occasions.
Consumables
- Gel polish in nude and white (CND Shellac in “Nude Knickers” and “Cream Puff”)
- Pink glitter powder (Born Pretty Glitter Powder)
- Small rhinestones (Swarovski Flatback Crystals)
- French tip guides (Orly French Manicure Guides)
DIY Tips
- Apply the nude base and cure under a UV lamp.
- Use French tip guides to create crisp white tips, then cure.
- Add pink glitter to selected nails for a touch of sparkle, and secure small rhinestones along the cuticle.
- Finish with a glossy top coat to seal the design and protect the glitter.
Save Pin