Are you ready to elevate your manicure game this fall? As the leaves change colors, so do the trends in nail art. If you’re looking for cute fake nails for fall 2024, you’re in the right place. From Acrylics to Short designs, this season offers an array of stunning Colors and Designs that will keep your nails looking chic and stylish. Let’s dive into the best nail ideas you can try out this fall.
Shimmery Bronze Elegance
This shimmery bronze nail design captures the essence of autumn perfectly. The rich, metallic finish adds a touch of luxury to the nails, making them stand out effortlessly. The smooth, even application of the polish enhances the natural beauty of the nails while providing a sophisticated look suitable for any occasion.
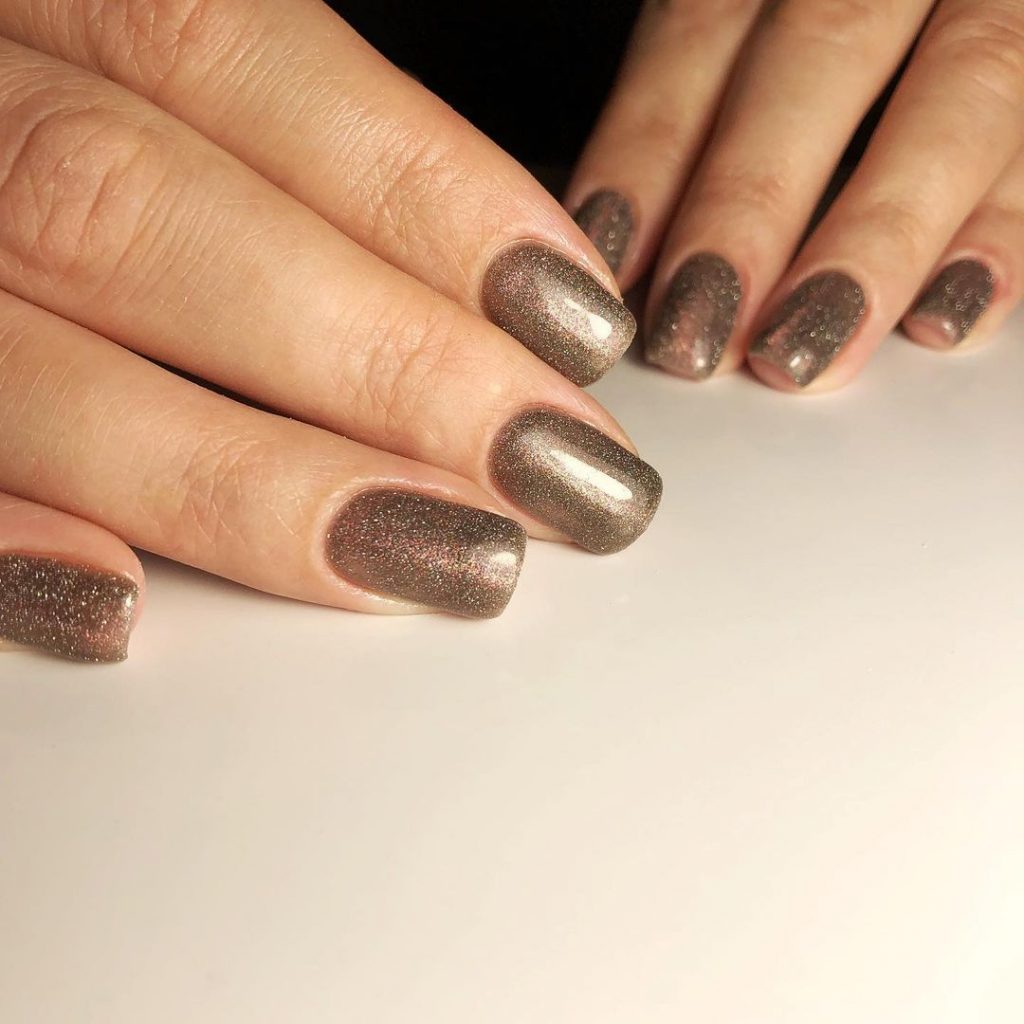
- Color: A mesmerizing bronze with subtle sparkles.
- Finish: Glossy and smooth.
- Length: Medium, ideal for everyday wear.
Consumables Needed
- Bronze shimmer nail polish (e.g., Essie “Bronze Ambition”)
- Base coat (e.g., OPI Natural Nail Base Coat)
- Top coat (e.g., Seche Vite Dry Fast Top Coat)
- Nail file and buffer
DIY Instructions
- Prep Your Nails: Start by filing your nails to the desired shape and buffing the surface for smooth application.
- Base Coat: Apply a thin layer of the base coat to protect your natural nails.
- Color Application: Apply two coats of the bronze shimmer nail polish, allowing each layer to dry completely.
- Top Coat: Finish with a top coat to seal the color and add shine.
- Drying: Allow nails to dry completely before engaging in any activity.
Chic Mauve with Leopard Accent
Mauve nails with a bold leopard accent bring a playful yet sophisticated vibe to your manicure. The combination of glossy mauve and a matte leopard print creates a striking contrast that’s perfect for any fashion-forward individual. This design allows you to express your wild side while keeping it classy.
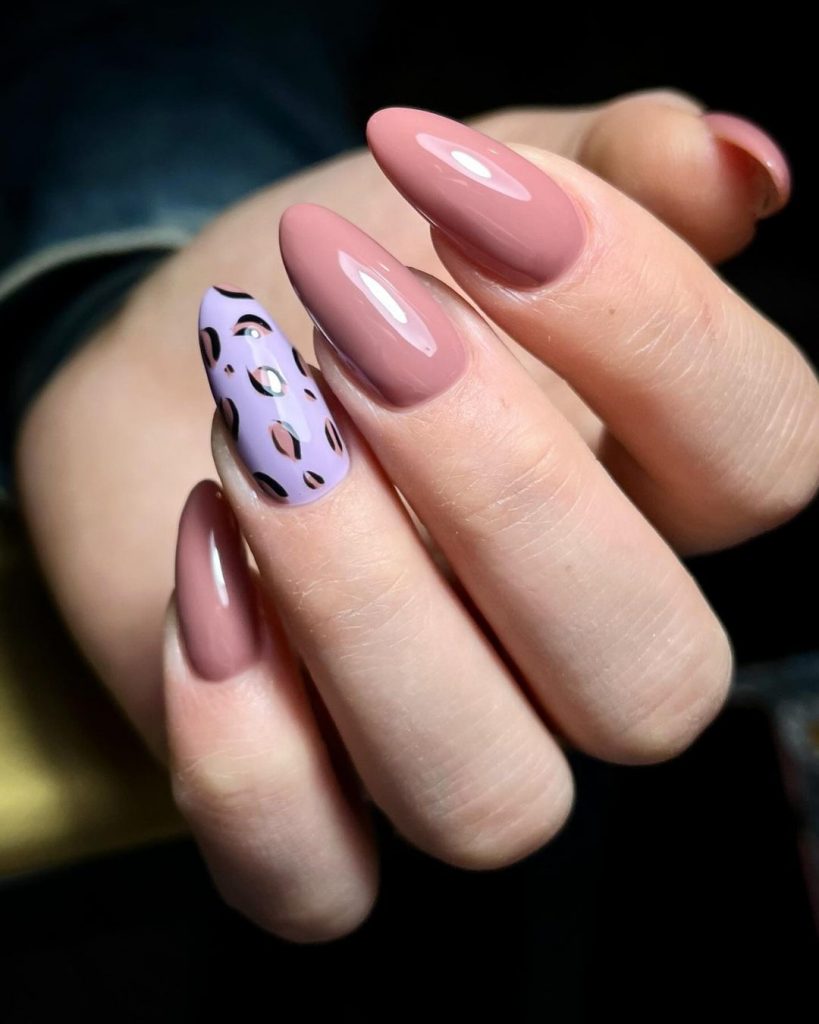
- Color: Soft mauve with a leopard print accent.
- Finish: Glossy and matte mix.
- Length: Long and elegant.
Consumables Needed
- Mauve nail polish (e.g., Sally Hansen “Mauve Over”)
- Leopard print nail stickers or nail art pen
- Base coat and top coat
- Nail file and buffer
DIY Instructions
- Prep Your Nails: Shape and buff your nails for a smooth foundation.
- Base Coat: Apply a base coat to protect your nails.
- Color Application: Paint your nails with the mauve polish, leaving one accent nail for the leopard print.
- Leopard Print: Apply the leopard print using stickers or a nail art pen on the accent nail.
- Top Coat: Seal everything with a top coat for durability.
- Drying: Let your nails dry completely.
Electric Blue Statement
For a bold and electrifying look, these electric blue nails are a must-try. The vibrant blue color is eye-catching and perfect for those who want to make a statement. This design is simple yet impactful, proving that sometimes less is more when it comes to nail art.
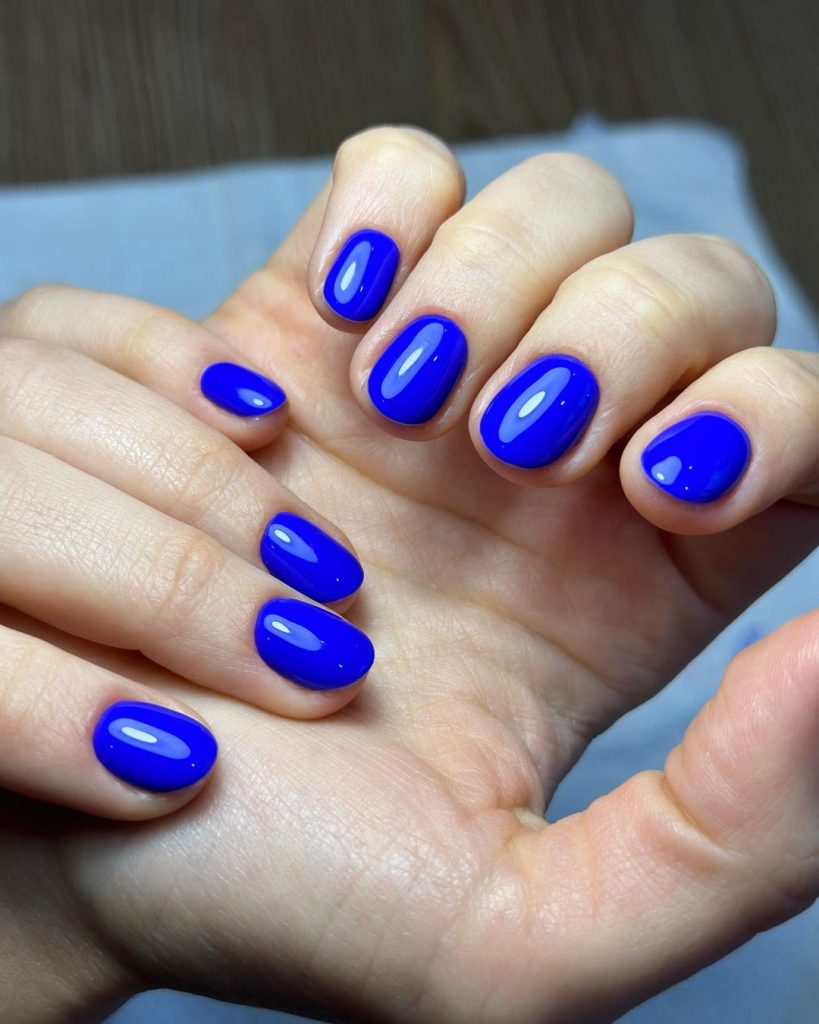
- Color: Vivid electric blue.
- Finish: High gloss.
- Length: Short and chic.
Consumables Needed
- Electric blue nail polish (e.g., China Glaze “I Sea the Point”)
- Base coat and top coat
- Nail file and buffer
DIY Instructions
- Prep Your Nails: File and buff your nails to prepare them.
- Base Coat: Apply a base coat for protection.
- Color Application: Apply two coats of electric blue polish, letting each coat dry.
- Top Coat: Finish with a top coat to enhance shine and longevity.
- Drying: Allow nails to dry thoroughly.
Sophisticated Grey Minimalism
These sophisticated grey nails are perfect for a minimalist look. The soft grey color is elegant and understated, making it ideal for any occasion. This design is versatile and can complement any outfit, from casual to formal.
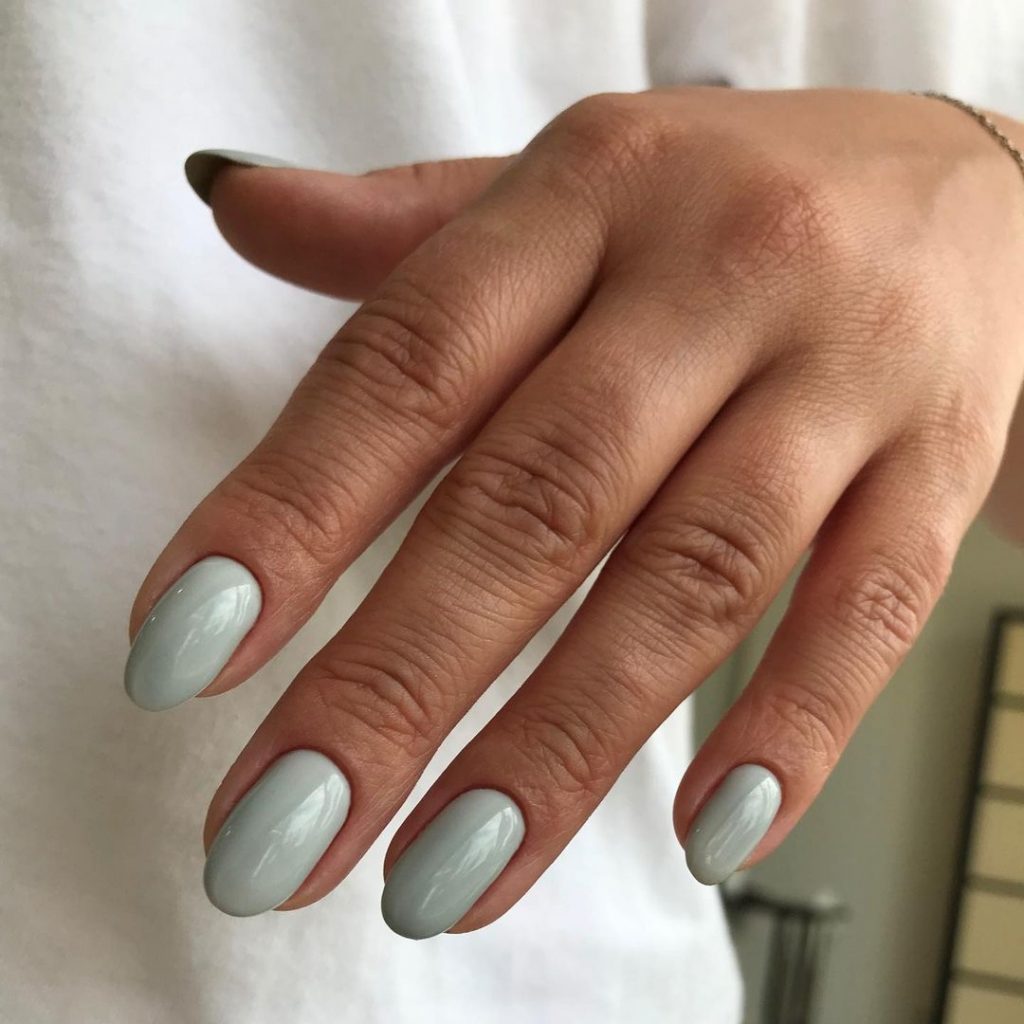
- Color: Soft grey.
- Finish: Glossy.
- Length: Medium and practical.
Consumables Needed
- Grey nail polish (e.g., OPI “I Can Never Hut Up”)
- Base coat and top coat
- Nail file and buffer
DIY Instructions
- Prep Your Nails: Shape and buff your nails.
- Base Coat: Protect your nails with a base coat.
- Color Application: Apply two coats of grey polish, allowing each to dry.
- Top Coat: Use a top coat for a glossy finish.
- Drying: Let your nails dry completely.
Floral Fall Fantasy
This design brings a touch of nature to your nails with its beautiful floral patterns. The mix of burgundy, nude, and floral accents creates a stunning look that is both elegant and unique. Perfect for those who love a bit of artistic flair in their manicures.
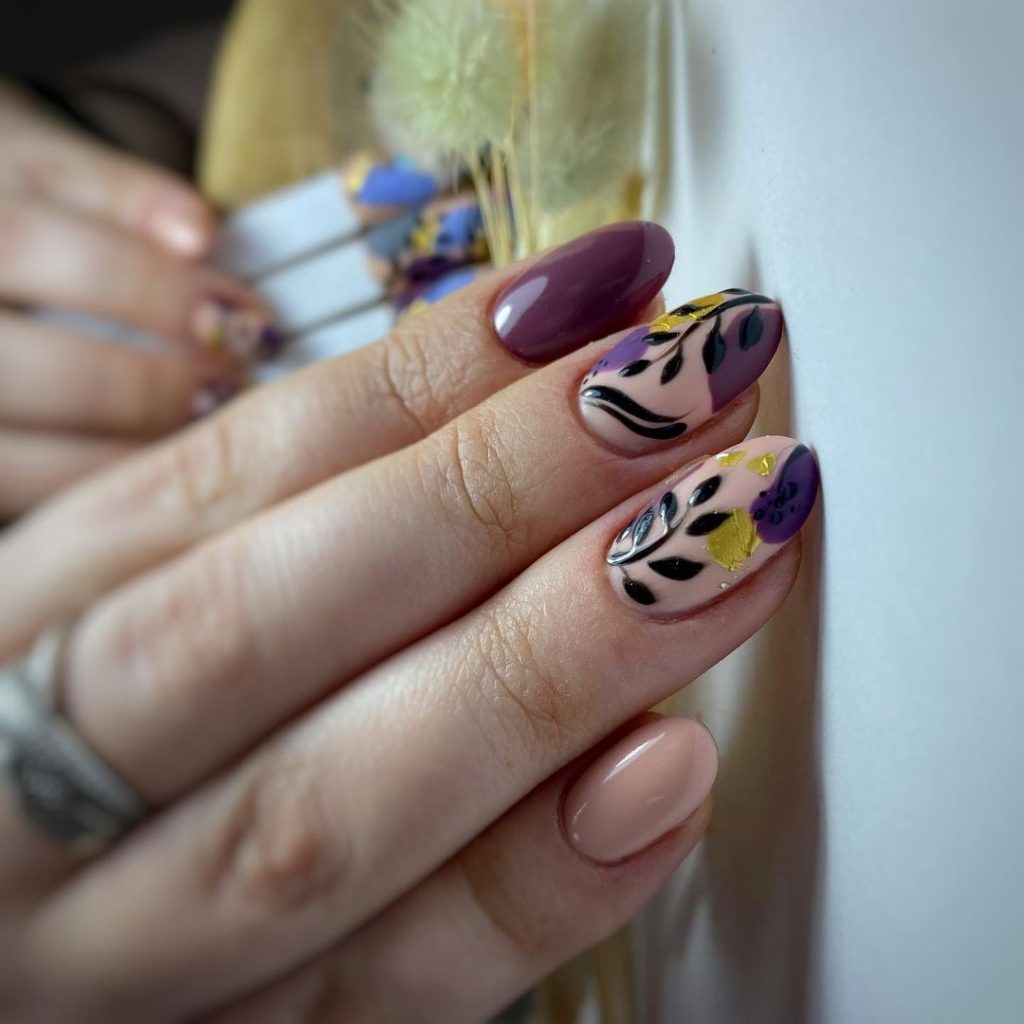
- Color: Burgundy, nude, and floral accents.
- Finish: Glossy with detailed art.
- Length: Long and stylish.
Consumables Needed
- Burgundy and nude nail polishes
- Floral nail stickers or nail art brushes
- Base coat and top coat
- Nail file and buffer
DIY Instructions
- Prep Your Nails: File and buff for a smooth surface.
- Base Coat: Apply a base coat.
- Color Application: Paint your nails with burgundy and nude polishes as desired.
- Floral Art: Add floral designs using stickers or a brush.
- Top Coat: Seal the design with a top coat.
- Drying: Allow your nails to dry completely.
Fall Leaves Accent
This nail design beautifully incorporates the vibrant colors of fall leaves. The mix of deep red, bright orange, and a delicate leaf pattern on a white background brings the essence of autumn to your fingertips. It’s a perfect way to celebrate the season with a bold yet elegant look.
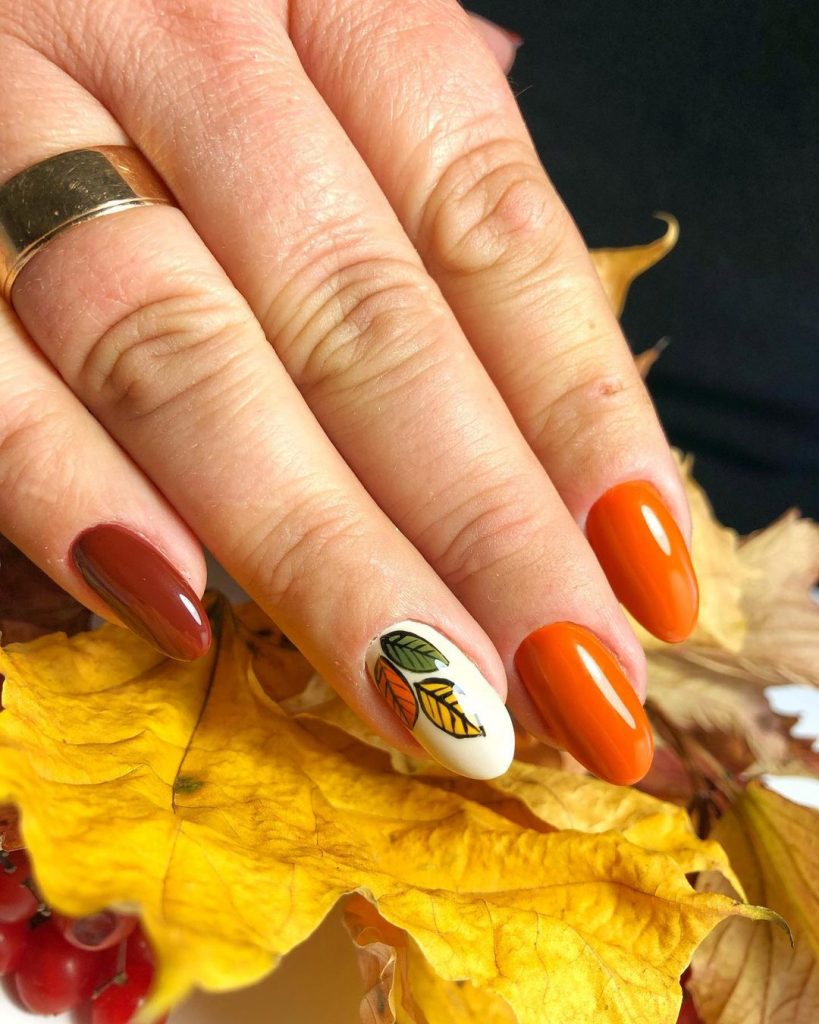
- Color: Deep red, bright orange, white with leaf design.
- Finish: Glossy.
- Length: Medium.
Consumables Needed
- Deep red nail polish
- Bright orange nail polish
- White nail polish
- Leaf pattern nail stickers or nail art brush
- Base coat and top coat
- Nail file and buffer
DIY Instructions
- Prep Your Nails: File and buff your nails to prepare them.
- Base Coat: Apply a base coat for protection.
- Color Application: Paint your nails with deep red and bright orange, leaving one accent nail white.
- Leaf Design: Apply the leaf design on the accent nail using stickers or a nail art brush.
- Top Coat: Finish with a top coat for a glossy shine.
- Drying: Allow nails to dry completely.
Abstract Red and Black Art
This design features a striking combination of red and black abstract art, accented with gold foil. The contrast between the bold red and deep black, along with the creative abstract shapes, makes this design a real head-turner. The touch of gold foil adds an extra layer of sophistication.
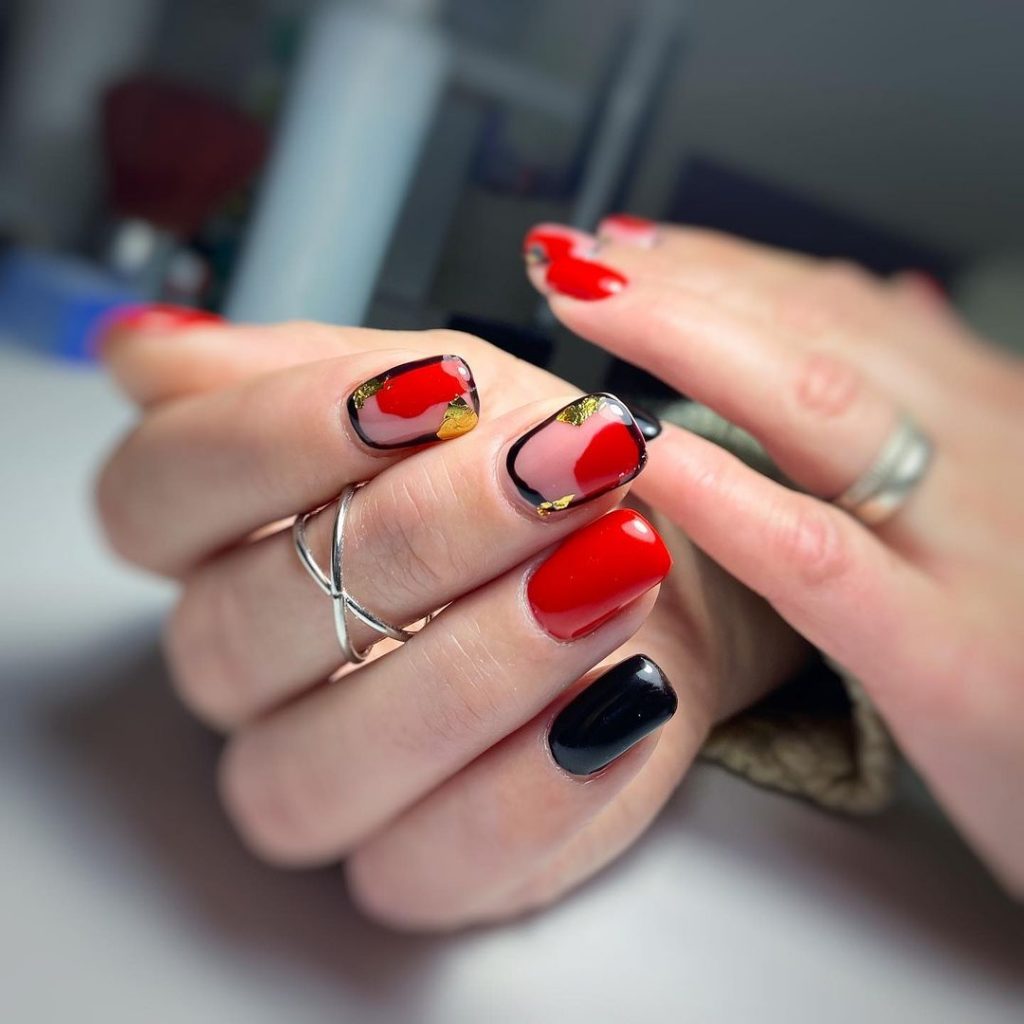
- Color: Red, black, and gold foil accents.
- Finish: Glossy with foil details.
- Length: Short.
Consumables Needed
- Red nail polish
- Black nail polish
- Gold foil
- Base coat and top coat
- Nail file and buffer
DIY Instructions
- Prep Your Nails: Shape and buff your nails.
- Base Coat: Apply a base coat.
- Color Application: Paint your nails with red and black polishes.
- Abstract Design: Use a thin brush to create abstract shapes and apply gold foil accents.
- Top Coat: Seal with a top coat.
- Drying: Let your nails dry thoroughly.
Vibrant Pink Ombre
These vibrant pink nails are perfect for adding a pop of color to your look. The gradient from light pink to deep magenta creates a beautiful ombre effect that’s both playful and sophisticated. This design is great for those who love bold, colorful nails.
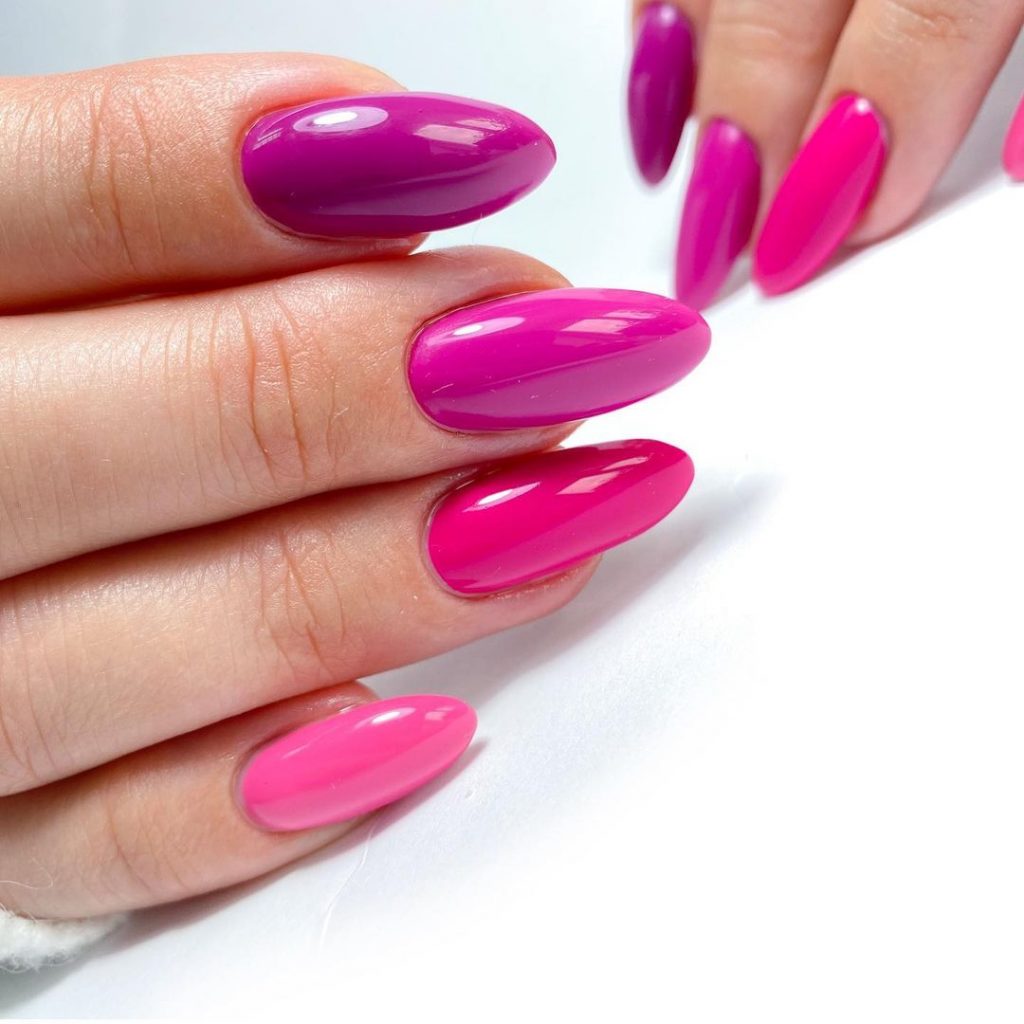
- Color: Light pink to deep magenta.
- Finish: Glossy.
- Length: Long.
Consumables Needed
- Light pink nail polish
- Deep magenta nail polish
- Sponge for ombre effect
- Base coat and top coat
- Nail file and buffer
DIY Instructions
- Prep Your Nails: File and buff your nails.
- Base Coat: Apply a base coat.
- Ombre Application: Use a sponge to apply the light pink and deep magenta polishes, blending them for a gradient effect.
- Top Coat: Finish with a top coat for a glossy finish.
- Drying: Allow your nails to dry completely.
Earthy Green Simplicity
This earthy green nail design is perfect for a simple yet chic look. The muted green color is sophisticated and versatile, making it a great choice for everyday wear. It’s an excellent way to embrace fall’s natural hues with a minimalist approach.
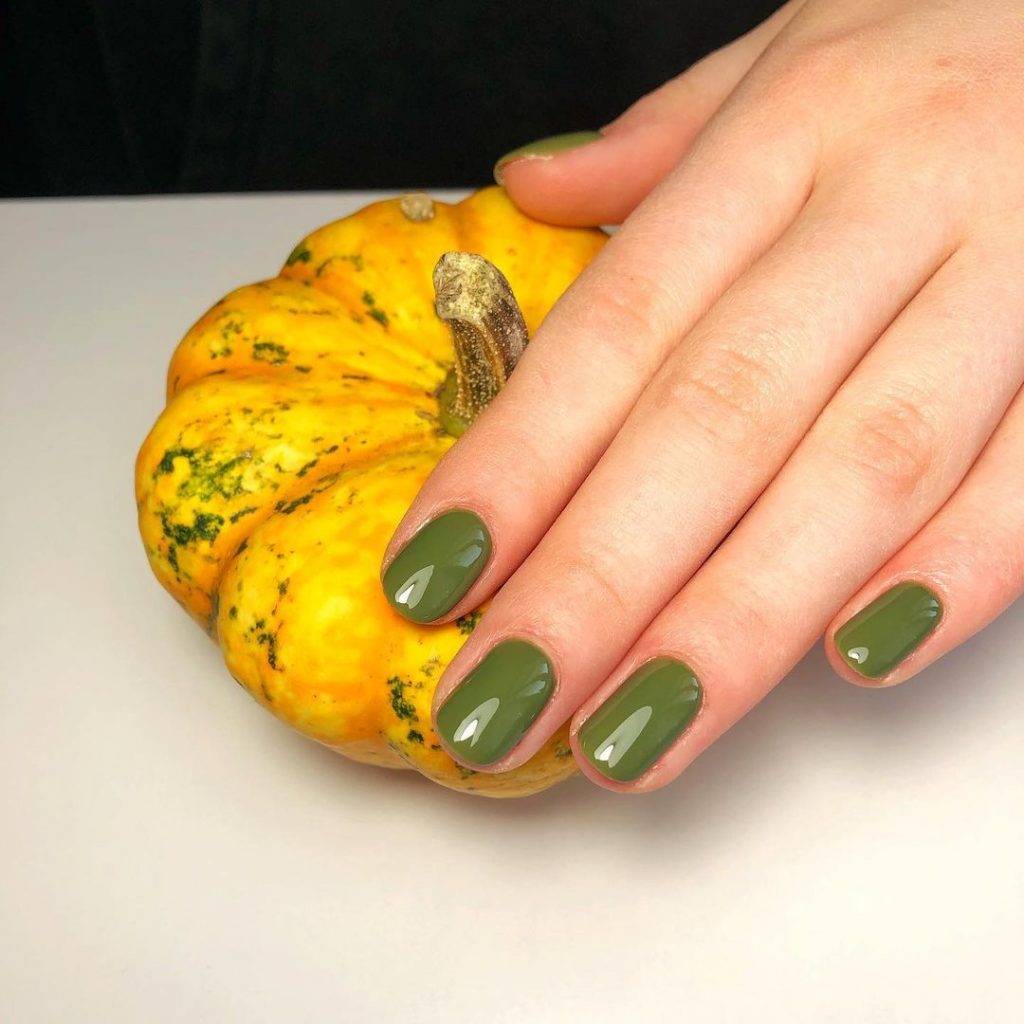
- Color: Muted green.
- Finish: Glossy.
- Length: Short.
Consumables Needed
- Muted green nail polish
- Base coat and top coat
- Nail file and buffer
DIY Instructions
- Prep Your Nails: Shape and buff your nails.
- Base Coat: Apply a base coat.
- Color Application: Apply two coats of muted green polish, letting each coat dry.
- Top Coat: Use a top coat for a glossy finish.
- Drying: Let your nails dry thoroughly.
Dark Chocolate Elegance
For a more dramatic look, these dark chocolate nails are perfect. The deep brown color is rich and luxurious, ideal for fall. This design is perfect for those who prefer a darker, more sophisticated manicure.
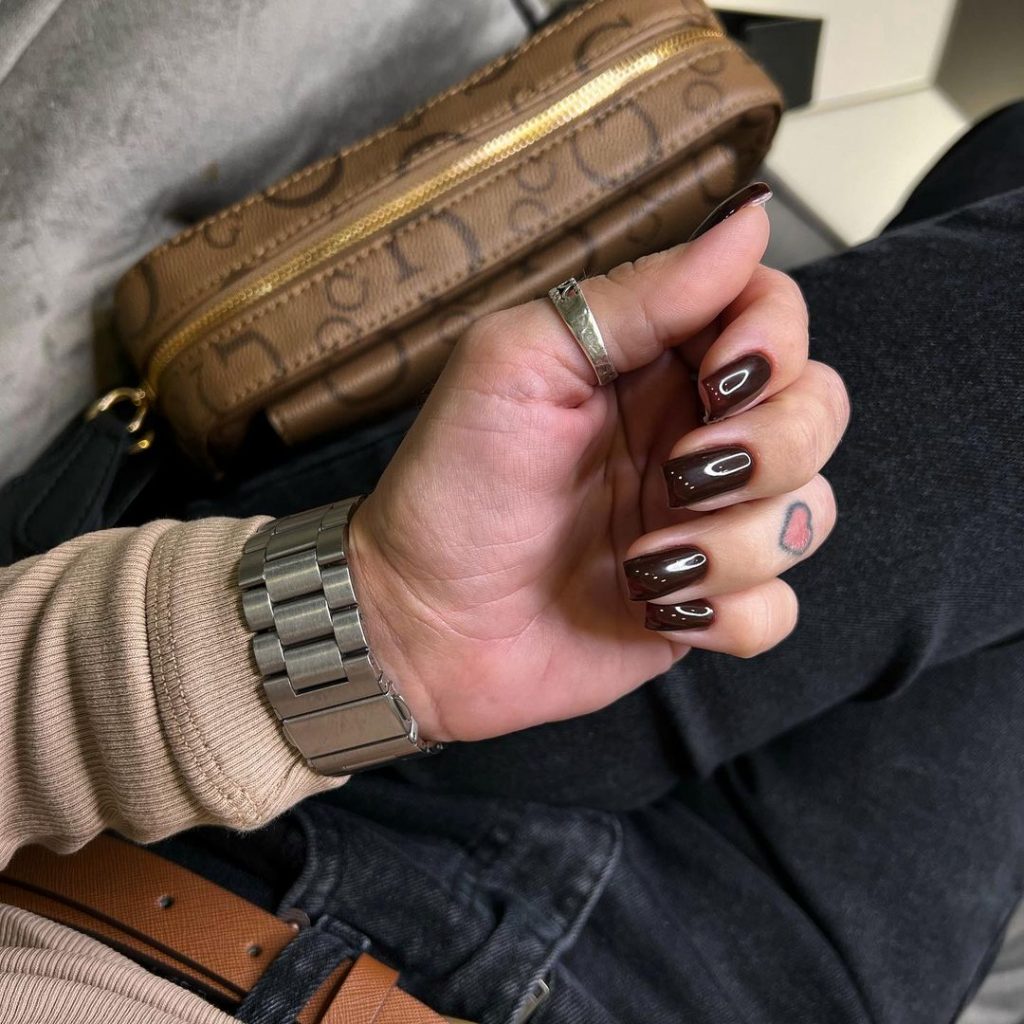
- Color: Dark chocolate brown.
- Finish: Glossy.
- Length: Short.
Consumables Needed
- Dark chocolate brown nail polish
- Base coat and top coat
- Nail file and buffer
DIY Instructions
- Prep Your Nails: File and buff your nails to prepare them.
- Base Coat: Apply a base coat for protection.
- Color Application: Apply two coats of dark chocolate brown polish, allowing each to dry.
- Top Coat: Finish with a top coat for a glossy shine.
- Drying: Allow nails to dry completely.
Classic Black Nails
These classic black nails are the epitome of elegance and simplicity. The high-gloss finish adds a sophisticated touch, making them perfect for any occasion. Black nails are timeless and versatile, complementing any outfit effortlessly.
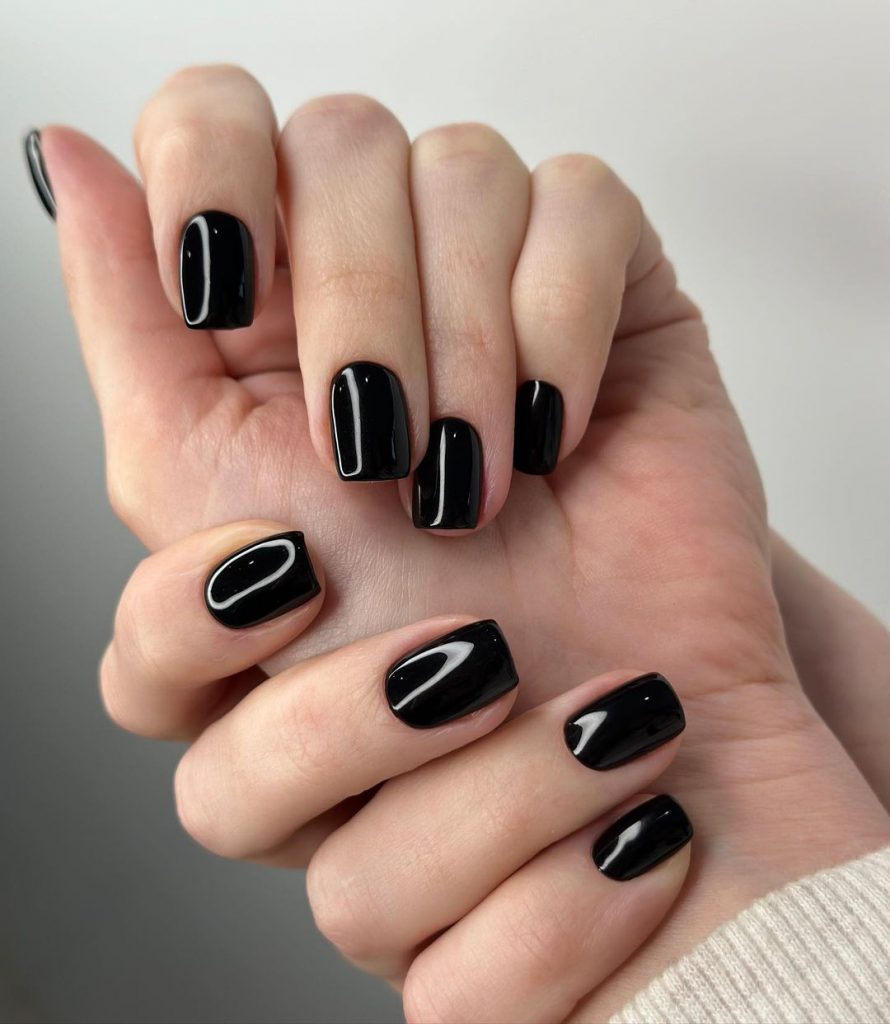
- Color: Jet black.
- Finish: High gloss.
- Length: Short.
Consumables Needed
- Black nail polish
- Base coat and top coat
- Nail file and buffer
DIY Instructions
- Prep Your Nails: File and buff your nails for a smooth base.
- Base Coat: Apply a base coat to protect your nails.
- Color Application: Apply two coats of black polish, letting each coat dry.
- Top Coat: Seal with a top coat for a glossy shine.
- Drying: Allow your nails to dry thoroughly.
Matte Green and Grey
This nail design combines matte green and grey polishes with delicate leaf patterns, creating a fresh and natural look. The matte finish gives it a modern twist, perfect for those who prefer a more understated manicure.
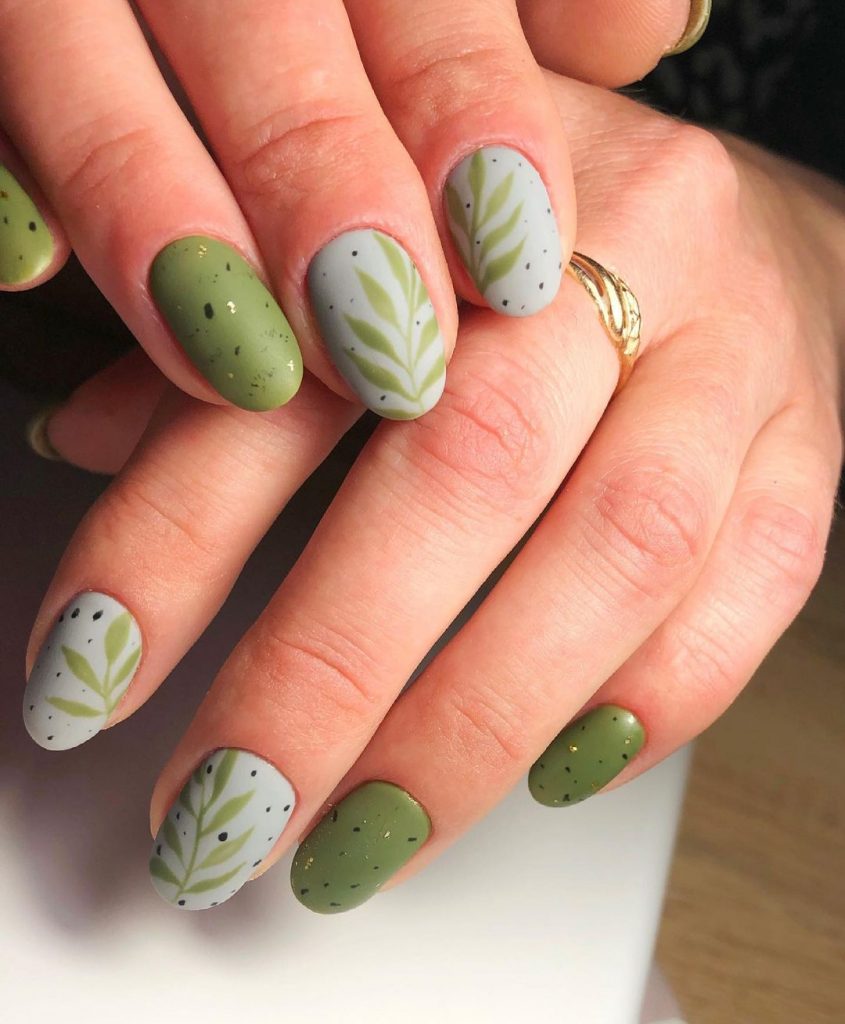
- Color: Matte green and grey with leaf patterns.
- Finish: Matte.
- Length: Medium.
Consumables Needed
- Matte green nail polish
- Matte grey nail polish
- Leaf pattern nail stickers or nail art brush
- Base coat and top coat (matte finish)
- Nail file and buffer
DIY Instructions
- Prep Your Nails: Shape and buff your nails.
- Base Coat: Apply a base coat.
- Color Application: Paint your nails with matte green and grey polishes.
- Leaf Design: Add leaf patterns using stickers or a brush.
- Top Coat: Use a matte top coat to seal the design.
- Drying: Let your nails dry completely.
Glossy Purple Passion
These glossy purple nails are bold and beautiful, perfect for making a statement. The deep purple color is rich and luxurious, ideal for adding a pop of color to your fall look.
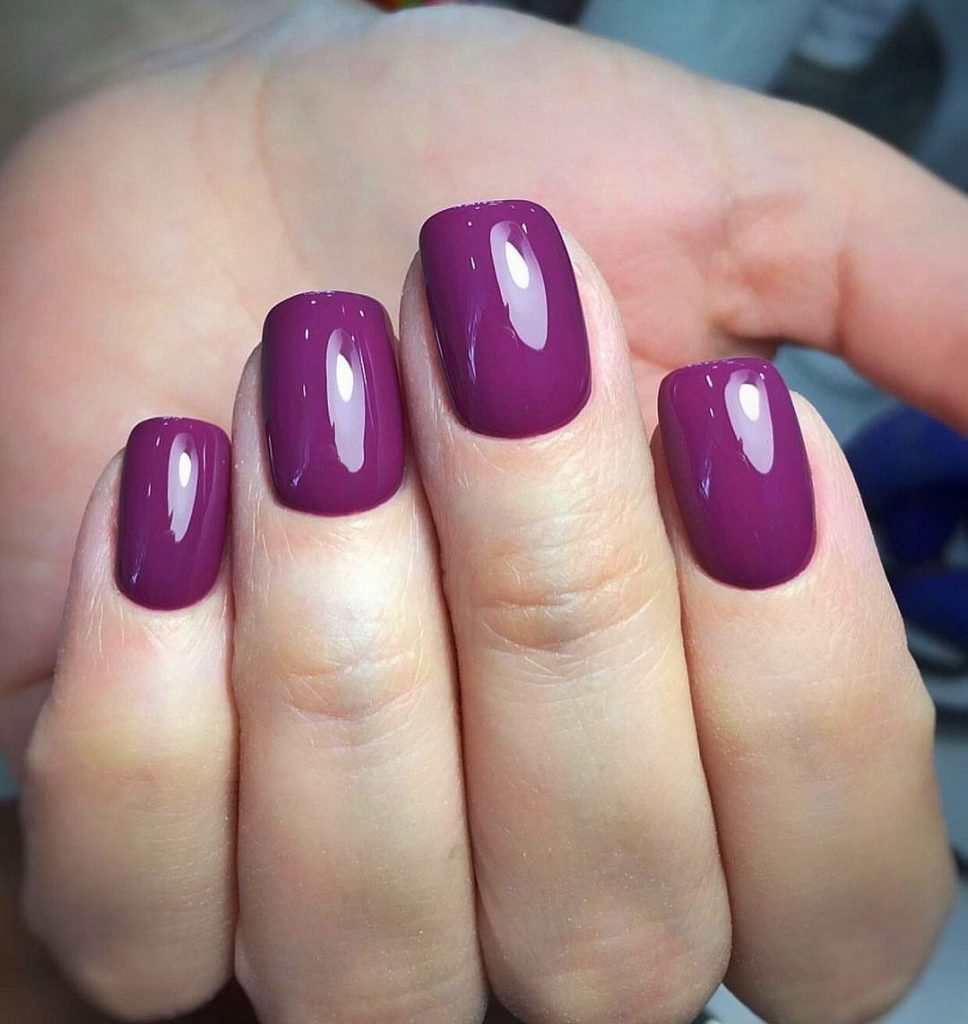
- Color: Deep purple.
- Finish: Glossy.
- Length: Short.
Consumables Needed
- Deep purple nail polish
- Base coat and top coat
- Nail file and buffer
DIY Instructions
- Prep Your Nails: File and buff your nails.
- Base Coat: Apply a base coat.
- Color Application: Apply two coats of deep purple polish, letting each coat dry.
- Top Coat: Finish with a top coat for a glossy finish.
- Drying: Allow your nails to dry thoroughly.
Olive Green with Leaf Accent
This design features a calming olive green with a simple leaf accent on one nail. The combination of green and white creates a fresh and clean look, perfect for those who love nature-inspired designs.
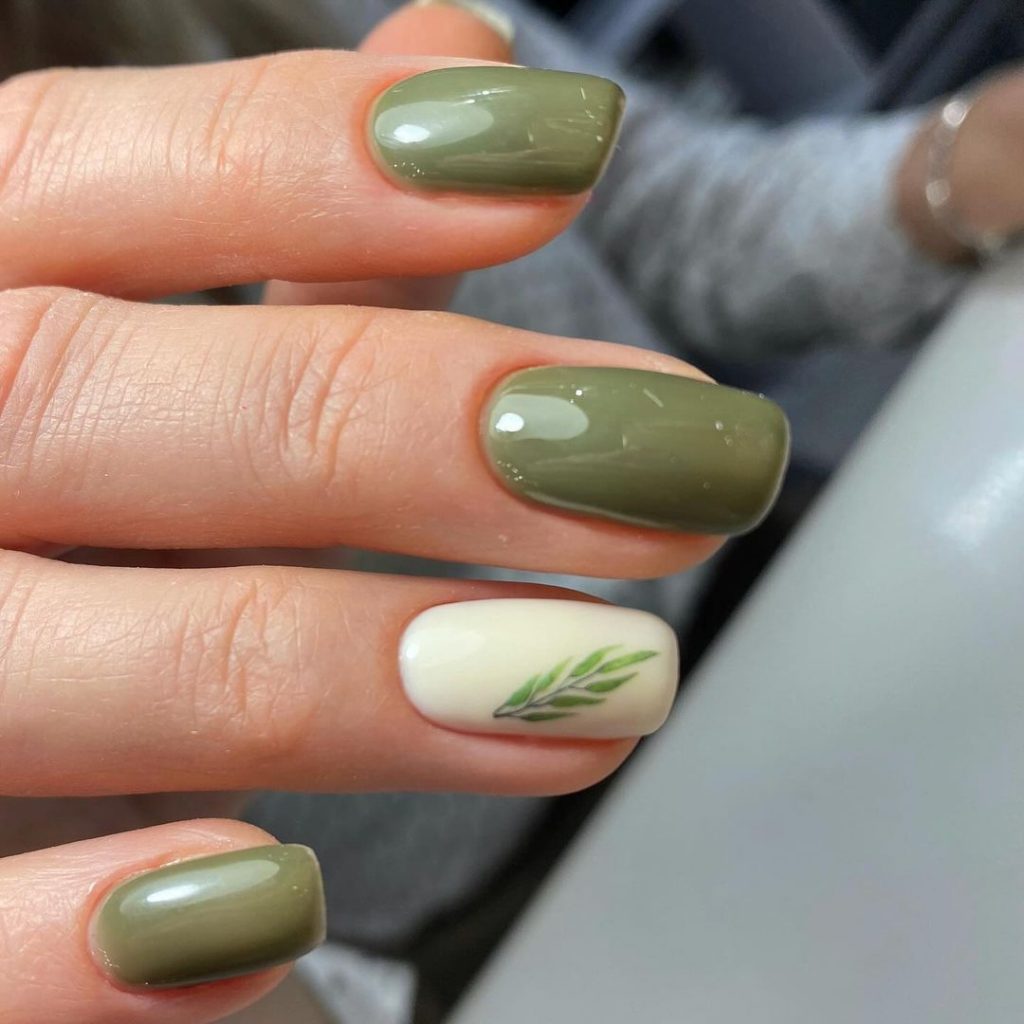
- Color: Olive green and white with leaf accent.
- Finish: Glossy.
- Length: Medium.
Consumables Needed
- Olive green nail polish
- White nail polish
- Leaf pattern nail stickers or nail art brush
- Base coat and top coat
- Nail file and buffer
DIY Instructions
- Prep Your Nails: Shape and buff your nails.
- Base Coat: Apply a base coat.
- Color Application: Paint your nails with olive green, leaving one accent nail white.
- Leaf Design: Add the leaf design on the accent nail using stickers or a brush.
- Top Coat: Use a top coat to seal the design.
- Drying: Let your nails dry completely.
Soft Pink Elegance
These soft pink nails are the perfect choice for a subtle yet elegant look. The gentle pink gradient creates a delicate ombre effect, making them ideal for any occasion, from casual to formal.
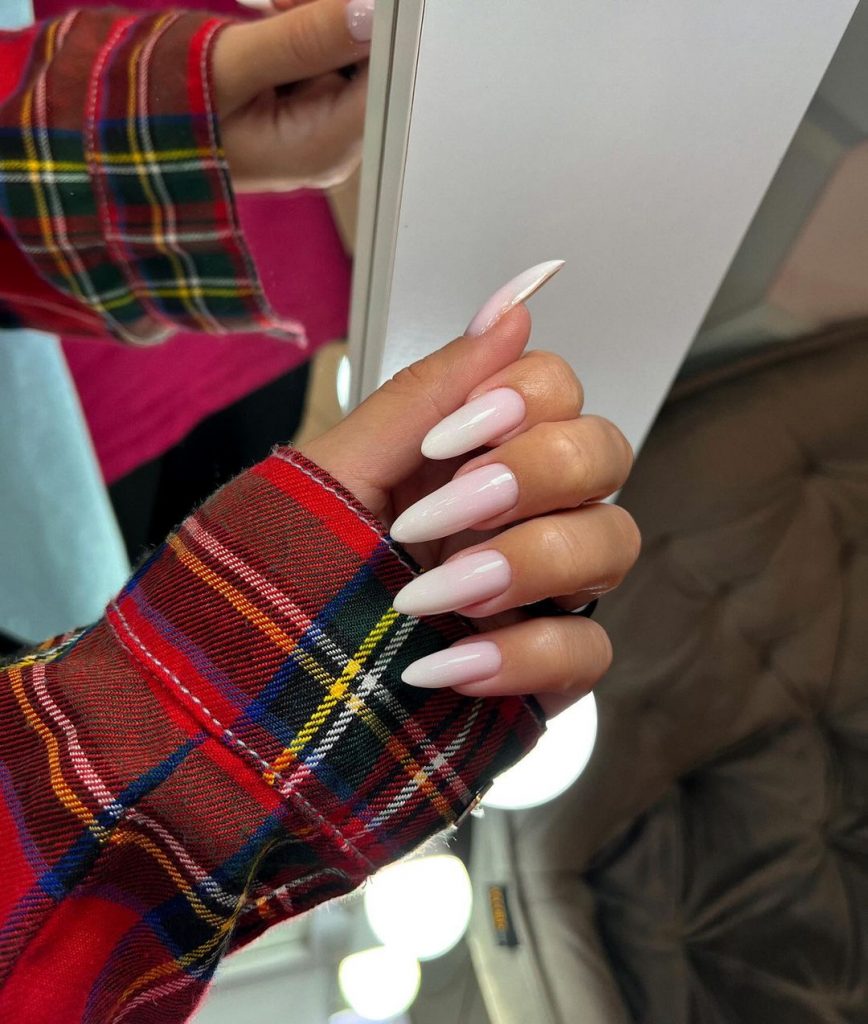
- Color: Soft pink gradient.
- Finish: Glossy.
- Length: Long.
Consumables Needed
- Light pink nail polish
- White nail polish
- Sponge for ombre effect
- Base coat and top coat
- Nail file and buffer
DIY Instructions
- Prep Your Nails: File and buff your nails.
- Base Coat: Apply a base coat.
- Ombre Application: Use a sponge to apply the light pink and white polishes, blending them for a gradient effect.
- Top Coat: Finish with a top coat for a glossy finish.
- Drying: Allow your nails to dry thoroughly.
Striking Green with Silver Stripes
This bold nail design features a vibrant green base with sleek silver stripes. The contrast between the green polish and the metallic silver creates a striking, modern look. This design is perfect for those who want to make a bold statement with their nails.
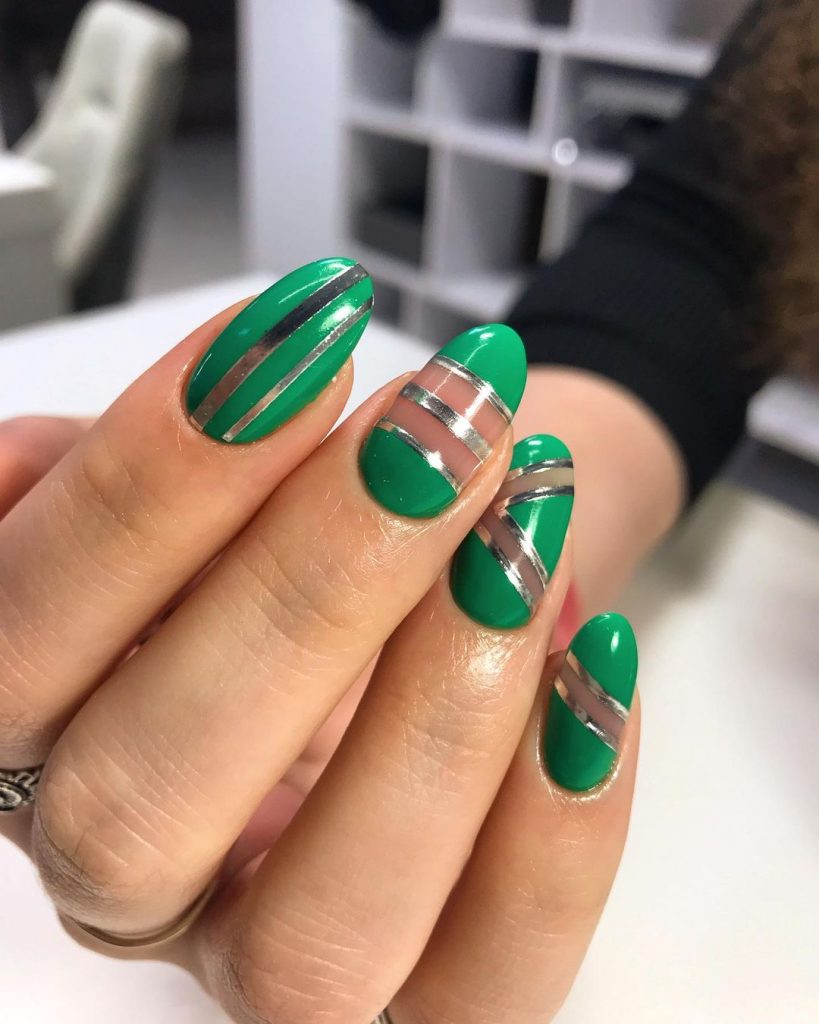
- Color: Vibrant green with silver stripes.
- Finish: Glossy with metallic accents.
- Length: Medium.
Consumables Needed
- Green nail polish
- Silver striping tape
- Base coat and top coat
- Nail file and buffer
DIY Instructions
- Prep Your Nails: Shape and buff your nails.
- Base Coat: Apply a base coat to protect your nails.
- Color Application: Paint your nails with green polish.
- Striping: Apply silver striping tape in desired patterns.
- Top Coat: Finish with a top coat to seal the design.
- Drying: Allow your nails to dry thoroughly.
Glossy Purple Perfection
These long, glossy purple nails are perfect for those who love a vibrant and bold manicure. The deep, rich purple color is eye-catching and sophisticated, making it a great choice for fall.
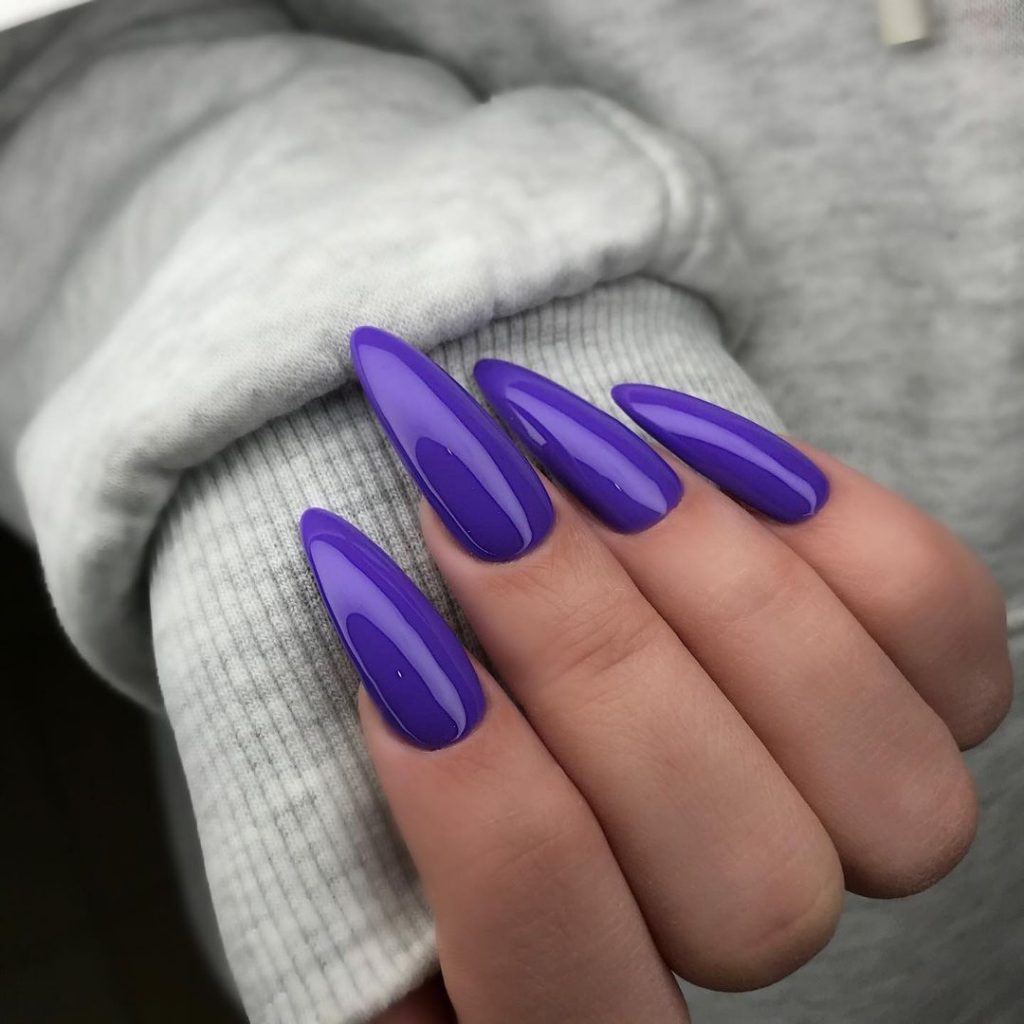
- Color: Deep purple.
- Finish: Glossy.
- Length: Long.
Consumables Needed
- Deep purple nail polish
- Base coat and top coat
- Nail file and buffer
DIY Instructions
- Prep Your Nails: File and buff your nails.
- Base Coat: Apply a base coat for protection.
- Color Application: Apply two coats of deep purple polish, letting each coat dry.
- Top Coat: Use a top coat for a glossy finish.
- Drying: Allow your nails to dry completely.
Matte Pink with Leaf Accent
This matte pink design is both soft and bold, with a beautiful leaf accent on one nail. The matte finish gives it a modern, chic look, while the leaf detail adds a touch of nature-inspired elegance.
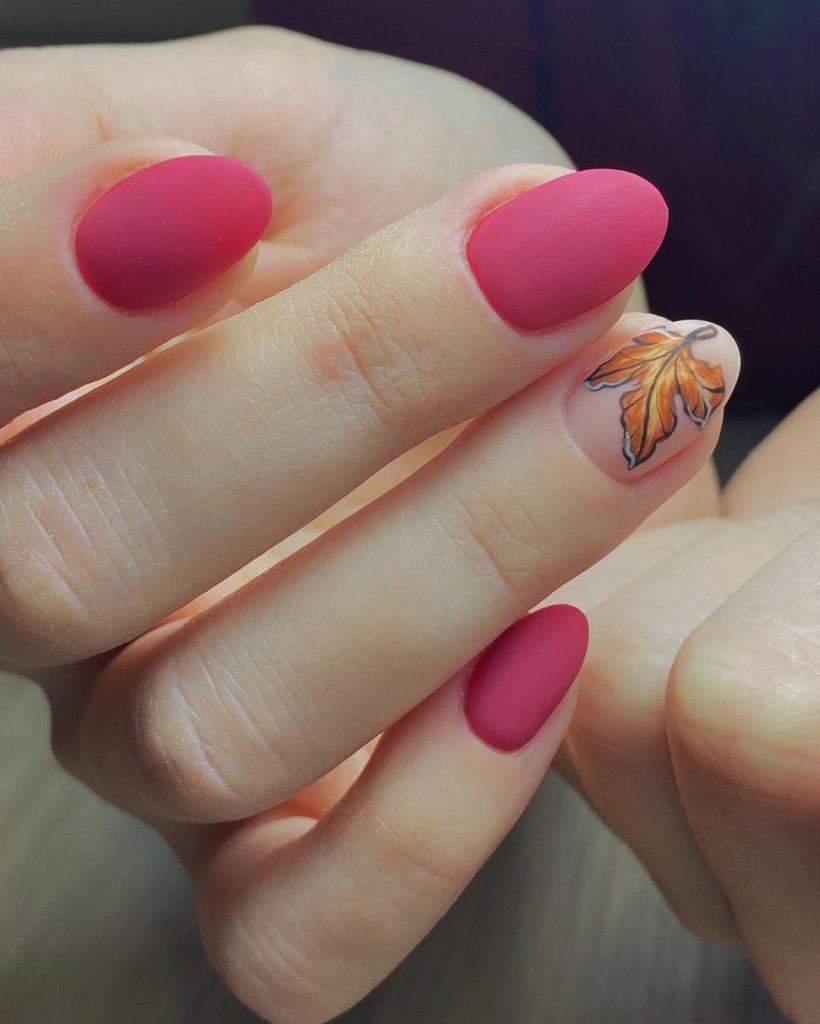
- Color: Matte pink with a leaf accent.
- Finish: Matte.
- Length: Medium.
Consumables Needed
- Matte pink nail polish
- Base coat and matte top coat
- Leaf pattern nail stickers or nail art brush
- Nail file and buffer
DIY Instructions
- Prep Your Nails: Shape and buff your nails.
- Base Coat: Apply a base coat.
- Color Application: Paint your nails with matte pink polish.
- Leaf Design: Add the leaf pattern using stickers or a brush.
- Top Coat: Seal with a matte top coat.
- Drying: Let your nails dry thoroughly.
Glossy Black Elegance
These glossy black nails are timeless and elegant. The high-shine finish adds a touch of luxury, making them perfect for any occasion. Black nails are versatile and always in style.
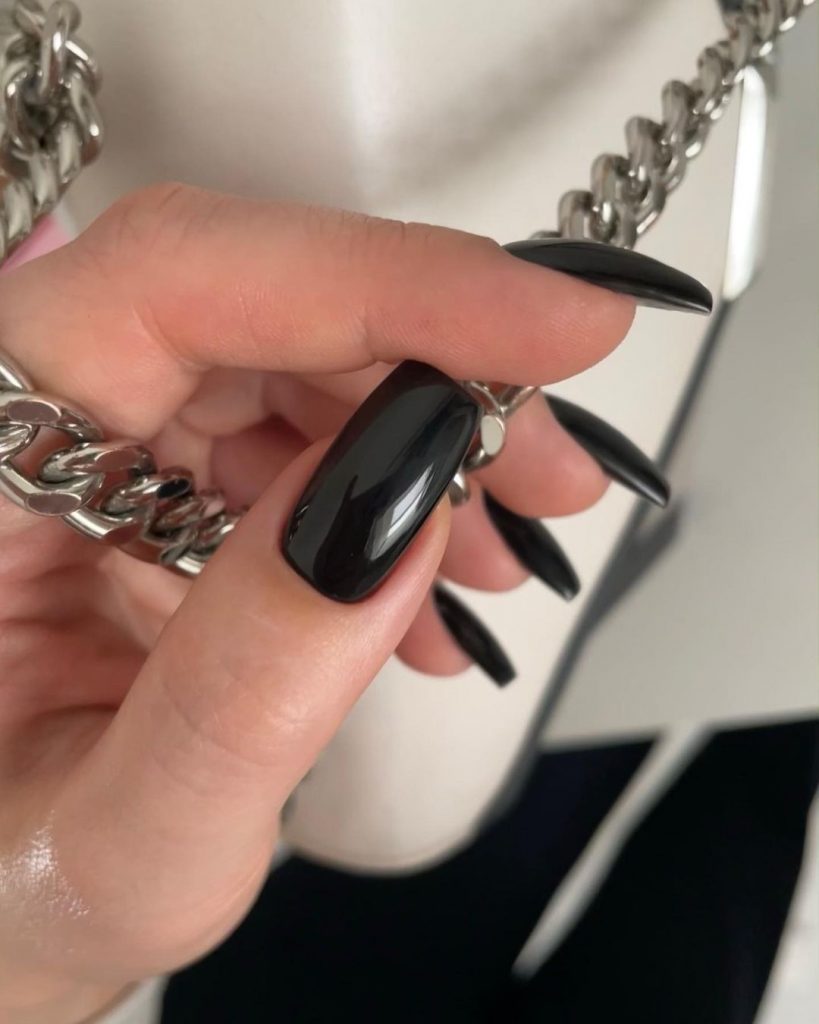
- Color: Jet black.
- Finish: High gloss.
- Length: Long.
Consumables Needed
- Black nail polish
- Base coat and top coat
- Nail file and buffer
DIY Instructions
- Prep Your Nails: File and buff your nails.
- Base Coat: Apply a base coat for protection.
- Color Application: Apply two coats of black polish, letting each coat dry.
- Top Coat: Finish with a top coat for a glossy shine.
- Drying: Allow your nails to dry thoroughly.
Autumn Floral Accent
This autumn-inspired design features a beautiful combination of green, orange, and black, with a floral accent. The mix of colors and the delicate flower detail make this manicure perfect for embracing the fall season.
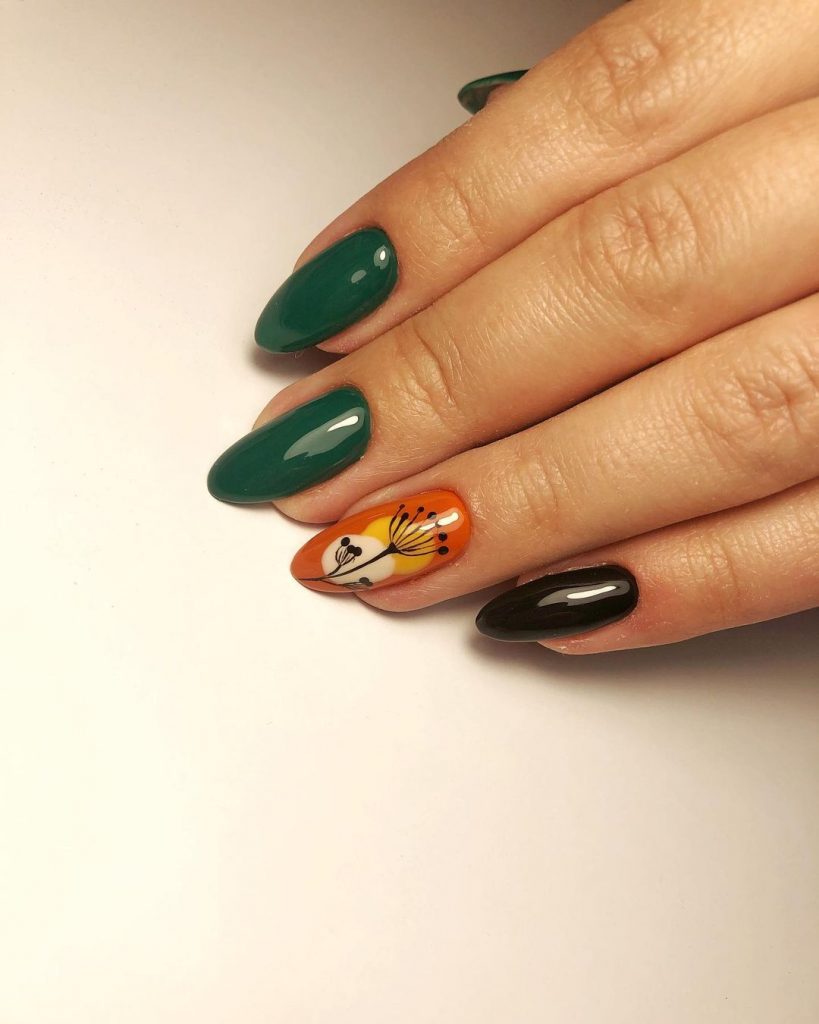
- Color: Green, orange, and black with a floral accent.
- Finish: Glossy.
- Length: Medium.
Consumables Needed
- Green, orange, and black nail polishes
- Floral pattern nail stickers or nail art brush
- Base coat and top coat
- Nail file and buffer
DIY Instructions
- Prep Your Nails: Shape and buff your nails.
- Base Coat: Apply a base coat.
- Color Application: Paint your nails with green, orange, and black polishes as desired.
- Floral Design: Add the floral pattern using stickers or a brush.
- Top Coat: Seal with a top coat for a glossy finish.
- Drying: Let your nails dry completely.
Matte Mauve with Leaf Accent
These matte mauve nails are perfect for a sophisticated yet subtle look. The warm mauve color is complemented by a delicate leaf accent on two nails, adding a touch of nature-inspired elegance. The matte finish enhances the overall chic and understated aesthetic.
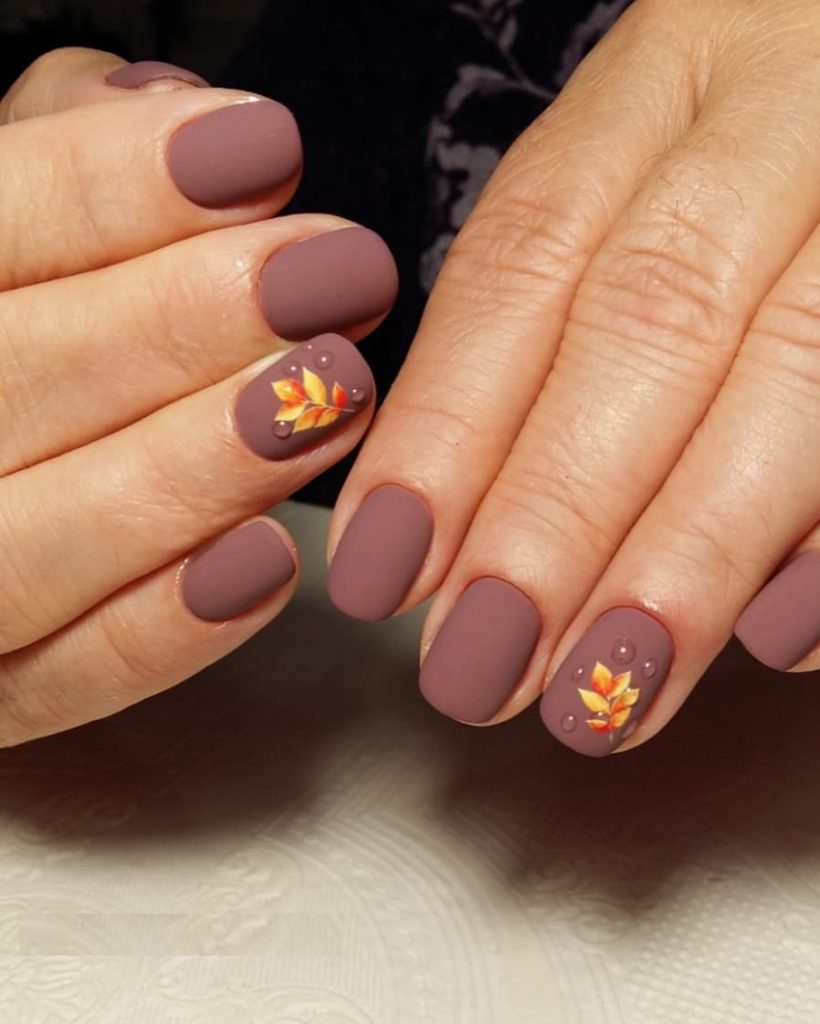
- Color: Matte mauve with leaf accent.
- Finish: Matte.
- Length: Short.
Consumables Needed
- Mauve matte nail polish
- Leaf pattern nail stickers or nail art brush
- Base coat and matte top coat
- Nail file and buffer
DIY Instructions
- Prep Your Nails: Shape and buff your nails.
- Base Coat: Apply a base coat to protect your nails.
- Color Application: Paint your nails with mauve matte polish.
- Leaf Design: Add the leaf pattern on two accent nails using stickers or a brush.
- Top Coat: Seal with a matte top coat.
- Drying: Let your nails dry thoroughly.
Golden Marble Elegance
These nails feature a stunning golden marble design with a gradient effect. The mix of gold and light beige creates a luxurious and elegant look, perfect for special occasions. The gold accents add a touch of opulence to the overall design.
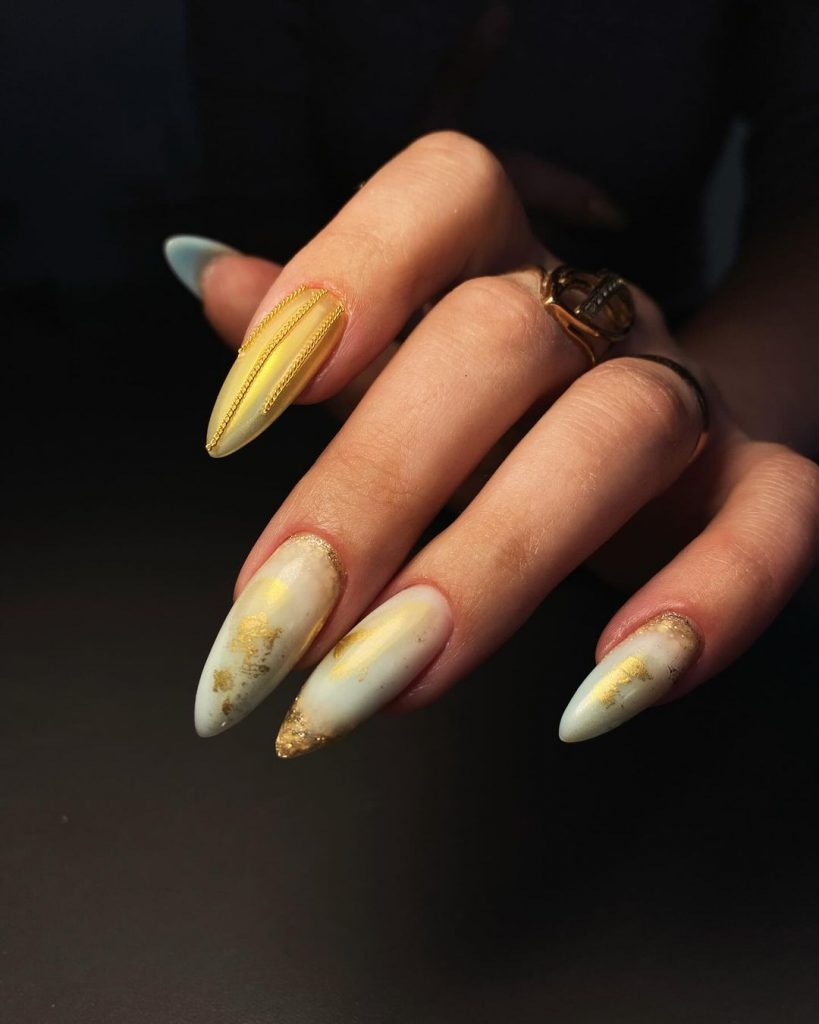
- Color: Gold and light beige.
- Finish: Glossy with marble effect.
- Length: Long.
Consumables Needed
- Light beige nail polish
- Gold nail polish
- Base coat and top coat
- Nail file and buffer
DIY Instructions
- Prep Your Nails: File and buff your nails.
- Base Coat: Apply a base coat.
- Color Application: Apply light beige polish and add gold accents to create the marble effect.
- Top Coat: Finish with a top coat for a glossy shine.
- Drying: Allow your nails to dry thoroughly.
Vibrant Green with Floral Accent
These vibrant green nails are sure to catch the eye. The bright green base is complemented by a delicate floral accent, adding a touch of nature and artistry to the design. This look is perfect for those who love bold, colorful manicures.
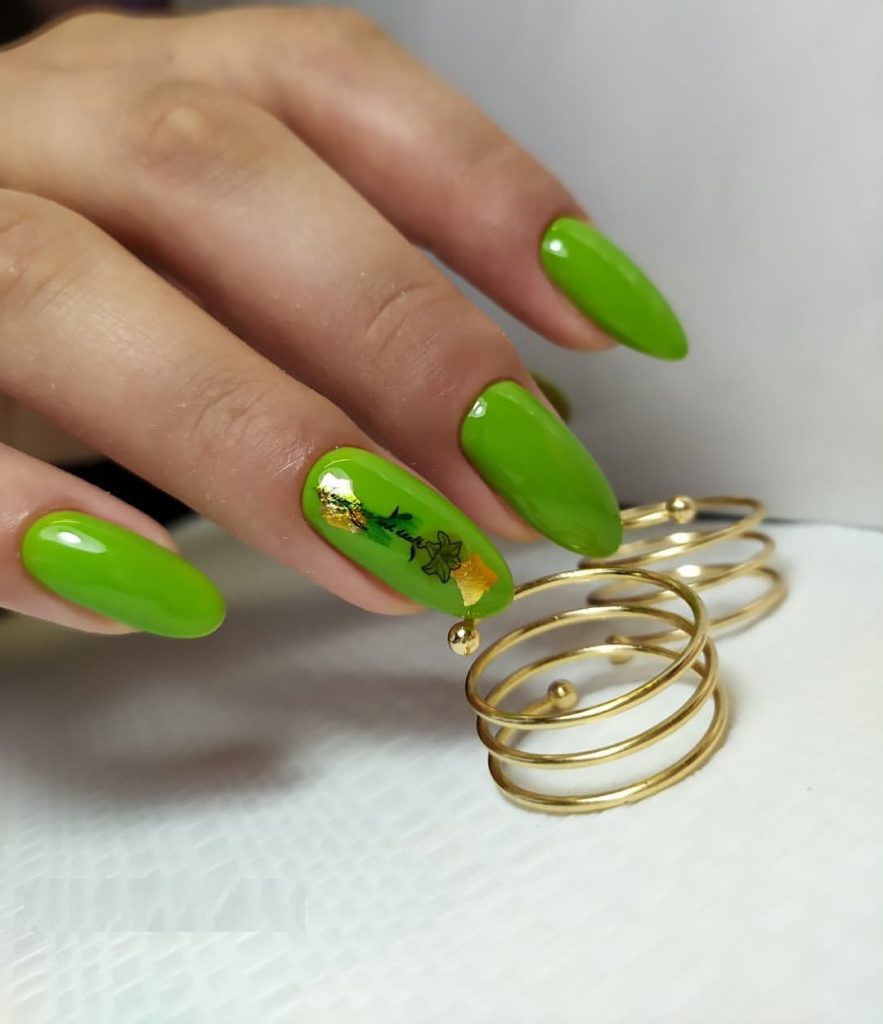
- Color: Bright green with floral accent.
- Finish: Glossy.
- Length: Long.
Consumables Needed
- Bright green nail polish
- Floral pattern nail stickers or nail art brush
- Base coat and top coat
- Nail file and buffer
DIY Instructions
- Prep Your Nails: Shape and buff your nails.
- Base Coat: Apply a base coat for protection.
- Color Application: Paint your nails with bright green polish.
- Floral Design: Add the floral pattern using stickers or a brush.
- Top Coat: Seal with a top coat for a glossy finish.
- Drying: Let your nails dry completely.
Soft Pink Elegance
These soft pink nails are perfect for a subtle yet elegant look. The gentle pink color is versatile and sophisticated, making it ideal for any occasion. This design is great for those who prefer a more understated manicure.
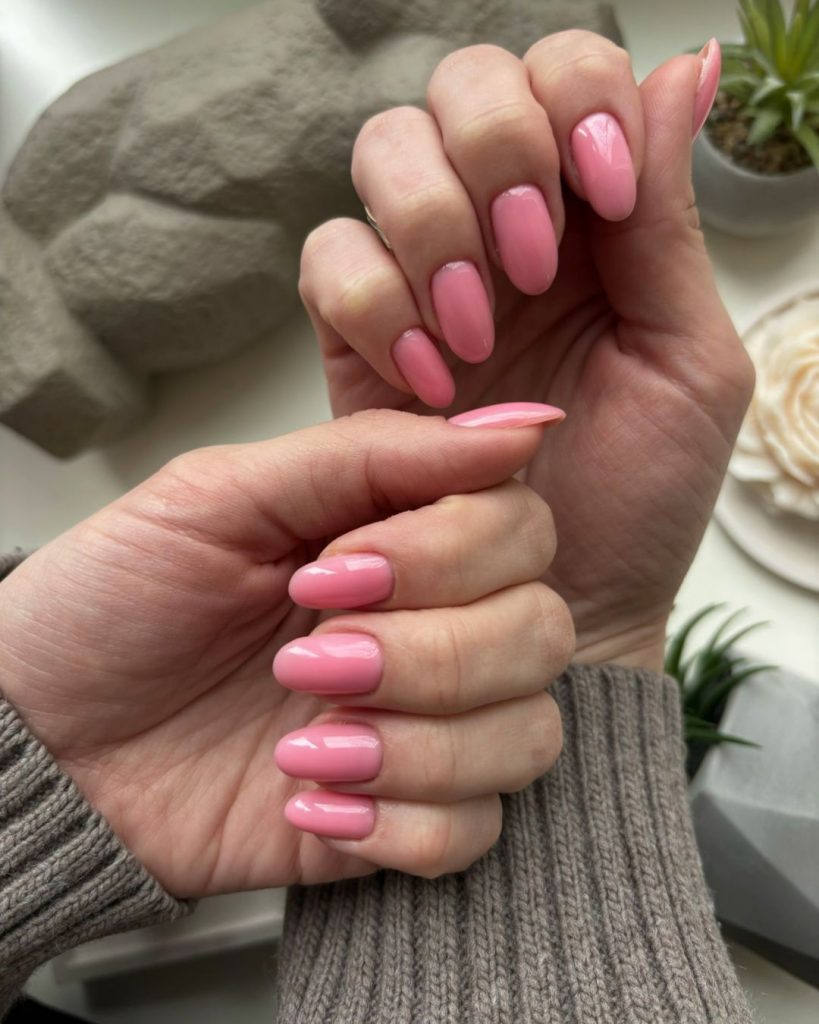
- Color: Soft pink.
- Finish: Glossy.
- Length: Medium.
Consumables Needed
- Soft pink nail polish
- Base coat and top coat
- Nail file and buffer
DIY Instructions
- Prep Your Nails: File and buff your nails to prepare them.
- Base Coat: Apply a base coat to protect your nails.
- Color Application: Apply two coats of soft pink polish, allowing each to dry.
- Top Coat: Finish with a top coat for a glossy shine.
- Drying: Allow nails to dry completely.
Pastel with Gold Flakes
This design features a mix of pastel colors with gold flakes, creating a soft and whimsical look. The combination of light shades and sparkling gold makes these nails perfect for adding a touch of fun and elegance to your style.
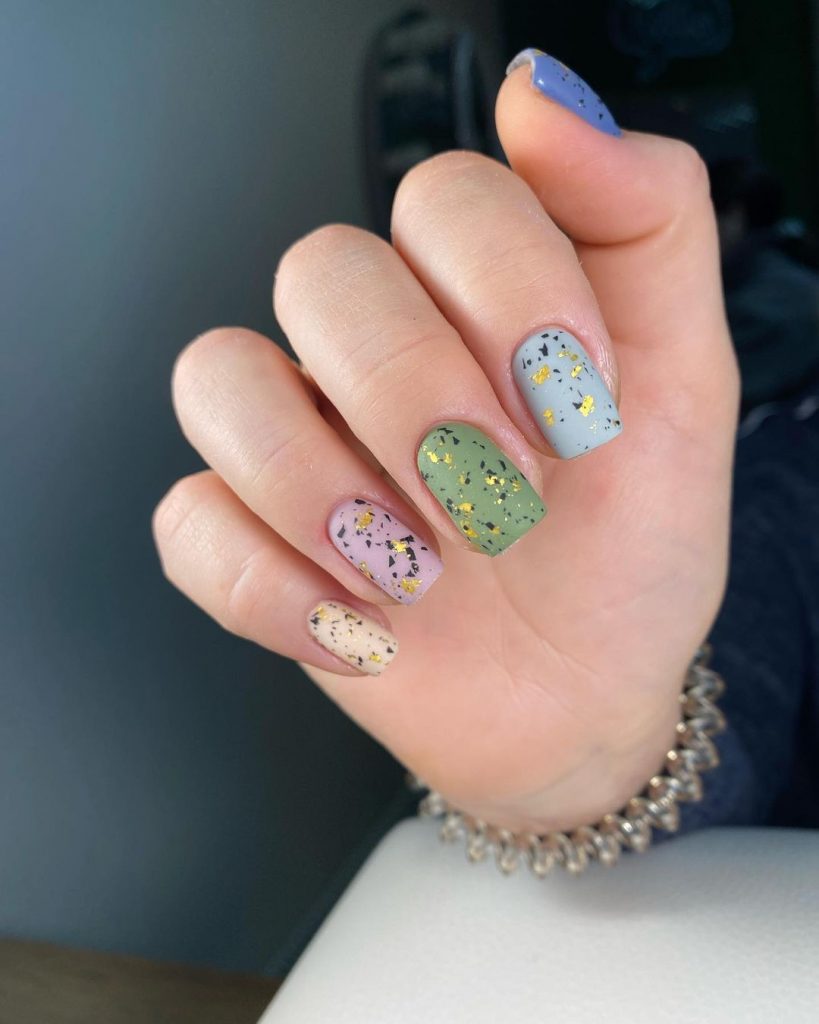
- Color: Pastel shades with gold flakes.
- Finish: Glossy with glitter.
- Length: Short.
Consumables Needed
- Pastel nail polishes
- Gold flake nail polish
- Base coat and top coat
- Nail file and buffer
DIY Instructions
- Prep Your Nails: Shape and buff your nails.
- Base Coat: Apply a base coat for protection.
- Color Application: Paint your nails with pastel colors and add gold flakes.
- Top Coat: Seal with a top coat for a glossy finish.
- Drying: Let your nails dry thoroughly.
Autumn Orange with Gold Flakes
These nails feature a rich autumn orange color with delicate gold flakes on accent nails. The combination of the warm orange and shimmering gold is perfect for embracing the fall season with a touch of glamour.
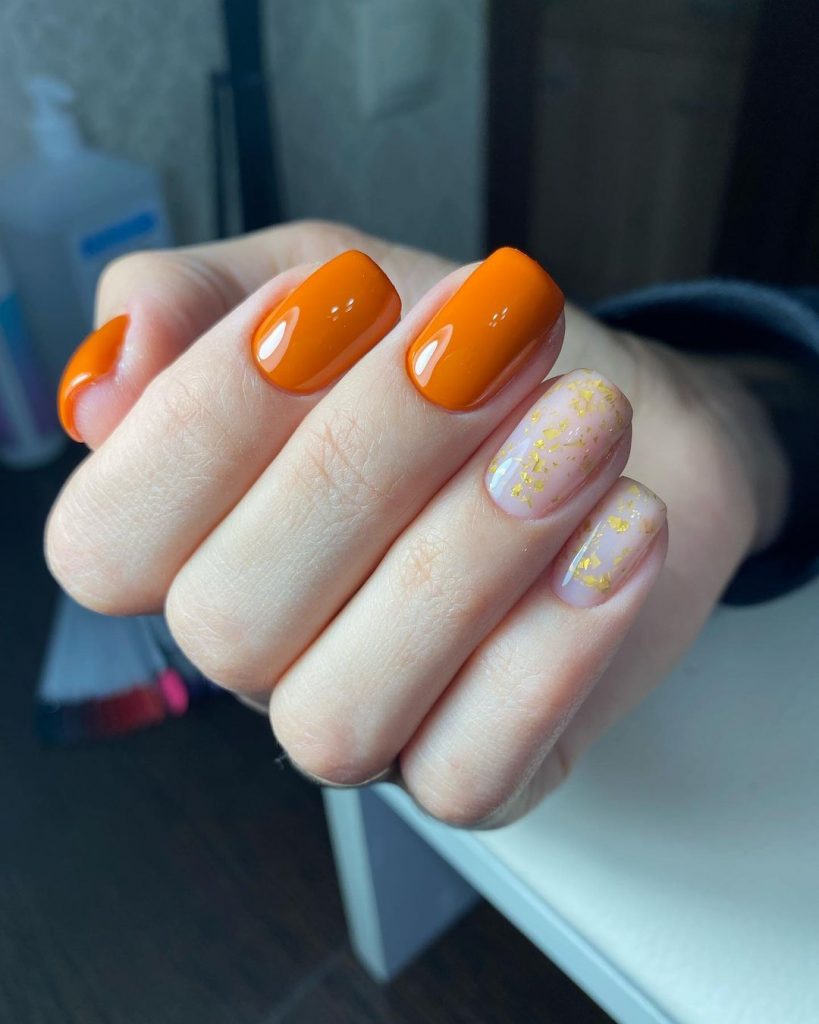
- Color: Autumn orange with gold flakes.
- Finish: Glossy.
- Length: Medium.
Consumables Needed
- Autumn orange nail polish
- Gold flake nail polish
- Base coat and top coat
- Nail file and buffer
DIY Instructions
- Prep Your Nails: File and buff your nails to prepare them.
- Base Coat: Apply a base coat to protect your nails.
- Color Application: Apply two coats of autumn orange polish, allowing each to dry.
- Gold Flakes: Add gold flakes to accent nails.
- Top Coat: Finish with a top coat for a glossy shine.
- Drying: Allow nails to dry completely.
Save Pin