Classy Fall Nails 2024 26 Ideas: Your Ultimate Guide to the Season’s Hottest Trends
When the leaves start to fall and the air turns crisp, it’s time to rethink your nail game. Are you ready to explore the top classy fall nails for 2024? This year, the trends are all about embracing bold colors, chic designs, and creative shapes. Whether you’re a fan of acrylics, prefer a short and simple look, or love intricate art ideas, there’s something for everyone. Let’s dive into some of the most stylish nail designs that will make your autumn truly aesthetic.
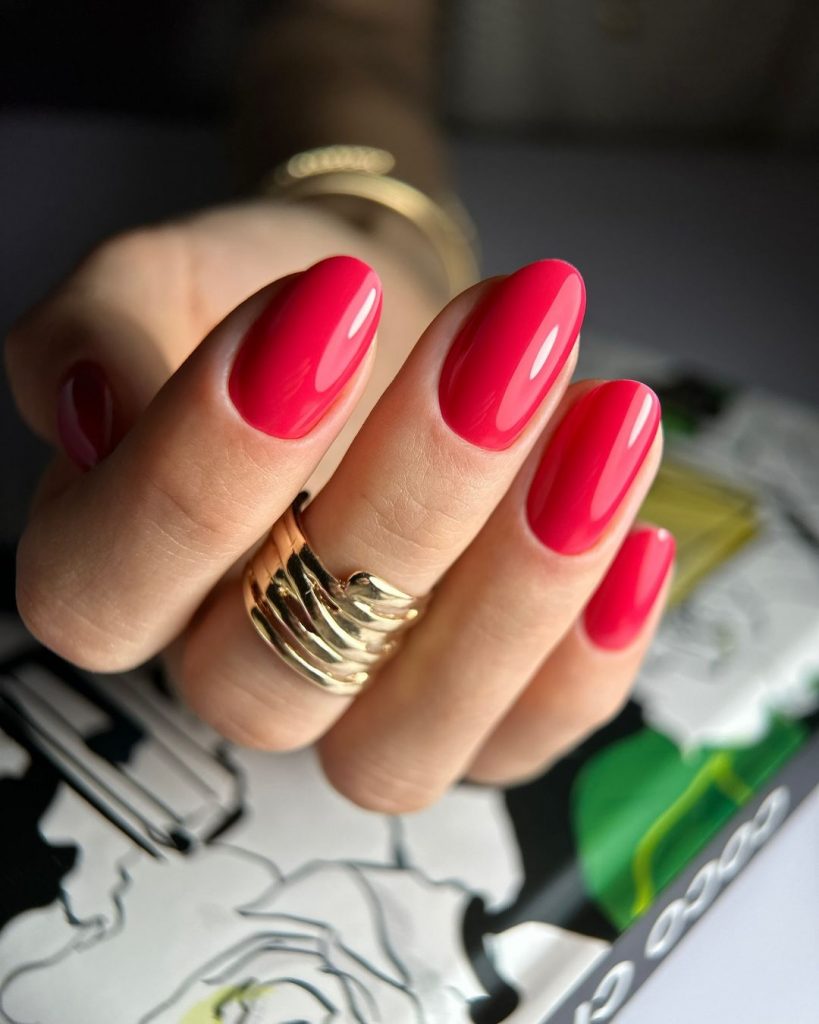
Pink Elegance: The Classic Fall Staple
Nothing says fall like a deep, rich pink. This classic color is perfect for those looking to make a bold statement. The smooth, glossy finish on these nails exudes sophistication and class. The rounded shape adds a touch of softness, making it suitable for both everyday wear and special occasions.
Consumables Needed
- Base coat: OPI Nail Envy
- Pink polish: Essie “Ballet Slippers”
- Top coat: Seche Vite Dry Fast Top Coat
- Nail file: OPI Crystal Nail File
Expert Tips
- Ensure you use a high-quality base coat to protect your nails.
- Apply two coats of the pink polish for a deep, vibrant color.
- Finish with a top coat for a glossy, long-lasting finish.
How to Create This Look at Home
- Start with clean, filed nails and apply a base coat.
- Apply two coats of Essie “Ballet Slippers,” allowing each layer to dry thoroughly.
- Finish with Seche Vite Dry Fast Top Coat to seal in the color and add shine.
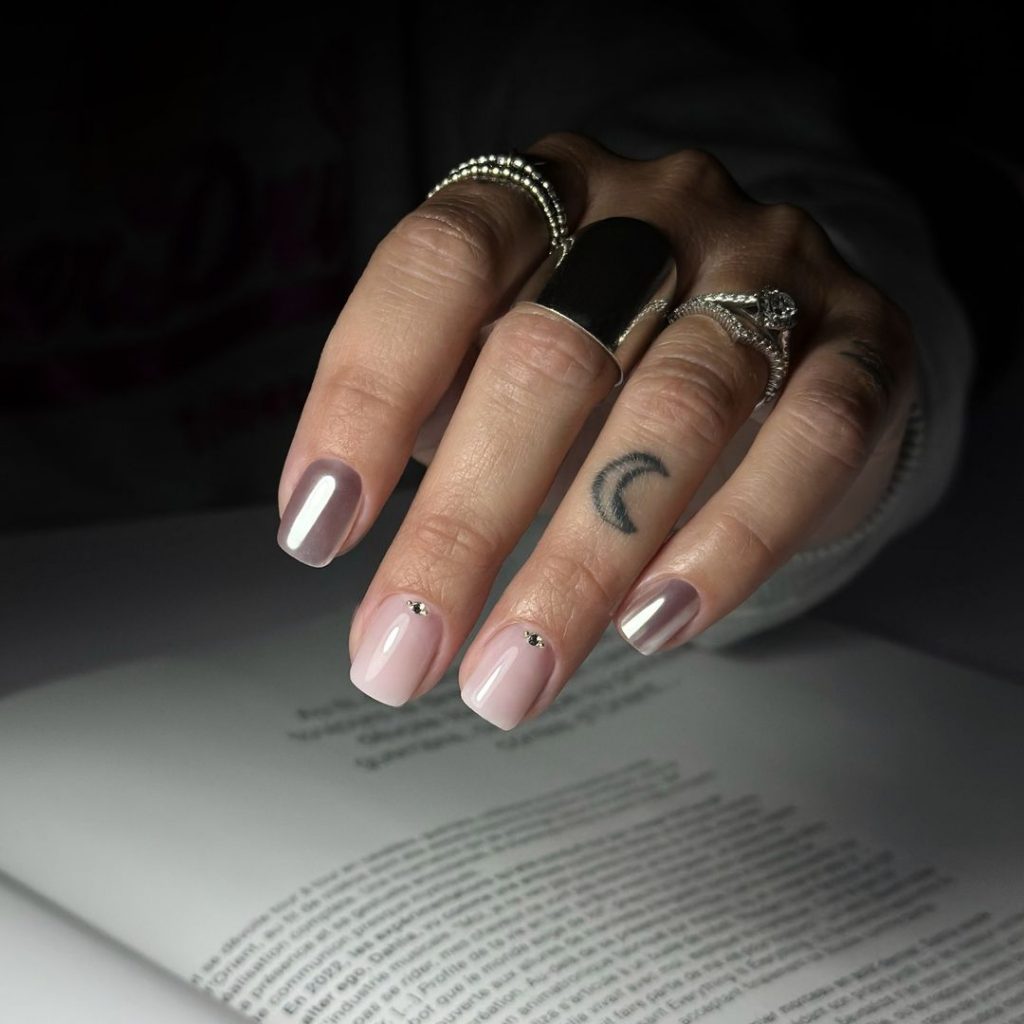
Minimalist Chic: Subtle and Sophisticated
For a more understated look, these minimalist nails are perfect. The soft pink hue is complemented by delicate silver accents, adding just the right amount of sparkle. This design is ideal for those who prefer a simple yet elegant aesthetic.
Consumables Needed
- Base coat: Sally Hansen Double Duty
- Pink polish: OPI “Mod About You”
- Silver accents: Essie “No Place Like Chrome”
- Top coat: CND Vinylux Weekly Top Coat
Expert Tips
- Use a precision brush for applying the silver accents.
- Apply thin layers of polish to avoid streaking.
- Seal with a top coat to enhance the longevity of your manicure.
How to Create This Look at Home
- Apply a base coat to clean, filed nails.
- Use OPI “Mod About You” for the base color, applying two coats.
- Add delicate silver accents with Essie “No Place Like Chrome” using a precision brush.
- Finish with CND Vinylux Weekly Top Coat.
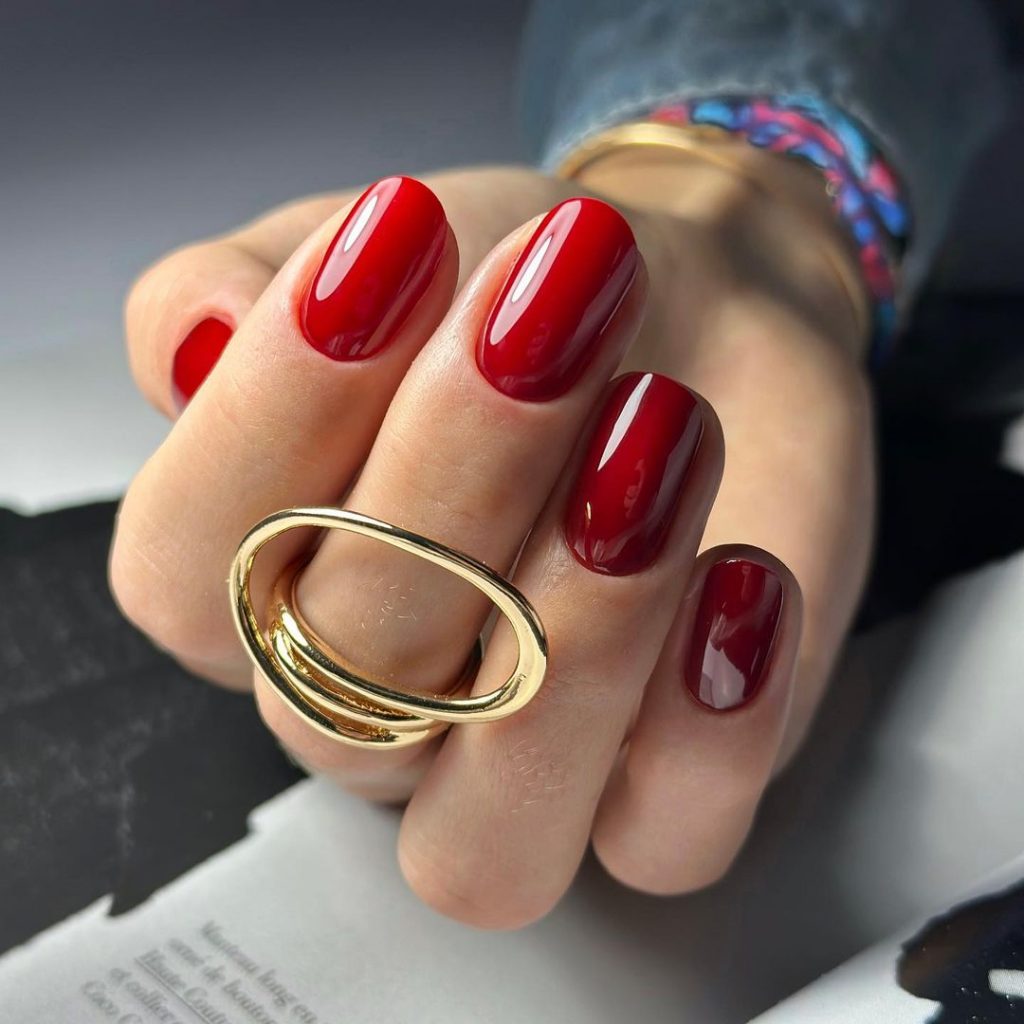
Bold Red: Making a Statement
These bold red nails are the epitome of autumn chic. The rich, glossy red is complemented by a rounded shape, making them both elegant and eye-catching. Perfect for those looking to stand out, this color is a must-have for the season.
Consumables Needed
- Base coat: Deborah Lippmann Gel Lab Base Coat
- Red polish: Chanel Le Vernis “Pirate”
- Top coat: Sally Hansen Miracle Gel Top Coat
- Nail file: Revlon Shape-N-Buff
Expert Tips
- Apply a generous amount of base coat to prevent staining.
- Use thin layers of red polish for an even finish.
- Seal with a top coat to achieve a high-gloss effect.
How to Create This Look at Home
- Prep your nails with a base coat.
- Apply two thin coats of Chanel Le Vernis “Pirate,” letting each layer dry.
- Finish with Sally Hansen Miracle Gel Top Coat for extra shine and durability.
Metallic Glam: A Modern Twist
Metallic nails are all the rage this fall. This sleek, silver design adds a modern twist to any outfit. The smooth finish and metallic sheen make these nails perfect for both day and night.
Consumables Needed
- Base coat: Orly Bonder Basecoat
- Silver polish: Zoya “Trixie”
- Top coat: Essie Gel Setter Top Coat
- Nail file: Tweezerman Neon Filemates
Expert Tips
- Use a ridge-filling base coat for a smooth surface.
- Apply the silver polish in thin, even layers.
- Finish with a gel top coat for a durable, high-shine finish.
How to Create This Look at Home
- Start with a ridge-filling base coat.
- Apply Zoya “Trixie” in thin layers, allowing each to dry.
- Seal with Essie Gel Setter Top Coat for a metallic shine.
Oceanic Hues: Deep and Dreamy
These oceanic blue nails bring a refreshing pop of color to the fall season. The deep blue tones with a hint of shimmer are reminiscent of the sea, making this design both unique and mesmerizing.
Consumables Needed
- Base coat: Butter London Nail Foundation
- Blue polish: Essie “Aruba Blue”
- Top coat: Dior Top Coat Abricot
- Nail file: Sephora Crystal Nail File
Expert Tips
- Apply a nourishing base coat to keep nails healthy.
- Use a shimmer polish for added depth.
- Seal with a top coat to maintain the shimmer effect.
How to Create This Look at Home
- Start with Butter London Nail Foundation.
- Apply two coats of Essie “Aruba Blue,” letting each layer dry.
- Finish with Dior Top Coat Abricot for a glossy, shimmery finish.
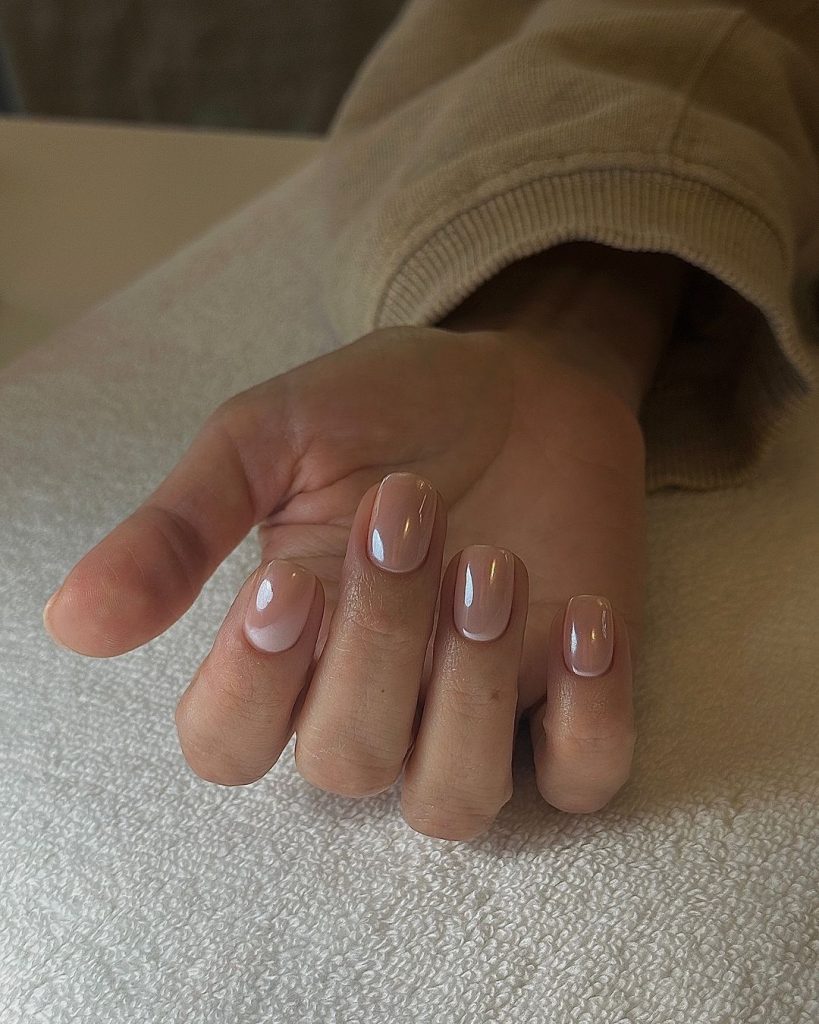
Nude Simplicity: Timeless and Elegant
These nude nails are the epitome of understated elegance. The soft, glossy finish adds a touch of sophistication, making them perfect for any occasion. The neutral shade complements all skin tones, adding a clean and chic look to your fall ensemble.
Consumables Needed
- Base coat: CND Stickey Base Coat
- Nude polish: Essie “Topless & Barefoot”
- Top coat: OPI Top Coat
- Nail file: OPI Crystal Nail File
Professional Tips
- Choose a base coat that prevents chipping.
- Apply two thin coats of the nude polish for a smooth finish.
- Use a high-shine top coat to enhance the natural beauty of the nude shade.
How to Create This Look at Home
- Start with clean, filed nails and apply CND Stickey Base Coat.
- Apply two coats of Essie “Topless & Barefoot,” allowing each coat to dry.
- Finish with OPI Top Coat for a glossy finish.
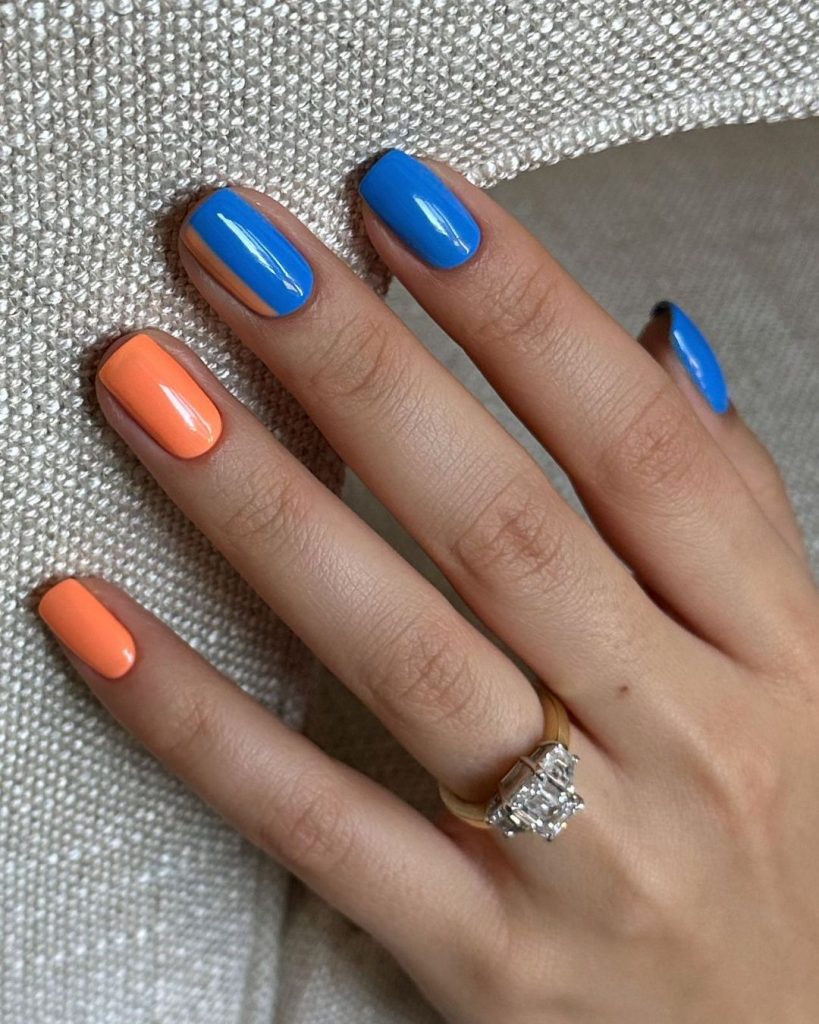
Bold Bicolor: Vibrant and Playful
This bicolor nail design combines bright blue and orange shades for a fun and lively look. Perfect for those who love to stand out, this design adds a pop of color to your fall wardrobe. The combination of these colors creates a dynamic and energetic vibe.
Consumables Needed
- Base coat: Orly Bonder Basecoat
- Blue polish: Essie “Butler Please”
- Orange polish: OPI “A Good Man-darin is Hard to Find”
- Top coat: Sally Hansen Insta-Dri Top Coat
- Nail file: Tweezerman Neon Filemates
Professional Tips
- Ensure the base coat is completely dry before applying colors.
- Use precision brushes for neat color application.
- Seal with a quick-dry top coat to prevent smudging.
How to Create This Look at Home
- Apply Orly Bonder Basecoat to your clean, filed nails.
- Paint alternating nails with Essie “Butler Please” and OPI “A Good Man-darin is Hard to Find.”
- Finish with Sally Hansen Insta-Dri Top Coat for a lasting finish.
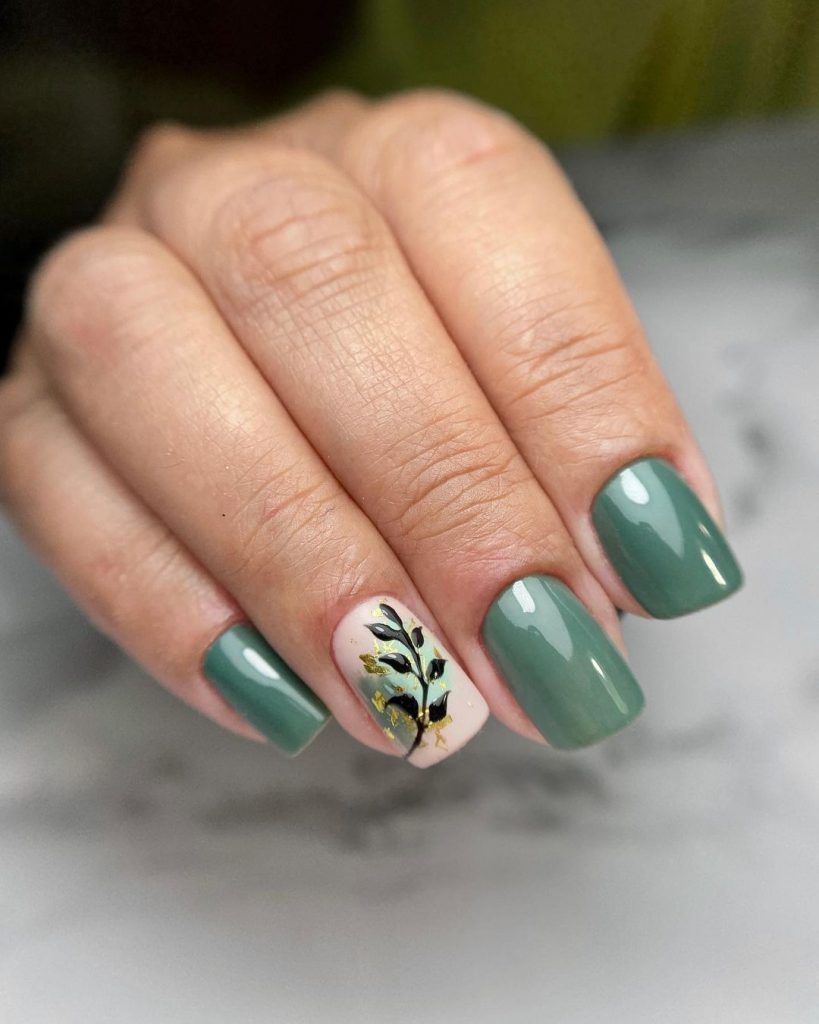
Nature’s Touch: Green and Leafy
This nail design brings a touch of nature to your fingertips with its beautiful green shade and delicate leaf accent. Perfect for the fall season, this look is both calming and stylish. The detailed leaf art on one nail adds a unique and personal touch.
Consumables Needed
- Base coat: Zoya Anchor Base Coat
- Green polish: OPI “Suzi – The First Lady of Nails”
- Leaf art polish: Essie “Licorice” (black), Essie “Blanc” (white), and Essie “Penny Talk” (gold)
- Top coat: Essie Gel Couture Top Coat
- Nail file: Revlon Shape-N-Buff
Professional Tips
- Use a detail brush for the leaf art.
- Allow each layer to dry completely before adding details.
- Apply a thick top coat to protect the design.
How to Create This Look at Home
- Apply Zoya Anchor Base Coat to clean, filed nails.
- Paint all nails with OPI “Suzi – The First Lady of Nails.”
- Using a detail brush, create the leaf art with Essie “Licorice,” “Blanc,” and “Penny Talk.”
- Finish with Essie Gel Couture Top Coat for a glossy, durable finish.
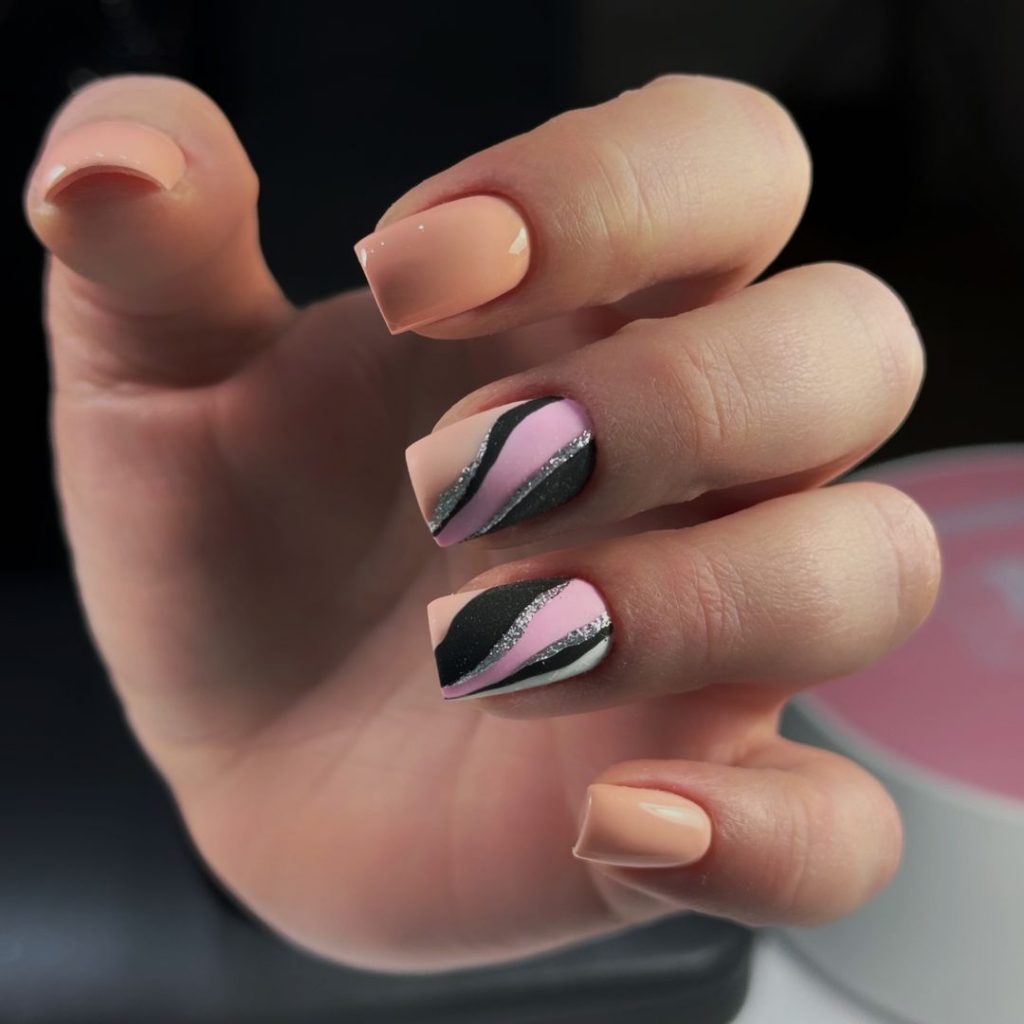
Abstract Art: Playful and Modern
This design features a mix of peach, pink, black, and silver accents, creating a modern and playful look. The abstract art is perfect for those who love to experiment with their nails. The combination of colors and patterns makes this design unique and trendy.
Consumables Needed
- Base coat: Deborah Lippmann Gel Lab Base Coat
- Peach polish: Essie “Aperitif”
- Pink polish: OPI “Mod About You”
- Black polish: Essie “Licorice”
- Silver glitter: China Glaze “Fairy Dust”
- Top coat: Seche Vite Dry Fast Top Coat
- Nail file: Tweezerman Neon Filemates
Professional Tips
- Use nail tape to create clean lines.
- Apply glitter polish with a fine brush for precision.
- Ensure each layer is dry before adding another to prevent smudging.
How to Create This Look at Home
- Start with Deborah Lippmann Gel Lab Base Coat.
- Paint the base color with Essie “Aperitif.”
- Use nail tape to create sections for the pink and black polishes, and apply OPI “Mod About You” and Essie “Licorice” accordingly.
- Add silver glitter accents with China Glaze “Fairy Dust.”
- Seal with Seche Vite Dry Fast Top Coat.
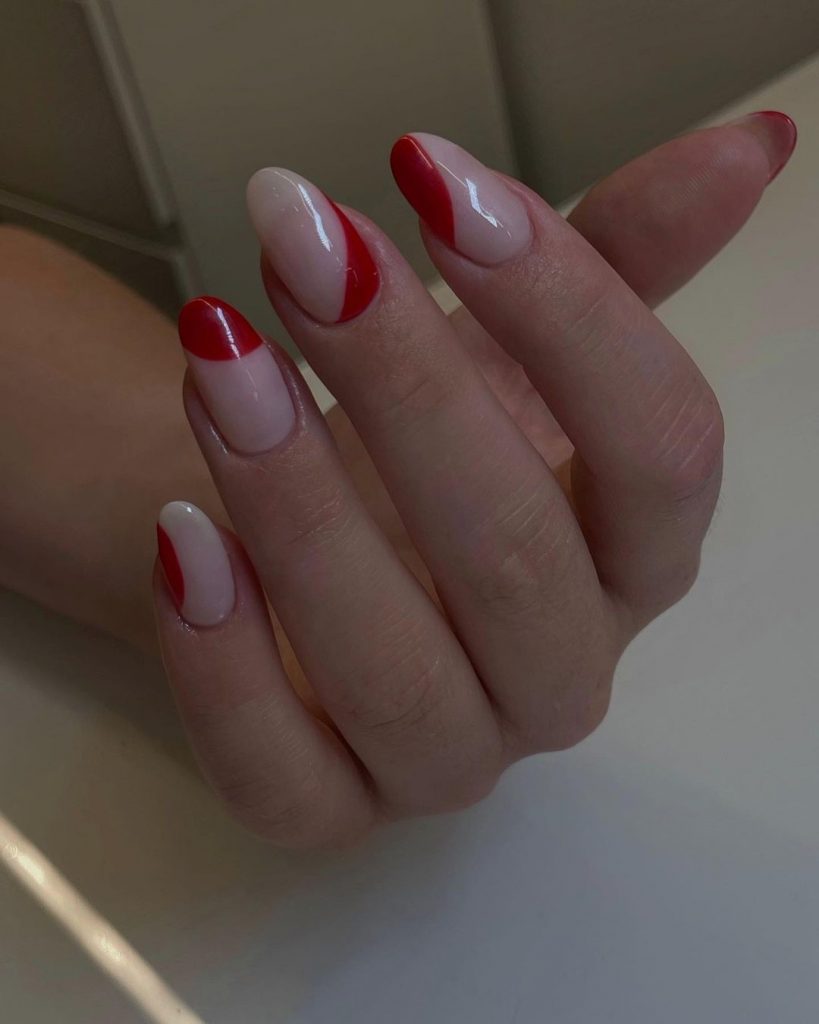
Candy Cane Twist: Festive and Fun
These nails bring a festive twist to your fall look with their candy cane-inspired design. The red and white colors, combined with a glossy finish, make this design perfect for the holiday season. The twisted pattern adds a playful touch, making your nails stand out.
Consumables Needed
- Base coat: Butter London Nail Foundation
- Red polish: Chanel Le Vernis “Pirate”
- White polish: OPI “Alpine Snow”
- Top coat: Dior Top Coat Abricot
- Nail file: Sephora Crystal Nail File
Professional Tips
- Use a fine brush to create the twisted pattern.
- Apply thin layers of polish for a smooth finish.
- Seal with a top coat to protect the design and add shine.
How to Create This Look at Home
- Apply Butter London Nail Foundation to clean, filed nails.
- Paint the base color with Chanel Le Vernis “Pirate.”
- Use a fine brush to create the twisted pattern with OPI “Alpine Snow.”
- Finish with Dior Top Coat Abricot for a glossy finish.
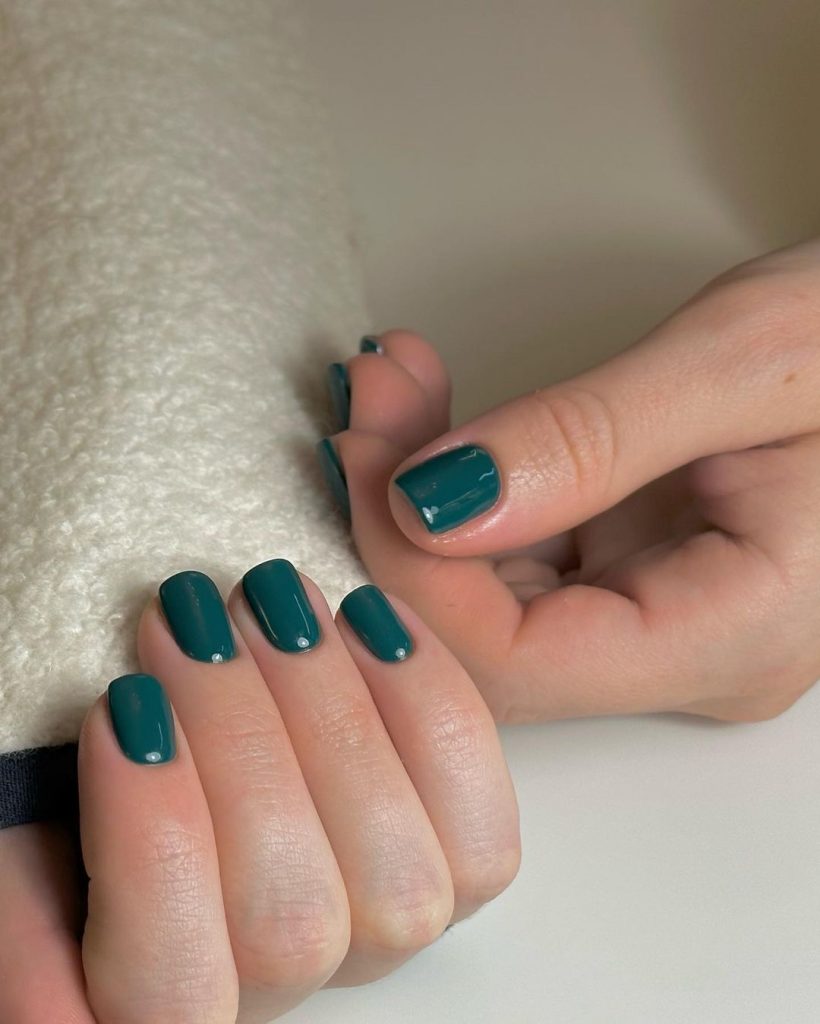
Teal Serenity: Bold and Beautiful
These teal nails bring a refreshing pop of color to your fall look. The deep teal shade is both vibrant and sophisticated, making it perfect for the autumn season. The clean, glossy finish enhances the richness of the color, ensuring your nails stand out.
Consumables Needed
- Base coat: CND Stickey Base Coat
- Teal polish: Essie “Garden Variety”
- Top coat: Seche Vite Dry Fast Top Coat
- Nail file: OPI Crystal Nail File
Expert Tips
- Use a ridge-filling base coat for a smooth surface.
- Apply two coats of teal polish for full coverage.
- Seal with a quick-dry top coat to maintain the glossy finish.
How to Create This Look at Home
- Start with clean, filed nails and apply CND Stickey Base Coat.
- Apply two coats of Essie “Garden Variety,” allowing each coat to dry.
- Finish with Seche Vite Dry Fast Top Coat for a lasting, glossy finish.
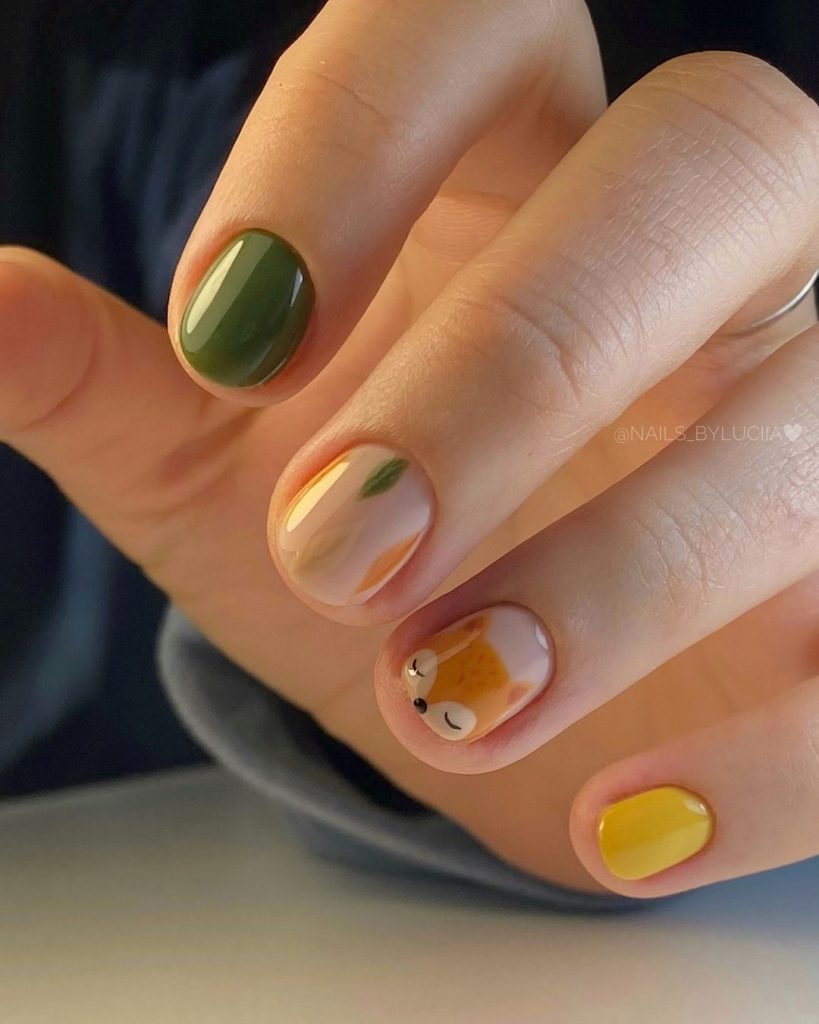
Autumn Critters: Fun and Whimsical
This nail design is a playful take on fall, featuring cute animal and leaf motifs. The mix of green, yellow, and neutral shades adds a whimsical touch to your nails, perfect for those who love a bit of fun in their manicure.
Consumables Needed
- Base coat: OPI Nail Envy
- Polishes: Essie “Going Incognito” (green), OPI “Sun, Sea, and Sand in My Pants” (yellow), OPI “Be There in a Prosecco” (neutral)
- Detail polish: Essie “Licorice” (black), Essie “Blanc” (white), Essie “Penny Talk” (gold)
- Top coat: CND Vinylux Weekly Top Coat
- Nail file: Tweezerman Neon Filemates
Expert Tips
- Use a fine brush for detailed artwork.
- Allow each layer to dry completely before adding another.
- Finish with a thick top coat to protect the design.
How to Create This Look at Home
- Apply OPI Nail Envy as a base coat on clean, filed nails.
- Paint each nail with your chosen base colors: Essie “Going Incognito,” OPI “Sun, Sea, and Sand in My Pants,” and OPI “Be There in a Prosecco.”
- Use a fine brush to create animal and leaf motifs with detail polishes.
- Finish with CND Vinylux Weekly Top Coat for durability.
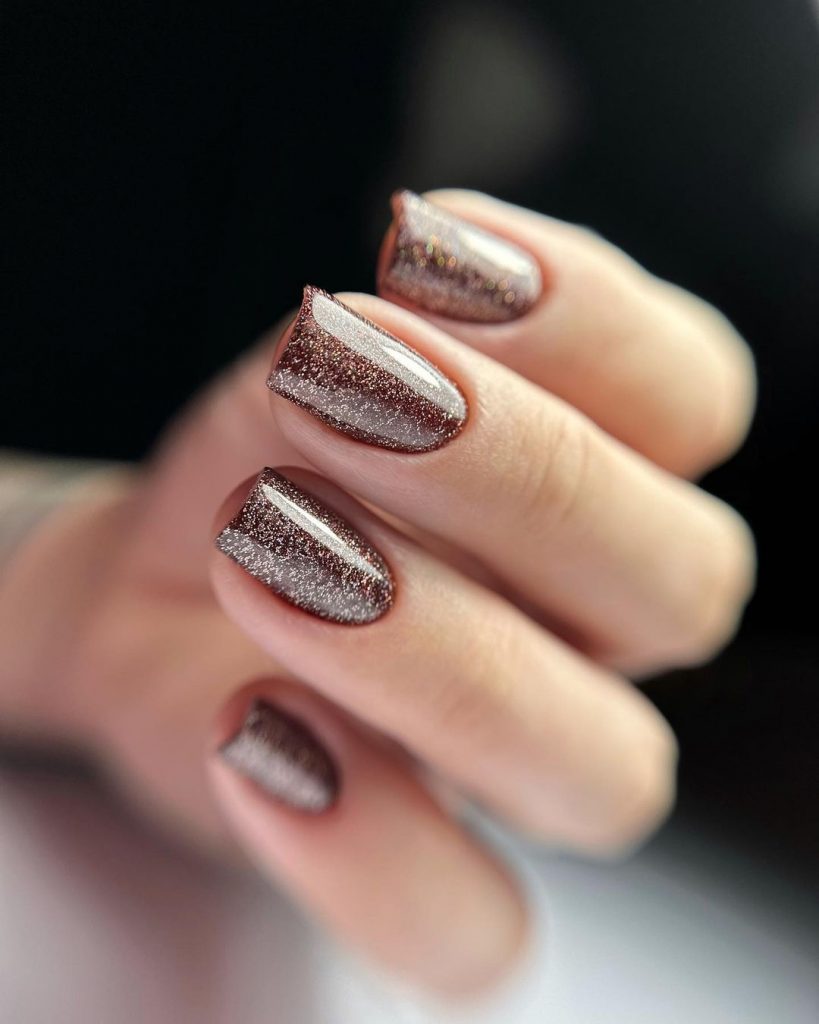
Glitter Glam: Sparkle and Shine
These nails are all about the sparkle. The combination of brown and silver glitter creates a glamorous look, perfect for fall parties or special occasions. The gradient effect adds depth and dimension, making your nails truly eye-catching.
Consumables Needed
- Base coat: Deborah Lippmann Gel Lab Base Coat
- Brown polish: Essie “Mink Muffs”
- Silver glitter polish: China Glaze “Fairy Dust”
- Top coat: Sally Hansen Miracle Gel Top Coat
- Nail file: Revlon Shape-N-Buff
Expert Tips
- Apply a base coat to prevent staining.
- Use a sponge to dab on the glitter for a gradient effect.
- Finish with a gel top coat to lock in the sparkle.
How to Create This Look at Home
- Start with Deborah Lippmann Gel Lab Base Coat on clean, filed nails.
- Apply two coats of Essie “Mink Muffs” and let dry.
- Use a makeup sponge to apply China Glaze “Fairy Dust” from the tips to the middle of the nails for a gradient effect.
- Seal with Sally Hansen Miracle Gel Top Coat.
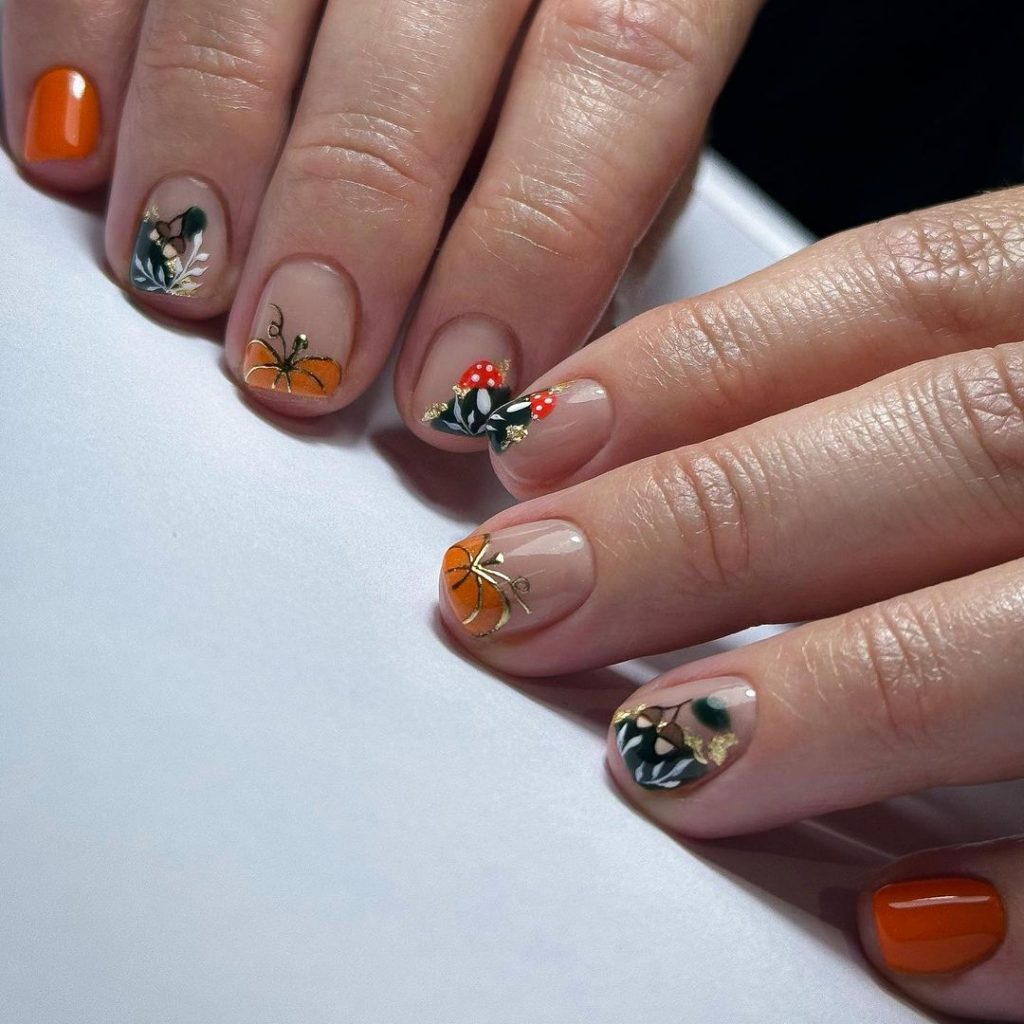
Pumpkin Patch: Festive and Fun
Celebrate fall with this festive pumpkin patch nail art. The mix of orange pumpkins, green leaves, and mushroom accents on a neutral base creates a charming and whimsical design perfect for the autumn season.
Consumables Needed
- Base coat: Butter London Nail Foundation
- Polishes: OPI “A Good Man-darin is Hard to Find” (orange), Essie “Going Incognito” (green), OPI “Be There in a Prosecco” (neutral)
- Detail polish: Essie “Licorice” (black), Essie “Blanc” (white), Essie “Penny Talk” (gold)
- Top coat: Dior Top Coat Abricot
- Nail file: Sephora Crystal Nail File
Expert Tips
- Use a fine detail brush for precise artwork.
- Allow each layer to dry completely to avoid smudging.
- Apply a top coat to protect the design and add shine.
How to Create This Look at Home
- Apply Butter London Nail Foundation to clean, filed nails.
- Paint the base color with OPI “Be There in a Prosecco.”
- Use a fine brush to create pumpkins, leaves, and mushroom accents with detail polishes.
- Finish with Dior Top Coat Abricot for a glossy finish.
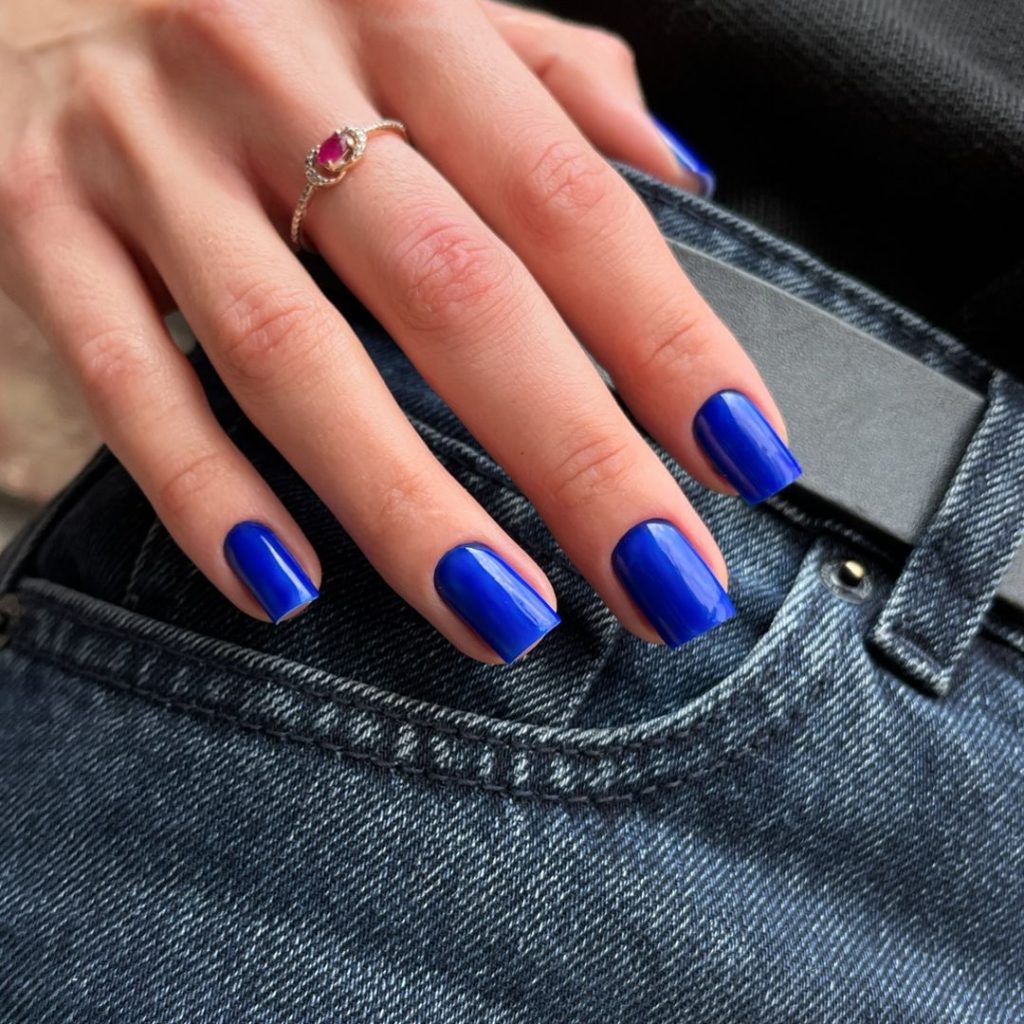
Royal Blue: Bold and Stunning
This royal blue nail design is both bold and stunning. The rich blue color is perfect for making a statement this fall. The clean and glossy finish ensures your nails look polished and sophisticated.
Consumables Needed
- Base coat: CND Stickey Base Coat
- Blue polish: Essie “Butler Please”
- Top coat: Seche Vite Dry Fast Top Coat
- Nail file: OPI Crystal Nail File
Expert Tips
- Use a base coat to enhance the vibrancy of the color.
- Apply two coats of blue polish for full coverage.
- Finish with a top coat for a high-shine effect.
How to Create This Look at Home
- Start with clean, filed nails and apply CND Stickey Base Coat.
- Apply two coats of Essie “Butler Please,” allowing each coat to dry.
- Finish with Seche Vite Dry Fast Top Coat for a lasting, glossy finish.
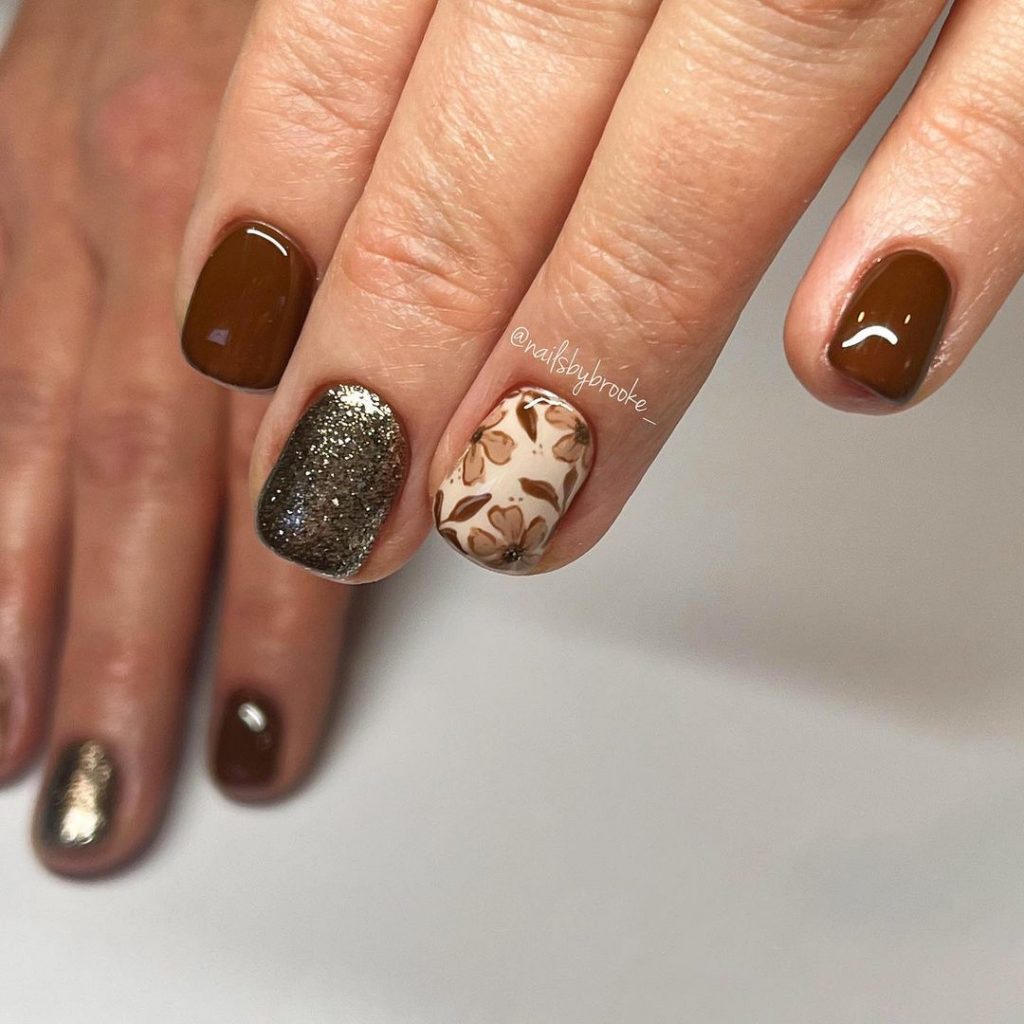
Chocolate Delight: Rich and Earthy
This nail design features a beautiful combination of rich brown and glittery accents, perfect for fall. The earthy tones are complemented by the glitter and floral details, adding a touch of elegance to the look. This design is both sophisticated and festive, making it ideal for the autumn season.
Consumables Needed
- Base coat: Orly Bonder Basecoat
- Brown polish: Essie “Wicked”
- Glitter polish: China Glaze “I’m Not Lion”
- Detail polish: OPI “Do You Take Lei Away?” (beige), Essie “Licorice” (black), Essie “Penny Talk” (gold)
- Top coat: Seche Vite Dry Fast Top Coat
- Nail file: OPI Crystal Nail File
Expert Tips
- Use a detail brush for precise floral artwork.
- Apply glitter polish with a sponge for full coverage.
- Finish with a high-shine top coat to seal the design.
How to Create This Look at Home
- Start with Orly Bonder Basecoat on clean, filed nails.
- Apply two coats of Essie “Wicked” on the base nails.
- Use a sponge to apply China Glaze “I’m Not Lion” for the glitter accent nail.
- Create floral designs with OPI “Do You Take Lei Away?”, Essie “Licorice”, and Essie “Penny Talk”.
- Seal with Seche Vite Dry Fast Top Coat.
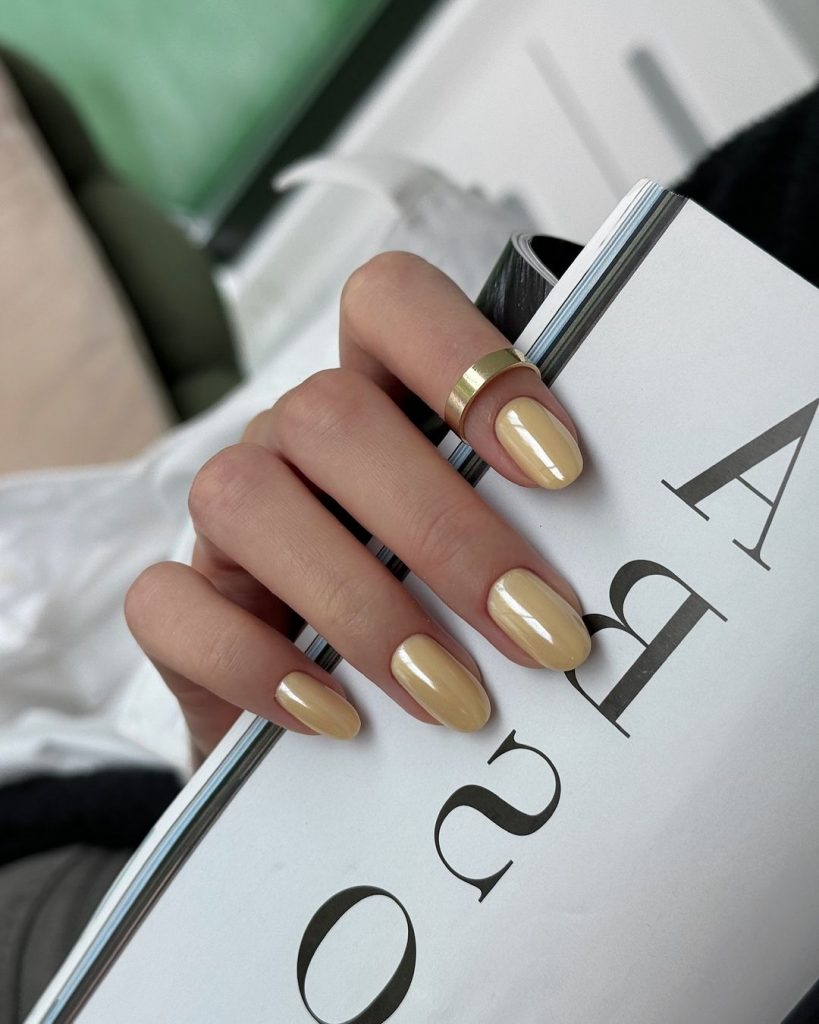
Buttery Yellow: Warm and Inviting
This buttery yellow nail color is warm and inviting, making it a perfect choice for the fall season. The soft, creamy shade adds a touch of sunshine to your look, brightening up the cooler days. The glossy finish enhances the smoothness and richness of the color.
Consumables Needed
- Base coat: Butter London Nail Foundation
- Yellow polish: OPI “Never a Dulles Moment”
- Top coat: Dior Top Coat Abricot
- Nail file: Tweezerman Neon Filemates
Expert Tips
- Apply a base coat to prevent yellow stains on the nails.
- Use thin, even layers of polish for a smooth finish.
- Finish with a glossy top coat for a polished look.
How to Create This Look at Home
- Apply Butter London Nail Foundation to clean, filed nails.
- Apply two coats of OPI “Never a Dulles Moment,” allowing each coat to dry.
- Finish with Dior Top Coat Abricot for a glossy finish.
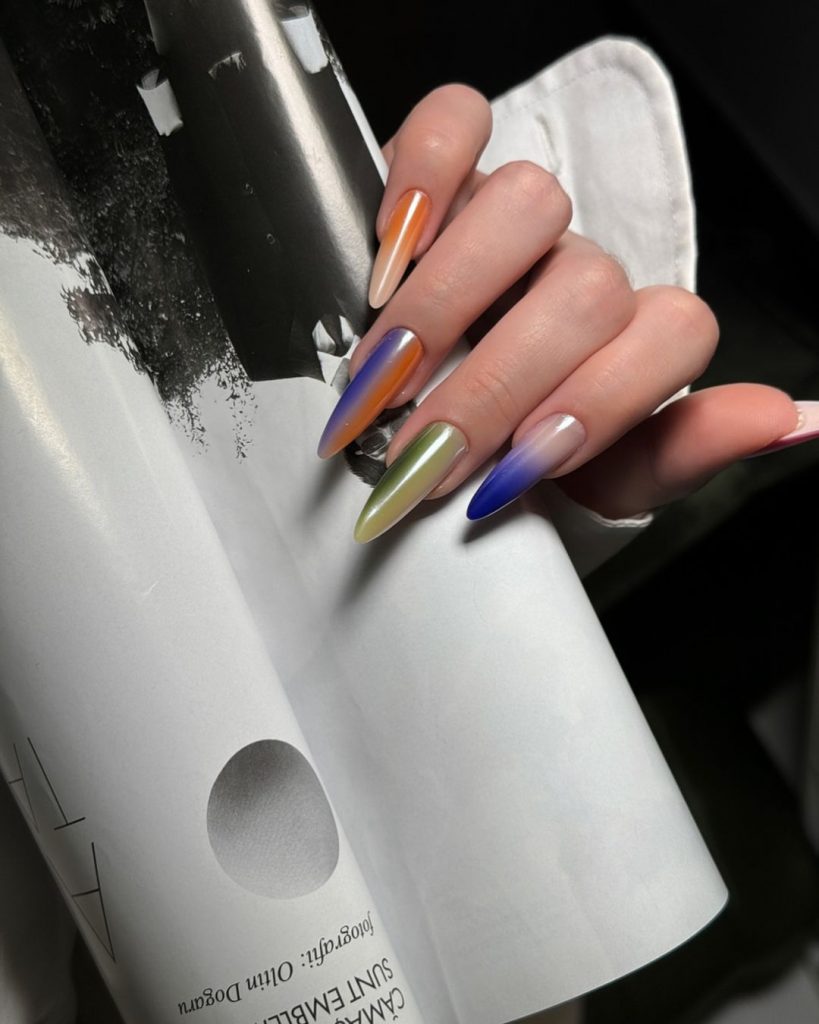
Gradient Delight: Colorful and Fun
This gradient nail design features a beautiful blend of fall colors, from orange to blue, creating a stunning ombre effect. The long almond shape adds to the elegance of the design, making it perfect for those who love a bold yet sophisticated look.
Consumables Needed
- Base coat: CND Stickey Base Coat
- Polishes: Essie “Tangerine Tease” (orange), Essie “Bon Boy-age” (green), Essie “Aruba Blue” (blue)
- Top coat: Essie Gel Setter Top Coat
- Nail file: Revlon Shape-N-Buff
Expert Tips
- Use a makeup sponge to create the gradient effect.
- Blend colors well to avoid harsh lines.
- Seal with a gel top coat for a smooth, long-lasting finish.
How to Create This Look at Home
- Apply CND Stickey Base Coat to clean, filed nails.
- Use a makeup sponge to apply Essie “Tangerine Tease”, “Bon Boy-age”, and “Aruba Blue” in a gradient pattern.
- Seal with Essie Gel Setter Top Coat for a glossy finish.
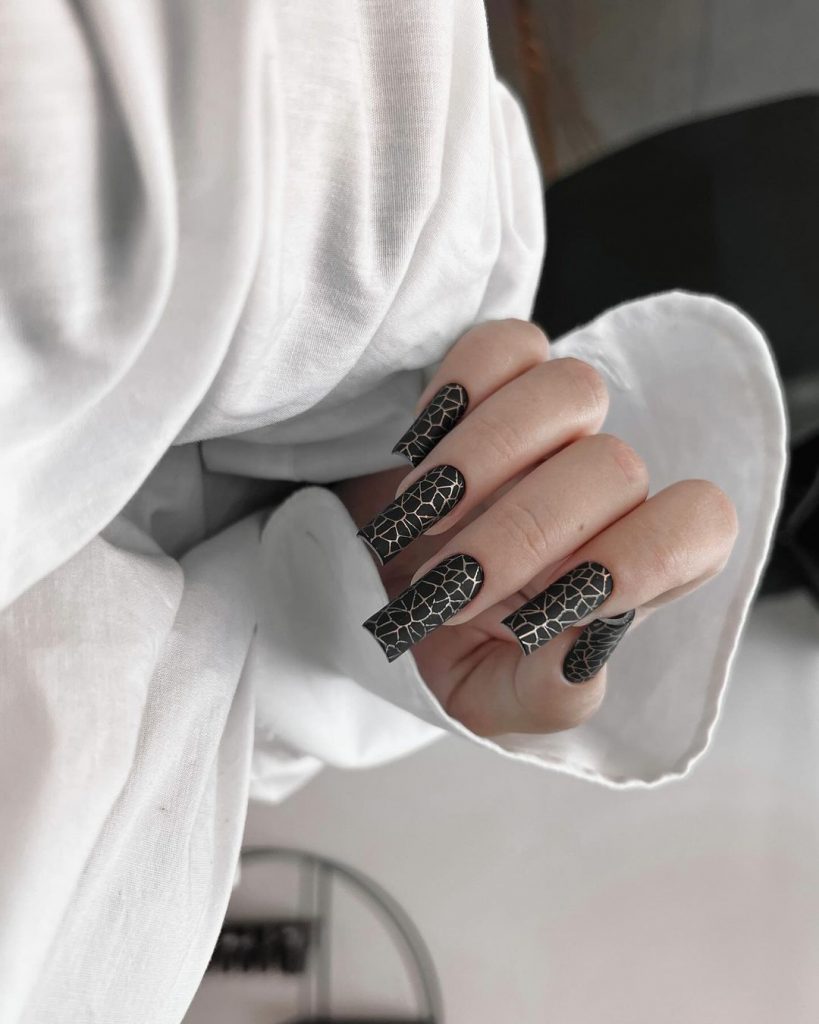
Black Web: Edgy and Mysterious
This edgy black nail design with a web-like pattern is perfect for adding a touch of mystery to your look. The matte black base and shiny web detail create a striking contrast, making this design stand out.
Consumables Needed
- Base coat: Deborah Lippmann Gel Lab Base Coat
- Black polish: OPI “Black Onyx”
- Top coat: OPI Matte Top Coat
- Detail polish: Essie “No Place Like Chrome”
- Nail file: Tweezerman Neon Filemates
Expert Tips
- Use nail tape or a fine brush to create the web pattern.
- Apply the detail polish carefully to avoid smudging.
- Finish with a matte top coat for a striking contrast.
How to Create This Look at Home
- Apply Deborah Lippmann Gel Lab Base Coat to clean, filed nails.
- Paint the nails with OPI “Black Onyx” and let dry.
- Use nail tape or a fine brush to create the web pattern with Essie “No Place Like Chrome.”
- Seal with OPI Matte Top Coat for a matte finish.
Leopard Print: Wild and Chic
This leopard print accent nail adds a wild touch to a classic manicure. The combination of neutral shades with a bold leopard print makes this design both trendy and chic, perfect for those looking to make a statement.

Consumables Needed
- Base coat: Butter London Nail Foundation
- Polishes: OPI “Be There in a Prosecco” (neutral), Essie “Licorice” (black), Essie “Good as Gold” (gold)
- Top coat: Dior Top Coat Abricot
- Nail file: OPI Crystal Nail File
Expert Tips
- Use a fine detail brush for the leopard print.
- Apply thin layers of polish for a smooth finish.
- Seal with a glossy top coat to protect the design.
How to Create This Look at Home
- Apply Butter London Nail Foundation to clean, filed nails.
- Paint the base color with OPI “Be There in a Prosecco.”
- Use a fine detail brush to create the leopard print with Essie “Licorice” and “Good as Gold.”
- Seal with Dior Top Coat Abricot for a glossy finish.
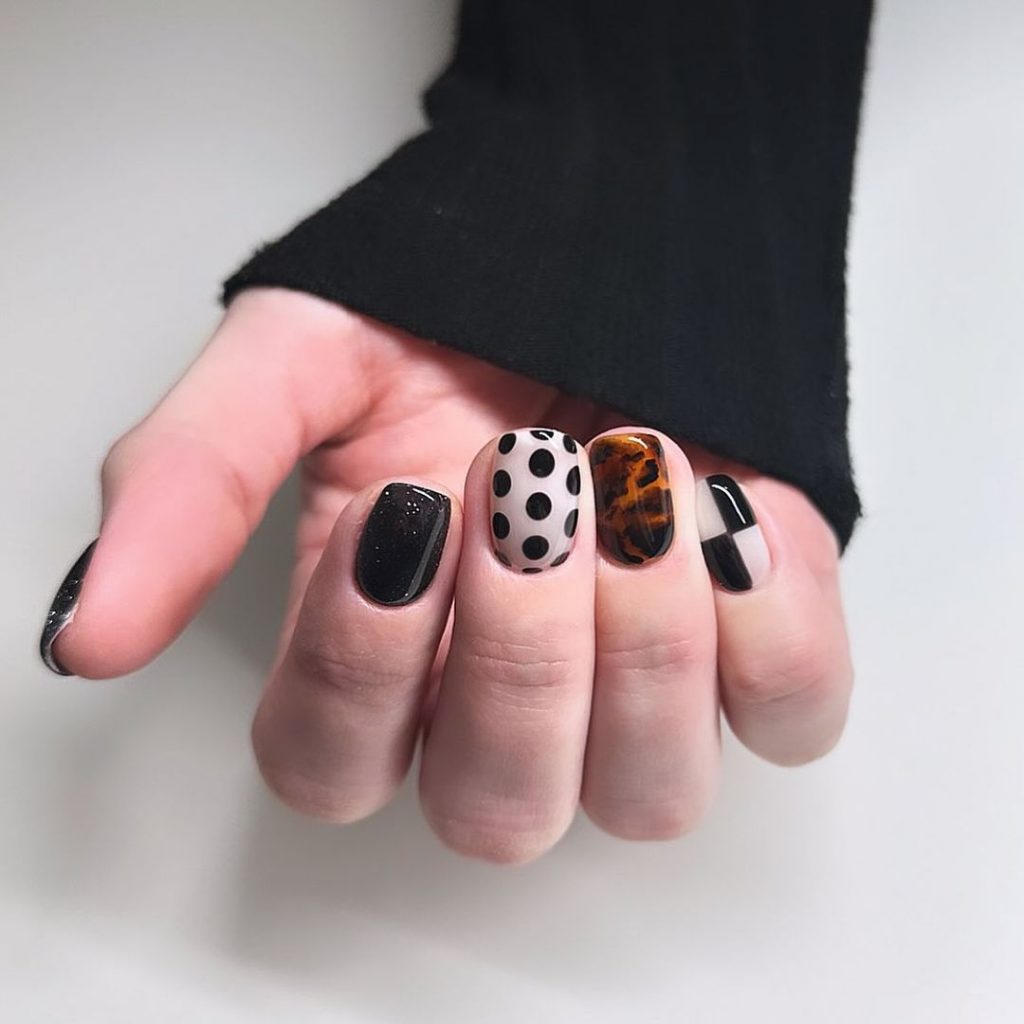
Polka Dots and Tortoise Shell: Playful and Chic
This nail design combines the playful polka dots with the sophisticated tortoise shell pattern. The black and white polka dots add a fun element, while the tortoise shell brings in a touch of elegance. The mix of patterns creates a unique and stylish look perfect for fall.
Consumables Needed
- Base coat: Orly Bonder Basecoat
- Black polish: OPI “Black Onyx”
- White polish: Essie “Blanc”
- Tortoise shell polish: OPI “Amber Karma”
- Detail polish: Essie “Licorice” (black)
- Top coat: Seche Vite Dry Fast Top Coat
- Nail file: OPI Crystal Nail File
Expert Tips
- Use a dotting tool for precise polka dots.
- Apply the tortoise shell polish with a sponge for a realistic effect.
- Finish with a high-shine top coat to seal the design.
How to Create This Look at Home
- Apply Orly Bonder Basecoat to clean, filed nails.
- Paint the base color with OPI “Black Onyx” and Essie “Blanc” for the polka dot nails.
- Use a dotting tool to create polka dots with Essie “Licorice.”
- Apply OPI “Amber Karma” with a sponge to create the tortoise shell effect.
- Seal with Seche Vite Dry Fast Top Coat.
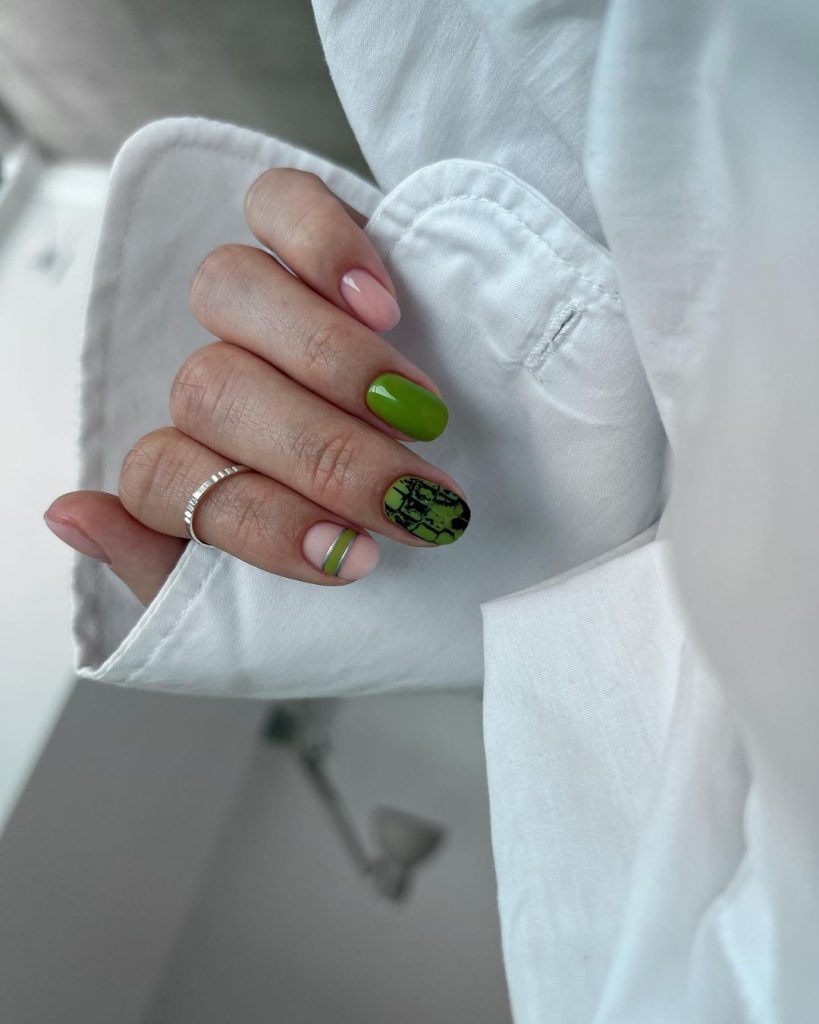
Green Snake Print: Bold and Edgy
This nail design features a bold green snake print, perfect for those who love a bit of edge in their manicure. The combination of light pink and vibrant green adds contrast, making the snake print stand out.
Consumables Needed
- Base coat: CND Stickey Base Coat
- Polishes: Essie “Romper Room” (light pink), Essie “Mojito Madness” (green)
- Detail polish: OPI “Black Onyx”
- Top coat: Essie Gel Couture Top Coat
- Nail file: Revlon Shape-N-Buff
Expert Tips
- Use a detail brush for the snake print design.
- Apply thin layers of polish to avoid streaking.
- Finish with a gel top coat for durability.
How to Create This Look at Home
- Apply CND Stickey Base Coat to clean, filed nails.
- Paint the base color with Essie “Romper Room” and “Mojito Madness.”
- Use a detail brush to create the snake print with OPI “Black Onyx.”
- Seal with Essie Gel Couture Top Coat.
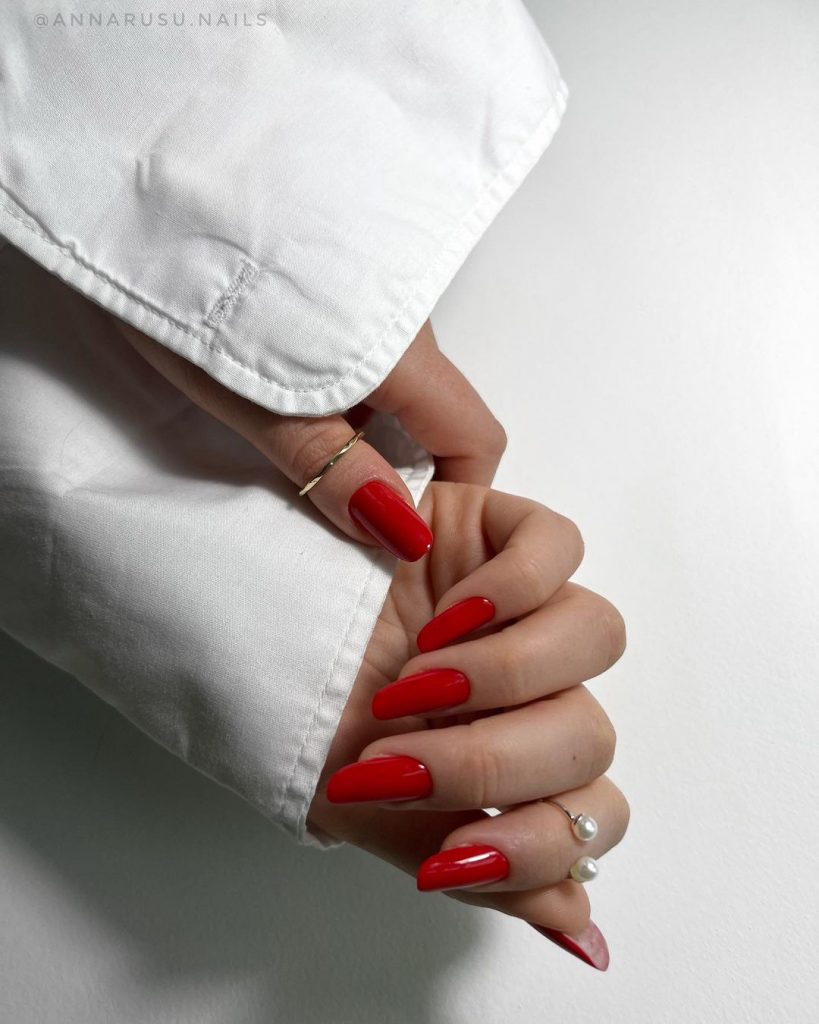
Classic Red: Timeless and Elegant
These classic red nails are always in style. The rich red color and glossy finish create a timeless and elegant look. Perfect for any occasion, this design is a must-have for fall.
Consumables Needed
- Base coat: Butter London Nail Foundation
- Red polish: Essie “Really Red”
- Top coat: Dior Top Coat Abricot
- Nail file: Tweezerman Neon Filemates
Expert Tips
- Apply a base coat to prevent staining.
- Use thin layers of polish for a smooth, even finish.
- Finish with a glossy top coat to enhance the shine.
How to Create This Look at Home
- Apply Butter London Nail Foundation to clean, filed nails.
- Apply two coats of Essie “Really Red,” allowing each coat to dry.
- Finish with Dior Top Coat Abricot for a glossy finish.
Burgundy and Gold: Rich and Luxurious
This nail design combines burgundy and gold for a luxurious look. The rich burgundy color is complemented by the delicate gold outline, adding a touch of elegance to the nails. Perfect for fall, this design is both sophisticated and stylish.

Consumables Needed
- Base coat: Deborah Lippmann Gel Lab Base Coat
- Burgundy polish: OPI “Malaga Wine”
- Gold polish: Essie “Good as Gold”
- Top coat: Seche Vite Dry Fast Top Coat
- Nail file: OPI Crystal Nail File
Expert Tips
- Use a fine brush to create the gold outline.
- Apply thin layers of polish for a smooth finish.
- Finish with a high-shine top coat to seal the design.
How to Create This Look at Home
- Apply Deborah Lippmann Gel Lab Base Coat to clean, filed nails.
- Paint the base color with OPI “Malaga Wine.”
- Use a fine brush to create the gold outline with Essie “Good as Gold.”
- Seal with Seche Vite Dry Fast Top Coat.
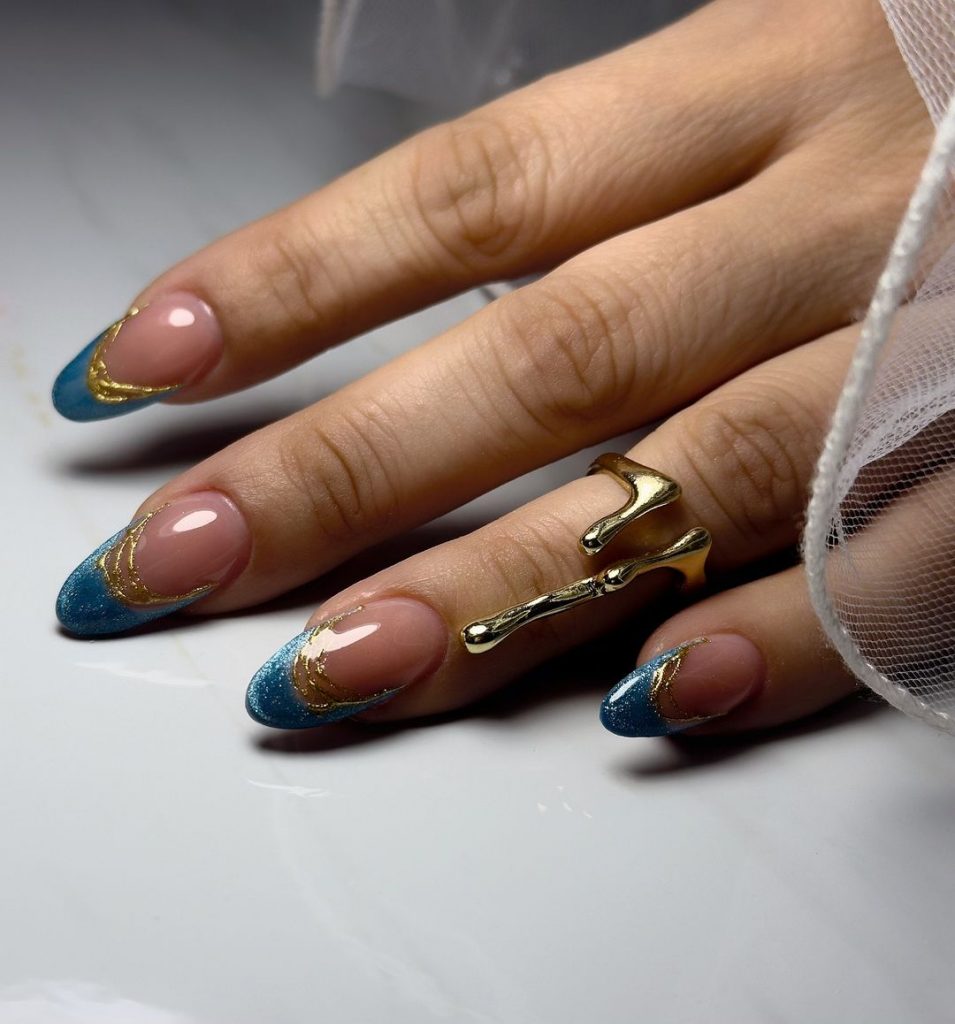
Blue and Gold Waves: Oceanic Elegance
This nail design features elegant blue waves accented with gold, creating a luxurious and oceanic look. The combination of blue and gold adds depth and sophistication, making it perfect for a stylish fall manicure.
Consumables Needed
- Base coat: Orly Bonder Basecoat
- Blue polish: Essie “Aruba Blue”
- Gold polish: Essie “Good as Gold”
- Top coat: Dior Top Coat Abricot
- Nail file: Sephora Crystal Nail File
Expert Tips
- Use a fine brush to create the wave design.
- Apply thin layers of polish for a smooth finish.
- Finish with a glossy top coat to protect the design.
How to Create This Look at Home
- Apply Orly Bonder Basecoat to clean, filed nails.
- Paint the base color with Essie “Aruba Blue.”
- Use a fine brush to create the gold wave design with Essie “Good as Gold.”
- Seal with Dior Top Coat Abricot.
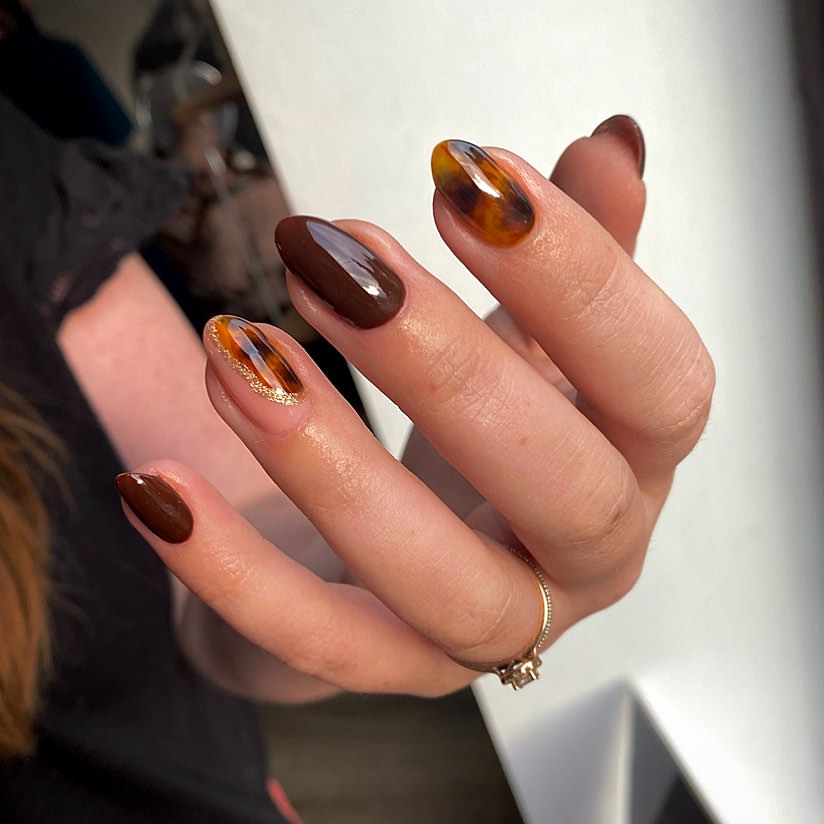
Tortoise Shell and Chocolate: Warm and Trendy
This nail design combines the trendy tortoise shell pattern with a rich chocolate color. The mix of patterns and warm tones creates a stylish and sophisticated look, perfect for fall.
Consumables Needed
- Base coat: Butter London Nail Foundation
- Polishes: Essie “Wicked” (chocolate), OPI “Amber Karma” (tortoise shell)
- Top coat: Seche Vite Dry Fast Top Coat
- Nail file: Tweezerman Neon Filemates
Expert Tips
- Use a sponge to apply the tortoise shell polish for a realistic effect.
- Apply thin layers of chocolate polish for a smooth finish.
- Finish with a high-shine top coat to seal the design.
How to Create This Look at Home
- Apply Butter London Nail Foundation to clean, filed nails.
- Paint the base color with Essie “Wicked.”
- Use a sponge to apply OPI “Amber Karma” for the tortoise shell effect.
- Seal with Seche Vite Dry Fast Top Coat.
Save Pin